Remote trunk release is a pretty handy feature to add to your alarm. It increases the value of your car. If you have to ask yourself why you need it, then you know you don't need it.
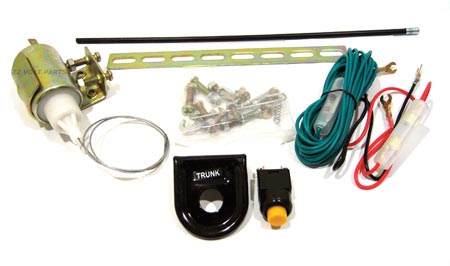
don't use a "trunk release solenoid" kit. It's overkill.
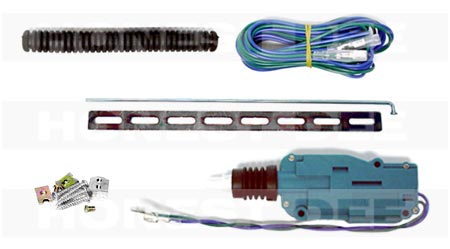
Just use a universal 2-wire door lock actuator kit like the DEI 524N.
I prefer to use universal door lock actuators over the product sold as "trunk release solenoids". Door actuators are much smaller and lighter, particularly the DEI 524N, giving you more flexibility to mount them. Trunk solenoids are overpowered which causes excessive shock to your latching mechanism. They're also quite loud.
It is especially easy to install a trunk popper on a 2 door DA. With other cars you usually have to trim some sheet metal.
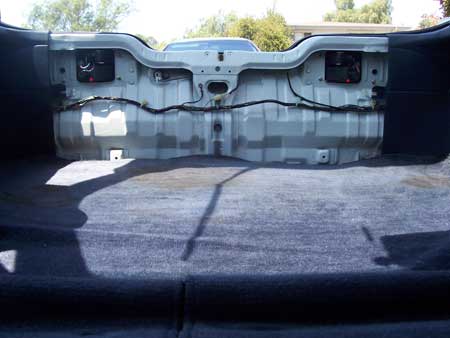
Remove the rear plastic covering the trunk release mechanism. Also loosen the rear quarter plastic so you can run wires behind it. When I installed the alarm, I ran the red/white negative auxiliary output wire (DEI alarm) back to the trunk. I also ran a fused (15A) constant power wire branched off the 14 gauge wire I ran to the alarm from the fusebox output. The fuse should be within 2 inches of the branching point.
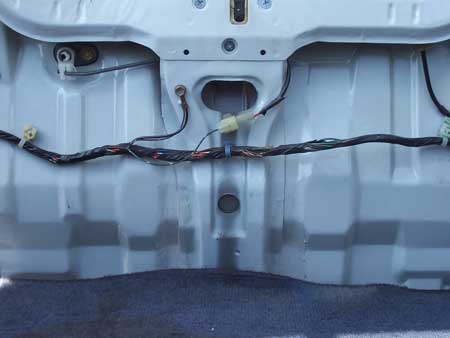
Here you can see the simple release mechanism. Pull the bar, pop the trunk.
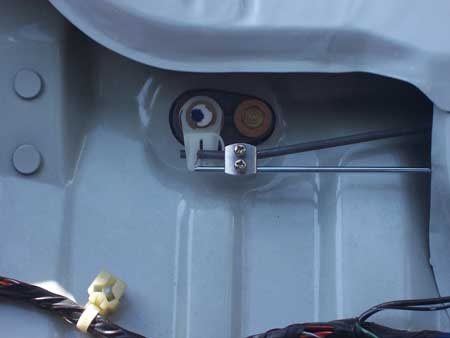
First thing you do is temporarily connect the clamp between the lock bar and actuator bar. Then you can get an idea of where the actuator has to be mounted to be level with the stroke of the latch bar. Determine the length of the actuator bar that allows clearance of the actuator arm.
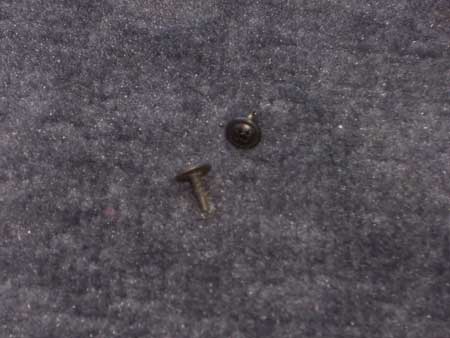
It's critical to have the shortest possible mounting screws so that you don't pierce the outside panel or your tail lights. These little metal-tapping bad boys are the foundation of this install.
90-93 Acura Integra hatchback

94-01 Acura Integra hatchback
Now that you know where the actuator needs to be you can go ahead and secure it with the backstrap. This setup is a little akward but I found it necessary. I added the second backstrap because there was just way too much flex when the actuator torqued. When mounting the actuator, make sure the arm is almost fully extended. If the arm is compressed, it obviously wont be able to pull anything. We"re relying on the natural behavior of the oem latch to pull the actuator arm back to an extended position. Tighten down the clamping screws. These have a tendency to back themselves out over time, so use some Loctite.
In the picture it looks like the screw in the center of the backstrap goes into the sheet metal of the car, but actually it's floating in space. I used a speed clip and screwed the two backstraps together.
Touch the actuator wires to your drill battery in order to figure out how it needs to be wired. On this actuator (DEI 524N), if you hook up the green wire to power and touch the blue to ground, it will pull. That's exactly what we need in this situation. If we had the actuator on the other side of the latch we"d have to hook it up in reverse. DEI actuators are very high quality, but you can get away with a cheap ebay actuator because it isn't used that often.
90-93 Acura Integra hatchback
94-01 Acura Integra hatchback
Now comes the fun part. First, ground the blue wire on the actuator using a ring terminal and a metal tapping screw. Connect the green wire to 87 on the relay. Connect 30 and 86 to constant 12v. Connect 85 to the alarm's red/white negative auxiliary output. 87a is not used. Now put the 15A fuse in the holder where you tapped your constant 12v. Secure your wires to factory wire harnesses using zip ties and use split loom where necessary.
If the fuse immediately blows, you don't have your relay's power or ground wires right. Make sure power flows through a switch and a load before going to ground. If the actuator immediately triggers when you put in the fuse, make sure your constant is on 87, not 87a. You have to hold down the aux button on your remote for several seconds for it to trigger. Make sure the trunk closes and latches the same as before. If it bounces back at you, loosen the clamp, climb into the trunk, close the trunk, and re-torque the clamp. Also make sure you can still open it with the key and with the handle by the driver's seat.
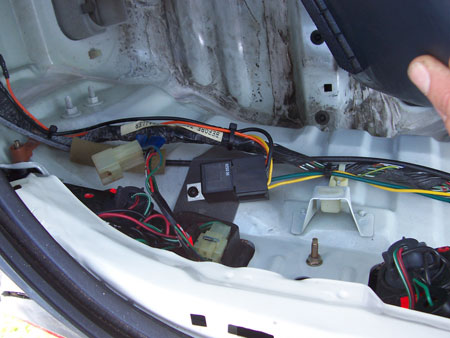
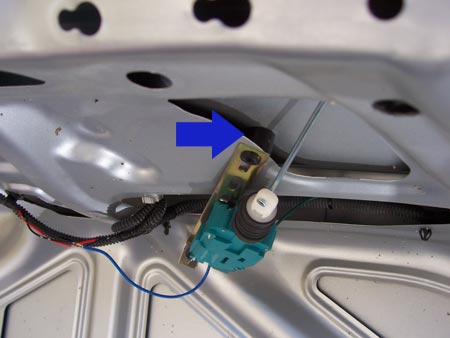
I'm going to be brief in this example and you can refer to the above example for more detail. The 01-05 Civic is a bit more tricky. The latching mechanism is on the door of the trunk itself which is unusual (and pretty stupid since the traditional design worked just fine).
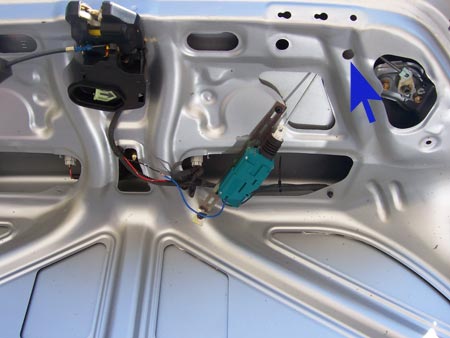
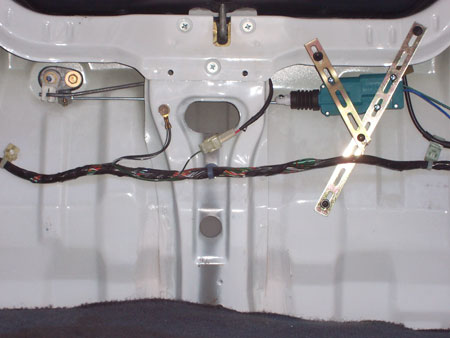
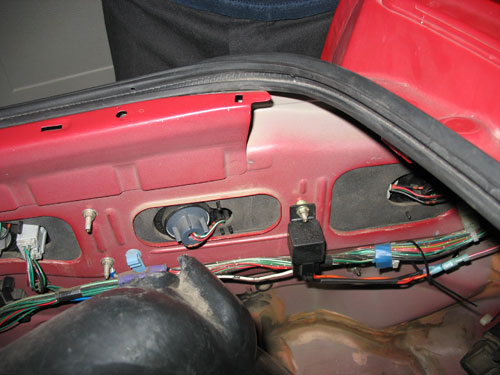
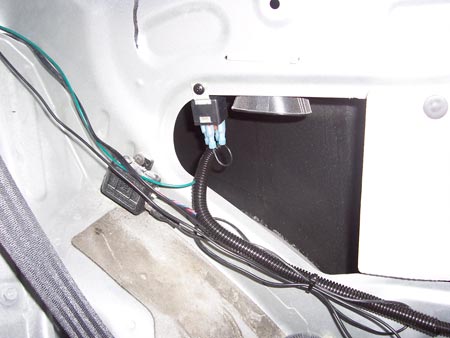
I didn't know if it was going to be possible until I spotted the peculiar movement of the key cylinder lock bar. Near the trunk key cylinder, the connecting bar actually moves up and down as opposed to side-to-side. So you can see how I mounted the actuator. You can't see the clamp in the pic but if you compare this pic to your car carefully, you'll noticed I used a unibit to drill a hole so that I could get a screwdriver in and tighten the screws on the clamp.
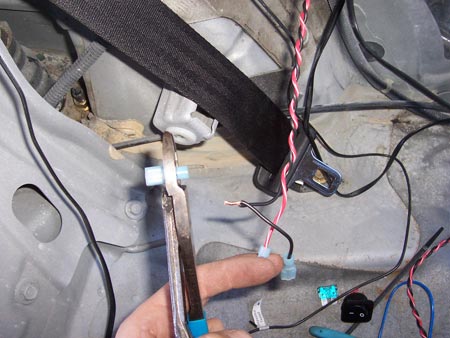
The blue wire I tapped into the black trunk latch ground wire. The green wire I ran down the right side of the trunk lid alongside the factory wire loom using zip ties, then back across the underside of the rear deck and into the driver's side rear passenger quarter panel where I always stealth mount my alarms.
I had to put a spacer between the two pieces of sheet metal so that my metal tapping screw wouldn't piece to the outside underneath the license plate.
I tapped power off the constant 12v feed to the alarm using a 15A inline fuse. I twisted this wire together with the red/white negative auxiliary output and ran it to where I wanted to mount the relay. Leave the fuse out until the wiring is done and the relay is mounted.
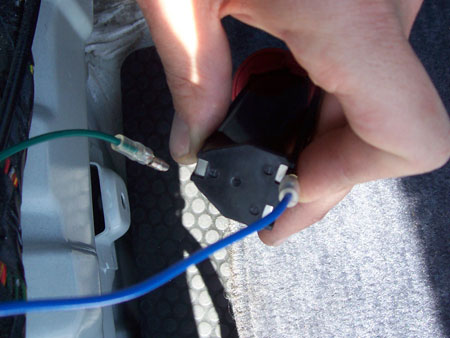
I crimped female quick disconnects onto the ends of the wires so I could slip them over the pins on the relay. You can see how I crimped two wires together into one female quick disconnect so I could loop the power from 30 to 86.
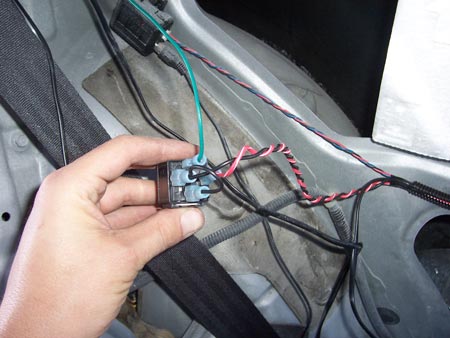
The red/white negative auxiliary output wire goes to 85, and the green actuator wire goes to 87. 87a is not used.
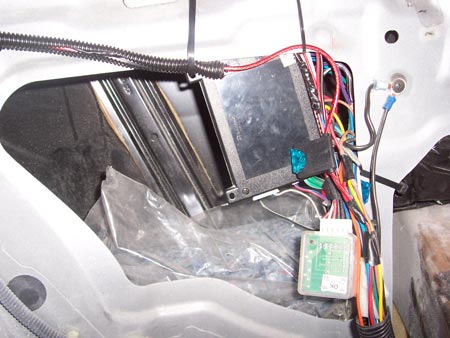
I mounted the relay in the rear quarter sheet metal cavity. Then I gave my girlfriend a call and told her to come get her car (and bring mine back).
Testing is exactly the same as example one.
