
- Home
- The Basics
- Stealth Installs
- Misc Security
- Kill Switches
- Convenience
- Modifications
- Maintenance
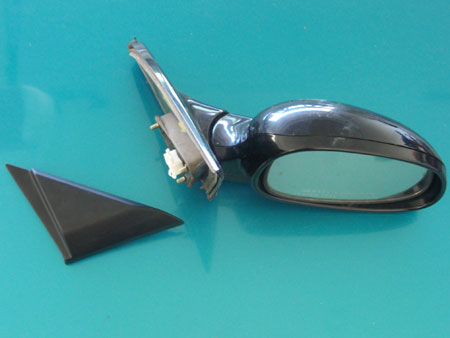
OEM Power Mirrors Swap
This is how you swap factory power mirrors into a Civic that came without it.
In my case I am only swapping the passenger side so that I can adjust it from my viewing position w/out having to lean over. I see no use in having a driver's side power mirror other than for symmetry. If you are swapping both sides you simply repeat the process for the driver's side.
Parts Required
- Power Mirrors
- Mirror Harness*
- Mirror Adjustment Switch
- Switch Harness
*Including the door jamb grommet.
Supplies
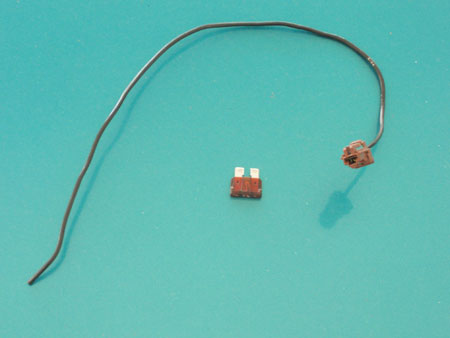
- 18 gauge wire, multiple colors preferred
- 7.5A Fuse
- Ring Terminal
- Solder
- Electric tape
- Option Plug or Female Quick Disconnect
Tools Required
Basic tools for removing small bolts, panels, and for connecting wires.
- Ratchet
- 8mm Socket
- Phillips Screwdriver PH1, PH2
- Hammer
- Reaching Tool
- Panel Popper
- Wire Cutters
- Wire Strippers
- Soldering Iron
- Digital Volt Meter
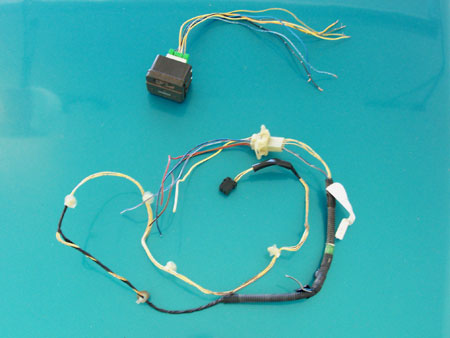
Removal (from donor vehicle)
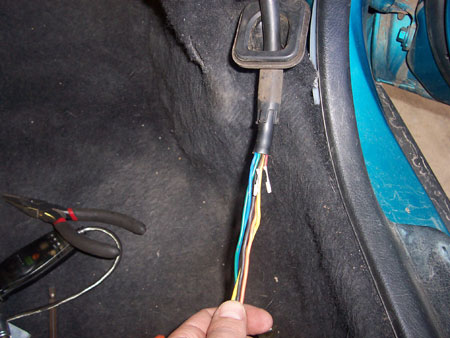
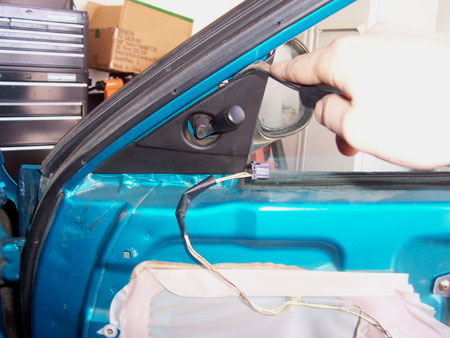
Pry from the top of the inner triangle panels to avoid breaking the mounting tabs. Disconnect the harness and remove the clips holding the wire bundle to the door frame. Pop out the door grommet and cut the wires as far back as you can into the passenger compartment.
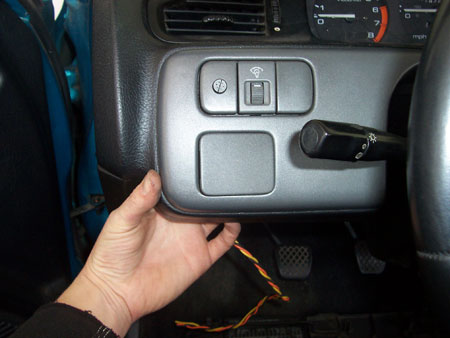
The best way to remove the dash switch and avoid pry marks is to remove the lower dash cover and push the switch out from behind. Pull the harness out and cut the wires as far back as you can.
Begin the Install
Remove Door Panel
How to Remove Door PanelRemove Speaker and Door Grommet

Remove the speaker and the door grommet. De-pin the speaker wires from both sides of the 2-pin harness. These pins will snap right into the door jamb harness you got from the donor vehicle (has more pins).
De-pin the speaker wires from the donor door jamb harness so that you can snap yours in.
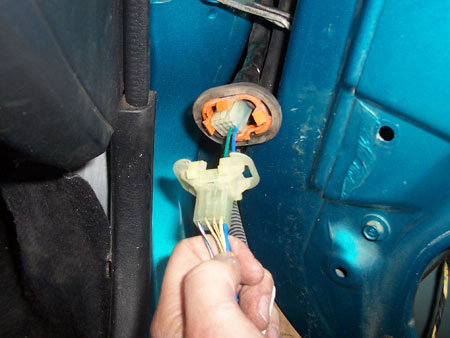
In my case I had previously run two wires for the door lock actuator. These can be forced through the empty pins in the harness for a clean install.

If you removed the mirror harness carefully from the donor vehicle, the pop ties should be intact. These will snap into the holes in your door frame that are covered with weather stripping.
Wiring
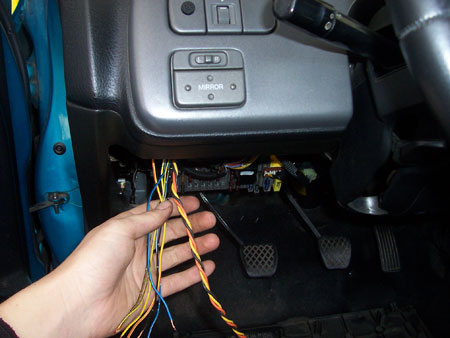
Run Wires
I estimated 7 feet for the passenger side mirror. Twisting the wires together (refer to Basics section) shortens the wires, but I still had a foot of extra length by the time I ran them to the adjustment switch.
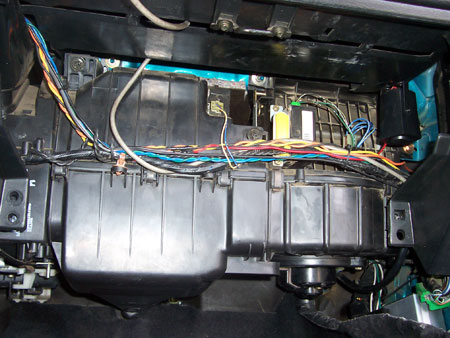
Run your wires in front of the heater box along with the factory wiring. Use zip ties to keep it secure.
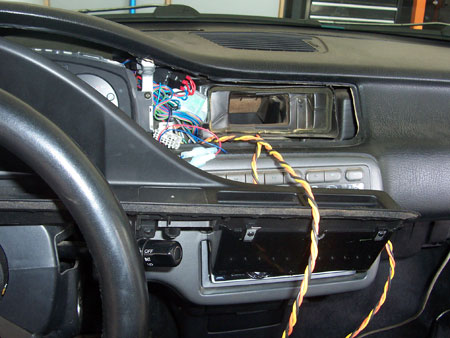
I decided to run them up behind the dash vents because I had already ran the door lock actuator wires this way, but you could just as easily run your wiring behind the stereo.
The wiring is pretty simple. Each mirror has 3 wires. One of the wires is common to both mirrors. The remaining two wires at the switch are for power and ground.
The Helms manual is incorrect when it indicates a blu/grn wire. Another problem is that sometimes the colors at the plug on the mirror itself are switched from left to right. The colors in the door jambs may also vary from left to right. In any case, it's easy to guess which wires connect to which. Blu/Blk at the switch connects to either Blu/Blk or Yel/Blk at the door jamb harness and mirror. Yel/Red connects to either Blu/Wh or Yel/Red. And Yel/Wh branches off at the switch to connect to Yel/Wh.
It's important to keep the Yel/Blk paired with the Blu/Wh, and the Yel/Red paired with the Blu/Blk (Yel/Wh is common to both sides). If you don't, the mirror will be very weak and it wont move consistent to the directions on the switch.
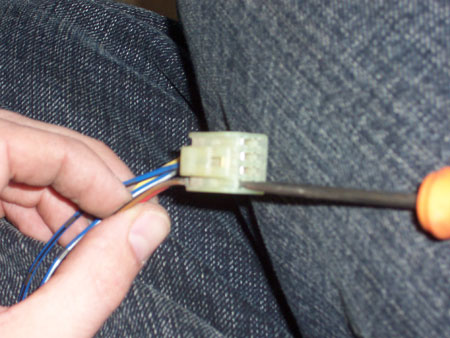
Run all the wires to the switch. Connect them all except these four. Then test to see which side is which before you solder a permanent connection.
Mirror Adjustment Switch
| Wire Color | Connects To | Mirror |
|---|---|---|
| Yel/Blk | Right Mirror | Yel/Blk |
| Blu/Blk | Left Mirror | Blu/Blk |
| Yel/Wh | Left and Right Mirror | Yel/Wh |
| Yel/Red | Left Mirror | Blu/Wh |
| Blu/Wh | Right Mirror | Yel/Red |
| Blk/Yel | Ignition 12V | |
| Blk | Ground |
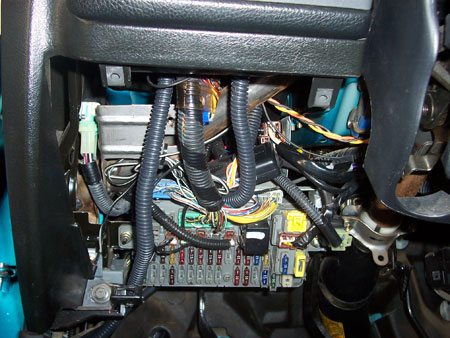
Power (Ign2 12V)
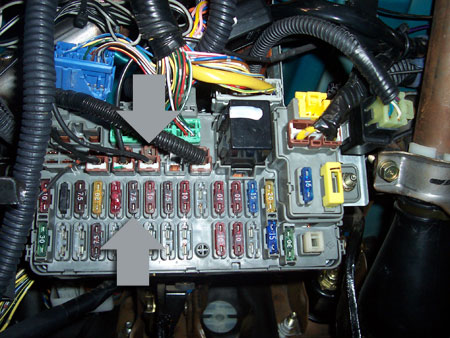
The option outputs on the under-dash fuse box provide an easy and clean power source. The third one from the left is "Ignition 2" power which is exactly what we need. It corresponds to fuse # 16, which is usually empty. Use a 7.5A fuse.
I think it's pretty funny that I'm at a point where I'm using every option output.
Ground
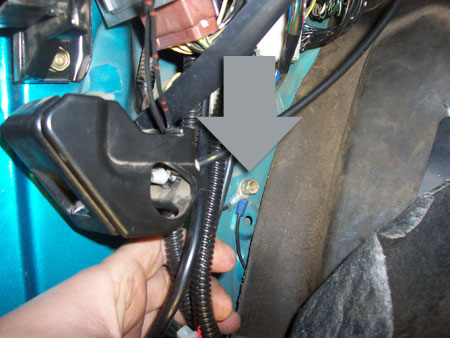
There's a 10mm threaded screw hole in the driver's kick where you can ground the switch using a ring terminal.
Split Loom
Loom up your wiring after you're done to protect your connections and to keep things looking OEM.
Test for Proper Operation
Now that the switch is powered up and connected to the door harness, temporarily connect the power mirror before you install it to make sure it works properly.
Removing Manual Mirror
Leave your manual mirror in until the very last minute after completing all the wiring and testing the power mirror.
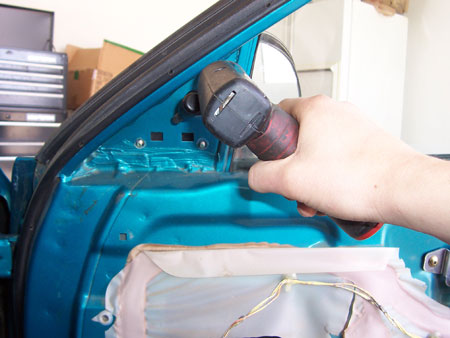
Pry from the top and then remove the three 8mm nuts.
Install Power Mirror
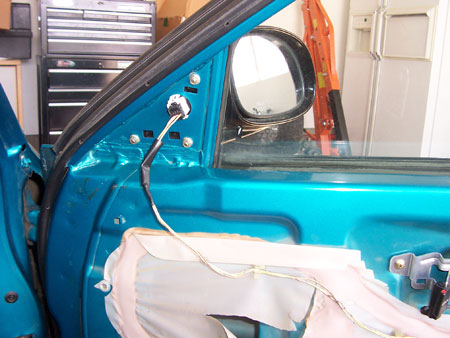
Now you can finally install the power mirror and plug in the harness. Put your car back together once you are sure that everything works properly (including your speaker and door lock actuator).