
- Home
- The Basics
- Stealth Installs
- Misc Security
- Kill Switches
- Convenience
- Modifications
- Maintenance
B18A1 Valve Adjustment
A valve adjustment requires an accuracy of .001 inch! The head has to be torqued to the block. The engine has to be cold from sitting overnight. And you have to tighten the jam nuts with the special tool first, then finish them off with a torque wrench. All of these factors affect the valve clearance.
Special Tools
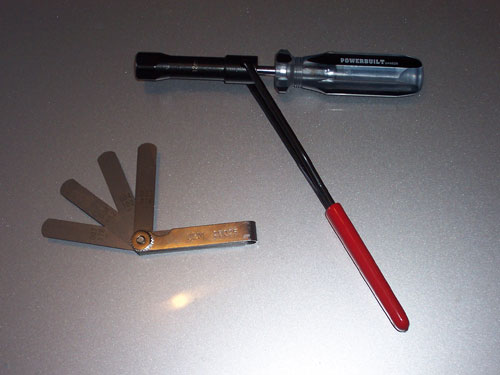
The B18A requires a 12mm jam nut adjustment tool (look up the specs for your particular engine). The specs call for a feeler gauge tool that has the following: .003, .004, .006, .007. Neither of the tools I used in my D series write-up work for this engine. You can find the jam nut tool and "OEM 25025" on Amazon for super cheap.
I would have preferred the feeler gauges that have the bend in the end like I used in my D-series write-up, but I couldn"t find them in the super small size that this engine requires.
The first thing you want to do with your feeler gauges is take the nut off and put the four gauges you'll be using right on top.
Other Tools

Every tool I used I threw into a pile and took a pic after I was done. I used a wire brush on the spark plug threads, a hammer to tap the valve cover loose. Pliers for the hose clamp. 19mm for the crank pulley bolt. The panel popper tool was useful for getting the valve cover washers and breather hose off. I needed a drop light to see the timing mark and the cam sprocket marks. The drill with socket adapters is unnecessary but I get impatient turning the ratchet. The rest is self-explanatory, but I will list them out.
- Ratchet
- 10, 12, 19mm, Spark Plug socket
- Long and short Extensions
- Mallet
- Light
- Flat head Screwdriver
- Torque Wrench
- One or two Torque Wrenches that can do 18 and 80 ft/lbs.
You'll also need liquid gasket (recommend Honda bond), spark plug boot grease, and anti-seize.
Incidentals
You might need a new valve cover gasket, spark plug tube seals, and valve cover grommets/washers.
Remove Wheel
Loosen the lugs on the driver's front wheel. Jack up the front of the car, put a jack stand under the driver's front jack point. Let the car down.
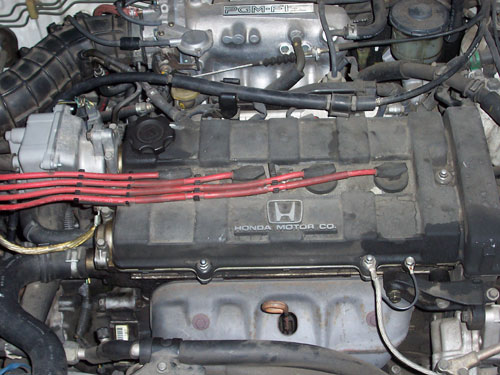
Plug Wires and Spark Plugs
Take the spark plug wires out of their holders and pull the spark plug boots out. Then remove the spark plugs. Check their condition, clean the threads, re-gap them, put a little bit of anti-seize on the threads for later.
Valve Cover
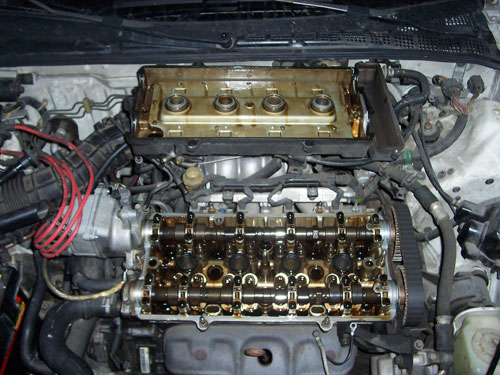
Remove all of the 10mm nuts holding the valve cover on. Also the nuts holding down the ground wire and the power steering hose. Put them in a box so you don't lose them.
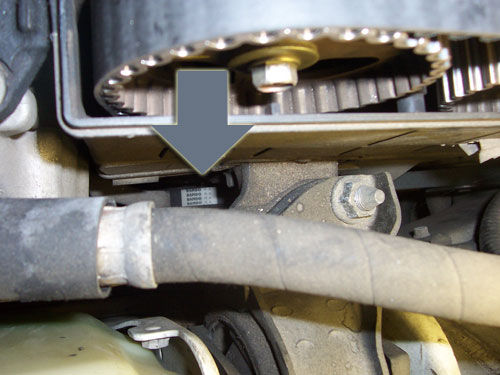
TDC the Engine
Put the 19mm on an extension and put it through this access hole onto the crank pulley bolt.
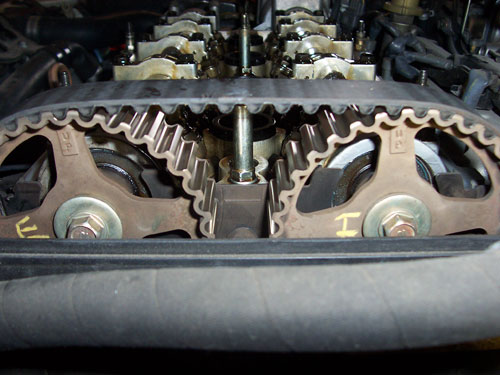
Start by finding top dead center for cylinder 1 (closest to crank pulley). Rotate the engine counterclockwise until the "up" arrows on the cam sprockets are facing up. Then shine a light down to the crank pulley from above until you see the pointer on the timing belt cover pointing at the white mark on the pulley. It doesn't have to be perfect.
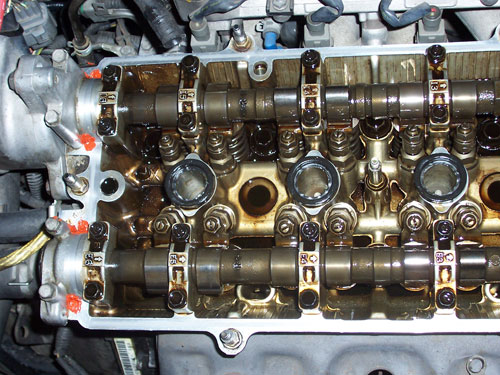
Check Valve Clearance
.003 gauge slides in...
.004 doesn't.
Check the valve clearance for cylinder 1. The spec for the B18A is .003 inches on the intake, .006 on the exhaust. On my engine that has probably never had a valve adjustment, the all the intake valves were too loose and the exhaust valves were too tight. So this will make a huge difference!
Adjust the Valves
This is the method that was taught to me by a coworker who's been working on Hondas since long before I was born. It's simple: you want the clearance as loose as it can be as long as the next larger feeler gauge will not fit. So on the intake valves the .003 gauge should slide in, but the .004 shouldn't. On the exhaust the .006 should slide in, but the .007 shouldn't. Piece of cake.

Put the feeler gauge in the gap below the cam lobe, tighten the screw with the special tool, pull the feeler gauge out and then try the next larger gauge. If it wont slide in, hold the screw and tighten the jam nut. Then torque the jam nut to 18 ft/lbs and measure the clearance again. Torquing it will increase the clearance slightly, so keep this in mind when you're adjusting them so you don't have to keep repeating the process.
Rotate the Engine
Rotate the engine counterclockwise so that the "UP" marks are now facing the front bumper (cam sprockets turn 90 degrees). Adjust the valves on cylinder 3. Rotate the engine so the "UP" marks are down. Adjust the valves on cylinder 4. Rotate the engine so the "UP" marks face the windshield. Adjust the valves on cylinder 2.
You'll know if you're checking the wrong cylinder if the cam lobes are facing down.
Triple Check Your Measurements
Rotate the engine and check each cylinder one last time.
Put it Back Together
Most of the re-installation process is the opposite of removal. The exception is that you need to clean the valve cover mating surface of any oil, crud, and old liquid gasket. Apply new liquid gasket to each of the 90 degrees bends in the valve cover gasket. You have about 15 minutes to torque the valve cover down before the liquid gasket dries. Then you have to wait an hour or two for it to fully cure before you can start the engine.
Reset the ECU
The 1992 Integra is OBD1 so you reset the ECU by pulling the 7.5A fuse in the fuse box under the hood (same as the EG Civic).
Hand tighten the lug nuts as much as you can with the wheel off the ground, drop the car, then torque them to 80 ft/lbs.