
- This Page
- Home
- The Basics
- Stealth Installs
- Misc Security
- Kill Switches
- Convenience
- Modifications
- Maintenance
Stealth Car Alarm Install
2001-2005 Honda Civic
A girl brought in her late model Civic for an alarm saying that someone broke into her car and stole her subs. I explained to her that Hondas/Acuras are theft targets and that it was going to take some serious security measures to keep her car safe. Like many customers, she assumed that I was simply pushing product to get a big commission (most retailers no longer pay commission). Rather than get discouraged, I decided that this would be a good candidate for a stealth install DIY because it gives me the opportunity to show the end result of being a cheapskate when it comes to security. On the other hand, I felt bad for her, and being that it's a Honda... I felt an obligation to take special care of the car and do a stealthy install.
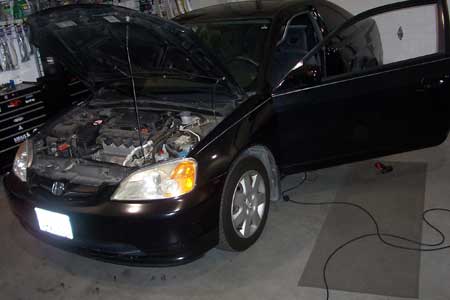
Another reason for this DIY is because I'm often asked, "is it possible to get a stealth install at Best Buy?". Working at a national retailer means that I'm on a serious time budget. I have the added constraint that I can't do an install that would be too difficult to warranty at a later date. It would have to be accessible to any Best Buy installer. My typical stealth (off the clock) rear-quarter install just wasn't feasible. I thought back to a time when someone brought me a four door hybrid. The 01-05 Civic has a big cavity beneath the cup holder in the center console, and I could remove the entire center console in roughly 2 minutes and 30 seconds (so could a thief, but he wont know to look there). An install here would be acceptable for warranty reasons and would fit into my time constraint.
Without a battery backup module this extra effort is virtually wasted. What do I care? I'm just trying to make a sale, right?
- Parts
- Alarm: Viper 350HV (Python 460HP/Clifford Matrix 1)
- Battery Backup Module N/A
- Piezo siren N/A
- One or two of the following sensors:
- Glass Breakage DEI 506T N/A
- Tilt DEI 507M N/A
You can get sensors and the backup module from ebay, Best Buy, or Circuit City *RIP. Alarms you can buy w/out installation at Best Buy or Circuit City. If I mention a particular brand/part number, that means I strongly recommend that exact part. Sensors and backup modules will work with all alarms although they will have to be hardwired in. The girl whose car is being used in this example decided against everything I recommended. Look at the other Honda/Acura stealth installs for instructions on how to wire in and mount those items.
OEM Wire Colors
| 2001-05 HONDA CIVIC | ||
|---|---|---|
| WIRE | COLOR | LOCATION |
| 12 VOLT CONSTANT | FUSE BOX OUTPUT | |
| STARTER | BLACK/WHITE | IGNITION HARNESS |
| IGNITION | BLACK/YELLOW | BLUE PLUG CENTER CONSOLE |
| PARKING LIGHTS (+) | RED/BLACK | BACK OF FUSE BOX |
| DOOR TRIGGER (-) | GREEN, LT GREEN/RED, *GREEN/WHITE (4 DR) | OEM ALARM PLUG |
| TRUNK TRIGGER (-) | RED | OEM ALARM PLUG |
| FUEL PUMP (+) | YELLOW/GREEN | CENTER CONSOLE |
| POWER LOCK (-) | WHITE/BLUE | DRIVER'S KICK |
| POWER UNLOCK (-) | WHITE/GREEN | DRIVER'S KICK |
*4 door sedans use a single Green/White wire to detect both rear doors. This wire is not present on other models.
Alarm Peripherals
The best way to start the install is to get all of the alarm's peripherals out of the way. By peripherals I mean the siren, the antenna, the valet button and LED.
Antenna
Remove the screw and squeeze the antenna wire through.
Mount the antenna as high up as you can. Tint will reduce the antenna's range. Loop any excess in the headliner if you can.
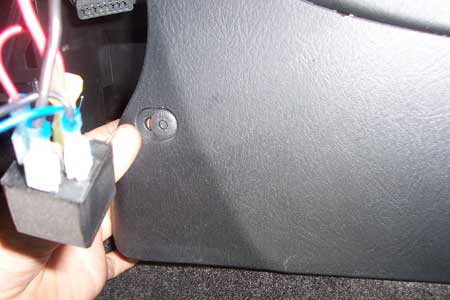
LED


The best mounting place for the LED is a pop out panel that is easily visible from outside the vehicle. Drill a hole using a 17/64 or 1/4 bit. The manual says 9/32, but then the LED will be loose so use the next size smaller and a round file. Press the LED in on a soft surface like a carpeted work bench.
Valet Button
The hole for the valet button is the same size as the LED. You can connect the valet button temporarily, program any options you want, then remove it. My work requires me to mount it to the driver's left kick panel. I programmed a code other than the default.
Siren
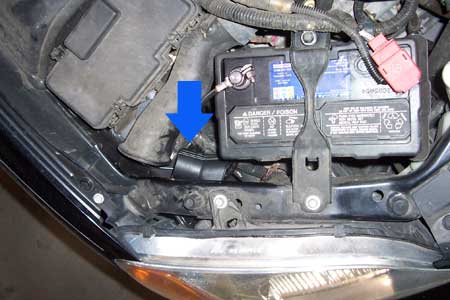
Siren placement is difficut on an EM as there isn't any free space under the hood. I was able to get some metal tapping screws down in this cavity by using a long extension. I actually stuck the extension through the hole after removing the rubber hood stop.

Here I'm pointing in the general direction of the engine harness grommet. I just couldn"t get a camera down there.
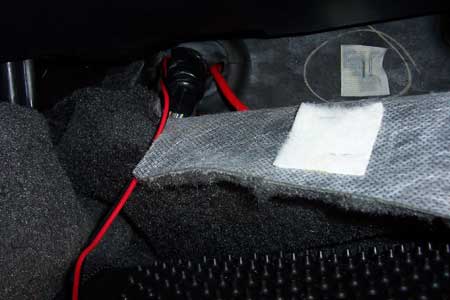
The main engine harness goes through a large rubber grommet on the passenger side near the center. Disconnect the negative battery terminal first. Use a grommet piercing tool (basically a small sharpened pipe with a handle) or just fish a closehanger through the outer rim of the grommet, careful not to pierce any of the wires in the engine harness.
Alarm Preparation
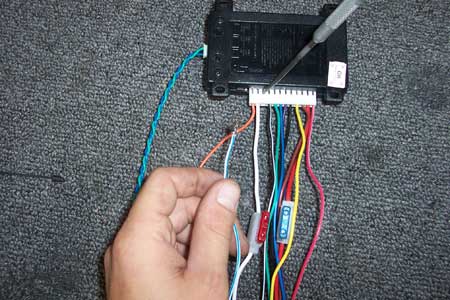
De-pin the white/blue (never used), purple (positive door trigger input doesn't apply to Japanese cars), and red/white (negative aux output used for trunk poppers etc) wires.
Cut the black wire and splice it together with the green (negative door trigger input) wire. I like to keep the alarm's cutting and splicing all at the same level (just before the fuses) because it's easier to trace down later if there's a problem.
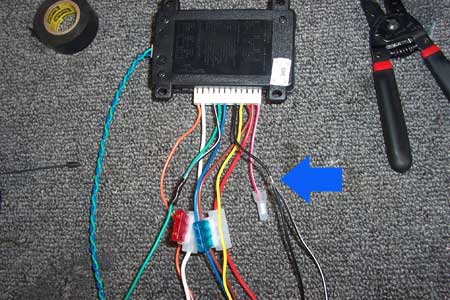
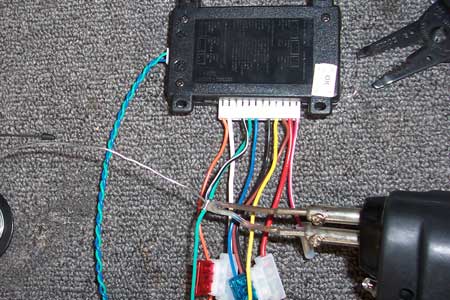
Use the cut black/white wire to branch off the ground wire for the siren ground. Twist it together with the brown siren wire.

Cut the slack from the yellow and orange wires that go to the start-kill relay. I like to make them the same length as the relay's green and black wires.

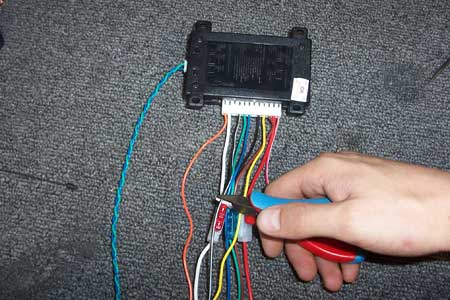
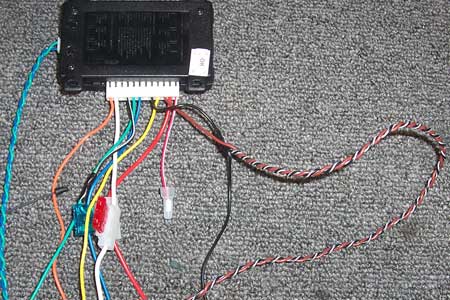
If you haven"t noticed yet, alarms have a lot of wires to manage. To help keep them clean and organized, you should twist wires together if they're going the same direction or are connecting to the same point. Put them in the end of your cordless drill, tighten the chuck down, hold the wires tight, and pull the trigger.

For this example, the best grouping is as follows (will be different than what you see pictured): Lock/unlock wires, trunk trigger/door trigger, constant 12v/parking lights, ground/ignition, siren positive/branched ground, relay's black/relay's green, relay's orange/relay's yellow (cut the extra yellow off).
In other words twist together the small gauge blue with the small gauge green, the 18 gauge blue with the 18 gauge green, the red with the white, the black with the yellow, and the brown with the black/white that was cut and branched off the black.
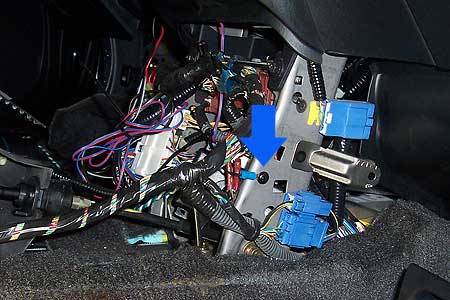
Getting Serious
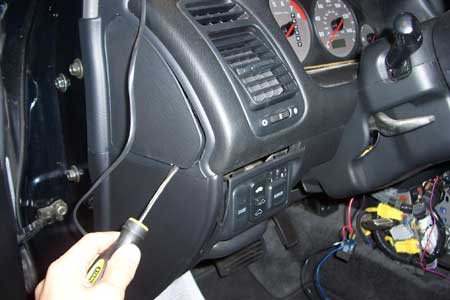
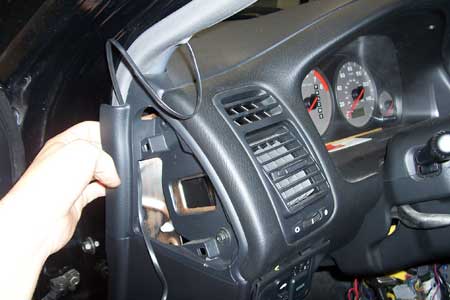
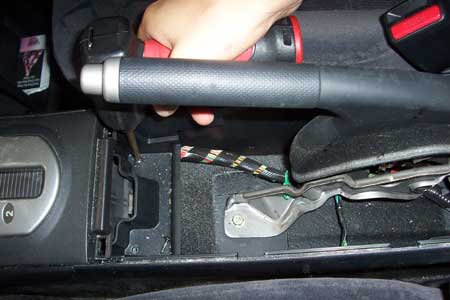
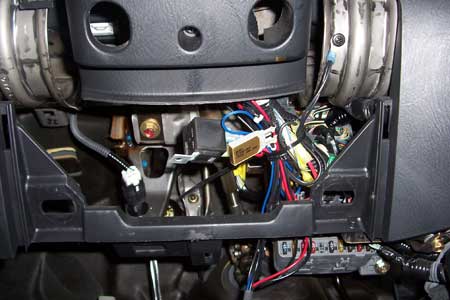
Remove the Center Console
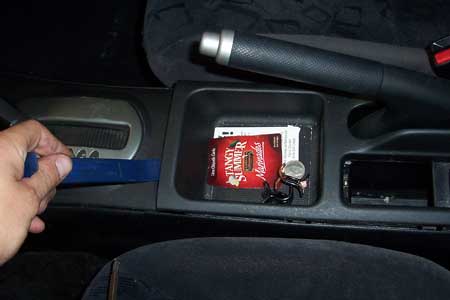
The ebrake cover is pressure fit.
Push in the center tab.
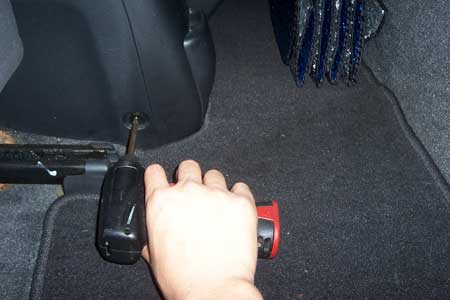
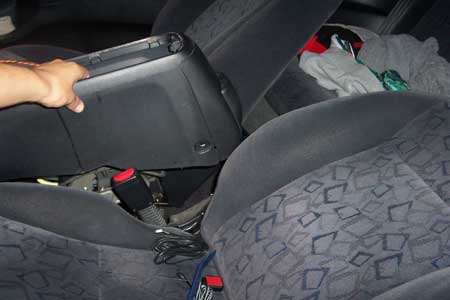
Slide the seats all the way back and lay the backrests flat. Move the shifter all the way back, then lift the rear of the center console up high.
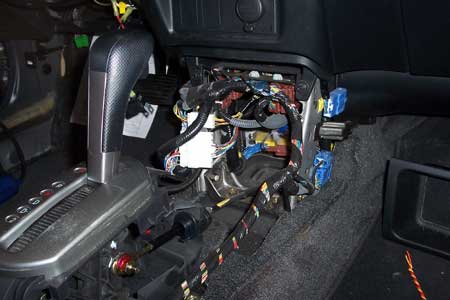
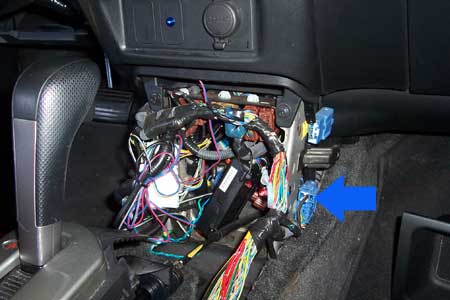
Wiring
Ground
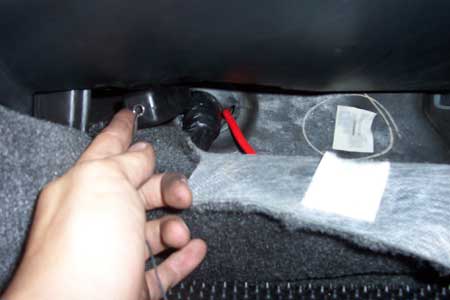
Crimp a ring terminal onto the ground wire and attach it using a metal tapping screw.
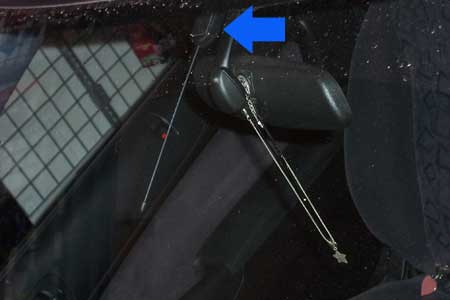
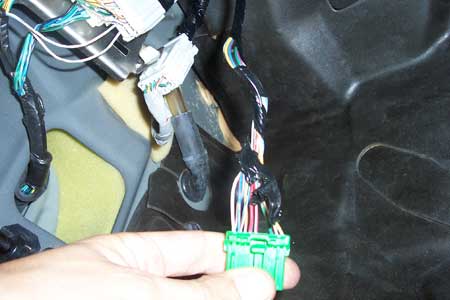
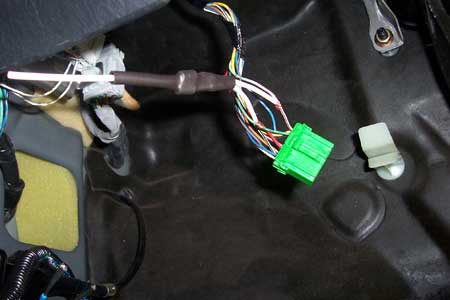
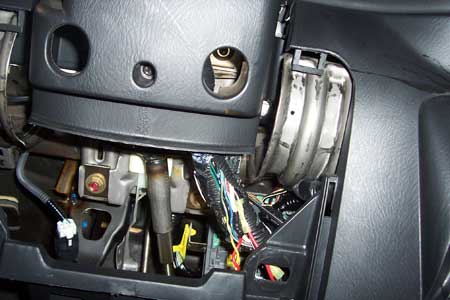
Door Trigger/Domelight, Door Locks, Trunk Trigger

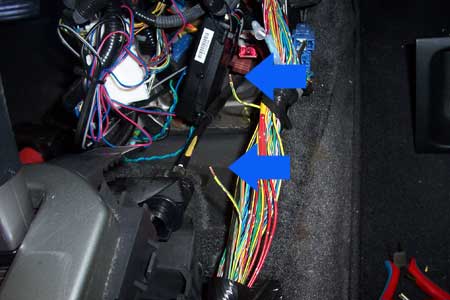
Run the green/blue wire bundles under the driver's carpet to the driver's kick.
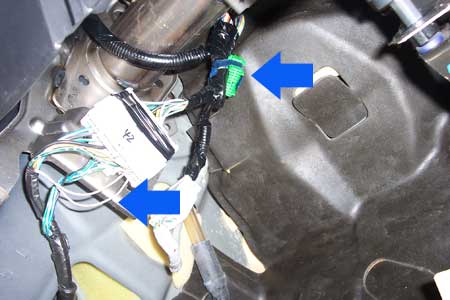
The upper arrow is the green oem alarm plug which contains the door triggers, trunk trigger, and some other inputs that might prove useful. The lower arrow shows the door lock and unlock wires on cars that came equipped with power door locks.
The door triggers are seperate and need to be diode isolated. High end DEI alarms come with this heat shrunk diode pack. This works great on 2 doors but you need 3 diodes for 4 doors. The striped ends of the diodes connect to the car side, then twist the other diode ends together and connect them to the alarm's door trigger input.
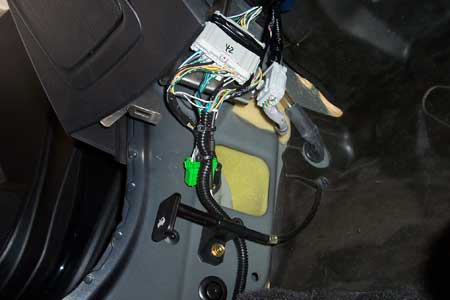
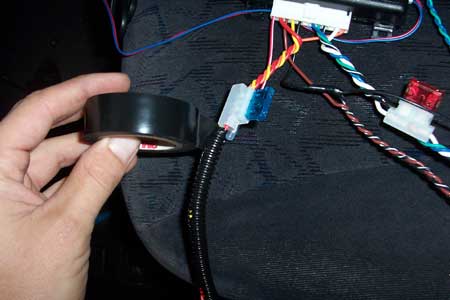
Split loom and tape the alarm wires and zip tie it to the factory wire loom.
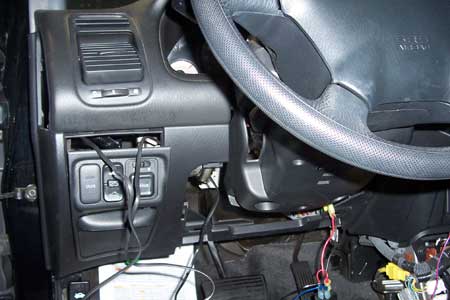
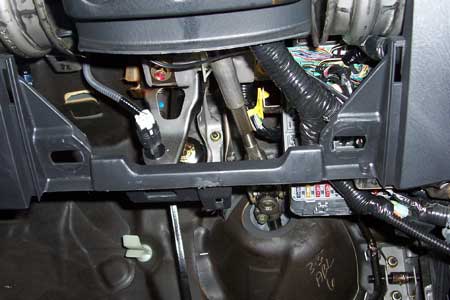
Constant 12V
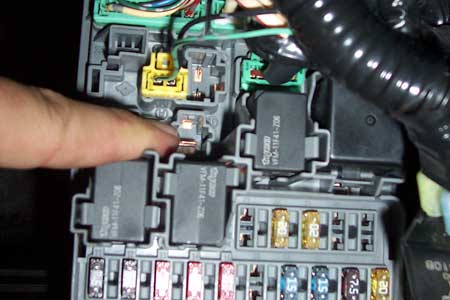
The 7th gen Civic has a single fusebox output and it just happens to be a constant 12v. Tap into it using a speaker terminal (female quick disconnect). It may seem vulnerable, but it's just as easy to remove as a wire going into the ignition harness, but less obvious. That's what your backup battery is for anyway. Oh wait, you didn't buy one? Well, you're screwed.
Ignition 12V
This is a strange place to find an ignition wire, but hey, I don't question it.
start-kill
Starguard/Starter Kill
Dealerships like to add this useless Starguard chip and charge you an exorbitive amount. If you buy a new car, NEVER allow them to install a chip. These actually make your car easier to steal.
The relay was crimped on well so I decided to re-use it. I pulled the connection from 87 and put it on 87a, then connected 85 to the alarm's orange ground-when-armed wire. 86 was already looped to the starter wire. Then I pulled the relay and its wiring to the side, split loomed it, and secured it with a ziptie. I don't expect this starter kill to be very effective, but it will serve its purpose.
Fuel Kill
It would be foolish to depend on the starter kill alone. The yellow/green fuel pump wire runs down the center console on the 7th gen Civic, so I decided to take advantage of that. There is more than one yellow/green wire in this bundle, so be sure to verify it with a multimeter.
First turn the radio OFF. Connect the black probe to chassis ground and connect the red probe to the suspected wire. There should be 0 volts. Turn the key to the ignition position. The meter should show 12 volts (or very close to it), and then drop to 0 in a second or two when you hear the fuel relay click. Start the car. There should be 12 volts with the car running, and 0 when you turn it off. Cut the wire with the engine running and it should stall after a few seconds.
Again, this really is a wasted effort if there is no backup battery.
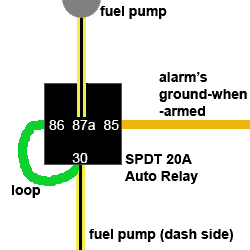
Branch a wire off of the alarm's orange ground-when-armed wire.
Testing the Alarm
Close the doors and trunk and arm the alarm. Make sure both doors lock when armed, unlock when disarmed. Also make sure the parking lights and LED flash. Make sure both sirens chirp. Unlock the door with the key and make sure it triggers the alarm, then test the other door and the trunk. Make sure the car wont start when the alarm is going off, but will start when it's disarmed. Try putting the alarm in valet mode and taking it out (turn the key on but the engine off and tap the valet button).
Program the Valet Button
By default it takes one press on the valet with the ignition on to put the alarm in valet. Program it for 2 or more presses and write it down in the booklet, or just program whatever options you want and then remove the valet button altogether.
Once you are satisfied that the alarm is fully functional, put your interior back together and give it one more quick test.
Theft Scenario
So, is this install really effective? No, not really. The alarm has some glaring weaknesses simply because the owner likes to pinch her pennies (and will end up paying a lot more in the end, both in cash and in grief). Here is a theft scenario to illustrate these weaknesses.
The thief sees the blinking LED telling him there's an alarm. He pops the hood by either slashing the plastic in the fender well and cutting the release cable, or reaching up the front bumper and going directly to the latch. There's no hood pin and the shock sensor does not detect the vibration. If the shock sensor was set sensitive enough to detect such a slight vibration, it would constantly false every time a car drove by. The thief lifts the hood and disconnects the battery. Since there is no backup battery, the alarm doesn't detect anything and would be powerless to react even if it could. The thief can now hunt down the siren and cut it, then reconnect the battery. There is no second siren fused from the first so the alarm is now muted.
Then he punches the door lock cylinder and opens the door. Once the door is open, the alarm triggers, but w/out a siren, it's merely a clicking relay sound. The alarm is interrupting the starter and fuel wires, but the thief has only to cut power to the alarm. Since they're normally closed relays, the start-kills are no longer in effect. The theif can then break the oem steering wheel lock by force, with a lever, or by punching the ignition. This also releases the shifter on auto trans vehicles. Now he's going to silently roll the car away, then start it where the people sleeping inside wont notice it. The whole incident plays out in minutes.
The alarm in this case was merely an annoyance. The shock sensor failed to detect an intrusion. There was no hood pin, motion sensor, tilt sensor, or glass break sensor to detect the thief early on and prevent damage to the car. There was no battery backup module to keep the alarm powered to blare the siren and keep the start-kills active. There was only the single siren which was easily accessible, eventhough an effort had been made to conceal it. The thief had unlimited time to deal with it since he never set the alarm off. The fuel kill was a nice touch, but it never came into play. It was negated as soon as the thief cut power to the alarm.
Your car is taken and stripped. its parts are sold to auto repair shops and tuners just like you. Now this car is some thief's paycheck. He can go buy some smack, some weapons to escalate his crimes, and some tools to make stealing cars that much easier. He was at very low risk of getting caught, and he has a new confidence and sense of impunity. He may have also brought along his stupid little thug friends to teach them the trade.
The victim may or may not have had insurance. Even with insurance, the victim and the car will never be the same. You're inconvenienced and violated. Some personal items are irreplaceable. The insurance haggles over every penny, and you're not likely to recover any money for aftermarket parts ie stereo equipment. You're late for work, or you're stranded somewhere. You have to deal with the police. You have to deal with the insurance company. You have to rent a car. Neither is all that pleasant.
Additional alarm accessories or even gps tracking no longer seem that expensive to you. Now you are determined never to let some scumbag take advantage of you again. But it's too late. You've become a victim.