
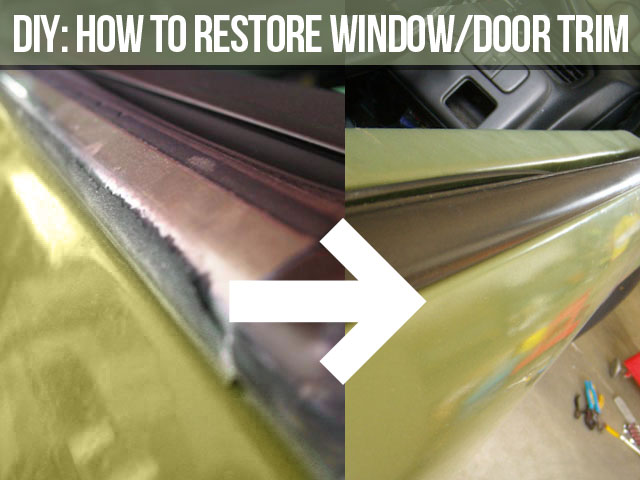
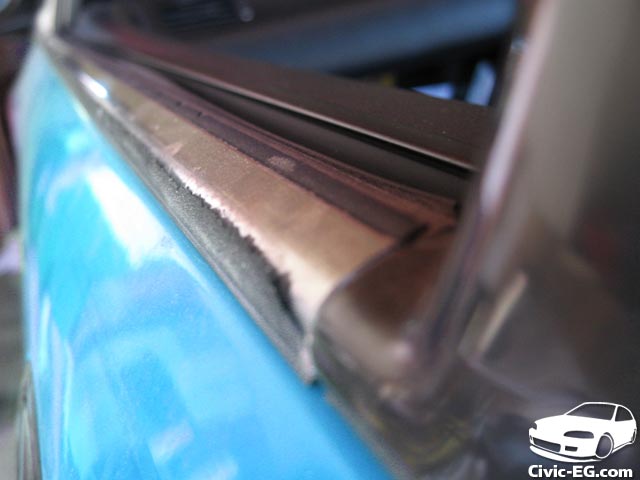
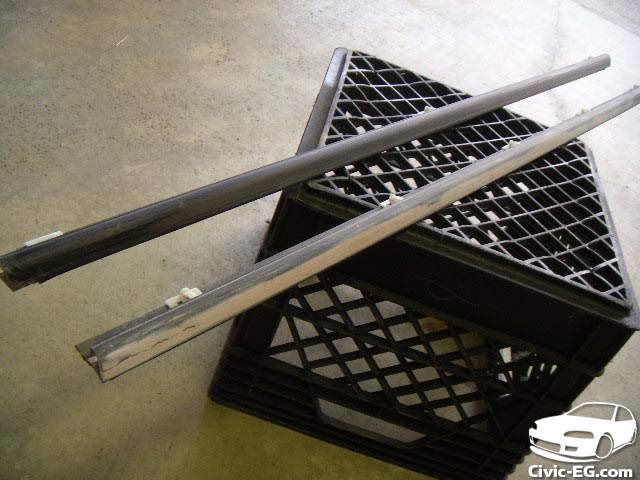
 Look familiar? Years of outside weather & sun is not kind to our window trim. The surface is actually rubber, over a piece of metal. Over time the rubber dries out and gets surface cracks, which then begin to chip off.
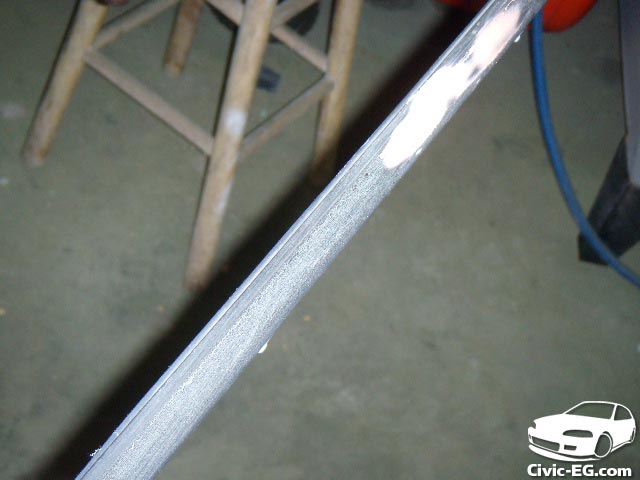
Take them off and sand then down to smooth any peeling edges that are sticking up. something in the 80-150 grit range is good so you’re not sanding all day. But remember the lower grit you use, you must watch out for any scratches in the end.
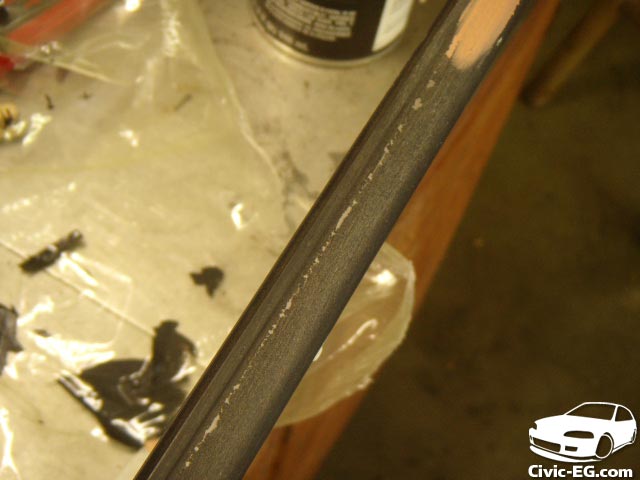
Here I have sanded down the worst areas and cleaned them off with a wax/grease remover. Then lay down the bondo/filler. The idea is to fill in the areas where the rubber coating has chipped off to make that part flush with the parts that still have the coating. Also fill in any areas that have the rubber coating with cracks in the surface.
Let it dry. Next sand down with your low grit sandpaper like before just to form the contour by removing any extra thick areas.
Once you’re happy with the overall contour of the face of the trim piece, go back with some lighter grits (220, 320, 400) and remove any deep scratches left by the low grip paper.
if your trim was like mine, there were some areas that did not even need to be sanded or bondo’d (the part by the mirror was better protected from the elements and was fine)
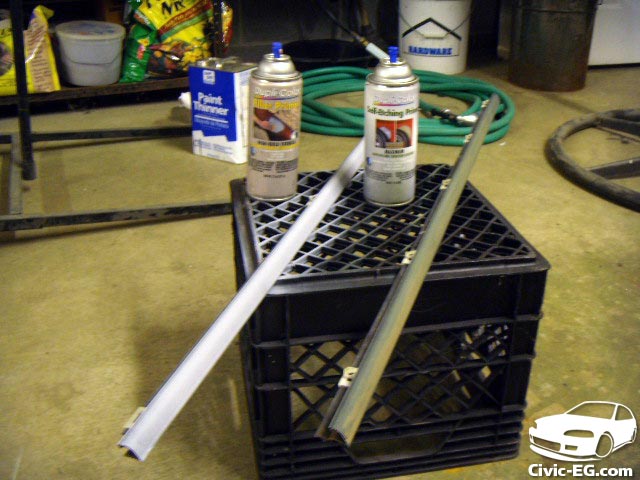
So for the initial primer, I used a couple light coats of Self Etching Primer.
(right side of pic)
Then I did a few coats of filler primer (left side of pic) to help fill in some additional remaining scratches from my sanding. (yeah even teal_dx rushes and leaves scratches lol)
Then give them one final sanding with a paper in the 400, then 600 grit range.
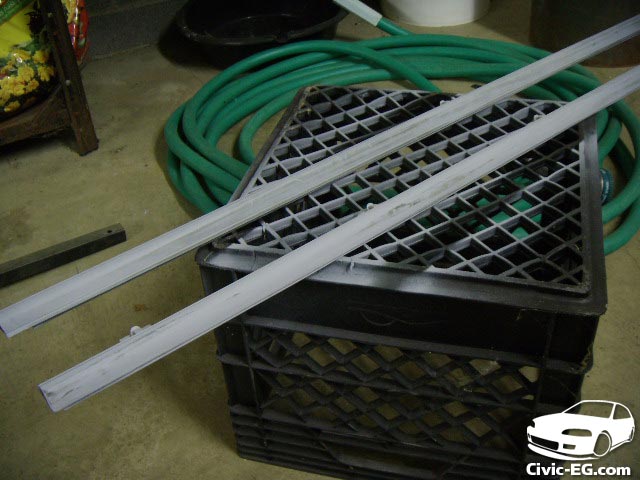
Clean them & One more final coat of primer…
Between every time you sand, you should give the trim a quick wipe down. Use a rag with wax & grease remover. Don’t use any thing oil based (paint won’t stick) and don’t use water (absorbs into the primer/bondo)
Wax & grease remover evaporates in just a few minutes and then you’re ready to move on to your next step
Then hit them with a few light coats of VHT Trim Paint
Let dry and install: 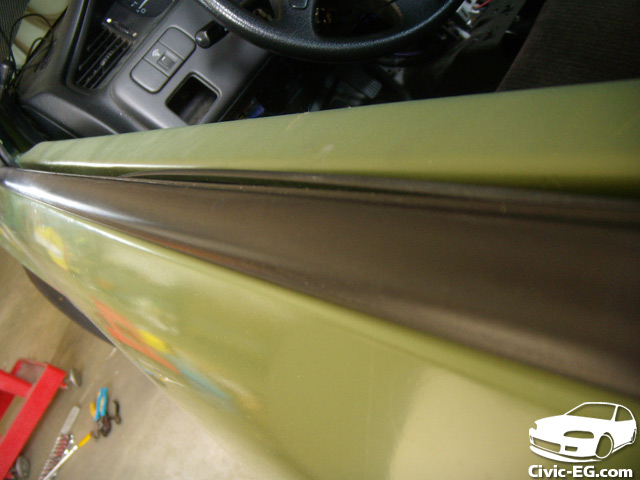
The Trim paint looks just like OEM. I had a few chips on my mirrors and white was showing, so I sanded them down and painted them too. 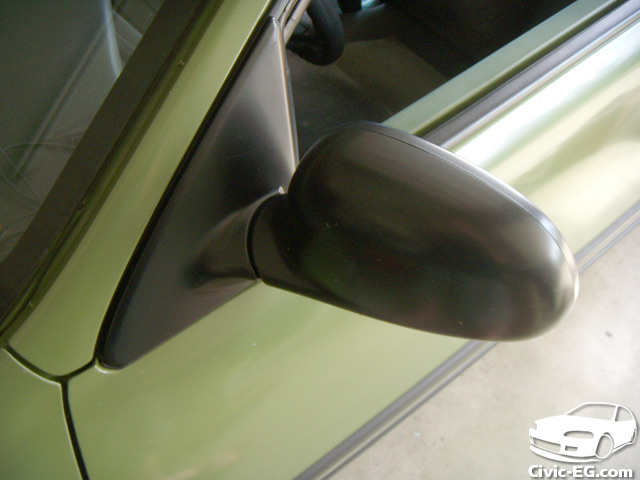

This paint is great stuff! If I still had my windshield wipers, I would have painted those too. Something as small as a few fresh trim pieces can really make your car look 25 years younger!
This is a featured DIY Tutorial from the Civic-EG.com forums. For additional comments and questions, please see the original thread here: http://civic-eg.com/forum/viewtopic.php?t=1161