- Thu Oct 14, 2010 3:40 am
#218285
I have seen a few people do this.
I seared the forum and didnt find a DIY on this, so i decided to help out.
Relocate Your Overflow Tank
start by taking your front bumper off. there are 5 screws on the top, and i had 1 on each side. there may also be a couple under the bumper, mine didnt have any.
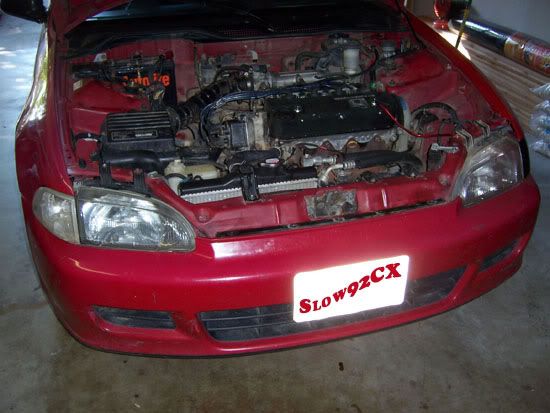
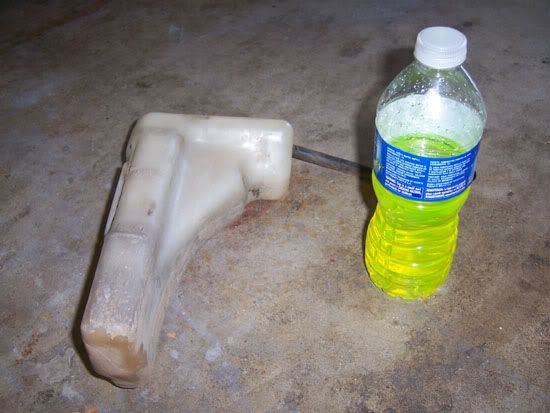
now in the engine bay, remove the snorkle pipe on the intake and pull out your overflow tank. i poured the fluid in a water bottle so i could just fill it back up when i was done.
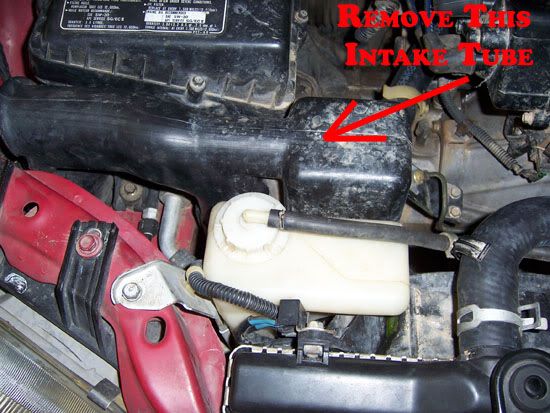
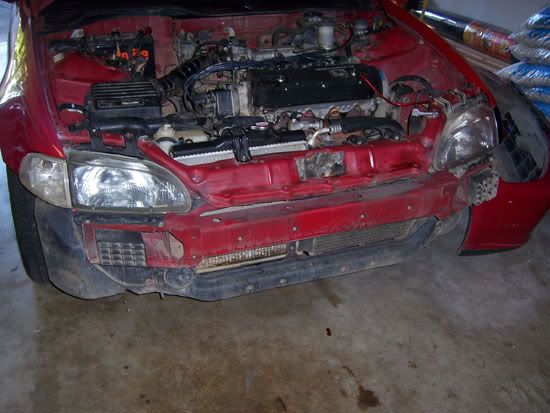
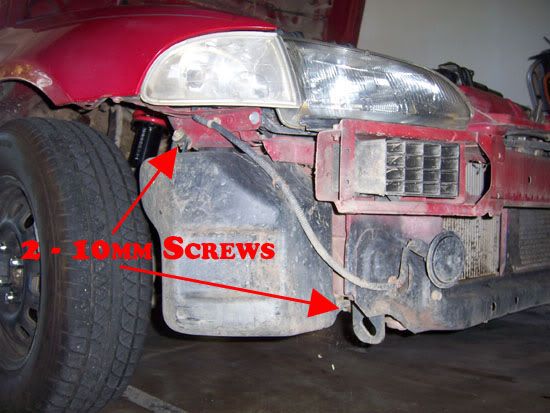
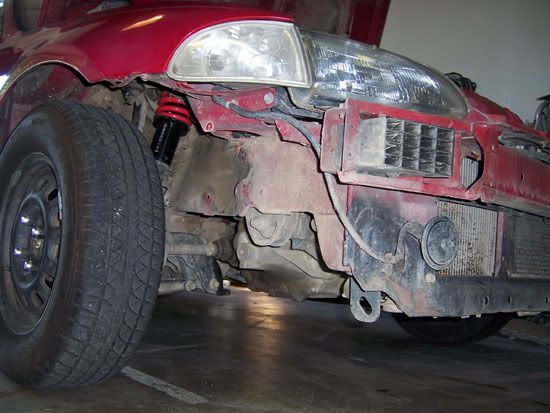
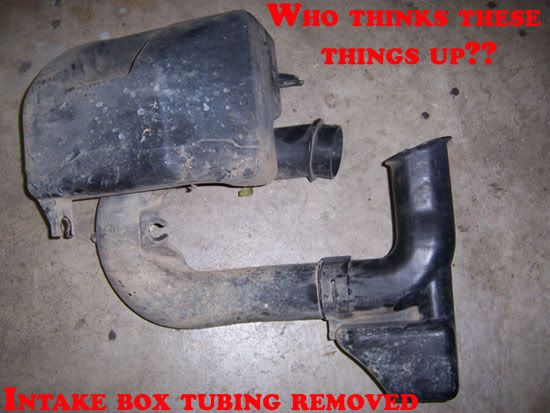
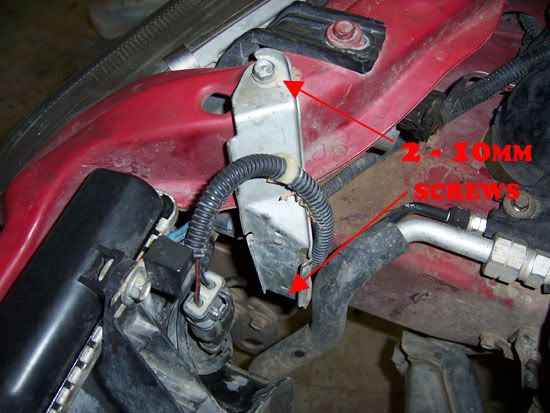
after the bumper is off you will see a big black box that is part of the intake system. remove the two 10mm screws that hold it on and then pull it strait down.
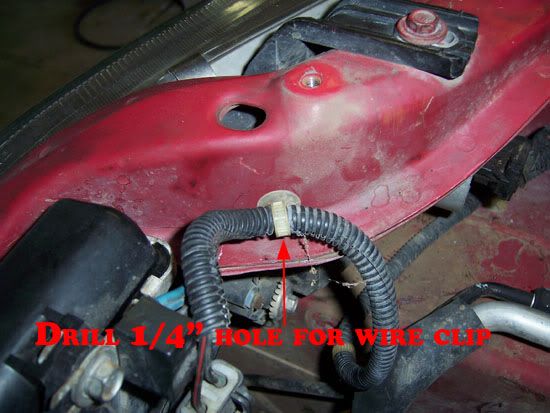
go back to the engine bay and take off the two 10mm bolts that hold the over flow tank bracket on. remove the bracket. i drilled a 1/4" hole to attach the wire clip. thats optional, it was just an idea that poped in my head at the moment.
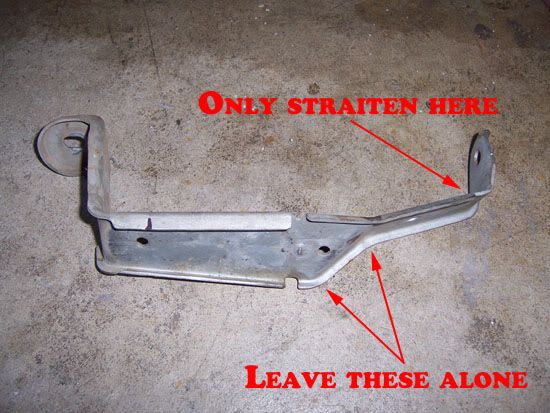
you will need to bend the top of the bracket flat. DO NOT bend any other part of this bracket. i made the mistake of making the whole bracket flat, then realised that it needs to be bent to go around the overflow tank. took forever to bend it back out after you bend the top flat, cut about 1/4" off the top. basicaly just above the top hole.
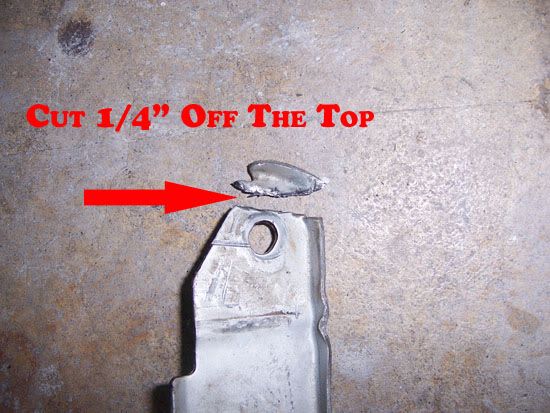
i did a lot of laying out and measuring so that i could put the tank in the best spot. but to make it easy for you, i took pictures
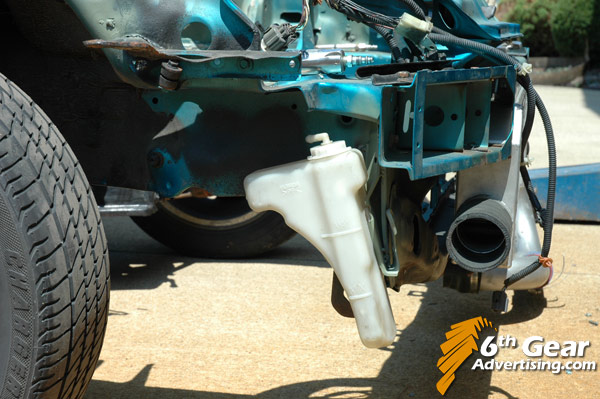
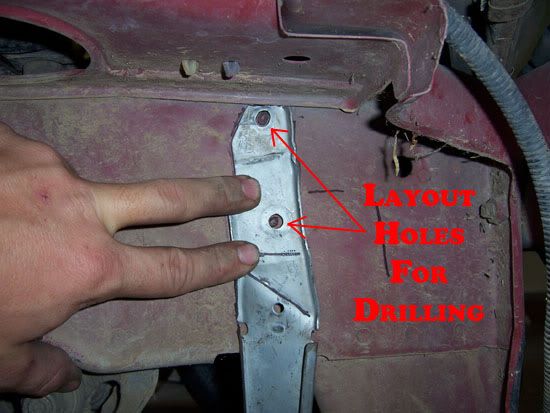
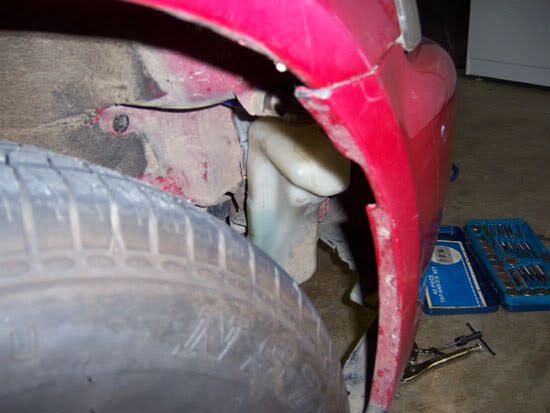
butt the top of the bracket up to the rolled down metal (as you can see in the first picture). then go 2" from the hole to the right, and 4" to the bottom. see pictures, its hard to explain. after you have the bracket in the right place, layout where the holes are. i drilled the holes with a 3/16 bit and then used a tap and die kit to thread the holes. i used the bolt that was origionaly on the bracket.

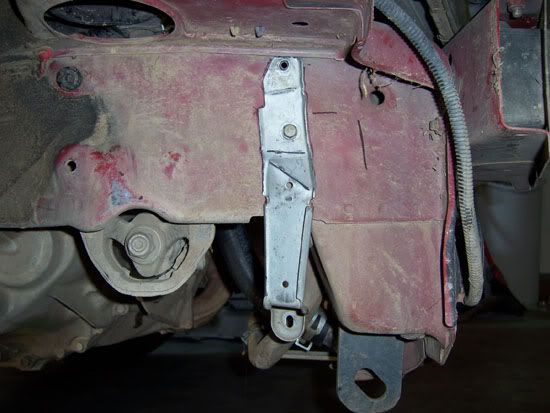
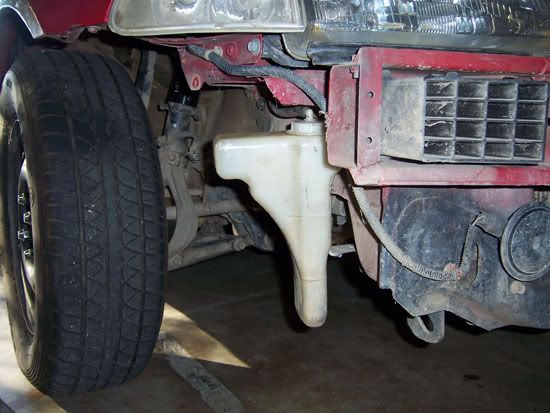
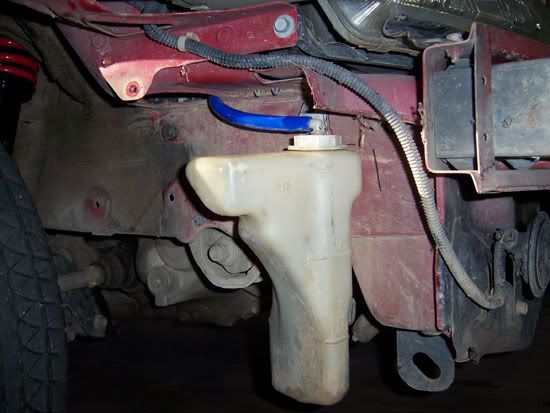
after you have it on, it should look like this. the top hole was too hard to get at with my tap and die, so i only put one bolt on it. the one bolt holds it tight, but you can put another bolt on if you want.
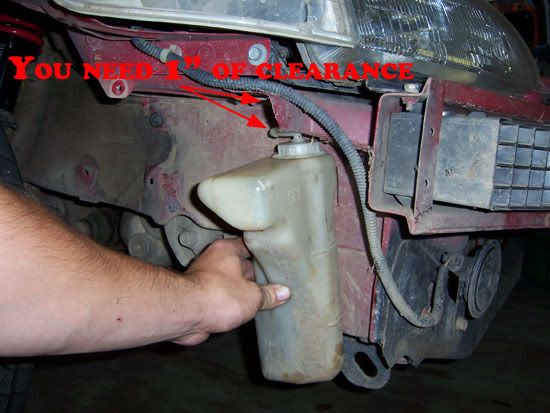
the bracket height has to be at this position. it can be lower, but not higher. you need a 1" clearance above the tank to allow enough room to take the tank on and off the bracket.
after you have the bracket on, its time for a test fit.
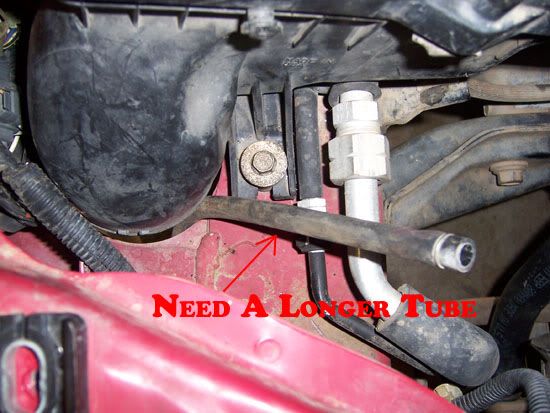
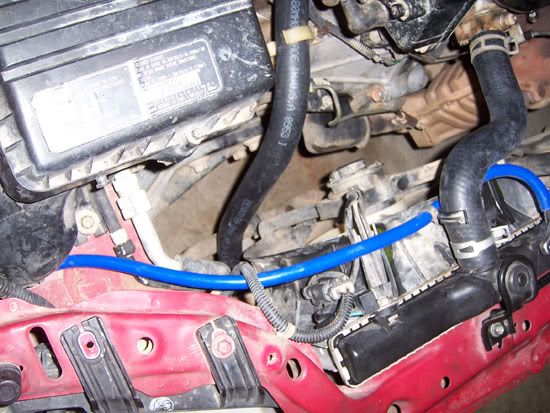
the tube will go up threw the big hole for the intake tube, or you can make your own hole. obviously you will need to get a longer tube. i had some blue urethane tubing laying around so i put some on there just for the pictures.
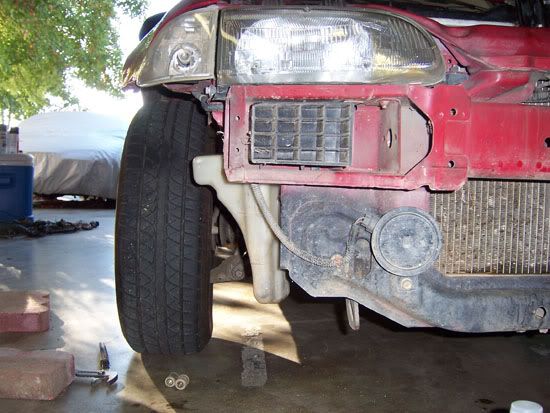
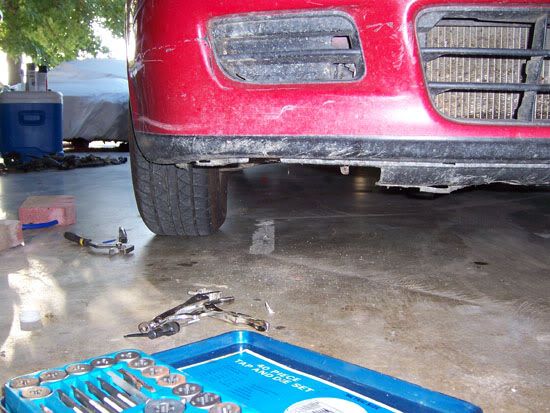
and thats it. just put your front bumper back on and your all done. the tank is hidden and it dosnt hang down lower than your front bumper.
this is my first DIY, so i hope i covered everying and everyone can easly understand what i did. but i can answer any and all questions. the whole process of doing this and taking pictures only took about an hour and a half. should be less for you since i gave you some measurements
I seared the forum and didnt find a DIY on this, so i decided to help out.
Relocate Your Overflow Tank
start by taking your front bumper off. there are 5 screws on the top, and i had 1 on each side. there may also be a couple under the bumper, mine didnt have any.
now in the engine bay, remove the snorkle pipe on the intake and pull out your overflow tank. i poured the fluid in a water bottle so i could just fill it back up when i was done.
after the bumper is off you will see a big black box that is part of the intake system. remove the two 10mm screws that hold it on and then pull it strait down.
go back to the engine bay and take off the two 10mm bolts that hold the over flow tank bracket on. remove the bracket. i drilled a 1/4" hole to attach the wire clip. thats optional, it was just an idea that poped in my head at the moment.
you will need to bend the top of the bracket flat. DO NOT bend any other part of this bracket. i made the mistake of making the whole bracket flat, then realised that it needs to be bent to go around the overflow tank. took forever to bend it back out
after you bend the top flat, cut about 1/4" off the top. basicaly just above the top hole.
i did a lot of laying out and measuring so that i could put the tank in the best spot. but to make it easy for you, i took pictures
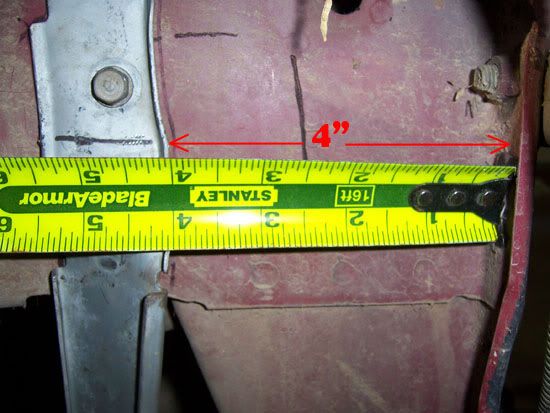
butt the top of the bracket up to the rolled down metal (as you can see in the first picture). then go 2" from the hole to the right, and 4" to the bottom. see pictures, its hard to explain.
after you have the bracket in the right place, layout where the holes are. i drilled the holes with a 3/16 bit and then used a tap and die kit to thread the holes. i used the bolt that was origionaly on the bracket.
after you have it on, it should look like this. the top hole was too hard to get at with my tap and die, so i only put one bolt on it. the one bolt holds it tight, but you can put another bolt on if you want.
the bracket height has to be at this position. it can be lower, but not higher. you need a 1" clearance above the tank to allow enough room to take the tank on and off the bracket.
after you have the bracket on, its time for a test fit.
the tube will go up threw the big hole for the intake tube, or you can make your own hole. obviously you will need to get a longer tube. i had some blue urethane tubing laying around so i put some on there just for the pictures.
and thats it. just put your front bumper back on and your all done. the tank is hidden and it dosnt hang down lower than your front bumper.
this is my first DIY, so i hope i covered everying and everyone can easly understand what i did. but i can answer any and all questions. the whole process of doing this and taking pictures only took about an hour and a half. should be less for you since i gave you some measurements