- Thu Jan 01, 2009 4:15 am
#86405
INTRO:
I first saw this topic in the FAQ's on Hondatech. I noticed that there are about 10 pages on that thread about Integra's with only a few posts about Civics; the 92-95 Eg specifically. There is a fair difference in the power racks between the two, so I thought I would get the facts out there for us Civic guys. I have a 93 hatch that will be getting a GSR swap so I figured I would get this out of the way while I am still running my D15.
The original thread is here: http://honda-tech.com/showthread.php?t=184202
After reading the entire thing, there is some good information that can be extracted for us Civic guys.
1. Civic Power racks have 3 ports. Integra's have 4 ports.
2. Almost everyone recommends using a reservoir of some type. The reservoir serves as a breather to keep the system from being pressurized reducing resistance and a place for excess fluid to gather under repeated use such as a track day. However, after reading many posts, I just don't see the necessity of a reservoir, especially if most are just using the line to hold excess fluid. I chose something a little more practical.
3. The rack works best with some fluid left in it. This maintains lubrication of the internal valve piston.
OVERVIEW:
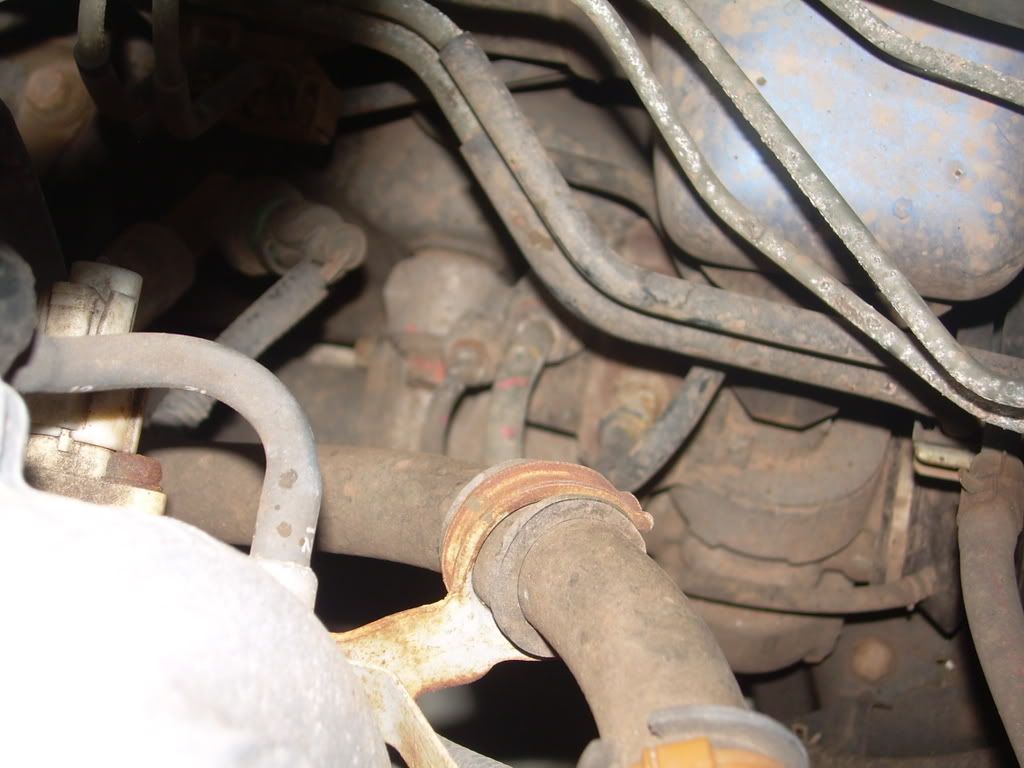
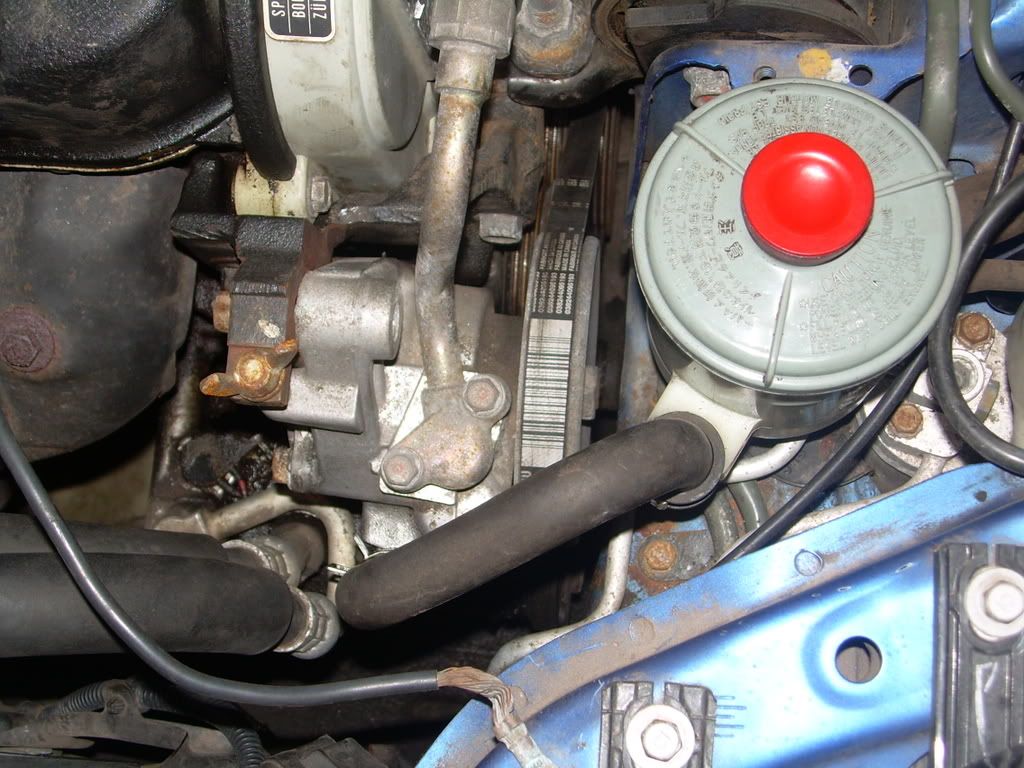
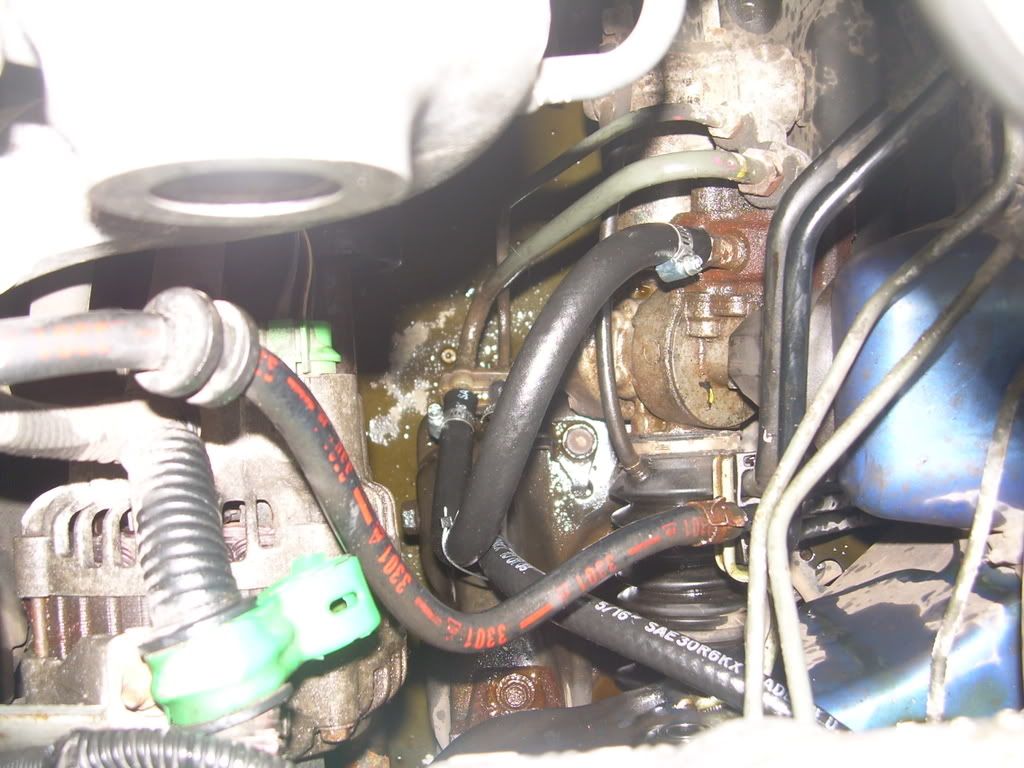
Civic racks have 3 ports. The smaller port to the left, and the center port are the outputs for each side of the control piston in the rack. Hot steering fluid is pushed out of each hole depending which way you turn the steering wheel. The line on the right is a high pressure line that comes from the Pump and feeds the rack.
Some would recommend buying expensive fittings and line.....much like the kit offered for the Integra. There is simply no need for high pressure fittings or line. The removal of the pump takes away all input pressure, and the lack of fluid in the rack removes most output pressure. Simple fuel line and hose clamp will work fine.
PARTS
2ft. 3/8 fuel line
2ft. 1/2 fuel line
4 small hose clamps
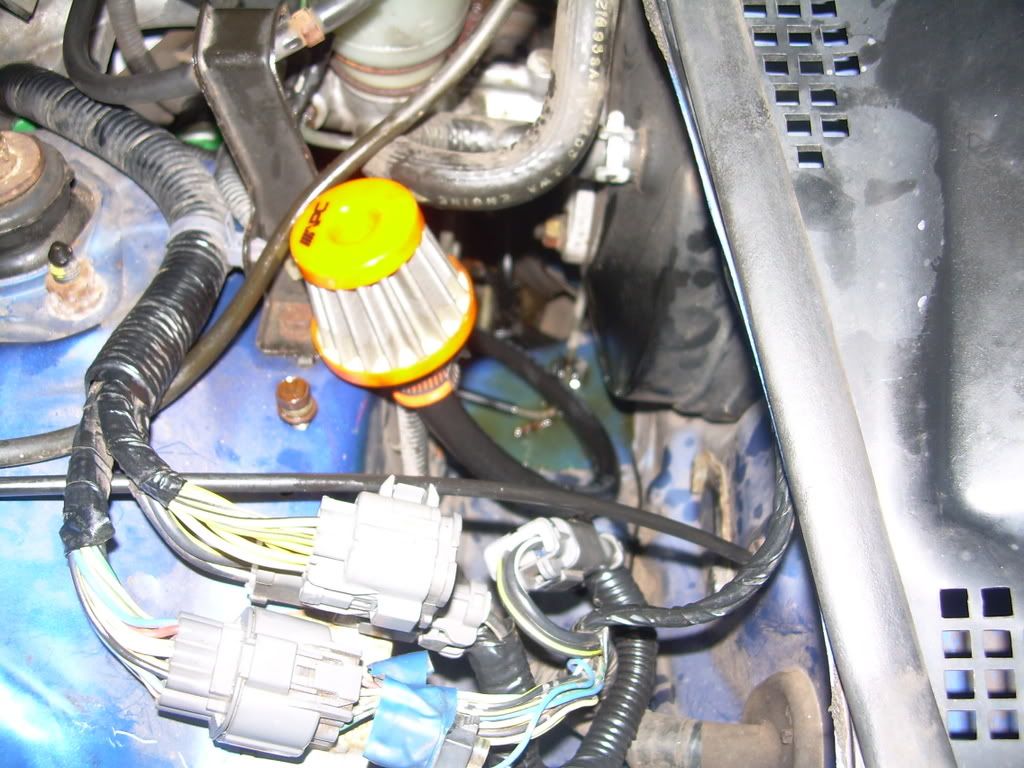
Small mesh filter (I used the APC one from Advance Auto)
HOW TO:
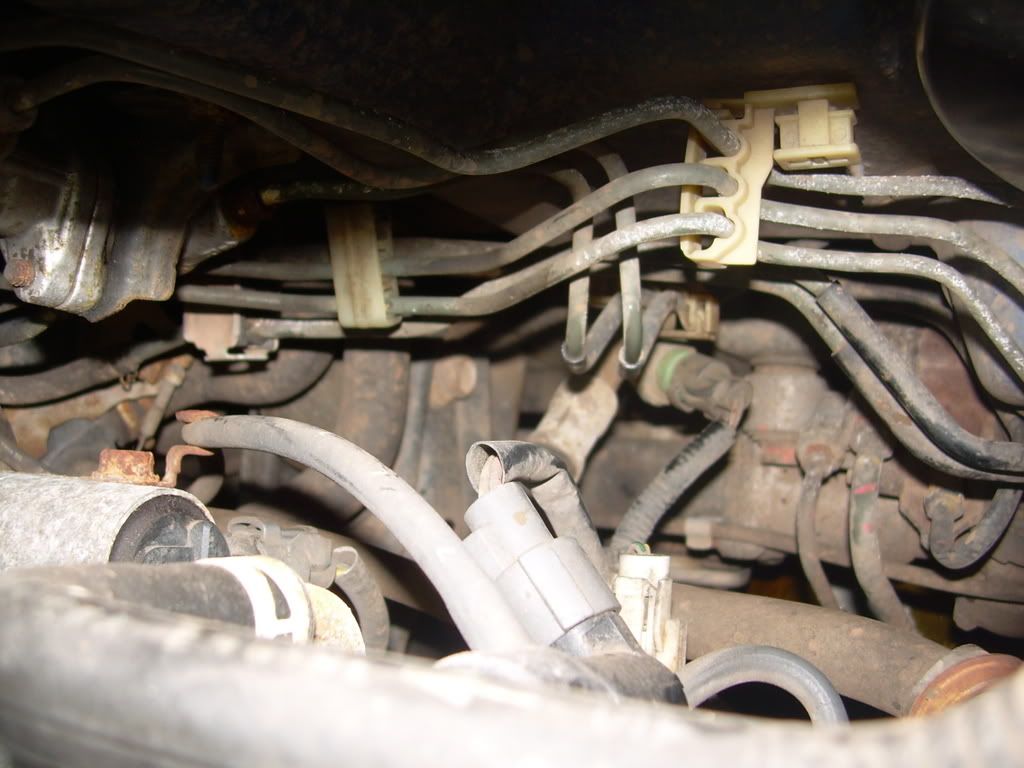
1. First thing is to remove that pump and lines. I recommend draining or removing the reservoir first. This will help with fluid spillage, but ultimately its going to happen,.. a lot, so prepare for it. The lines run fro the reservoir to both the pump, and the rack. It is fairly straight forward. Start unbolting brackets and getting those lines out of there. The cooler that is mounted behind the bumper will take some maneuvering to remove. If you have A/C, I suggest removing the two top brackets that hold the condenser so it can be pushed back. This helps when pulling the cooler line out.
2. I removed the two low pressure lines from the reservoir and cooler up until the last hard lines twist into the rack. Simply pull off the hose clamps and the rubber hose. The high pressure line however will need to be removed completely from the pump to the fitting on the rack, this fitting will be gut in the next step. You will see a sensor that plugs in to the high pressure line coming from the pump. Simply unplug the connector and move it aside. It will not throw a CEL.
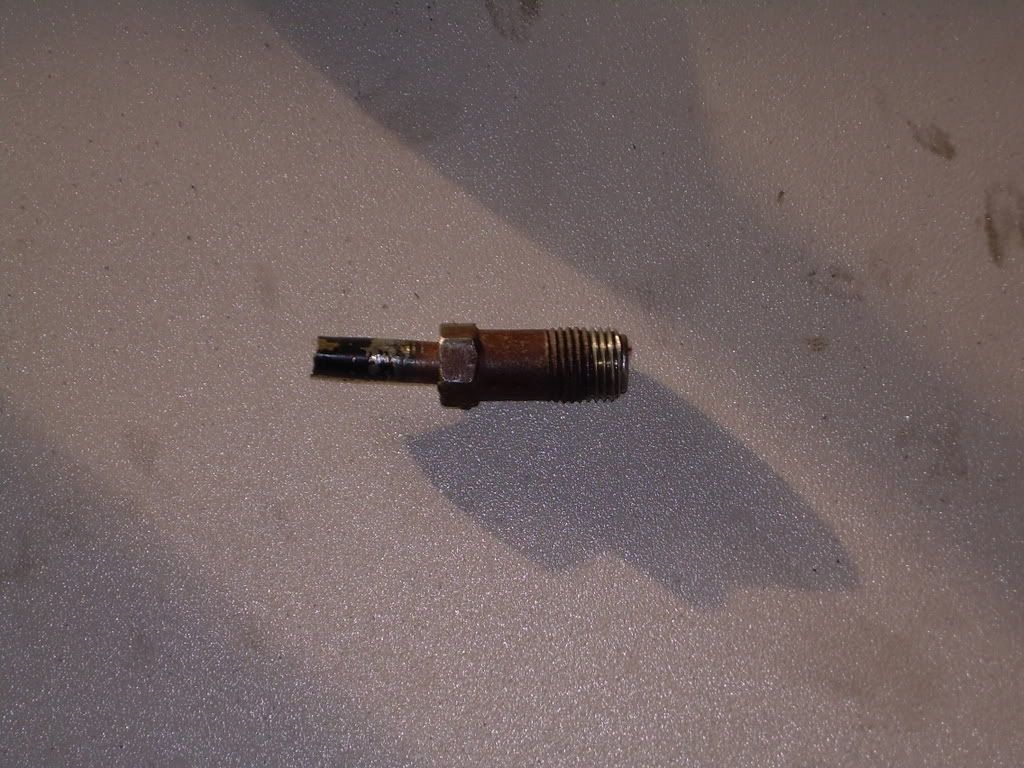
3. After removing the entire high pressure line, its time to cut off the fitting that went into the steering rack. Now you can purchase a fitting if you like. The thread size is M16x1.5. I looked everywhere for it locally only to find that I would have to order it. I didn't care about converting it back, and cutting the factory fitting was cheap and easy. Be sure to cut right before it starts to curve. Then tighten it back into the rack.
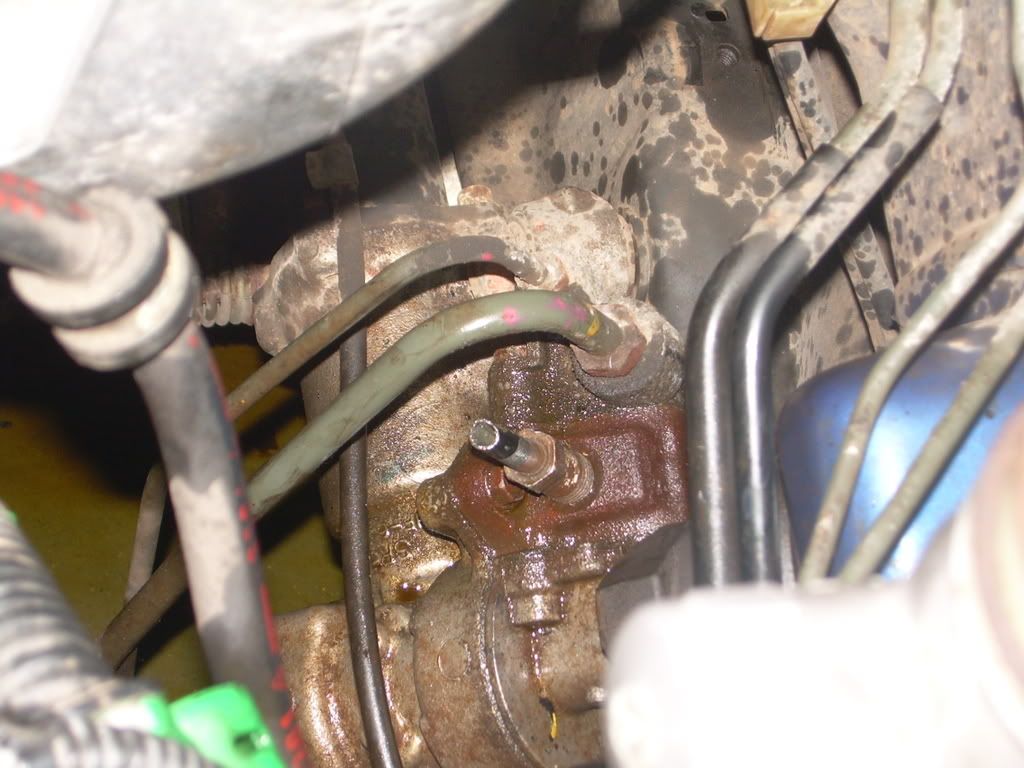
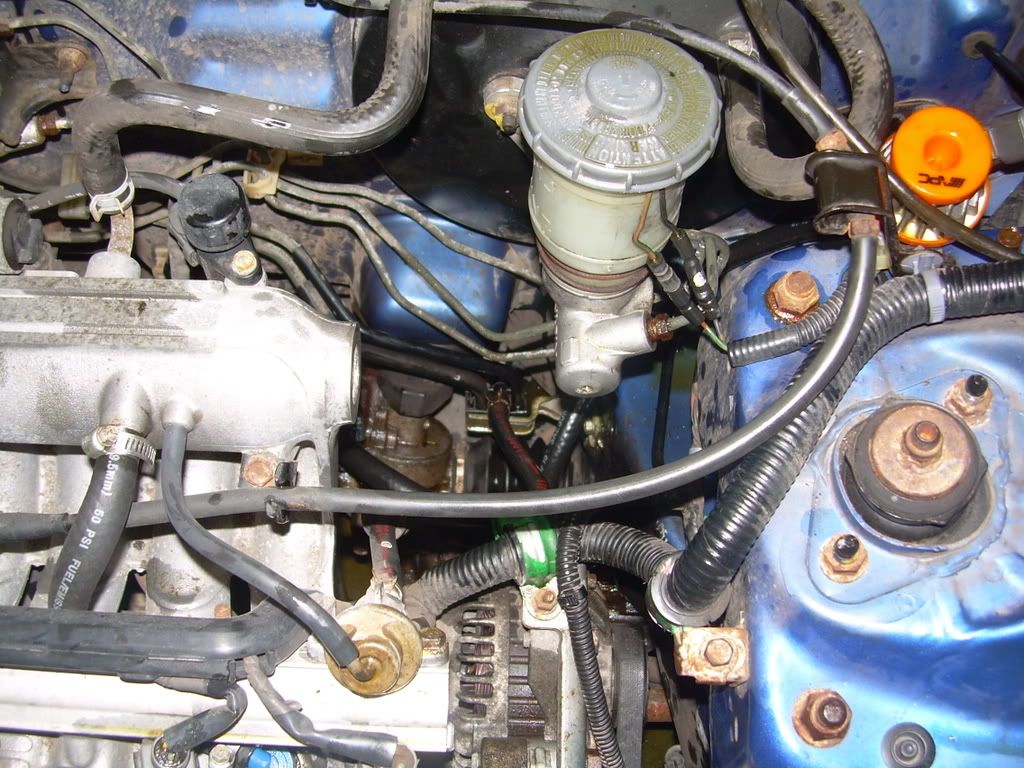
4. Loop the the large output with the input, and put the breather on the small output. After testing it works well. Essentially, looping the input with one of the outputs, and putting a breather on the other output. You could mix up the configuration if you like. However, if you try to loop the two outputs it will blow off the hose. I chose this because of hose size, ease and logic after studying the flow diagram from the service manual.
5. The other line is going to the breather. I will probably source some nice brackets someday, but I just placed it in a clean spot for now, and zipped tied it to a few things. It looks clean, and isn't going anywhere.
IMPRESSION
Driving the car feels great. When sitting still the car is noticeably harder to steer, but not bad at all. Once you begin to roll, it all becomes just as easy to steer.. While driving, it feels like you have power steering but with much more feedback. If you thought you needed tie rods before, you will definitely notice it now. The wheel feedback is awesome, much easier to feel the road and drive aggressively. I definitely noticed the play more from my worn steering. I imagine when I put my new Moog tie rod ends and ball joints on, it will feel great. I even noticed the slight power gain. Overall, a great mod.
MAINTENANCE
I would recommend periodically pouring some Steering fluid or ATF into the breather hole. This will keep the piston and seal in the control valve happy.
Enjoy!
-XLR8
I first saw this topic in the FAQ's on Hondatech. I noticed that there are about 10 pages on that thread about Integra's with only a few posts about Civics; the 92-95 Eg specifically. There is a fair difference in the power racks between the two, so I thought I would get the facts out there for us Civic guys. I have a 93 hatch that will be getting a GSR swap so I figured I would get this out of the way while I am still running my D15.
The original thread is here: http://honda-tech.com/showthread.php?t=184202
After reading the entire thing, there is some good information that can be extracted for us Civic guys.
1. Civic Power racks have 3 ports. Integra's have 4 ports.
2. Almost everyone recommends using a reservoir of some type. The reservoir serves as a breather to keep the system from being pressurized reducing resistance and a place for excess fluid to gather under repeated use such as a track day. However, after reading many posts, I just don't see the necessity of a reservoir, especially if most are just using the line to hold excess fluid. I chose something a little more practical.
3. The rack works best with some fluid left in it. This maintains lubrication of the internal valve piston.
OVERVIEW:
Civic racks have 3 ports. The smaller port to the left, and the center port are the outputs for each side of the control piston in the rack. Hot steering fluid is pushed out of each hole depending which way you turn the steering wheel. The line on the right is a high pressure line that comes from the Pump and feeds the rack.
Some would recommend buying expensive fittings and line.....much like the kit offered for the Integra. There is simply no need for high pressure fittings or line. The removal of the pump takes away all input pressure, and the lack of fluid in the rack removes most output pressure. Simple fuel line and hose clamp will work fine.
PARTS
2ft. 3/8 fuel line
2ft. 1/2 fuel line
4 small hose clamps
Small mesh filter (I used the APC one from Advance Auto)
HOW TO:
1. First thing is to remove that pump and lines. I recommend draining or removing the reservoir first. This will help with fluid spillage, but ultimately its going to happen,.. a lot, so prepare for it. The lines run fro the reservoir to both the pump, and the rack. It is fairly straight forward. Start unbolting brackets and getting those lines out of there. The cooler that is mounted behind the bumper will take some maneuvering to remove. If you have A/C, I suggest removing the two top brackets that hold the condenser so it can be pushed back. This helps when pulling the cooler line out.
2. I removed the two low pressure lines from the reservoir and cooler up until the last hard lines twist into the rack. Simply pull off the hose clamps and the rubber hose. The high pressure line however will need to be removed completely from the pump to the fitting on the rack, this fitting will be gut in the next step. You will see a sensor that plugs in to the high pressure line coming from the pump. Simply unplug the connector and move it aside. It will not throw a CEL.
3. After removing the entire high pressure line, its time to cut off the fitting that went into the steering rack. Now you can purchase a fitting if you like. The thread size is M16x1.5. I looked everywhere for it locally only to find that I would have to order it. I didn't care about converting it back, and cutting the factory fitting was cheap and easy. Be sure to cut right before it starts to curve. Then tighten it back into the rack.
4. Loop the the large output with the input, and put the breather on the small output. After testing it works well. Essentially, looping the input with one of the outputs, and putting a breather on the other output. You could mix up the configuration if you like. However, if you try to loop the two outputs it will blow off the hose. I chose this because of hose size, ease and logic after studying the flow diagram from the service manual.
5. The other line is going to the breather. I will probably source some nice brackets someday, but I just placed it in a clean spot for now, and zipped tied it to a few things. It looks clean, and isn't going anywhere.
IMPRESSION
Driving the car feels great. When sitting still the car is noticeably harder to steer, but not bad at all. Once you begin to roll, it all becomes just as easy to steer.. While driving, it feels like you have power steering but with much more feedback. If you thought you needed tie rods before, you will definitely notice it now. The wheel feedback is awesome, much easier to feel the road and drive aggressively. I definitely noticed the play more from my worn steering. I imagine when I put my new Moog tie rod ends and ball joints on, it will feel great. I even noticed the slight power gain. Overall, a great mod.
MAINTENANCE
I would recommend periodically pouring some Steering fluid or ATF into the breather hole. This will keep the piston and seal in the control valve happy.
Enjoy!
-XLR8
93 Civic Hatch DX..... full suspension and brakes....LS/Vtec.....boost is on the way!!