- Thu Jan 15, 2015 5:05 am
#351066
I have 1995 Honda Civic with an automatic transmission (AT) and a little while ago the shift cable started to go. It finally gave out and I replaced it myself. I took some pictures along the way and wrote this up to help others who may want to do this repair. I did this all in my driveway.
First, my symptoms, as time went on.
Tools:
Put the gear shift lever in N. Jack the car up in front, place jackstands and wheel chocks.
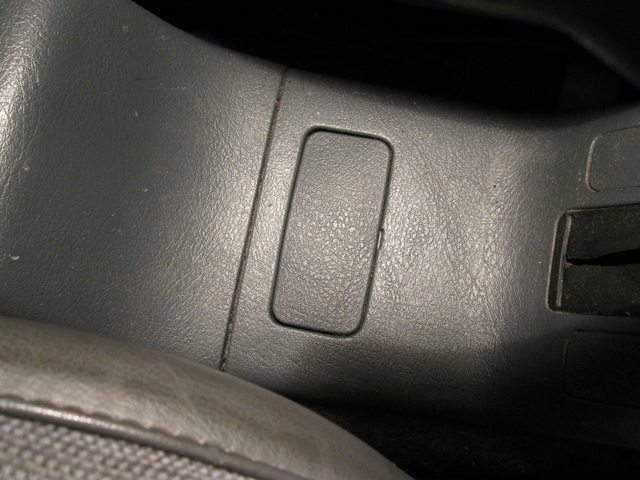
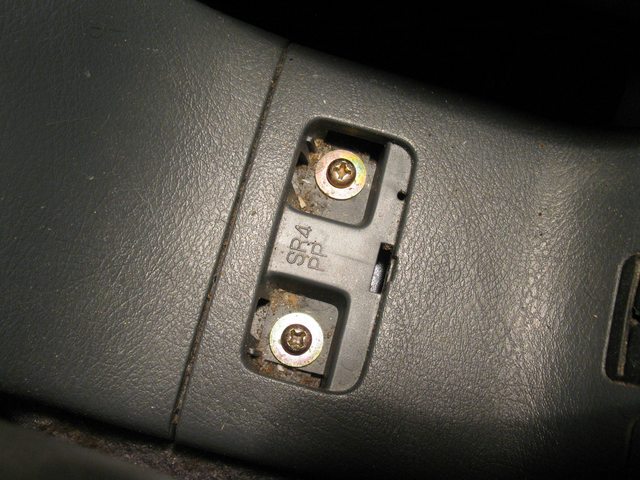
We need to remove some plastic panels to access the shifter. Start by popping off this plastic cover and remove the two bolts (never been opened = nastiness). They're the cursed phillips head. I used an impact driver to get them cracked (I've replaced them with socket head cap screws).
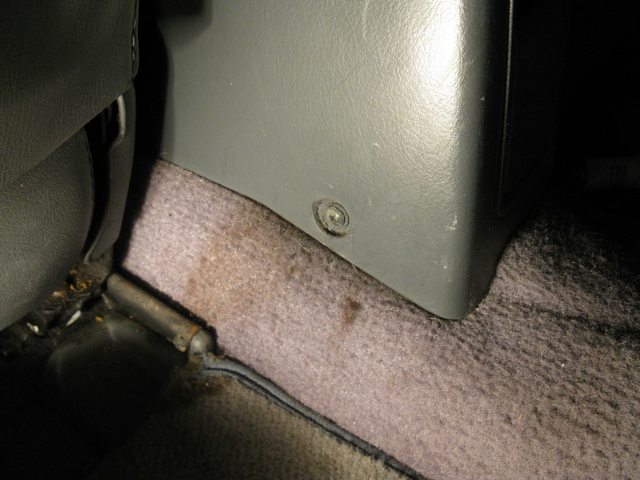
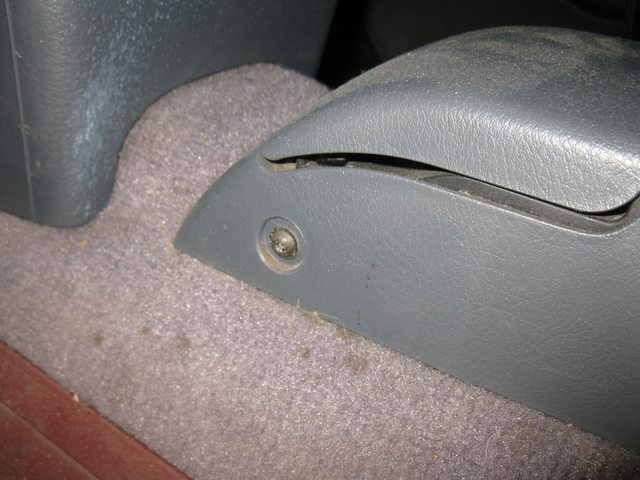
At the rear of the car, take two smaller phillips screws out (one per side) near the floor. Remove the entire console.
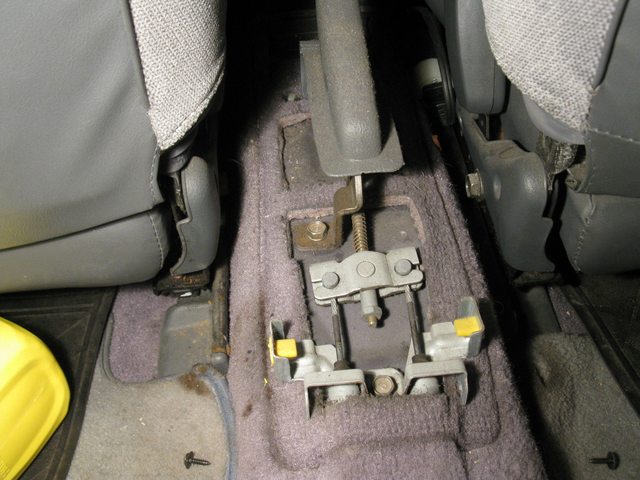
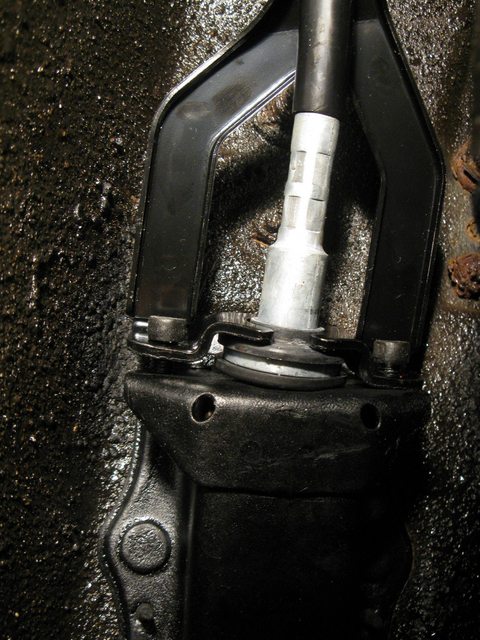
At the front, remove two phillips screws (one per side) and remove the console to reveal the shift cable.
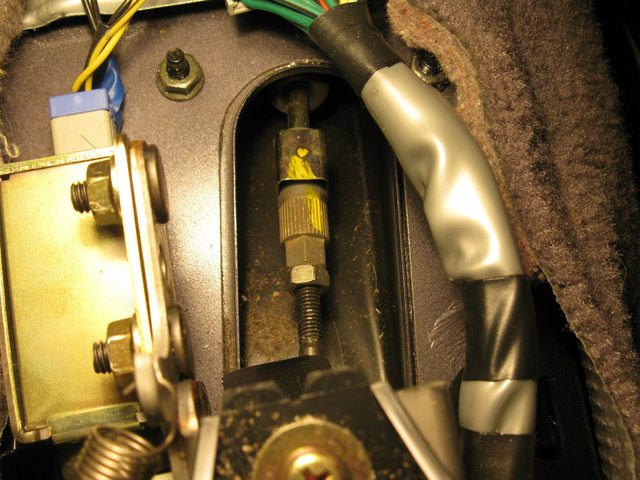
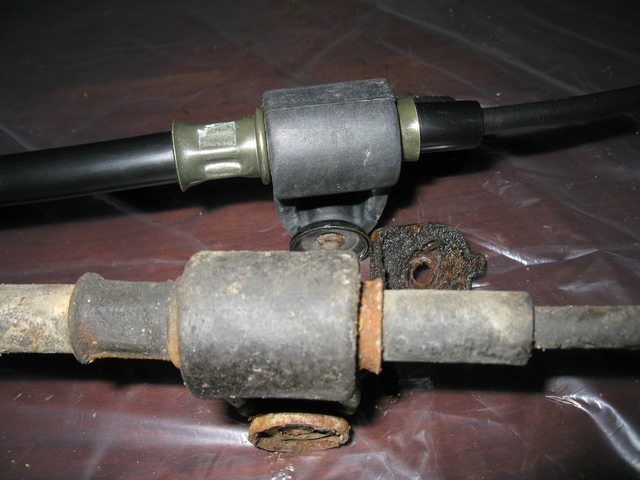
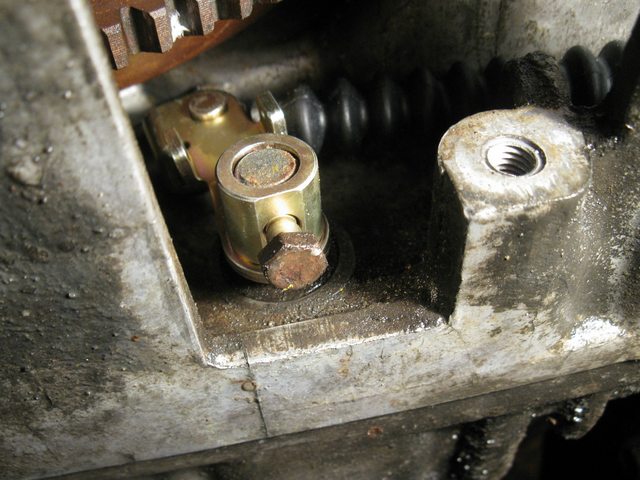
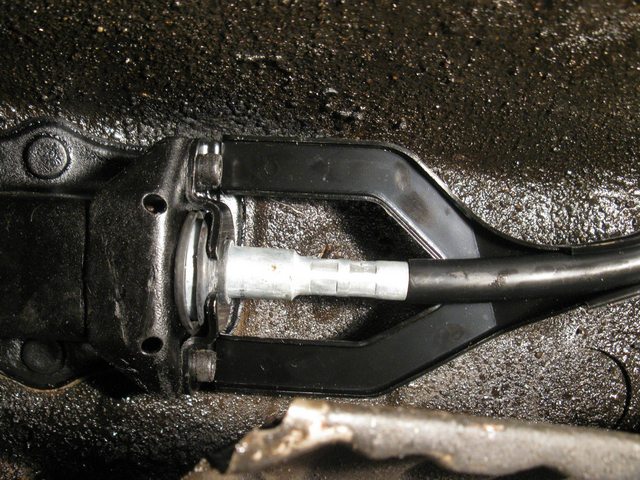
The cable is held to the adjuster by a lock pin (with a yellow smear of paint in the picture). Remove it by pulling straight up. I used two needle nosed pliers to get into the corners on opposite sides.
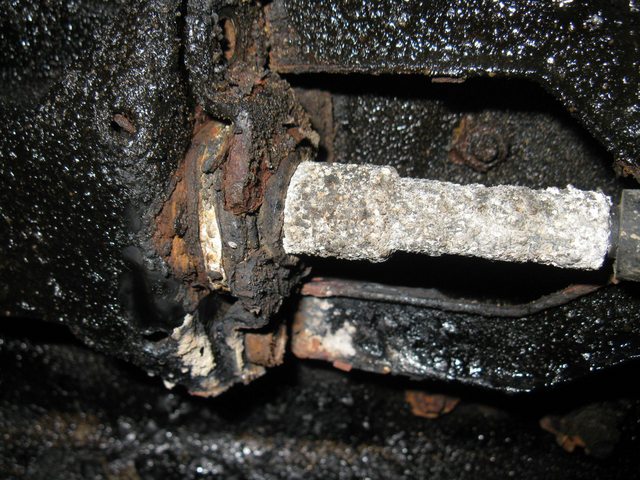
Next is to remove the shift cable bracket from under the car. This is where I hit some issues.
The bolts are M6 (10mm socket), likely rusted, and space is tight. I snapped one bolt off (top of the picture). I got the other one out using a torch. The welded nuts are somewhat accessible behind the bracket, so you can heat the nut and hopefully get the bolt out. Once both bolts are out, the cable will pull out.
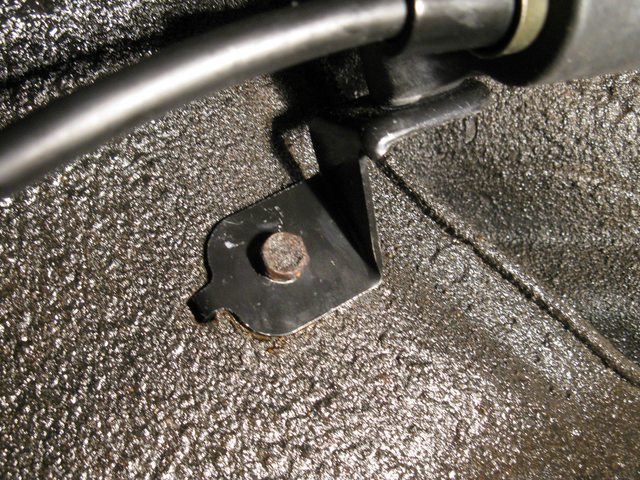
There is a bracket about midway along the cable that attaches to the frame with another bolt (10mm again). Should come off easily.
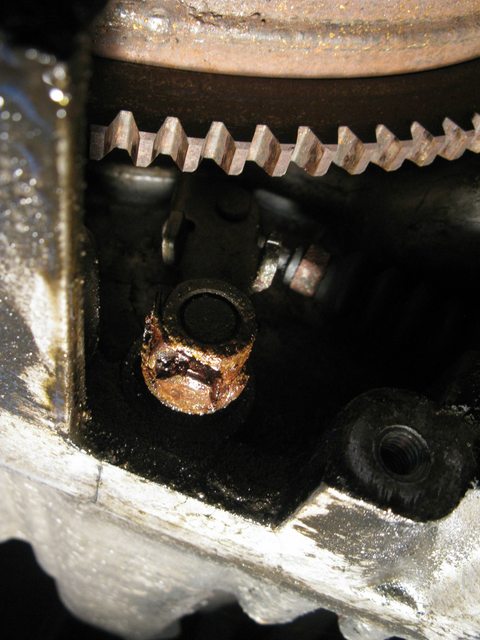
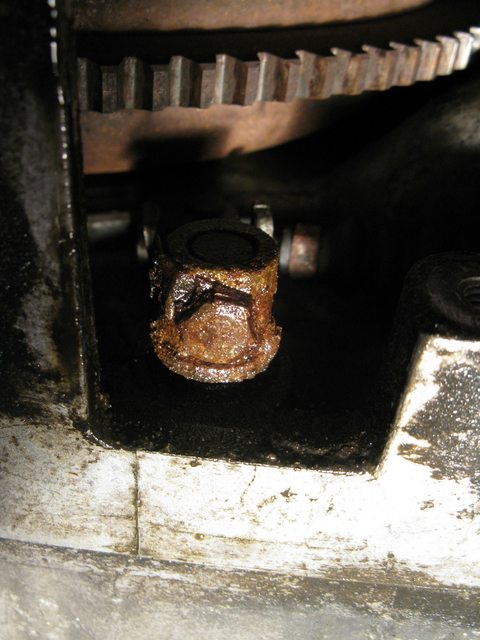
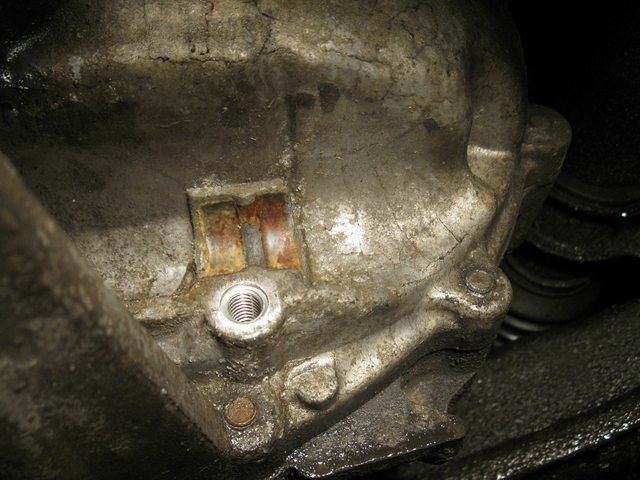
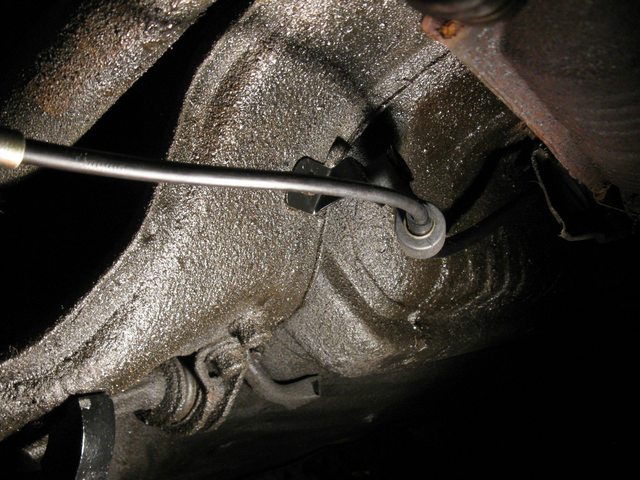
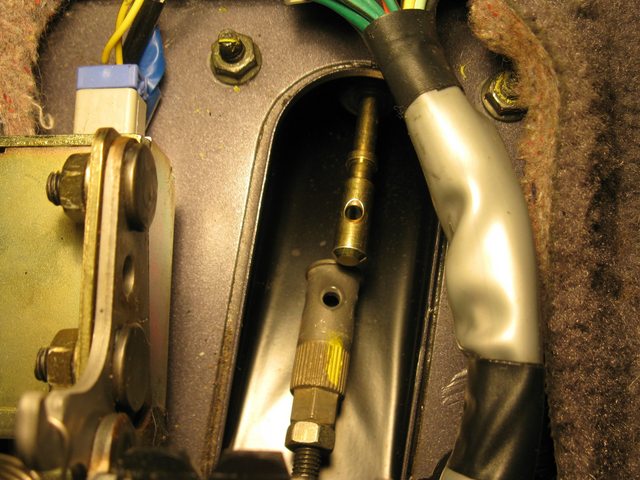
Next, there is a shift cable cover where the transmission meets the engine. Remove two M8 (13mm socket) bolts and reveal the connection between shift cable and transmission.
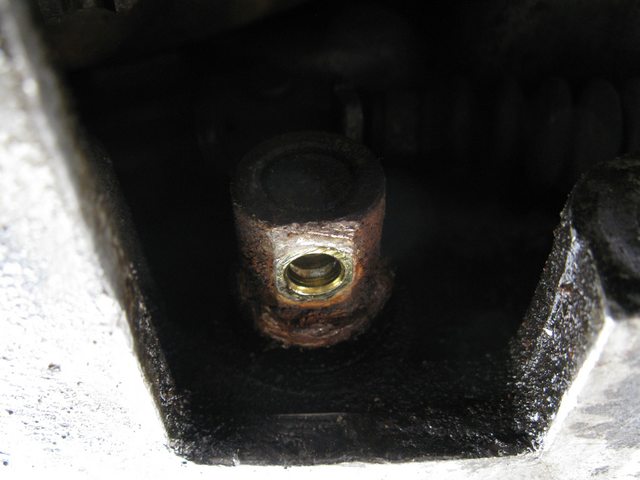
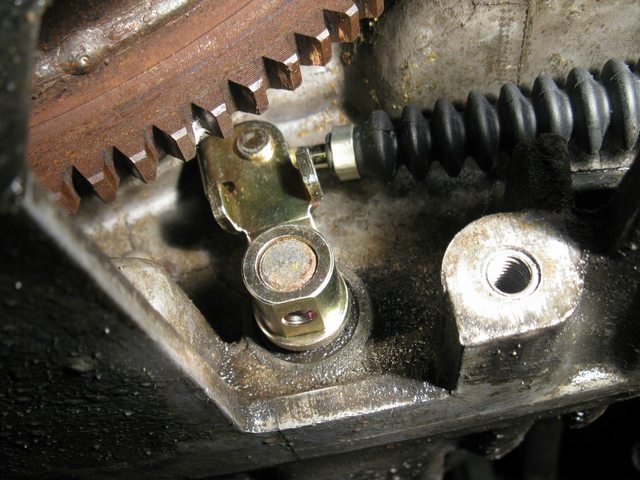
Here you can see what we're looking at. The bolt is an M6 (10mm socket) and needs to come off. Try not to break this because it would need to be drilled out and that is a huge pain. If you attempt to heat it, be careful as there is a seal nearby and heat conduction could ruin it. Mine came off surprisingly easily with no heat.
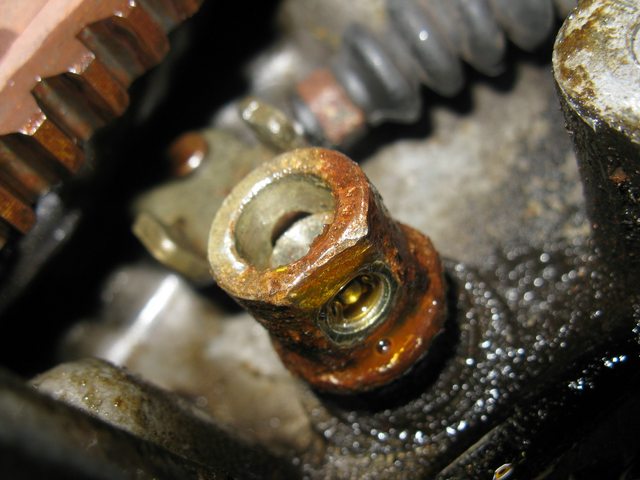
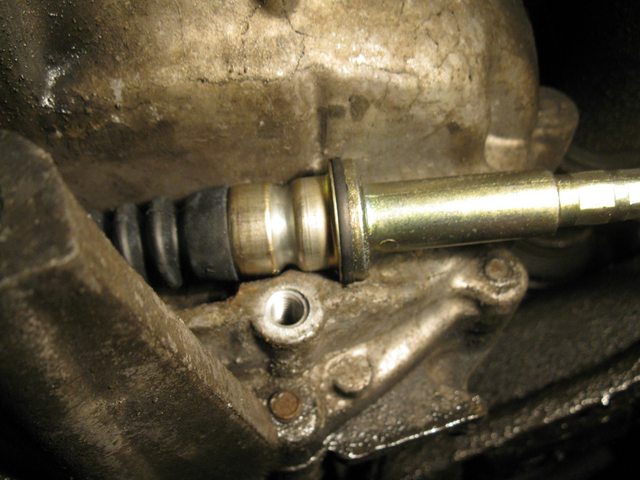
Carefully use a flat tool to pry the sleeve off the transmission shaft (I used open needle nose pliers). Once done, the removal is complete.
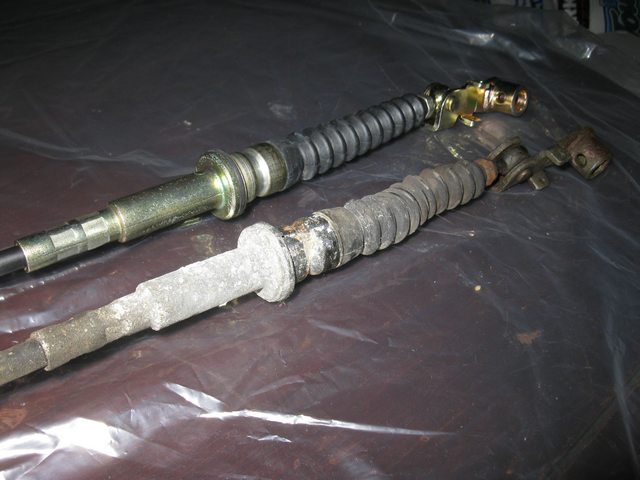
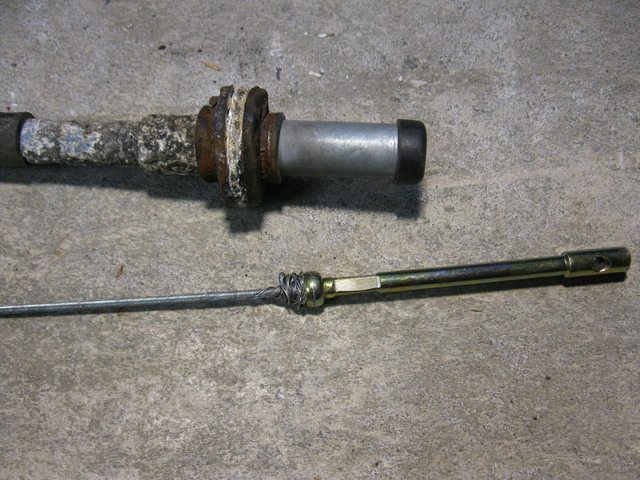
I got a new shift cable from a supplier here. The 92-95 cables are really hard to come by and nobody has them in stock. No matter, because the 96-00 cable is exactly the same! Here is the only difference I could see between the old cable (right) and the new (left):
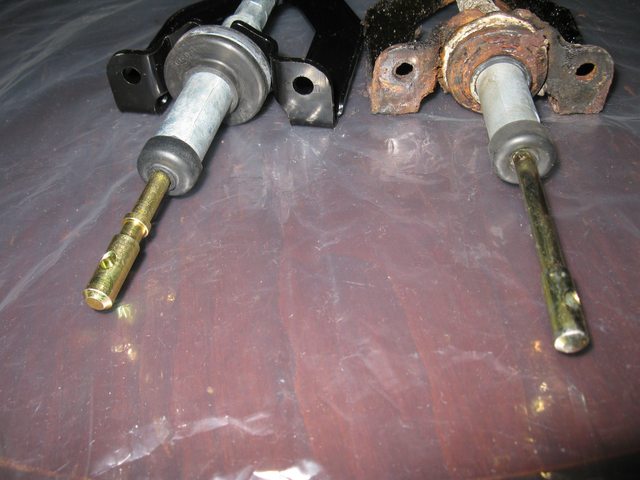
Everything else is identical.
Putting everything back is the reverse of installation.
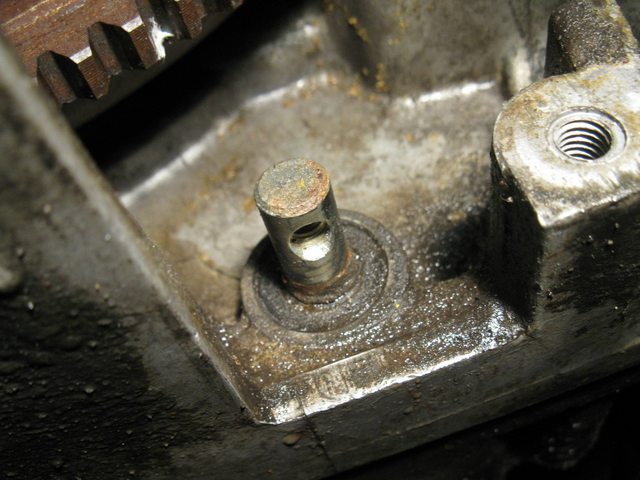
Here we can see the bare transmission shift shaft. I put a smear of grease before I put the cable back on.
Here is the nice new cable installed and the holes lined up.
The transmission has a specially shaped pocket to accept the shift cable, so place it there.
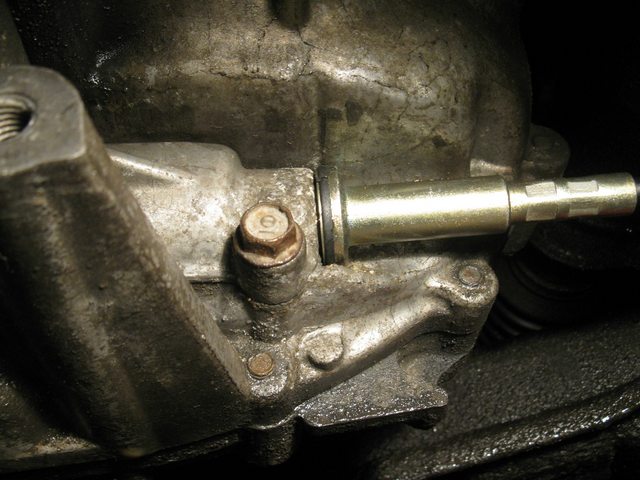
Now replace the bolt through the cable and shaft. Torque to 14 Nm. In this picture I am missing the lock washer. I put a new one on later. It is important to have so that vibrations don't loosen the bolt - you won't be able to shift!

Replace the shift cable cover around the cable. Torque both bolts to 22 Nm.
Place the shift cable bracket against the frame, make sure the cable end goes through the hole, and then tighten up the bolts to 12 Nm.
You'll notice that I had socket head cap screws in the last picture. I was in a bit of a bind since I snapped one bolt. Luckily I discovered that the entire bracket was removable! Removing two nuts in the car and two nuts underneath (towards the back) allows the entire bracket to be removed. I then drilled out the bolt, but I stripped the threads on the nut. I got some help to weld an additional nut to replace the threads. I used these bolts as a temporary measure until I could go and buy nice hex head M6 bolts. I also took the opportunity to paint the bracket with rust-proof paint.
I've left the bracket in the middle of the cable until the end. I had to pull on the cable quite hard to get it into position. Torque to 12 Nm.

The manual says not to bend the cable, but the cable cannot be installed without it snaking around like this:
I'm assuming they meant don't fold it in half.
Inside the car now, place the cable inside the adjuster. You might have to loosen the lock nut just behind it with an open ended wrench. Line up the holes on the cable and the adjuster.
With any luck, no adjustment will be needed, but if it is, follow this procedure:
Just be super careful when doing this. I let the brake off ever so slightly to see if the wheels turned. The manual says to simply turn on accessories and verify that the correct dash light comes on at each position of the shift lever. Once that is done, then start the car and check the transmission actually shifts. That is a much better way of going about it.
Finally replace all the interior panels, lower the car, and celebrate success!
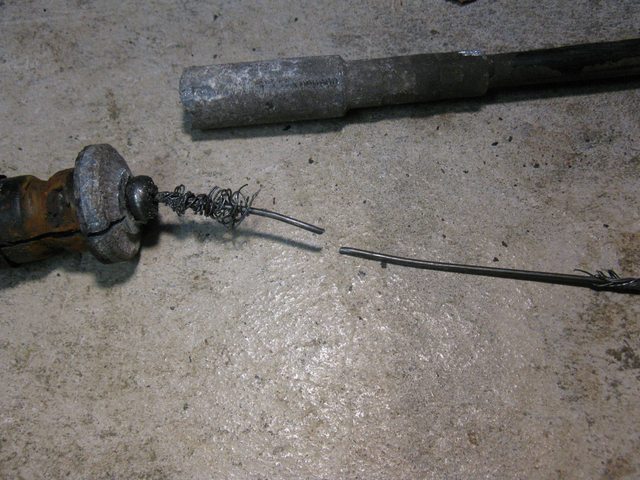
I performed a 'cable autopsy' after since I was curious as to what happened. The actual cable is just a thin wire covered in three or four layers of sheaths so it doesn't buckle. There was no rust at all inside the cable, so the sheath seems to have worn out simply due to age and fatigue. Once it broke, that led to the hard shifting as it clogged up the tube and then it bunched up near the end which made it hard to get into park. Finally, it bound so tightly that when I tried to shift, the wire snapped like you can see.
I'm very happy with the result. The new cable has made changing gears so smooth that it almost feels like the shifter is disconnected. I can shift with light finger pressure whereas before I had to pull with my whole arm.
Thanks to those that helped me diagnose the problem and for all the knowledge on the forums!
First, my symptoms, as time went on.
- Stiff gear selector movement
- Does not easily shift into park
- Transmission shifts (e.g. from N to R) but dash light does not come on
- Does not shift into park at all even though dash light comes on
- Does not shift into any gear
Tools:
- Jack
- Jack stands (pair)
- Wheel chocks
- 13mm socket
- 10mm socket
- 10mm open ended wrench (ideally two)
- Phillips screw driver
- Various pliers
- Torch (maybe)
Put the gear shift lever in N. Jack the car up in front, place jackstands and wheel chocks.
We need to remove some plastic panels to access the shifter. Start by popping off this plastic cover and remove the two bolts (never been opened = nastiness). They're the cursed phillips head. I used an impact driver to get them cracked (I've replaced them with socket head cap screws).


At the rear of the car, take two smaller phillips screws out (one per side) near the floor. Remove the entire console.


At the front, remove two phillips screws (one per side) and remove the console to reveal the shift cable.


The cable is held to the adjuster by a lock pin (with a yellow smear of paint in the picture). Remove it by pulling straight up. I used two needle nosed pliers to get into the corners on opposite sides.
Next is to remove the shift cable bracket from under the car. This is where I hit some issues.
The bolts are M6 (10mm socket), likely rusted, and space is tight. I snapped one bolt off (top of the picture). I got the other one out using a torch. The welded nuts are somewhat accessible behind the bracket, so you can heat the nut and hopefully get the bolt out. Once both bolts are out, the cable will pull out.

There is a bracket about midway along the cable that attaches to the frame with another bolt (10mm again). Should come off easily.
Next, there is a shift cable cover where the transmission meets the engine. Remove two M8 (13mm socket) bolts and reveal the connection between shift cable and transmission.
Here you can see what we're looking at. The bolt is an M6 (10mm socket) and needs to come off. Try not to break this because it would need to be drilled out and that is a huge pain. If you attempt to heat it, be careful as there is a seal nearby and heat conduction could ruin it. Mine came off surprisingly easily with no heat.


Carefully use a flat tool to pry the sleeve off the transmission shaft (I used open needle nose pliers). Once done, the removal is complete.

I got a new shift cable from a supplier here. The 92-95 cables are really hard to come by and nobody has them in stock. No matter, because the 96-00 cable is exactly the same! Here is the only difference I could see between the old cable (right) and the new (left):

Everything else is identical.


Putting everything back is the reverse of installation.
Here we can see the bare transmission shift shaft. I put a smear of grease before I put the cable back on.

Here is the nice new cable installed and the holes lined up.

The transmission has a specially shaped pocket to accept the shift cable, so place it there.


Now replace the bolt through the cable and shaft. Torque to 14 Nm. In this picture I am missing the lock washer. I put a new one on later. It is important to have so that vibrations don't loosen the bolt - you won't be able to shift!


Replace the shift cable cover around the cable. Torque both bolts to 22 Nm.

Place the shift cable bracket against the frame, make sure the cable end goes through the hole, and then tighten up the bolts to 12 Nm.


You'll notice that I had socket head cap screws in the last picture. I was in a bit of a bind since I snapped one bolt. Luckily I discovered that the entire bracket was removable! Removing two nuts in the car and two nuts underneath (towards the back) allows the entire bracket to be removed. I then drilled out the bolt, but I stripped the threads on the nut. I got some help to weld an additional nut to replace the threads. I used these bolts as a temporary measure until I could go and buy nice hex head M6 bolts. I also took the opportunity to paint the bracket with rust-proof paint.
I've left the bracket in the middle of the cable until the end. I had to pull on the cable quite hard to get it into position. Torque to 12 Nm.


The manual says not to bend the cable, but the cable cannot be installed without it snaking around like this:

I'm assuming they meant don't fold it in half.
Inside the car now, place the cable inside the adjuster. You might have to loosen the lock nut just behind it with an open ended wrench. Line up the holes on the cable and the adjuster.

With any luck, no adjustment will be needed, but if it is, follow this procedure:
- Make sure both front wheels are off the ground.
- Place in N
- Insert locking pin
- Start car
- Shift to D
Just be super careful when doing this. I let the brake off ever so slightly to see if the wheels turned. The manual says to simply turn on accessories and verify that the correct dash light comes on at each position of the shift lever. Once that is done, then start the car and check the transmission actually shifts. That is a much better way of going about it.
Finally replace all the interior panels, lower the car, and celebrate success!
I performed a 'cable autopsy' after since I was curious as to what happened. The actual cable is just a thin wire covered in three or four layers of sheaths so it doesn't buckle. There was no rust at all inside the cable, so the sheath seems to have worn out simply due to age and fatigue. Once it broke, that led to the hard shifting as it clogged up the tube and then it bunched up near the end which made it hard to get into park. Finally, it bound so tightly that when I tried to shift, the wire snapped like you can see.


I'm very happy with the result. The new cable has made changing gears so smooth that it almost feels like the shifter is disconnected. I can shift with light finger pressure whereas before I had to pull with my whole arm.
Thanks to those that helped me diagnose the problem and for all the knowledge on the forums!