- Fri May 31, 2013 3:30 am
#332320
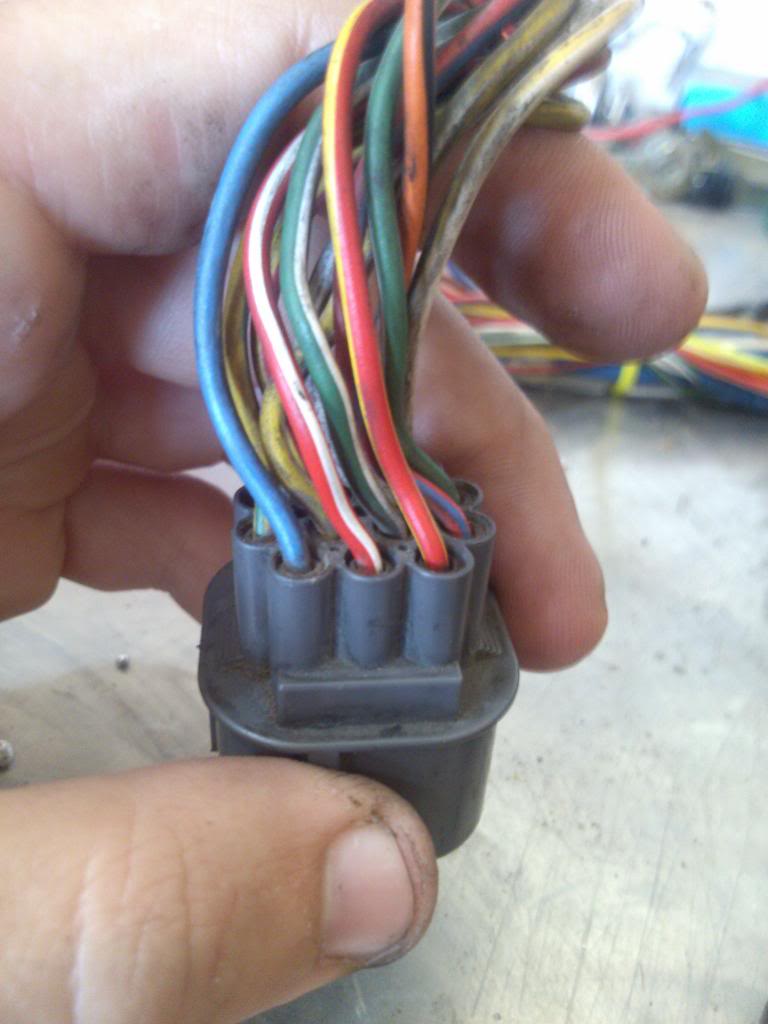
I bought a non-vtec wiring harness the other day for my Gsr swapped hatch. I wanted to keep the engine bay clean so I tried a google search (searching for a good 45 minutes) to find a way to depin the male end of the harness all to no avail. I saw numerous thing on depinning the ECU and female ends but nothing on the male ends. I took what I saw on the female ends and tried it on the male end and bingo I got it. Here are some pictures of the tools and how I was able to get it apart.
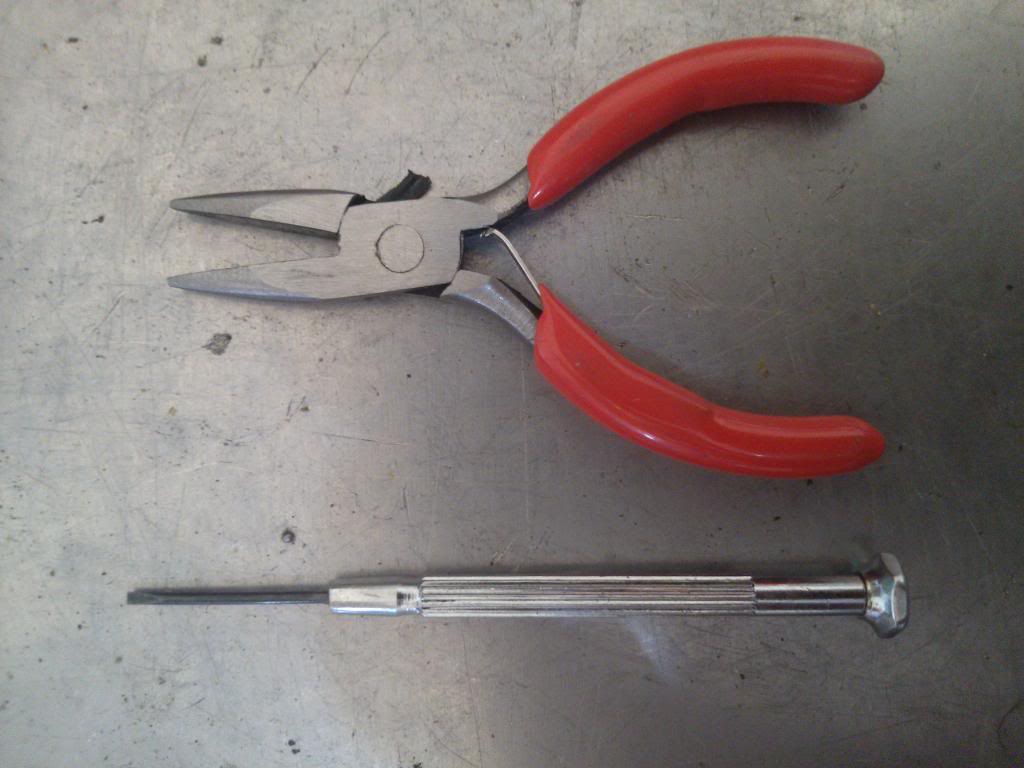
The tools I used were the smallest flat head screw driver I could find, I guess a jewelers tool set works also, and a very small pair of needle nose pliers.
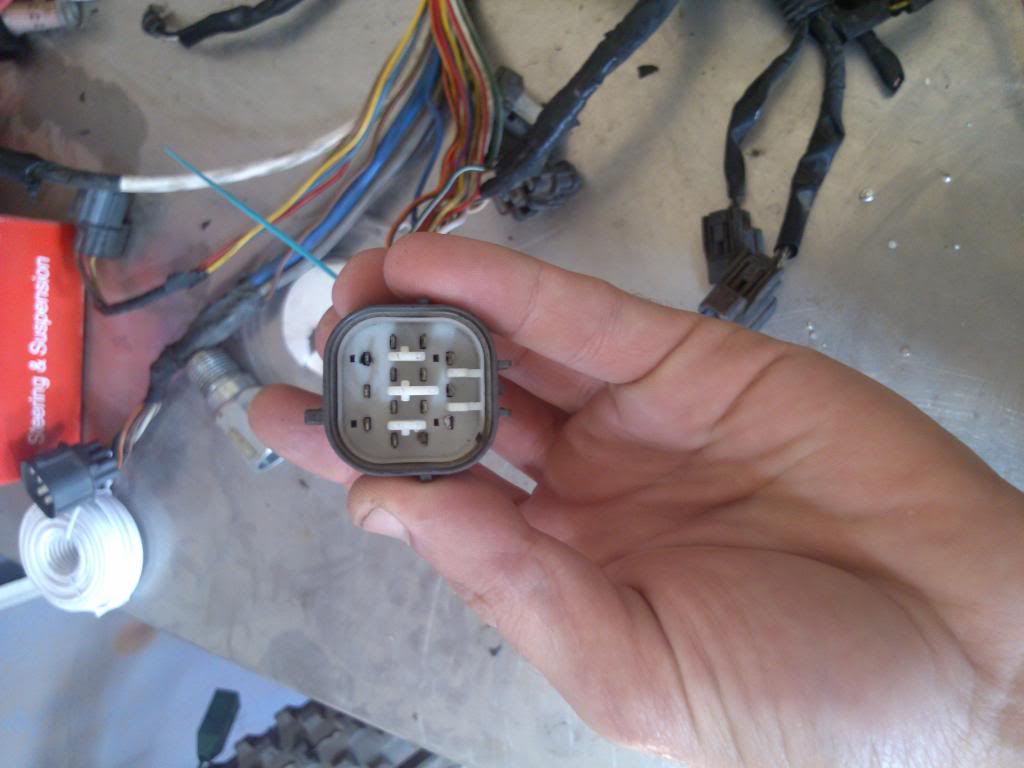
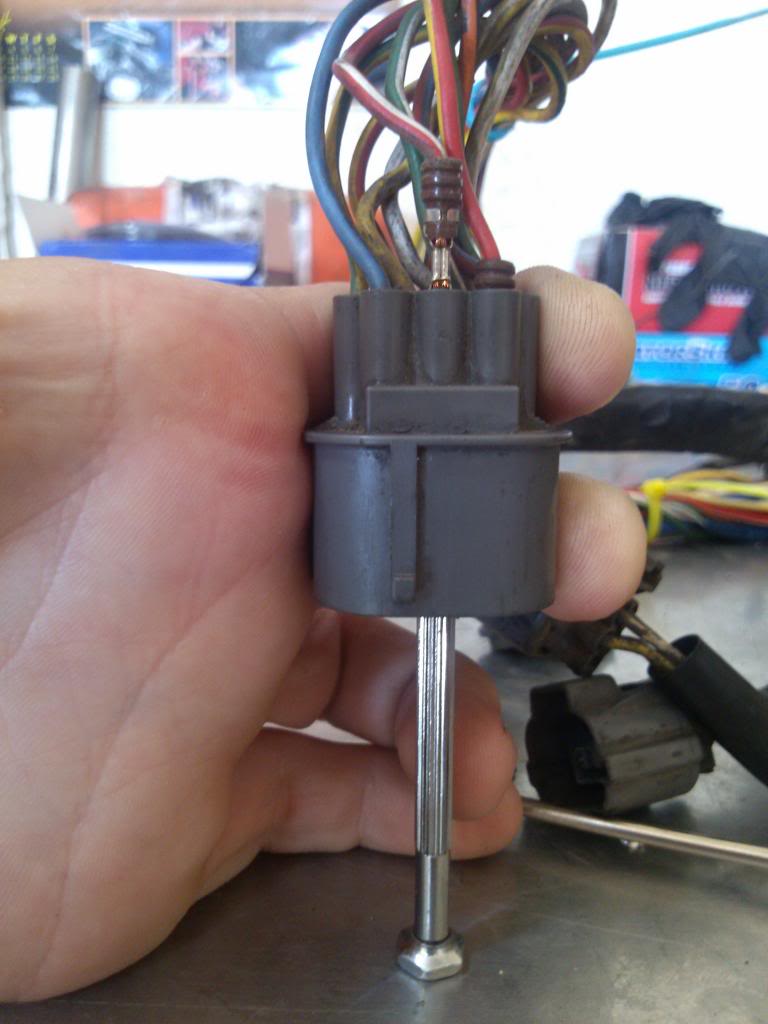
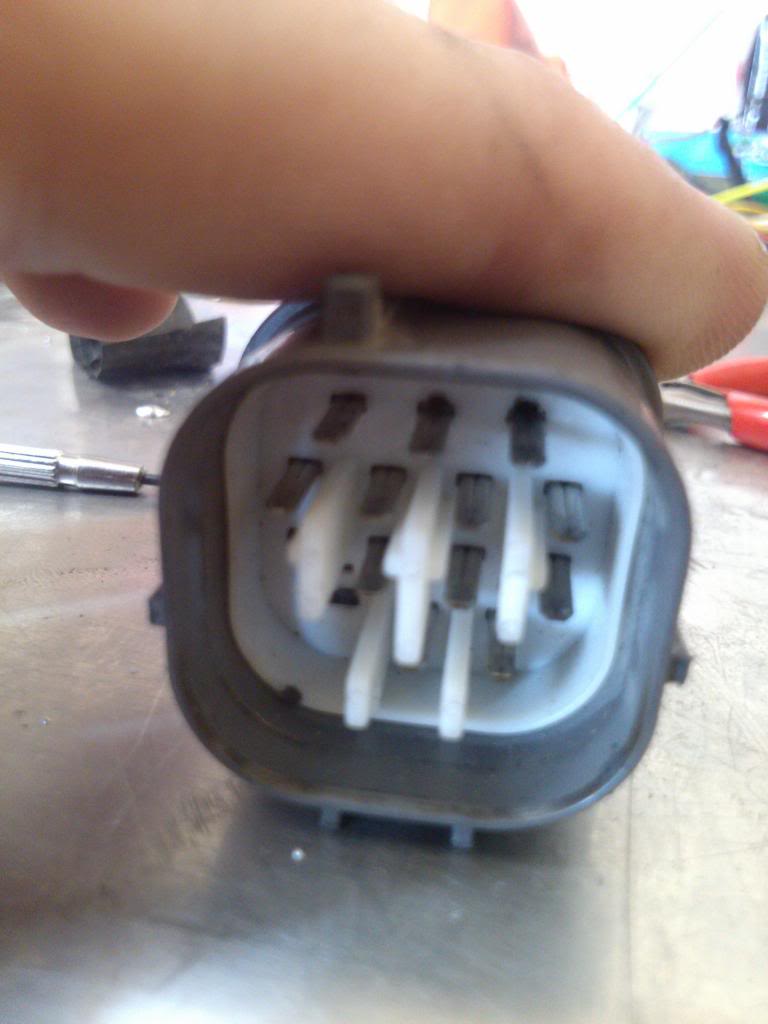
Here is he male end if anyone was confused.
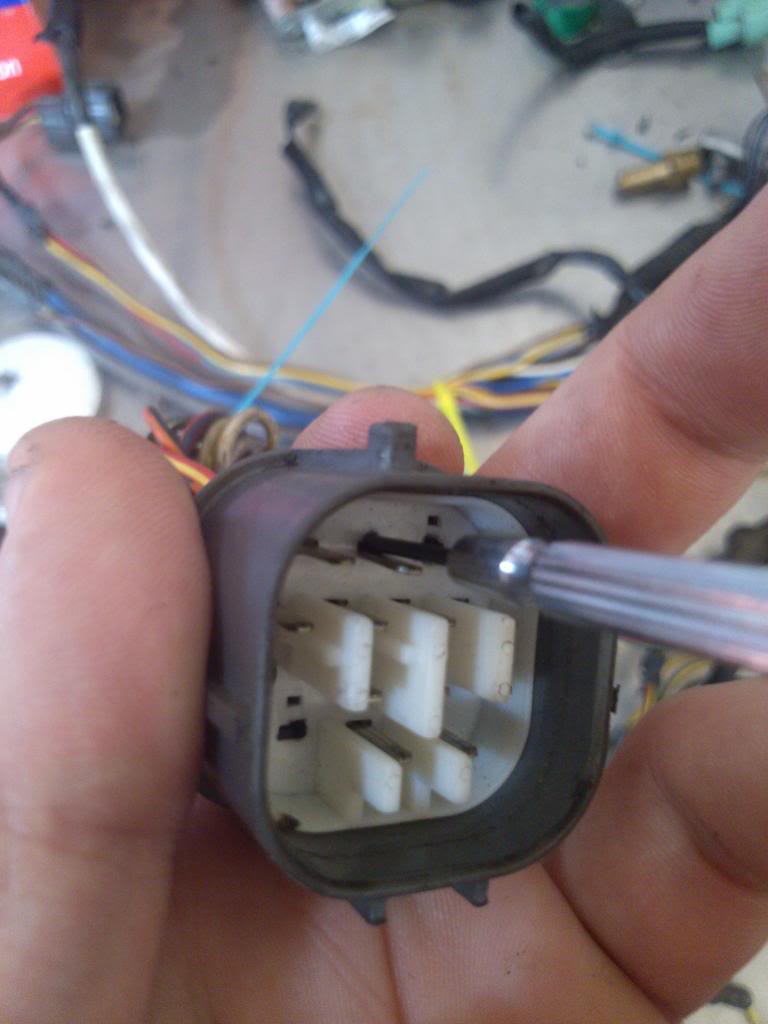
Put the small screw driver into the top of the male end. You can kind of see where there is a tiny gap. That is where it goes then push until you feel it stop.
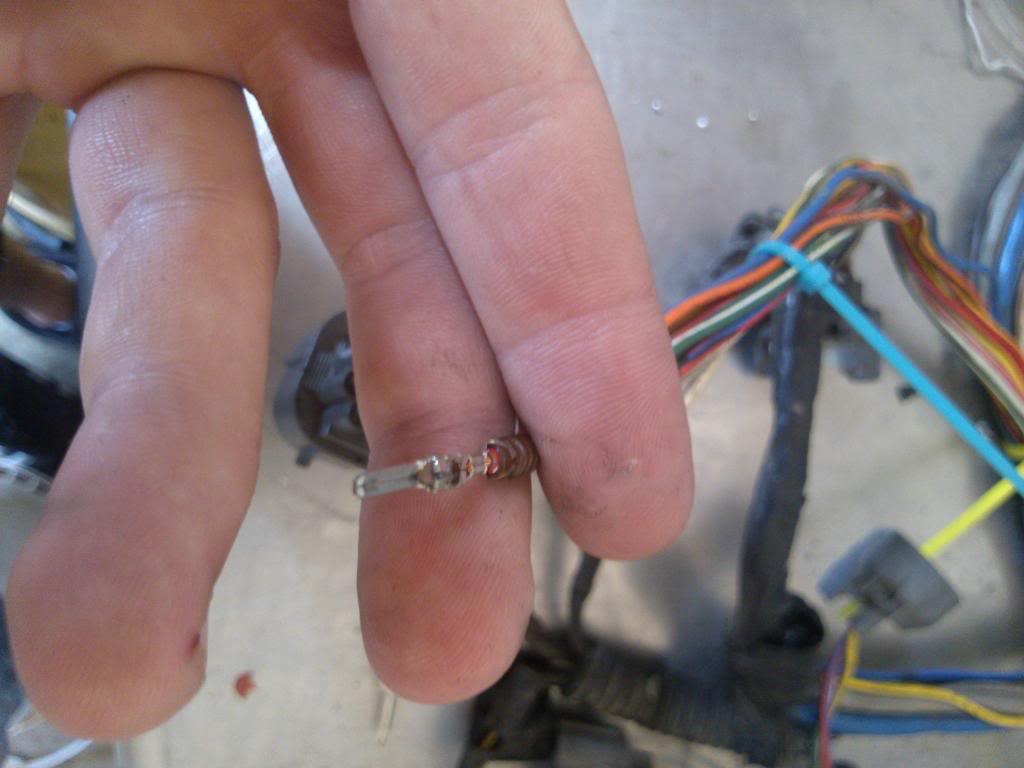
This is the one I am pushing out this time.

Next I wasn't able to just push the pin out with my hands so I took the end of the screw driver on a table and push the clip towards the table.
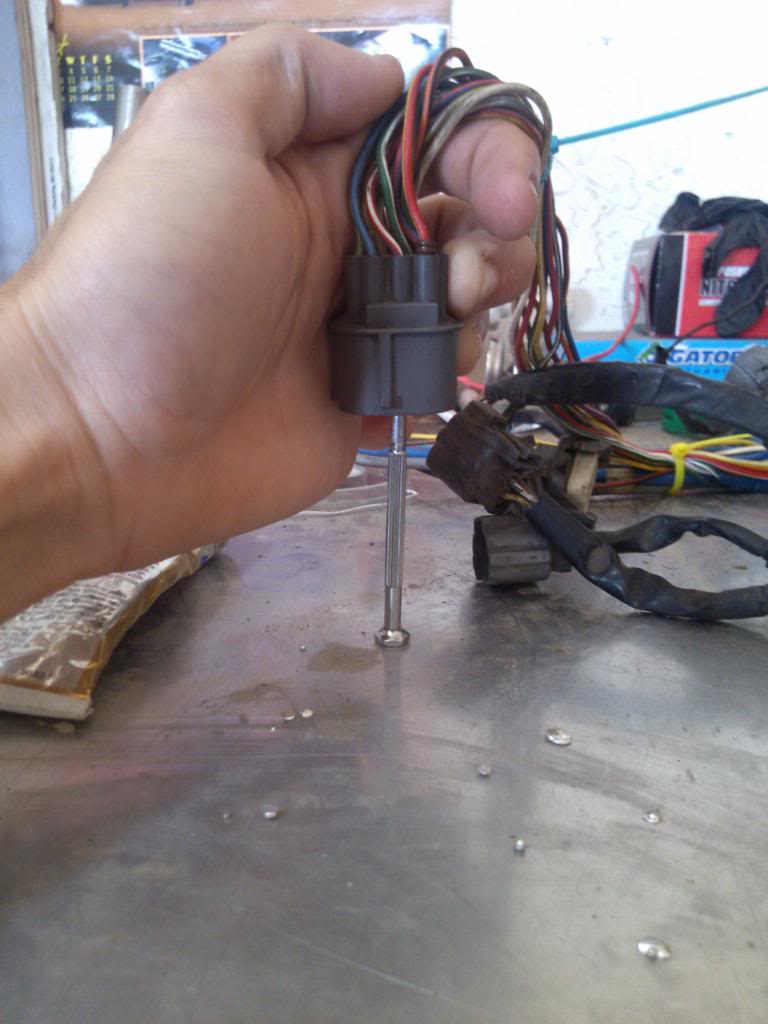
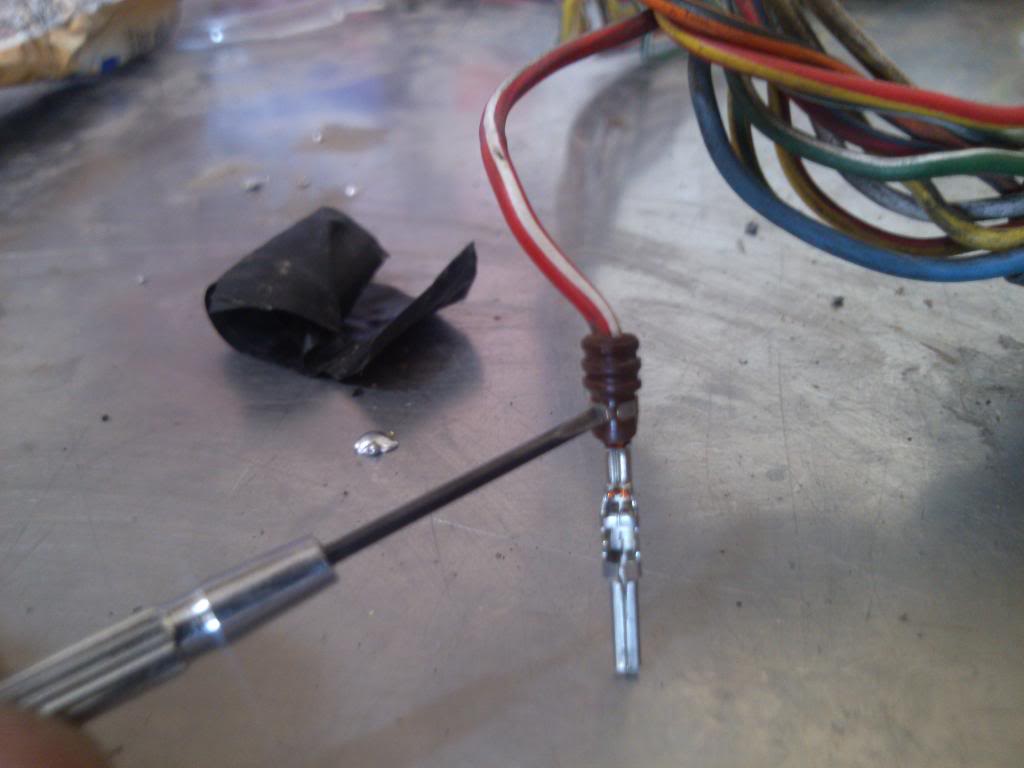
This is what it is going to look like when it pops out. Now when this happens you are going to have to separate the pin from the screw driver but that is easy. Simply pull on the wire and on the screw driver.
TA DA!!
Sorry it is blurry but where the screw driver is pointing is a set of tabs that bend back on each other. Those tabs need to be bent back together to get it into the plug. There are two sets of tabs on the male end and I did have one male end that needed both sets to be bent back together but it is the same concept for both sets of tabs.

Here is where the needle nose come into play. Just simply grab the male end on either side and apply a little bit of pressure until the tabs touch again.
These tabs here may also have to be bent back depending on how hard you had to push on the screw driver.
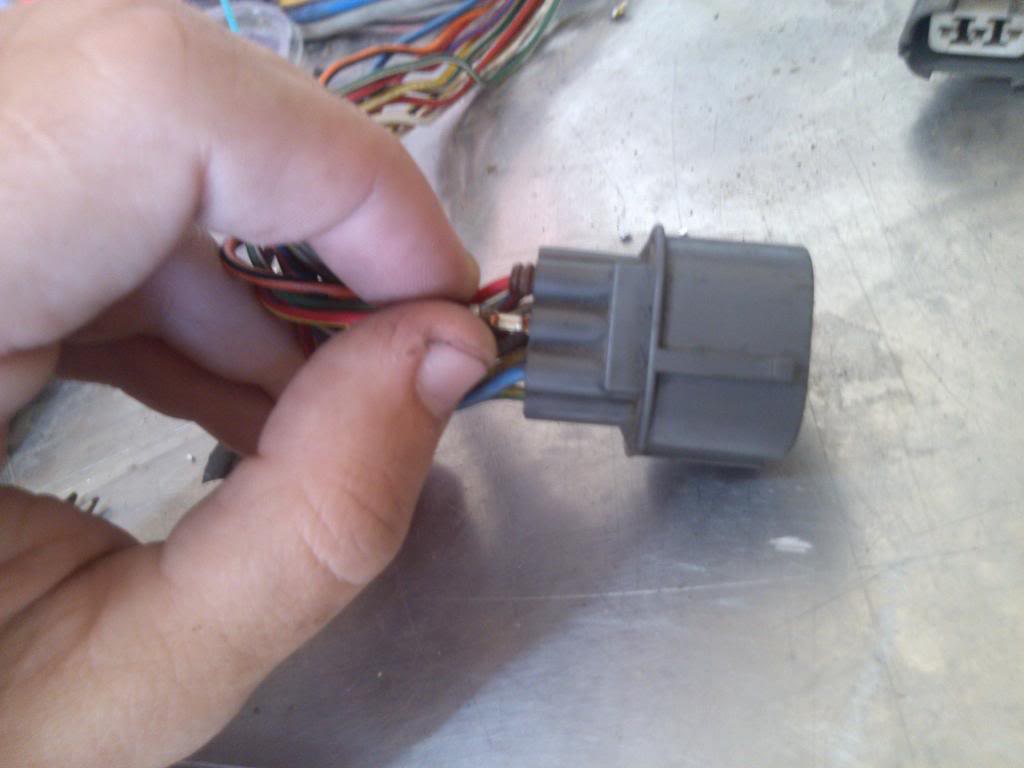
Once all the tabs are bent back together you can start to put it back in.
Make sure it goes back in flat.
On one of mine I had to use the needle nose pliers to pull it all the way through to get it flush with the rest of the pins.
It is pulled all the way through now and sitting flush.
And here is the back of the clip looking like nothing ever happened.
I wasn't able to figure this style clip. Sorry about that.
Hope this helps out at least one person. Let me know what you think.
The tools I used were the smallest flat head screw driver I could find, I guess a jewelers tool set works also, and a very small pair of needle nose pliers.

Here is he male end if anyone was confused.

Put the small screw driver into the top of the male end. You can kind of see where there is a tiny gap. That is where it goes then push until you feel it stop.

This is the one I am pushing out this time.

Next I wasn't able to just push the pin out with my hands so I took the end of the screw driver on a table and push the clip towards the table.

This is what it is going to look like when it pops out. Now when this happens you are going to have to separate the pin from the screw driver but that is easy. Simply pull on the wire and on the screw driver.

TA DA!!

Sorry it is blurry but where the screw driver is pointing is a set of tabs that bend back on each other. Those tabs need to be bent back together to get it into the plug. There are two sets of tabs on the male end and I did have one male end that needed both sets to be bent back together but it is the same concept for both sets of tabs.

Here is where the needle nose come into play. Just simply grab the male end on either side and apply a little bit of pressure until the tabs touch again.
These tabs here may also have to be bent back depending on how hard you had to push on the screw driver.

Once all the tabs are bent back together you can start to put it back in.

Make sure it goes back in flat.
On one of mine I had to use the needle nose pliers to pull it all the way through to get it flush with the rest of the pins.
It is pulled all the way through now and sitting flush.

And here is the back of the clip looking like nothing ever happened.

I wasn't able to figure this style clip. Sorry about that.


Hope this helps out at least one person. Let me know what you think.
MY vtec went BWAAAAHHHH!!!!!
No more honda ladies and gents :'(
No more honda ladies and gents :'(