

- Sat Jun 13, 2009 5:05 am
#122728
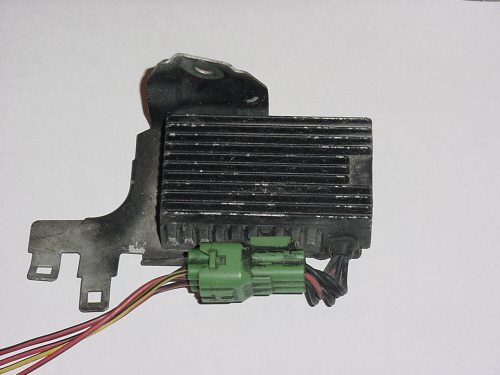
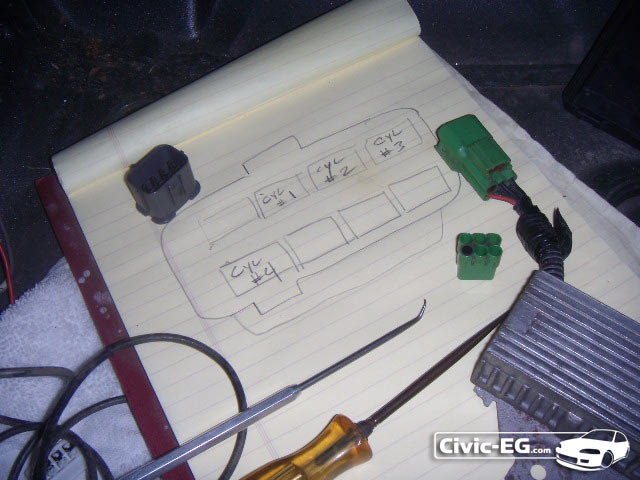
When using Peak & Hold Injectors (low impedence injectors) on our cars, you must install a resistor box. The resistor box can be from a crx, early integra, accord or prelude- other models may have them too.
For this install, you will need both sides of the plug on the box.
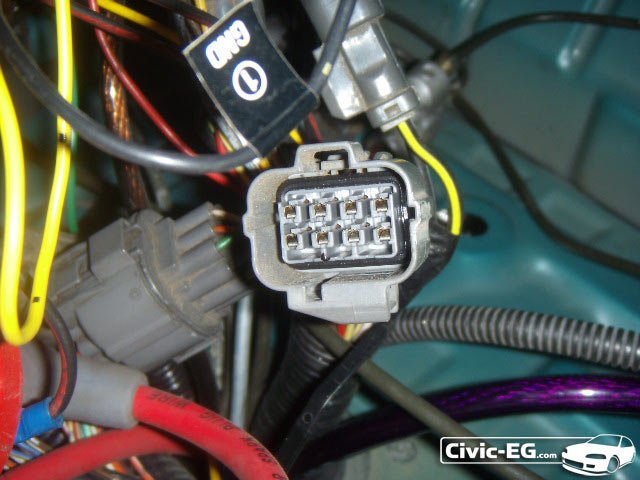
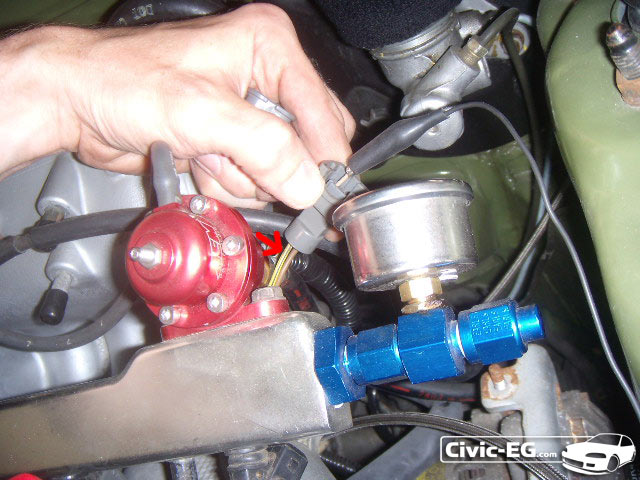
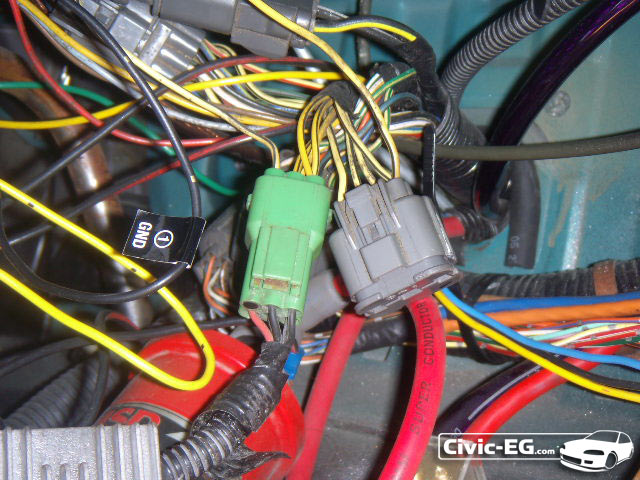
Look for this plug on the driver side of your engine harness, by the shock tower. It will have all yellow/blk wires in it. It will have a cap over the end like this:
(mine is relocated behind the firewall from a wire tuck)

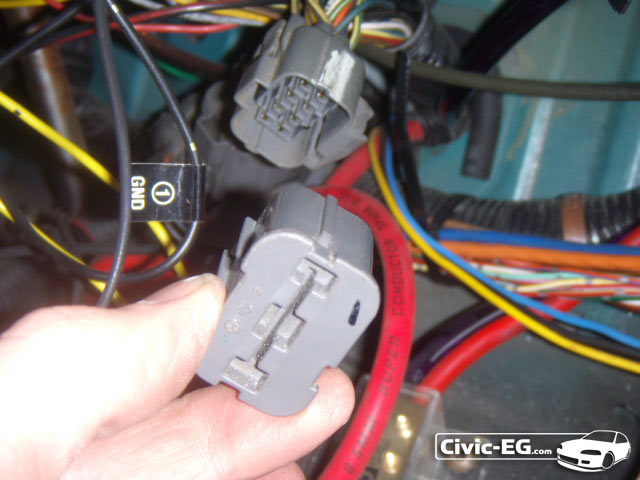
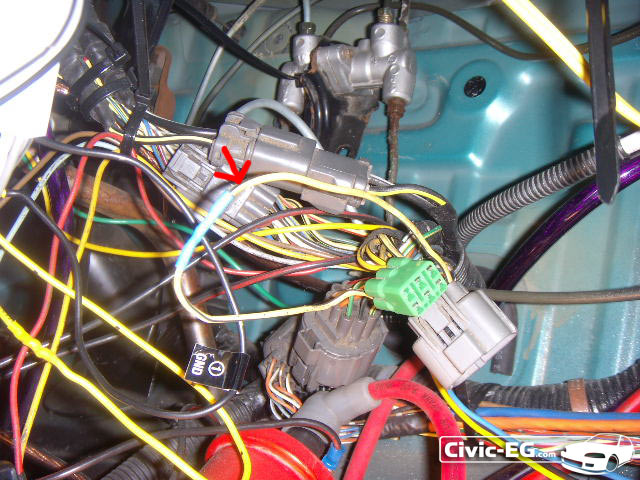
with needle nose pliers, pull the white piece out of the middle of the plug after removing that cover. This will let you see what you're doing.
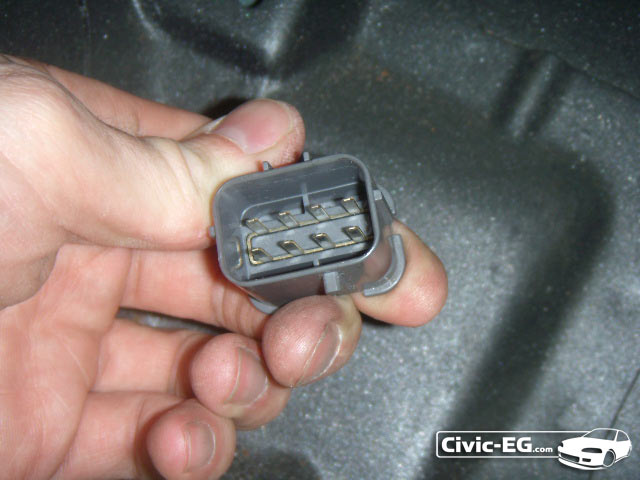
Here's a look at the inside of the plug cap. This is called a Junction harness. it just connects them all together with the cap.
What you will be doing is taking 4 of the yellow/blk wires that run to the injectors and routing them through the resistor box as shown in the illustration:
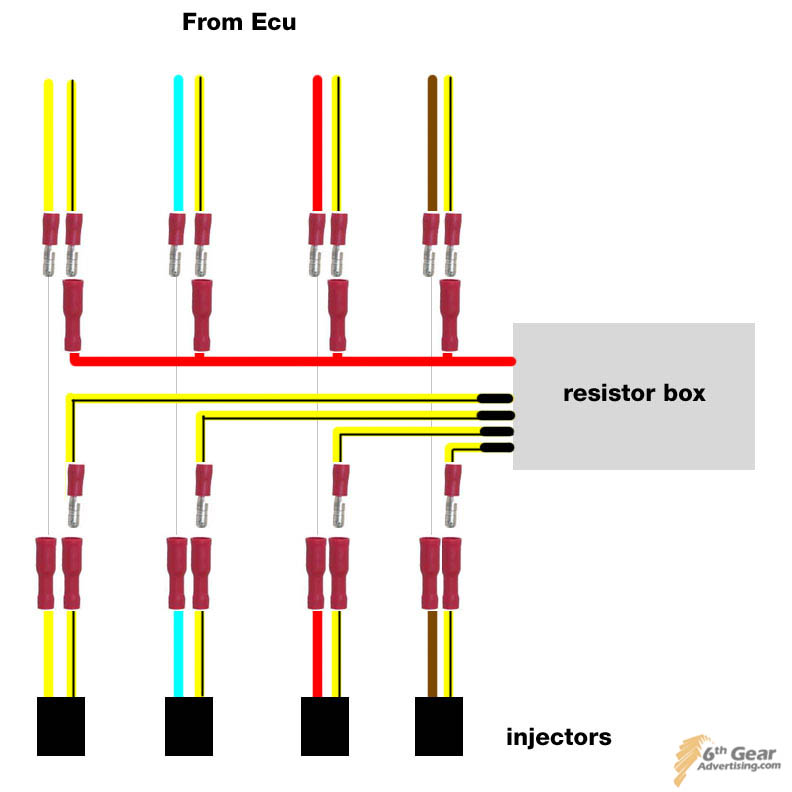
But this will be done without any wire splicing or cutting.
You need to find out which 4 of the yellow/blk wires are for the injectors using a test light. You could also use a volt meter but I didn't have one handy. Also I used a test light because I had to test the harness on the other side of the firewall, yours will be only a foot away from the injector.
Unplug the first injector and put a test lead on the yellow/blk terminal of the plug.
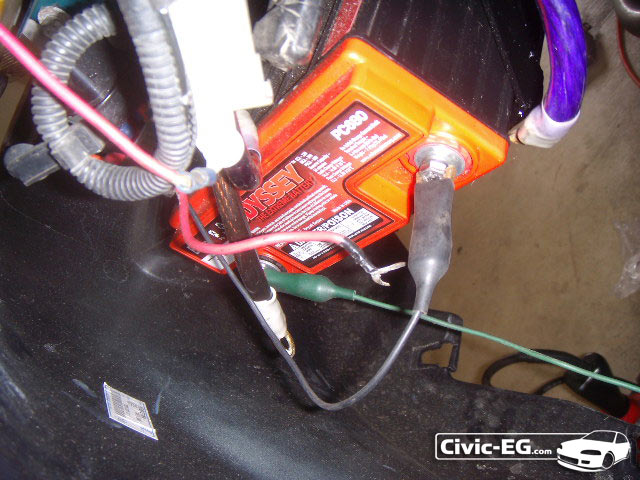
Next i unhooked my battery cables and put the lead from the yellow/blk injector wire onto the positive terminal of the battery. Now there is a +12v charge going through that yellow/blk wire to the junction harness and stopping there since I pulled the plug off the end.
I put another lead on the negative side of the battery that I ran into the car and hooked up to the wire on my test light.
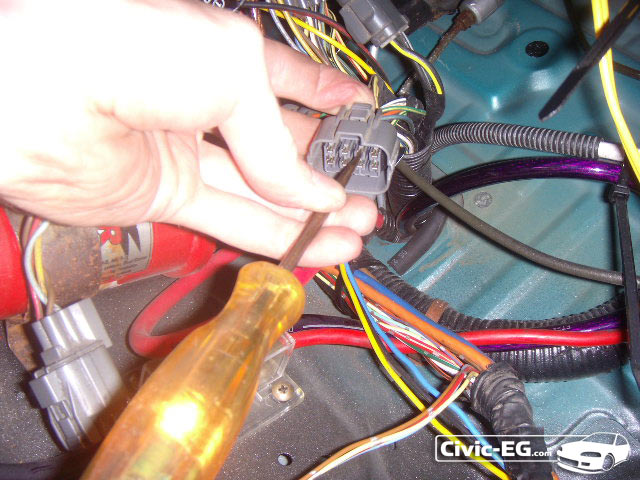
Now with the + on the injector wire and the - hooked to the test light, I just had to touch each terminal with the tip of the test light. When I touched a terminal and the light came on, that is the wire for the #1 injector.
Do the same for injectors 2, 3, and 4. I wrote them all down.
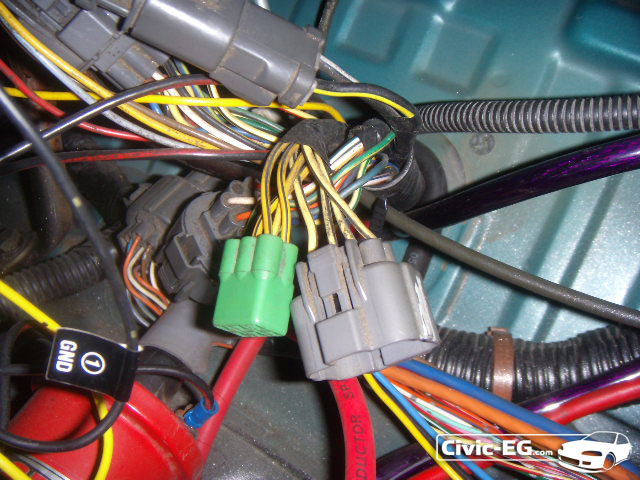
de-pin those 4 wires from the junction harness and plug them into the green male plug from the resistor box (the plug from the harness side).
There is a total of 6 pin holes on the plug. One has a plug in it. Leave it alone.
There is one going to the red wire and 4 going to black wires.
The 4 yellow/blk injector wires will need to go to the 4 black wires. Order does not matter.
Next you will need a wire to go into the resistor box.
For this I made a short wire with female pins on both ends from an old harness I had. I just clipped 2 ends off and soldered them together.
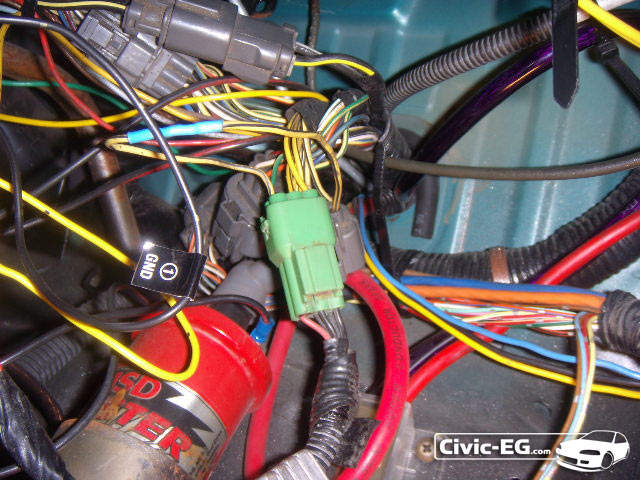
Plug one end into one of the now empty spots in the junction harness and plug the other end into the resistor plug where the red wire is.
Now you have the power going into the box from the junction harness where the yellow/blk wires originally were.
plug in your resistor box and you're done!
Plug your injectors in and hook up your battery.
Also don't forget to put the white cover back inside the junction harness AND put the end cap on the junction harness.
So what you have done is removed the 4 injector wires and hooked them up to the resistor box. The input to the resistor box is from the source that the injectors originally were. You can convert back to stock without having to unsolder any wires. This is useful if you have to pass ref or emissions where you live and need to make your car stock for a day.
For this install, you will need both sides of the plug on the box.
Look for this plug on the driver side of your engine harness, by the shock tower. It will have all yellow/blk wires in it. It will have a cap over the end like this:
(mine is relocated behind the firewall from a wire tuck)
with needle nose pliers, pull the white piece out of the middle of the plug after removing that cover. This will let you see what you're doing.
Here's a look at the inside of the plug cap. This is called a Junction harness. it just connects them all together with the cap.
What you will be doing is taking 4 of the yellow/blk wires that run to the injectors and routing them through the resistor box as shown in the illustration:
But this will be done without any wire splicing or cutting.
You need to find out which 4 of the yellow/blk wires are for the injectors using a test light. You could also use a volt meter but I didn't have one handy. Also I used a test light because I had to test the harness on the other side of the firewall, yours will be only a foot away from the injector.
Unplug the first injector and put a test lead on the yellow/blk terminal of the plug.
Next i unhooked my battery cables and put the lead from the yellow/blk injector wire onto the positive terminal of the battery. Now there is a +12v charge going through that yellow/blk wire to the junction harness and stopping there since I pulled the plug off the end.
I put another lead on the negative side of the battery that I ran into the car and hooked up to the wire on my test light.
Now with the + on the injector wire and the - hooked to the test light, I just had to touch each terminal with the tip of the test light. When I touched a terminal and the light came on, that is the wire for the #1 injector.
Do the same for injectors 2, 3, and 4. I wrote them all down.
de-pin those 4 wires from the junction harness and plug them into the green male plug from the resistor box (the plug from the harness side).
There is a total of 6 pin holes on the plug. One has a plug in it. Leave it alone.
There is one going to the red wire and 4 going to black wires.
The 4 yellow/blk injector wires will need to go to the 4 black wires. Order does not matter.
Next you will need a wire to go into the resistor box.
For this I made a short wire with female pins on both ends from an old harness I had. I just clipped 2 ends off and soldered them together.
Plug one end into one of the now empty spots in the junction harness and plug the other end into the resistor plug where the red wire is.
Now you have the power going into the box from the junction harness where the yellow/blk wires originally were.
plug in your resistor box and you're done!
Plug your injectors in and hook up your battery.
Also don't forget to put the white cover back inside the junction harness AND put the end cap on the junction harness.
So what you have done is removed the 4 injector wires and hooked them up to the resistor box. The input to the resistor box is from the source that the injectors originally were. You can convert back to stock without having to unsolder any wires. This is useful if you have to pass ref or emissions where you live and need to make your car stock for a day.
Do Not PM me your technical questions. Post them in the forum! 
My 1992 SOHC Turbo Hatch
My Youtube Channel: 6th Gear Garage
My 1992 SOHC Turbo Hatch
My Youtube Channel: 6th Gear Garage


 Chance is a homo # 69