

- Mon Nov 22, 2010 4:43 am
#223990
Since Honda decided to make OBD1 vtec distributors have a different bolt pattern than non-vtec distributors, it's not practical to use one in place of the other even though the internals are identical.
Lets say you just swapped in a D16z6 engine or just the head (mini-me) and it didn't come with a distributor or the distributor it came with is bad. But there's never a shortage of non-vtec OBD1 distributors it seems...
This tutorial is going to explain the process of swapping the internals from one distributor to another.
In this specific case, I had a D16z6 distributor which was modified to use an external coil. my car was missing at high RPM so I wanted a bone stock distributor to begin troubleshooting. THere were plenty of non-vtec ones on craigslist so I bought one for a decent price.
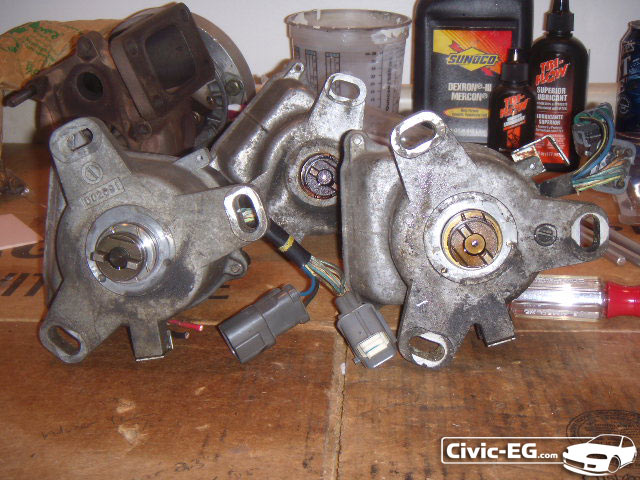
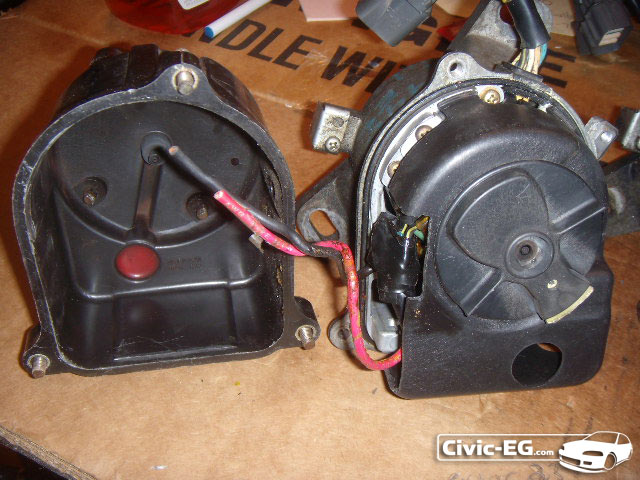
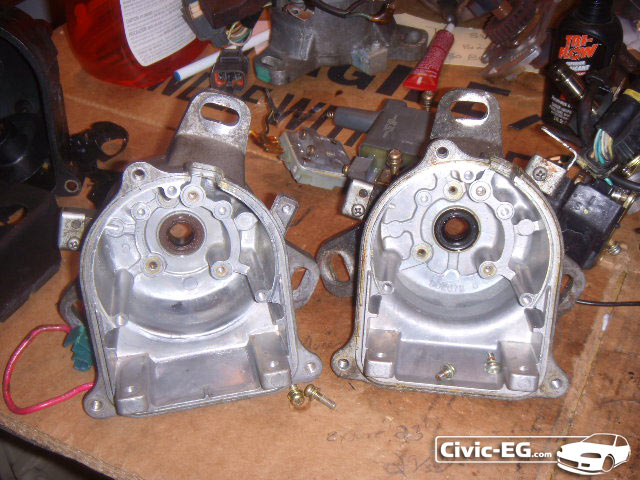
The D16z6 distributor is on the left, D15b7 on the right. notice the 'leg' pointing to the right is at a different angle. That bolt hole being in a different position is the main reason that a D15b7 distributor will not bolt up to the D16z6 head and vice versa.
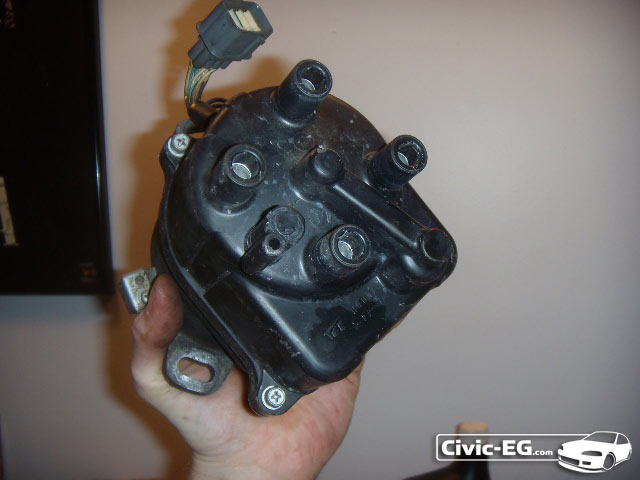
The D16z6 dizzy has a cap designed for an external coil. Because it was modded for an external coil, the previous owner removed the OEM internal coil.
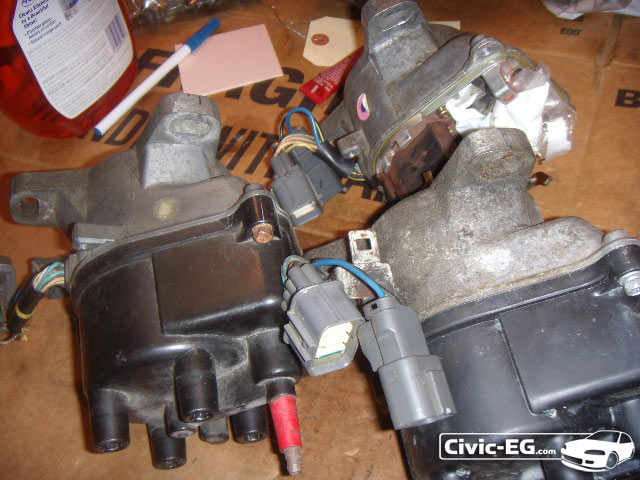
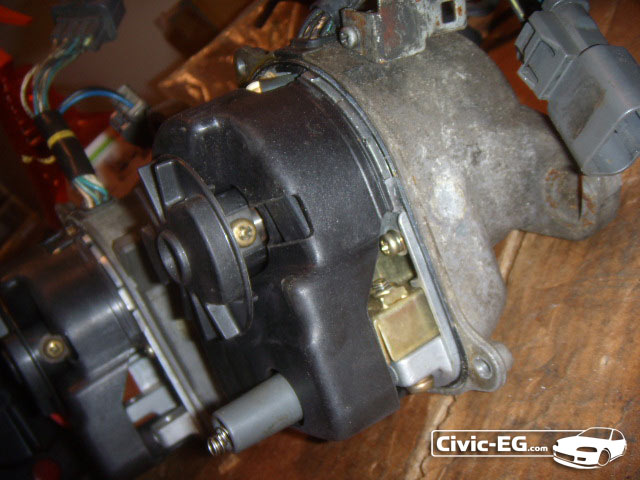
First remove the screws holding the cover on.
The stock D15b7 dizzy with internal coil.
Now I'm looking inside the D16z6 dizzy which was modified for the external coil.
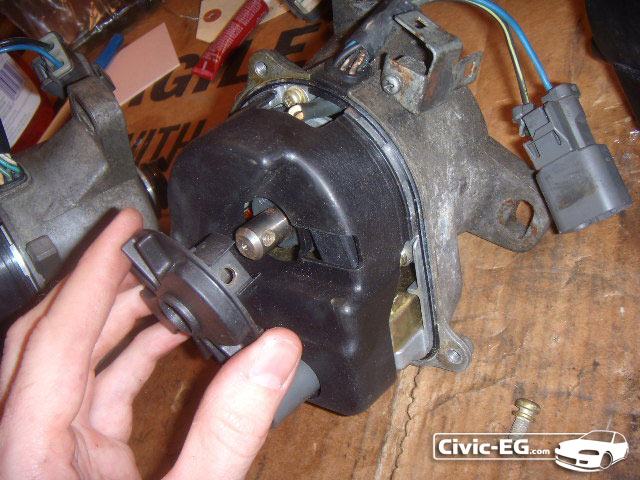
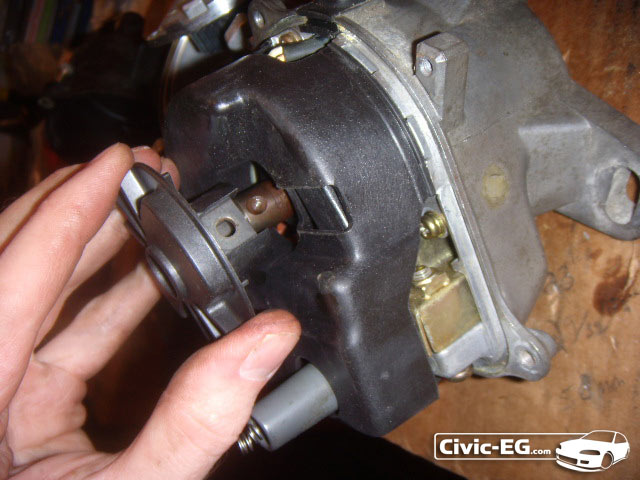
remove the rotor by taking out this screw. These can be tight, use the correct size phillips so you don't strip the screw out.


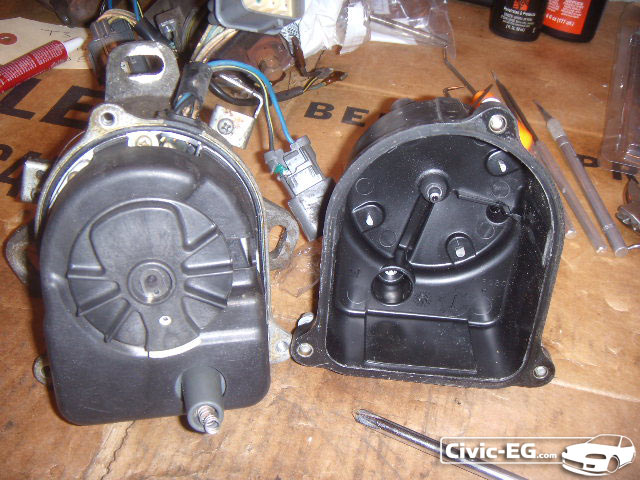
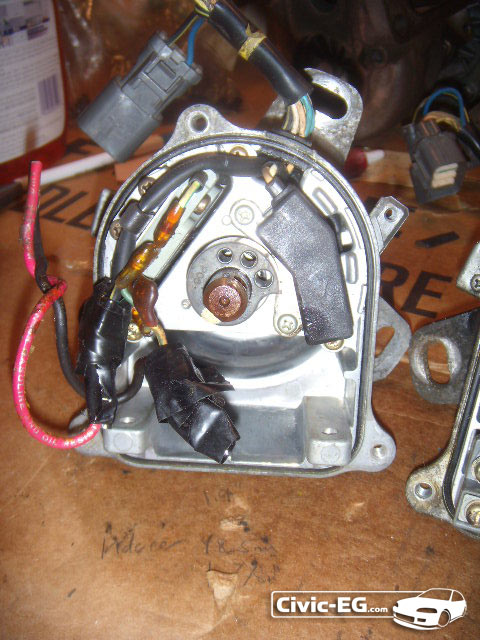
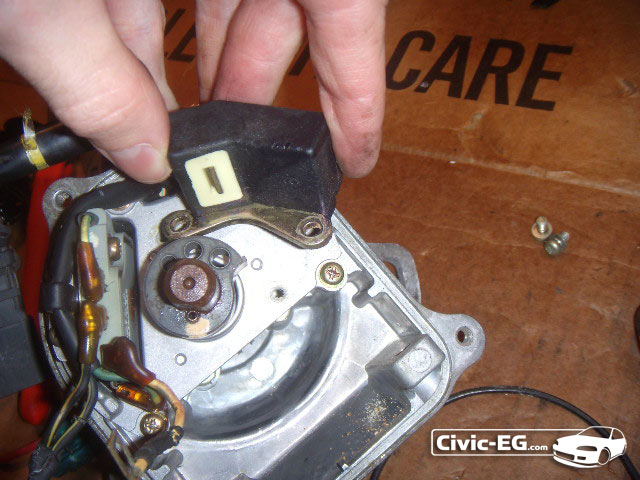
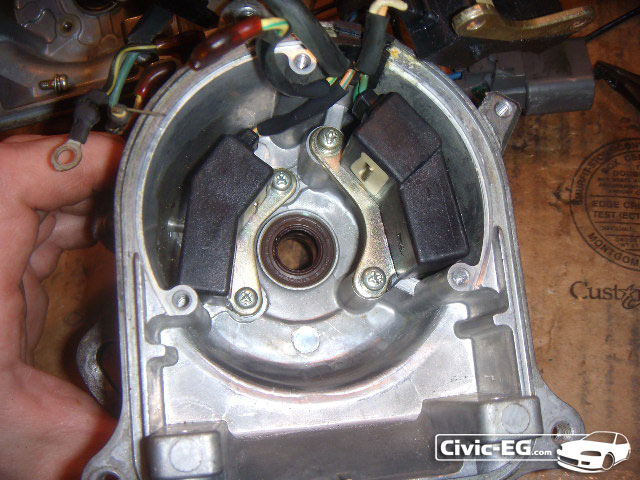
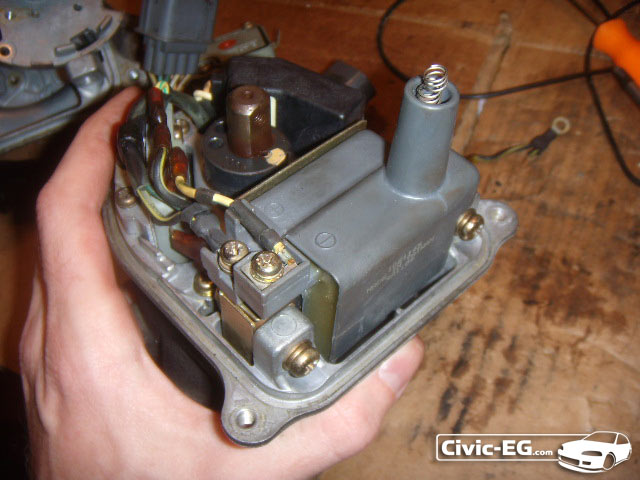
Pull off the plastic cover behind the rotor. This is the D15b7 dizzy with OEM internal coil (big grey thing on the bottom inside).
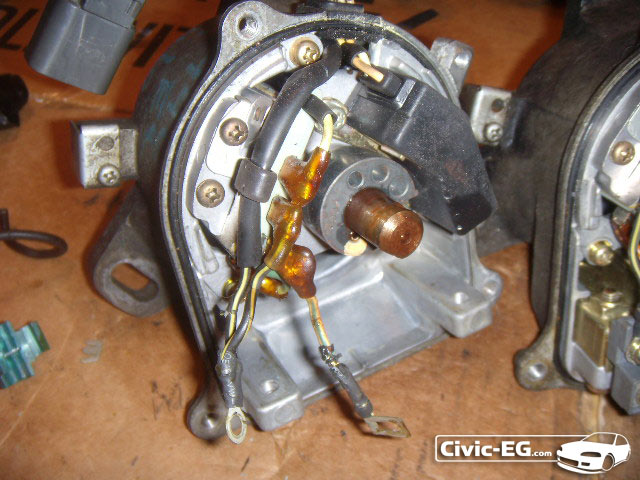
And Here's the D16z6 dizzy which was modified for use with an external coil.
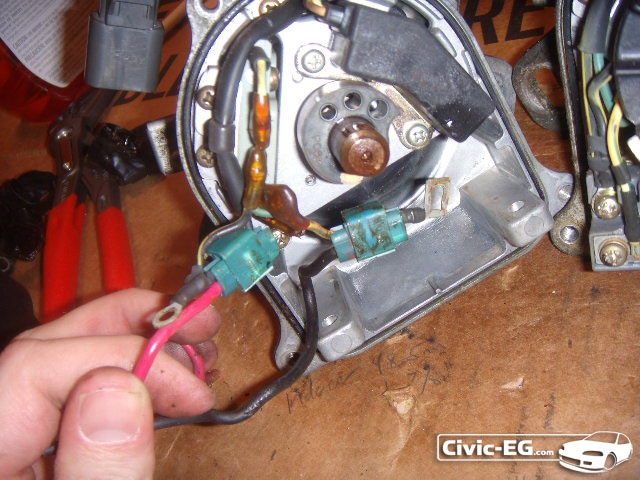
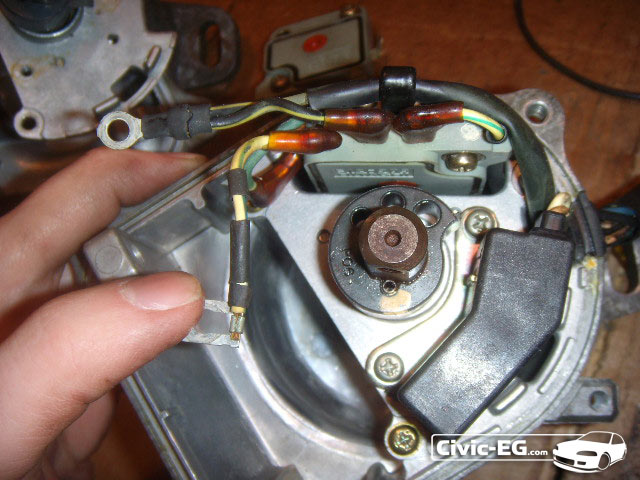
lol really? I had THIS in my car all along?? what a mess.... Never use those connectors for something critical to your engine such as a distributor, not to mention the high voltage.
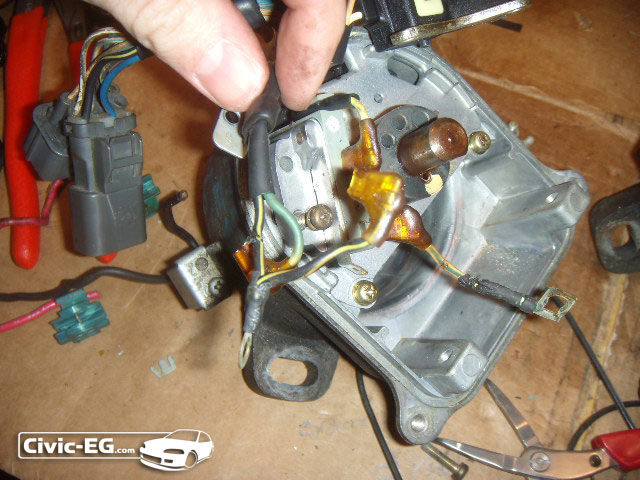
Here I am gutting the internals from the D16z6 casing.
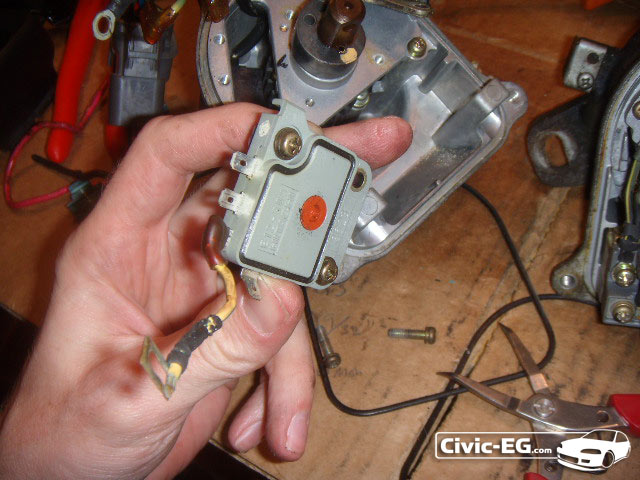
Be careful with this stuff, especially the ICM. These are very expensive and they can go bad after a while so hang on to the spare if you have one.
Now I pulled all the sensors I could get to from the z6 dizzy... back to the OEM D15b7 dizzy....
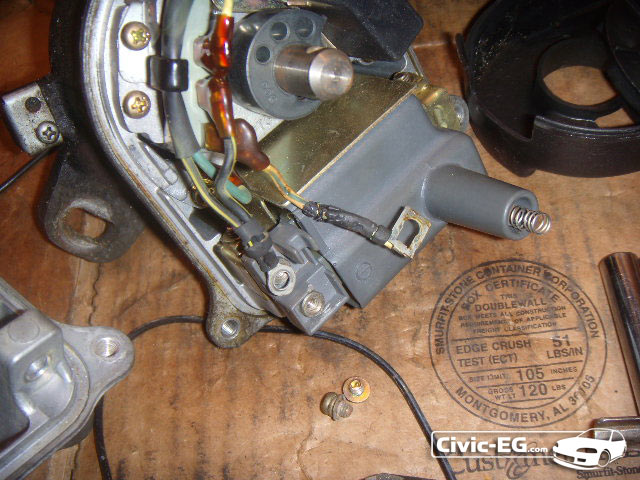
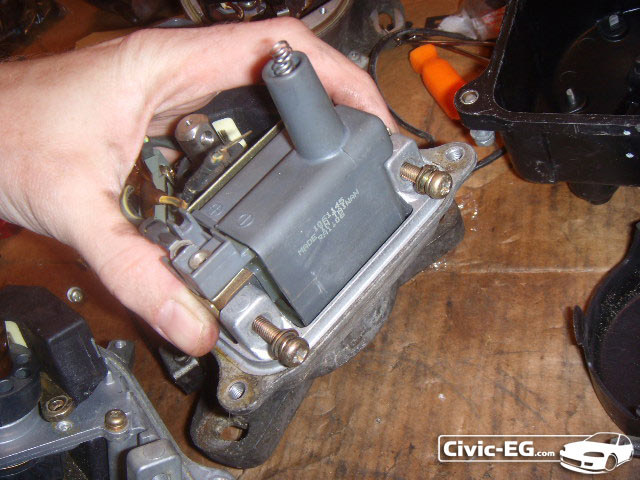
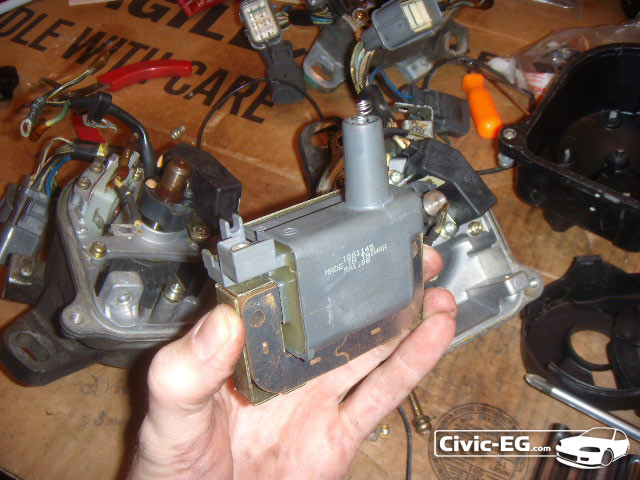
Here's the OEM Coil I needed.
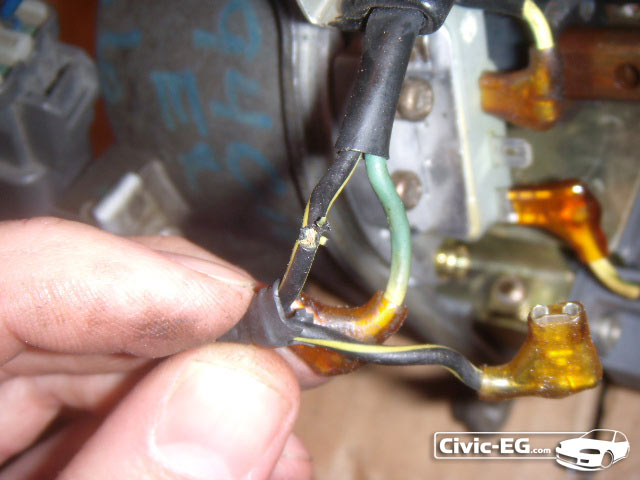
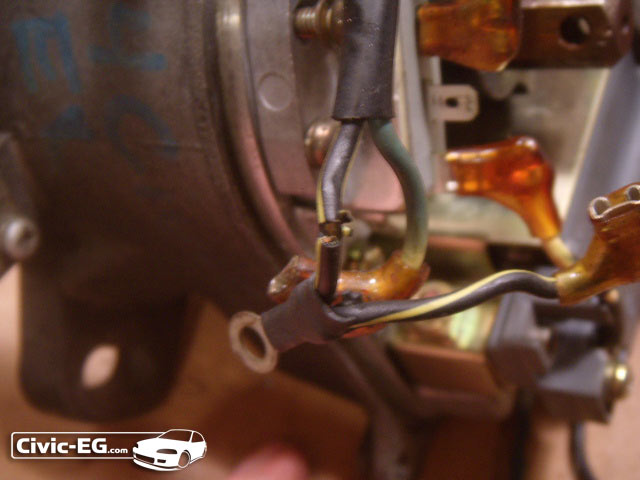
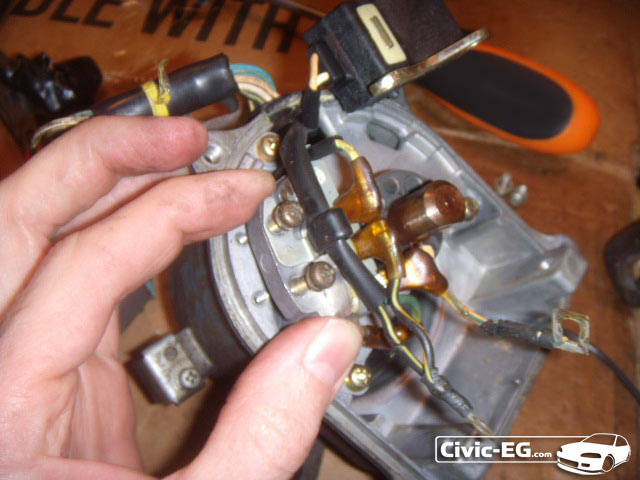
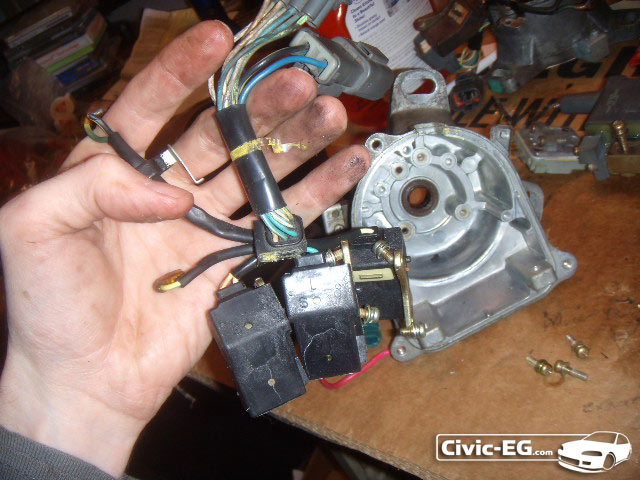
Unfortunately the wiring in the z6 dizzy was hacked up so bad, I need to swap everything over now. These wires and connectors can be brittle so be careful.

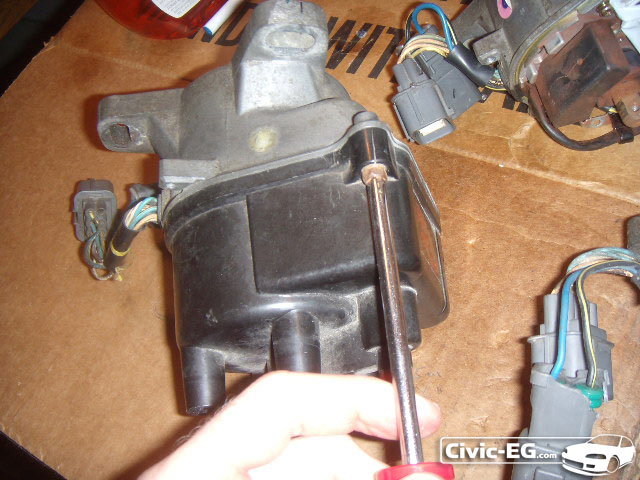
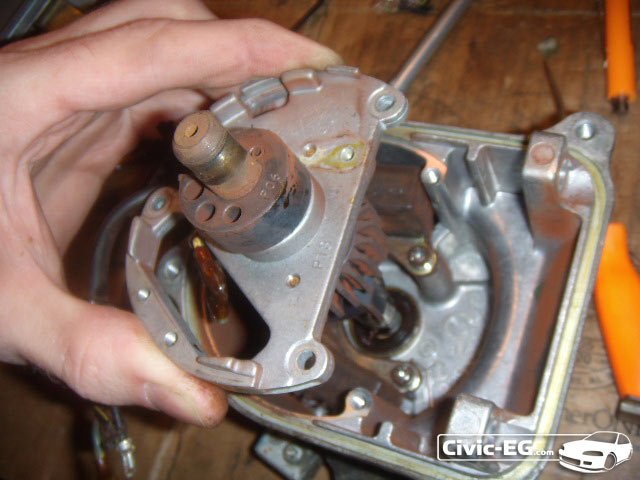
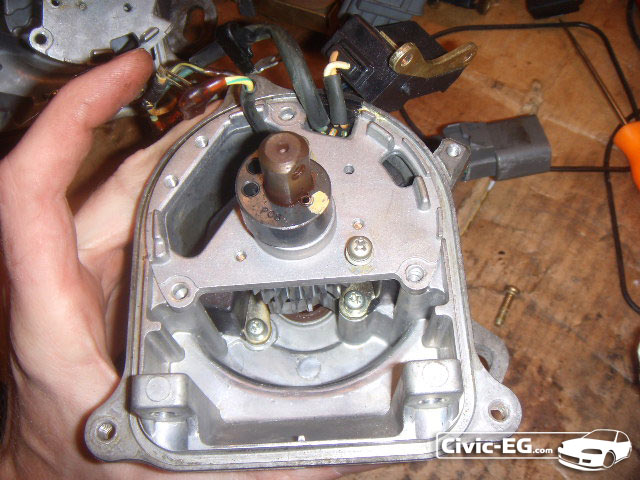
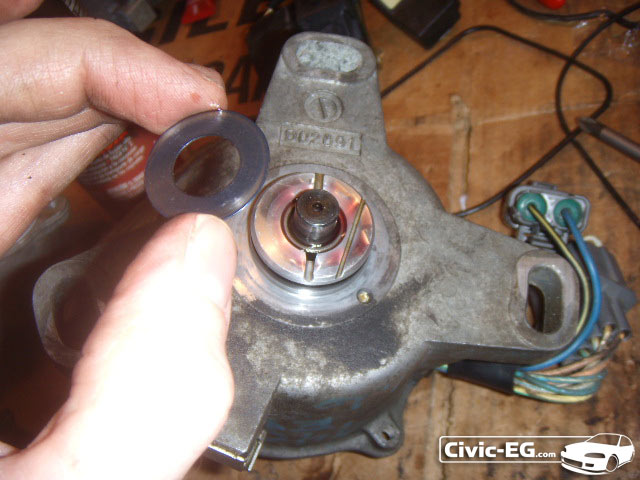
This is about as far as you can get from the front. Next thing to do is to remove the shaft to you can get the rest apart.
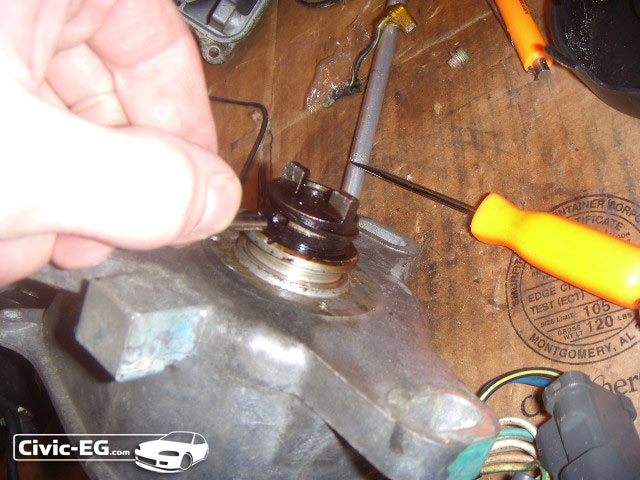
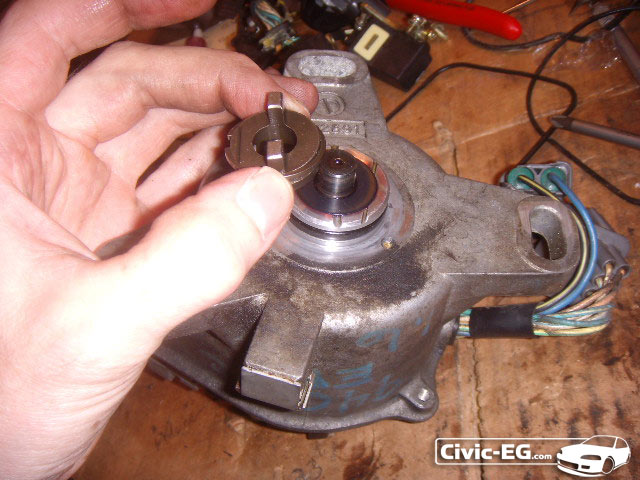
There's a snap ring on the key. The key fits in the end of the cam one way only. The 2 teeth are slightly offset to one side to prevent you from putting the distributor on and having the timing off 180° and the engine not run. If you ever put one of these Distributors on before, you know what I mean about only going in one way.
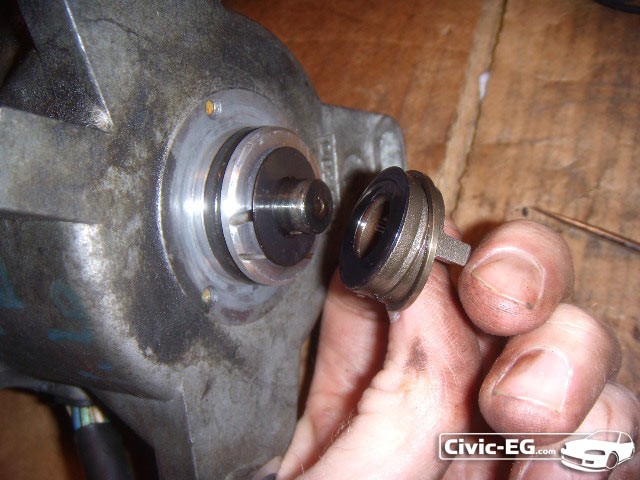
So once the snap ring is removed (I only slid it up enough) then you can remove the pin from the center.
That pin locks the key to the shaft so they turn as one.
NOTE: mark which side of the shaft the 2 teeth are offset toward. Even though the key will only go into the cam the correct way, the key can be installed on the shaft of the distributor the wrong direction, turned 180° backwards. I learned this the hard way when my car wouldn't start once everything was back together. There's thin washers under the key too, don't lose it because it can stick to the key.
More pics of this when I put the dizzy back together later.
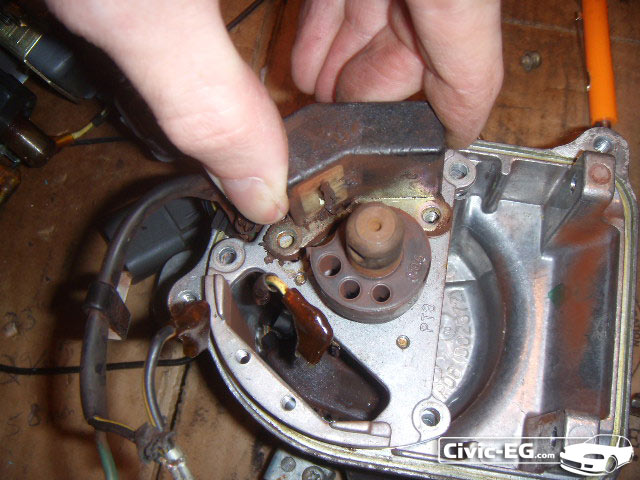
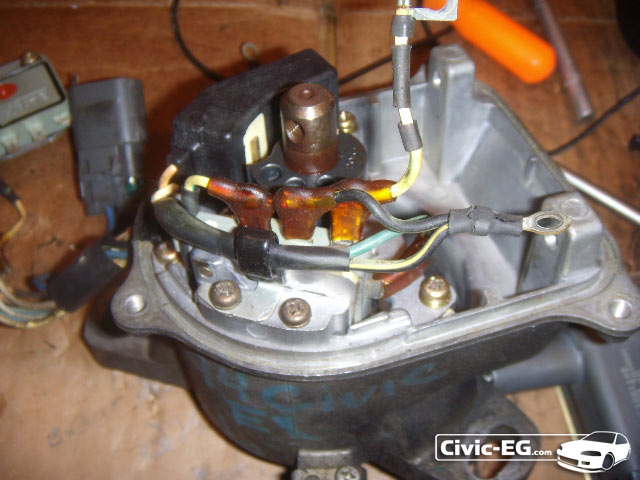
Coil and ICM have been removed so far, now the rest can come out. Screws have been removed here. This sensor I'm holding has wires going through the center section.
Pull the whole assembly straight out. The black sensor from above it still attached to the harness, just set off to the side, hanging over the edge of the casing.
Here's the other 2 sensors inside that I'm going to remove.
All these black sensors are connected with the same harness and I didn't want to cut & solder, it was faster to re-use everything as a whole.
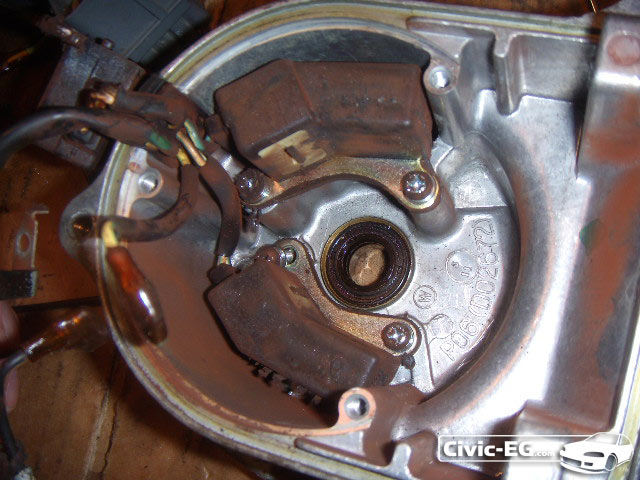
I cleaned the outer case out and it is ready for the donor organs.
From here on, just do everything backward that you already did.
The last 2 sensors in the Z6 dizzy.
The center section back in.
The other black sensor screwed down.
The ICM installed. Be sure you note which wires go where. Most of them aren't long enough to go to the wrong place.
And finally the Coil.
Now... Here's where I have detailed pics of the Key
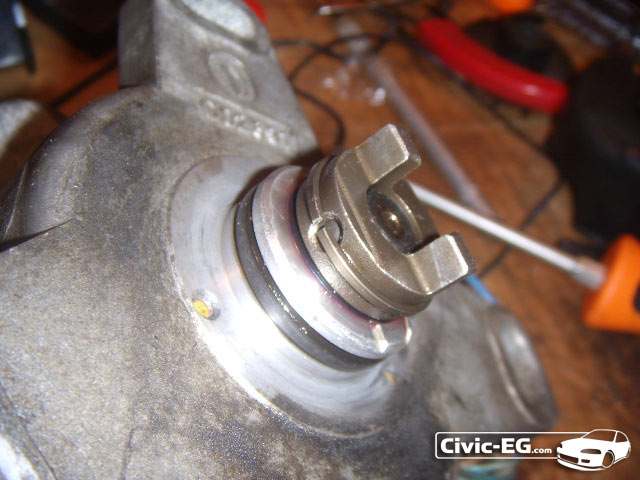
Put some oil on the surface and then there's the washers that go on before the key. Put oil between the 2 washers too as well as the washer and the key.
Here's where I messed up and put the key on 180° backwards. Looking back, it makes sense that there was that extra line on the right side of the case surface and also an extra line on one side of the top of the key. So this pic is incorrect. turn it so the outside lines match instead oon opposite sides.
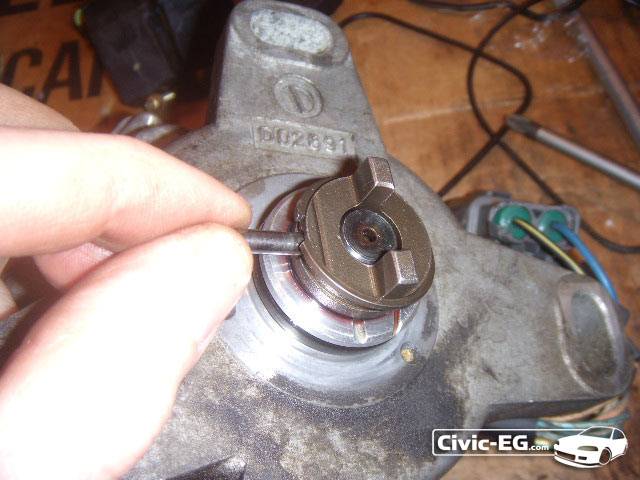
The snap ring is slid up and I'm putting the pin in.
Push the snap ring back into its grove and that pin isn't going anywhere.
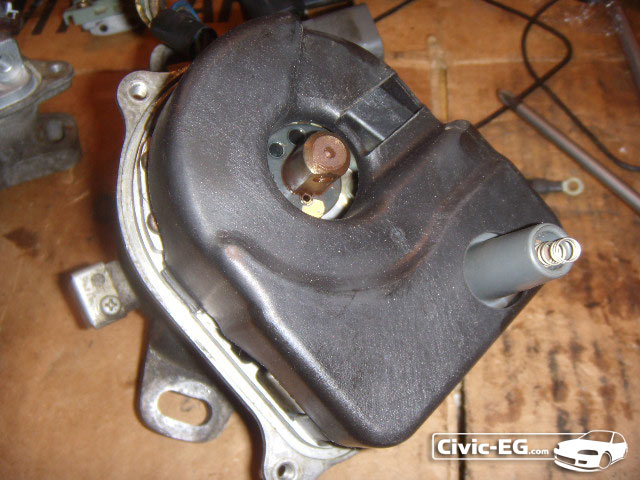
Back to the other side of the rebuilt distributor.... put on the inside plastic cover before putting the rotor on.
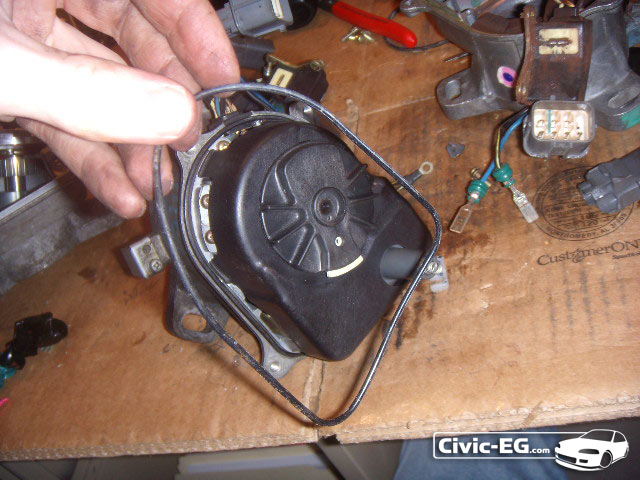
Don't forget the rubber gasket before putting the outer cover on.
The outer cover is held on with 3 screws and done!
Lets say you just swapped in a D16z6 engine or just the head (mini-me) and it didn't come with a distributor or the distributor it came with is bad. But there's never a shortage of non-vtec OBD1 distributors it seems...
This tutorial is going to explain the process of swapping the internals from one distributor to another.
In this specific case, I had a D16z6 distributor which was modified to use an external coil. my car was missing at high RPM so I wanted a bone stock distributor to begin troubleshooting. THere were plenty of non-vtec ones on craigslist so I bought one for a decent price.
The D16z6 distributor is on the left, D15b7 on the right. notice the 'leg' pointing to the right is at a different angle. That bolt hole being in a different position is the main reason that a D15b7 distributor will not bolt up to the D16z6 head and vice versa.
The D16z6 dizzy has a cap designed for an external coil. Because it was modded for an external coil, the previous owner removed the OEM internal coil.
First remove the screws holding the cover on.
The stock D15b7 dizzy with internal coil.
Now I'm looking inside the D16z6 dizzy which was modified for the external coil.
remove the rotor by taking out this screw. These can be tight, use the correct size phillips so you don't strip the screw out.
Pull off the plastic cover behind the rotor. This is the D15b7 dizzy with OEM internal coil (big grey thing on the bottom inside).
And Here's the D16z6 dizzy which was modified for use with an external coil.
lol really? I had THIS in my car all along?? what a mess.... Never use those connectors for something critical to your engine such as a distributor, not to mention the high voltage.
Here I am gutting the internals from the D16z6 casing.
Be careful with this stuff, especially the ICM. These are very expensive and they can go bad after a while so hang on to the spare if you have one.
Now I pulled all the sensors I could get to from the z6 dizzy... back to the OEM D15b7 dizzy....
Here's the OEM Coil I needed.
Unfortunately the wiring in the z6 dizzy was hacked up so bad, I need to swap everything over now. These wires and connectors can be brittle so be careful.
This is about as far as you can get from the front. Next thing to do is to remove the shaft to you can get the rest apart.
There's a snap ring on the key. The key fits in the end of the cam one way only. The 2 teeth are slightly offset to one side to prevent you from putting the distributor on and having the timing off 180° and the engine not run. If you ever put one of these Distributors on before, you know what I mean about only going in one way.
So once the snap ring is removed (I only slid it up enough) then you can remove the pin from the center.
That pin locks the key to the shaft so they turn as one.
NOTE: mark which side of the shaft the 2 teeth are offset toward. Even though the key will only go into the cam the correct way, the key can be installed on the shaft of the distributor the wrong direction, turned 180° backwards. I learned this the hard way when my car wouldn't start once everything was back together. There's thin washers under the key too, don't lose it because it can stick to the key.
More pics of this when I put the dizzy back together later.
Coil and ICM have been removed so far, now the rest can come out. Screws have been removed here. This sensor I'm holding has wires going through the center section.
Pull the whole assembly straight out. The black sensor from above it still attached to the harness, just set off to the side, hanging over the edge of the casing.
Here's the other 2 sensors inside that I'm going to remove.
All these black sensors are connected with the same harness and I didn't want to cut & solder, it was faster to re-use everything as a whole.
I cleaned the outer case out and it is ready for the donor organs.
From here on, just do everything backward that you already did.
The last 2 sensors in the Z6 dizzy.
The center section back in.
The other black sensor screwed down.
The ICM installed. Be sure you note which wires go where. Most of them aren't long enough to go to the wrong place.
And finally the Coil.
Now... Here's where I have detailed pics of the Key
Put some oil on the surface and then there's the washers that go on before the key. Put oil between the 2 washers too as well as the washer and the key.
Here's where I messed up and put the key on 180° backwards. Looking back, it makes sense that there was that extra line on the right side of the case surface and also an extra line on one side of the top of the key. So this pic is incorrect. turn it so the outside lines match instead oon opposite sides.
The snap ring is slid up and I'm putting the pin in.
Push the snap ring back into its grove and that pin isn't going anywhere.
Back to the other side of the rebuilt distributor.... put on the inside plastic cover before putting the rotor on.
Don't forget the rubber gasket before putting the outer cover on.
The outer cover is held on with 3 screws and done!
Do Not PM me your technical questions. Post them in the forum! 
My 1992 SOHC Turbo Hatch
My Youtube Channel: 6th Gear Garage
My 1992 SOHC Turbo Hatch
My Youtube Channel: 6th Gear Garage


 great write up

