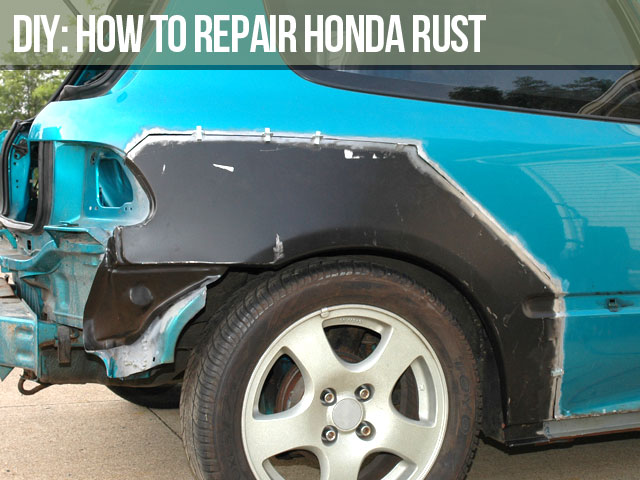
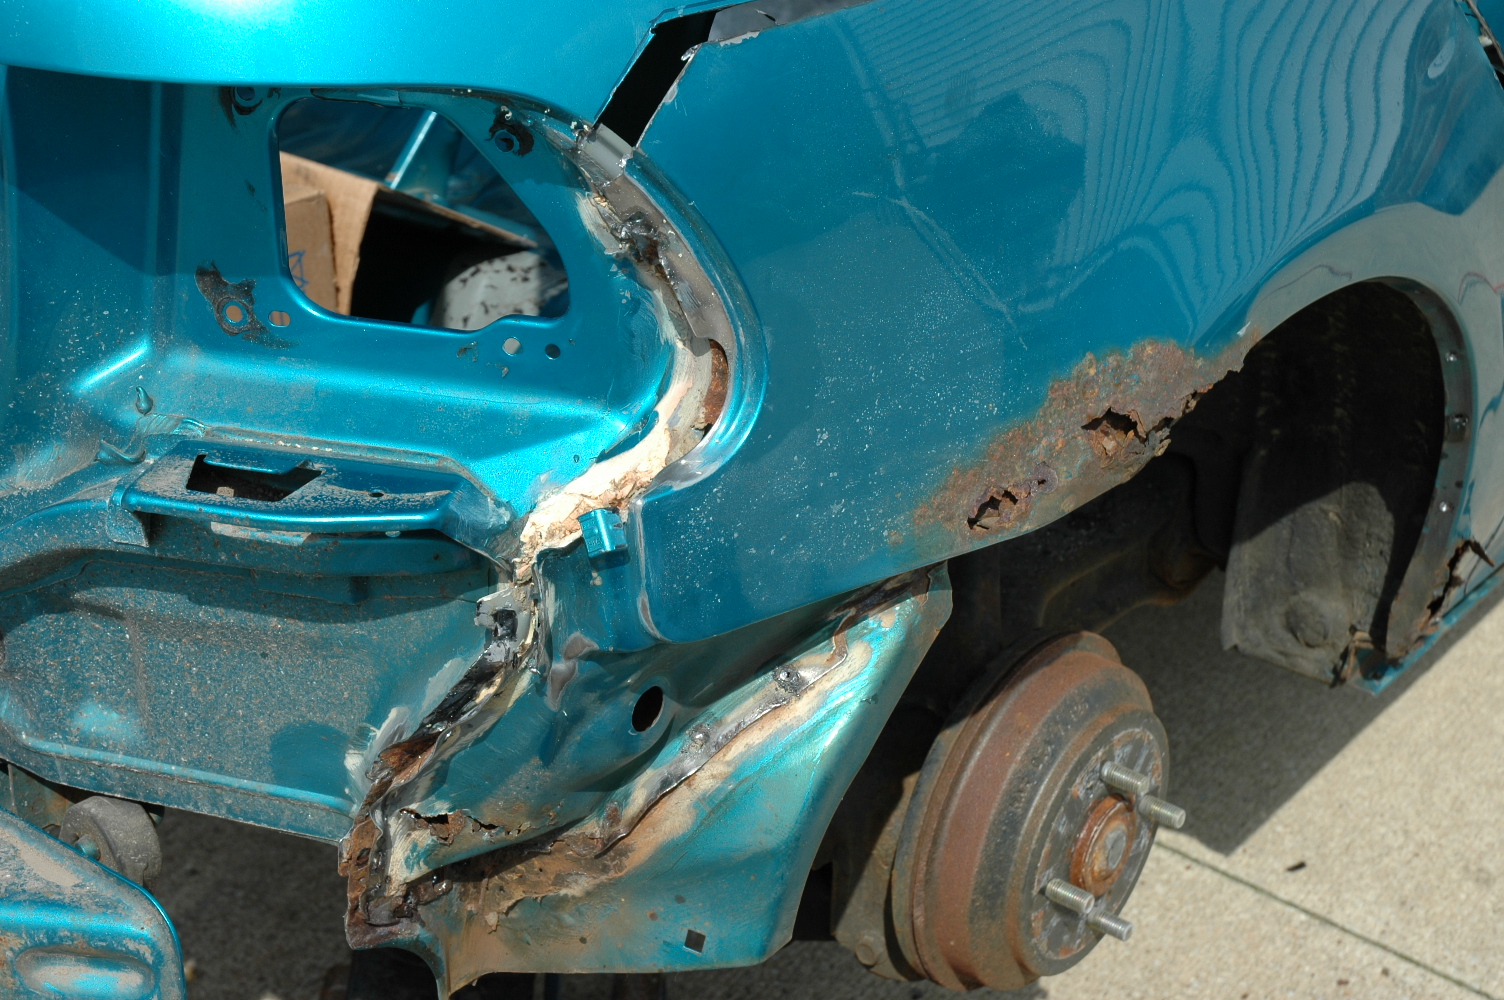
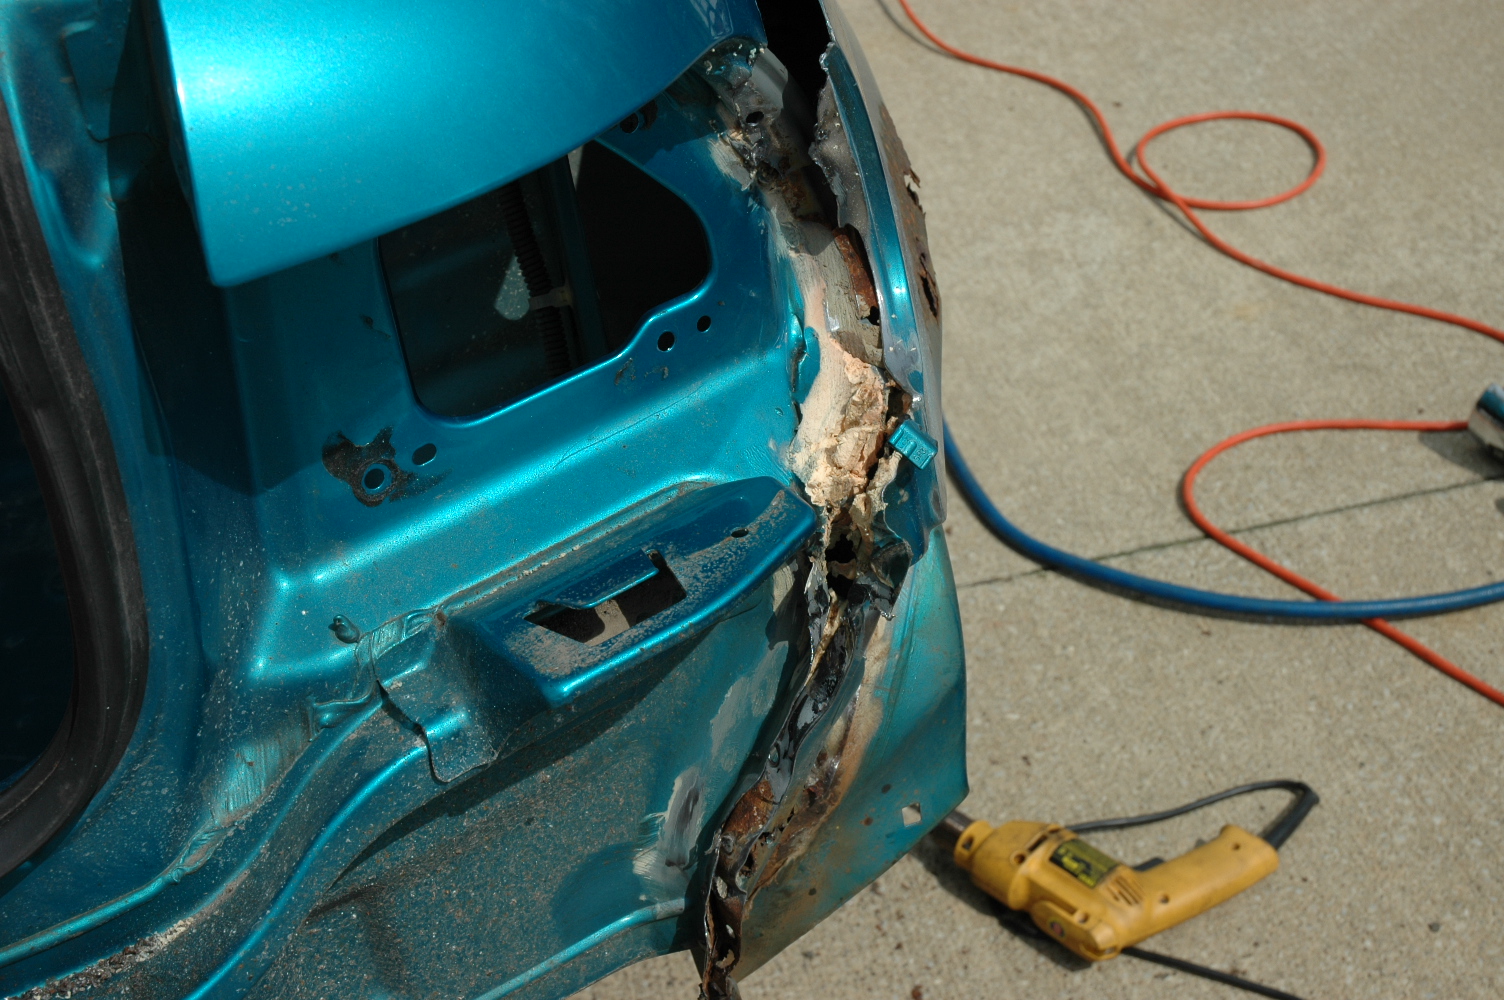
Many of the civics, especially the older models, have the common rust around the rear wheel well. Many of these rusty civics are located in the north and driven through the winters. There are a couple reasons so many civics are rusting.
First is the condensation that forms on the inside of the car. Think of a glass of ice water sitting outside on a warm summer day. Condensation is going to form on the outside of the glass because it is so warm. I’ve even seen condensation form on the outside of house windows on a hot humid summer day when the air conditioner is on inside. Same concept with your car. When it is cold and snowy outside, you have the heat cranked up inside your car. This creates condensation, in addition you create more moisture when you are breathing and when you get in your car with snow on your shoes which melts and then evaporates. Cars have vents near the rear to help keep the air flow going through the vehicle, however that is not enough in the civic’s case. Also the civic only has this vent on the drivers side below the tail light, not like many vehicles that have them on both sides and even in the door jambs sometimes. This creates condensation build up on the inside of your rear quarter panels. It drips down and collects around the inside of the wheel well. This is how the rust begins where the rear bumper meets the wheel well, the rust starts inside and eats its way through, until you see a tiny bubble or two form on the outside of your fender’s paint. Condensation also drips down the front of the wheel well and sits in the inner rocker panel area. Fortunately, the inner rocker panel space has drain holes in the bottom but can still rust. This area is behind the plastic side skirts so you usually wouldn’t know if there is rust.
Second cause of rust is the rubber strip honda puts on the inner fender lip. People rip these off and throw them away because they retain water and road salt. These rubber strips also prevent rock chips which can lead to rust. So instead of taking them off and throwing them away, clean the whole area and inside of the strip & let everything dry, apply body sealer, silicone or similar calk to the inside of the strip and put it back on. Now you have protection from rock strips, and you’re keeping the moisture out.
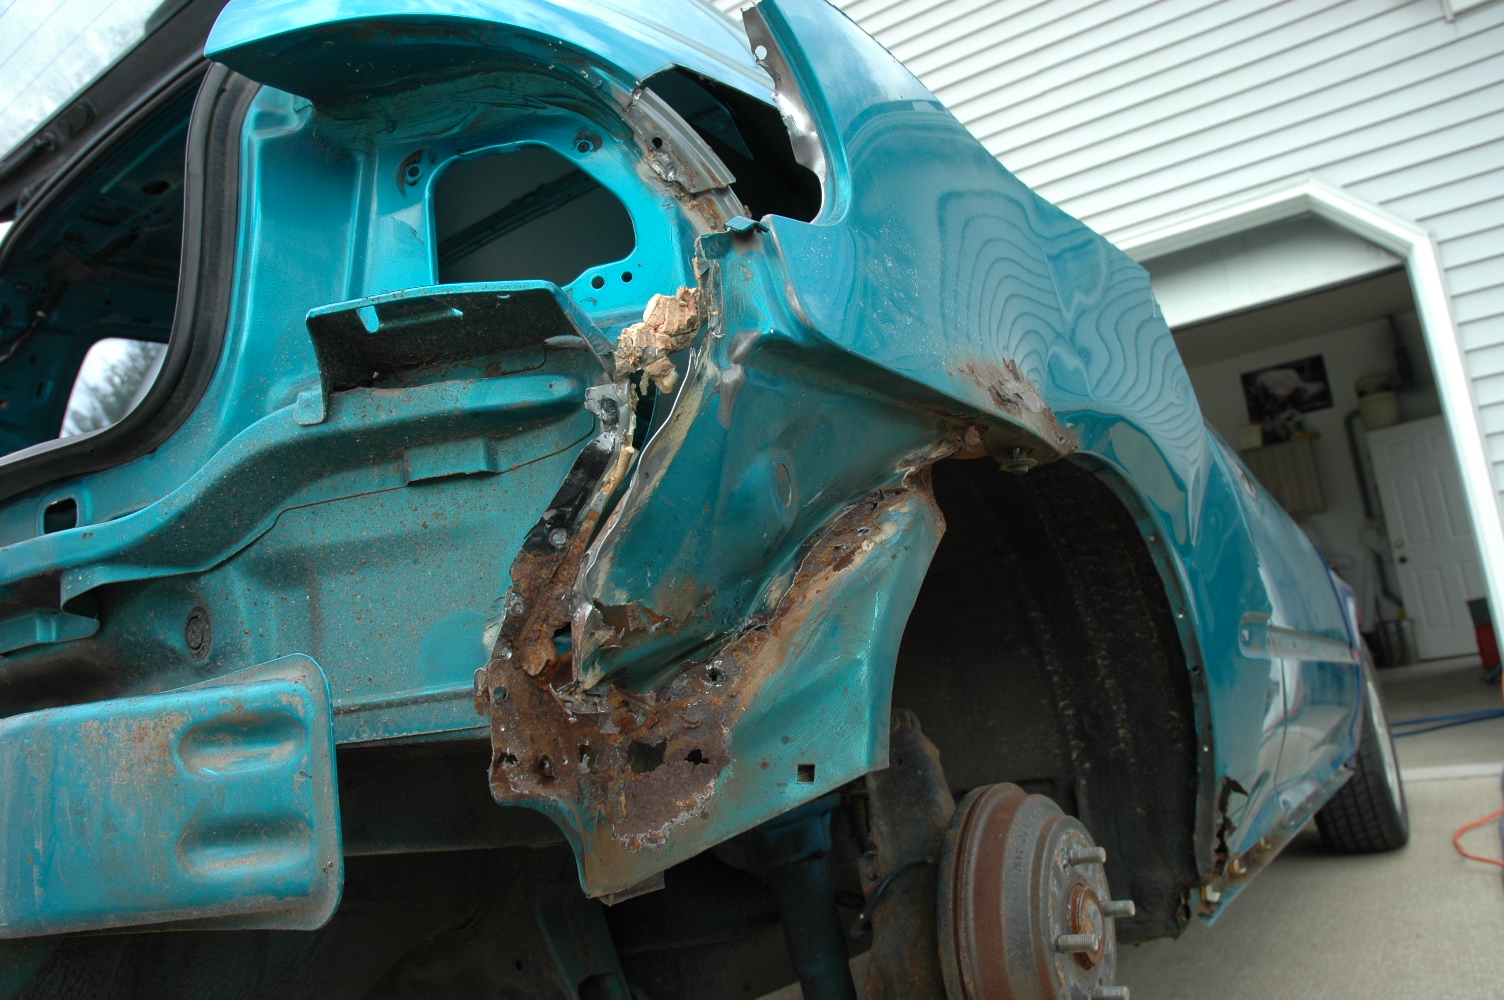
I have a 92 hatchback. I bought it with 100k miles in summer of 2000, it had only one tiny bubble in the paint on the passenger fender. In fall of 2005 and 177k mi the body wasn’t so pretty. The car has always been driven in winters. I love how the car handles, so I decided to fix the body. I had many of the tools, or was able to borrow them.
I bought a Lincoln SP135 MIG welder & accessories which would pay for itself on this job. ($430 shipped brand new from ebay)
A compressor & air tools made life easier too. A cutoff tool, angle die grinder, and 5″ sander were used. The sander wasn’t as nessacery though.
I also used an electric 4.5″ grinder and drill, both of which are needed. The drill is used to drill out the spot welds so have some sharp bits. Also have a couple wire wheel attachments for the drill to remove the factory body sealer. Other tools were vise grips, c-clamps, quick grip clamps, and some special clamps to hold on the panel for welding (although I found it easier to hold the panel by hand to tack it on)
DISCLAIMER: I’m not liable for anything you do to injure yourself. Always wear eye protection and other needed pretection when cutting metal and welding. Always use jackstands! I am by no means an expert at body work, my civic was my first attempt at doing so. There may be a better way to do this, but I created this page to show how an average joe can do this by themselves, in their driveway. Do not attempt to do this yourself if you are not 100% confident. Rather than injure yourself or mess up your repair, it may be worth your time/$$ to pay a professional to repair your honda.
Companies now offer the lower rocker panels as well, so you won’t have to fabricate your own out of sheet metal like I did. That’s going to save a ton of time!
Let’s get started!
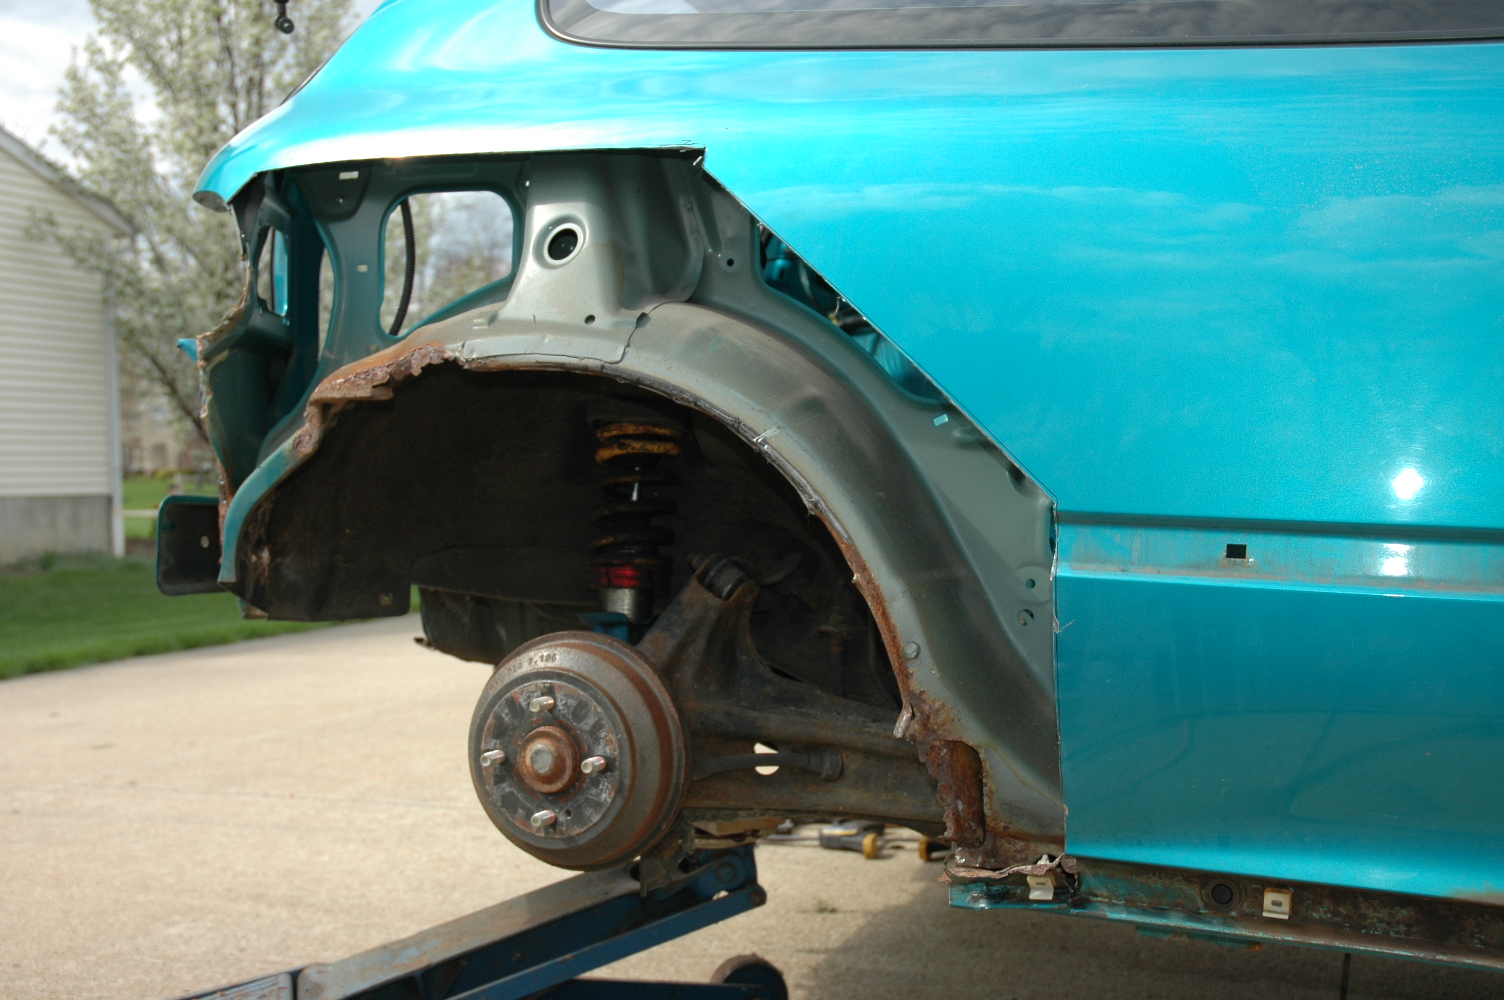
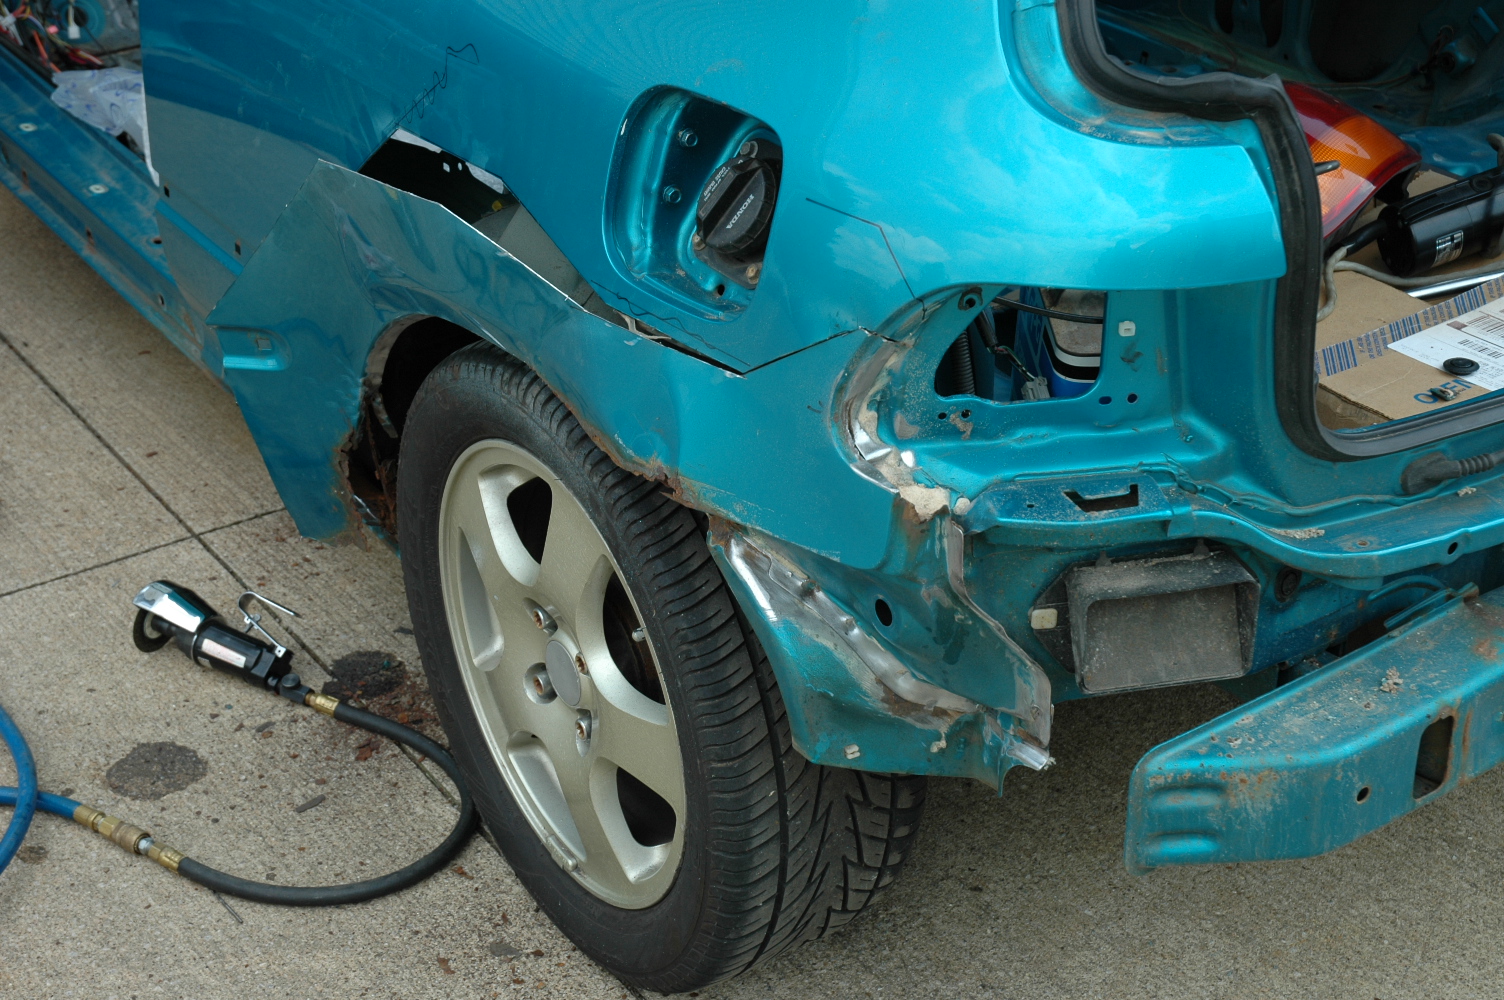
Remove the rear bumper, tail lights, tail gate/trunk, side skirts and side molding if you have it. Pull out your interior plastic panel. Lift the car & support with jack stands, then remove the rear wheel.
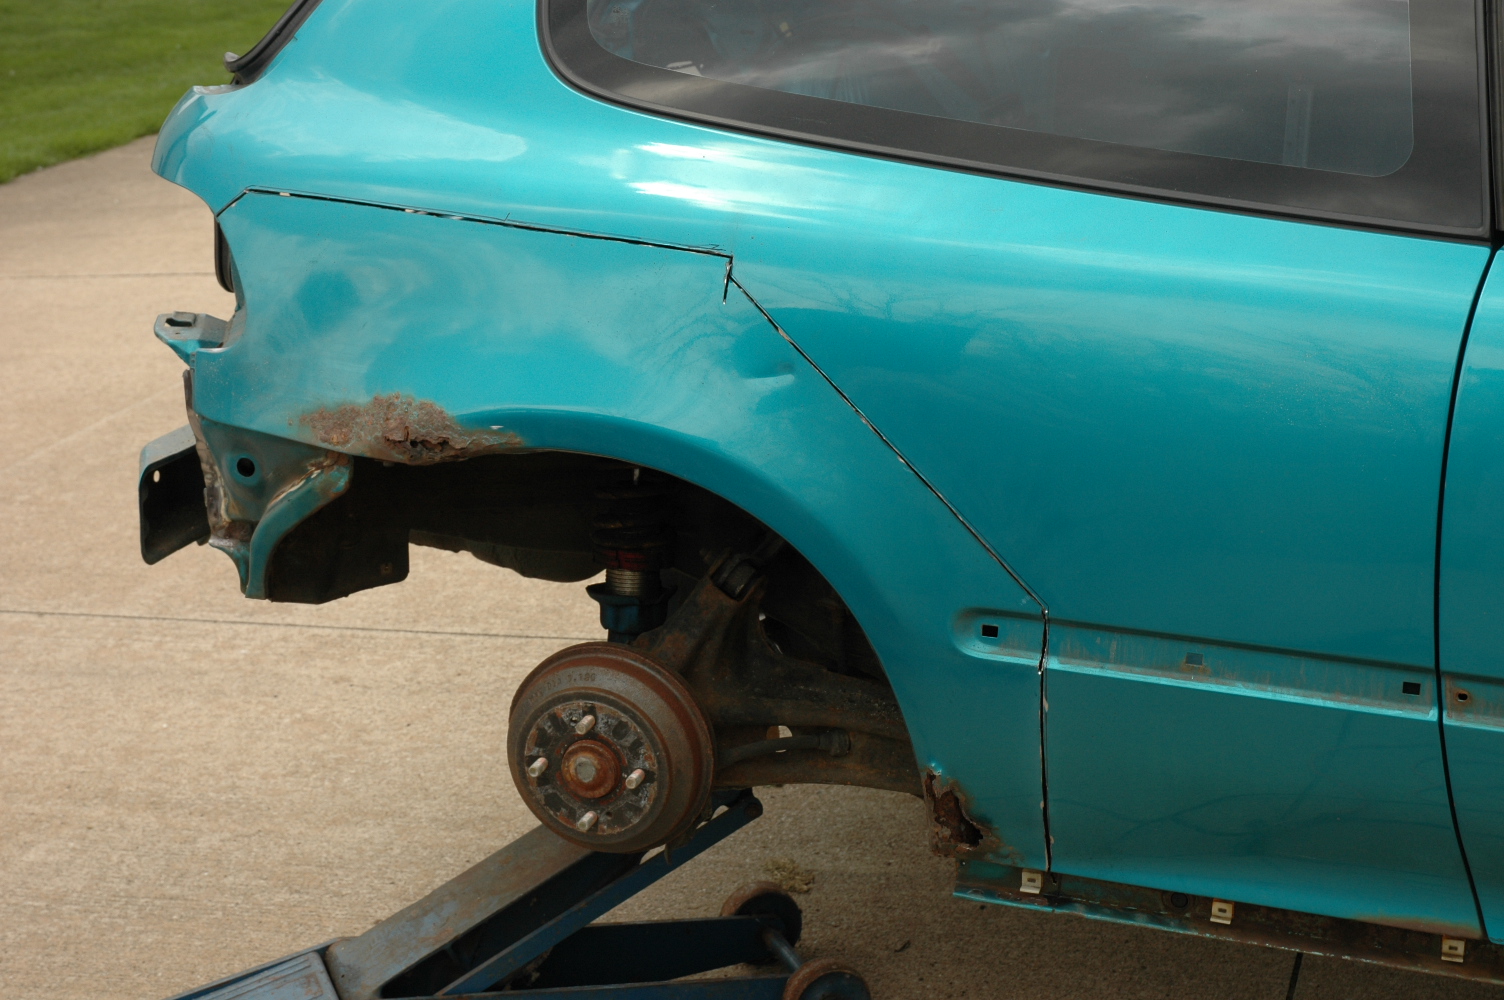
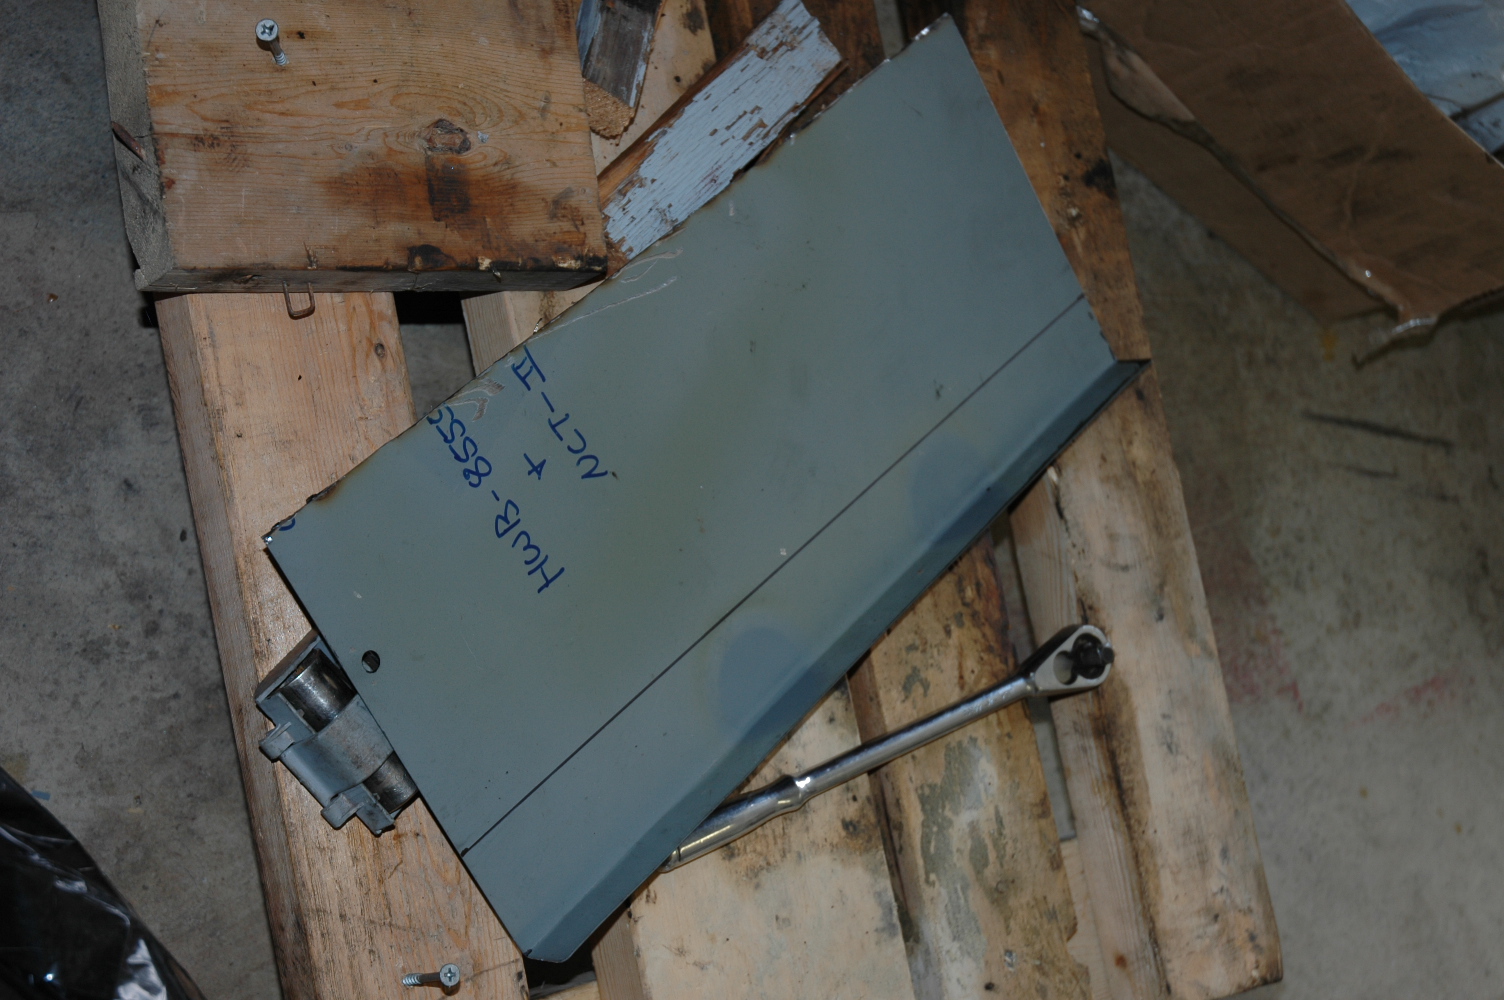
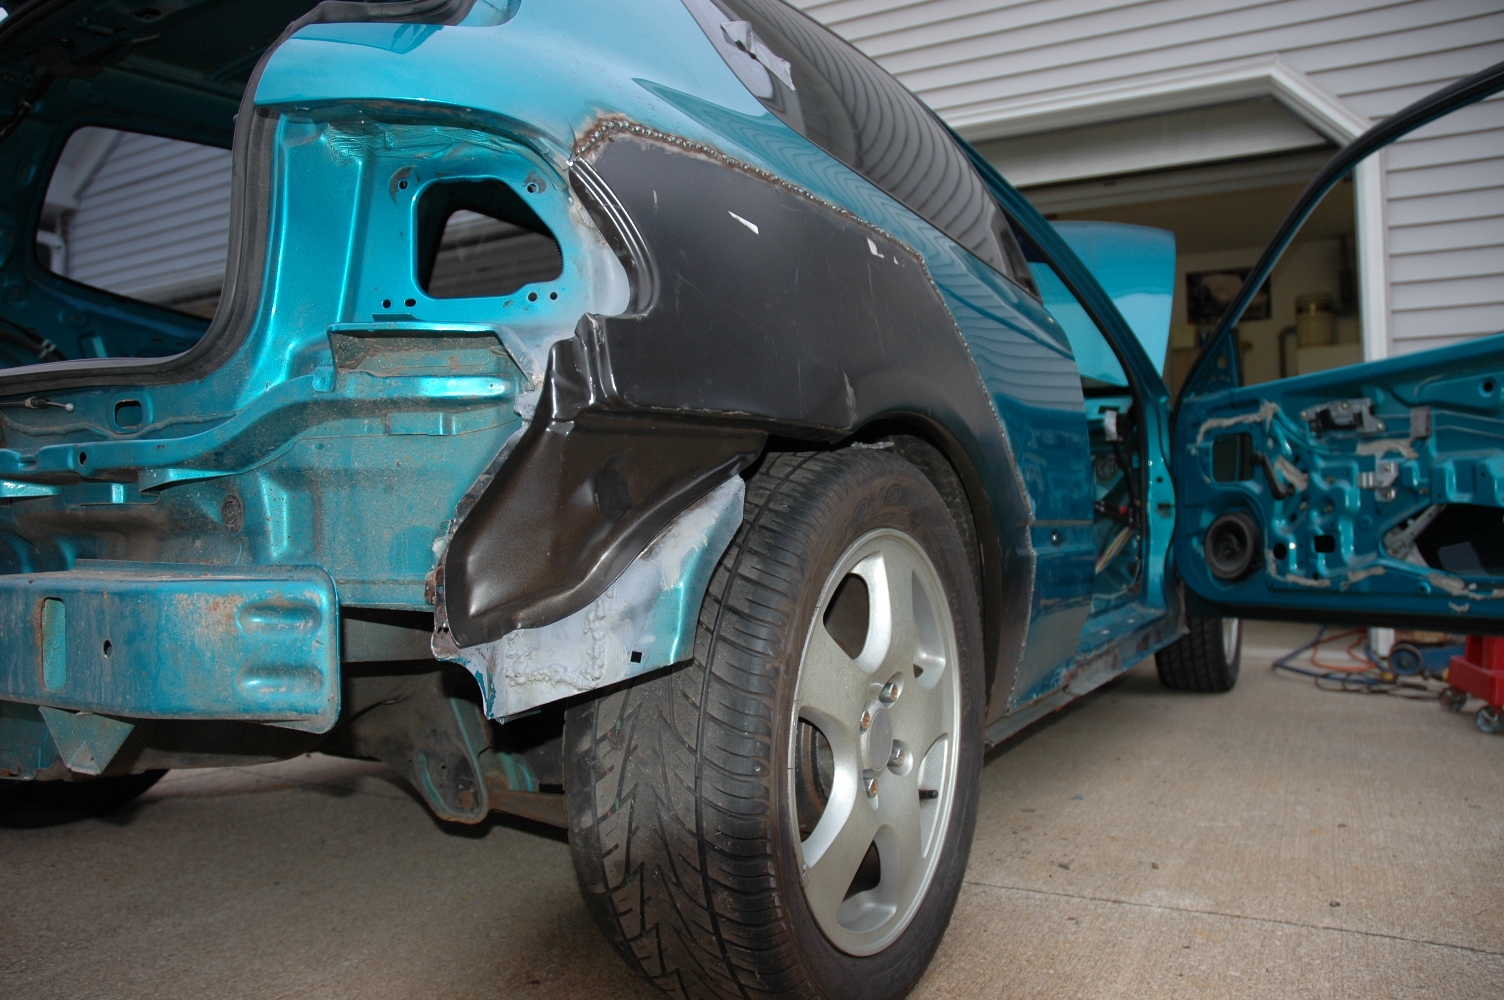
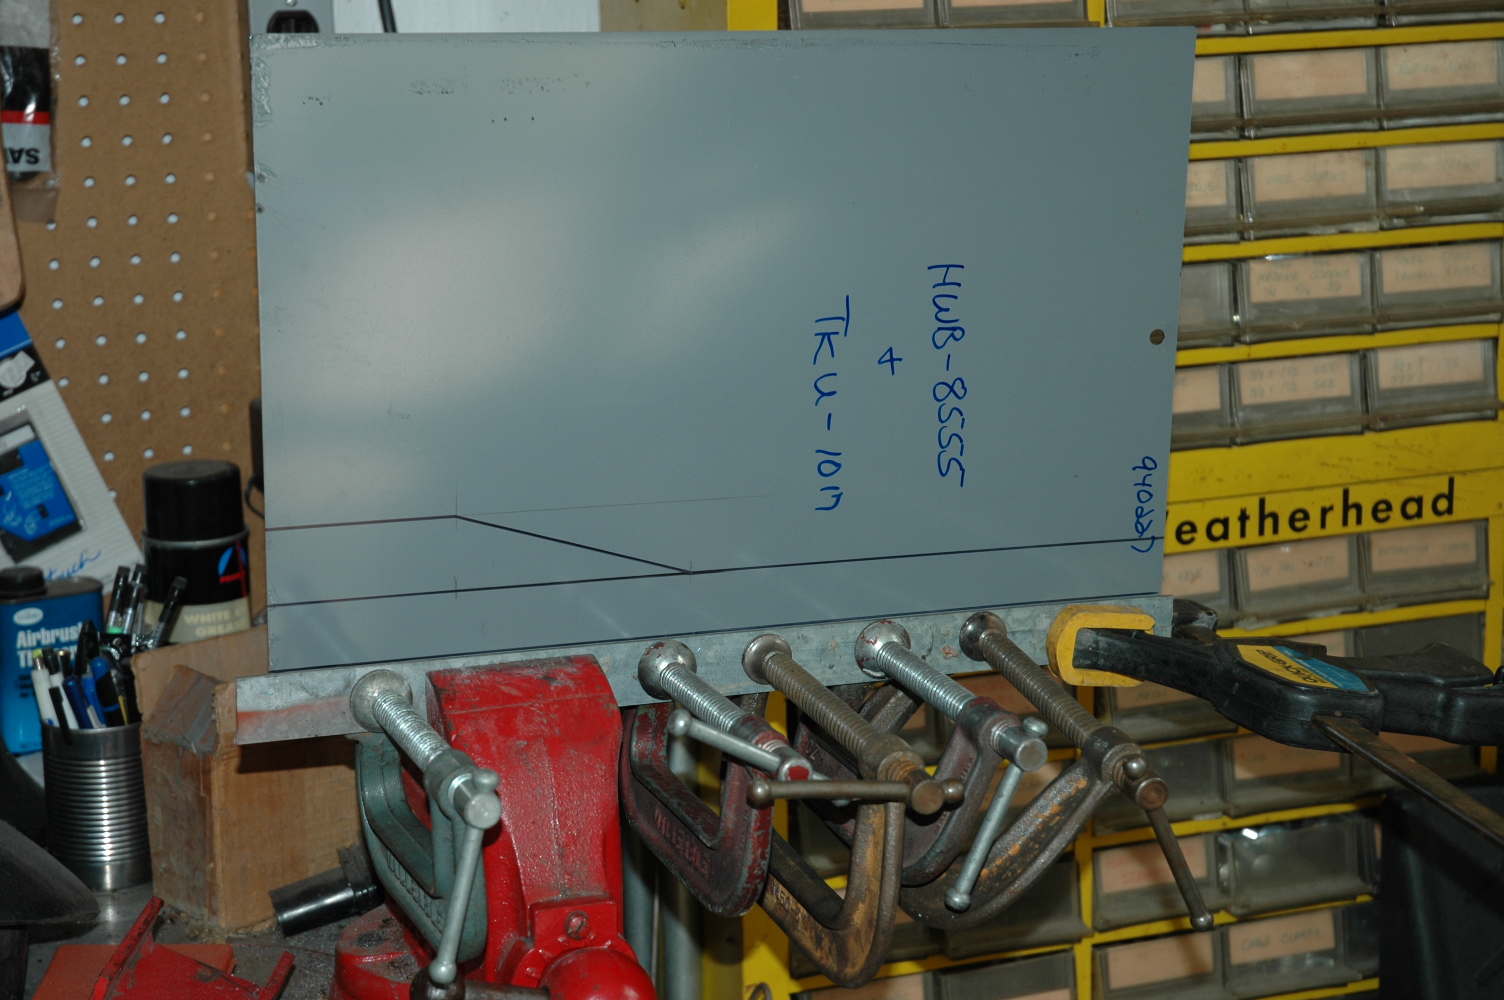
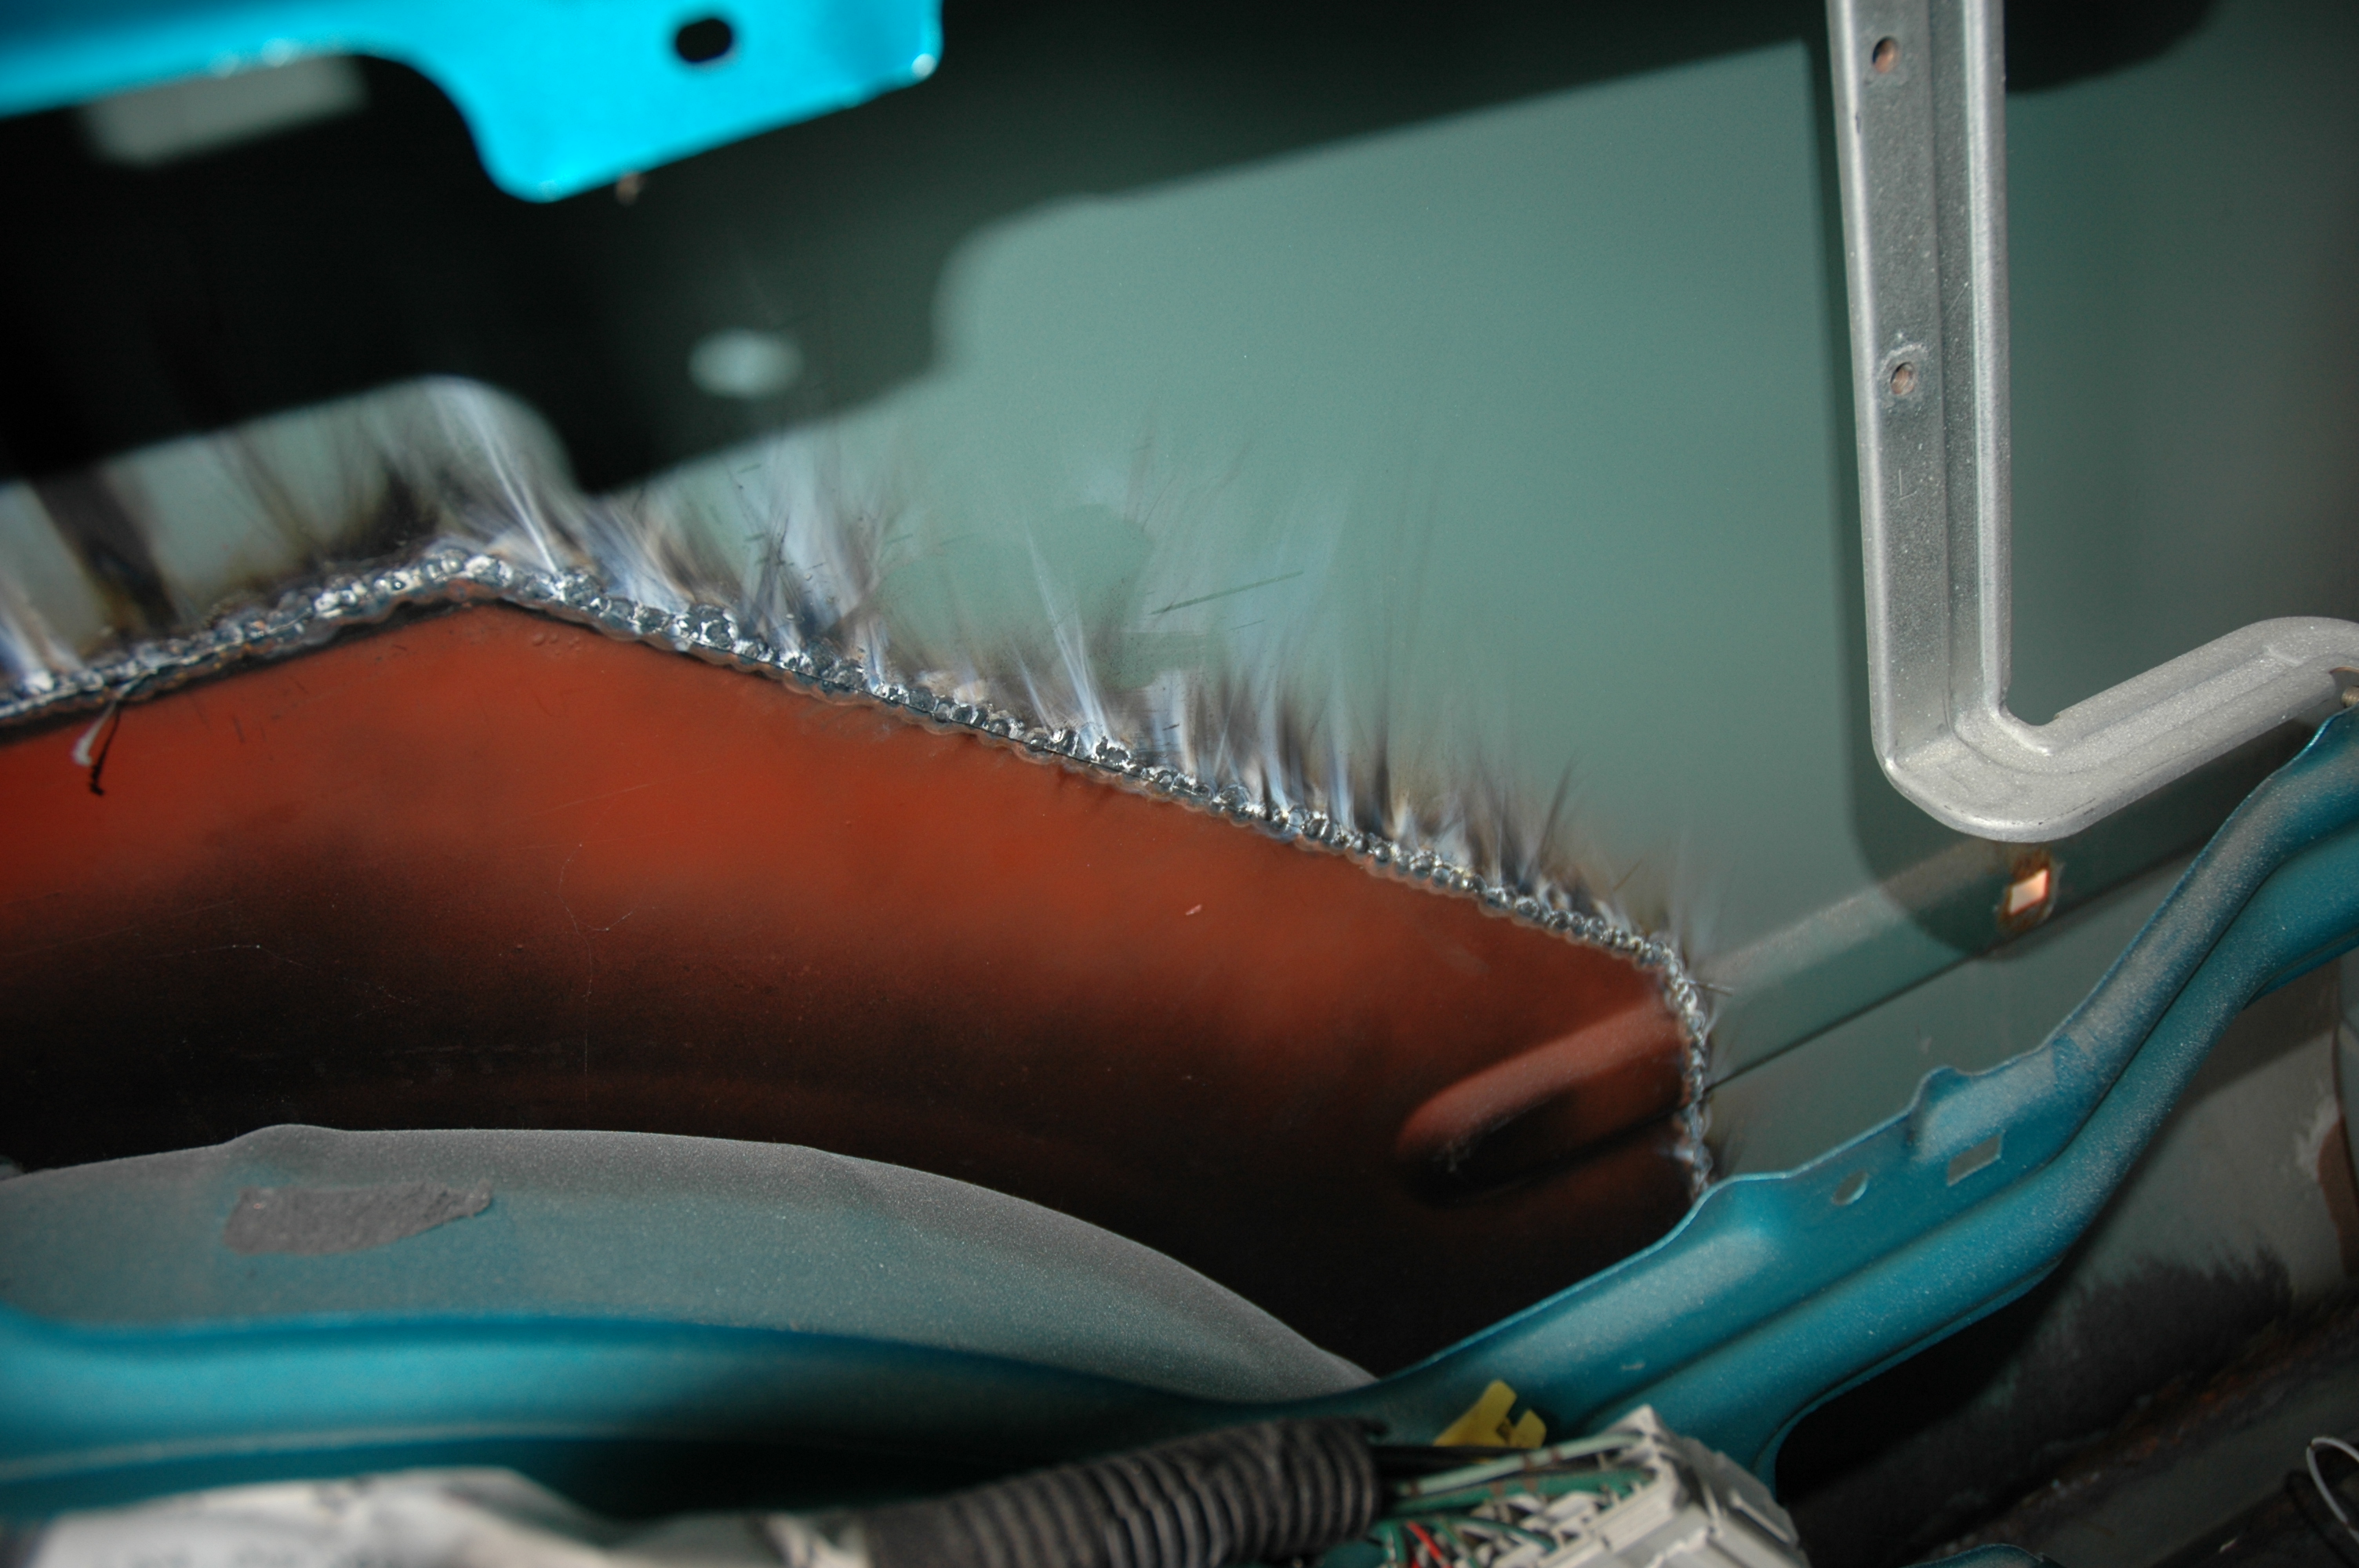
Using your new quarter panel, hold it to your car and use it as a template to trace. Remember it is better to not cut too much out than to go over and remove too much metal. It is always easier to remove metal than to add it! In the pic above, I have drawn the cut line with a sharpie marker and cut another 1/8″ outside that line using the air cutoff wheel.
Using the drill, attach a wire wheel to the end and brush the seams of the panel. Above you can see where the wire brush was used.
After removing all the body sealer, you can see the spot welds holding the panel to the body. Each spot weld must be drilled out (unless you’re lucky enough to have a spot weld remover.)
The drilling takes a while, keep a cup of oil near so you can frequently dip the tip of the bit in the oil to keep it cool

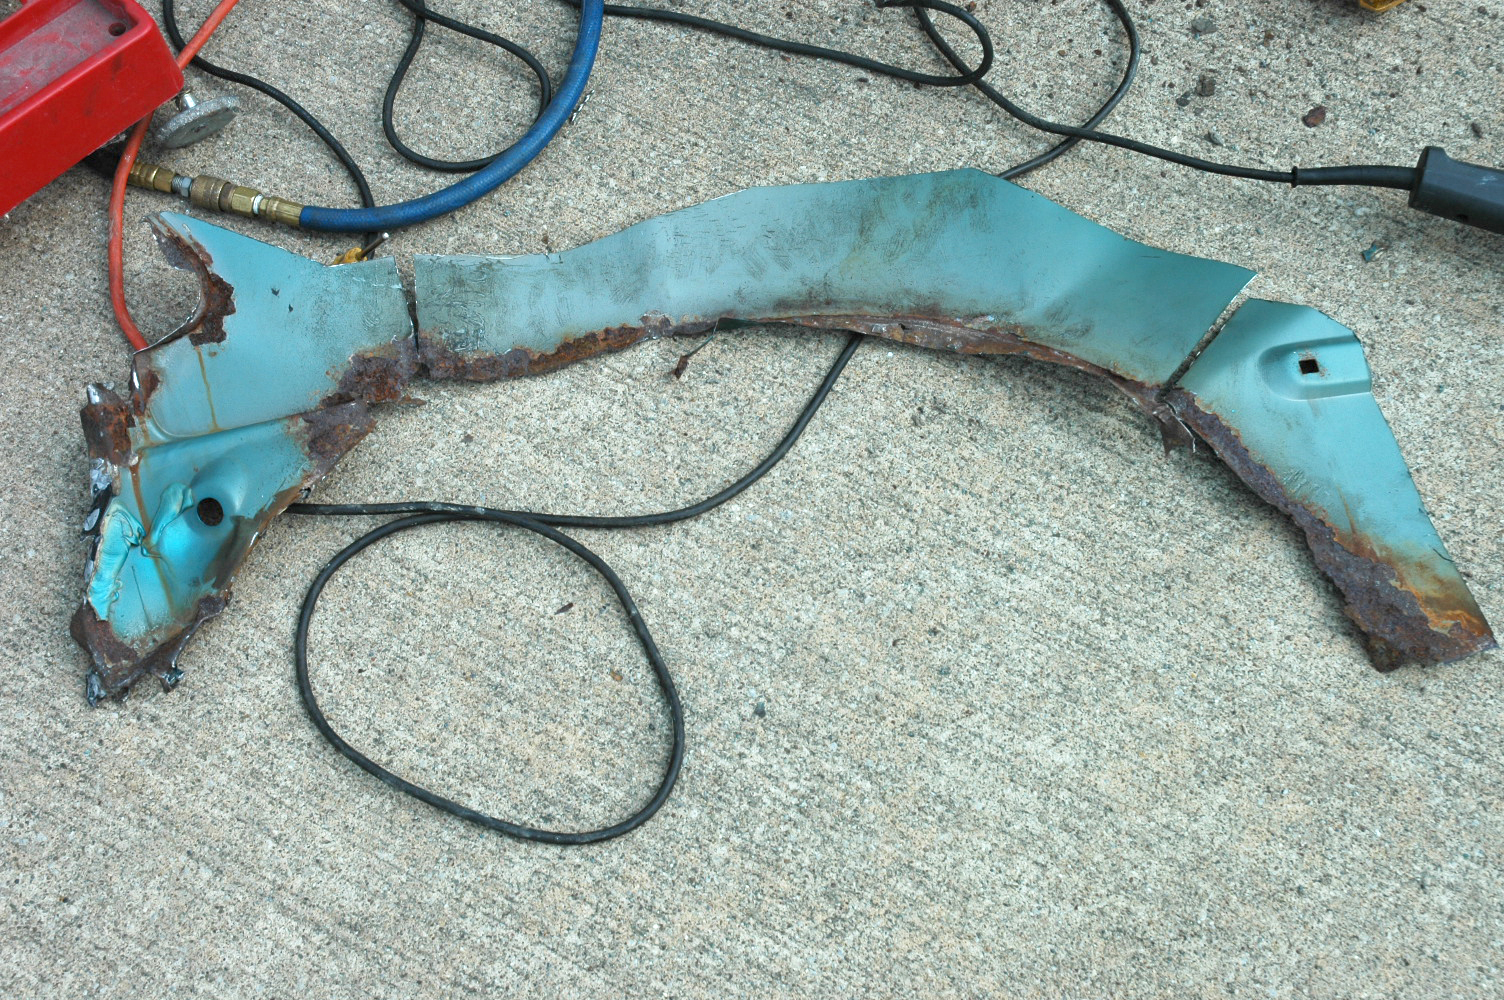
After drilling them ALL (there’s always a couple you don’t see at first) pull the panel from the body.
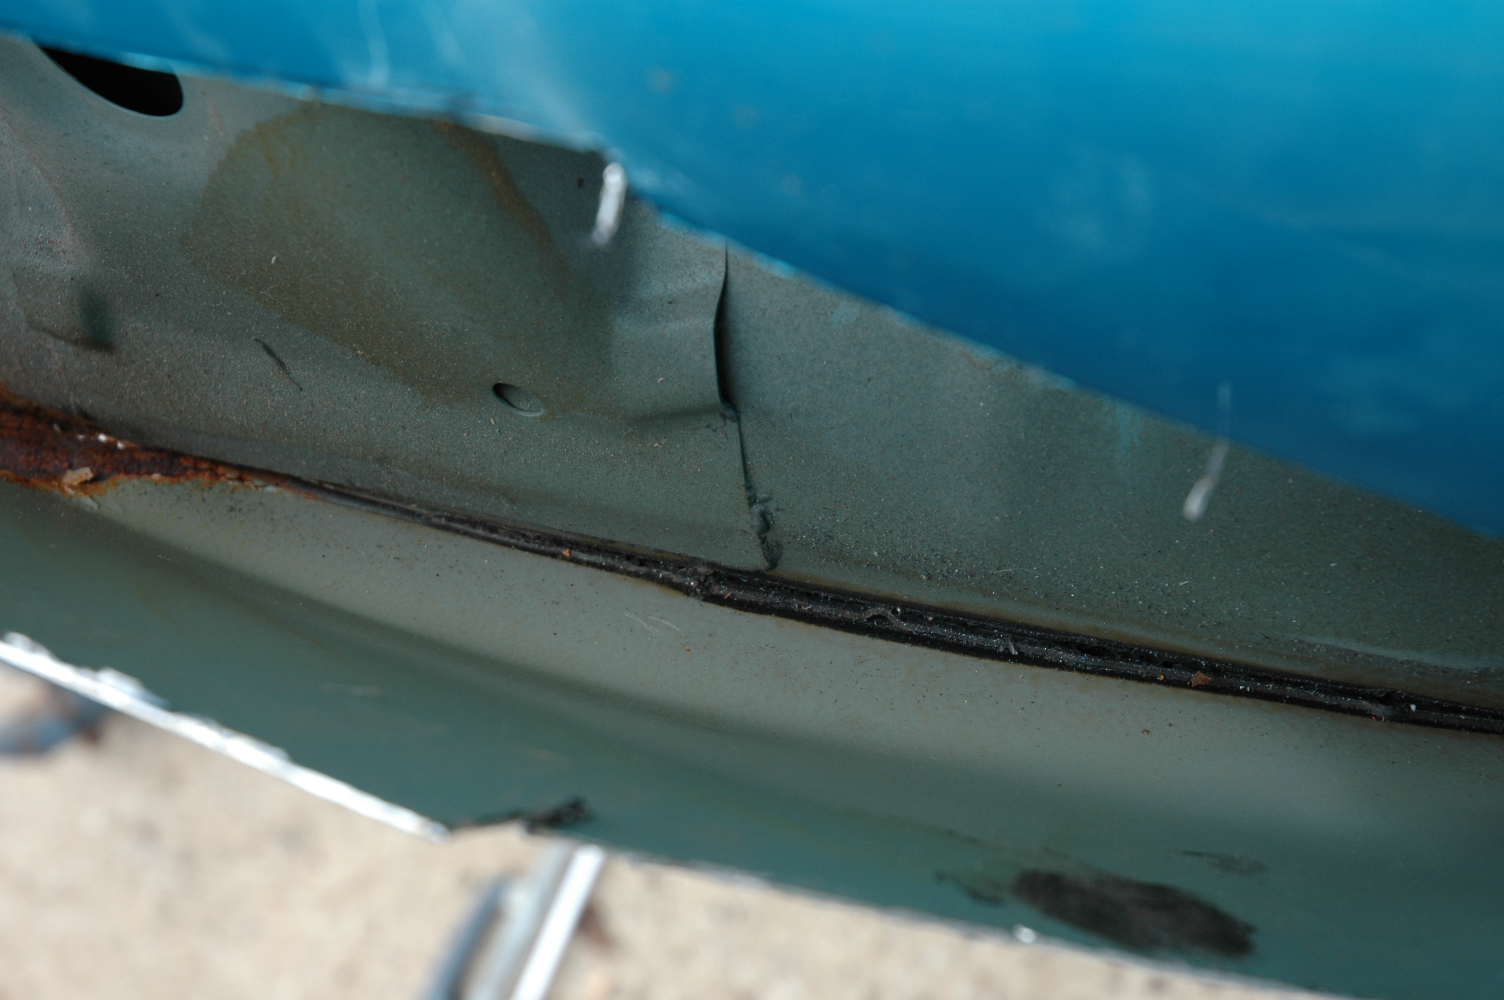
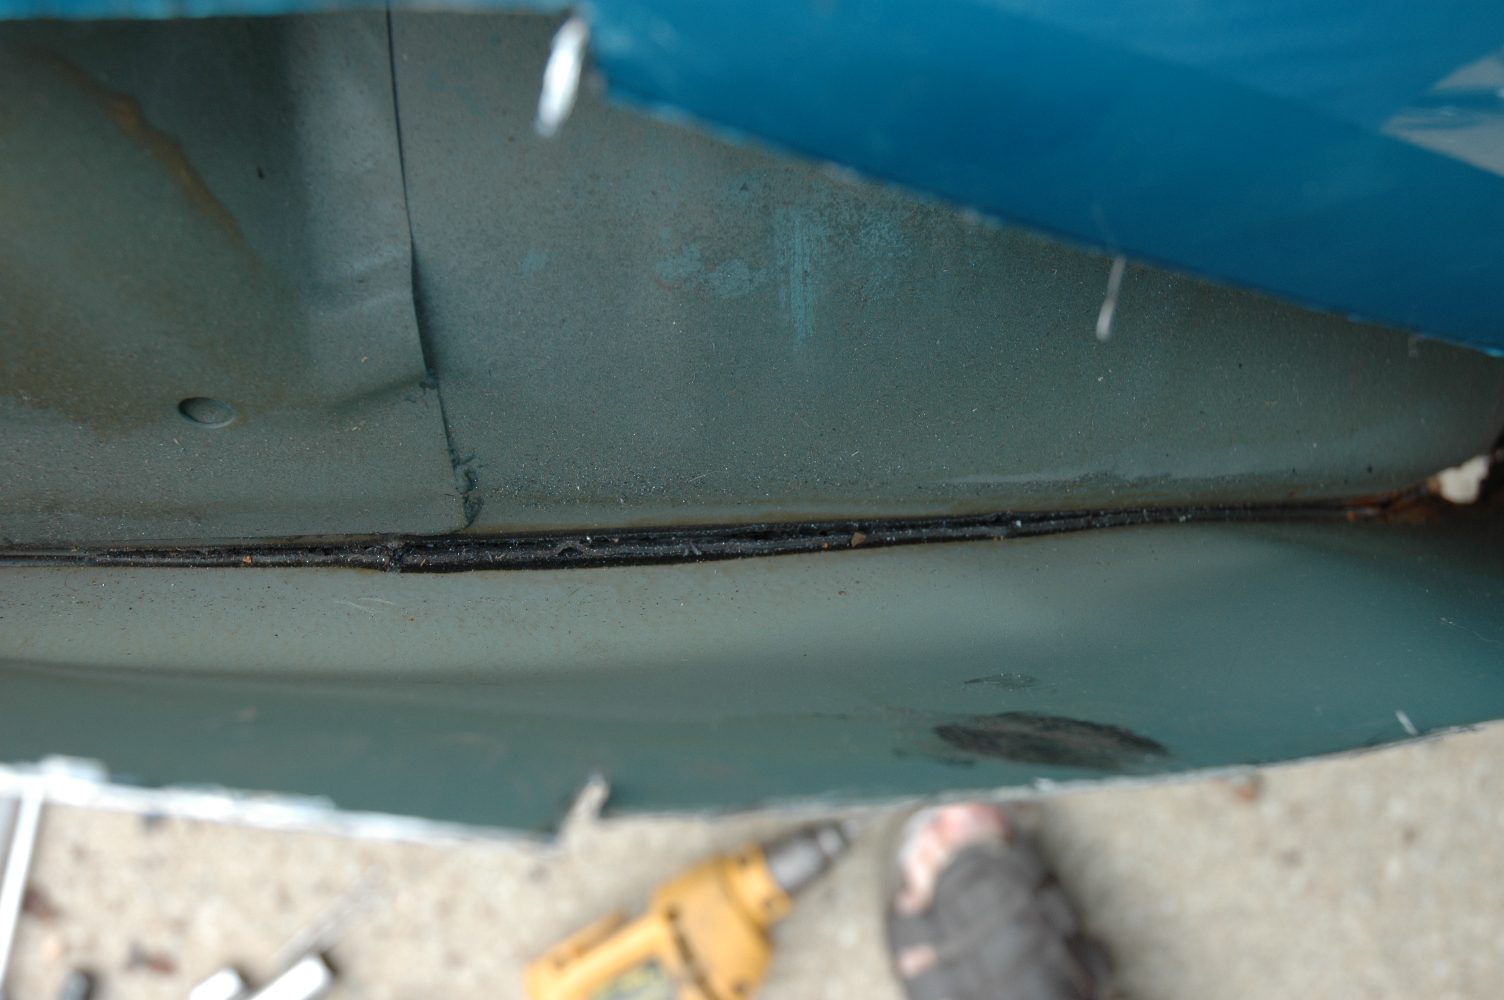
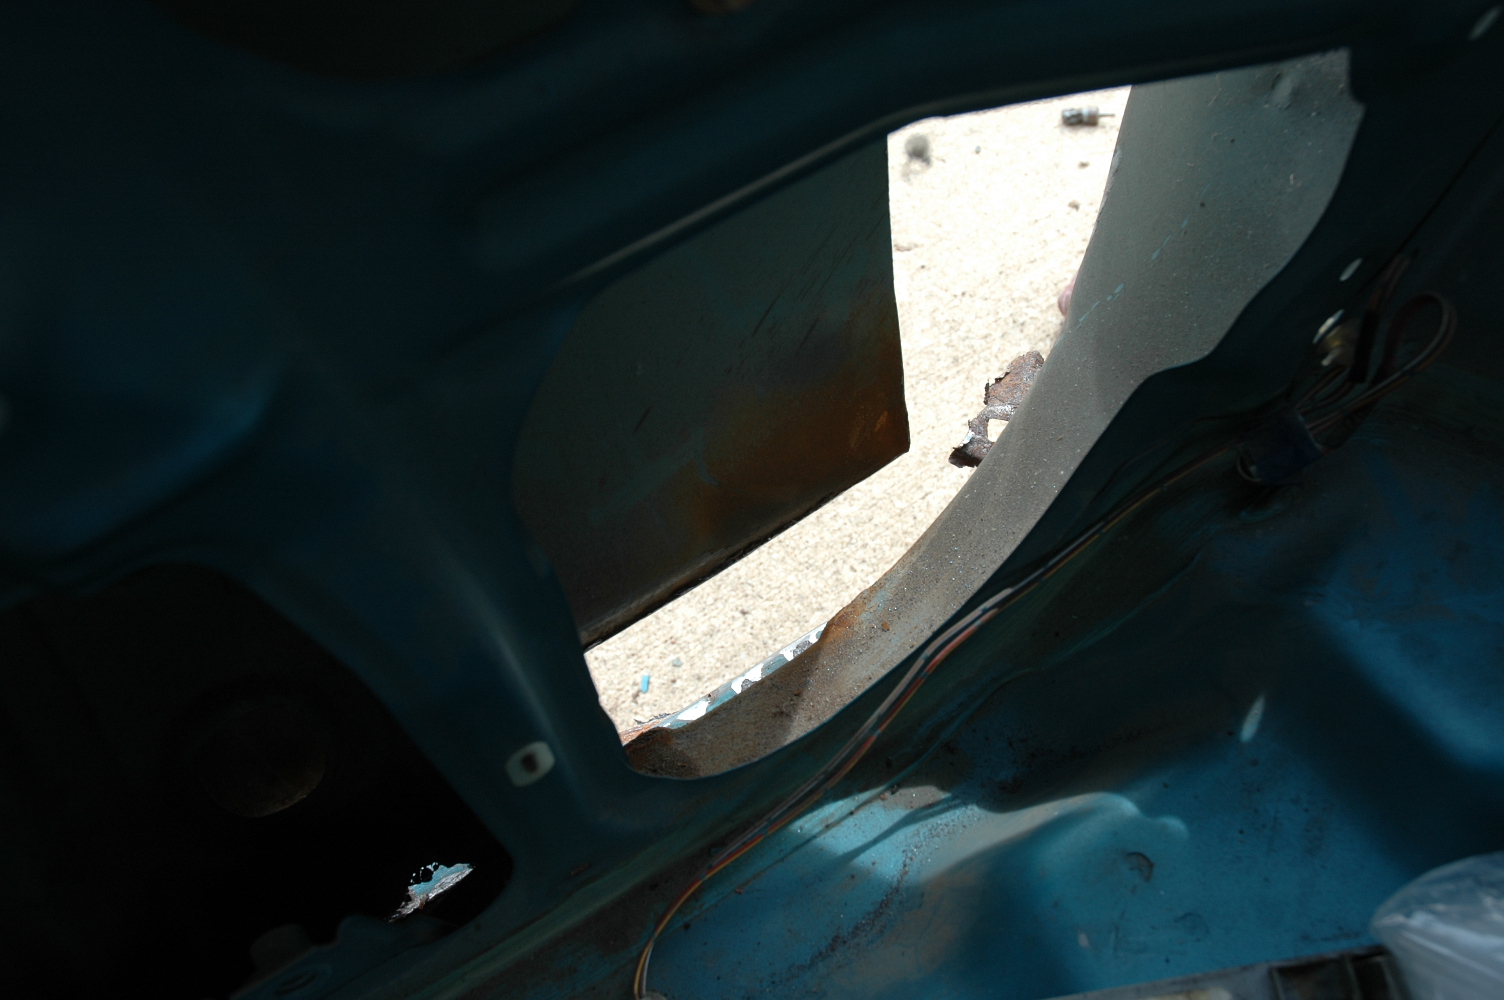
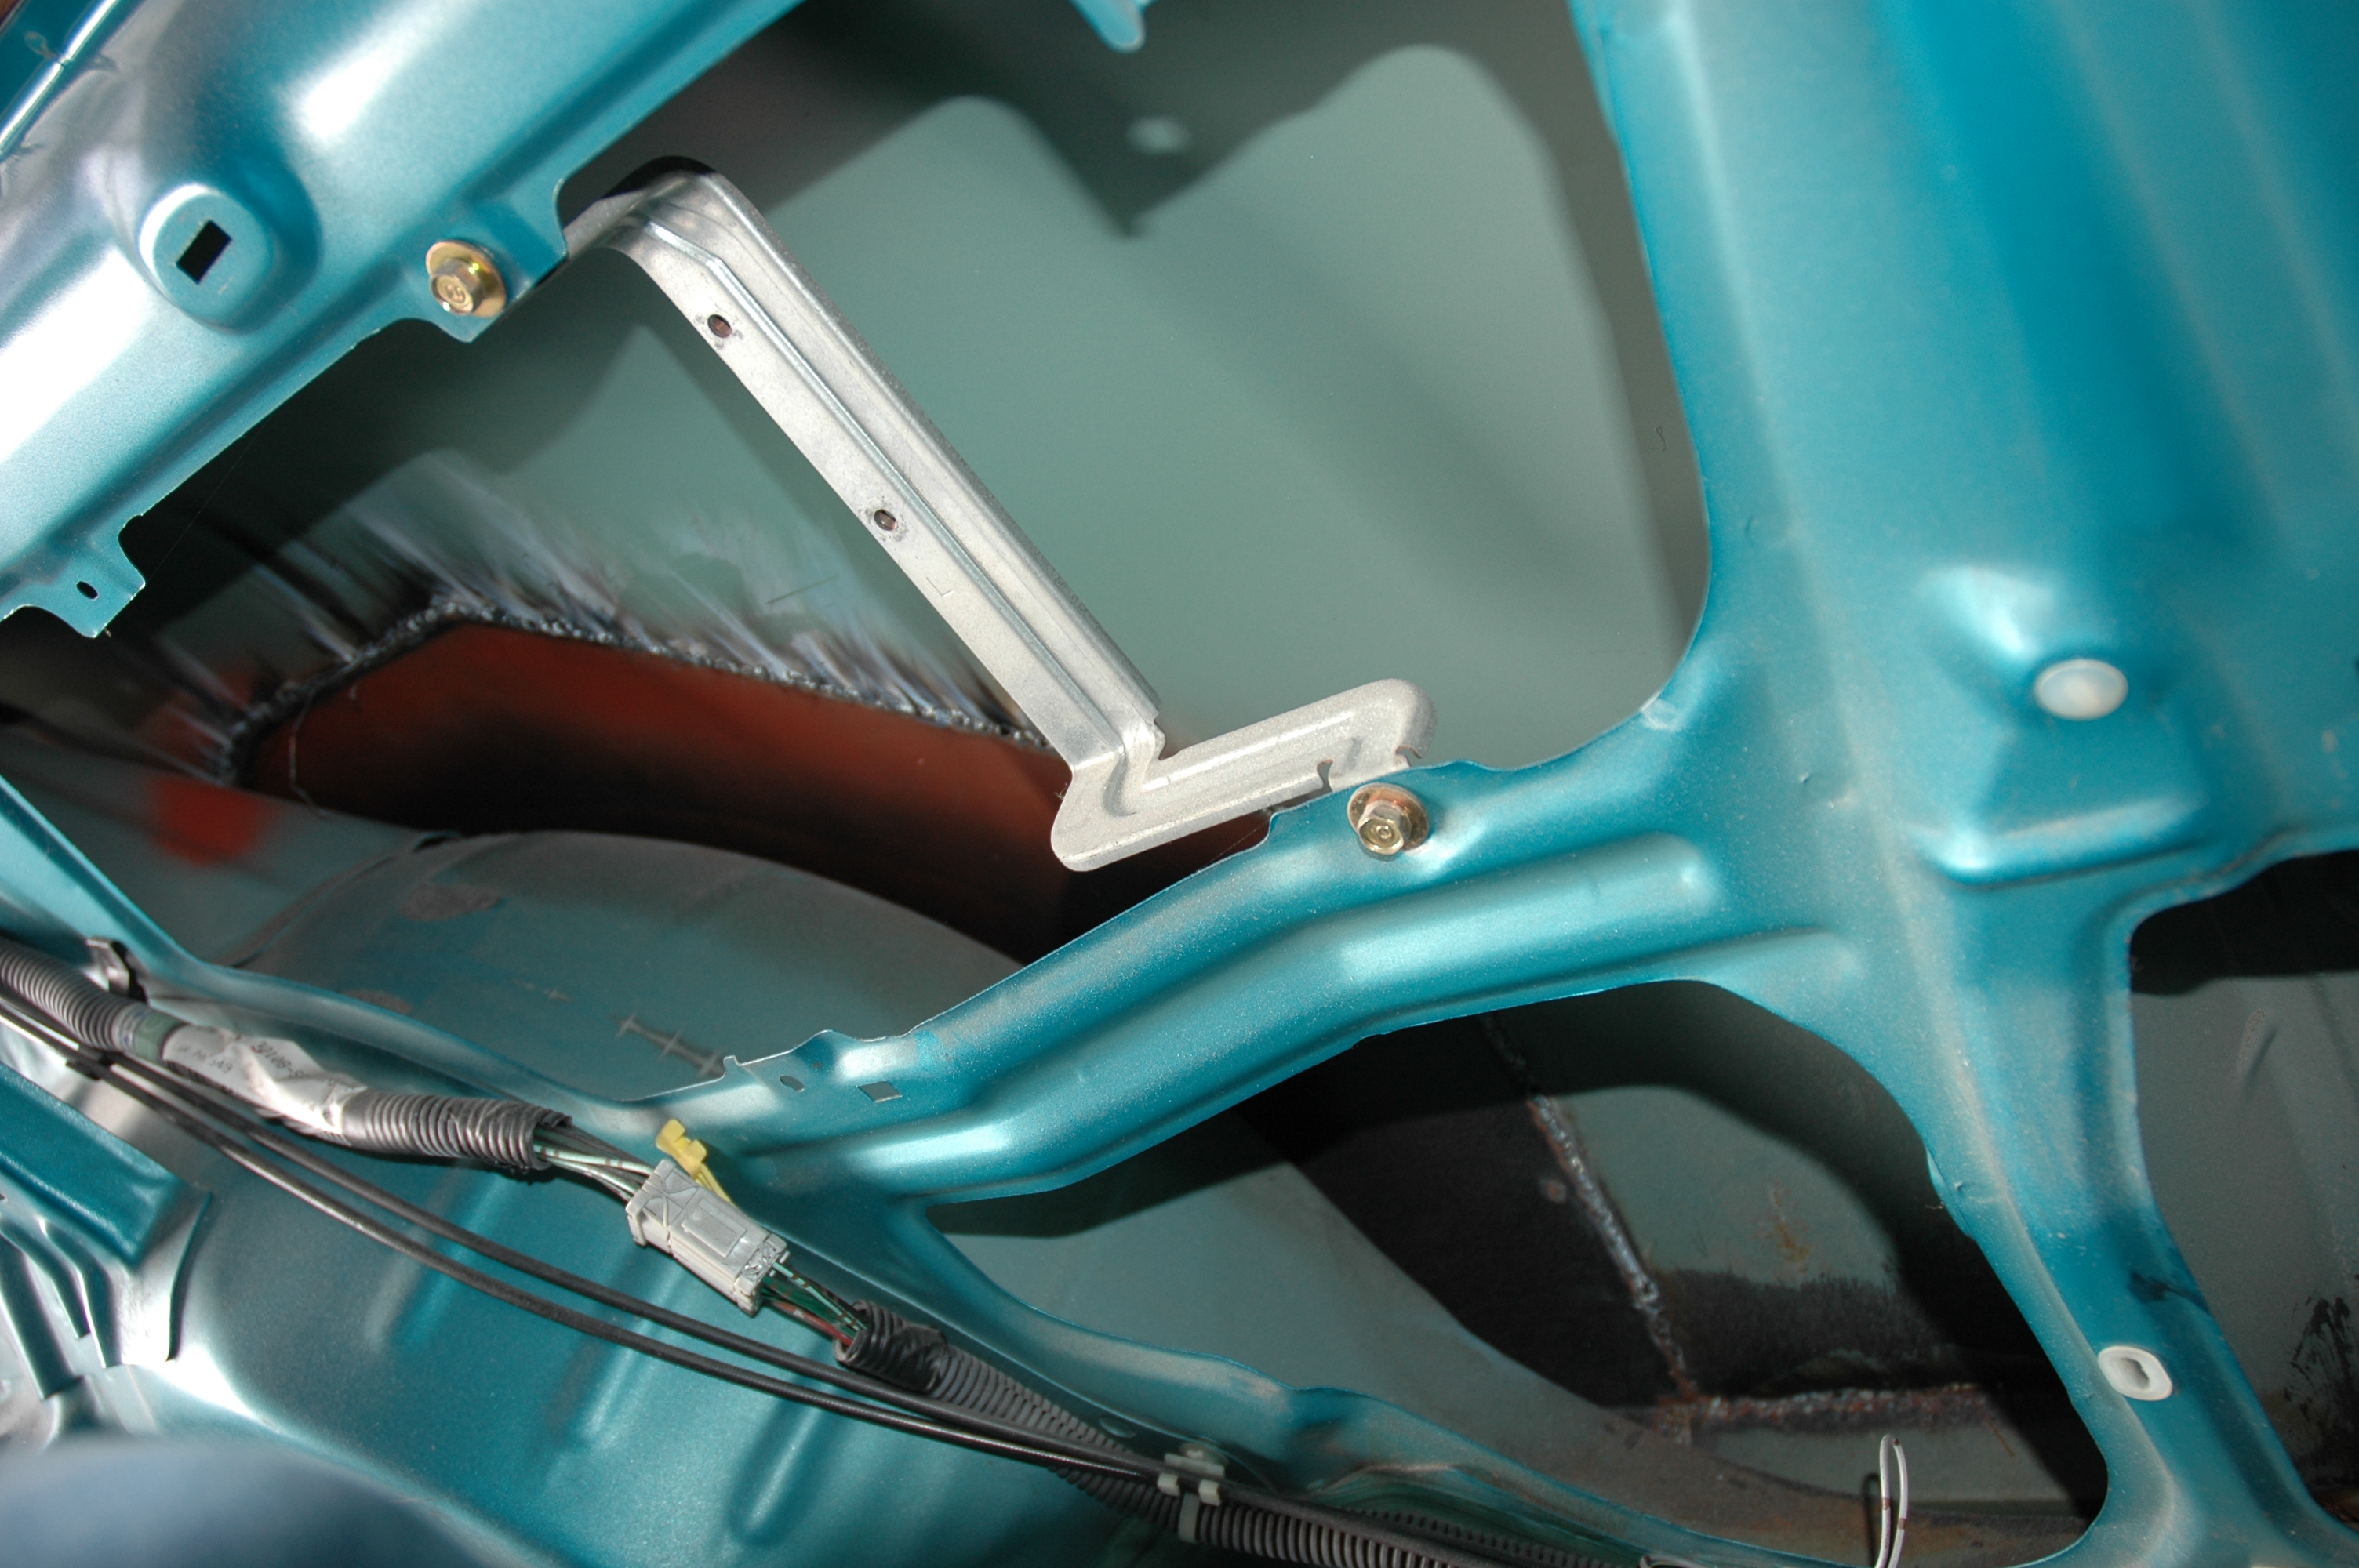
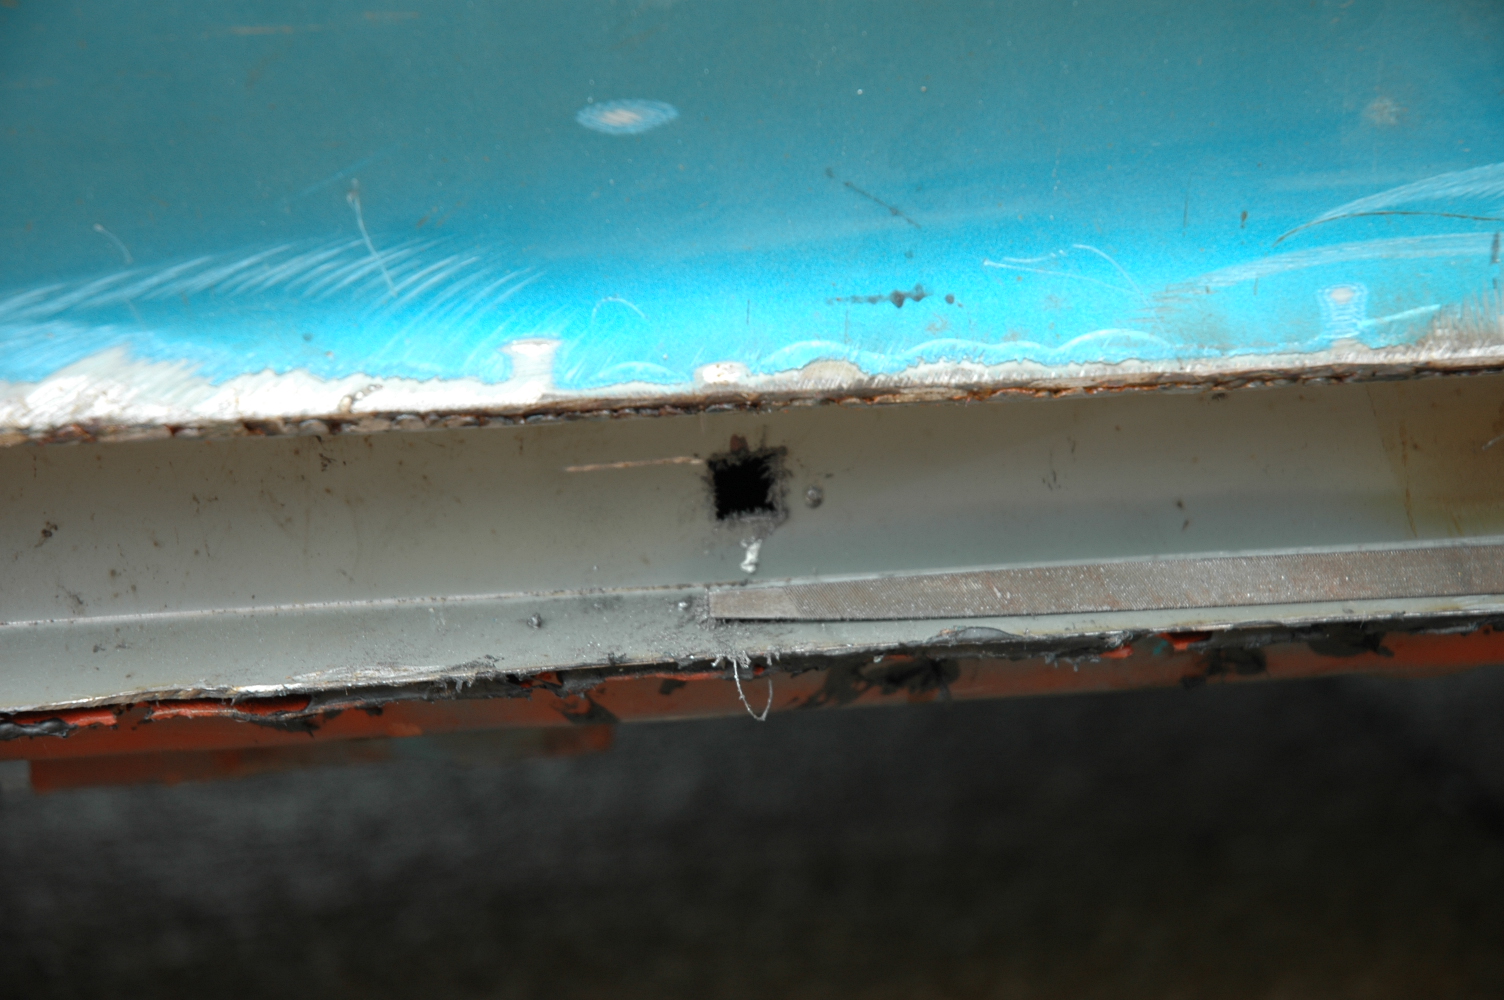
This pic was taken looking down into the fender well from the top where the cut was made. That black strip is the seal that honda put between the quarter panel and inner fender. Guess it wasn’t enough.
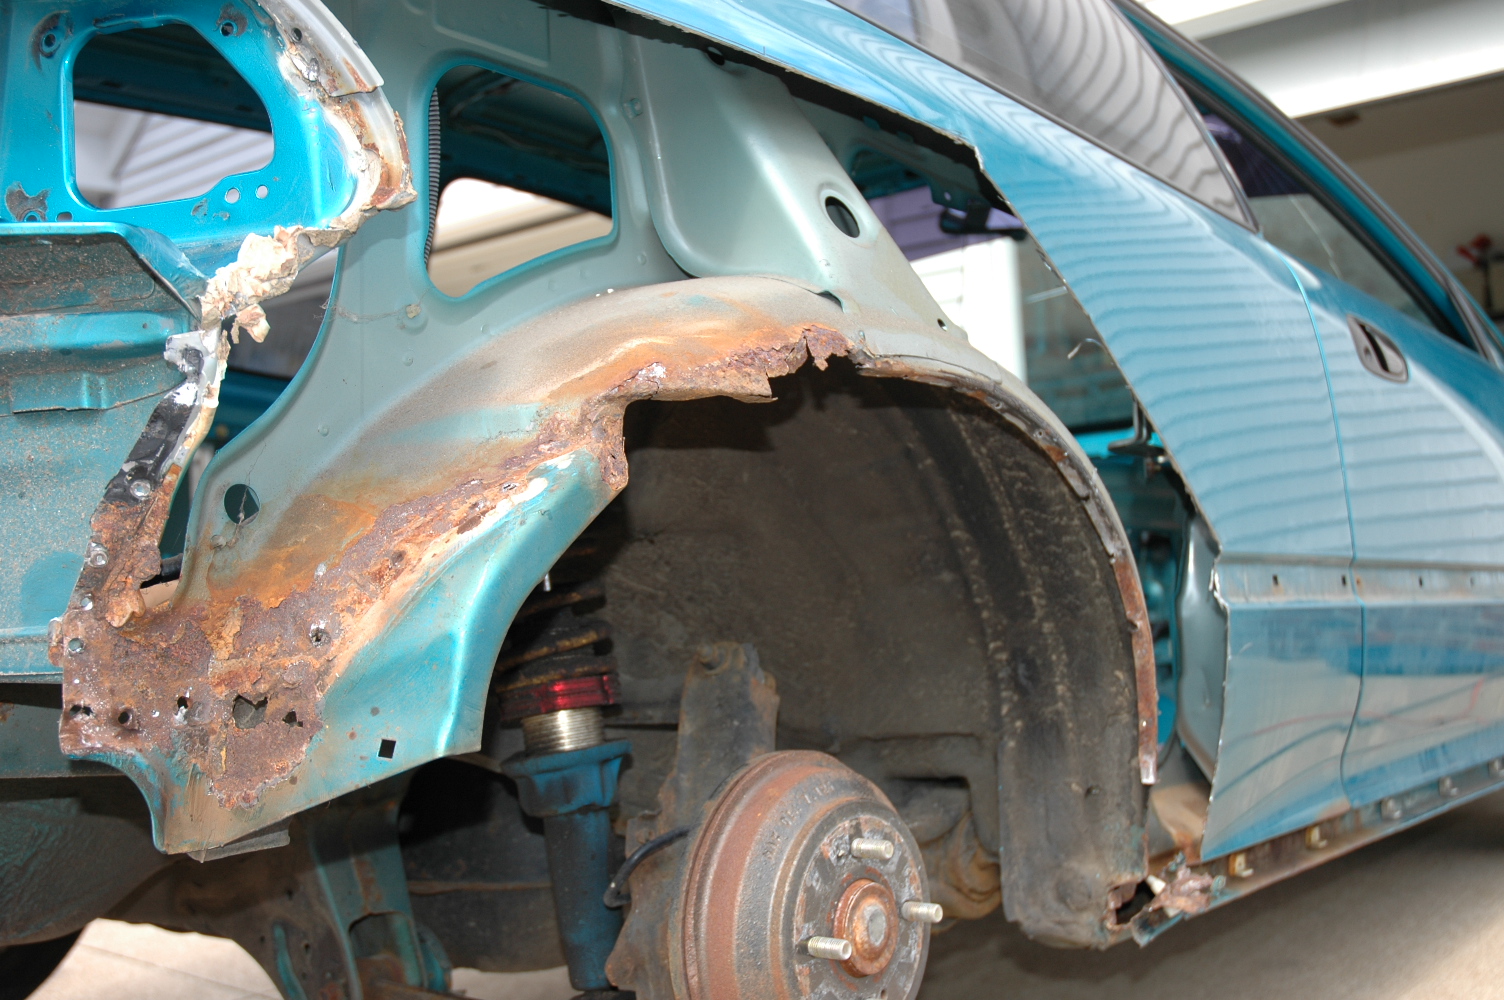

There are more spot welds to drill on the fender lip. If your rust was bad like mine, some of them will be rusted through. After you drill these, there are a few more on the bottom holding the panel to the rocker panel. Then you can pull the old quarter panel off.

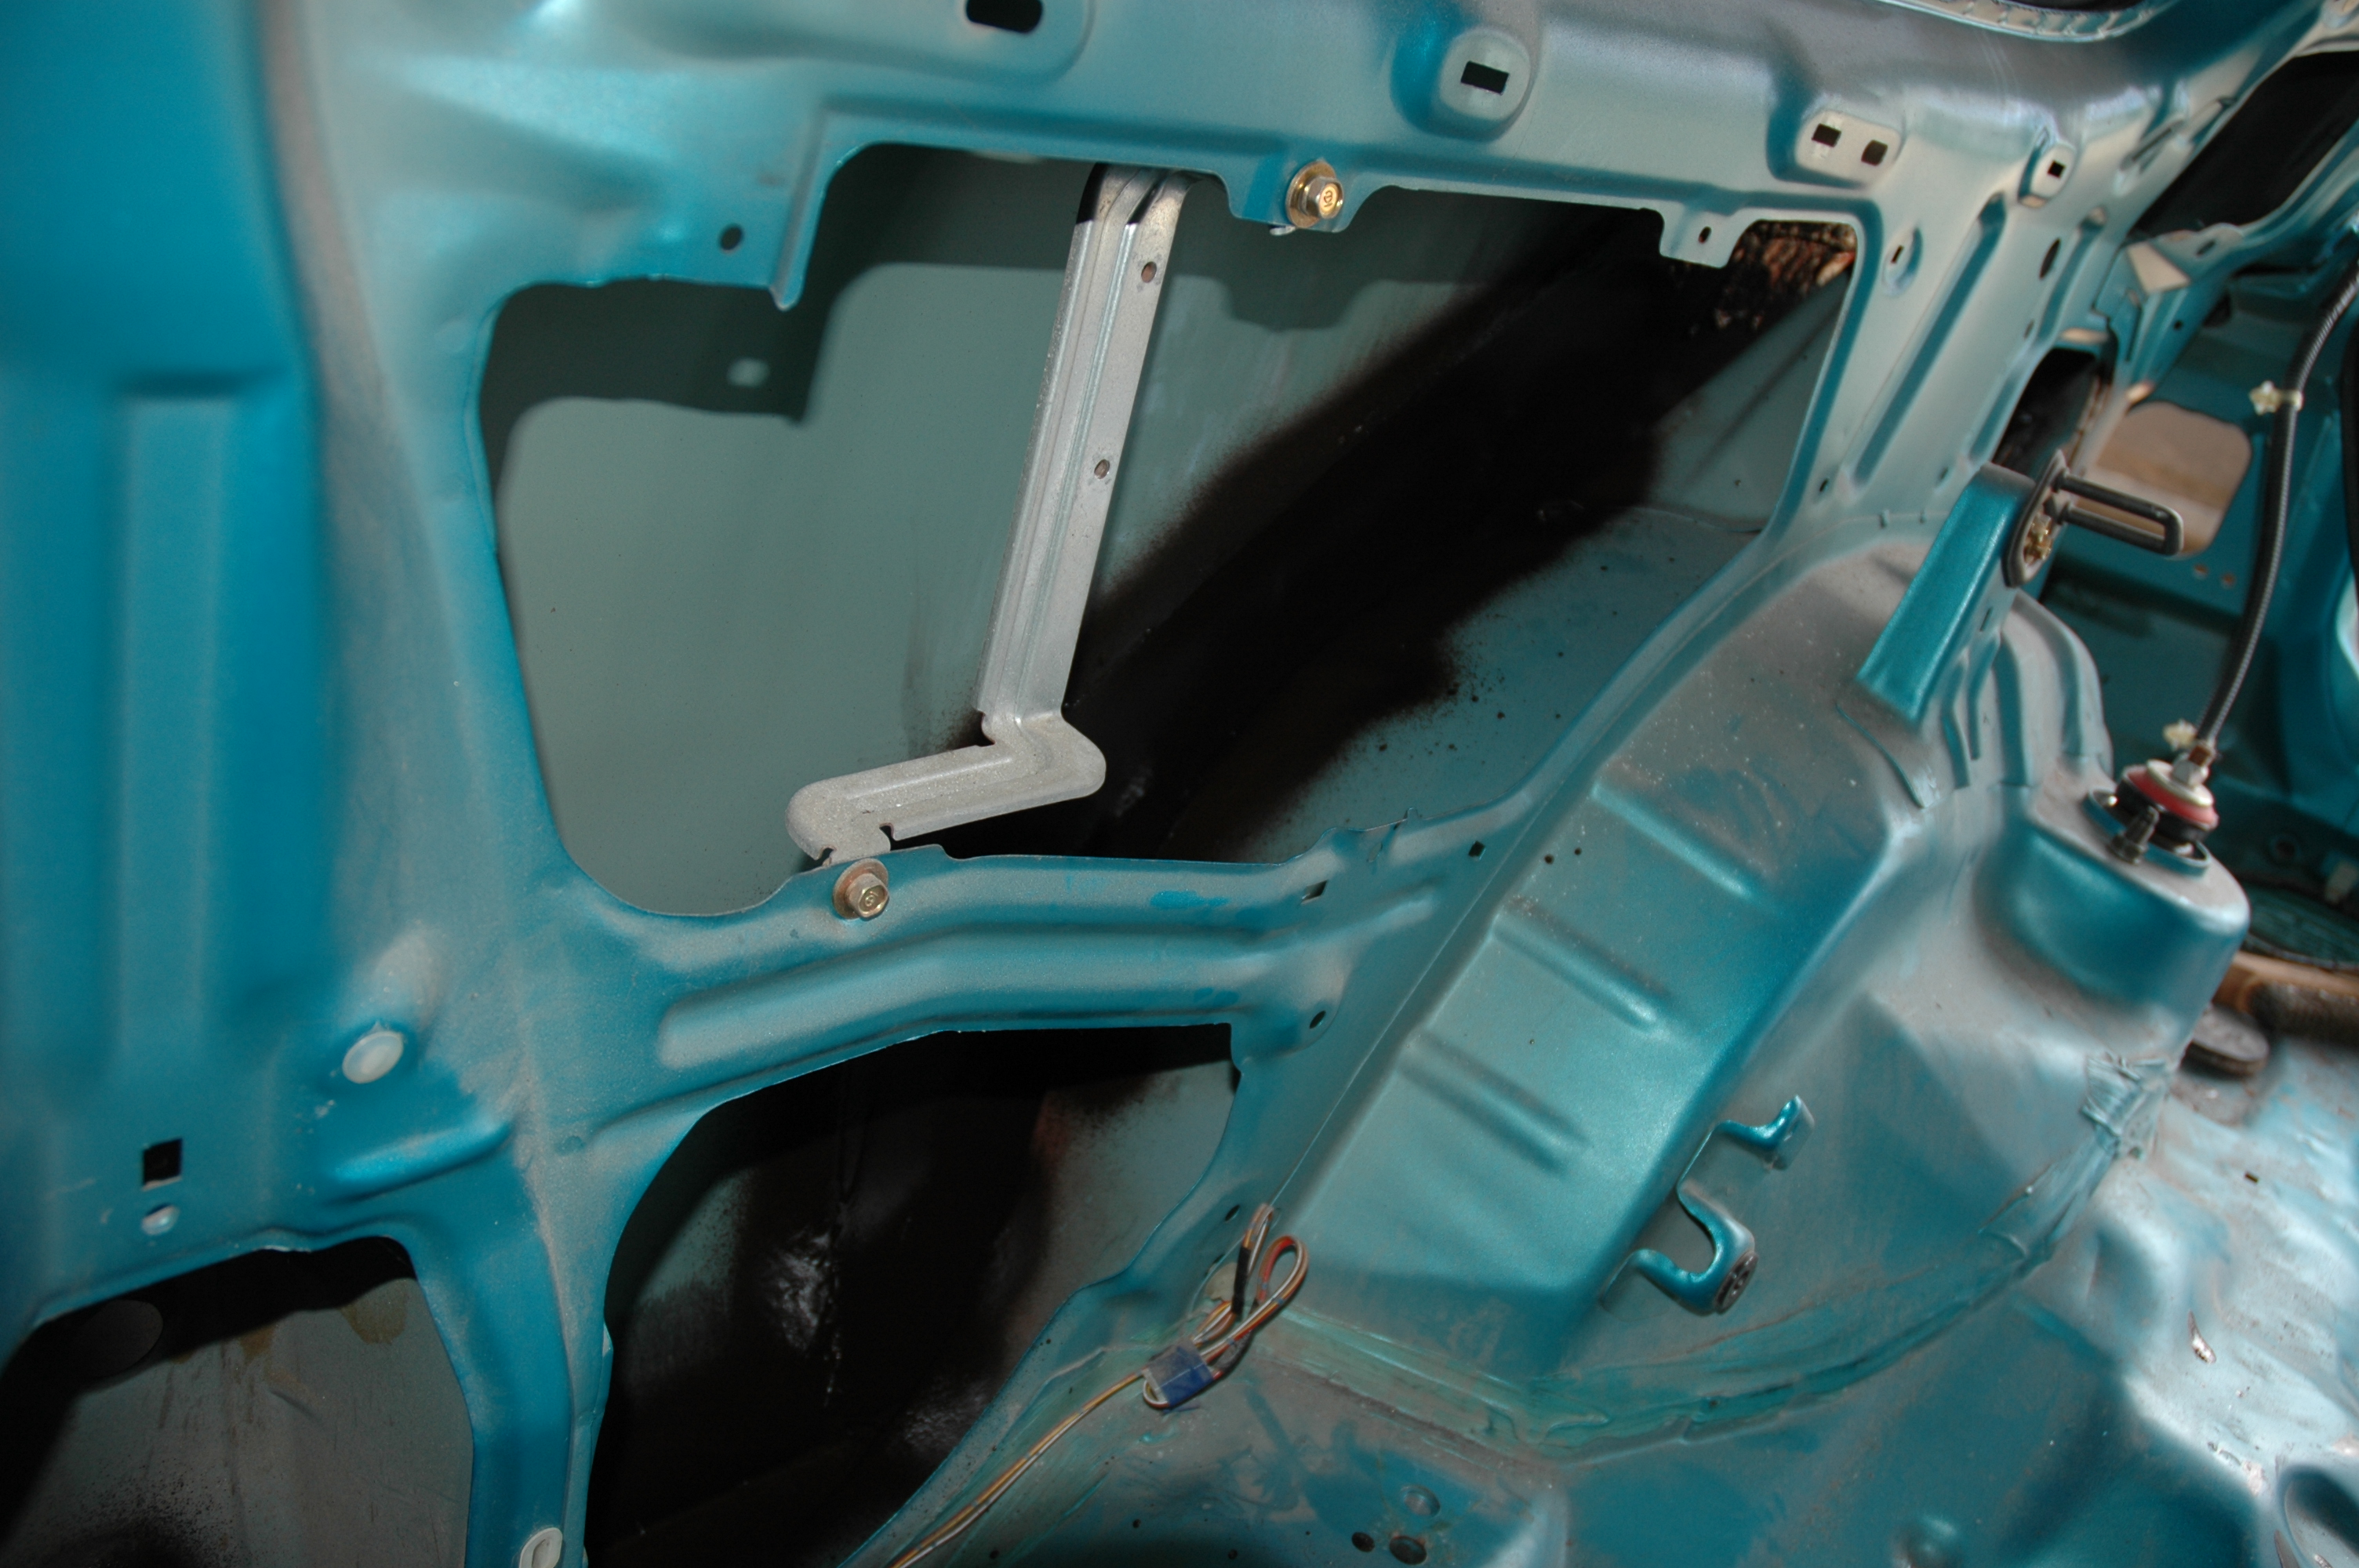
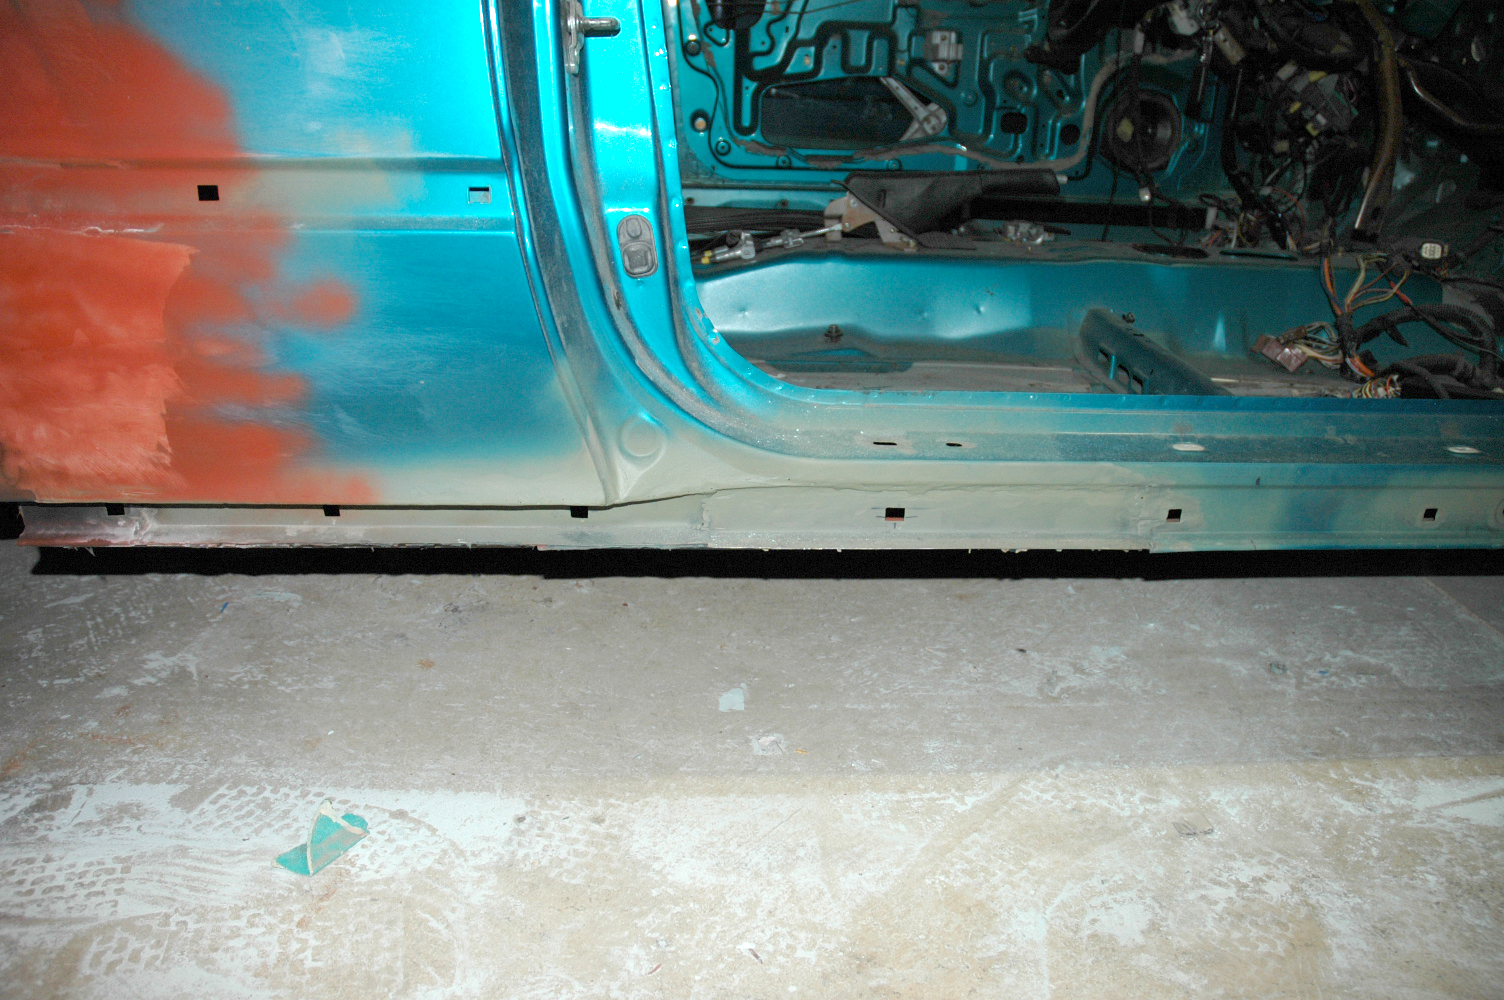
Here’s a pic of what your interior will look like, I’d remove the rear seats, trunk carpet, and plastic. You’ll need access to the panels from the inside and when you start welding, it will help avoid any accidents with hot metal and catching things on fire.
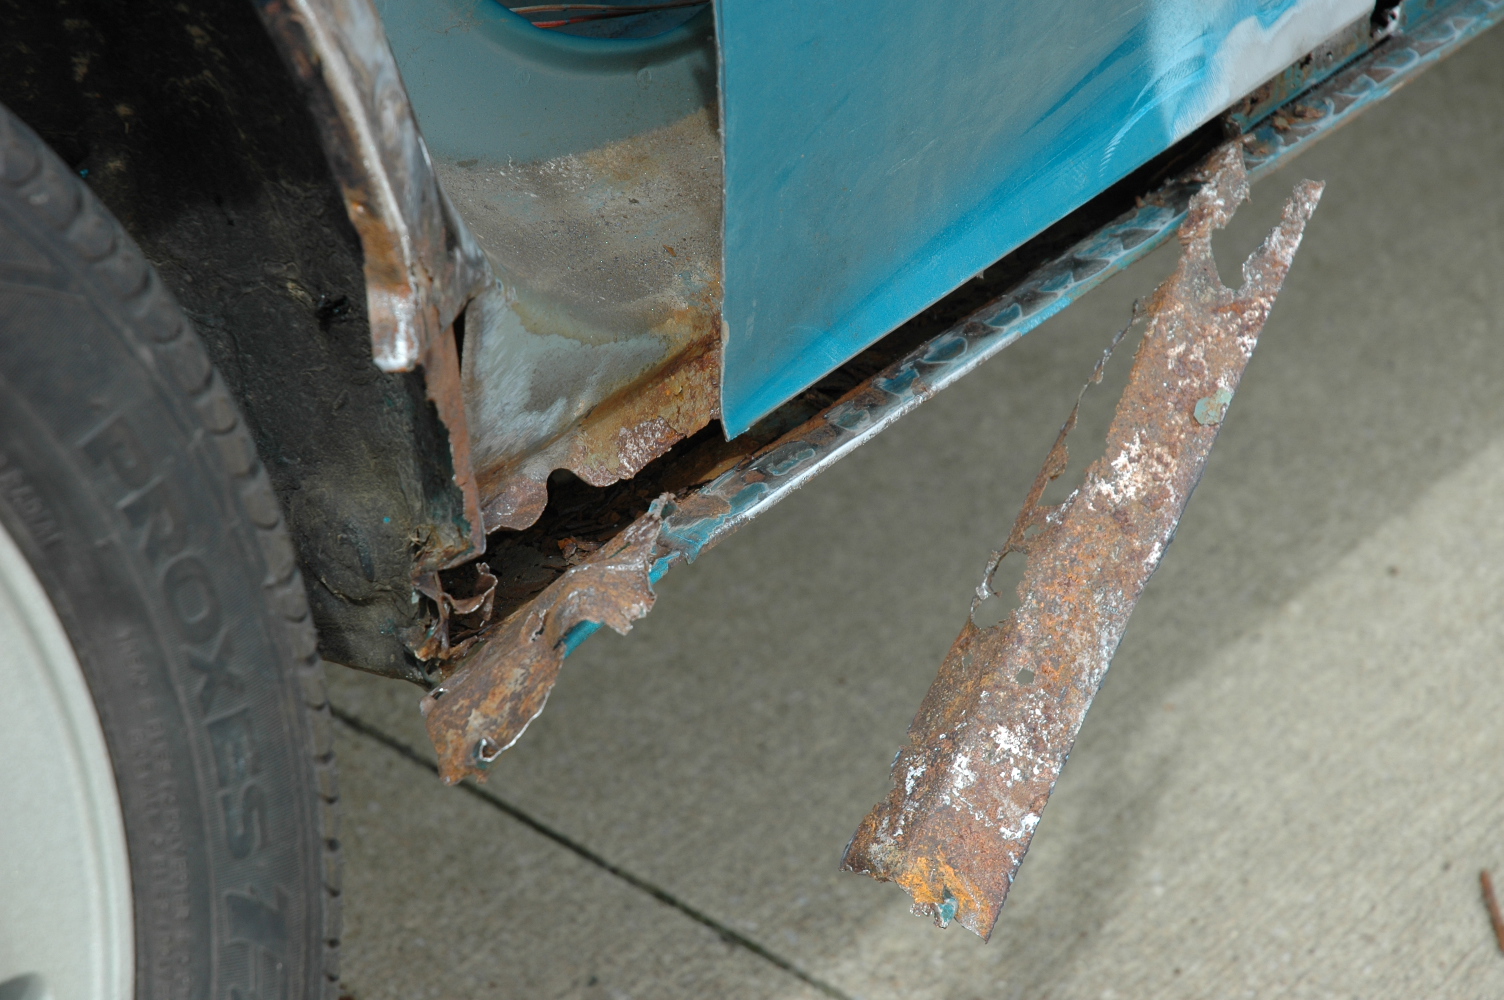

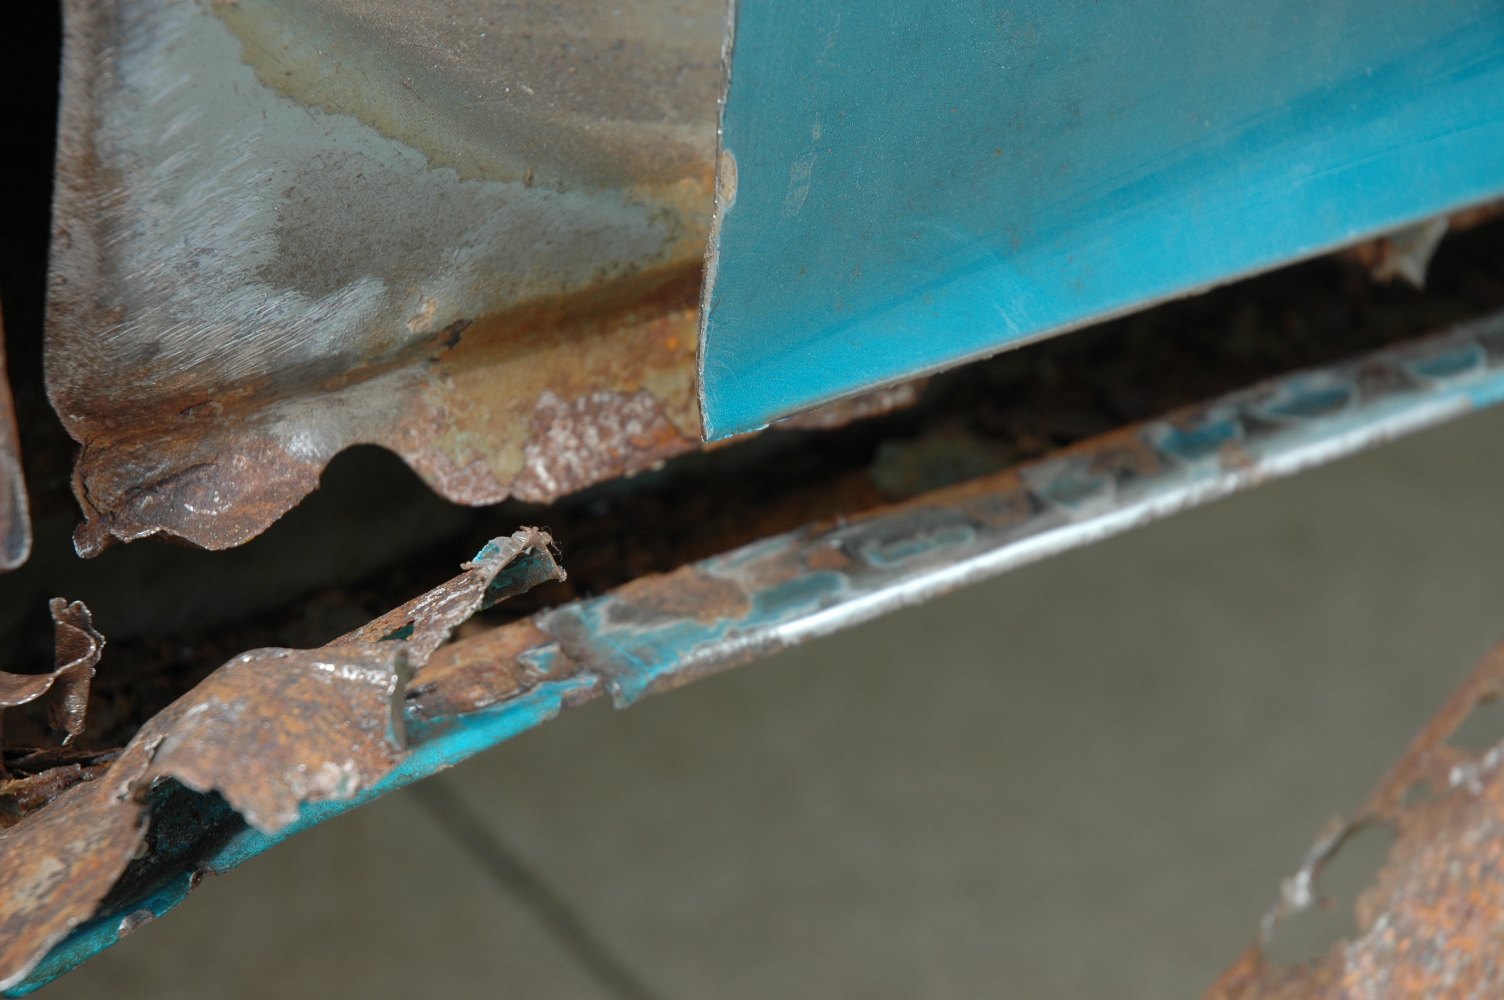

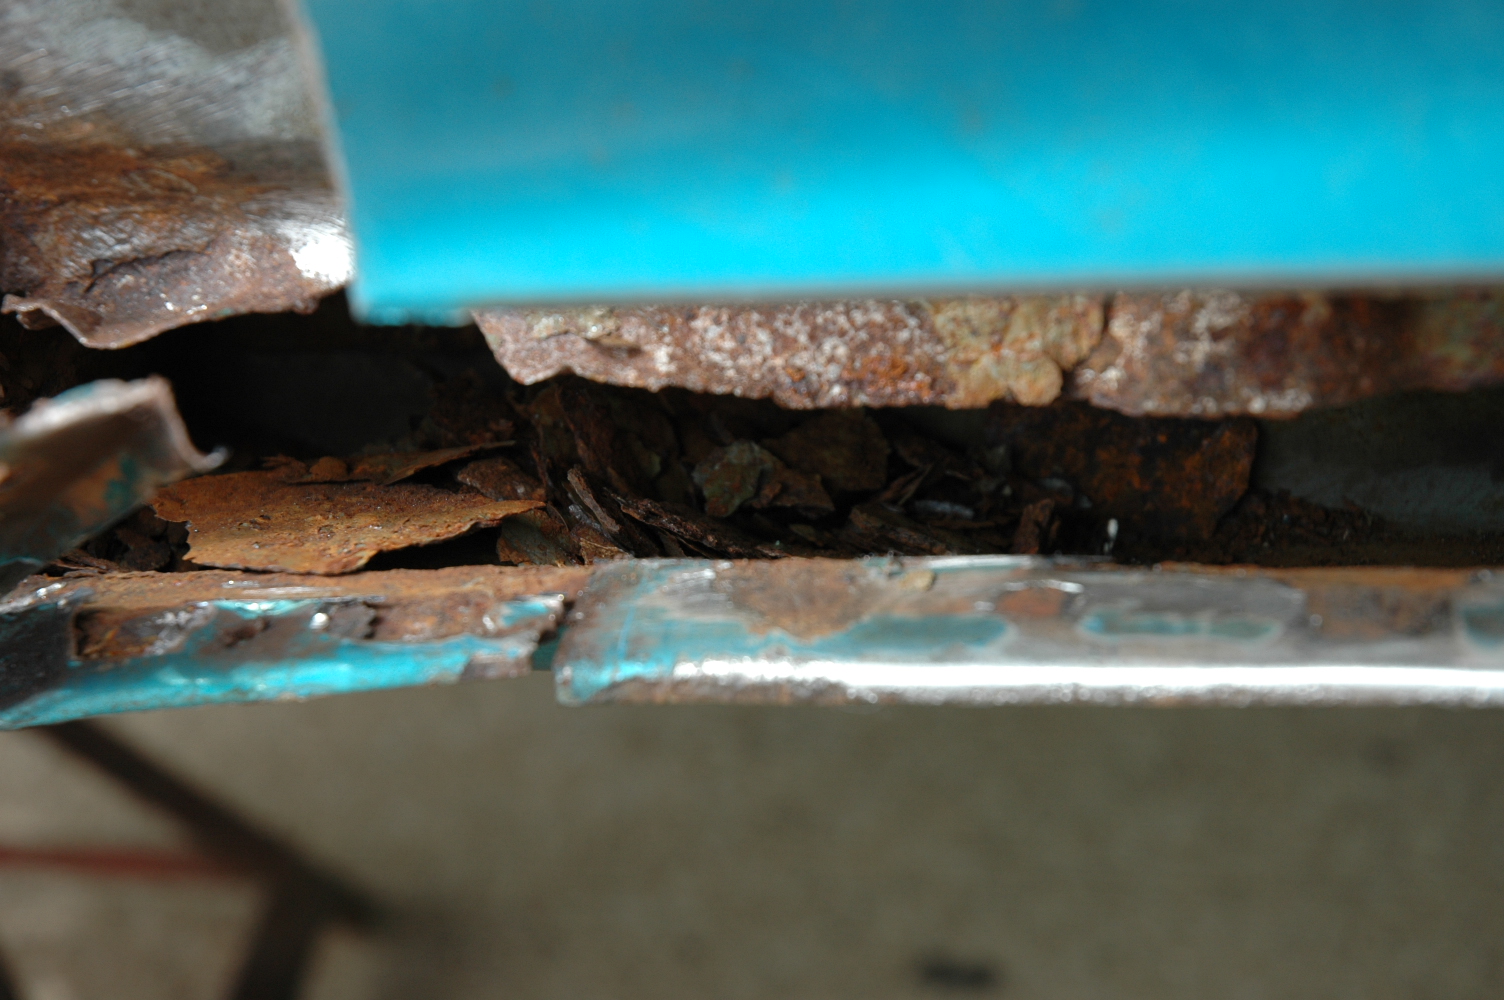
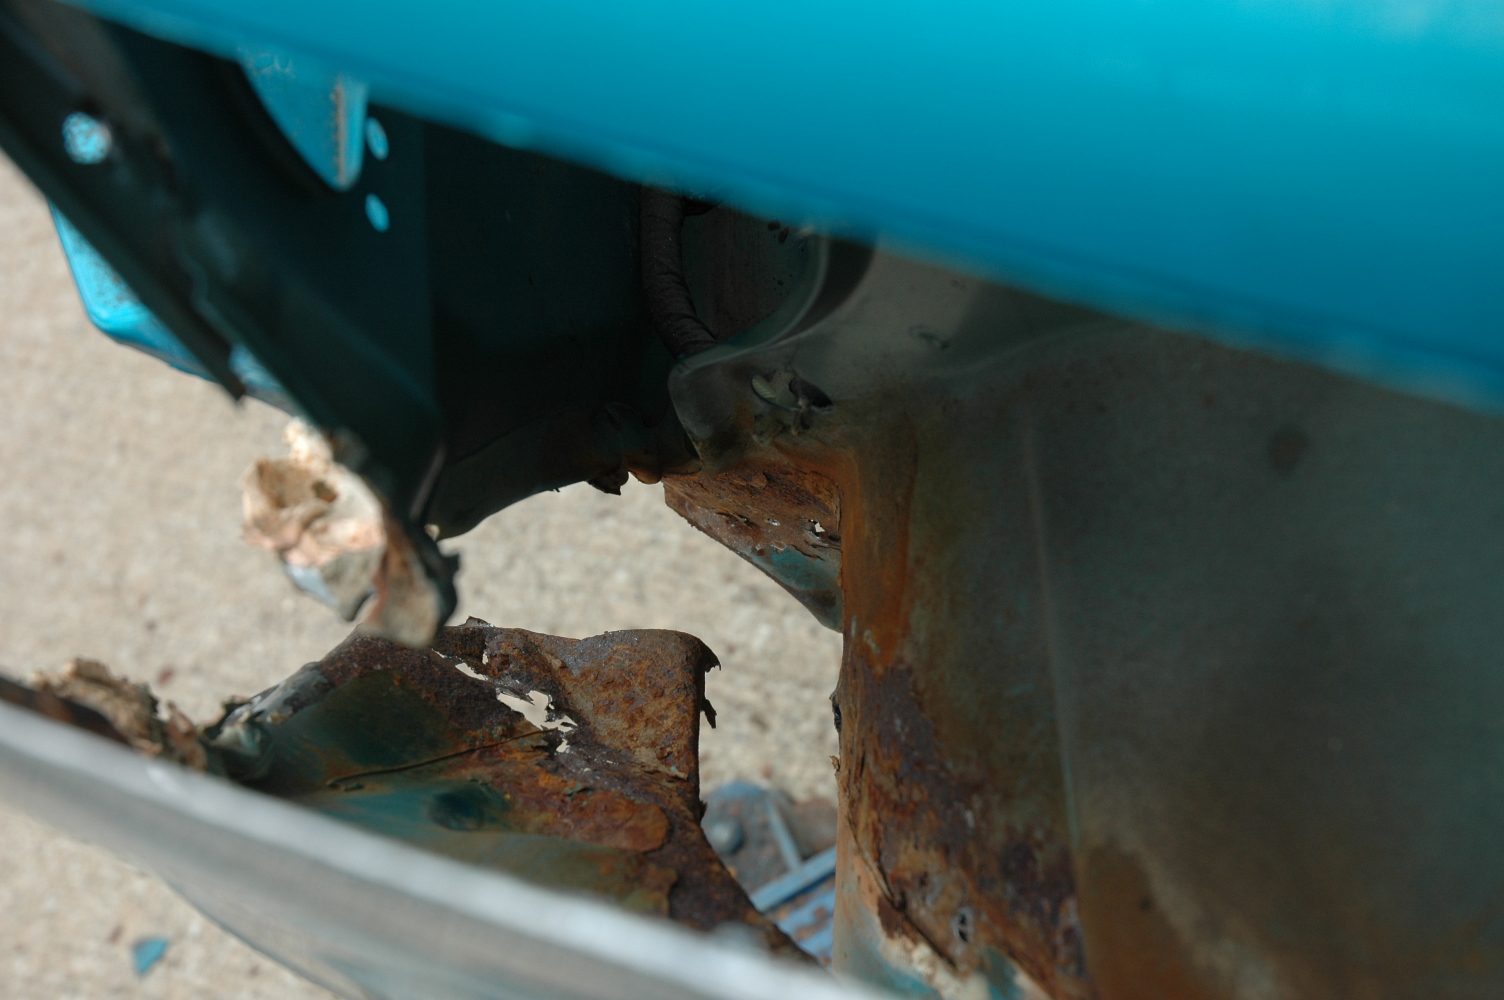
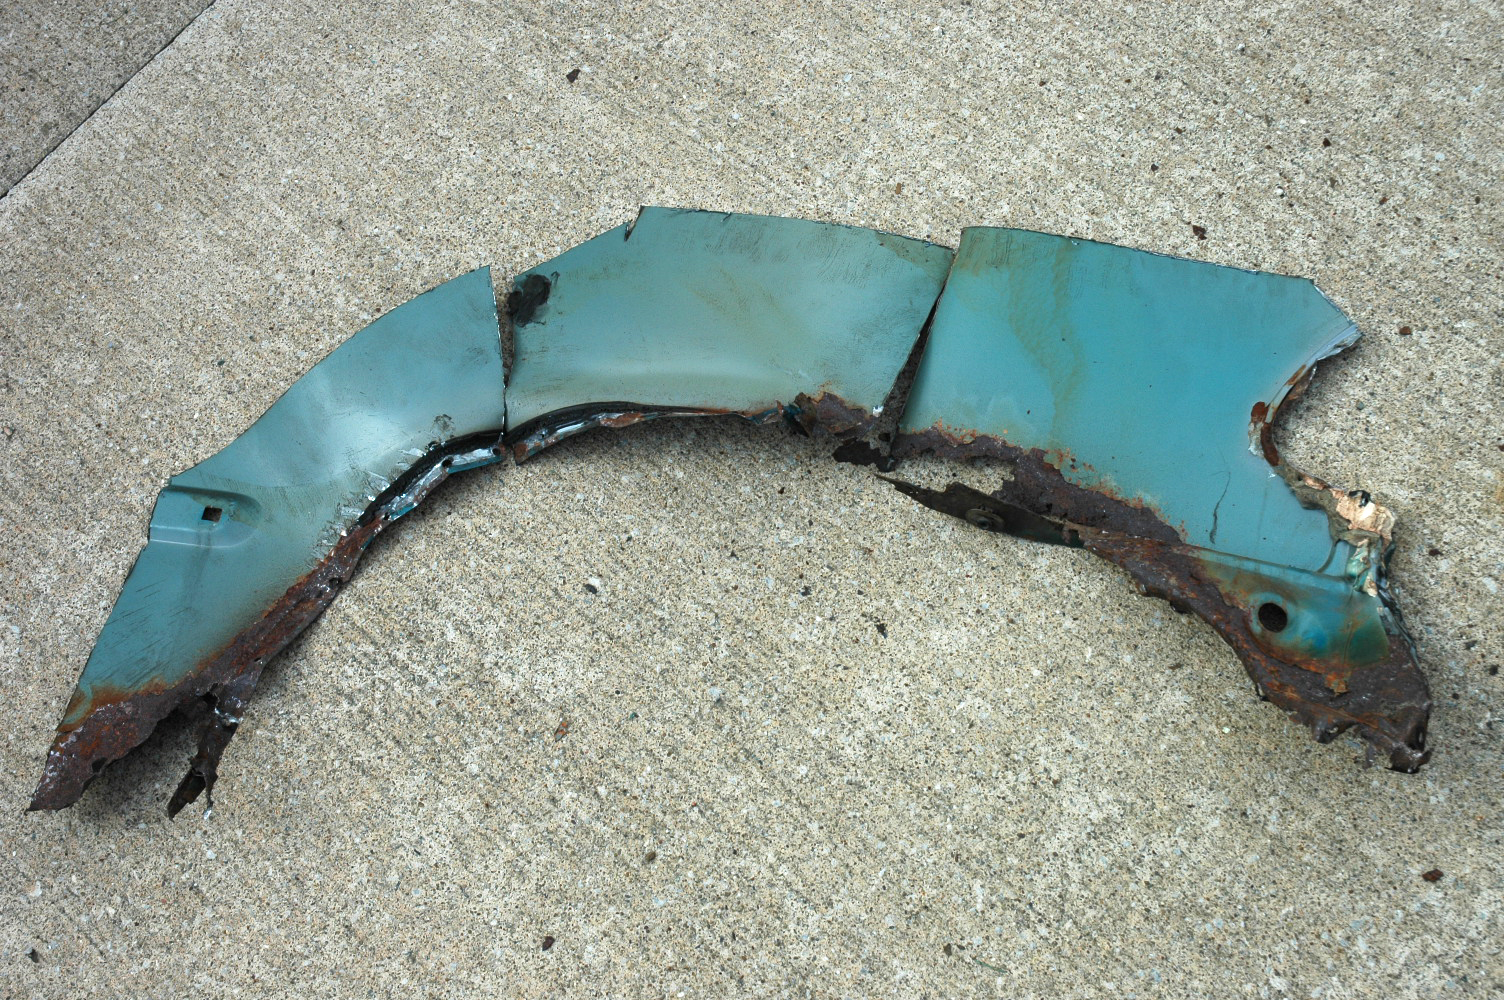
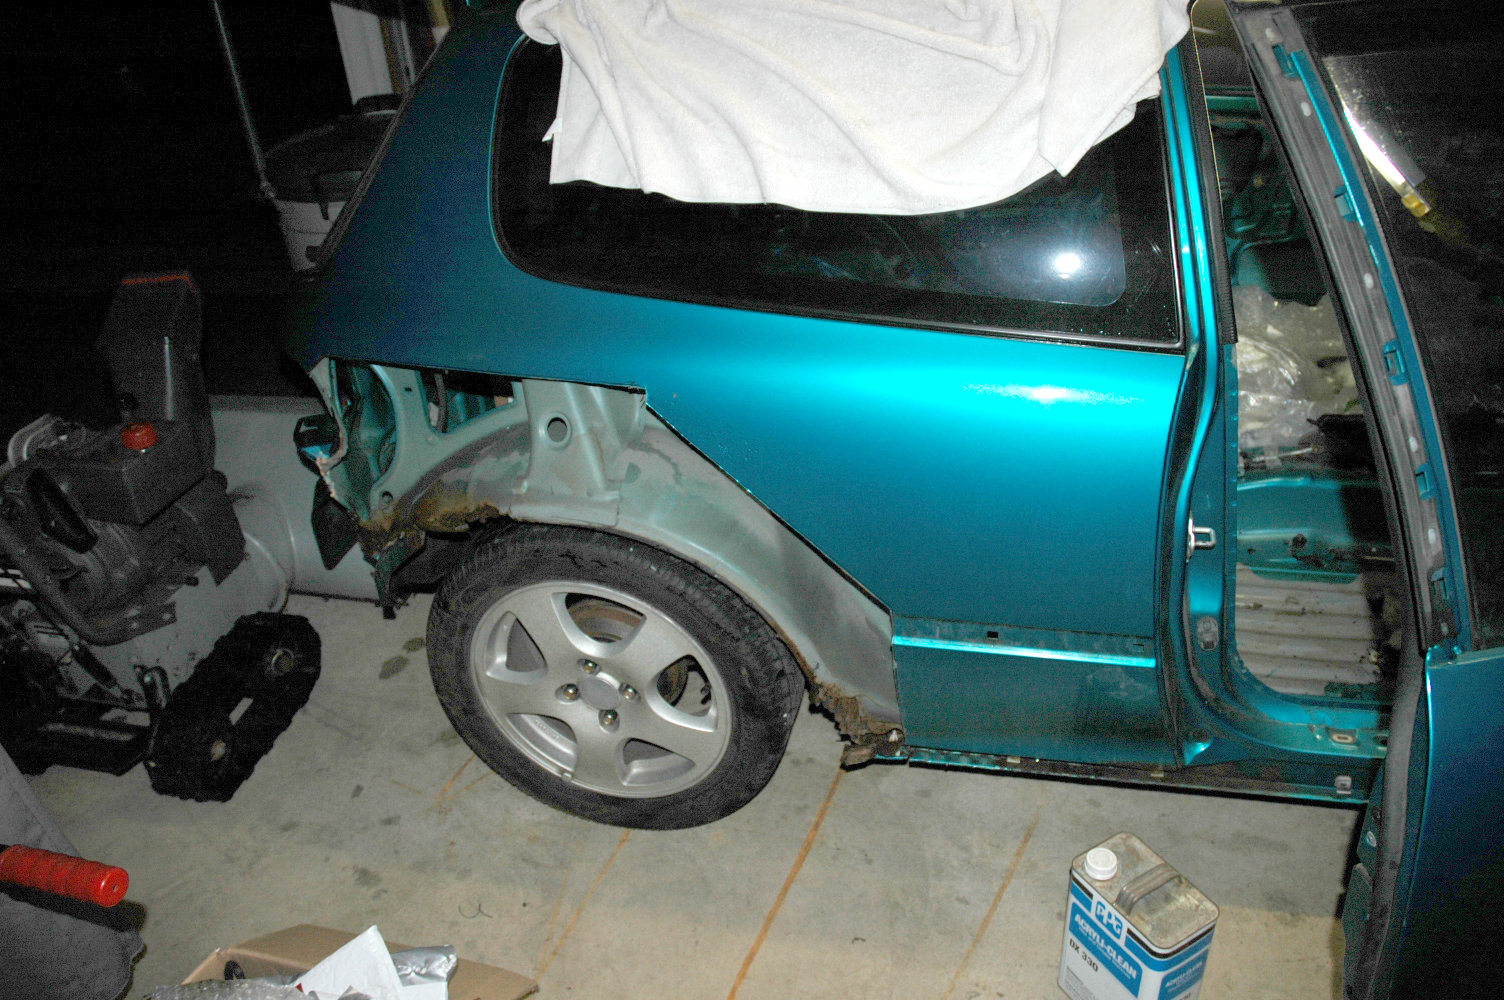
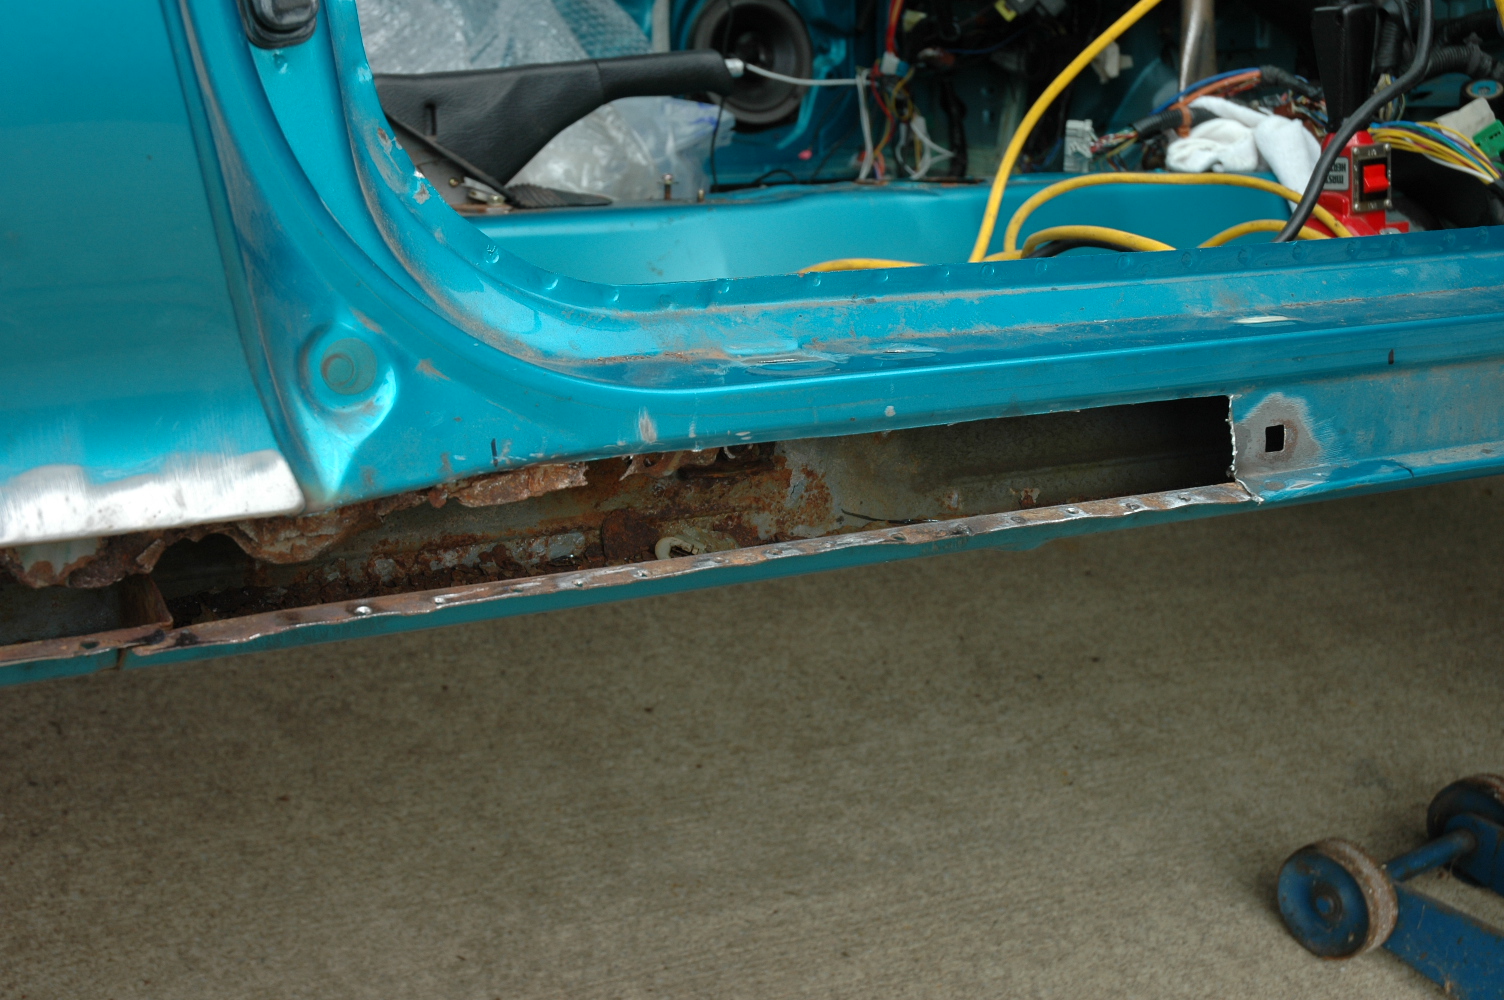
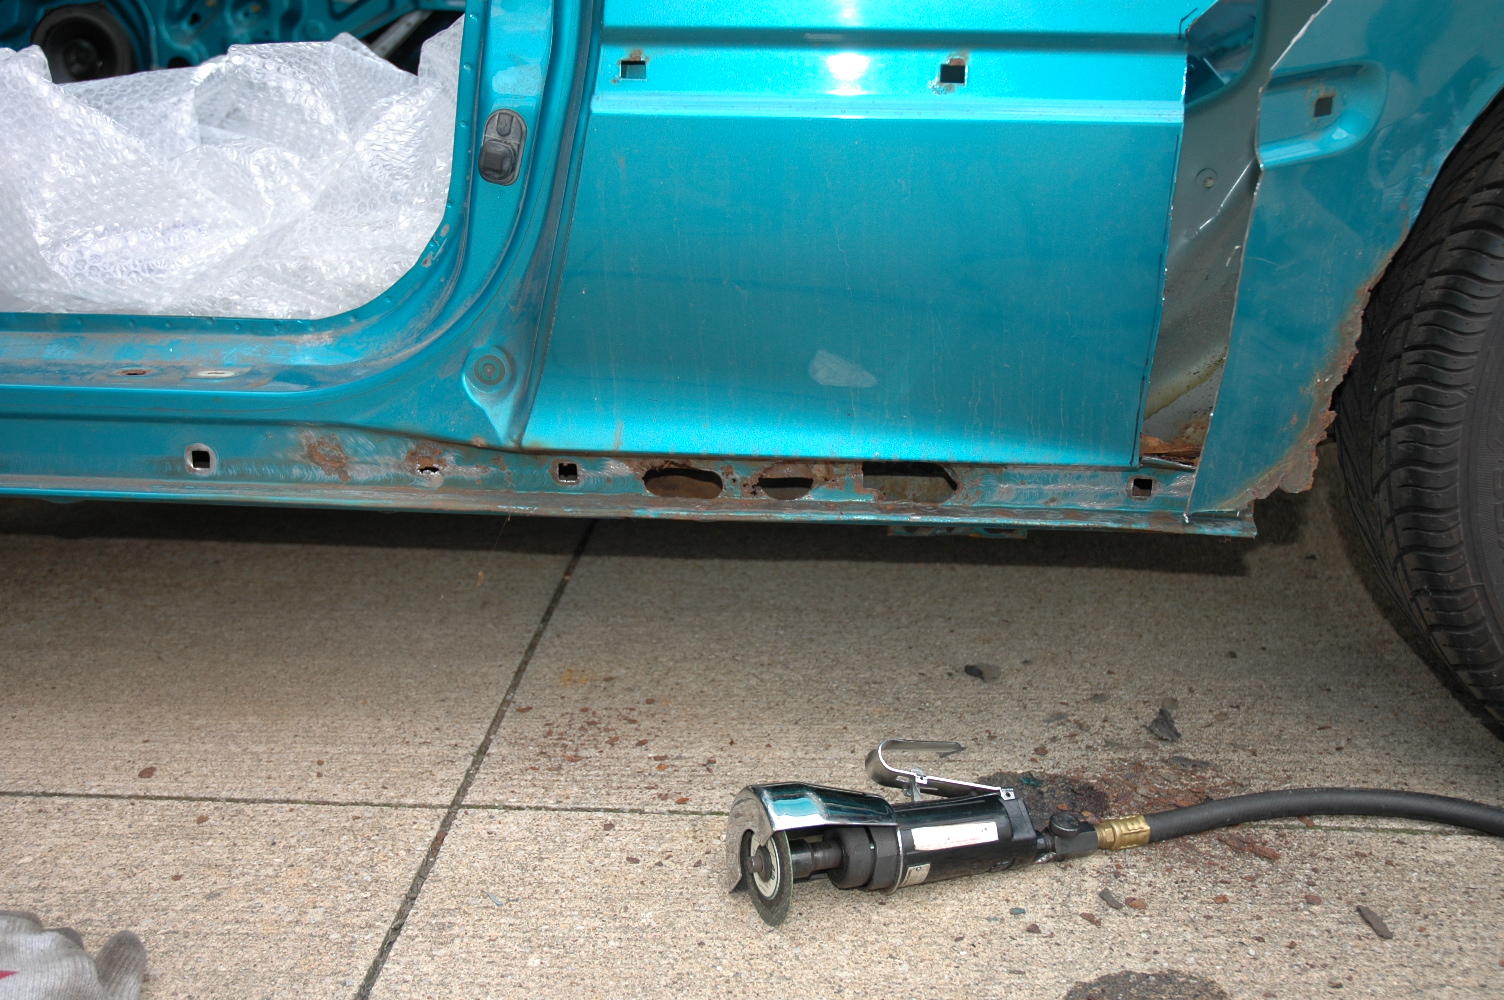
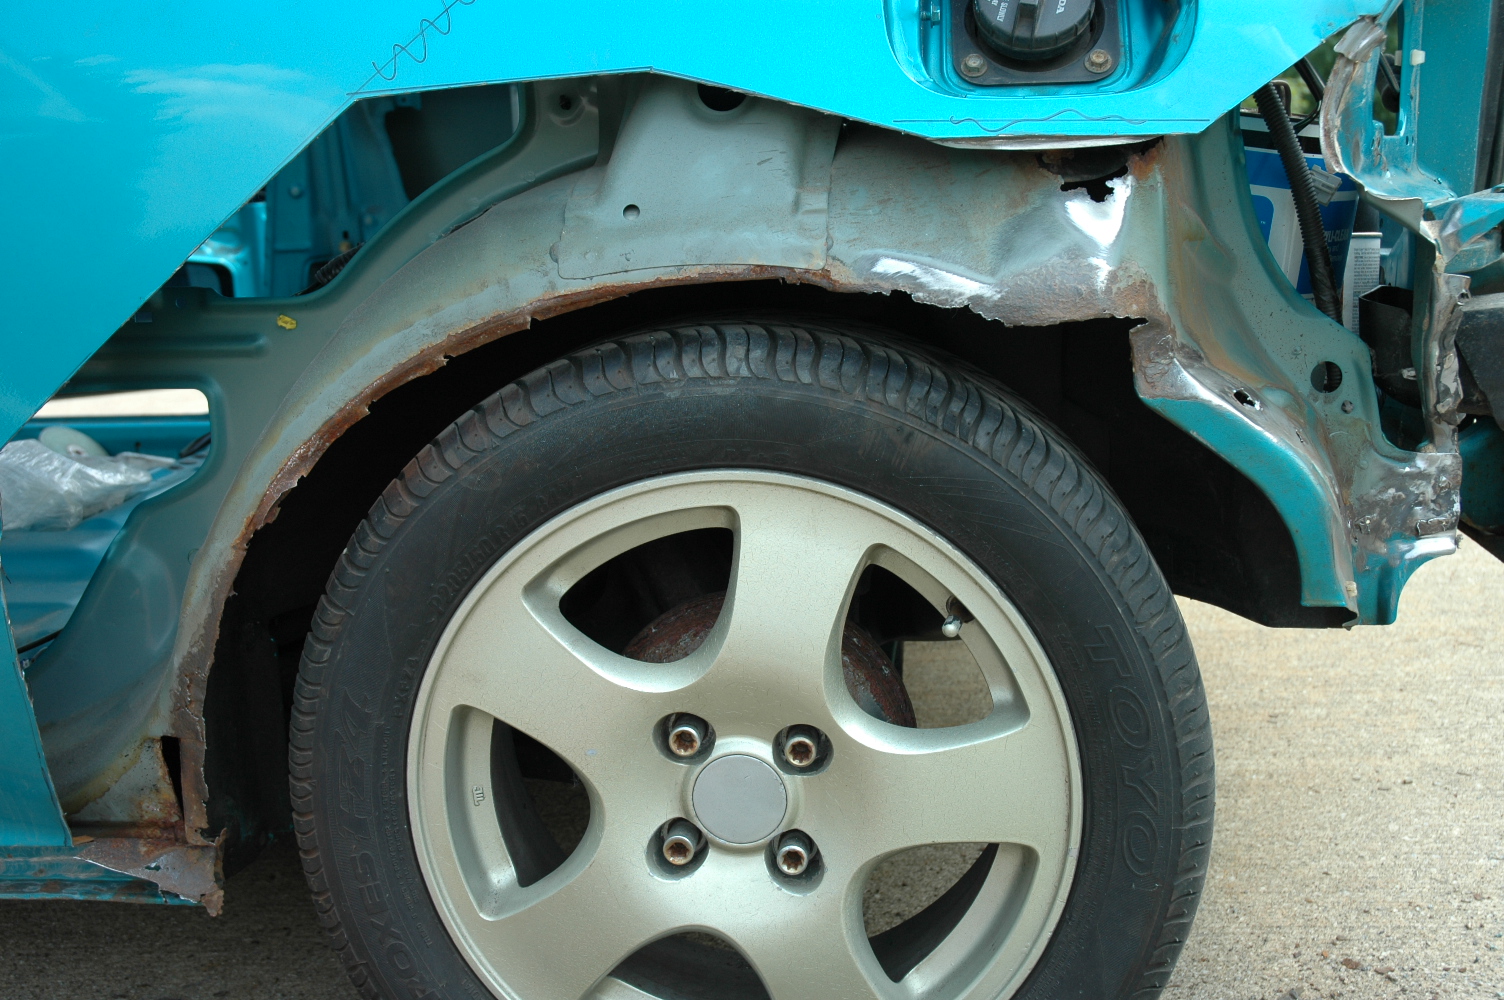
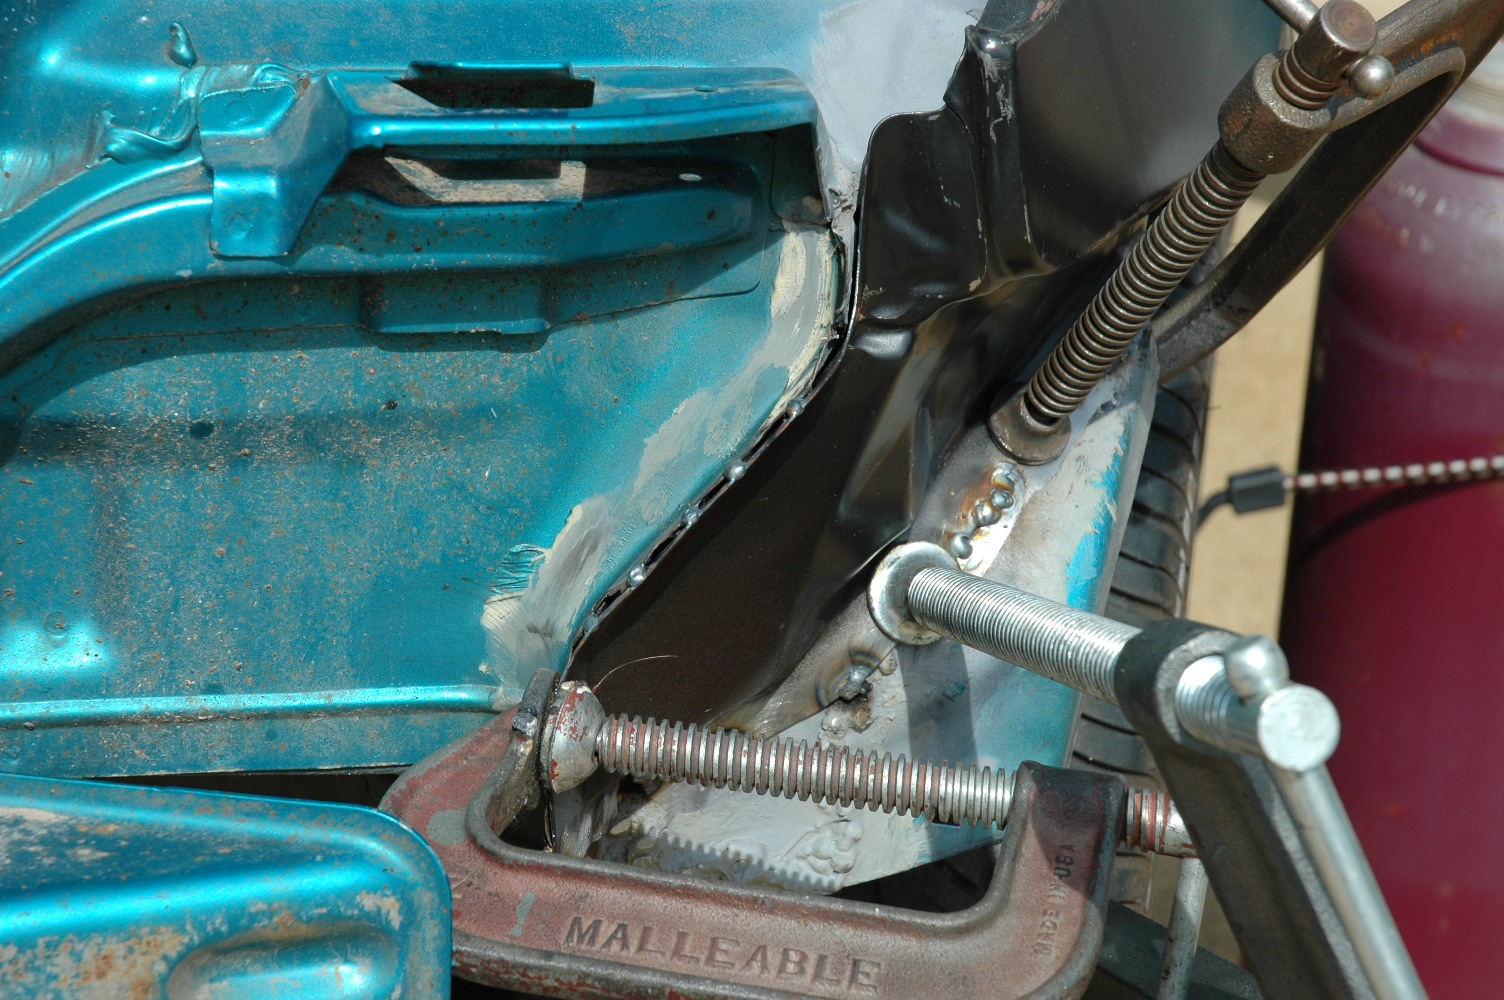
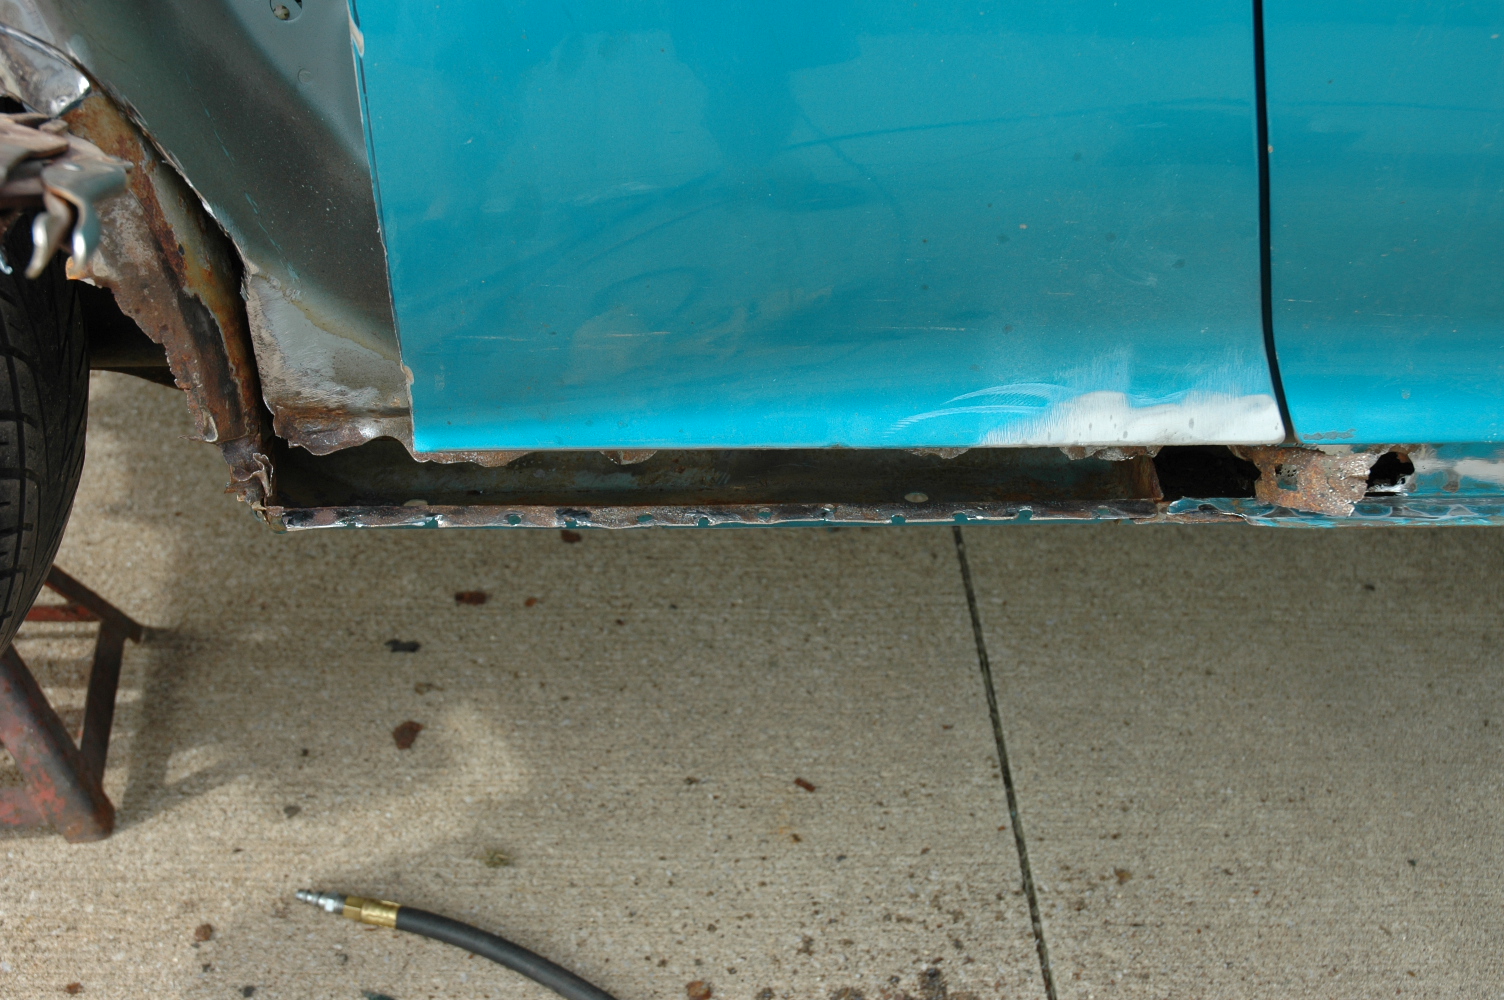 Above is a pic of my rocker panel. when I removed the plastic side skirt, I saw there was rust showing through. I poked it with a screw driver and it went right through! At the time I did this repair, nobody was producing replacement rocker panels for the 92-95 civic.

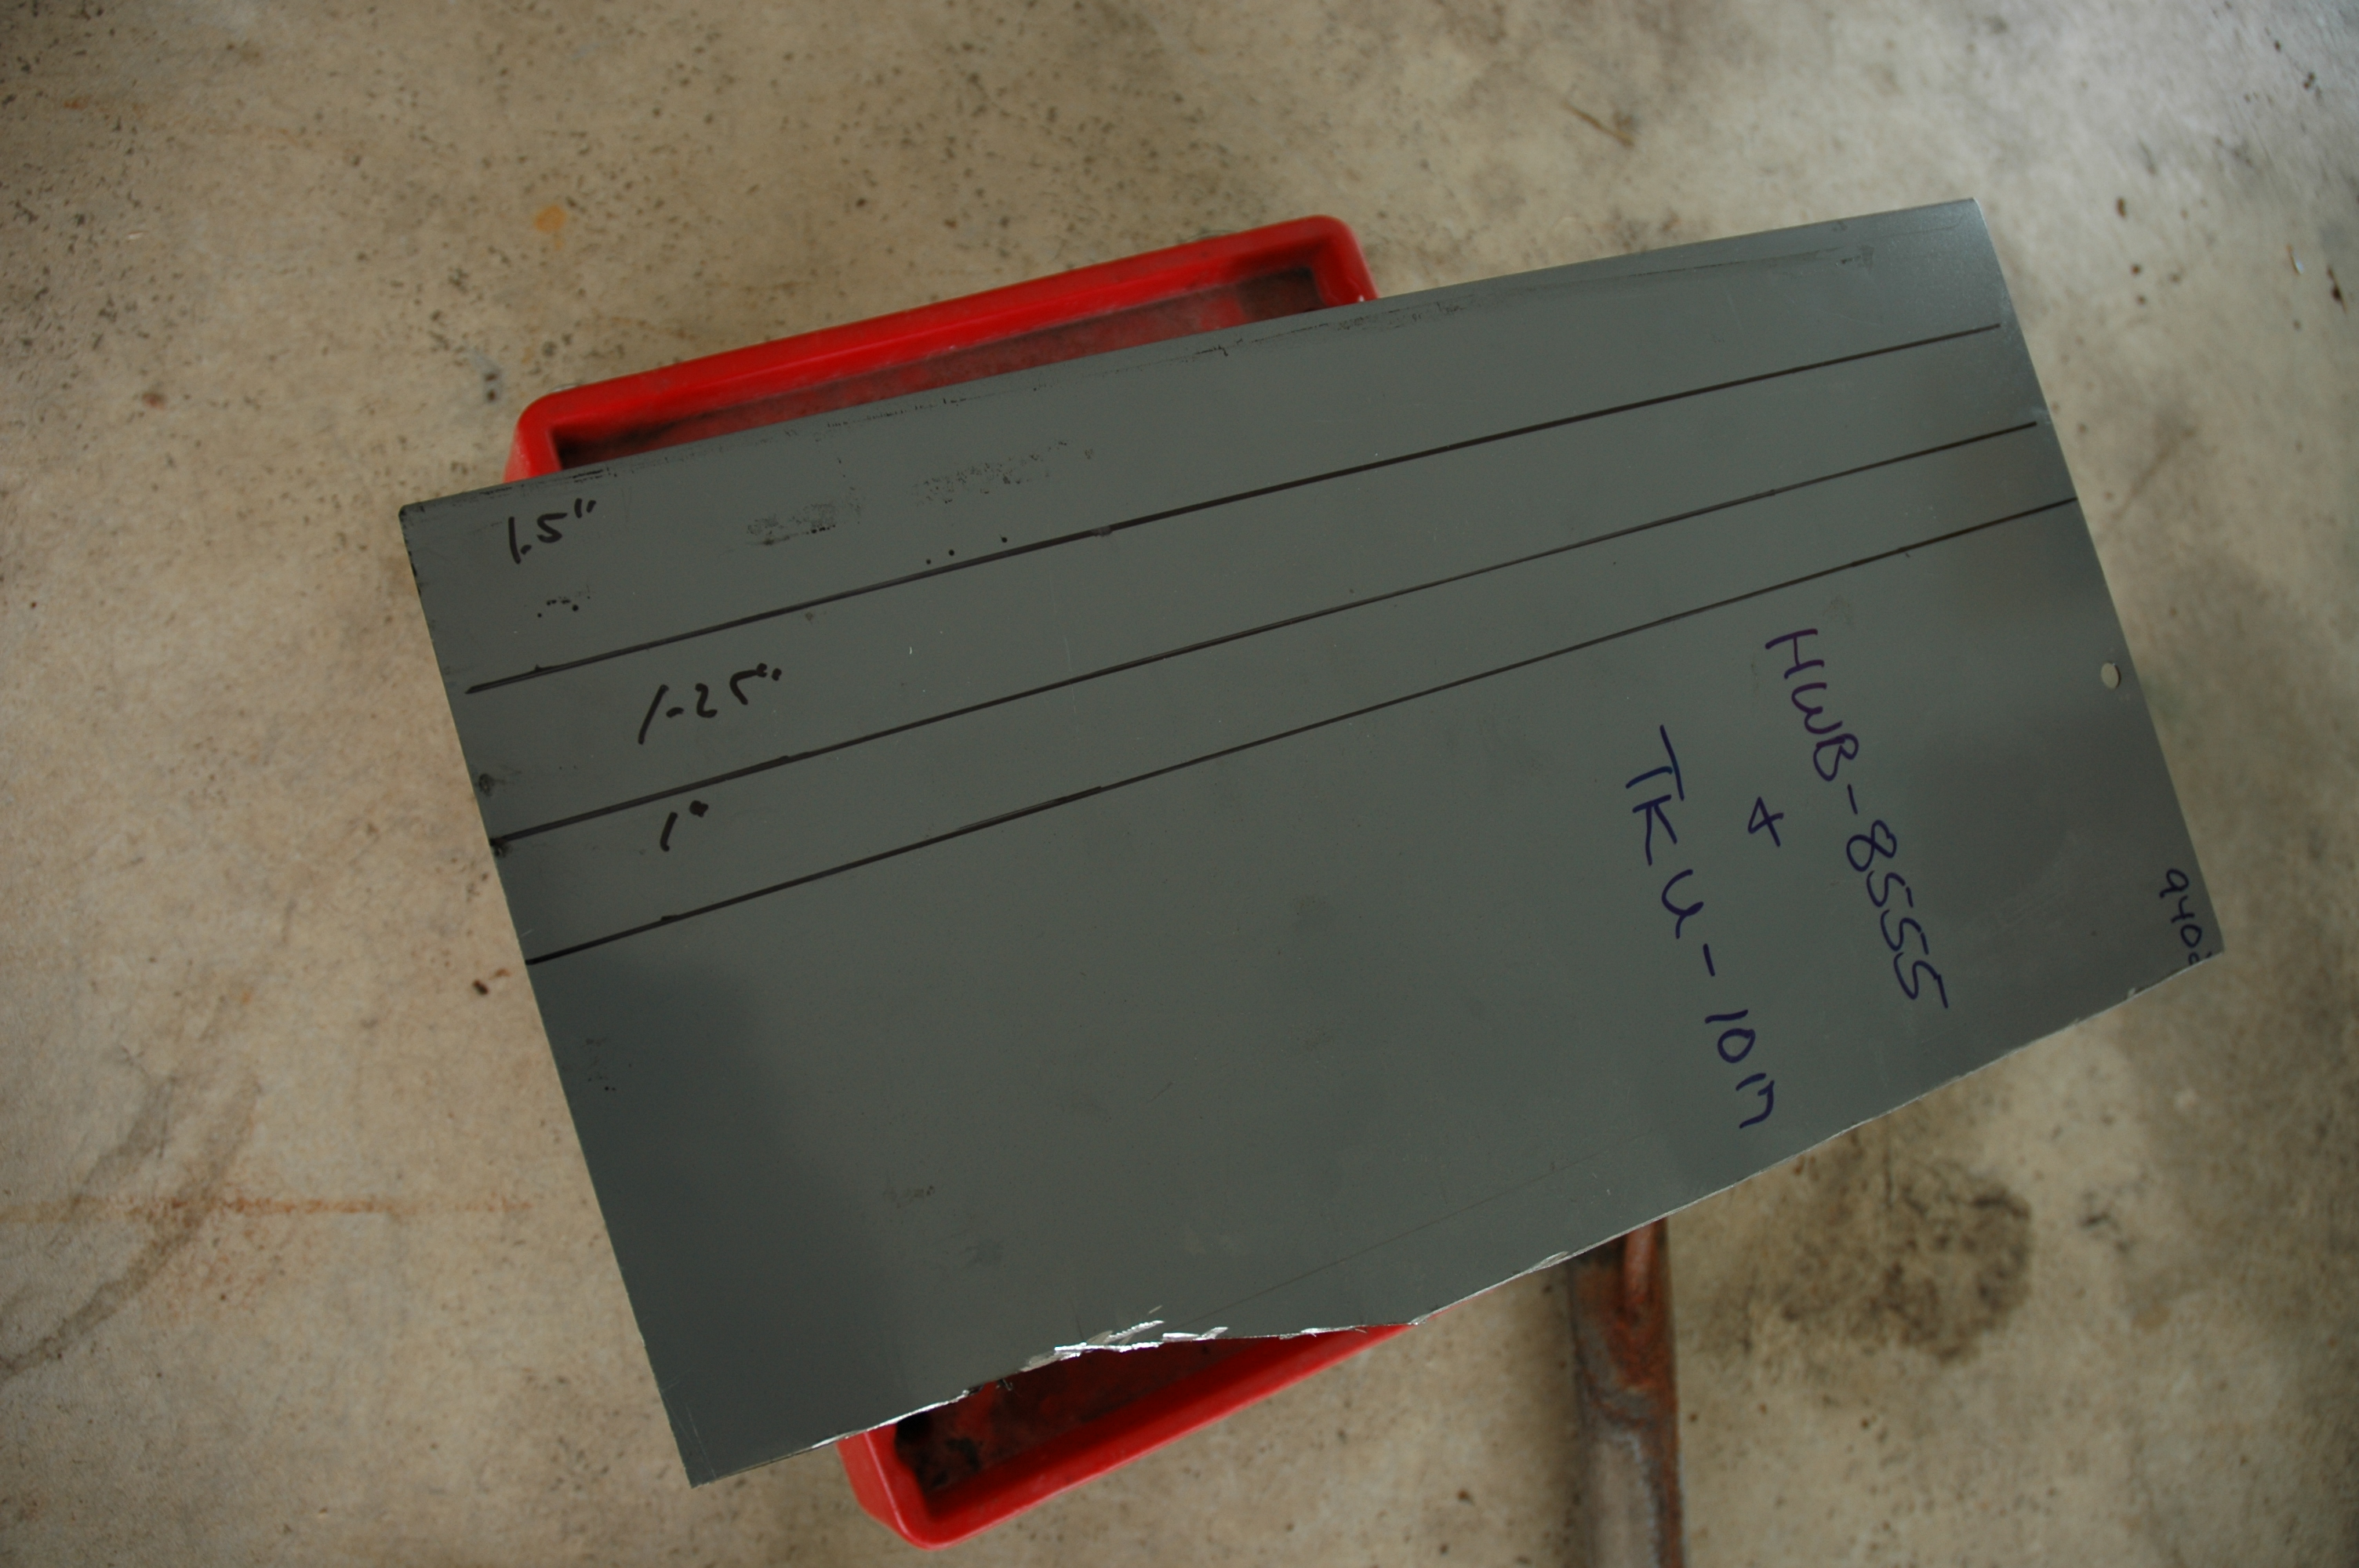
Using some sheet metal, I measured the dimensions and drew some rocker panels up. You could also make some out of thin cardboard first and use that as a template for the final metal ones.

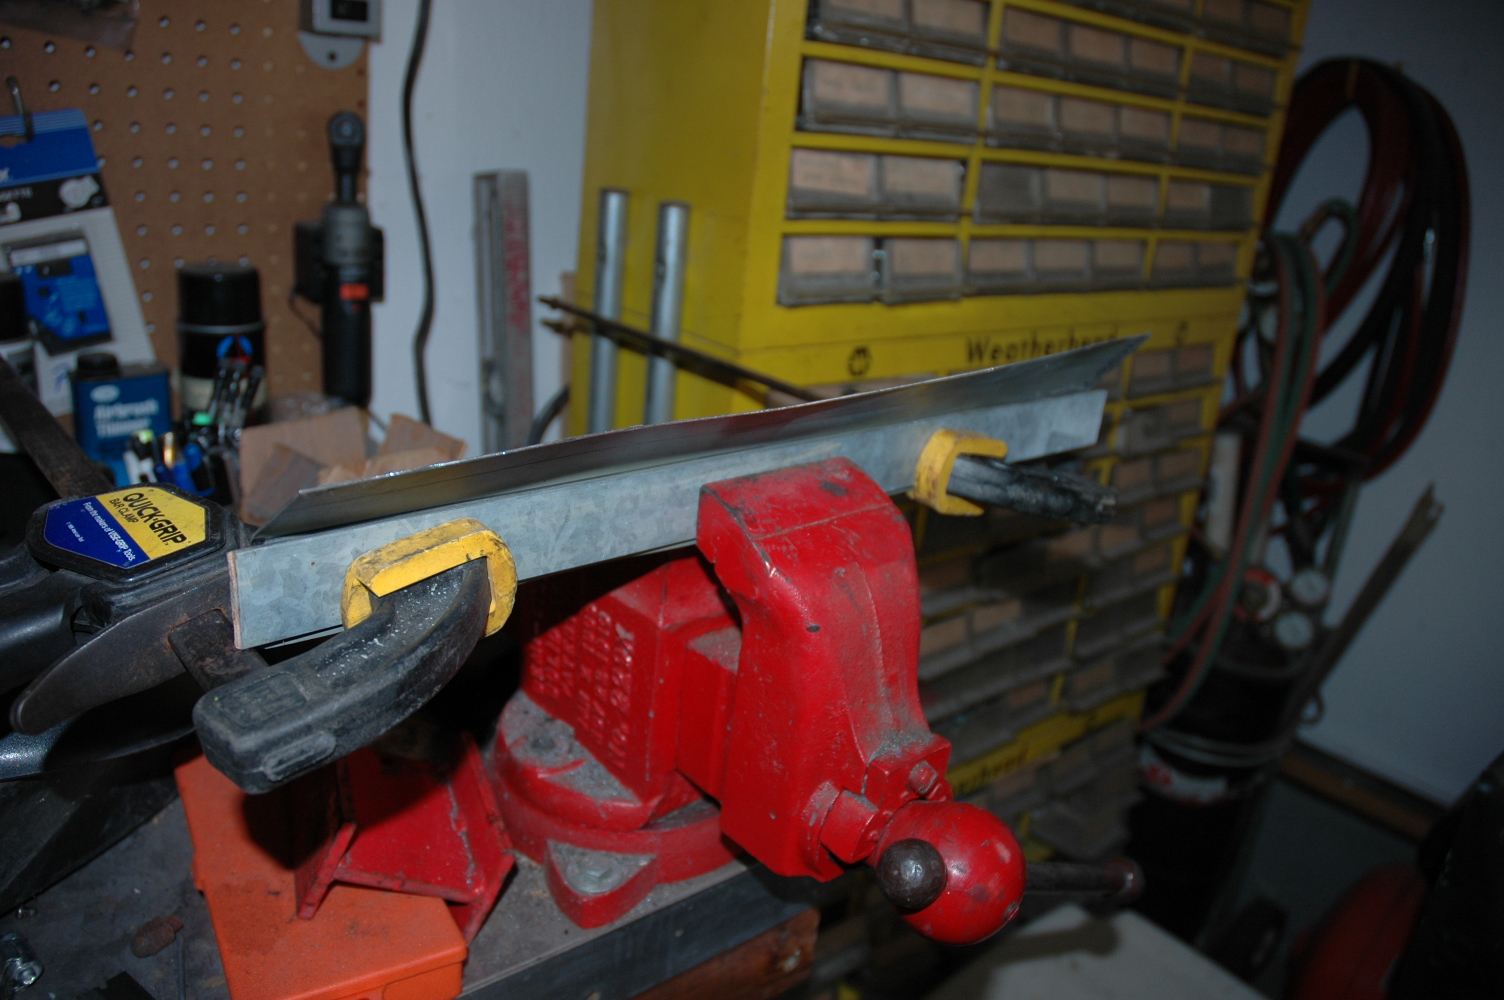

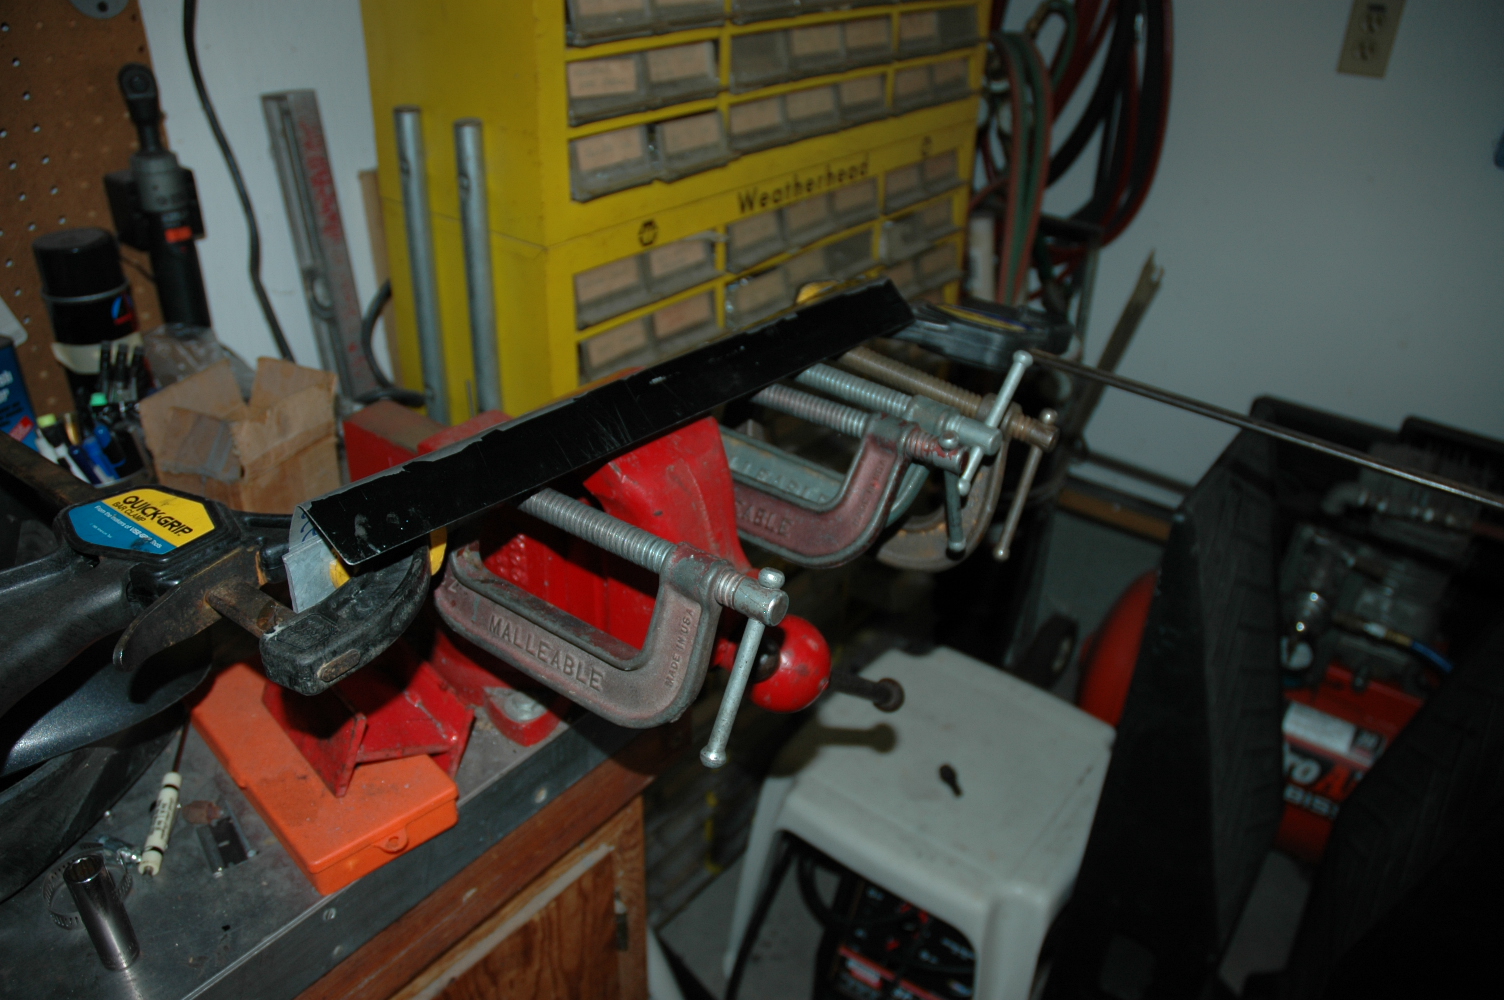
To bend the sheet metal, I clamped it in a bench vise with a thicker strip of steel on the front side to use as a straight edge. Then clamped the sheet metal to the straight edge all the way across. Next I hammered it evenly across with a mallet until it was just about at the right angle. Then flipped the rocker panel piece around and repeated the process for the other bend.
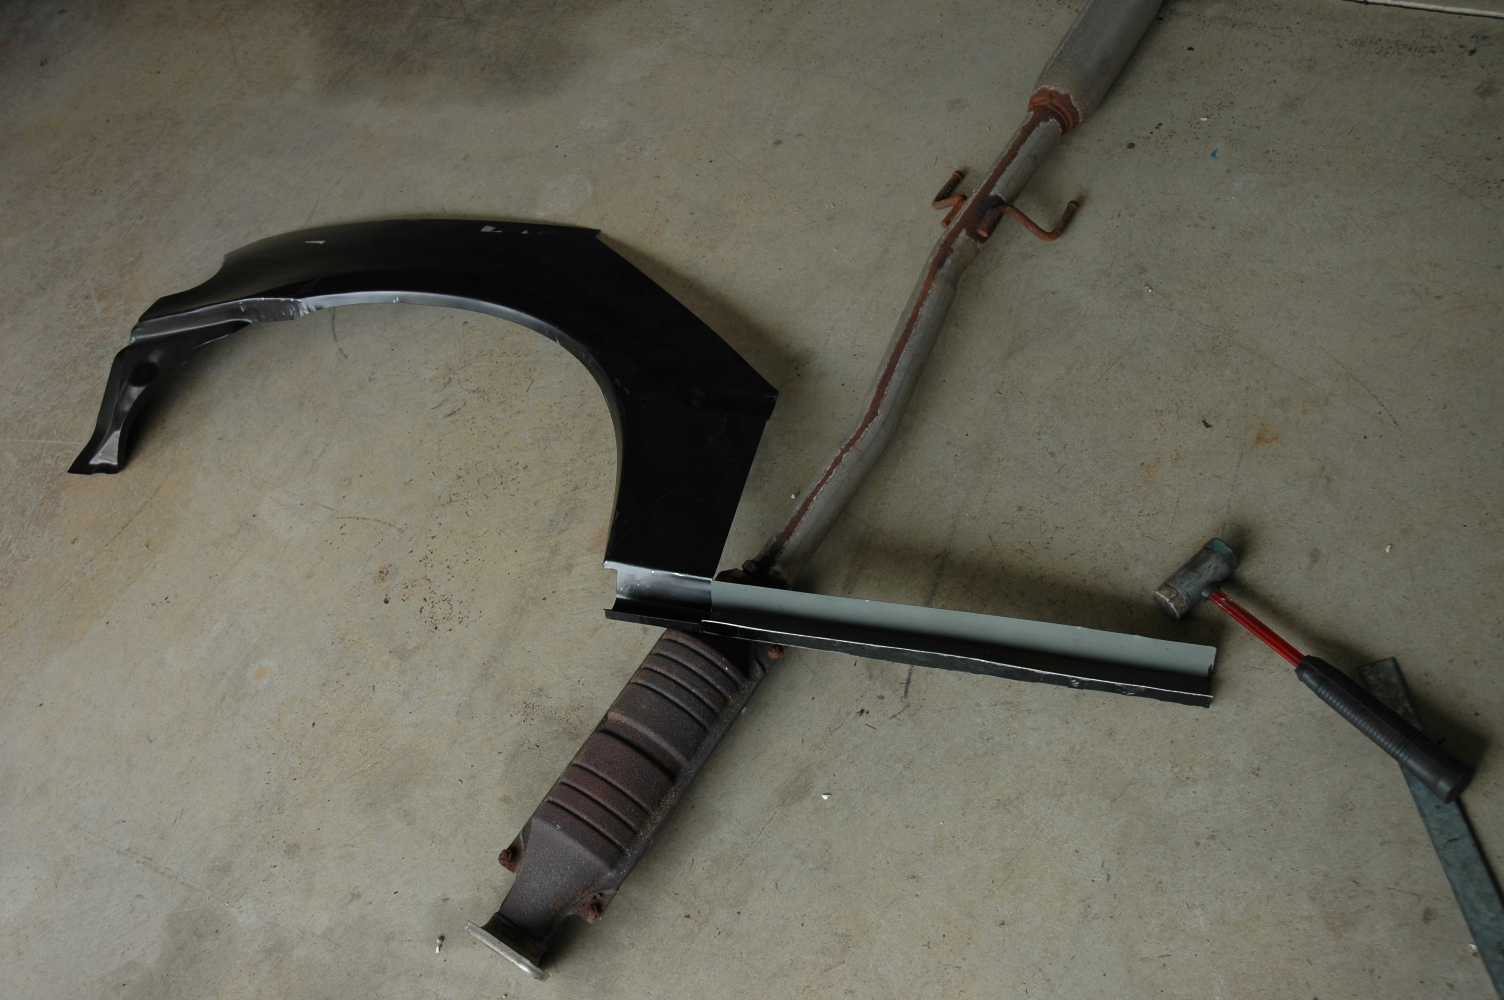
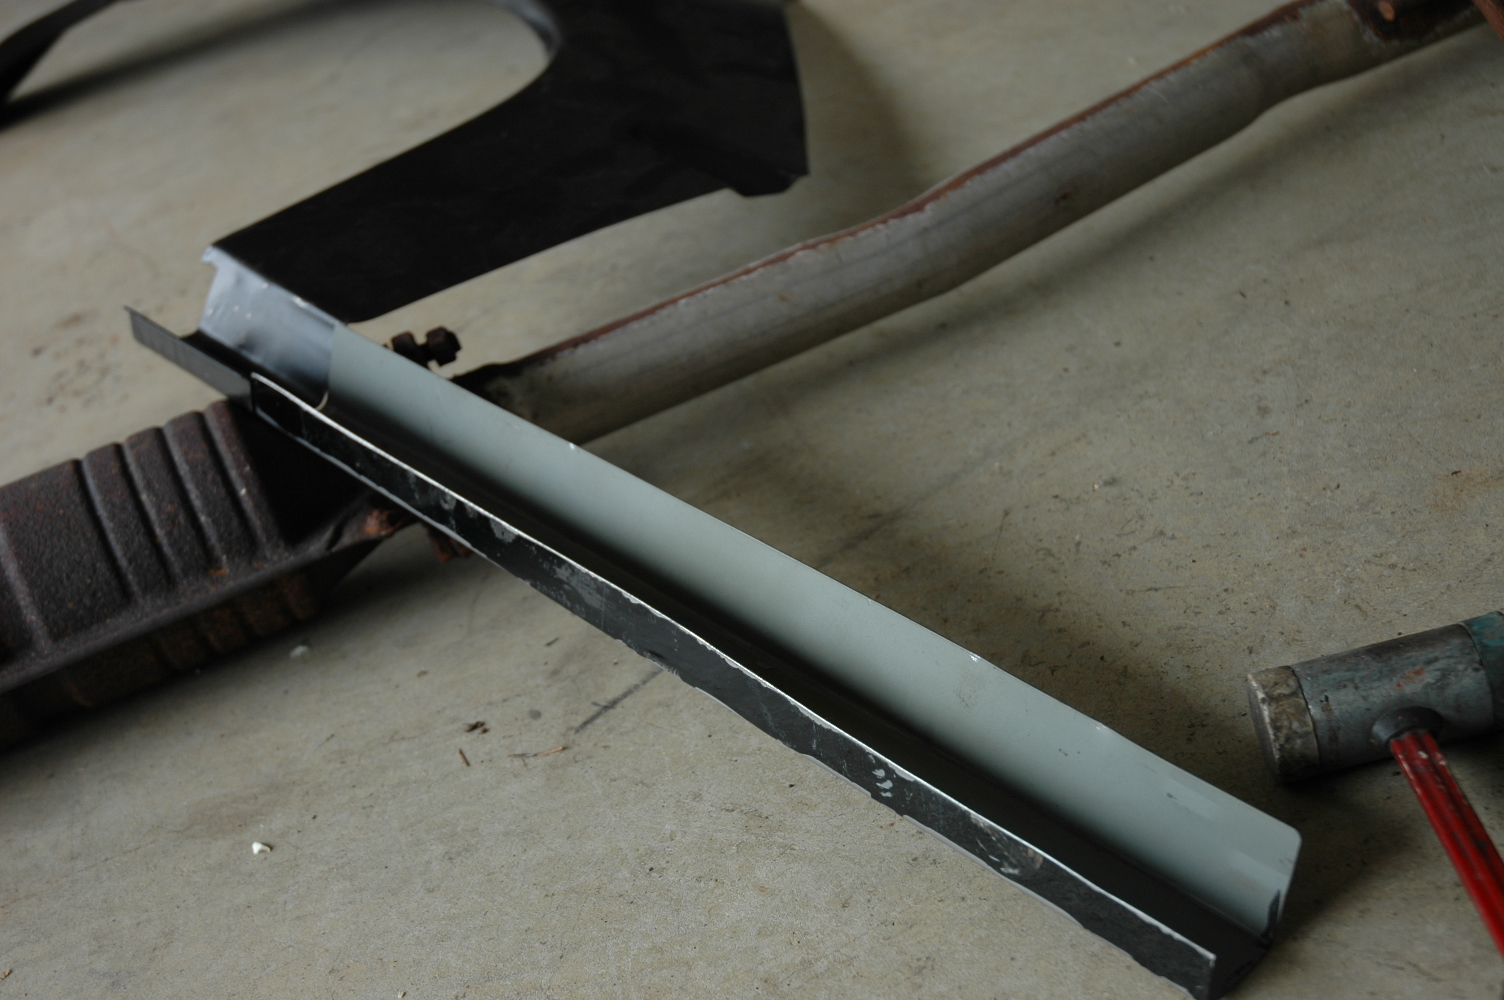
Not bad for my first time with basic tools!
The rotted area was pretty long. my pieces of sheet metal weren’t large enough to make the new piece in one sheet. Next I made a piece to go toward the front of the hole.

But first I coated the inside with rust inhibitor. There are many types, some brush on, some spray on. After the Rust inhibitor cured, I primered the inside. (red primer seen below)

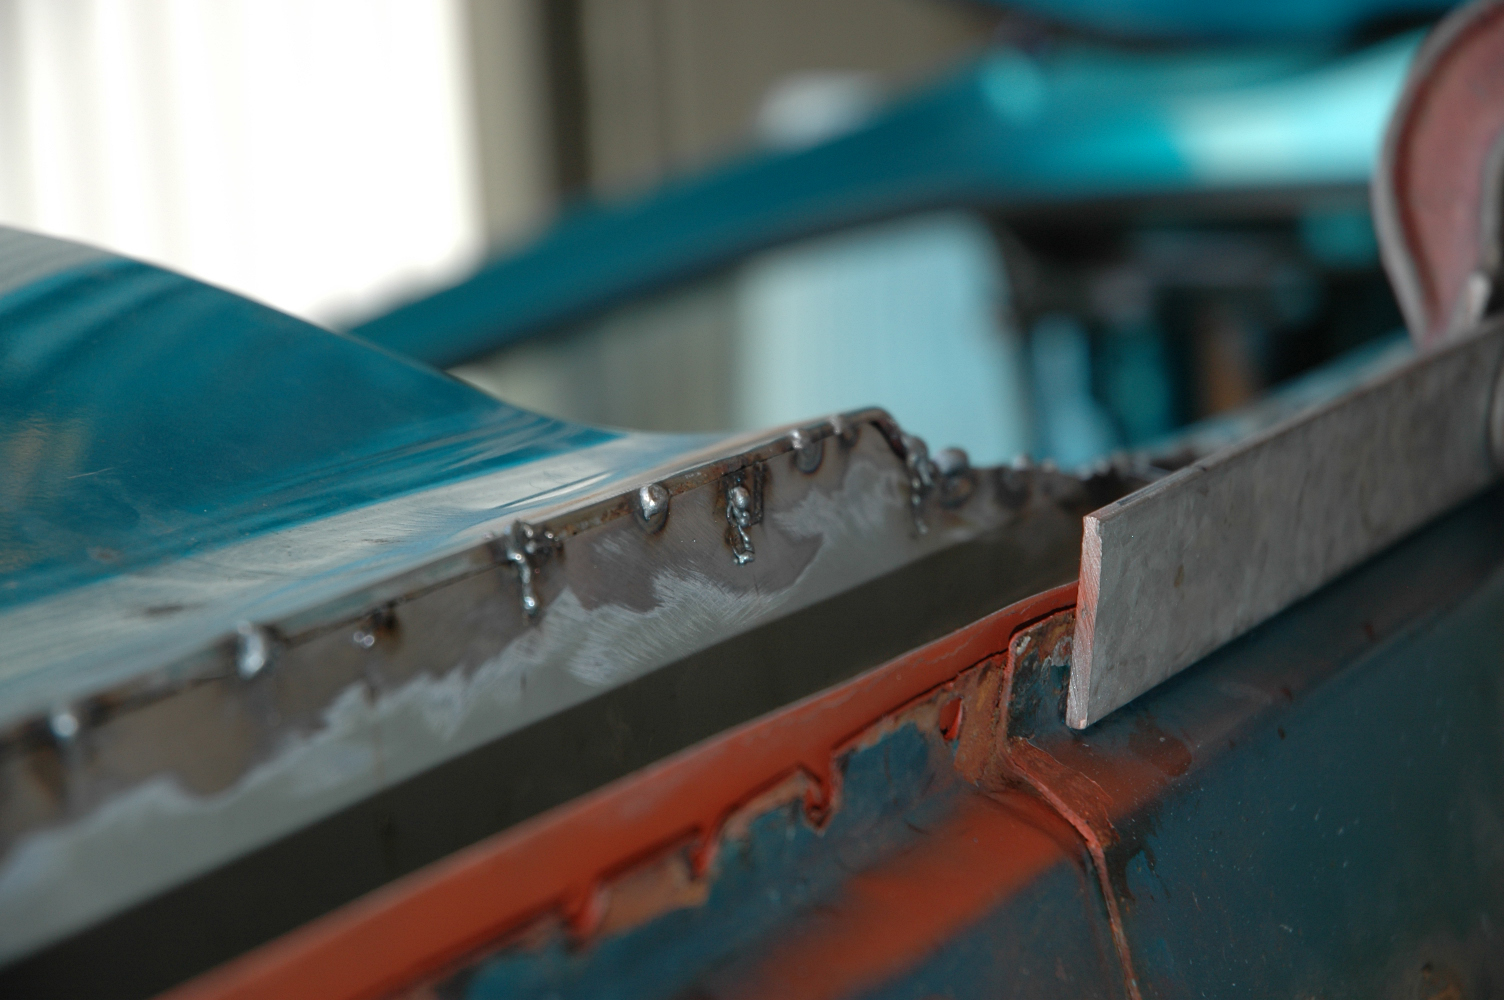
Then cut your angle in the pieces where they taper as shown in the pic above. Tack weld them both in and be sure everything fits. When welding body pieces like this, it is best to tack in a few places. Then go back and tack between the first tacks, then tack between those tacks etc. A clean weld looks nice, but it will be too hot to just weld a straight bead and your sheet metal will likely warp or even burn through.


Keep tacking and eventually your holes will fill in. Then grind it down smooth and fill in any spots you notice you missed. Repeat the process again and again.
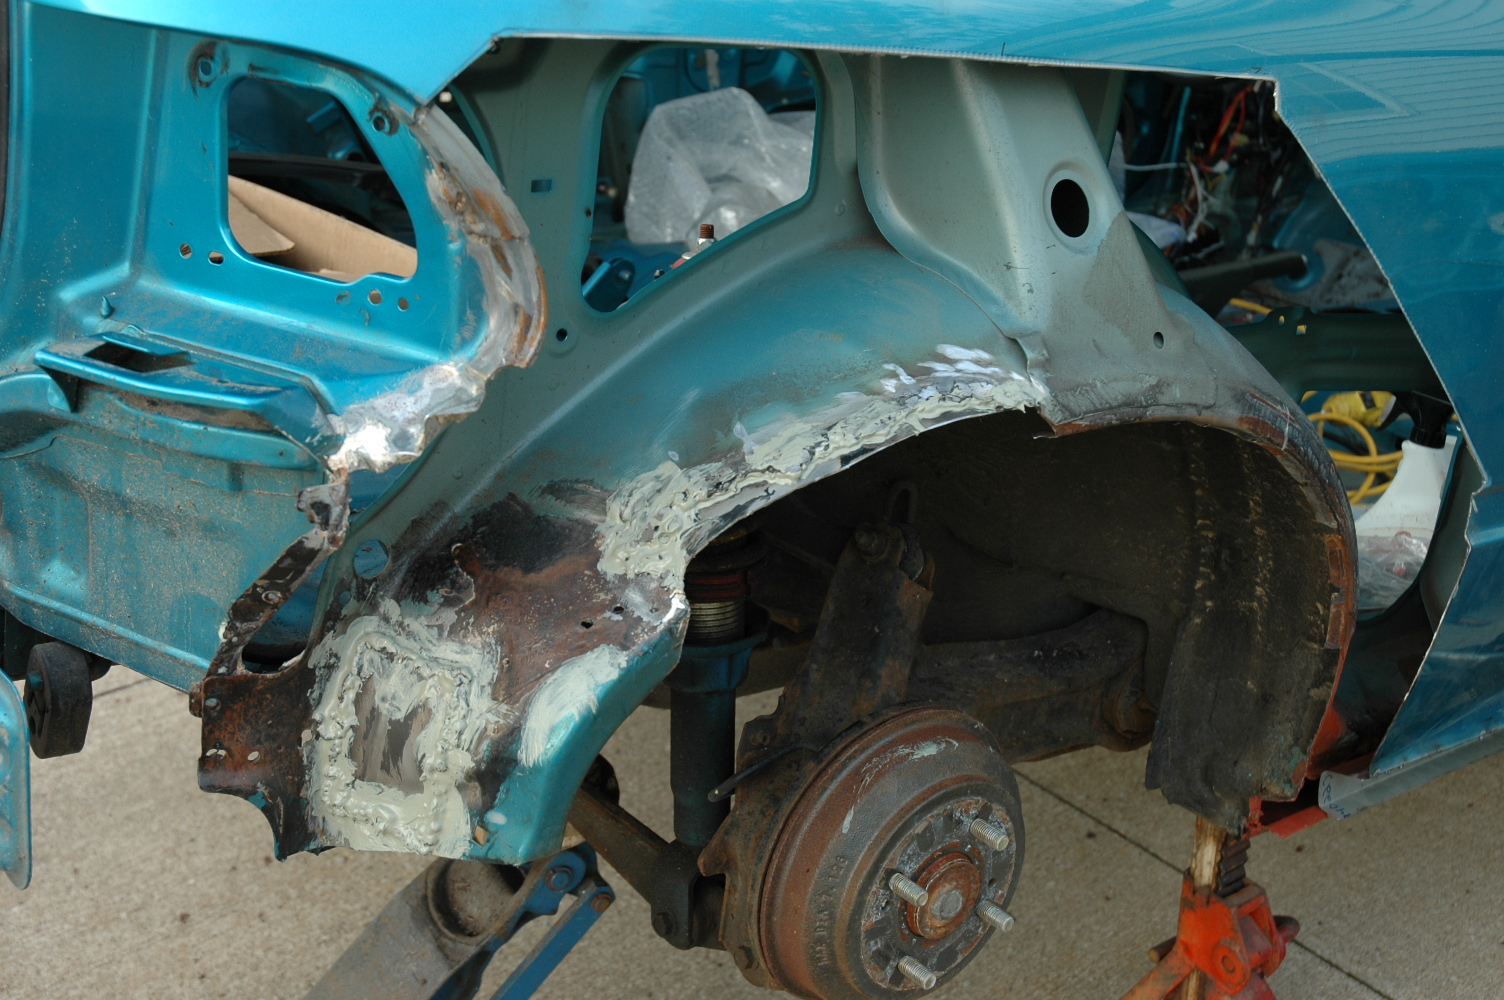

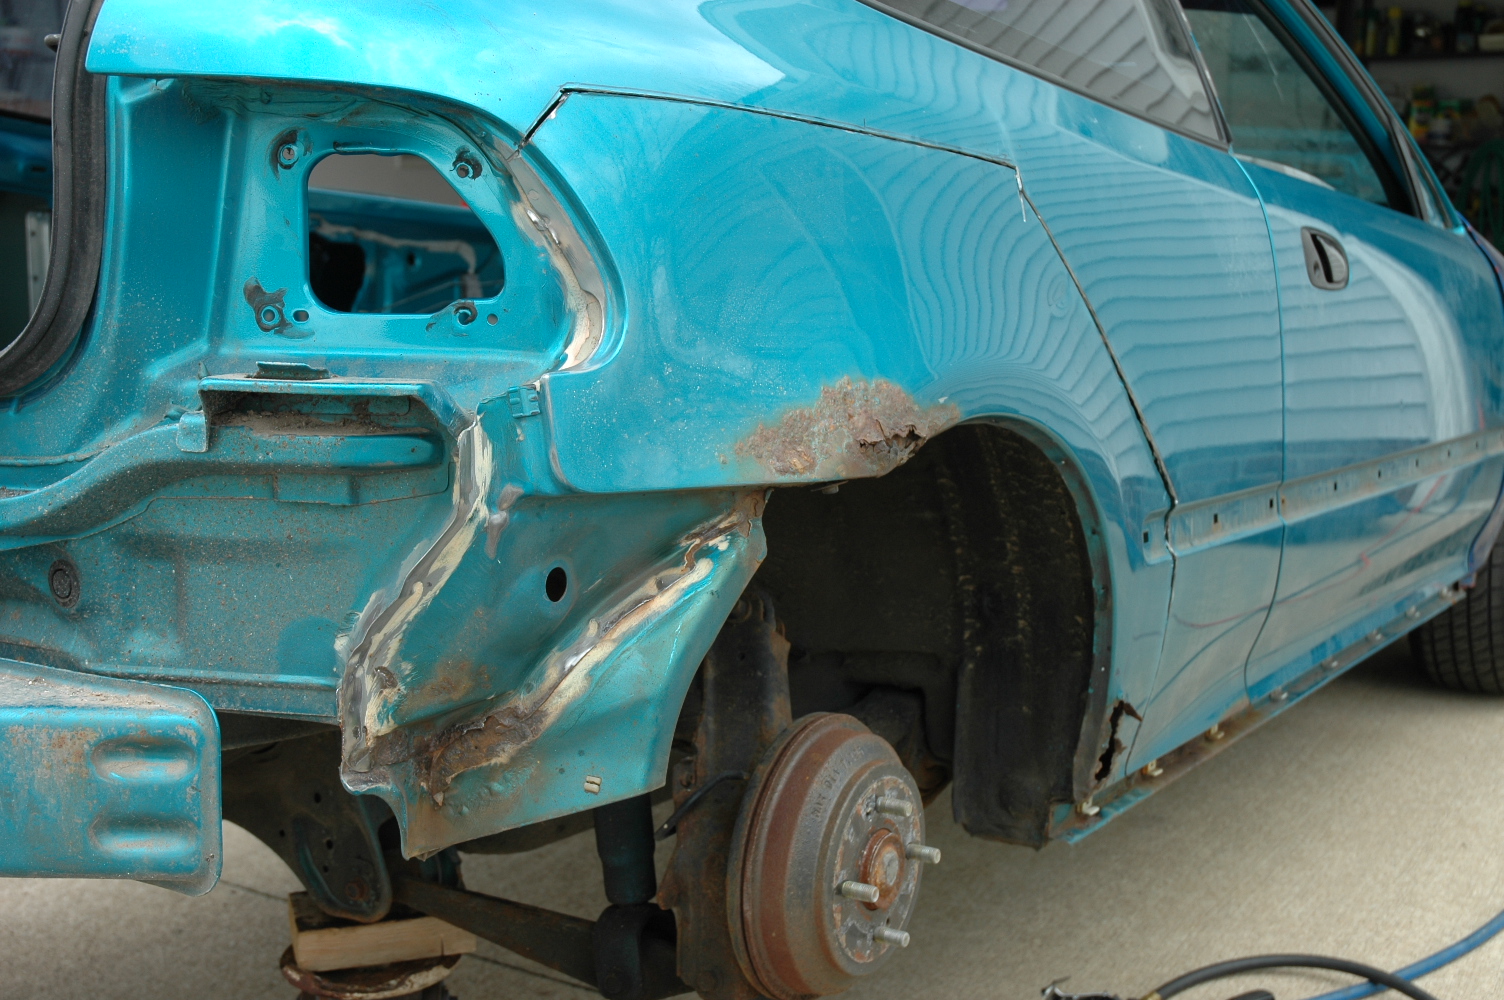
Although it doesn’t look pretty, nobody will ever know. I cut out the rotted areas of the inner fender and welded in new sheet metal. Then sealed it inside & out.

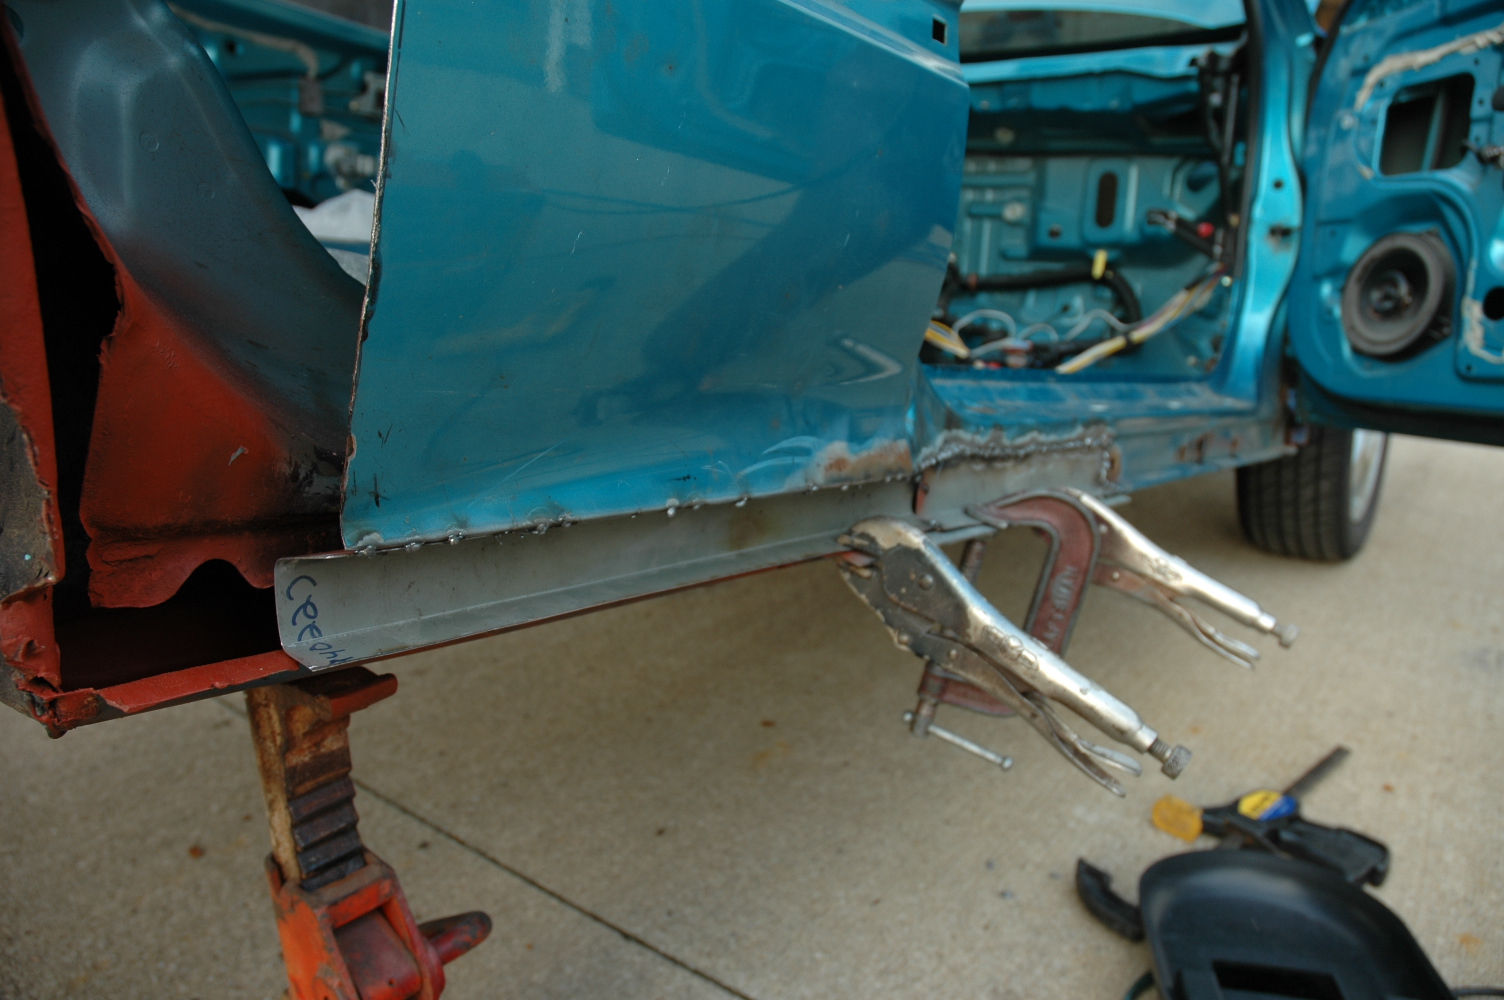
After the rocker panels are completed, or if yours weren’t bad like mine, time to weld in the quarter panel. First task is getting the fit perfect.
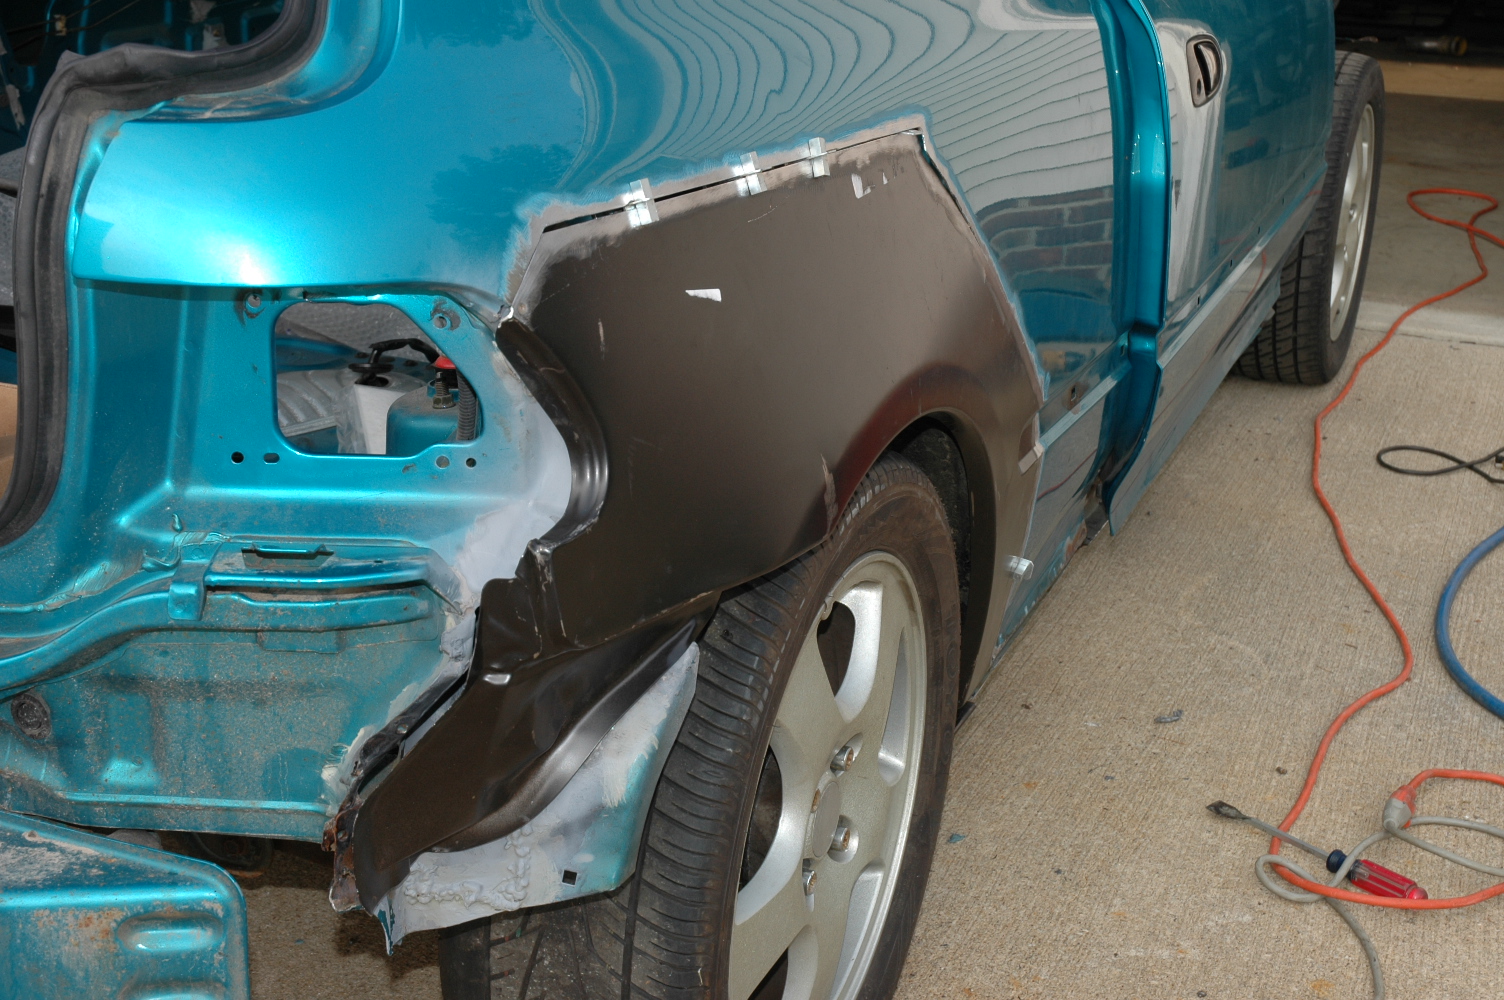
 It is not easy, and trimming is a subtractive process so take your time. You can see near the bottom of the body I trimmed too much off and had to tack in a gap that was 1/4″ at the bottom. Before you weld, grind the paint off the inside and outside edges of both pieces of metal. This will give you cleaner welds.

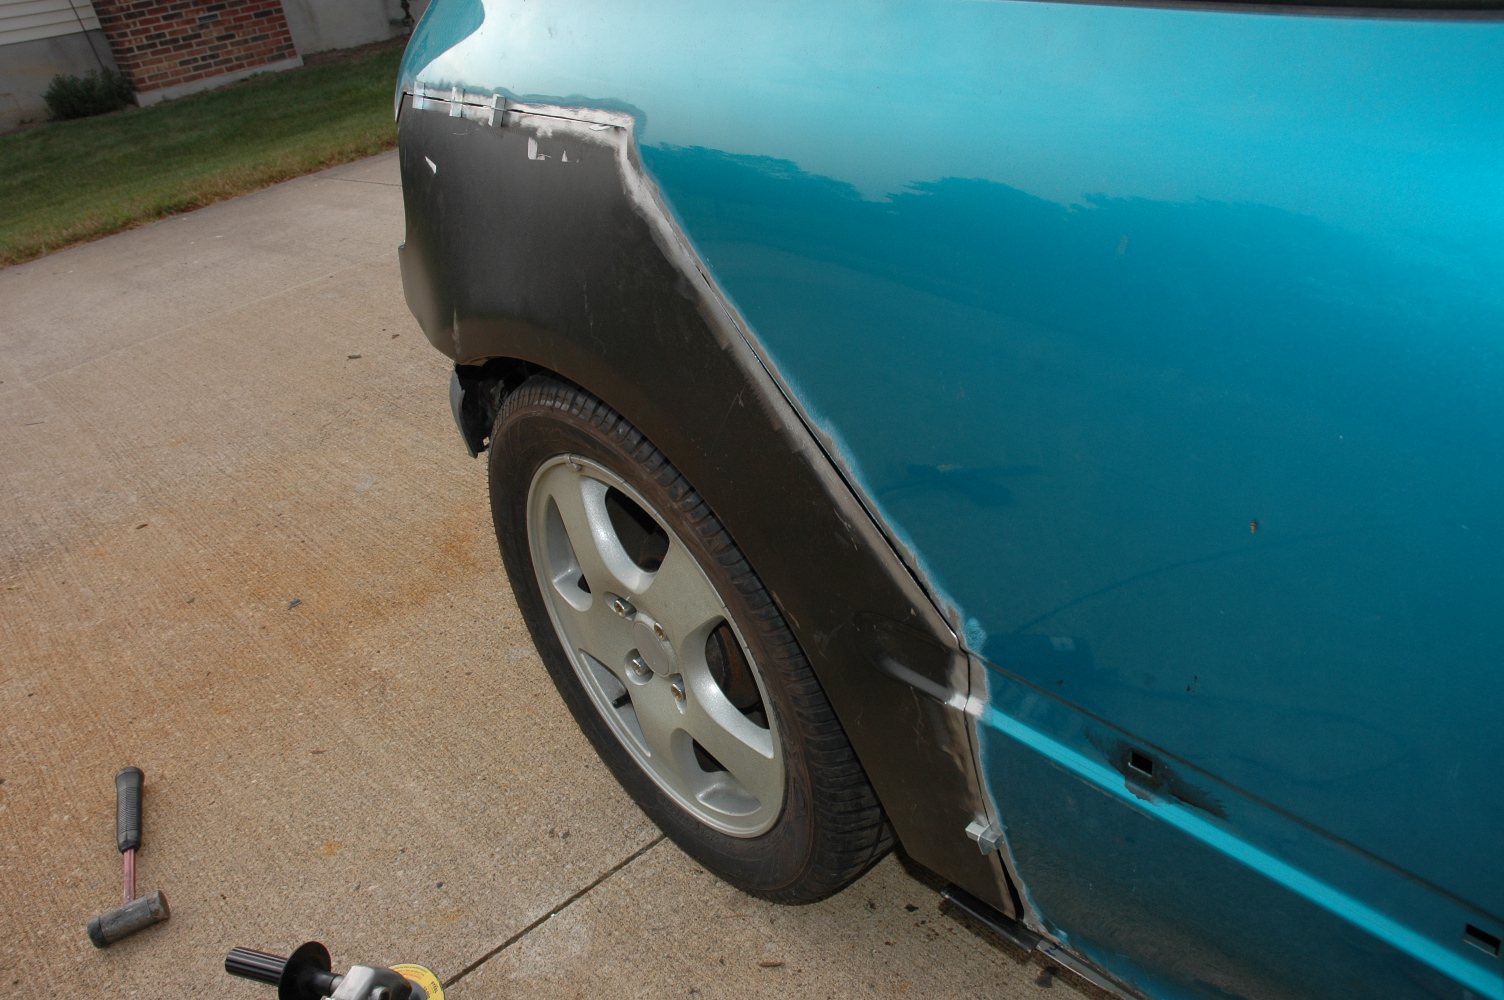
An extra person would be helpful here, or get creative with the clamps. When you have the panel positioned, begin tacking. Just tack it in a couple spots and keep checking to make sure it didn’t move. If everything is good, then begin tacking in between those tacks…. etc….
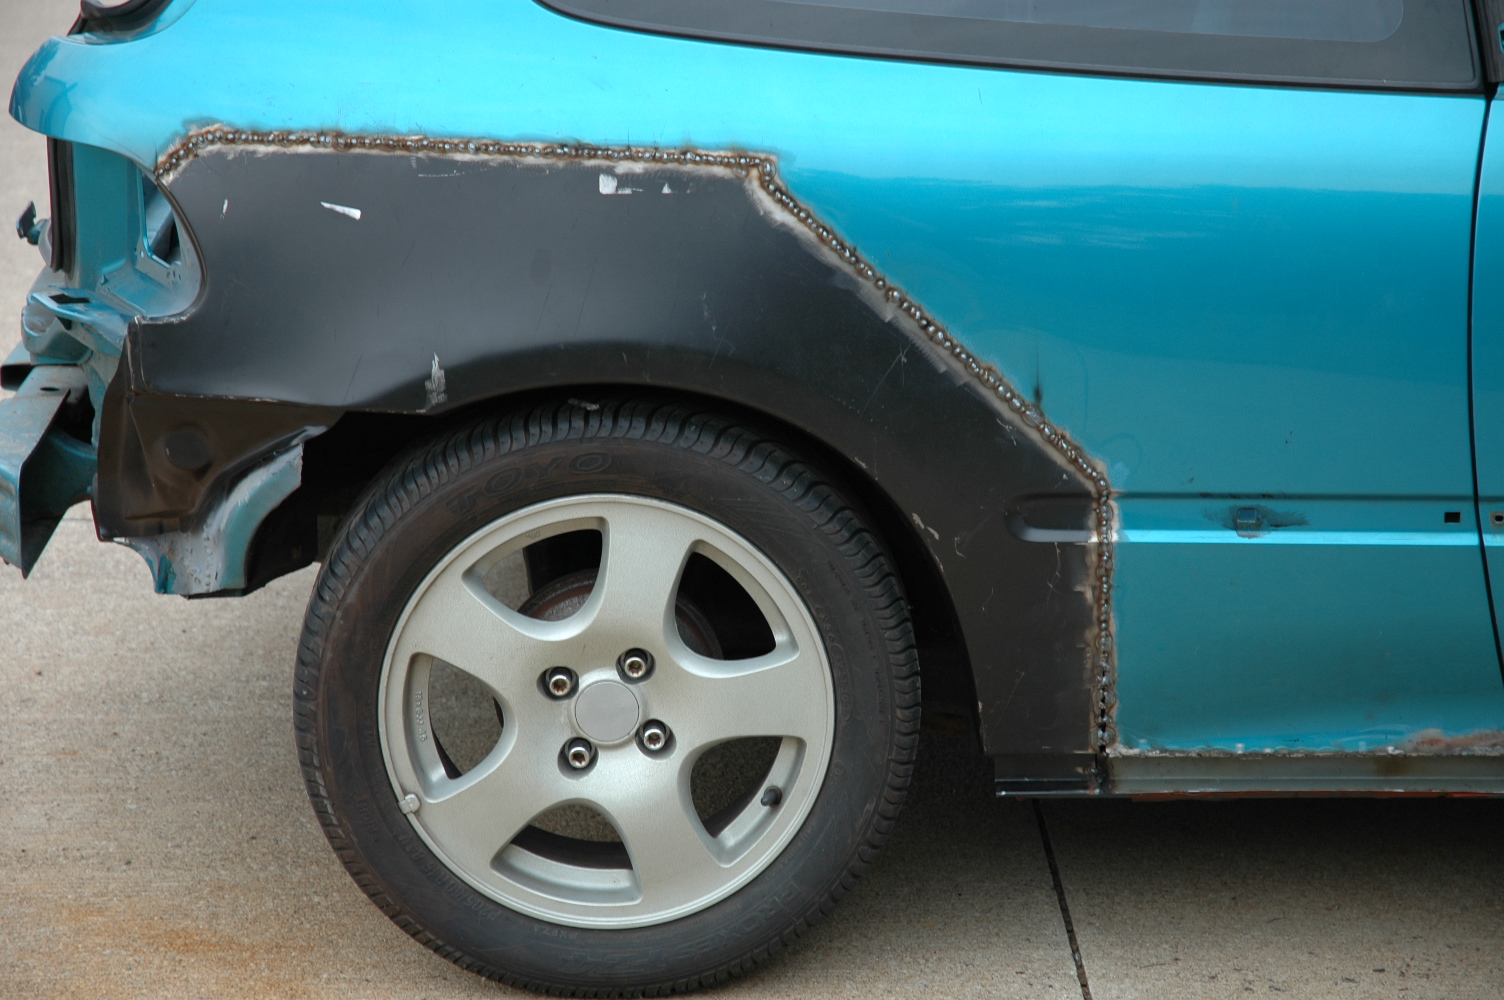
After filling in more tacks again and again…
(Also note that you see there is no hole drilled where the rear bumper attaches to the quarter. You will need to do this after the quarters are welded in. Fitting the rear bumper will come last since it is more flexible and can adapt.)

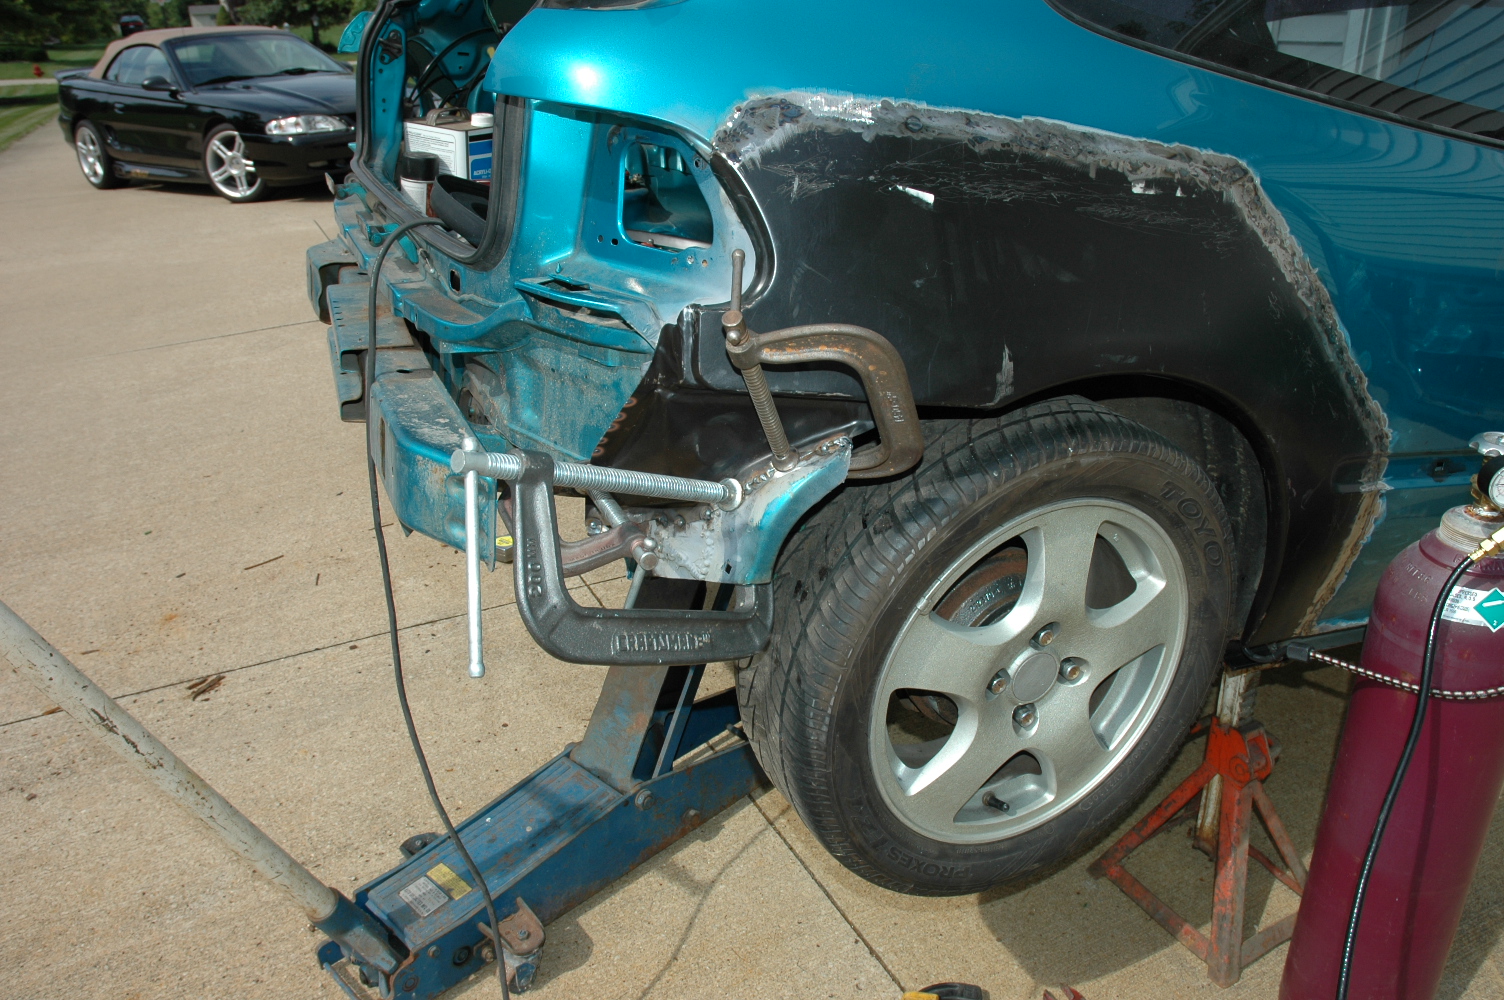
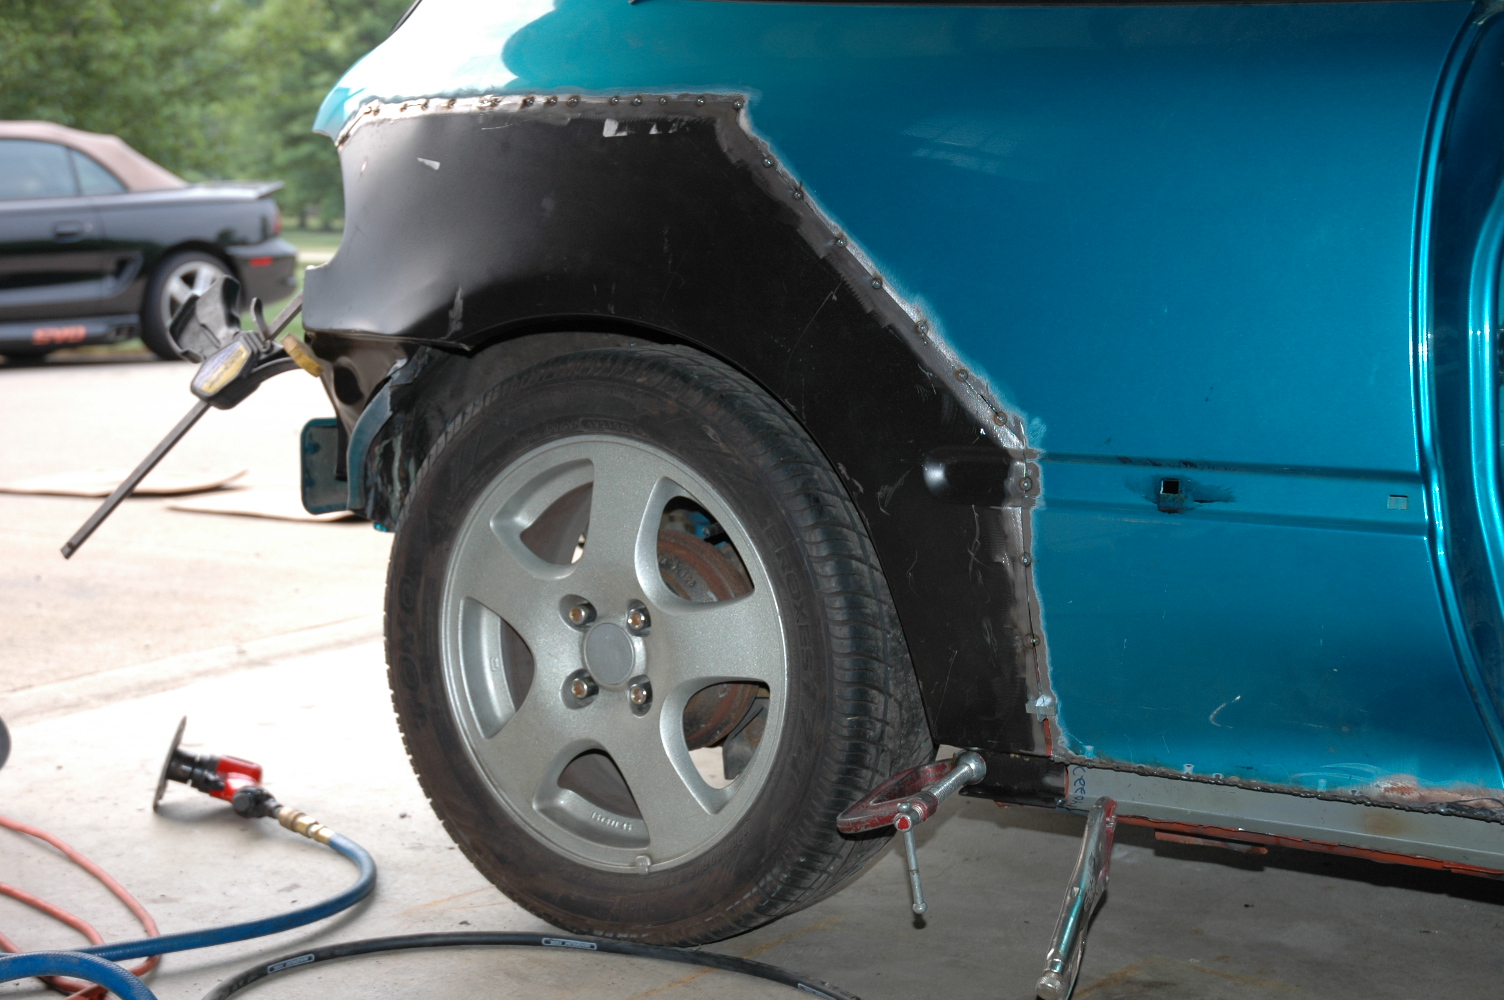
After being ground smooth. Next task was to weld the bottom of the panel to the inner fender well. Originally these were spot welded from the factory, but I’m just going to tack weld the seam and seal it from the inside & out.


Got creative with the clamps again. Now welding on the passenger side is complete! Note the tail light in the last couple pics. Keep the tail light around when you’re test fitting your quarter panel.
Next I started on the driver’s side. Here is a pic of the rocker panel after I poked through all the rusted areas.
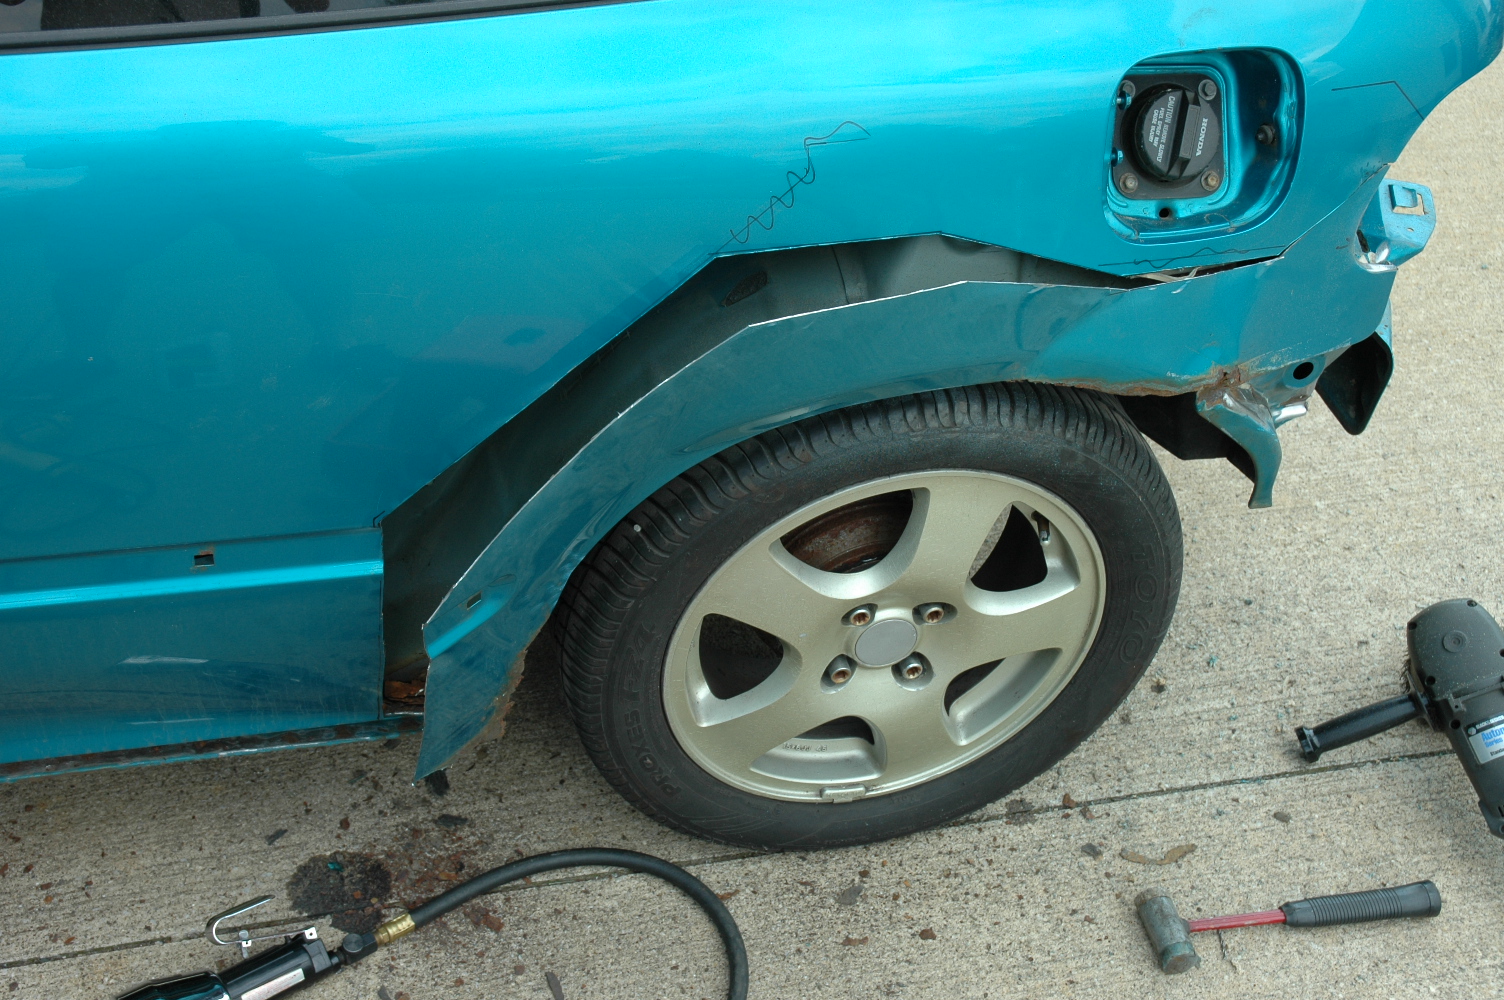
The driver side panel must be cut to go around the gas door opening. My driver side rust didn’t go up too high so I didn’t even need all of the new panel.


I used the wire brush attachment again to remove all the body panel adhesive, exposing the spot welds.


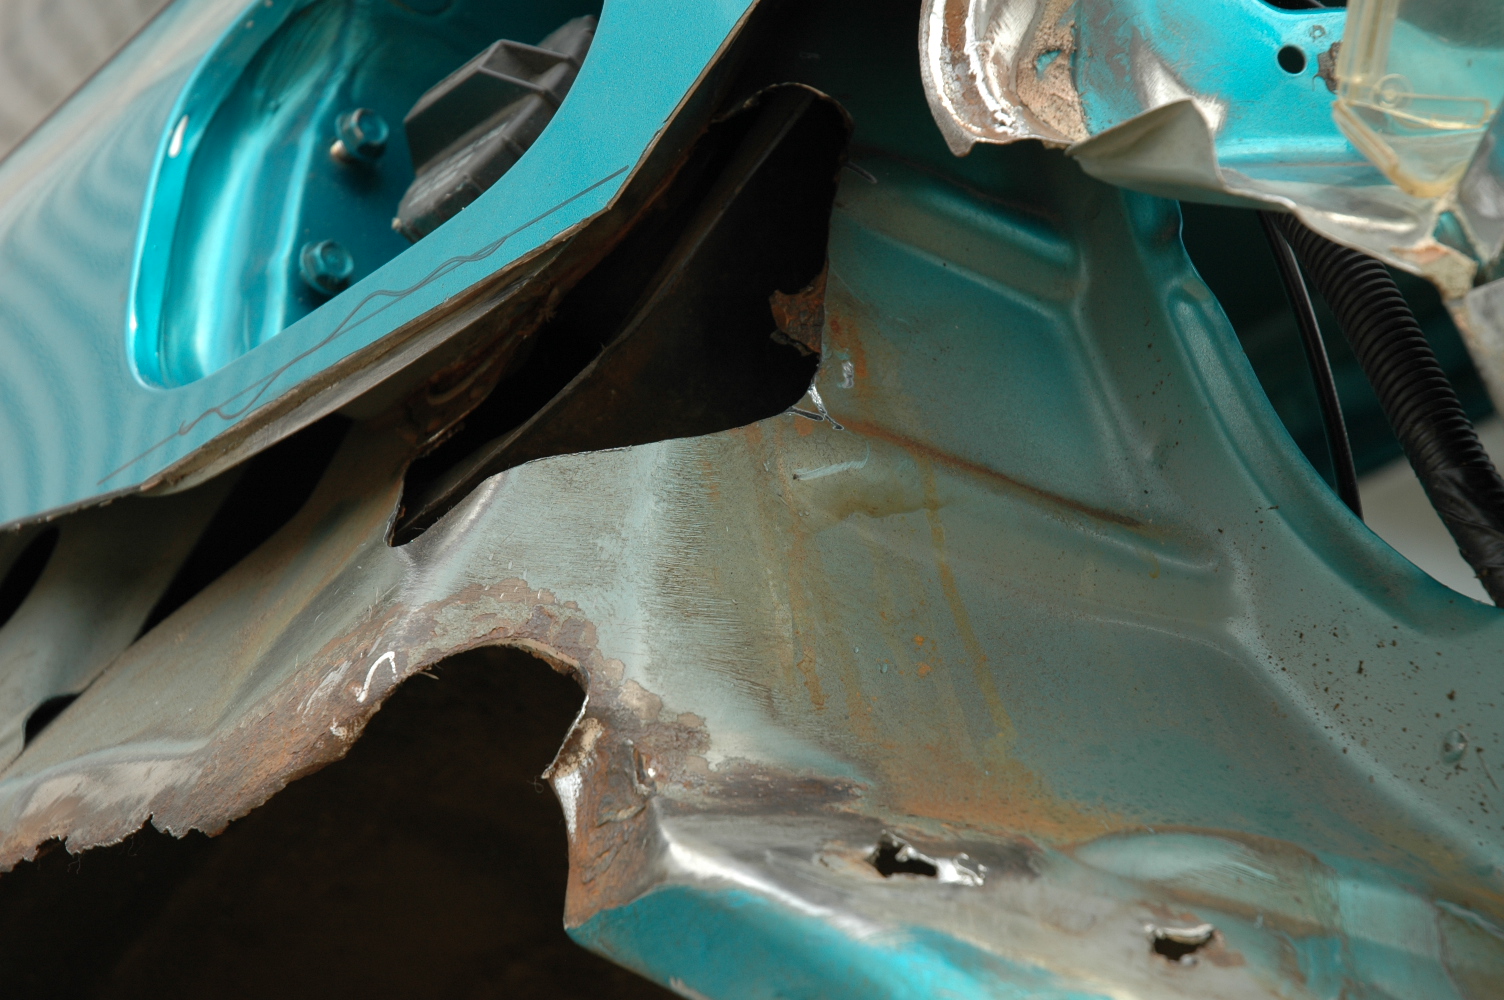
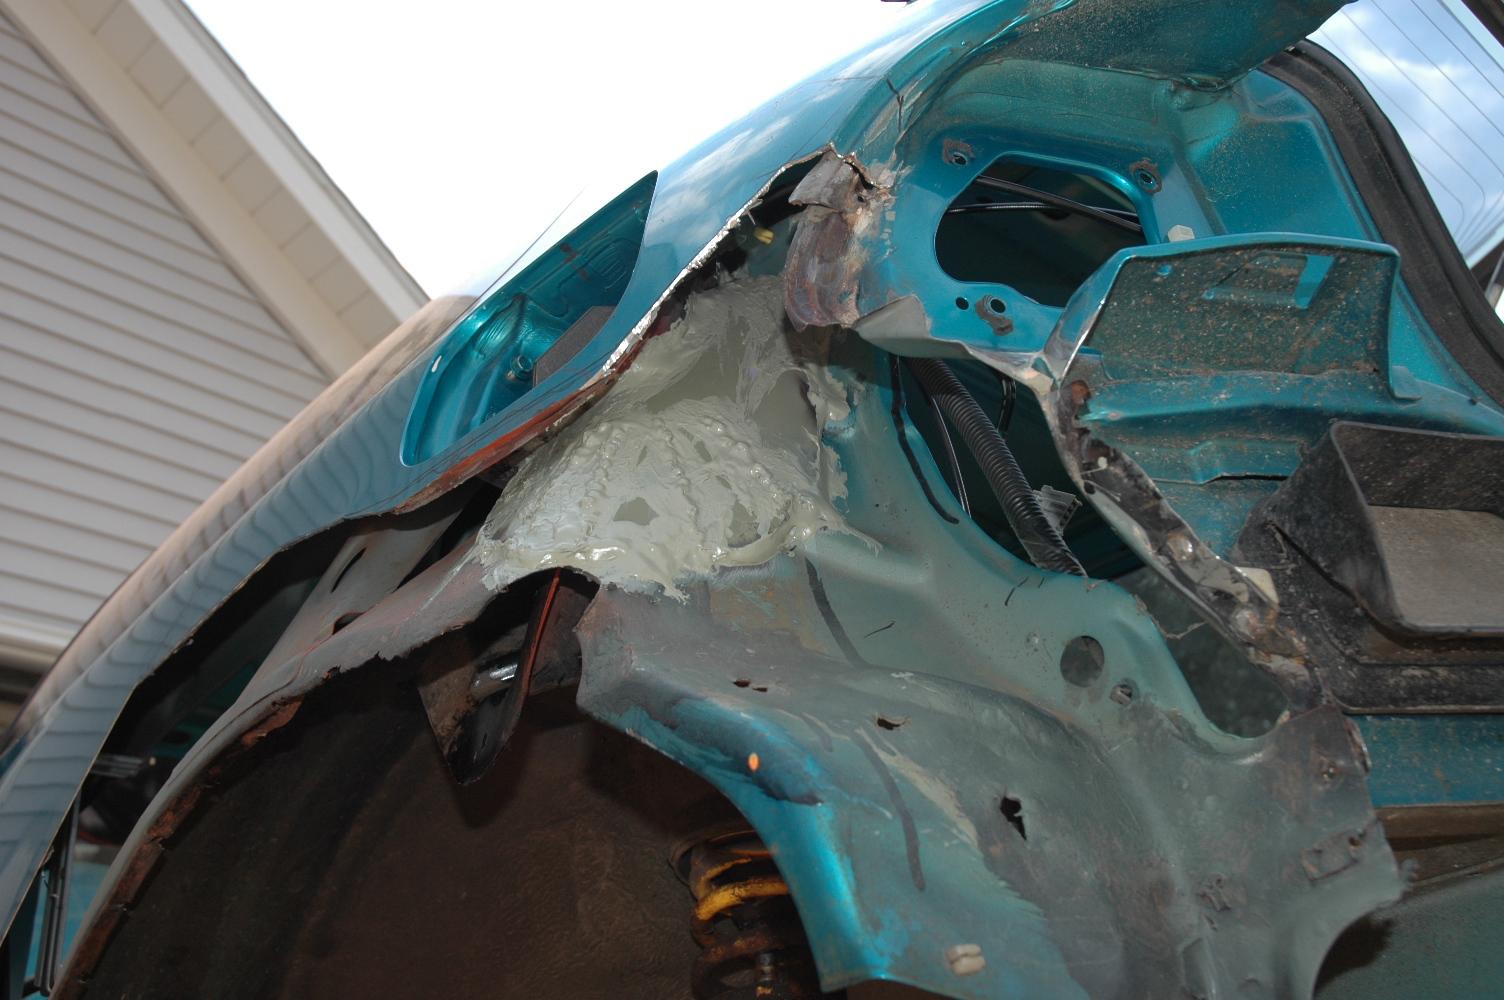
The inner wheel well wasn’t rotted like the passenger side was, but there was a different problem…

First, I cut away all the existing rust with the angle die grinder.

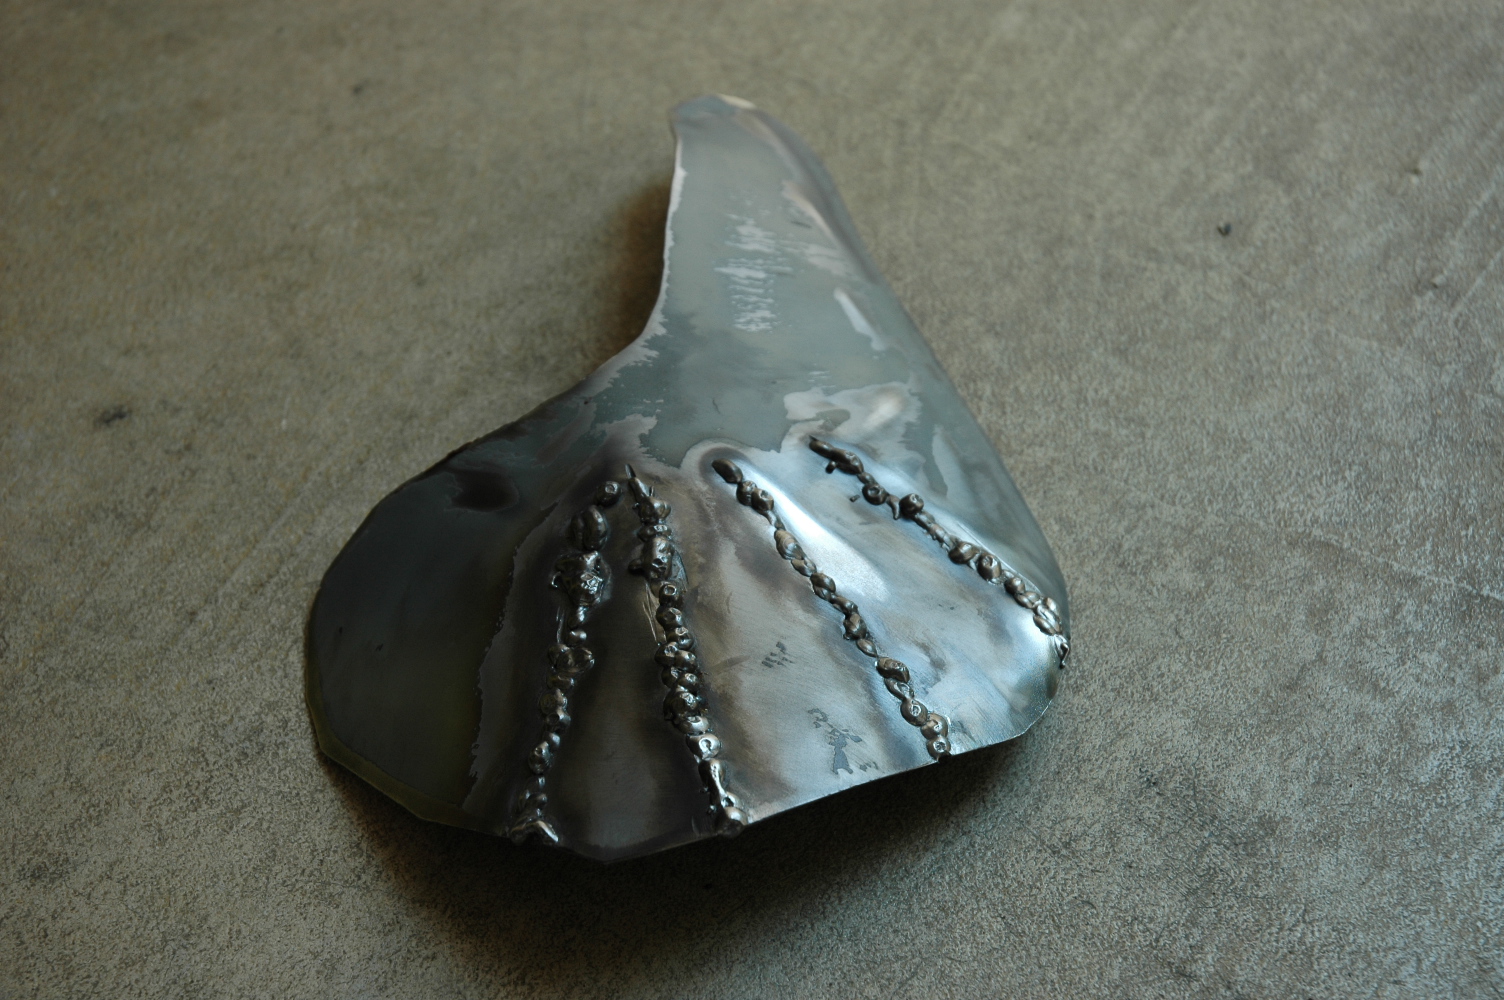

I used a piece of cardboard to make a template for a patch. Then traced the shape onto a piece of sheet metal.
Here it is welded in and sealed.
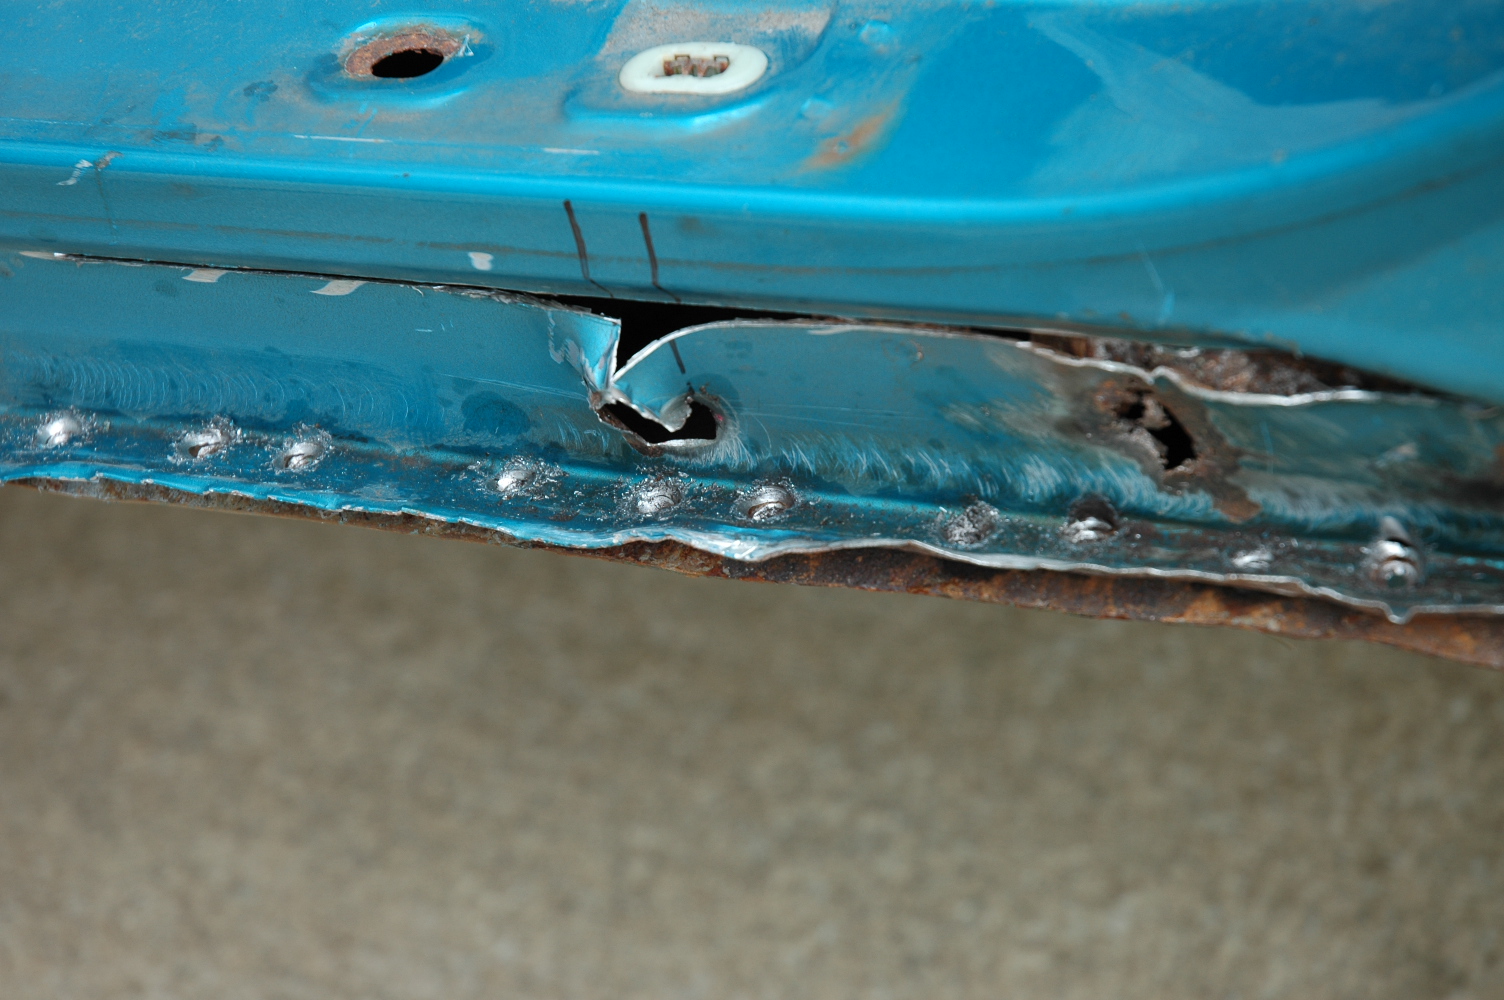
Drilling out the spot welds on the driver side rocker panel. Note the marks I put above the square side skirt mounting holes, so that I know where to drill the holes on the new panel.
After cutting out the old rusty piece, more rust inhibitor was applied to the inside. Before applying the inhibitor, I ground as much as I could to remove surface rust, and then cleaned the inside. From there, follow the directions of the type of rust inhibitor that you use. Some common ones are POR 15, Rust Bullet.

Driver side is all welded in and ground smooth.
Now you’ve done the majority of the work. From here you need to tack up where your spot welds once were, as you did on the right side of the car…
Then seal everything up, inside and out. Also be sure to apply body sealer between the inner & outer lip of your wheel well. Then be sure to apply generous amounts of sealer from the inside of the car to be sure that the problem won’t return. Also undercoat the underside of the inner wheel wells too. After all the work that just went into the car, it is worth going the extra step to protect it.
Here is the inside of the rear panel after installation.
Use a wire wheel brush on the inside to clean the weld area and then coat it.

I used aerosol Undercoating over the welded areas.
Before you start getting the body ready to paint, there’s one more thing you should consider… rolling the rear fenders. If you are running a wider rim/tire than factory, then you should do this. There is a normally the risk that you could crack the paint, but now is the time you don’t have to worry about that! Put your wheel/tire on and with the car on the ground, look at the amount of space. Find a bat or pole that isn’t too big. If you’re trying to do this with your aftermarket 17×7″ rims with 205/40/17 tires, you might have some problems. I had a set of GSR wheels with 205/55R15 tires, an average size bat fit perfect. Lift the corner of the car up a little so the wheel is still touching the ground. Insert bat (may want to put a piece of cardboard or similar between bat and fender so you don’t scrape up your bat). Slowly lower. Now just turn the bat between your fender and tire and roll it along.
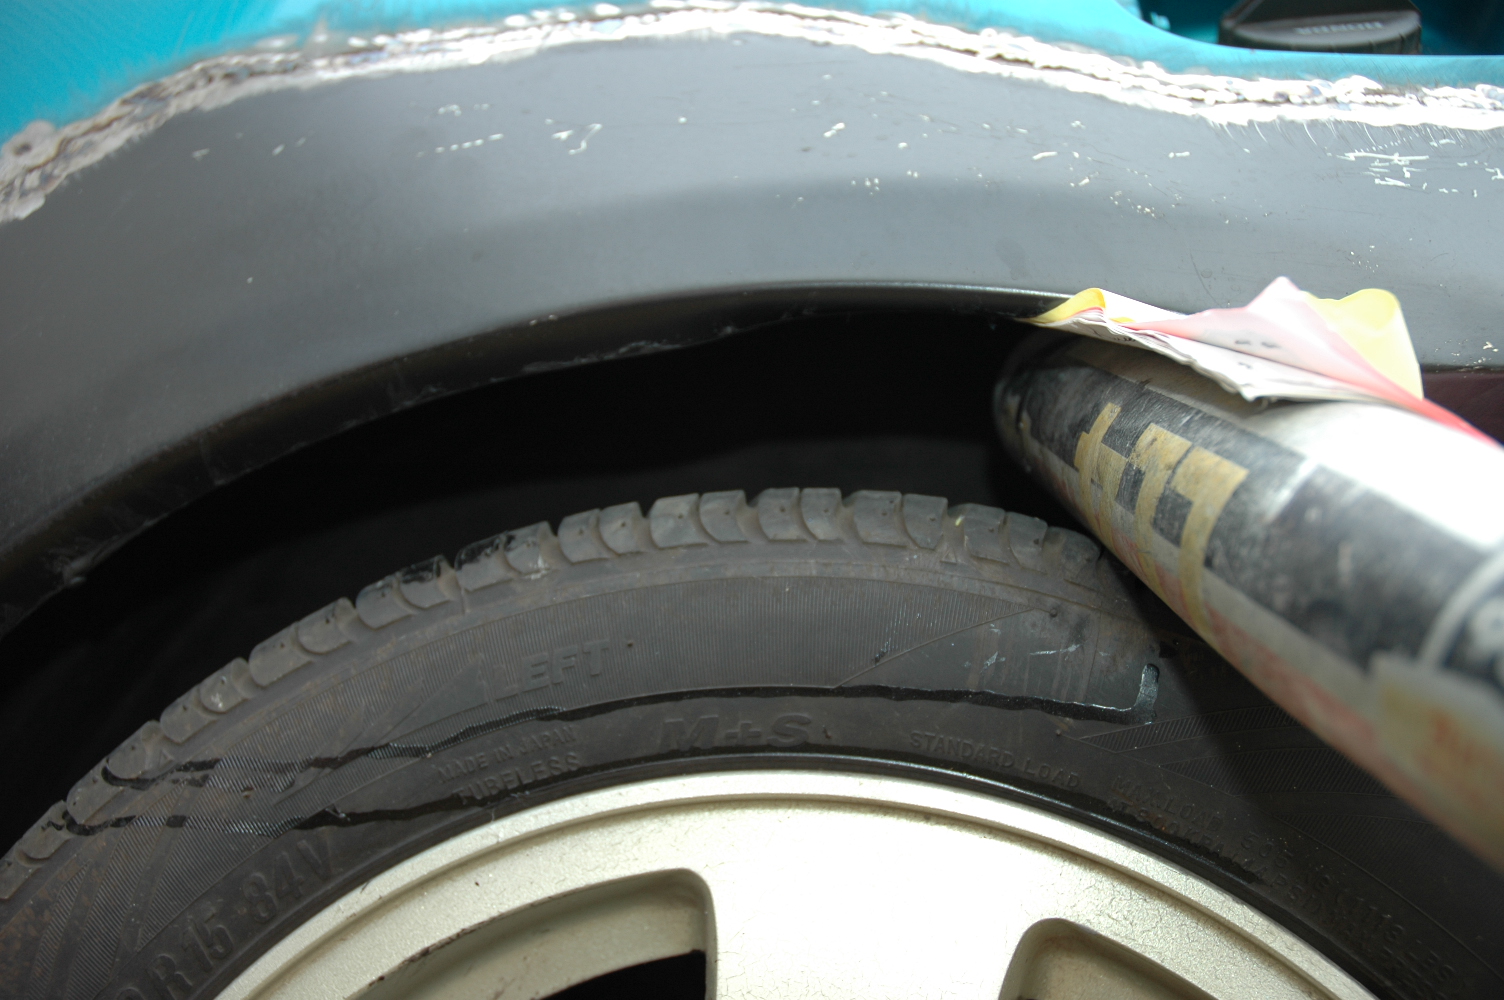
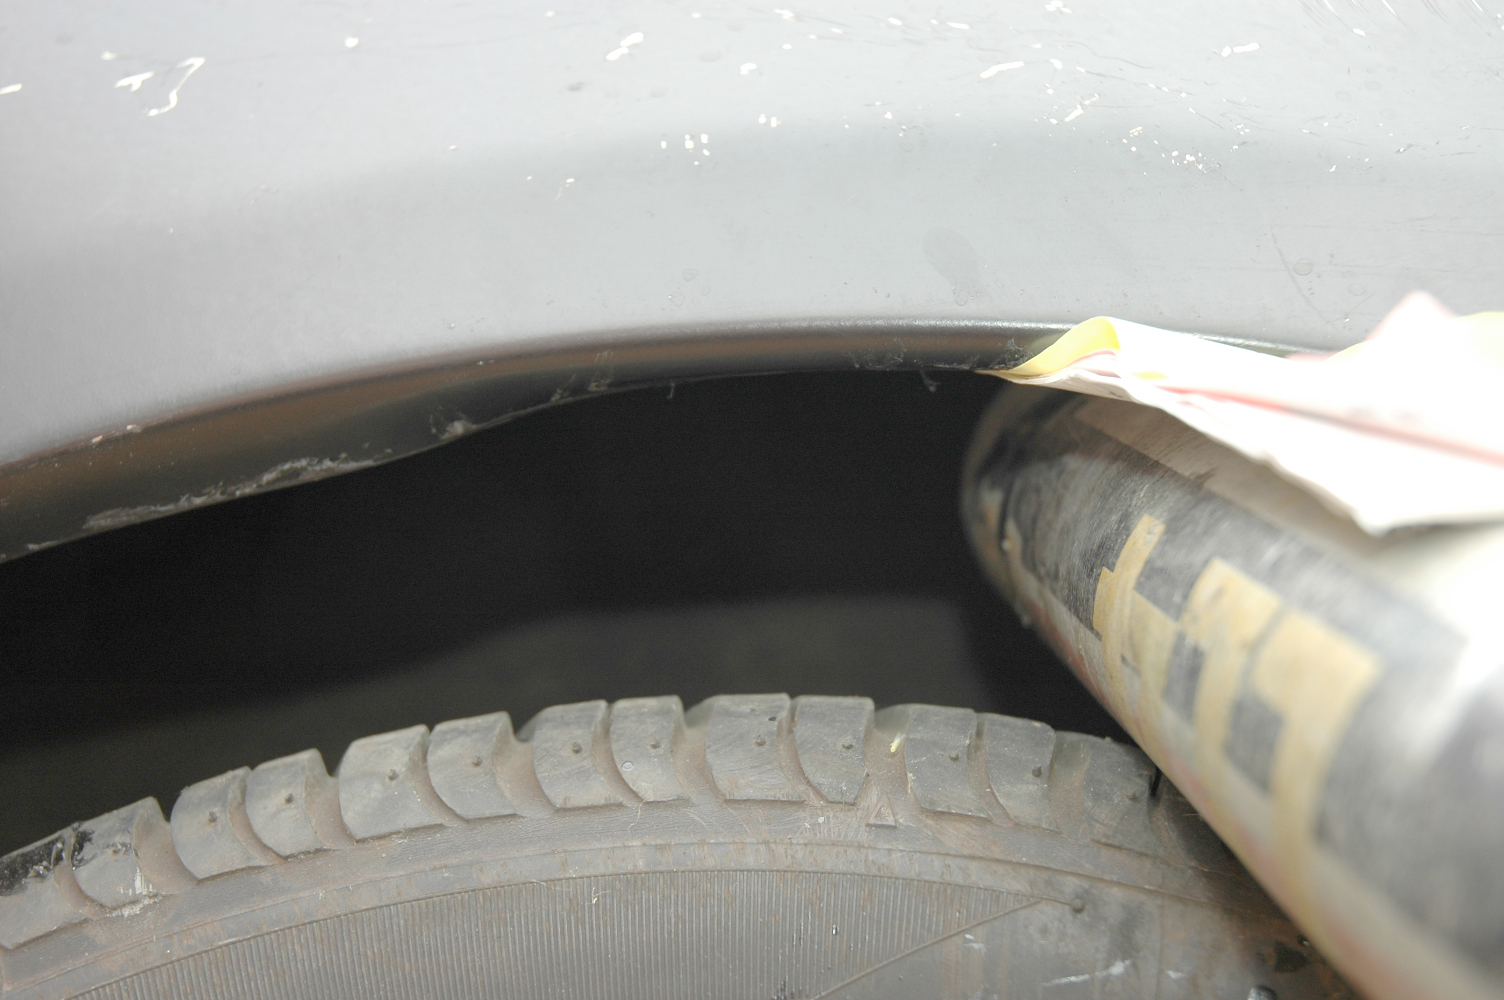
Go slow and take your time. I went over it twice and gained about an extra inch of clearance.

Installing the sideskirts:
First I had to measure where the holes would be. (During all the rocker panel work, I ended up removing the black marks I made above the holes.)
This wasn’t too hard, I installed all the white plastic clips onto the back of the side skirt. The original holes toward the front are still there. Putting the clips on the front of the sideskirt part way into their holes, it will pretty much line up where your new holes toward the back will need to be.
I did a vertical measurement first, to make sure the holes weren’t too high or low.
Now I just had to be accurate from Left to Right. I put a small dab of grease on the tip of the white clips and lined up the side skirt. I partially put the white clips in the front holes and this showed me where the rear holes will be. I already marked where they should be vertically, now where the grease mark was left is where the hole needs to be horizontally. Where the 2 lines came together is where to drill!

Now if you are a little off, it is OK. Next you will need to file the small round hole into a bigger square hole. Keep test fitting the side skirt with the white clips installed. Each time you test fit, you will see which side of the square hole you need to file on. If your skirt looks to be too low, then file the top of the hole away. If the clip is not going in because the hole does not go to the right enough, file that side. Be careful not to file too much though, or the clips will be too loose. best thing to do is keep the side skirt with white clips installed right there and keep checking.
After your panels fit, you can clean & primer the area.
You’ll know they fit when the skirts pop in with an easy punch. if you keep punching them hard, then you need to file a little more.
To get the skirt & clips off after installing, slide the whole side skirt forward from back wheel to front wheel. The skirt will release from the clips. Then turn each white clip 45 degrees and wiggle it out.
Cleaned & painted with some self etching primer.
When you are welding, be VERY careful not to get the metal too hot or it WILL warp. The metal on these cars is so thin it can happen very easily. Both sides of my car were warped inward after I was done welding. I kept checking them in the beginning and they were ok. It must have happened at the very end when i was going back and tacking in between all the welds. So I had to use some filler in the warped area to fill in the recessed part. It was very time consuming to scuplpt it back to the shape of the car. But after much sanding, it is complete. This was the first time using body filler and It was hard to get everything perfectly smooth and not wavy. Basicially you will start with a long board or long sanding block. Start big and then work your way down to the minor imperfections.
From here, you will prep the body to get ready for paint.
I wrote this from my personal experience. I was able to drive another vehicle during the time I was working on this one. This is not a weekend project, I worked on this project one day a week for at least a couple months. My civic was extra rusty, having to repair the lower rocker panels made this project last much longer than expected.
When deciding if you should attempt to do this yourself, remember time is money!
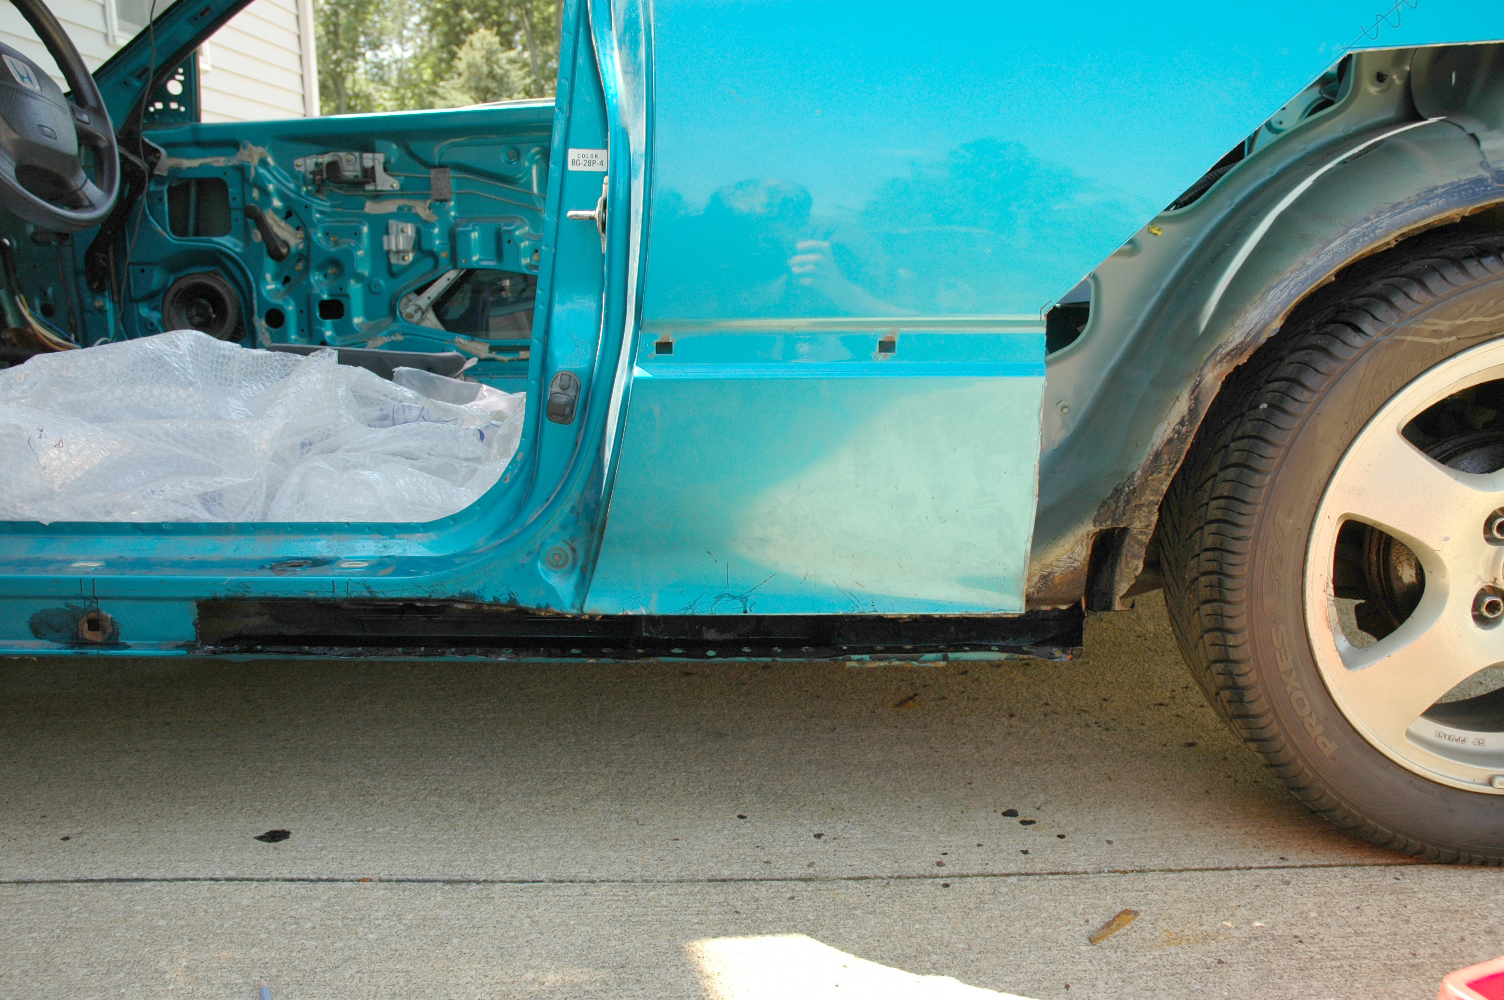
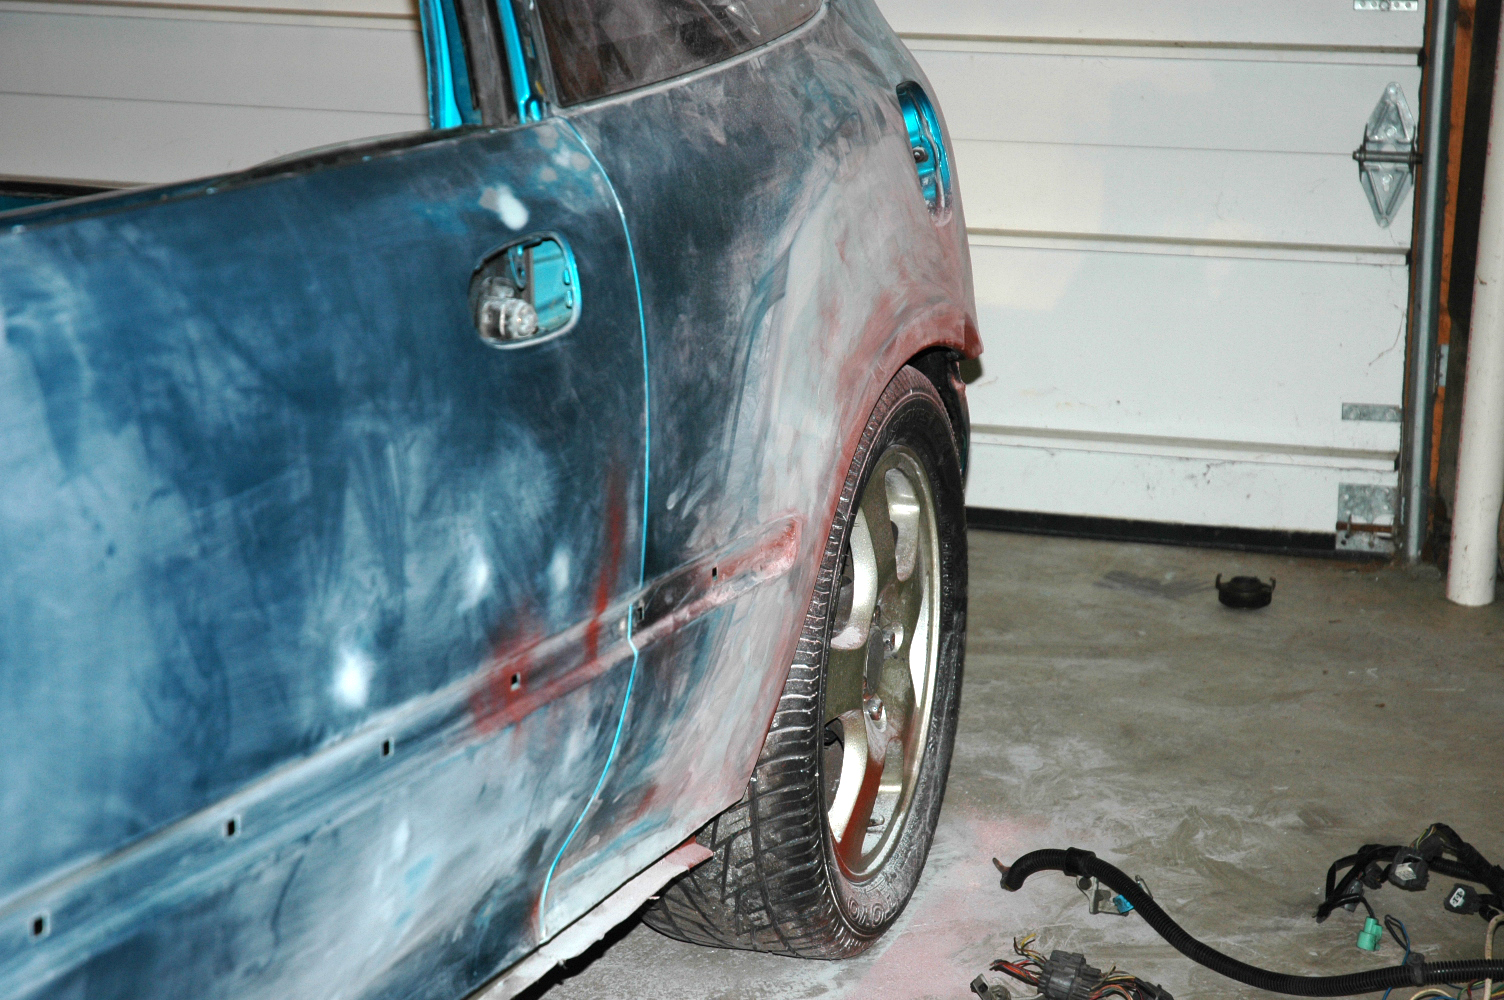
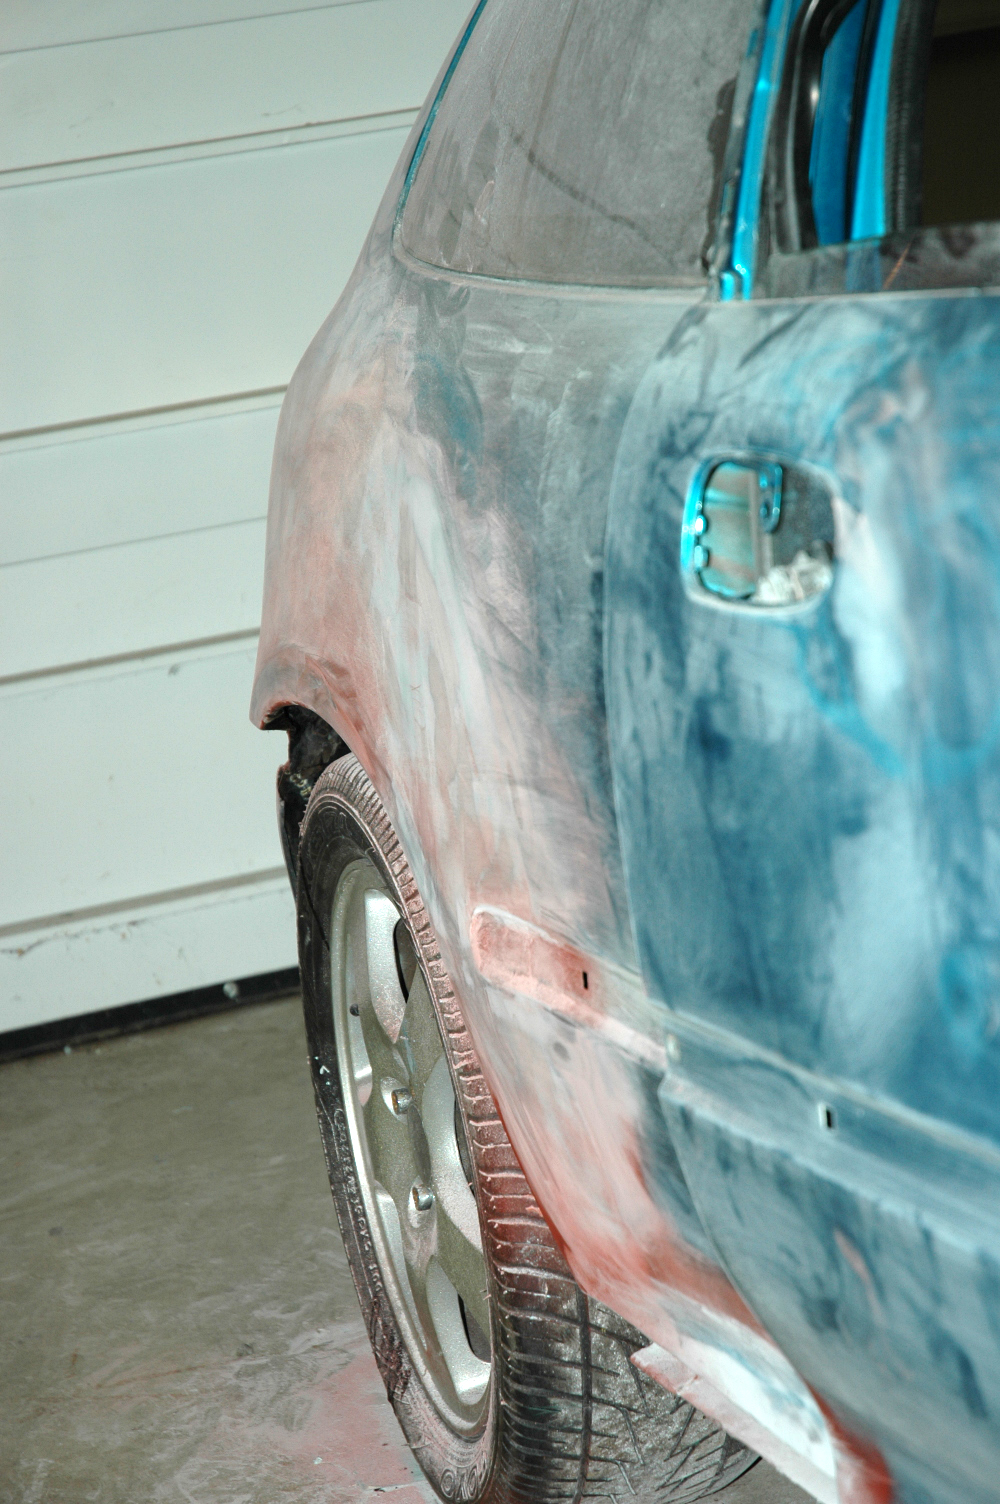
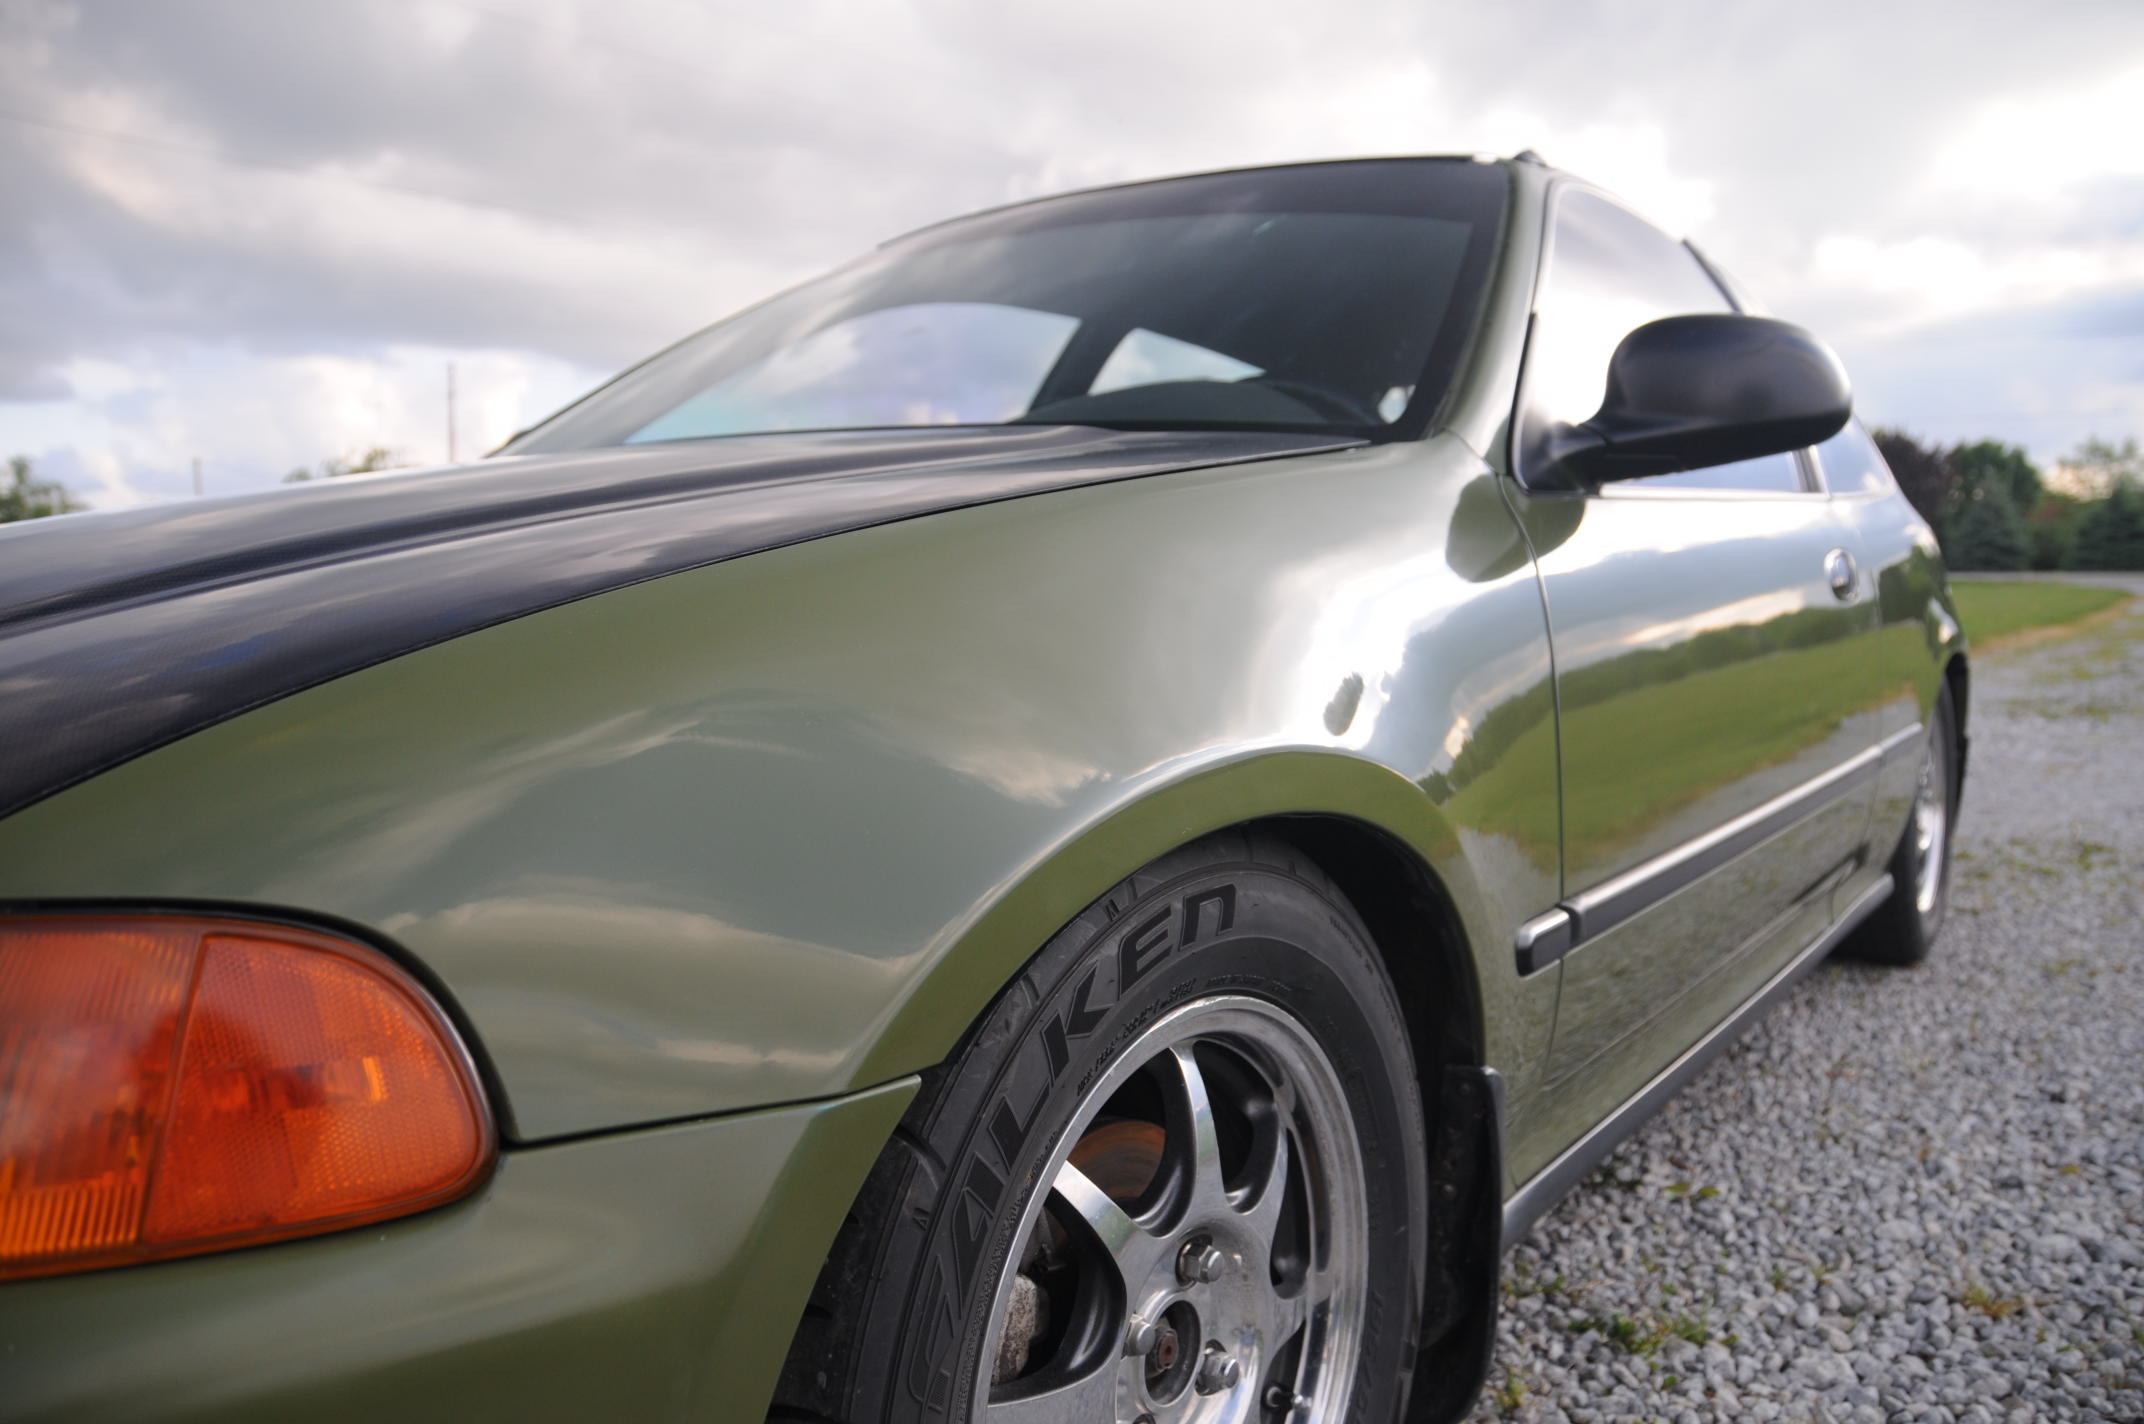
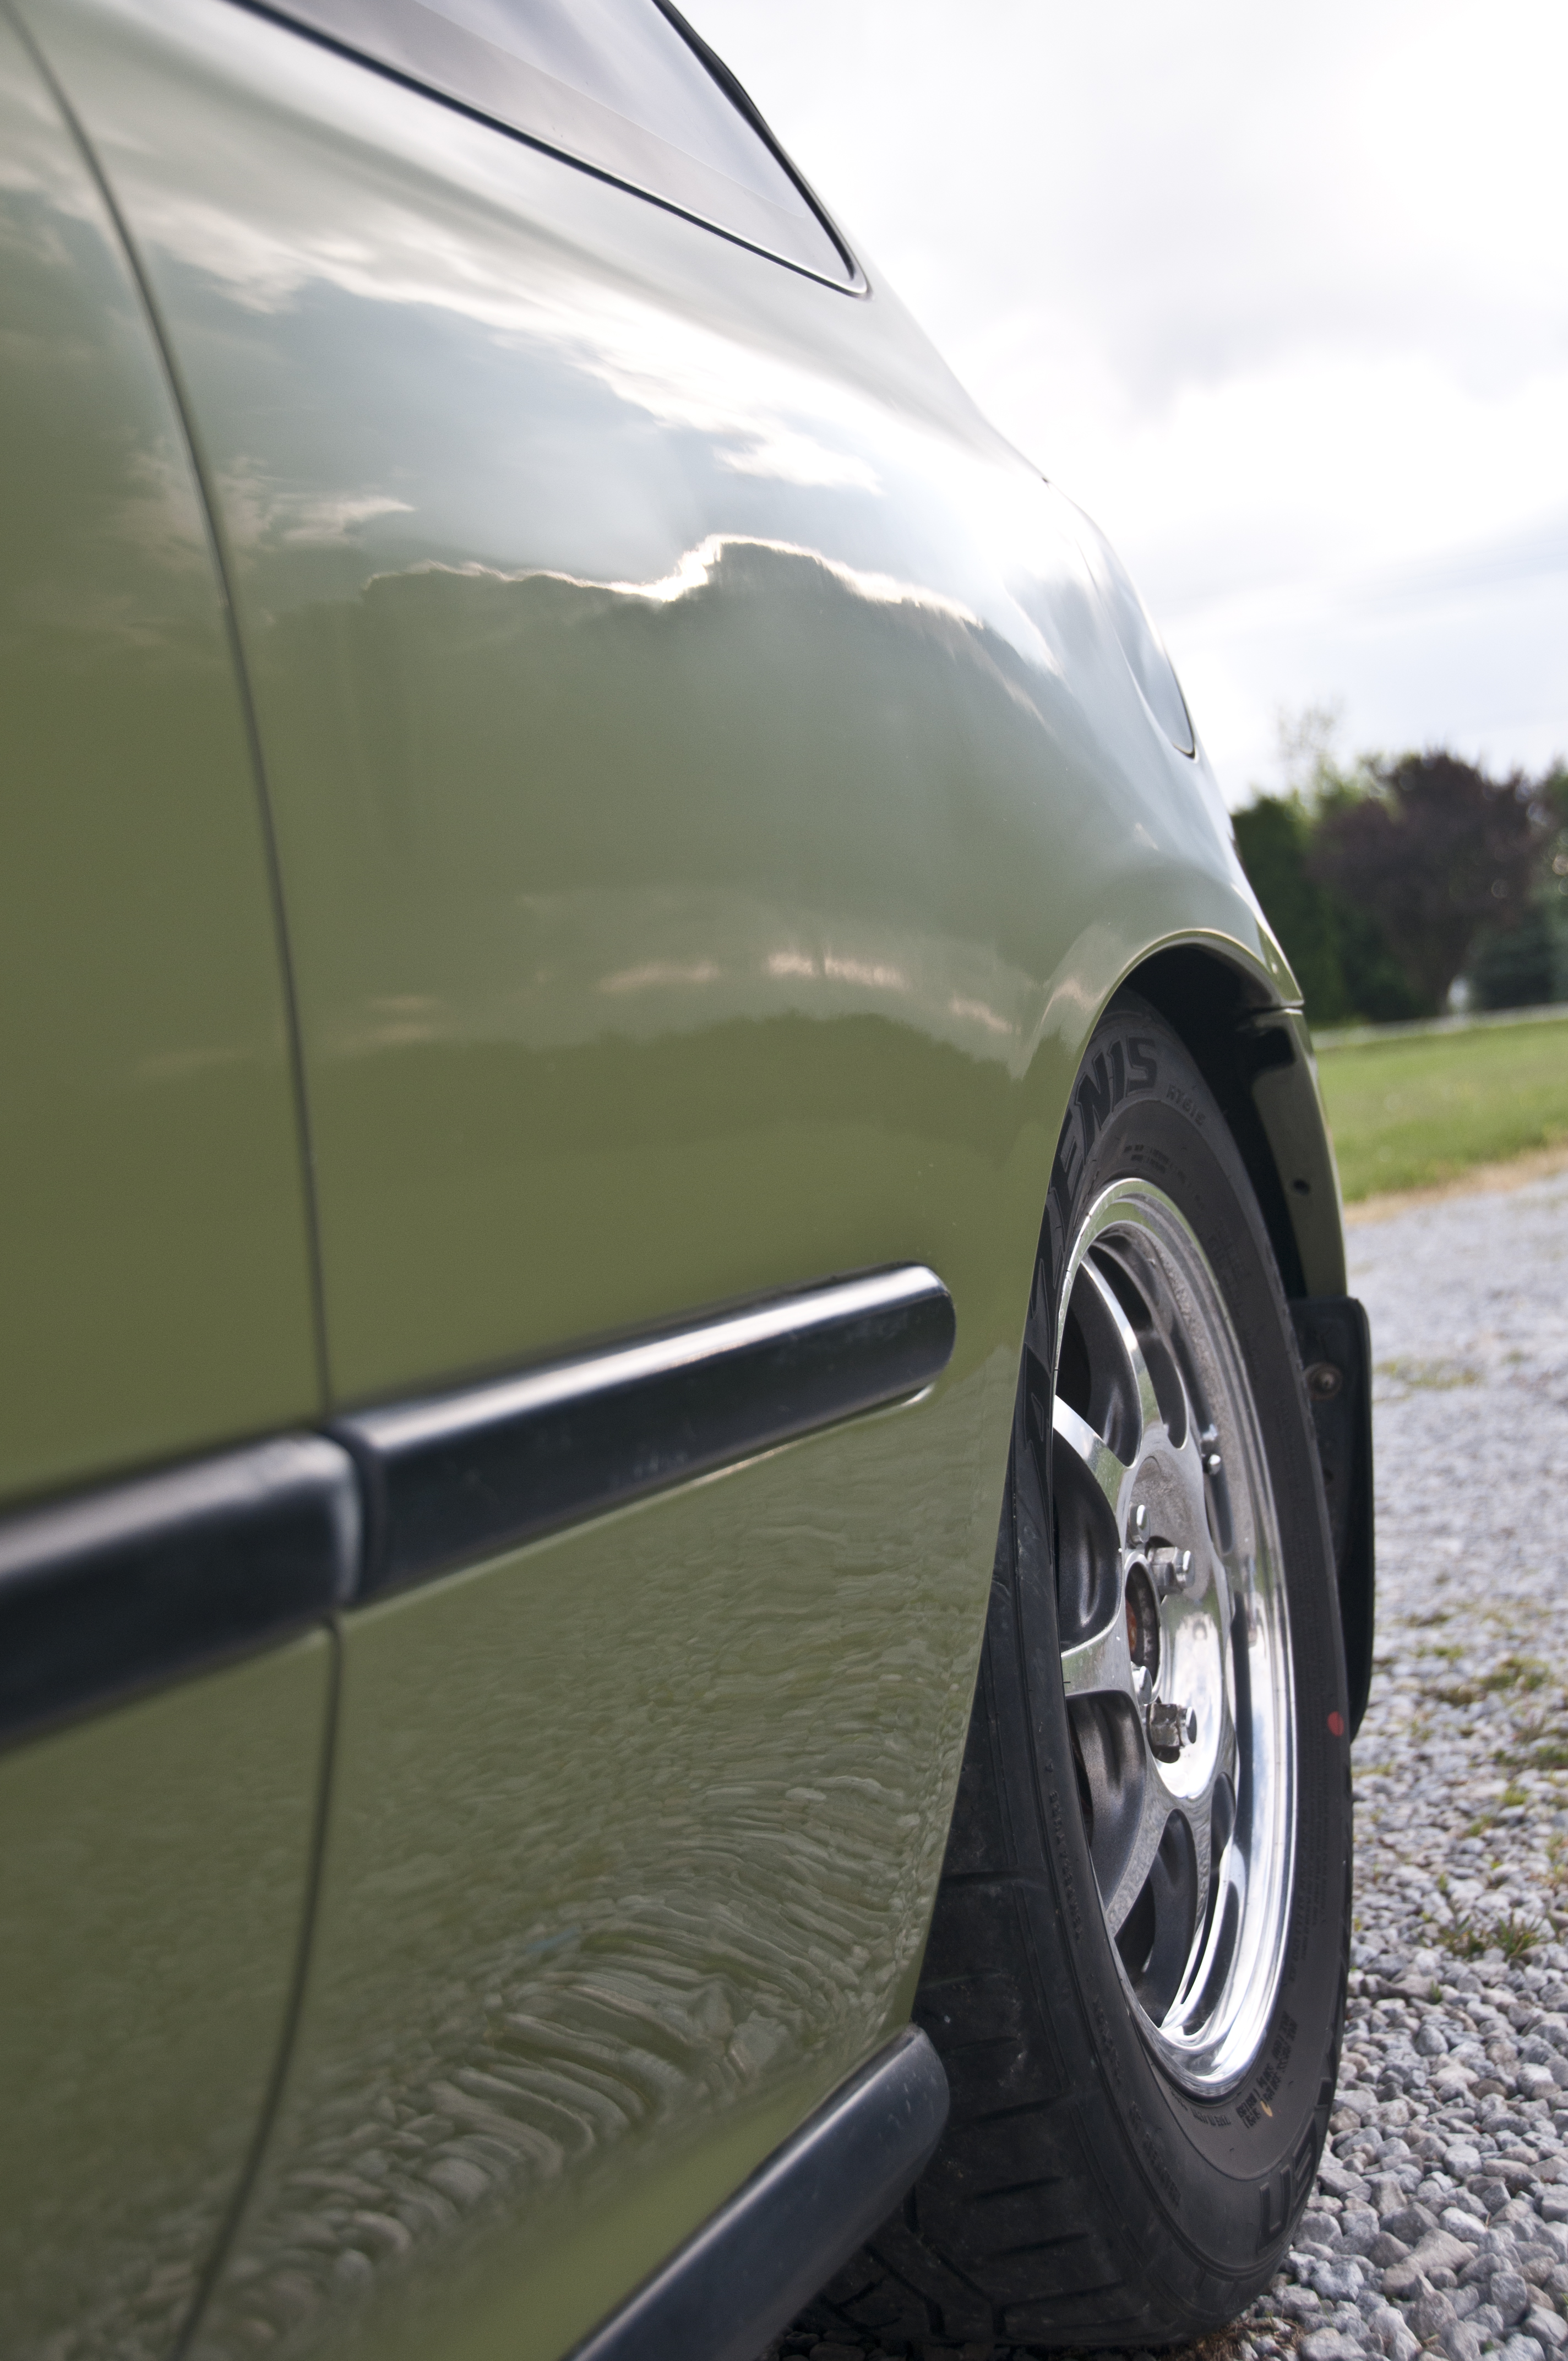
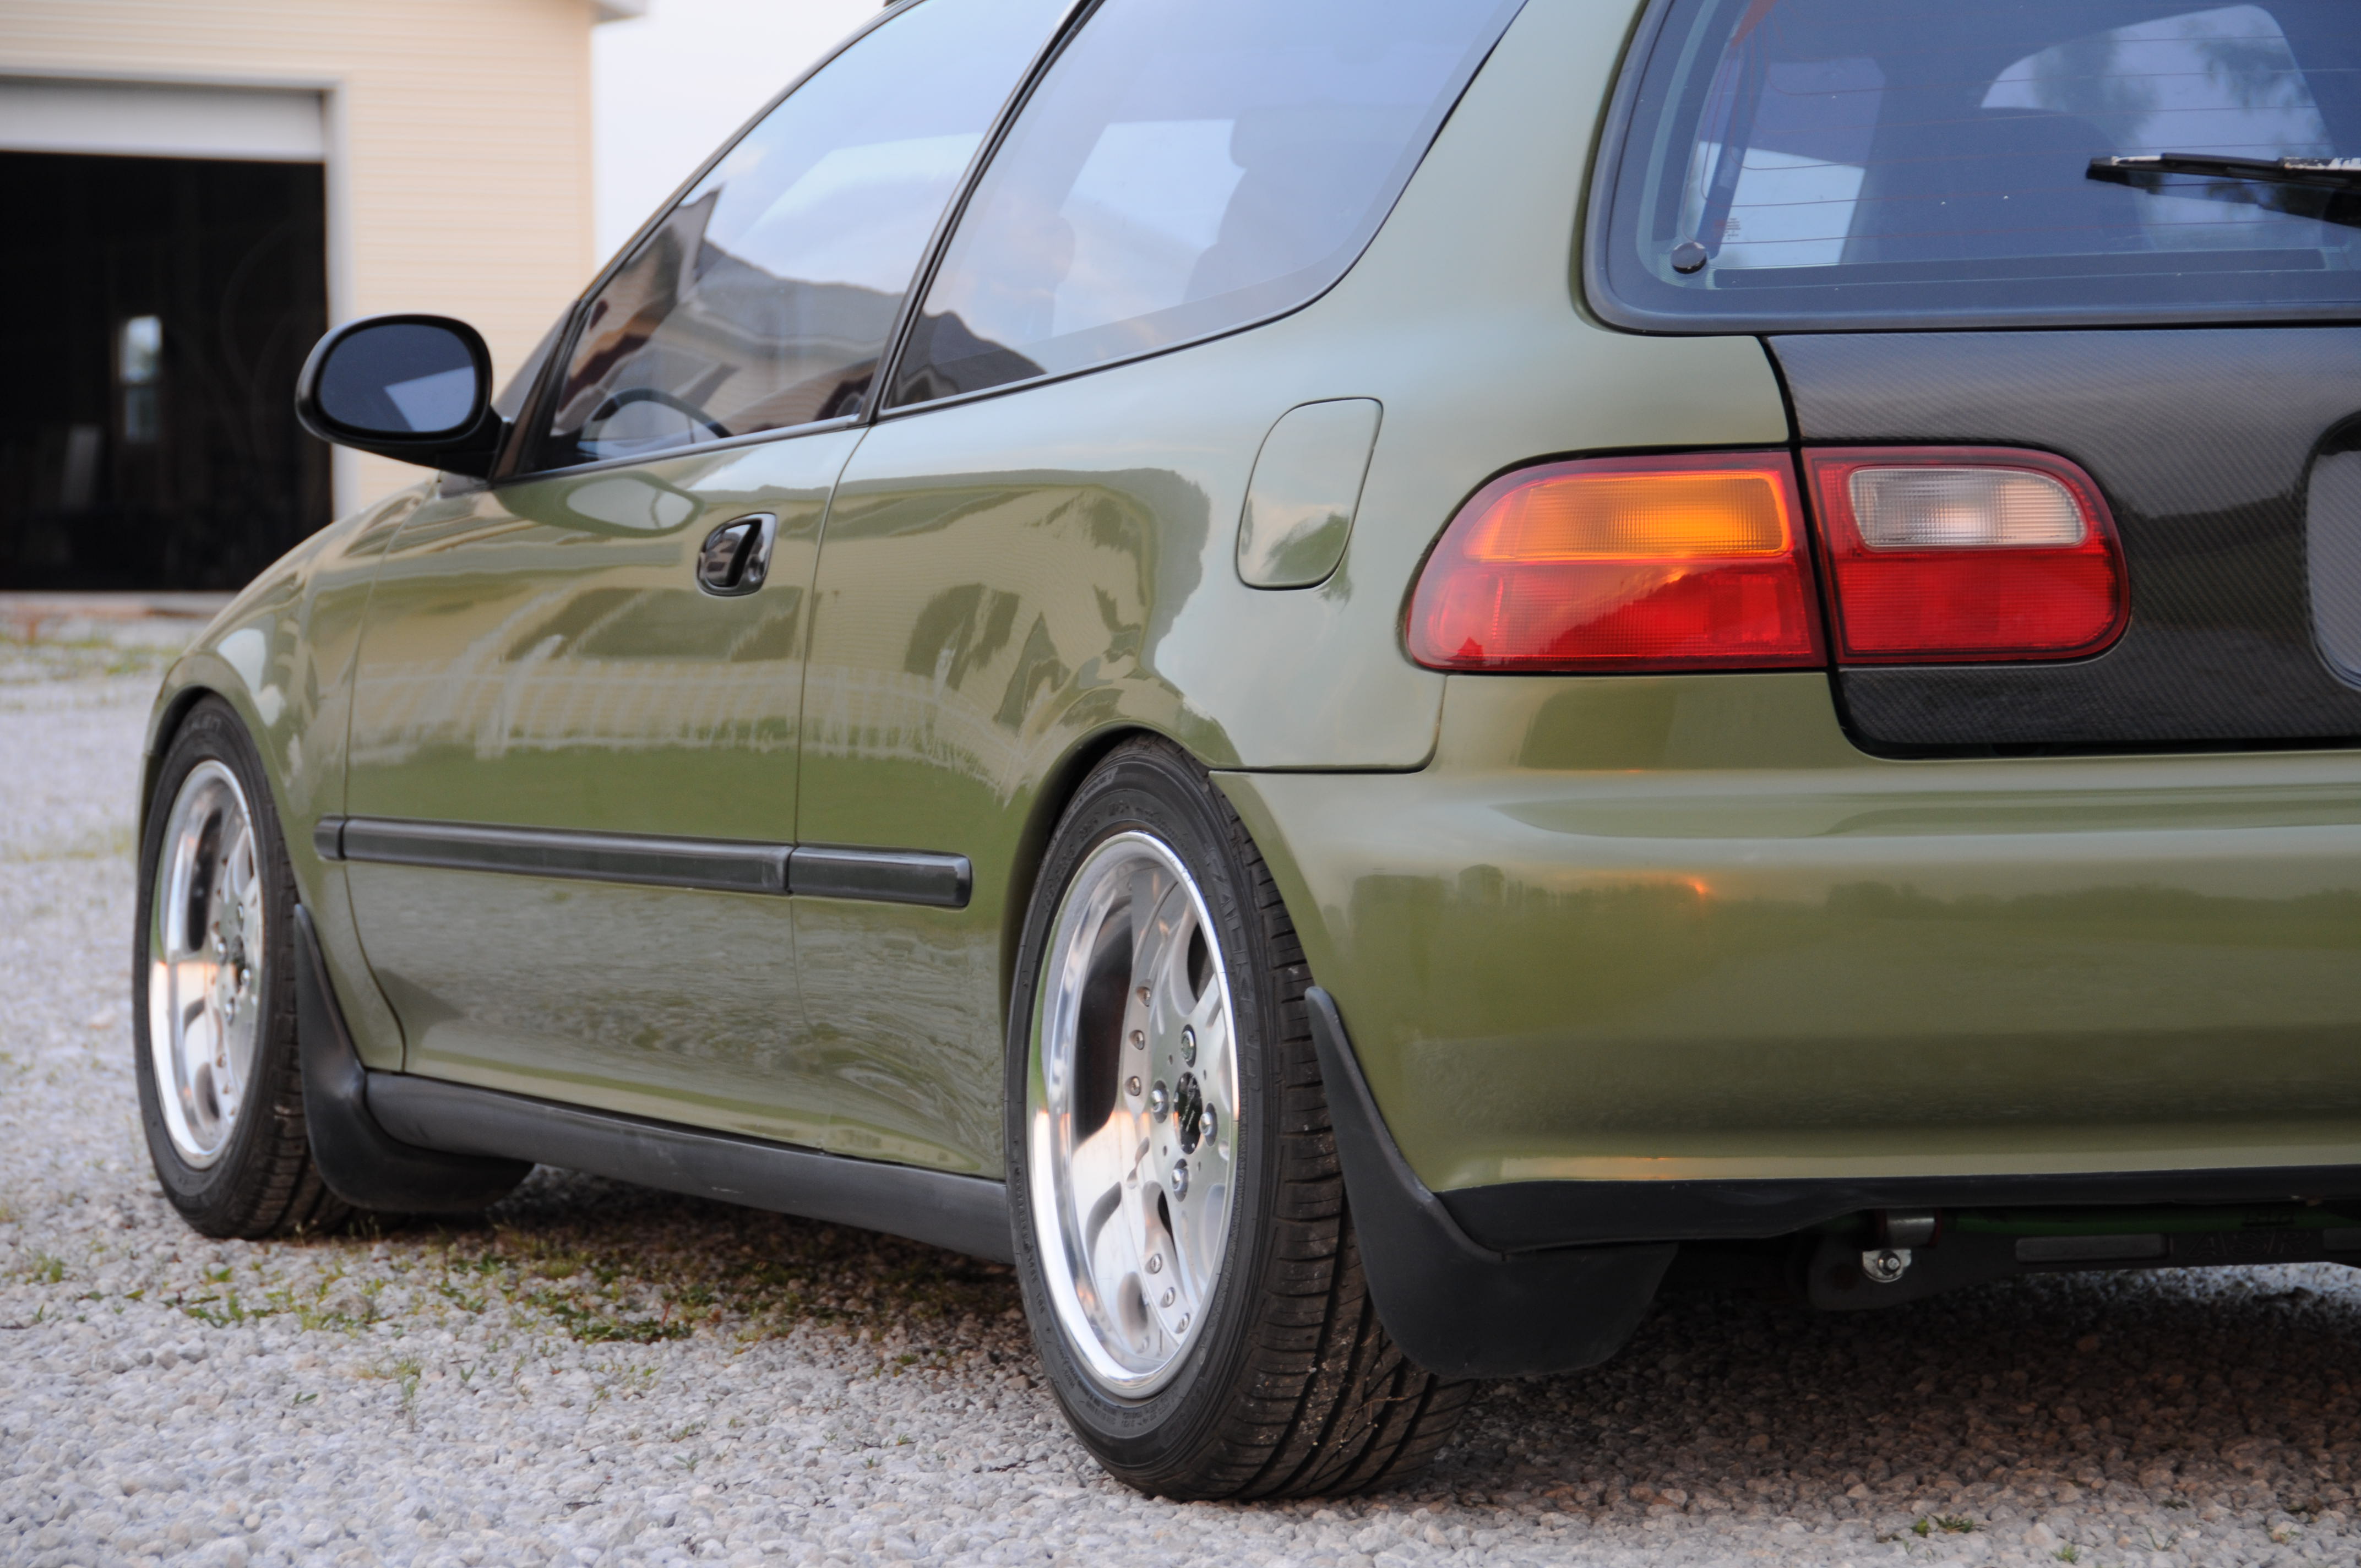
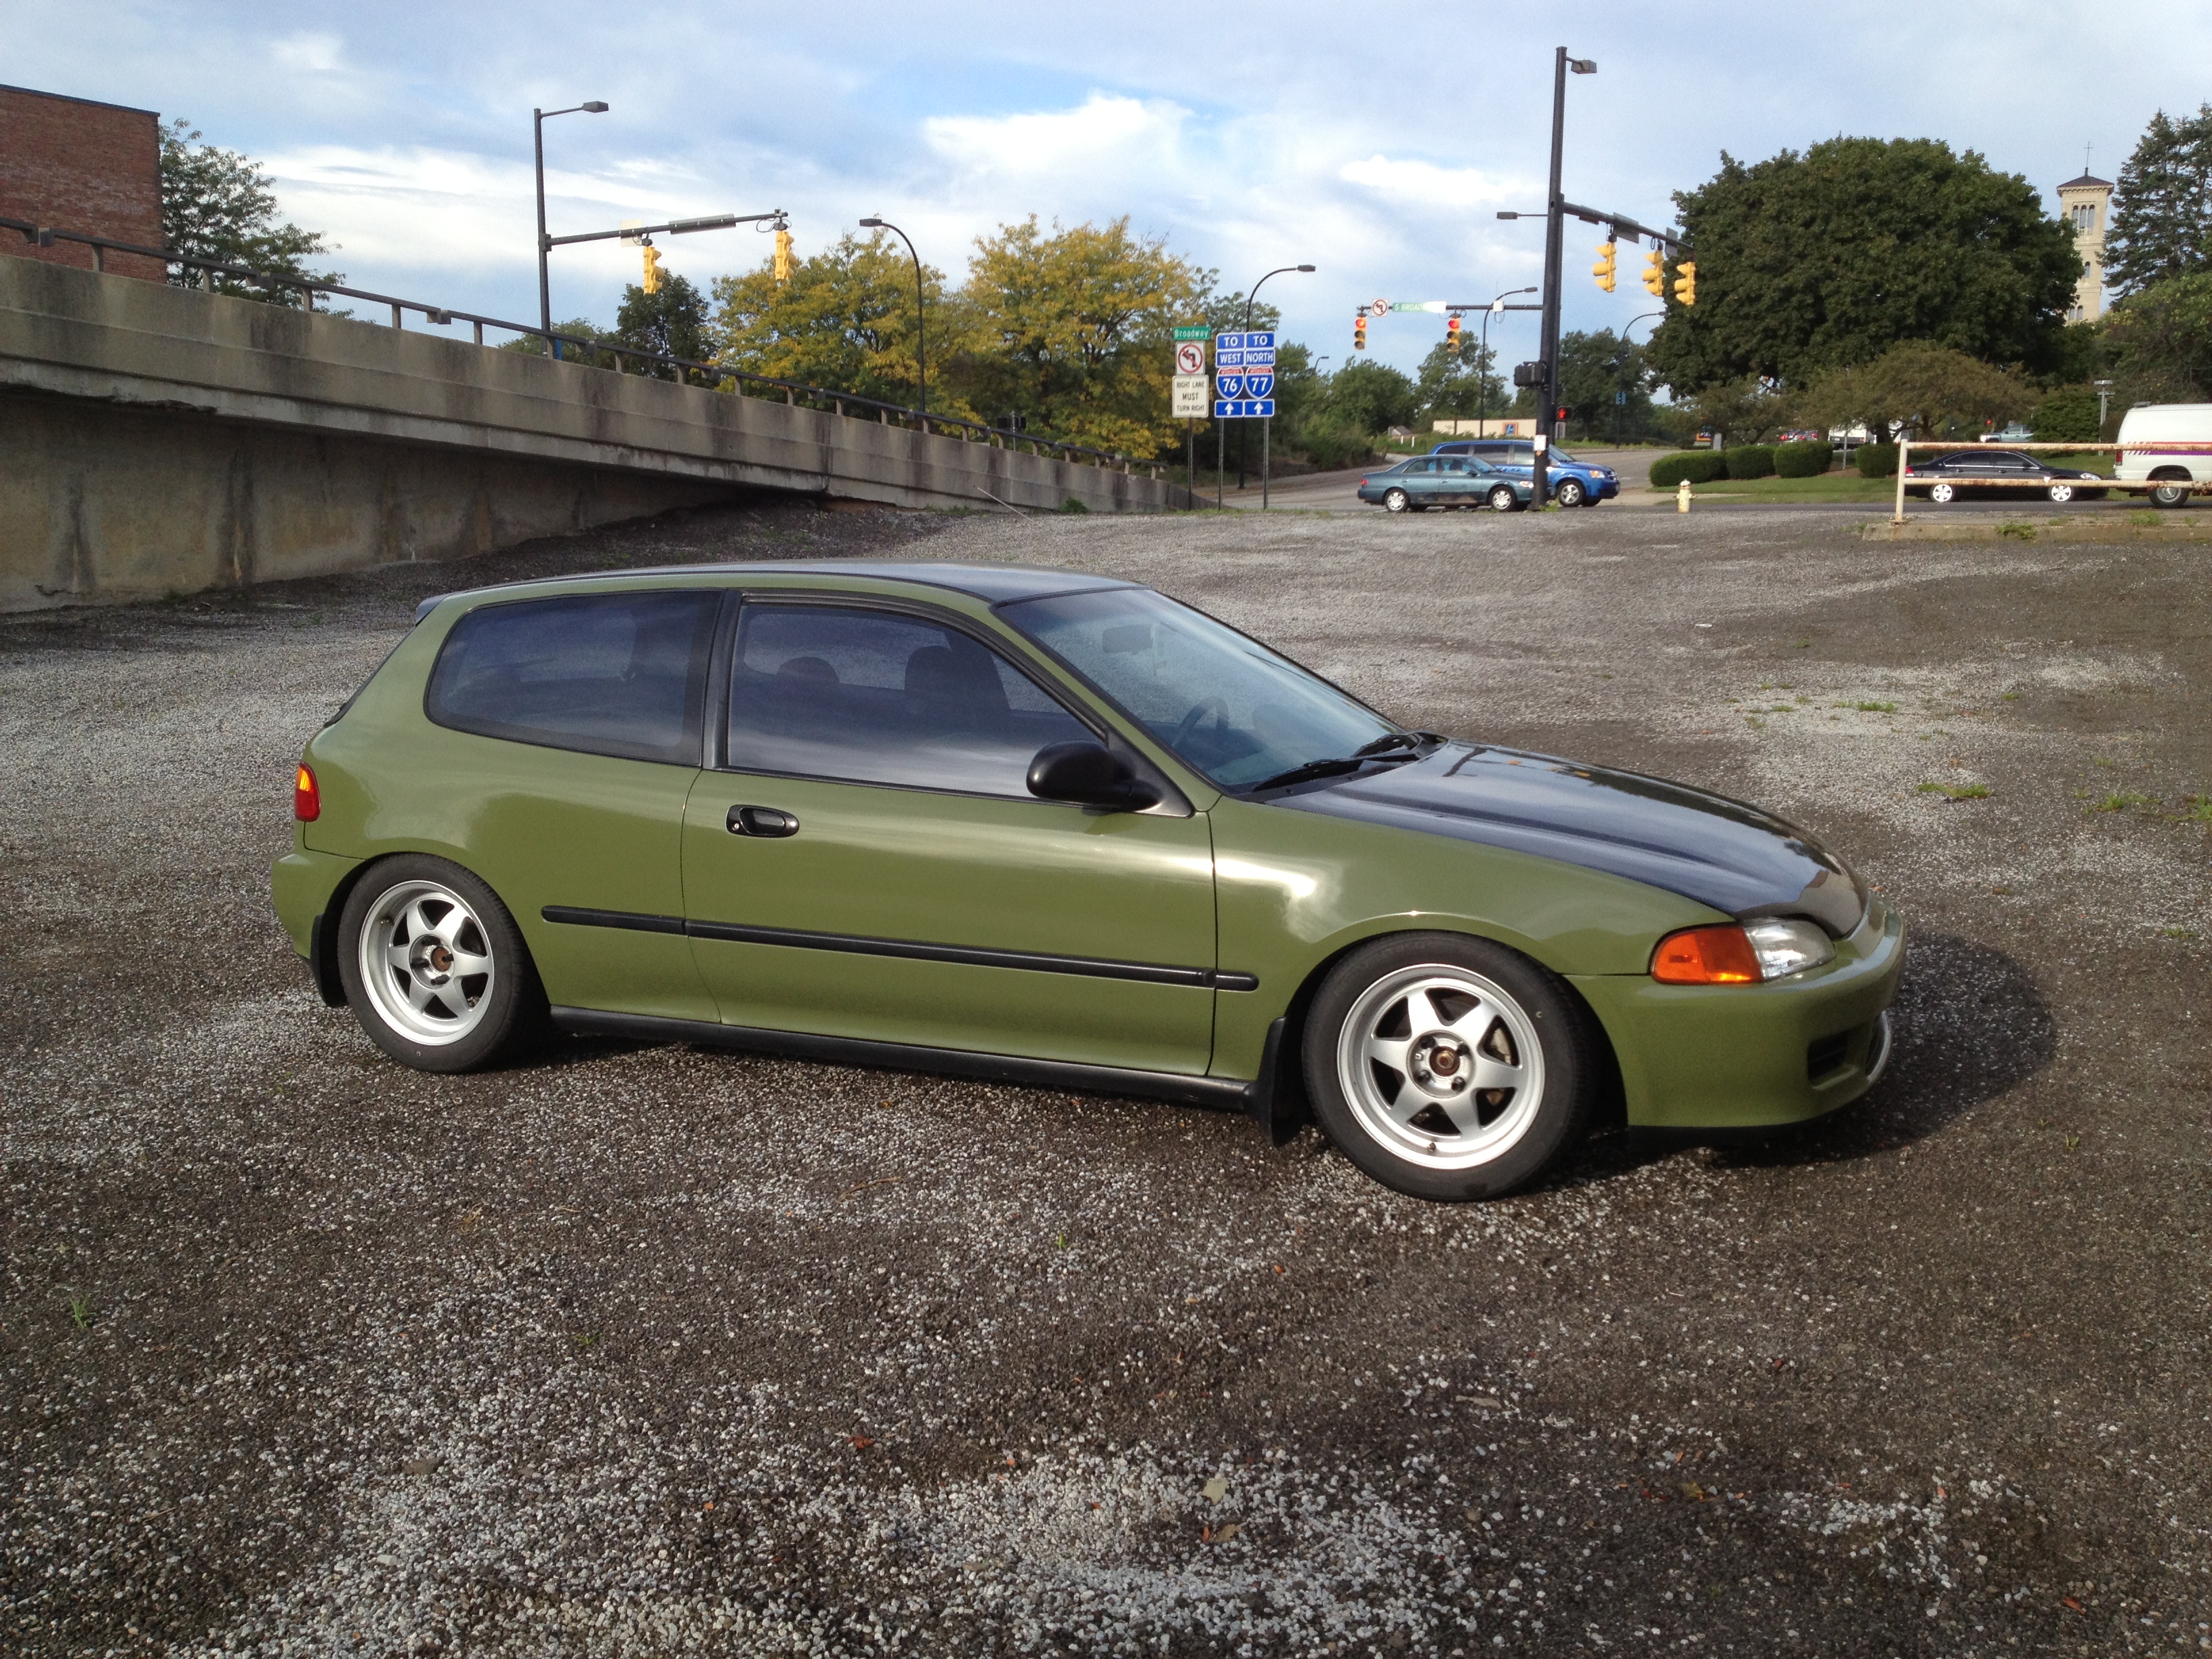
Here’s some pictures of the final product:


This is a featured DIY Tutorial from the Civic-EG.com forums. For additional comments and questions, please see the original thread here: http://civic-eg.com/forum/viewtopic.php?t=24