

- Tue Aug 28, 2007 7:43 pm
#21362
HTH
***from our local forum

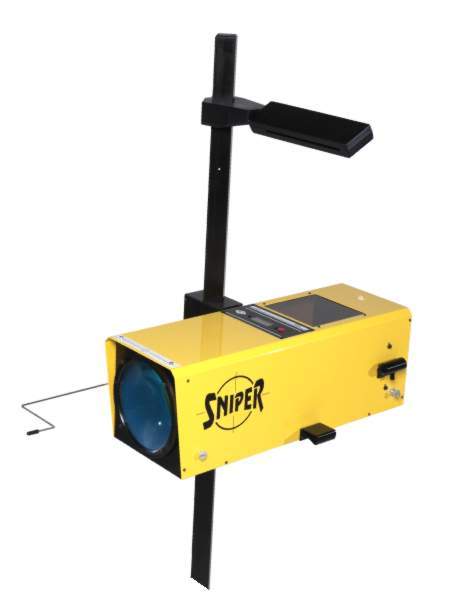
Not everyone can afford a professional headlamp aimer like the one pictured below.
But for optimum road safety, here are some instructions and pictures (lifted from the various sources) on the correct way to aim our headlamps and foglamps.
Proper aiming of the lamps will help keep you from blinding people, but the fact is that in some circumstances, coming over the crest of a hill for instance, the concentrated light from the H4 will bother motorists no matter whether you've got 55 watts or 130. Passing can also be a problem if your headlamps are aimed too high. The "hot spot" of your beam may shine right on the motorist's mirrors and into their eyes. Makes them rather cranky. If you see your beam pattern heading toward their mirror, just pick up the pace a bit and re-align your headlamps as soon as you can.
Before you start, your tire pressures should be correct and your gas tank maybe half full for best accuracy.
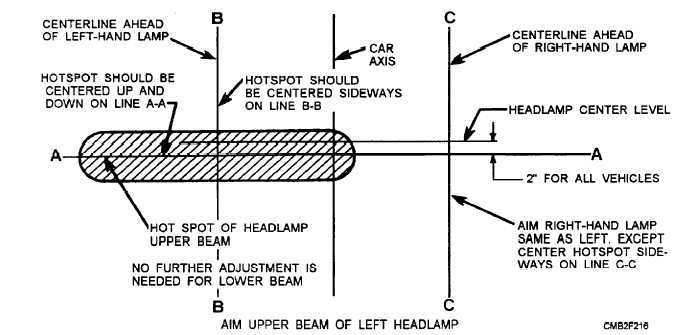
Here's a good template to follow:
STEP 1:
Begin by finding a level surface and a vertical garage door or wall. Park the vehicle close to the wall and mark the lights' horizontal centerlines with masking tape. This will be line A-A in the template above, which should be around 26-inches up from the ground.
STEP 2:
Next, mark the low beams' vertical centerlines. This will be lines B-B and C-C in the template above. For better precision, stand behind the car at its center point and, looking through the rear windshield, then guide a friend in marking the vertical centerlines. Marking the vehicle's centerline is also helpful to verify side-to-side alignment.
STEP 3:
Move the vehicle 25 feet away from the wall you just marked, pointing straight ahead. Use the lights' horizontal- and vertical-adjusting screws to position the low beams' intensity zones 1.5-inches below and to the right of the taped centerlines.
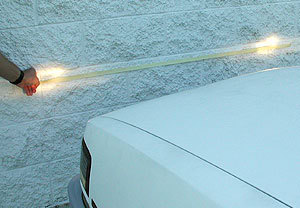
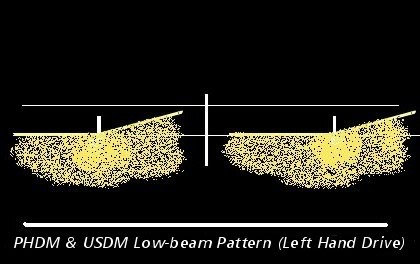
The low beam pattern of a visually-aimable headlamp has a distinct horizontal cutoff. Below the cutoff is bright light. Above the cutoff is dark. The aim is determined by measuring and adjusting the height of this cutoff relative to the reference marks you plotted on the wall.
NOTE:
After adjusting a high/low beam headlamp in the low beam mode, do not attempt to readjust it in high beam mode. All high/low beam headlamps are meant to be adjusted on the low beam setting only--the high beam adjustment is correct when the low beam adjustment is correct. If you are experiencing a problem where setting the low beams correctly places the high beams too high, but setting the high beams correctly places the low beams too low, you may have a poorly-designed bulb, or a bulb that is not from a known good manufacturer. Consider changing to bulbs from Philips, Osram, and other known manufacturers.
-----------------
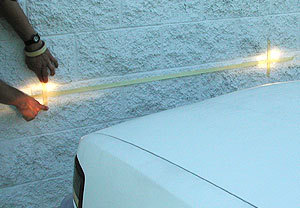
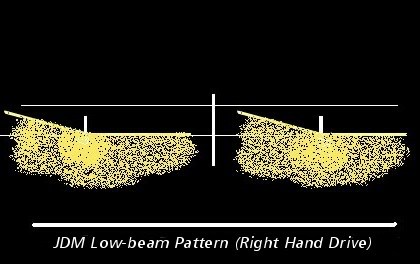
If you have headlights with this kind of low-beam pattern:
You probably have JDM headlamps.
Although this looks good (lalo na yung Type-R version) and preserves the JDM look, this will be bad for oncoming traffic.
If you must have these headlamps, aim them a bit lower.
A good recommendation would be to aim the center hotspot (explained above) 6-inches or more below line A-A in the template above to avoid glaring oncoming traffic.
-----------------
AIMING FOG LAMPS
Fog lamps are aimed using a similar procedure but the vertical drop is different. Follow the vehicle-preparation and wall-marking instructions given above for aiming low beam headlamps, but the B-B line should be 2" below the fog lamp axis height.
Traditional fog lights are usually mounted under the front bumper about 10-24 inches from the ground. There are two important issues to address when installing fog lights, the first is to minimize the amount of return glare into the driver's eyes, and the other is to minimize glare into oncoming driver's eyes. Both must be accomplished while putting as much light as possible on the road.
These fog/foul weather light aiming instructions are suggestions taken from common practice and the S.A.E. standard J583. Some modifications to these instructions may be necessary to minimize glare.
Visual aim is made with the top of the beam 4 inches below the lamp center at 25 feet with the lamp facing straight forward. (See below.)
Fog lamps produce a wide, bar-shaped beam of light. Horizontal aim is much less critical than it is with headlamps. The fog lamps should be pointed straight ahead, not leftward or rightward.
To get best results, you may need to to disconnect or cover one foglamp when you are aiming the other one.
I hope these procedures help everyone with their headlamps and foglamps, whether halogen, HID or both!
HTH
***from our local forum