- Wed Sep 11, 2013 4:05 pm
#336580
It was a rainy day in couple of weeks ago, so I thought to clean up the dashboard:

When the sunshine came back, I removed the surface rust from the floor:


I noticed something strange when removing the side sills:

What is this?

And why the wiring works was made like this?:

Previous owner did some undersealing...

...But in this case it wasnt doing any good, cause the underseal was applied straight over the debris and other shit -> accelerates rusting


Needs some fresh metal...
I also started to do some wire tuck, but nothing serious in here:

Then i bought Asus Nexus 7 (2013 model) to be my new I.C.E front end

Just a raw test fitting:
/20130821_181857.jpg/_img1280.jpg)
Then i did some shopping:
Civic 92-00 OEM Hood Insulator:

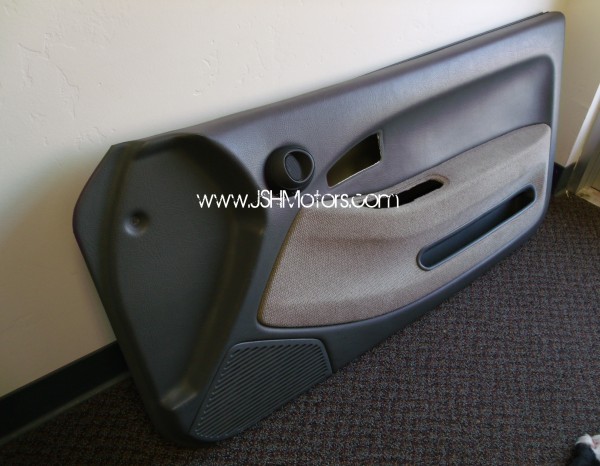
JDM Optional Bronze Door 1 DIN pocket:


OEM cable channel to the passengers side. Eases up some wire routing

Its very hard to get a good picture from those floor mats, strange light gray to dark grey effect


Part number:

ABS-wire harness retrofit:

Cluster ABS-light wire:

Then i also used some fosfor acid to remove even the tiniest rust spots from the metal:


The my JDM bronze lid 1 DIN pocket came and i gave it a good clean, removed the scratches and polished it:


Then i bought a rare EJ1/2 Coupe third brake light from Malaysia:


And also another EG/EJ BNIB parking pole and also a Power Folding Mirror switch, which is in very nice condition (please excuse the dirt):

Is this the OEM-Power Folding relay location? Can someone confirm? This is the only place where i can install this cause the other possible place will be used for Cruise Control computer and Headlight Washer System relay:

Power Folding mirrors will also be controlled by the alarm door lock pulses.
Then we are coming to this day:
Some chemicals:

Protecting the new floor mats from the dirt and moisture:

Water test after application and drying:

Bilt Hamber Deox-C, Deox-Gel and Hydrate 80 usage:


After drying:

And after seam sealer:

Edit: Current progress:
- OEM JDM EG/EJ Parking Pole (BNIB) /Bought & Installed
- OEM EDM/USDM Optional 2DIN Audio Console (BNIB) /Bought
- OEM JDM Optional 1 DIN Bronze pocket /Bought & Installed
- OEM JDM Power Folding Heated Side mirrors /Bought, Modded to LHD & Installed
- OEM Civic 92-95 NH-1 floor mats (BNIB) / Bought, Protected & Installed
- OEM Drivers side power door lock upgrade /Bought & Installed
- OEM CDM/USDM Cruise Control retrofit
- OEM JDM Auto Climate Control retrofit
- OEM JDM Low Fuel light retrofit /Wiring Ready, Fuel Sender missing
- OEM JDM Door open indicator retrofit
- OEM JDM 93-95 Coupe third brake light /Bought
- OEM Civic 92-00 Hood Insulator /Bought used, (BNIB already ordered)
- OEM ABS retrofit /Main & Secondary harness Bought & Installed
Last edited by HiTec on Fri Sep 27, 2013 4:08 pm, edited 3 times in total.


 ) and the lower one is new: