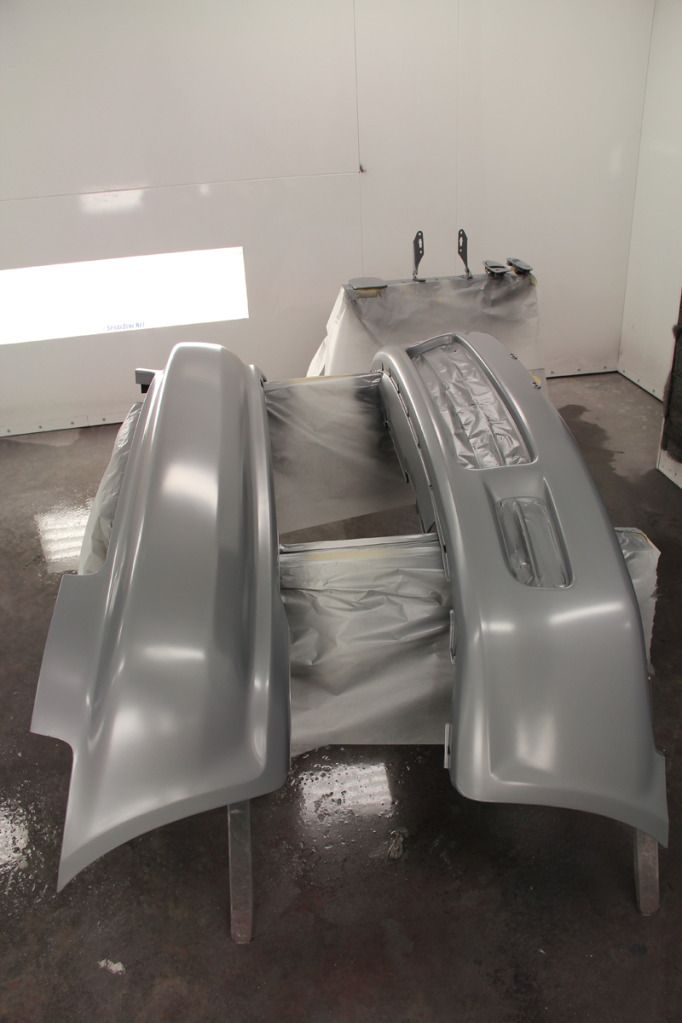
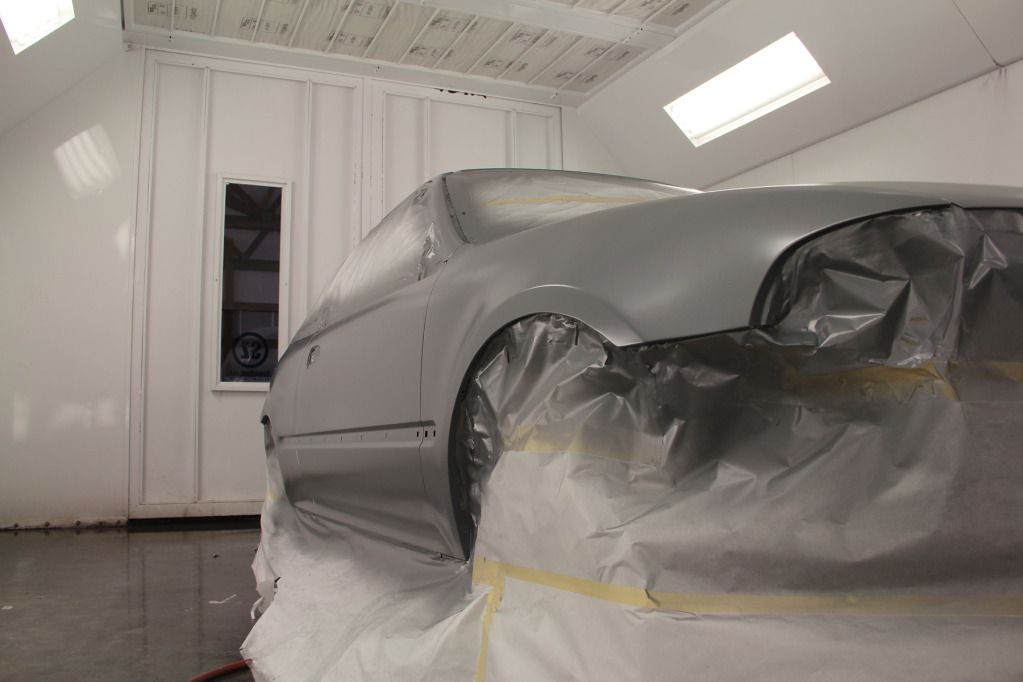
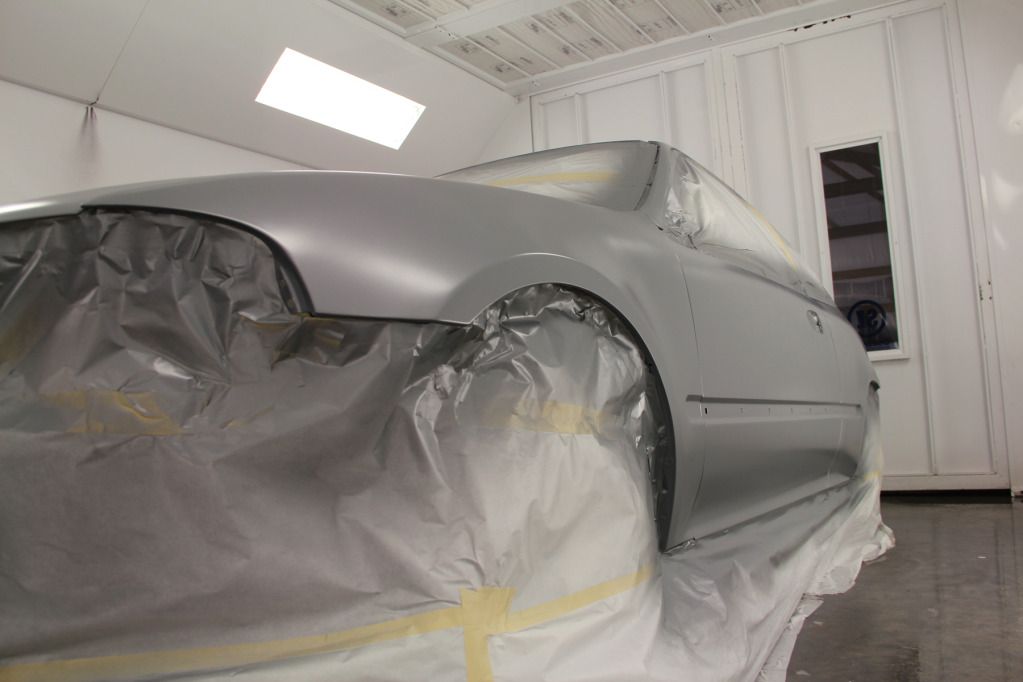
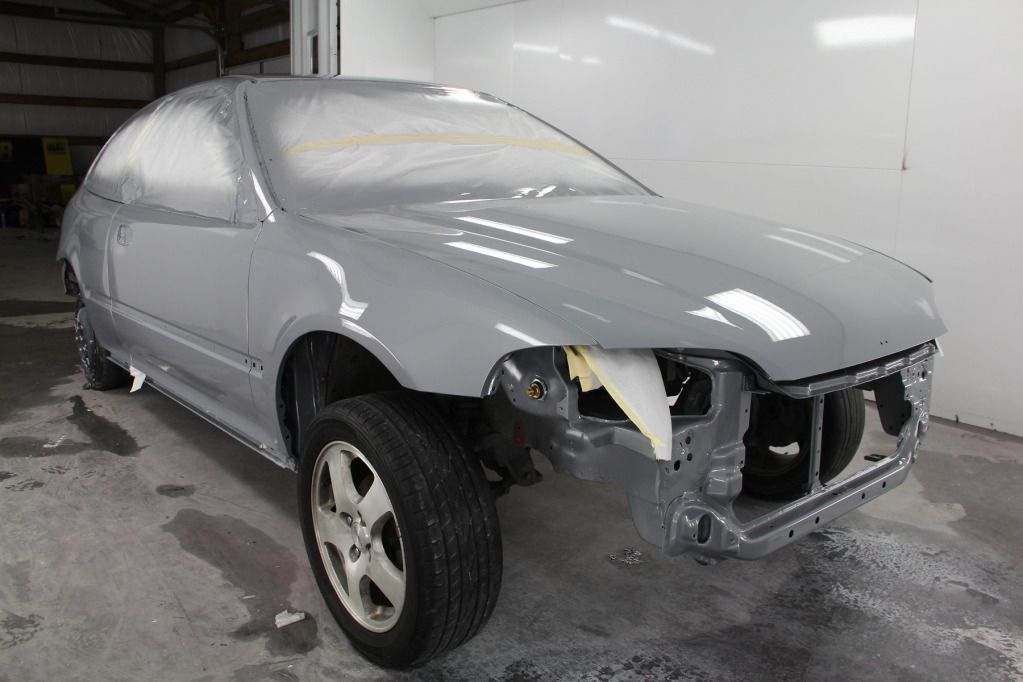
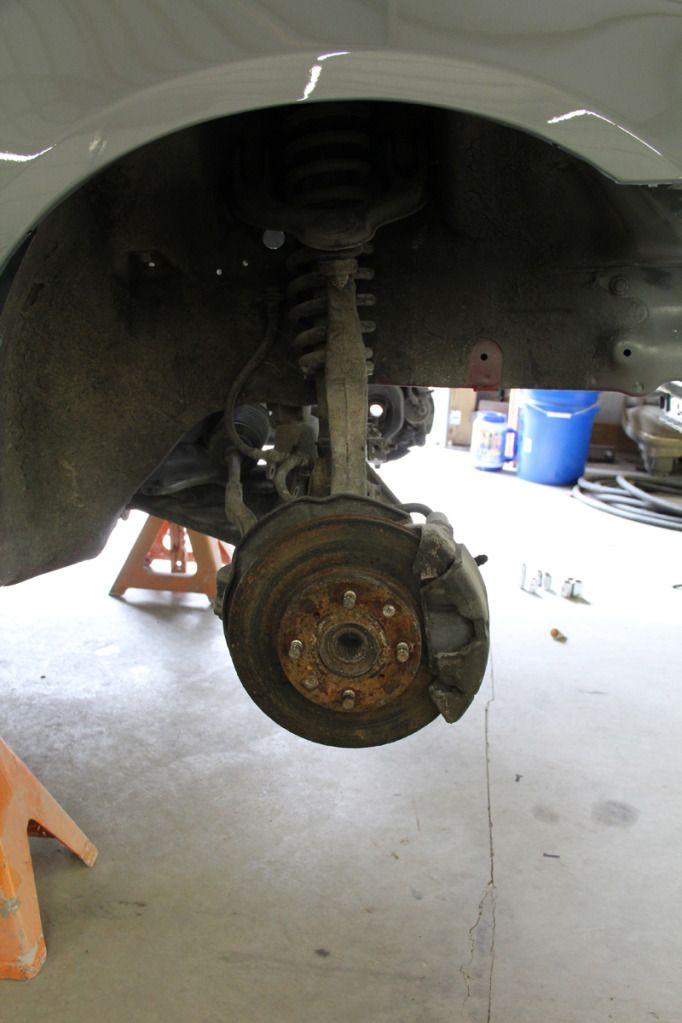
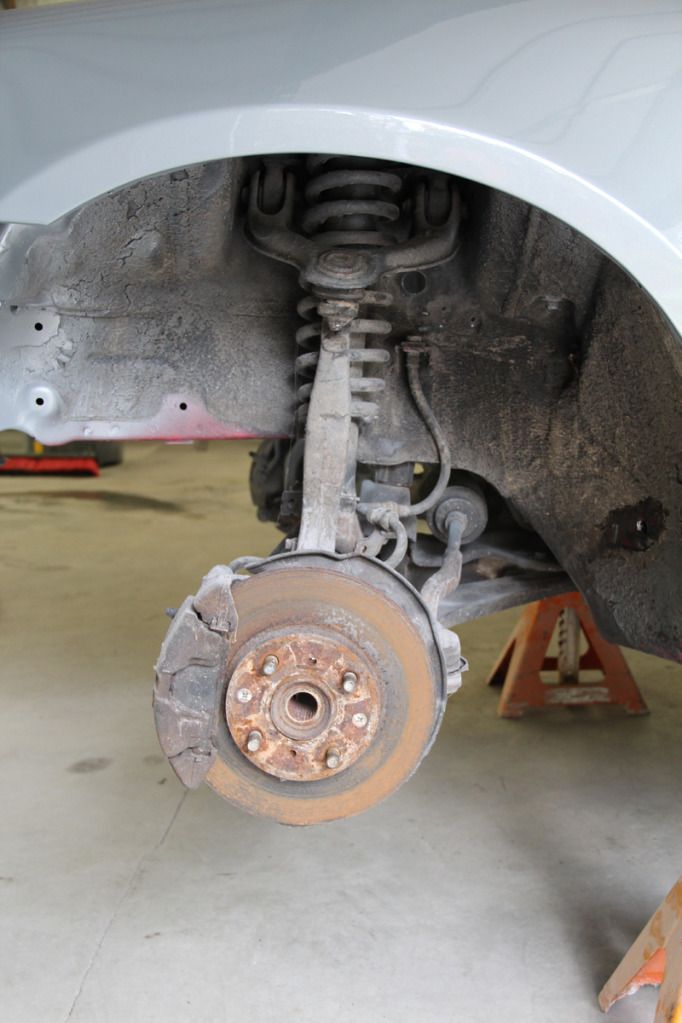
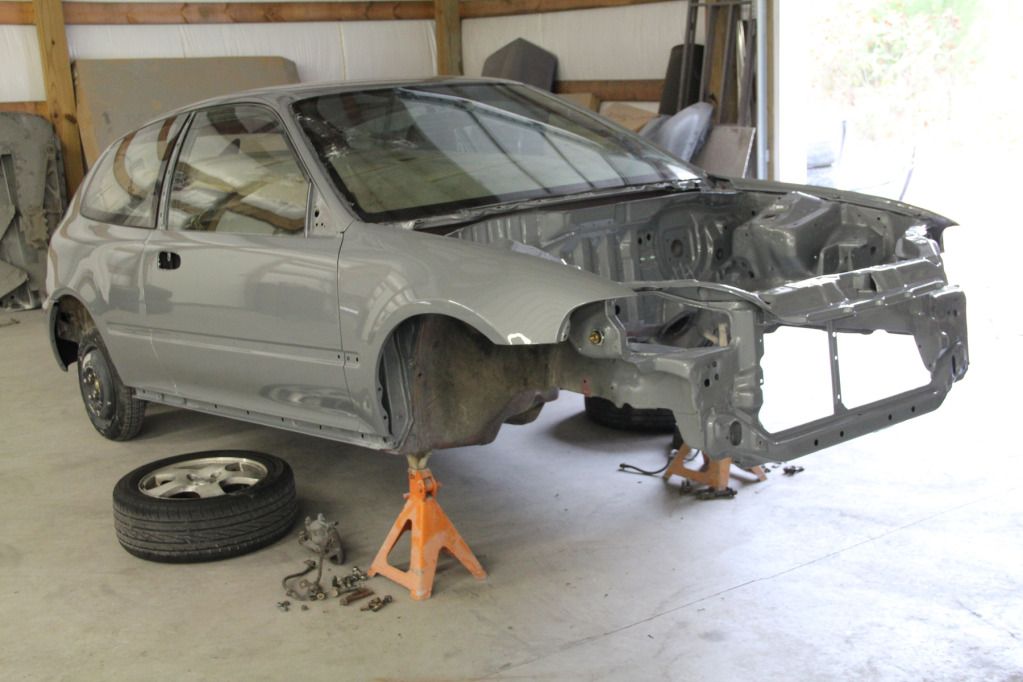
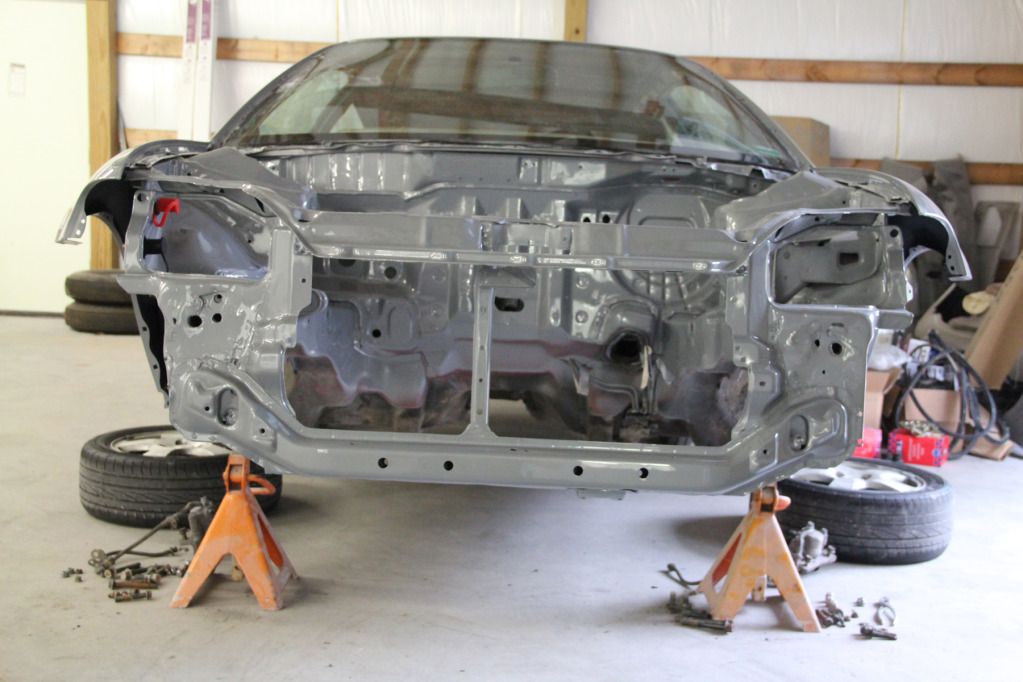
- Mon Oct 22, 2012 6:30 am
#318373
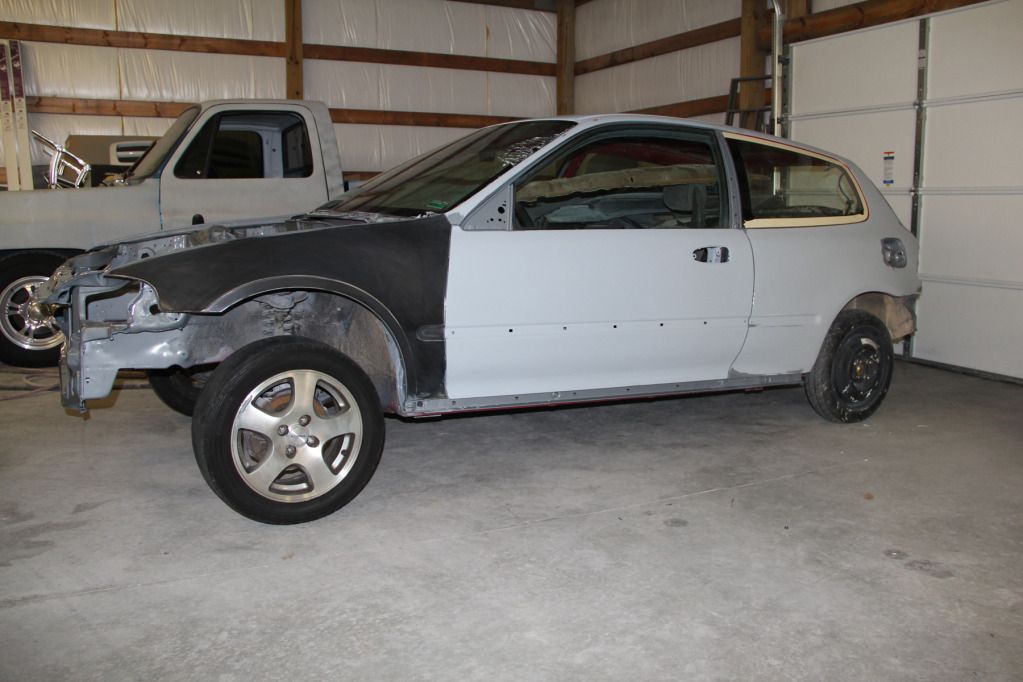
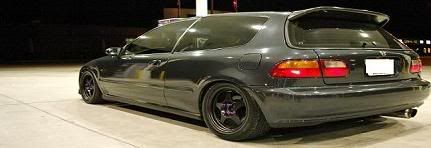
Hey everyone. My name is Josh and I live near St. Louis, Missouri. I recently sold all of my toys and cut back on quite a bit of debt due to getting married on September 22nd (happy 1 month to me, right?) and buying a house. Selling my car at the time (2008 SRT Caliber w/ bolt ons) was completely my decision, and I knew I wanted to still have something nice, even if it had to be cheap and good on gas. What I came up with after scouring the local forum, www.stlhondas.com , was a '93 Hatch roller. No engine, no trans, a pieced together interior, no fenders, no bumpers, no hood, missing trim on the inside and out, etc etc etc. Over the past few months I've been working on rebuilding the car, and I've tracked it fairly well on the local forum. However, any of my friends wanting to stay updated on my build have to have a forum subscription to stlhondas in order to see the post, and the forum there isn't very developed. I love the guys there, it's just pretty limited as to how much exposure/how many opinions you can actually get. I stalk Civic-EG ALL the time for DIY, photos, build threads, and everything else I can find, so becoming a member here was a no brainer. This is my attempt at sharing my experiences with you as I've saved this 93.
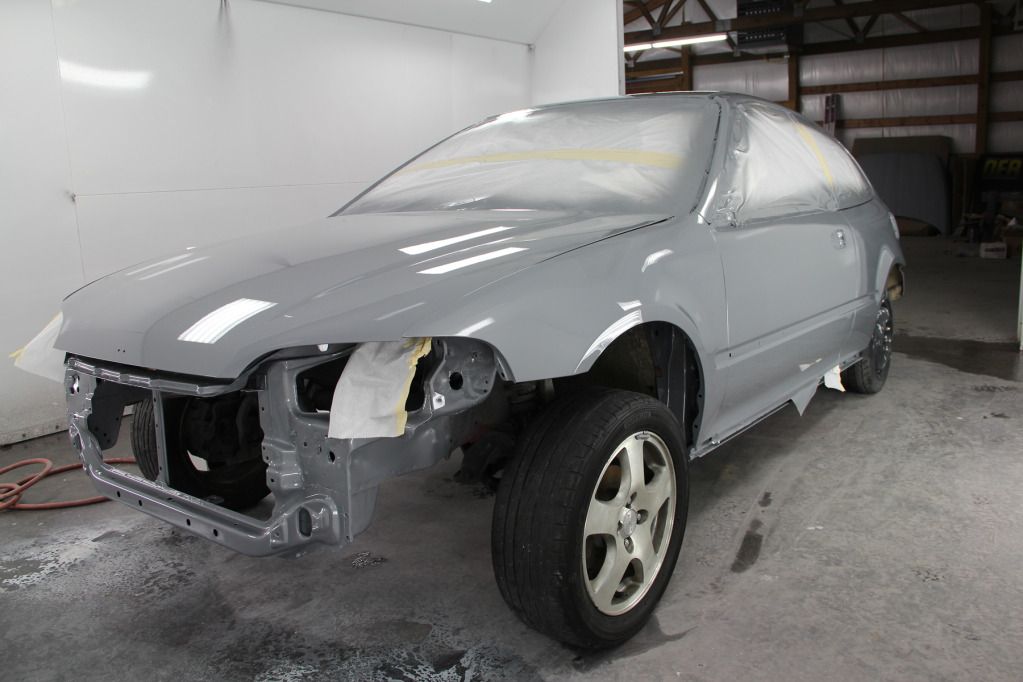
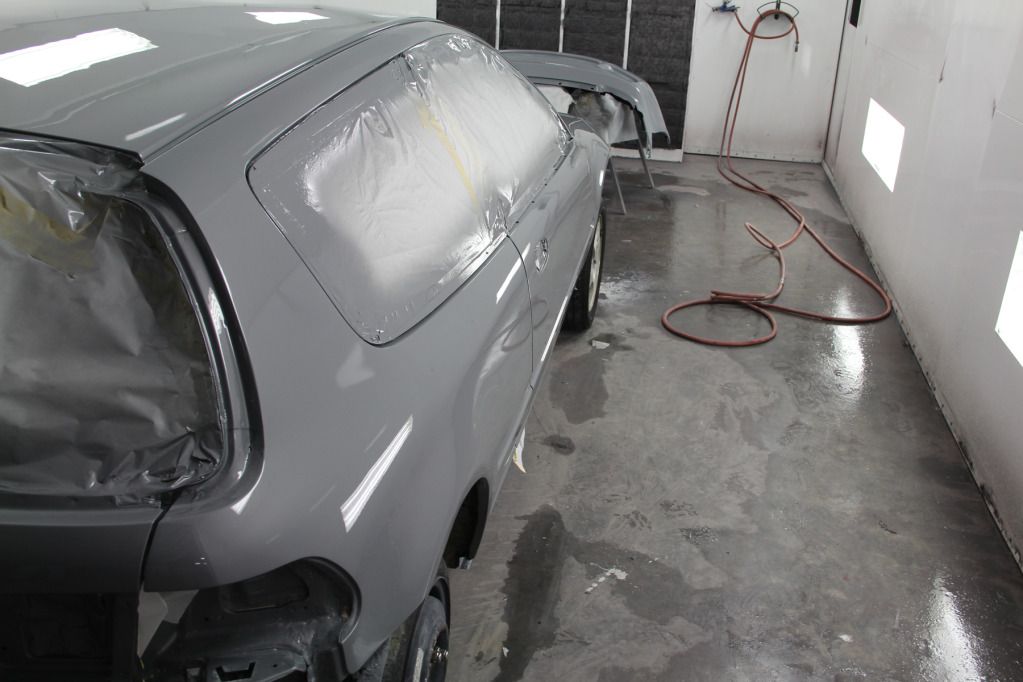
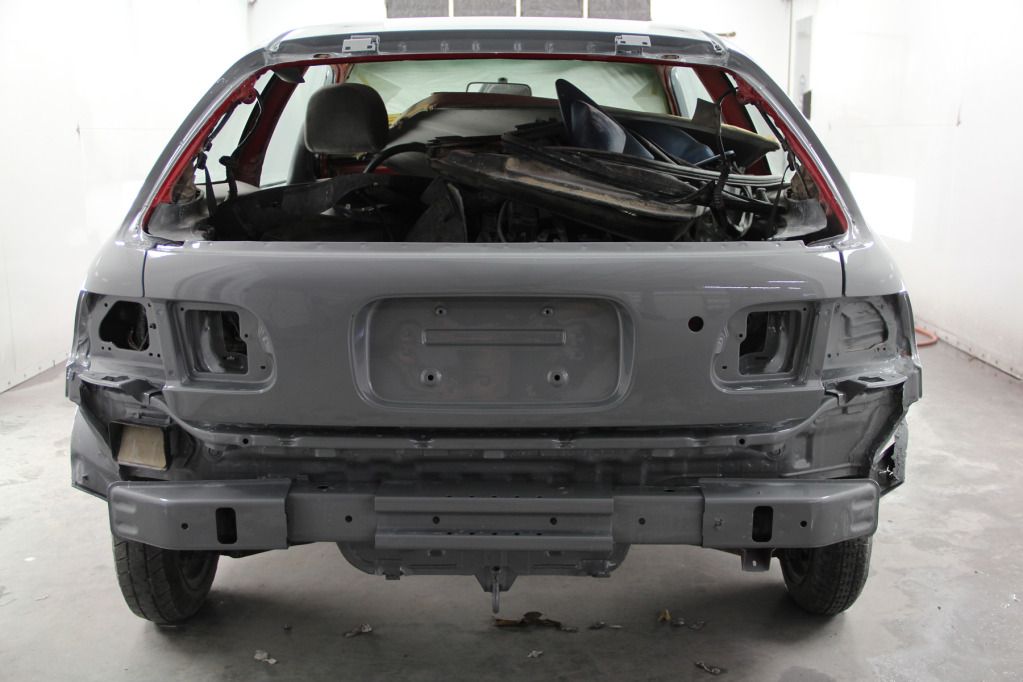
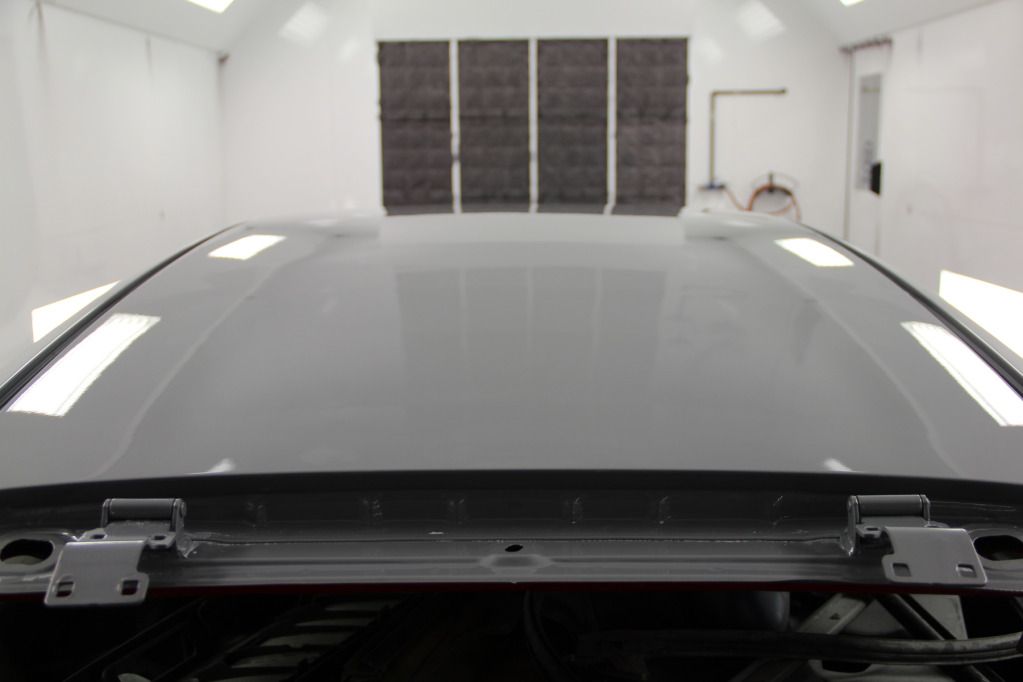
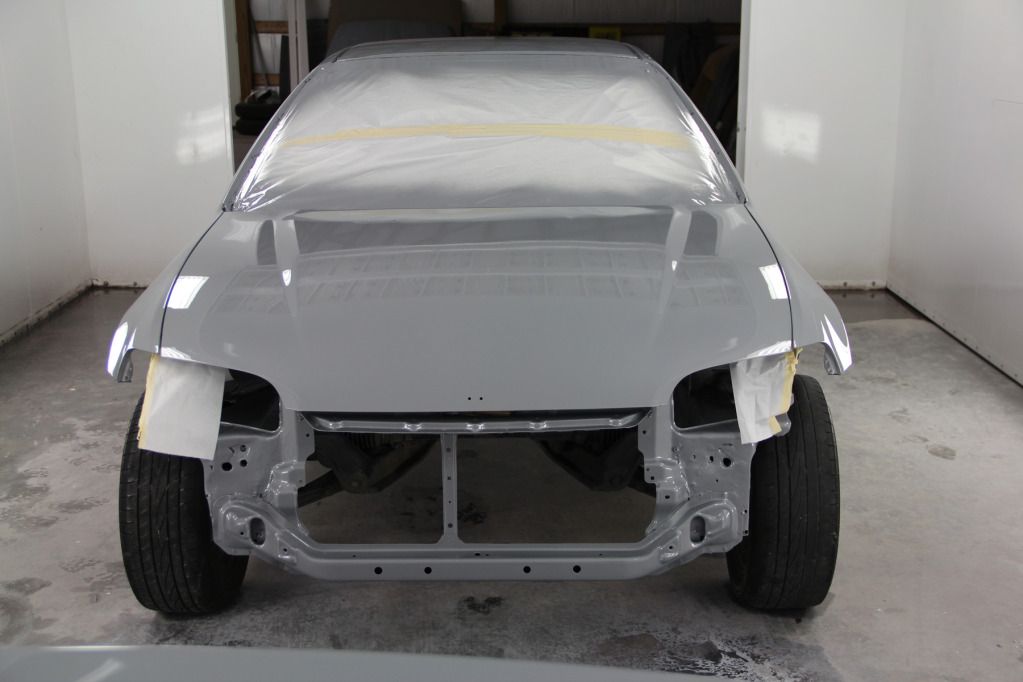
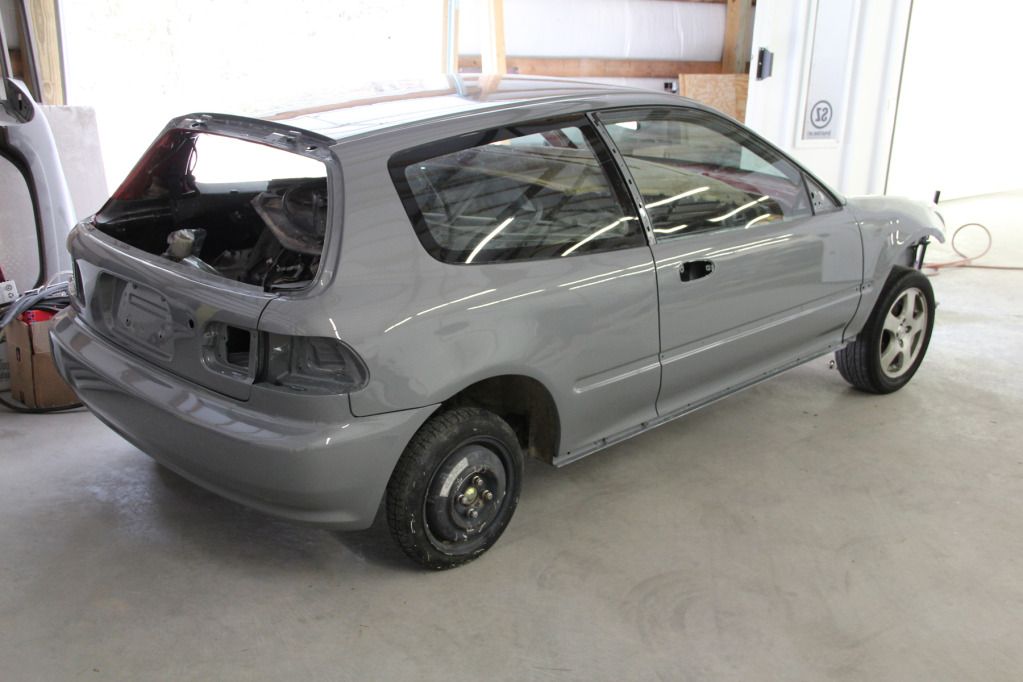
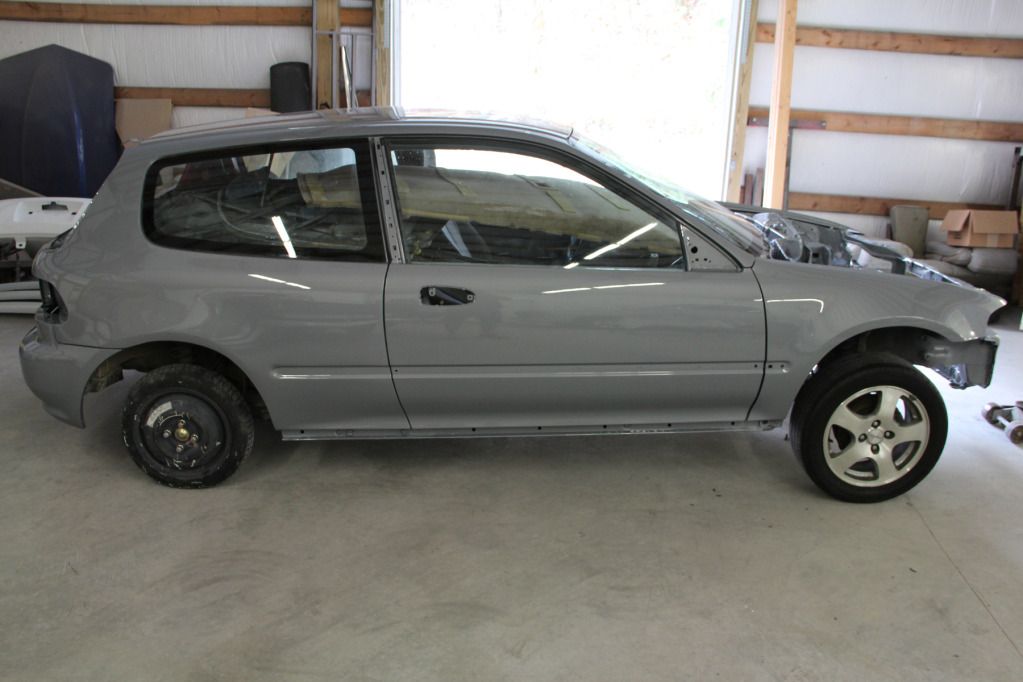
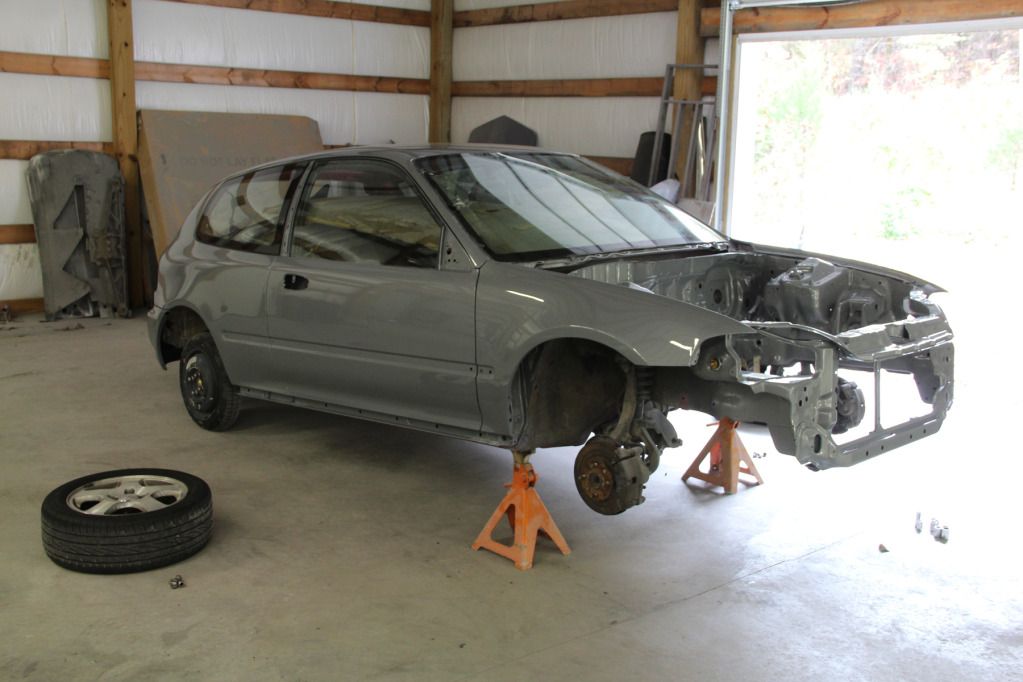
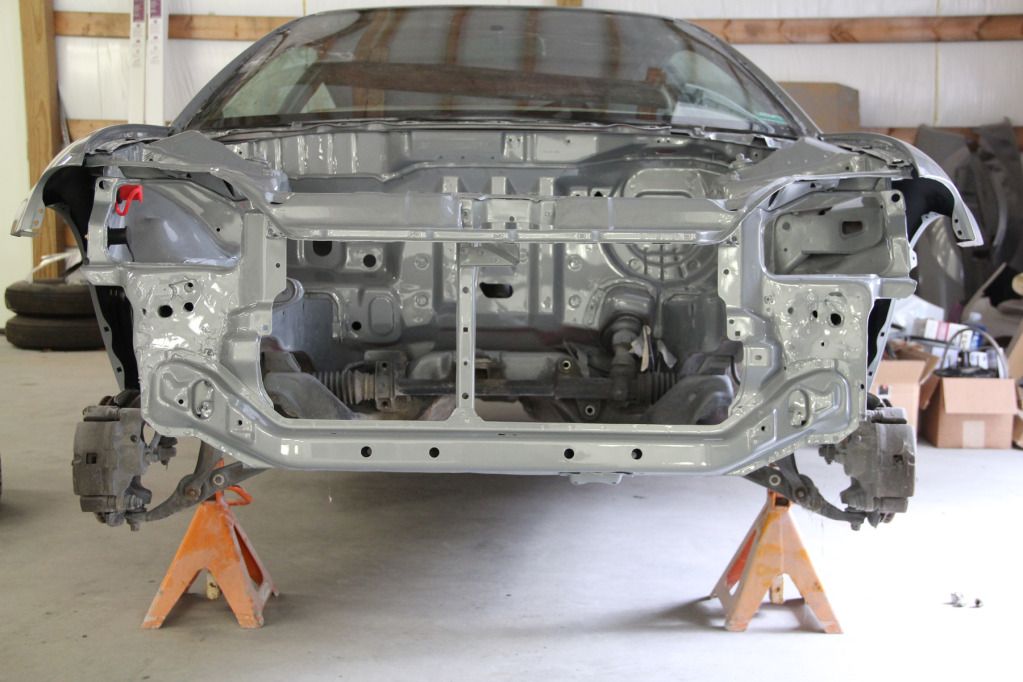
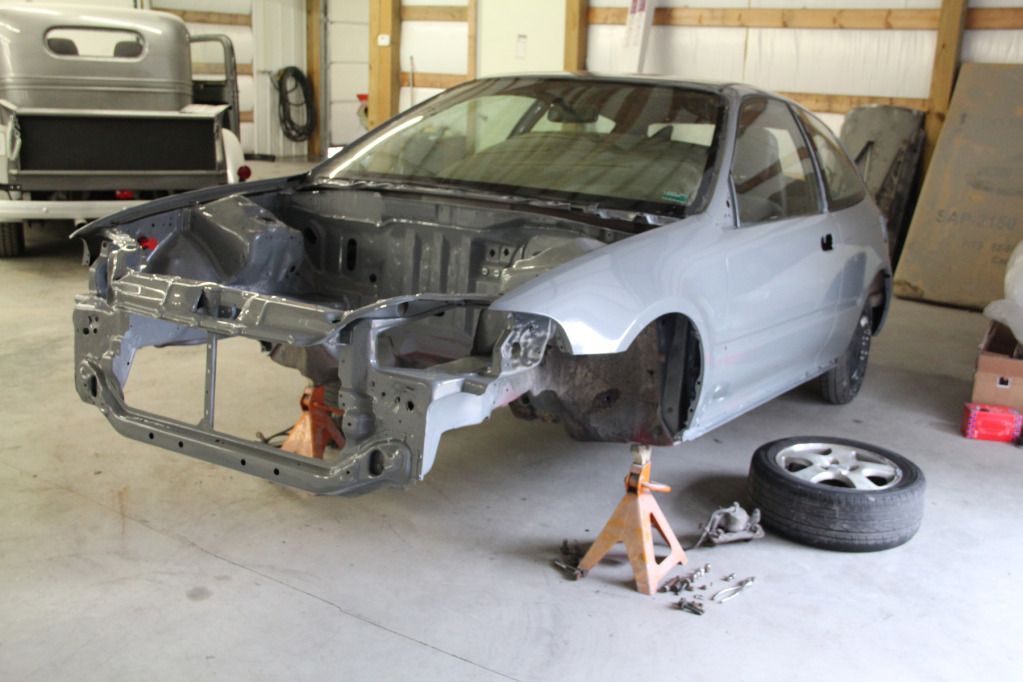
Bought the car from a guy who had it sitting next to his barn with no driver's side window in it, and all but gutted. I paid $250 for it, and got to work right away. The past few months have caused me to do a lot of thinking about what all to do with the car, and the final build for my new daily includes: D15Z1 swap (Civic VX motor) after a minor rebuild, lowered on coils, partial brake and wire tuck, polished GSR Fat Fives, a straight body sprayed in the new Scion tC2 color 'Cement', and a few practical improvements like more comfortable seats, HIDs, iPad mount, etc. This car will get me from home to work and back, and needs to last me the next few years as I finish nursing school. I got two bachelor's and decided I wanted to go back for a third. Lol. The rest of this first post will be mostly cut and paste from my other build thread with minor edits made to fit this forum in particular. I look forward to hearing everyone's opinions now and as I finish!
July 27th, 2012
So, I figured since I was doing quite a bit to this car, I'd log it in here and hope that it helps, inspires, explains, or at least gives someone something to troll. Never done a build thread before, but I'll do my best.
A little backstory: I'm not building this car to be quick. Not even a little bit. I just graduated with two bachelor's degrees, and have decided I'm going back for a third, so I need a decent DD to get me from home to work and to school. I also just bought a house and I'm getting married in September, so I sold my SRT Caliber to get out of most of my debt, and decided to start building.
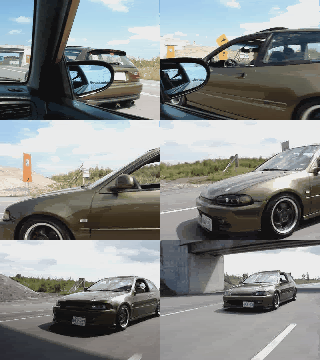
The car is a '93 hatch that I bought as a roller. As a warning, anything I say about this car being rough, or junk, or anything else derogatory isn't intended towards the previous owners. I knew what I was getting into when I bought it. :hug: Here she is on the way home.
And here she is once we finally made it home (just a few shots for space sake)
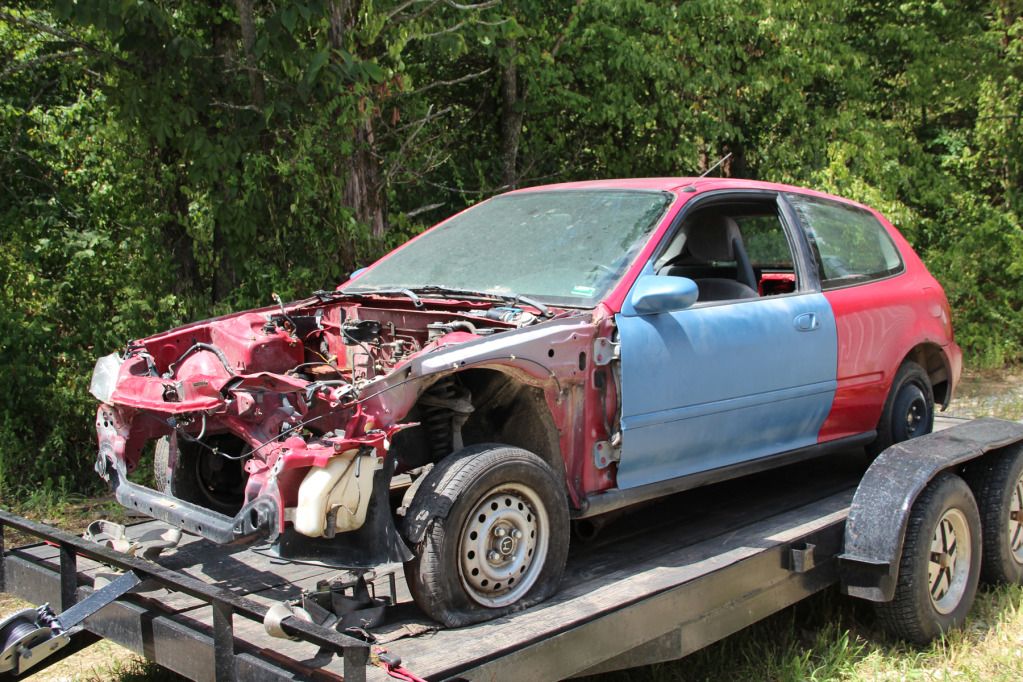

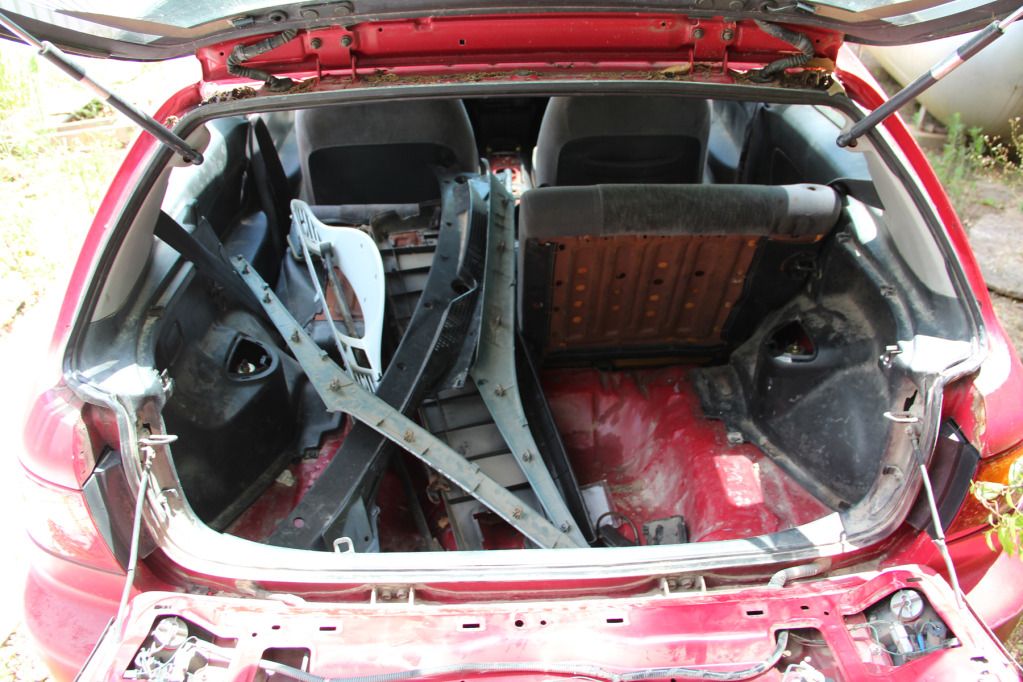
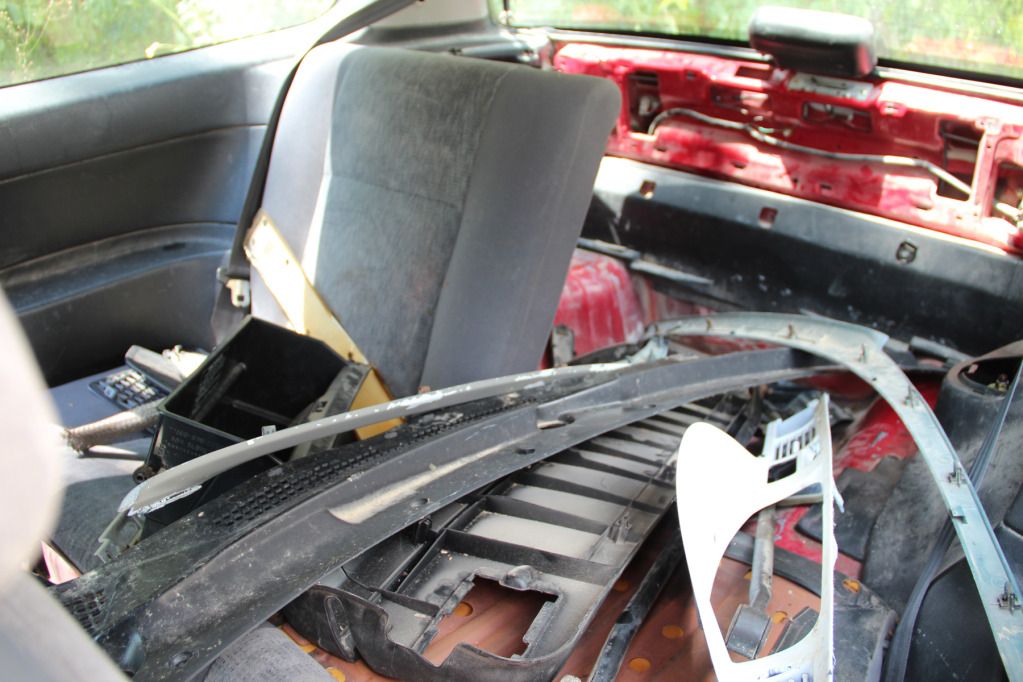
I suppose now would be a good time to mention that I work overnights in the Emergency Room at Mercy (formerly St. John's Mercy), an average of six nights each week, so I don't have TONS of free time, but I make the most of the time I get. I'll update this thread accordingly.
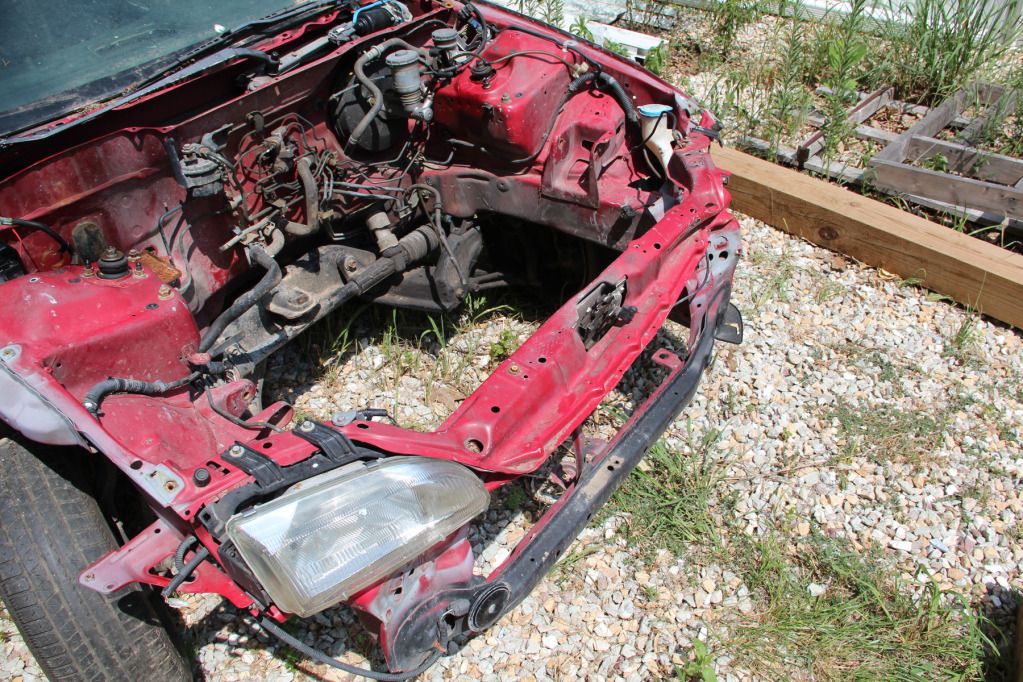
I purchased a radiator support to get the front end straightened out a little:
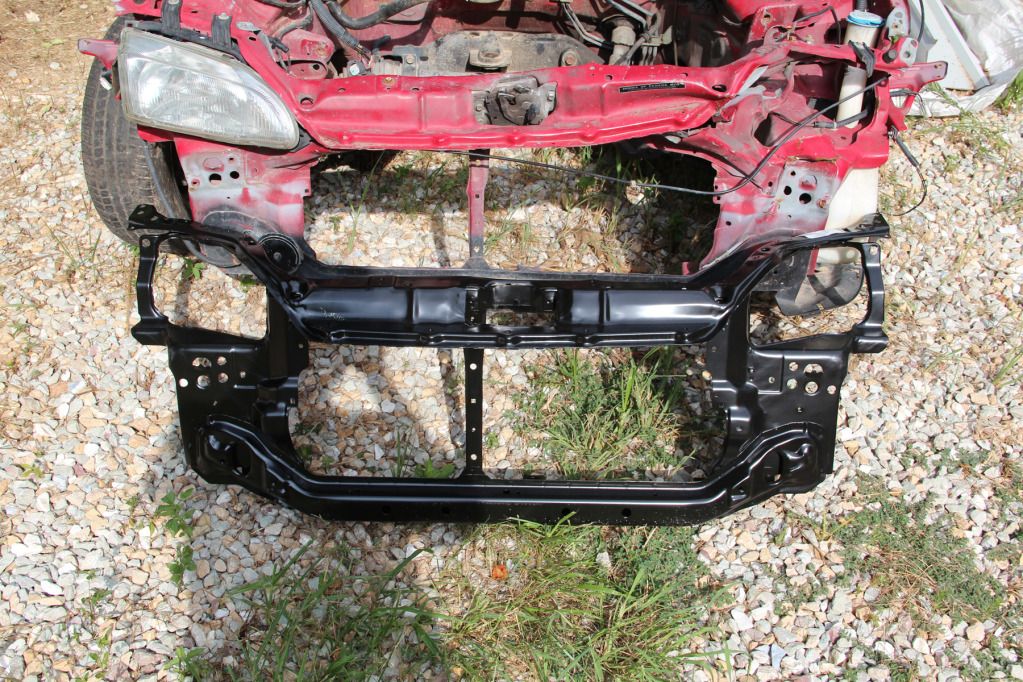
But the day I was planning on replacing it, I ended up cleaning out the interior, and stripping the bay of everything I didn't want anymore, taking it from this:
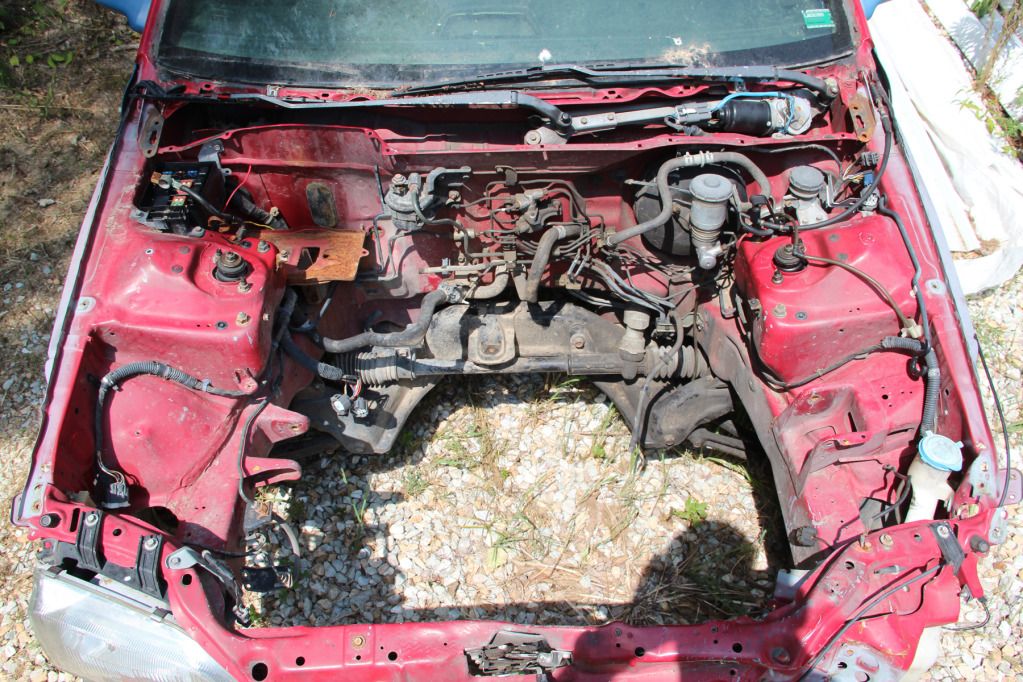
To this:

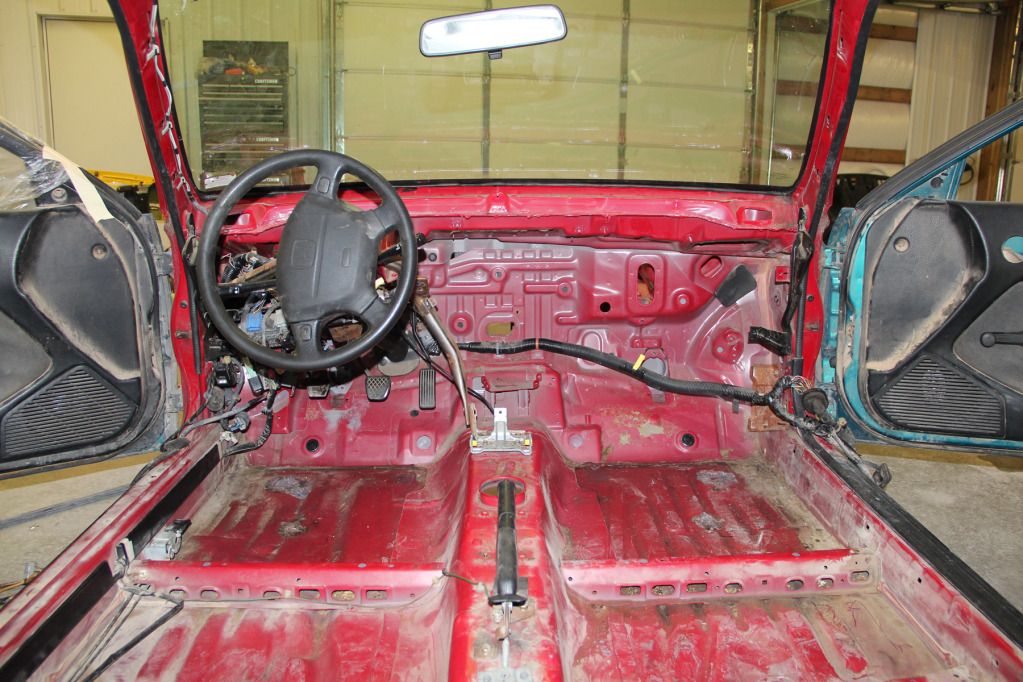
And before/after of the interior:
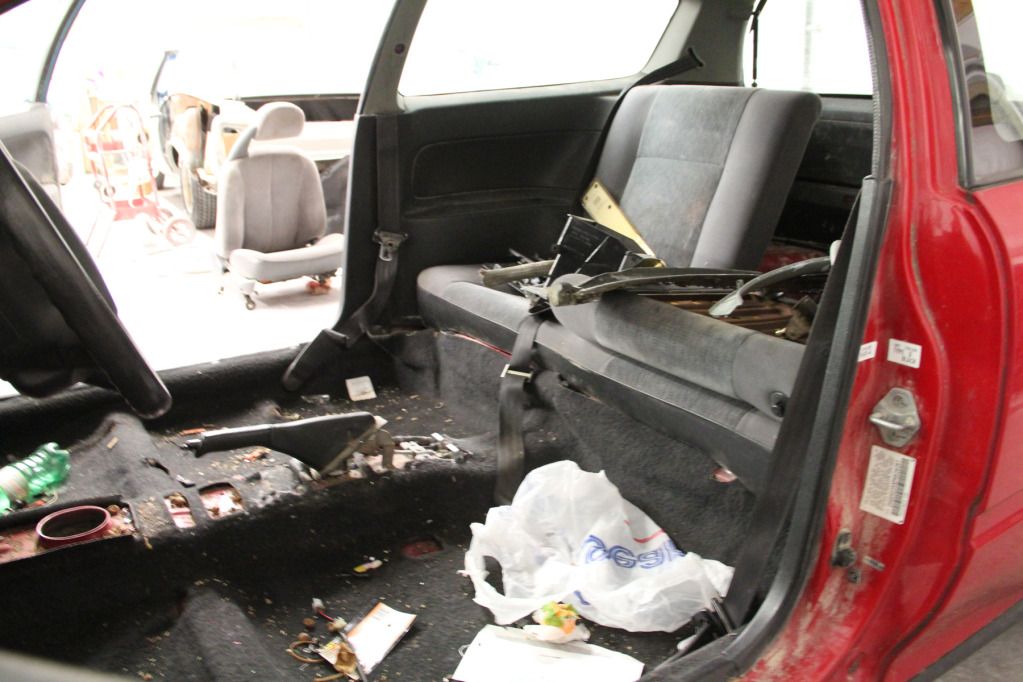
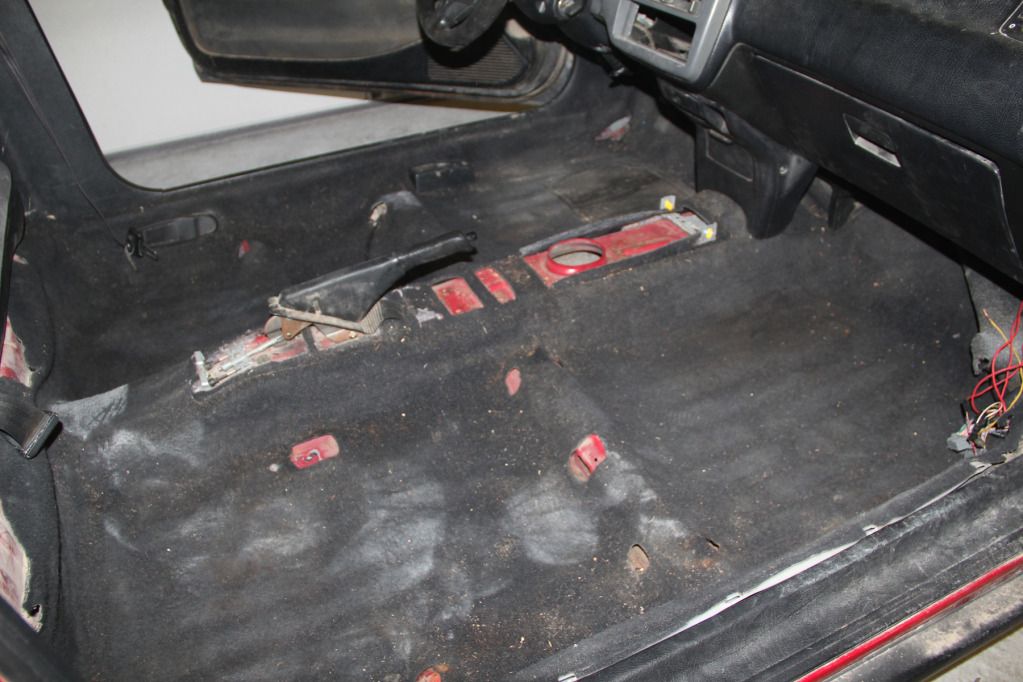
Basic plans for the car include a brake tuck, partial wire tuck, a slightly freshened up D15Z1 swap (mpg all the way, and all maintenance items complete before going in the car), new paint in the bay and on the body, a COMPLETE body (fenders, bumper, lights, hood, etc), and either replacing several interior parts, or at least cleaning them up VERY well. We found a mouse in the car when we were loading it up on the trailer. It could use a good cleaning. Lol.
I also purchased my swap and a few 'extra parts'. Last photo is of the shipment I got from Summit this week for the new brake and fuel lines, the battery relocate, and a few other small items. (Sorry for the iPhone shots).


I'll be tearing into the Z1 next to start getting it ready to drop in. The seller believes it's solid and would be a reliable swap as-is, but I'd rather open it up and see for myself, and I'd like to replace basic things like the timing belt, water pump, F/R seals, clutch, flywheel, head gasket, oil pan and VC gaskets, etc. so that I'm not running into these things right away once it's up and running. After the initial swap is in and I'm partially done with the car (running/driving daily), I'll open up another one of the Z1s and do a complete rebuild with rotating assembly, just to have on hand if/when the original craps out. Right now, I'm slightly crunched for time, money and space with so many other things going on with the car, but I'll get there.
That's about it right now. Like I said, I'll take photos and update as I go. Feel free to comment, give suggestions, etc. I think it'll encourage me if I can ignore the trolls. Lol. Thanks for checking this out!
July 30th, 2012
...And the whole car is actually going to be a battle ship grey color. Gloss grey with no metallic/pearl/etc in it. I'm toying with the idea of just doing a gloss black bay (like you would do on the body, as opposed to a laquer or single-stage engine bay paint). It would match the gloss black wheels I'm planning on going with too. If I go this route, I'll likely do something at least a little eye catching on the VC, just so it's not a sea of grey and black. Still deciding... :chin:
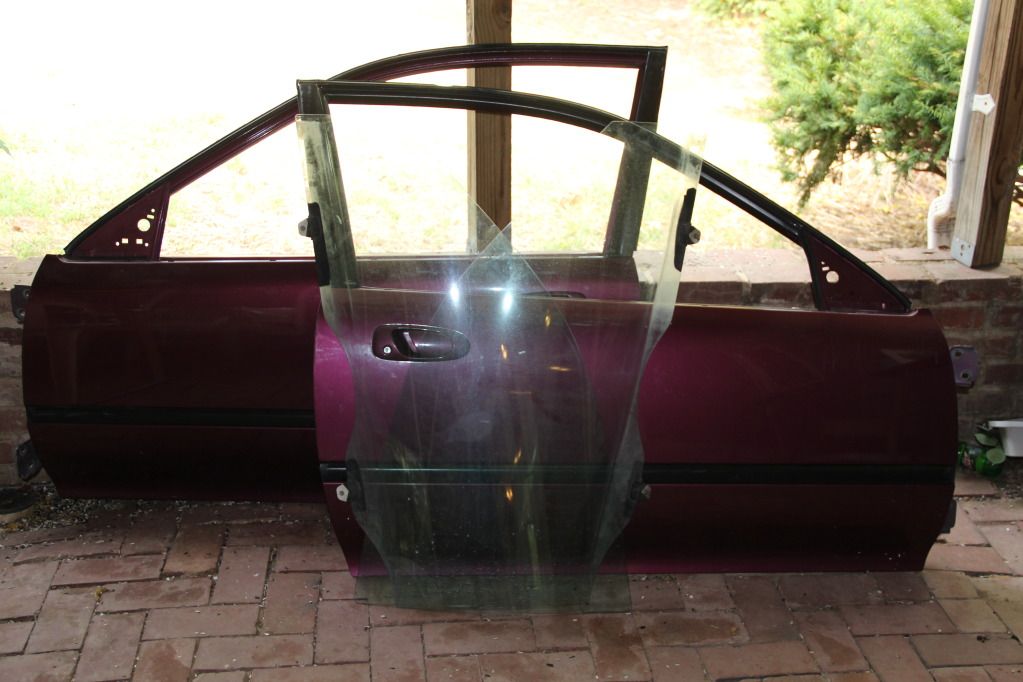
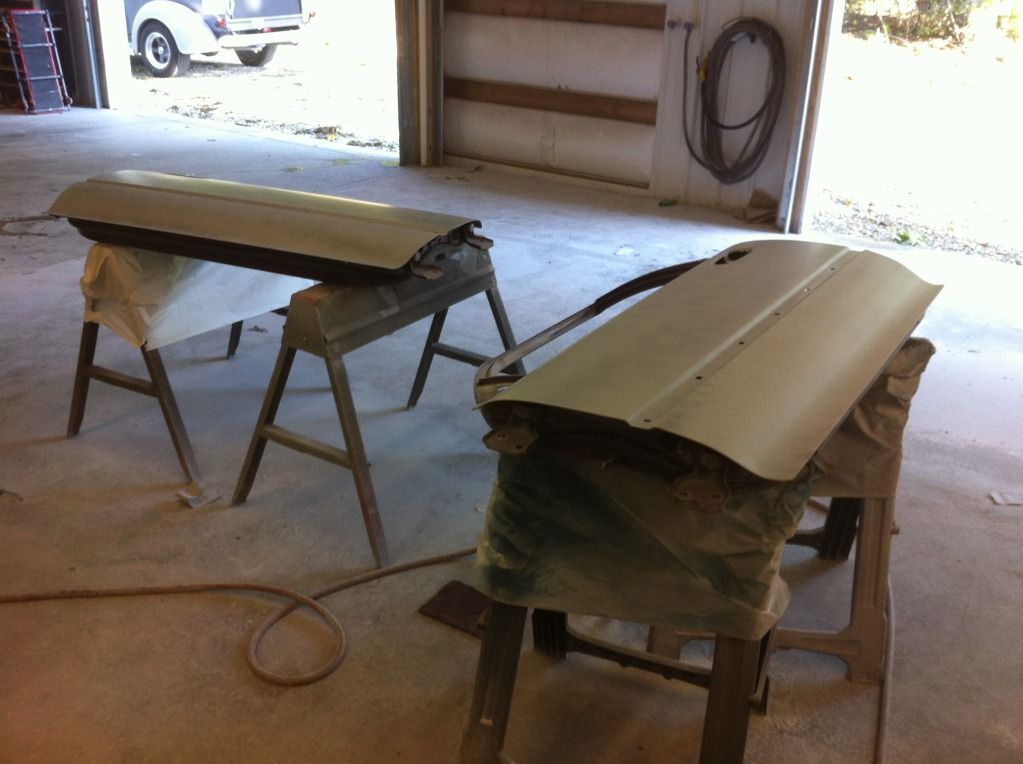
I had mentioned buying new doors and windows. They aren't installed yet since I'm only able to work on the car on my days off (Wednesday and Thursday this week hopefully), but here they are. Not too bad!
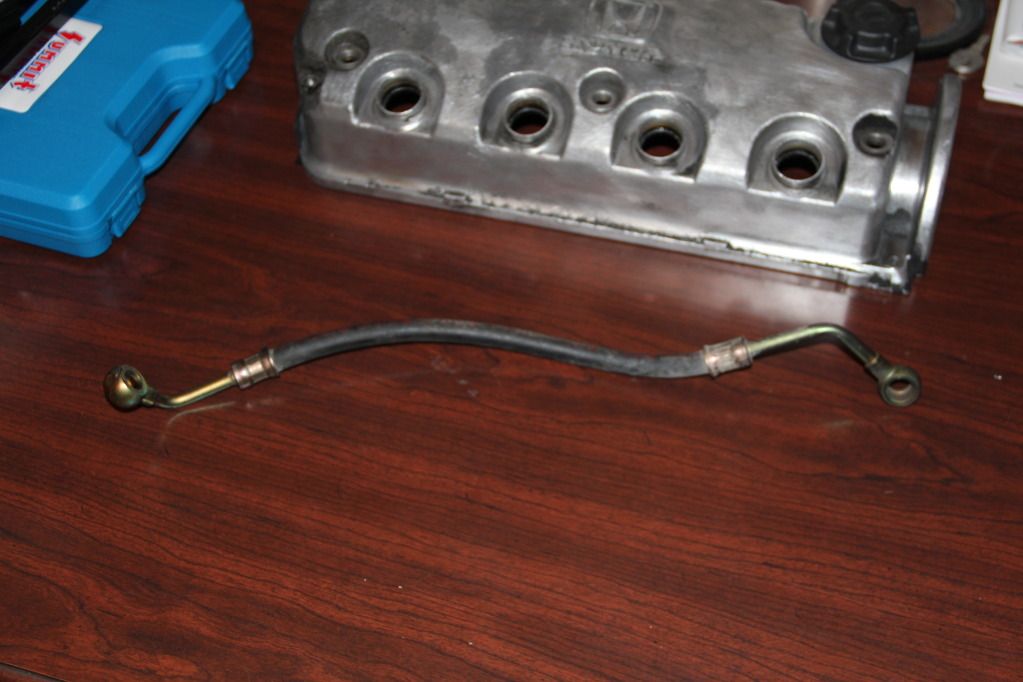
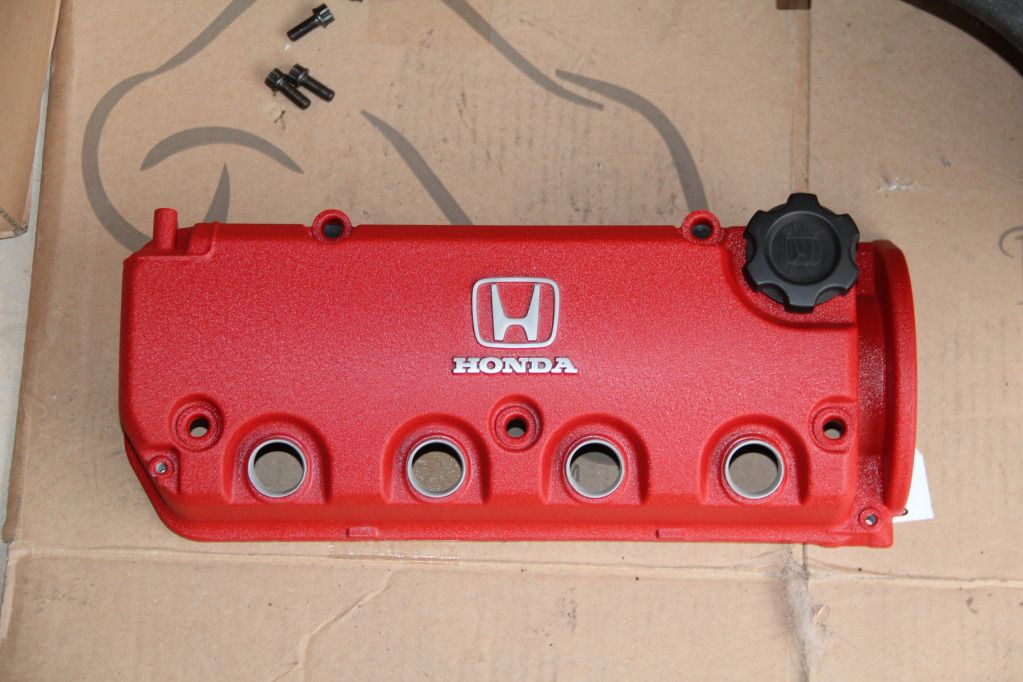
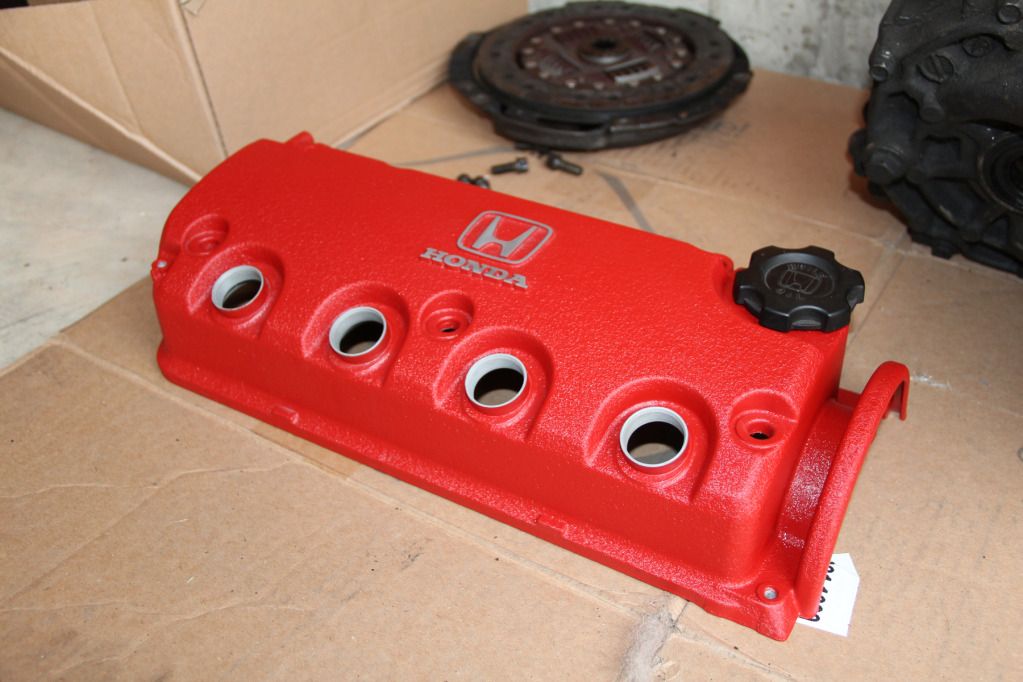
Also pulled the VC from one of the extra blocks and quickly wire wheeled it. I decided to use this VC as opposed the the one on the engine currently since it has the Honda emblem in addition to the word 'Honda' on it, and there are also less bolt holes on the top of this one. The other VC has two extra threaded holes up top for mounting brackets on to, and I'd rather forego having those there since a lot will be shaved anyways. Here's the VC as it sits today (more work to come on it).

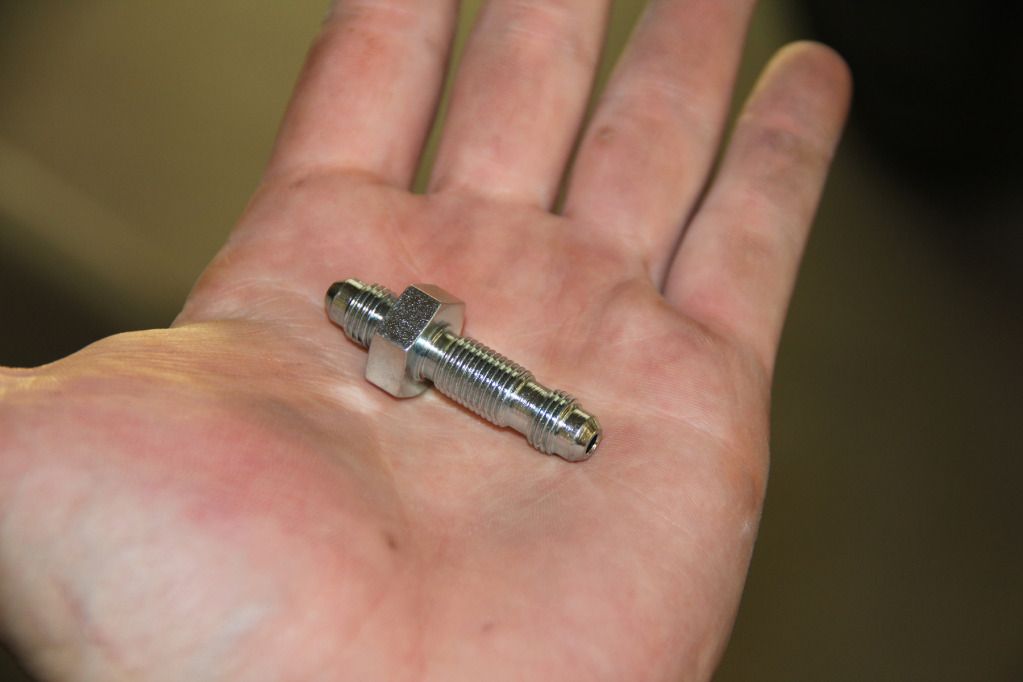
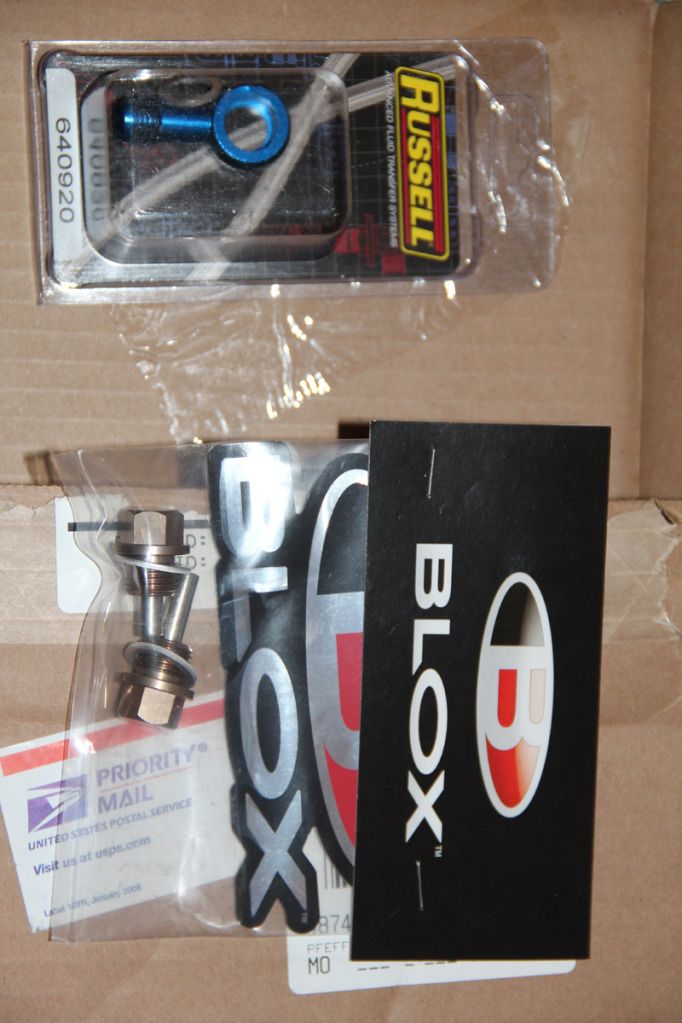
Finally, I pulled the stock fuel line after realizing that there wasn't a nice, pretty hole in the side of my fuel rail as described on most D-Series (another joy of the Z1), so I'm going to be purchasing another fitting to adapt the new SS fuel line to this input. It'll look better this way anyways I think, so it sort of works out. I just need to figure out what size banjo fitting this is, if anyone knows?
Not much to read about today, but my work schedule is sort of killing me. More pics to come soon.
August 2nd, 2012
So, I had a couple days off, and decided to spend them working on the body of the car instead of the engine. I didn't get anywhere near as far as I would have liked, but it's making progress.
I dropped my VC off at Gateway Powder Coating Wednesday morning after work. He's charging me $75 to chemical dip to remove the oil & grease, sandblast, powder coat the VC in a wrinkle red finish, and to brush the letters and H emblem after it's coated. I'm pretty ecstatic about the price and excited to see it finished. Turn around time is around 3 days for him, but I told him it's not a huge rush since I won't need it for at least a week or two. Very impressed with his customer relations so far.
I started off Wednesday morning with this view after removing my seats (they are just sitting in place, not bolted in or anything).
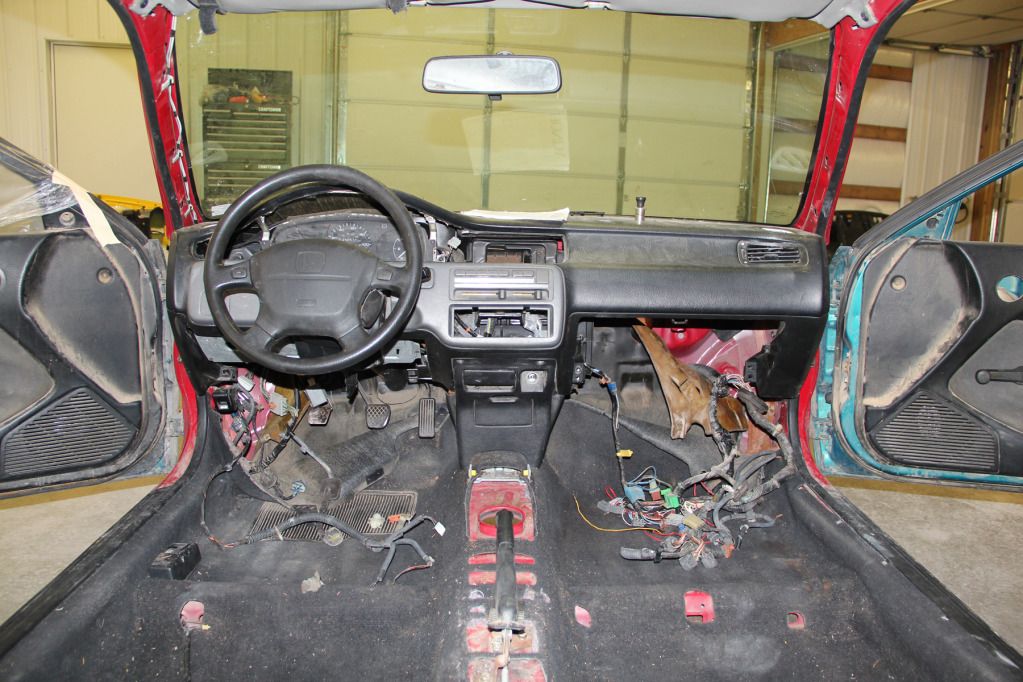
Then I removed the dash:
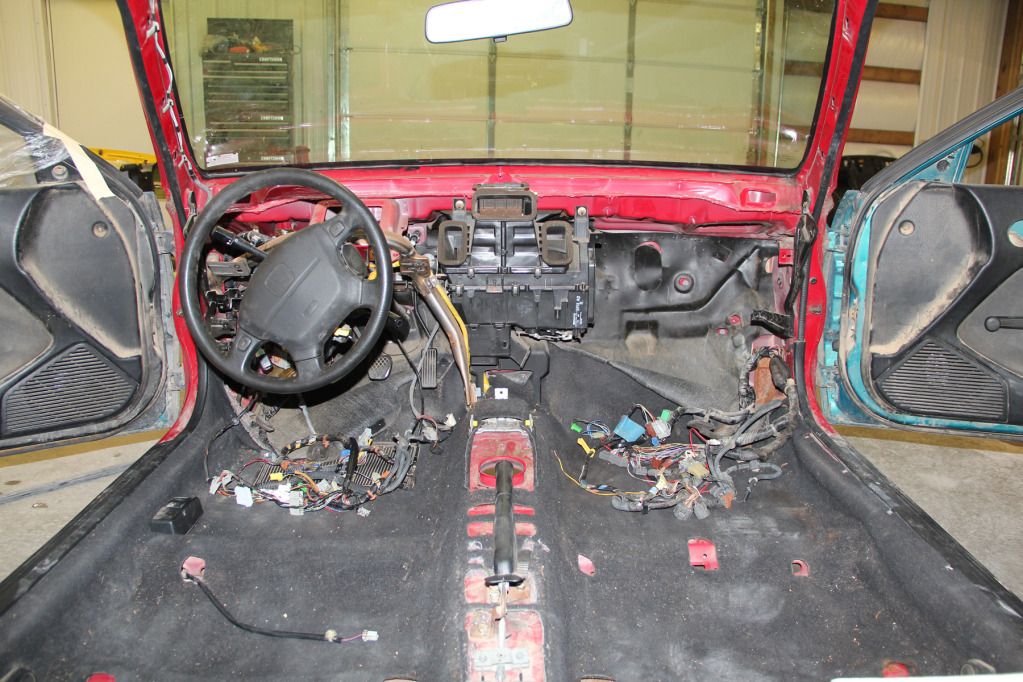
And I also removed the carpet since the whole car smelled like mouse urine. What I found behind the thick rubbery piece on the firewall was about 1,000 (literally) ants and winged bugs.
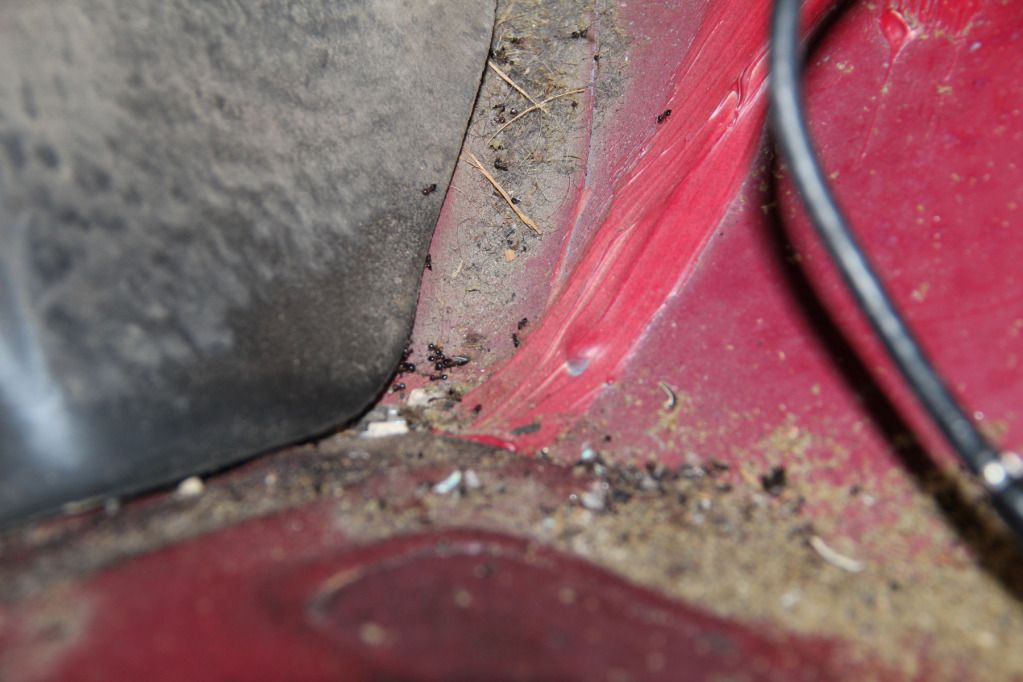
I sucked them all up with the ShopVac and was glad it was 'just' bugs, and not mice like I expected. After removing the carpeting though, there were shells everywhere; evidence that mice had definitely been in the car for a while, but I already knew that since we saw one when we loaded the car on the trailer at Caleb's. Here's a shot with the carpeting removed, and I think the driver's side was vacuumed already when I decided to take a pic.
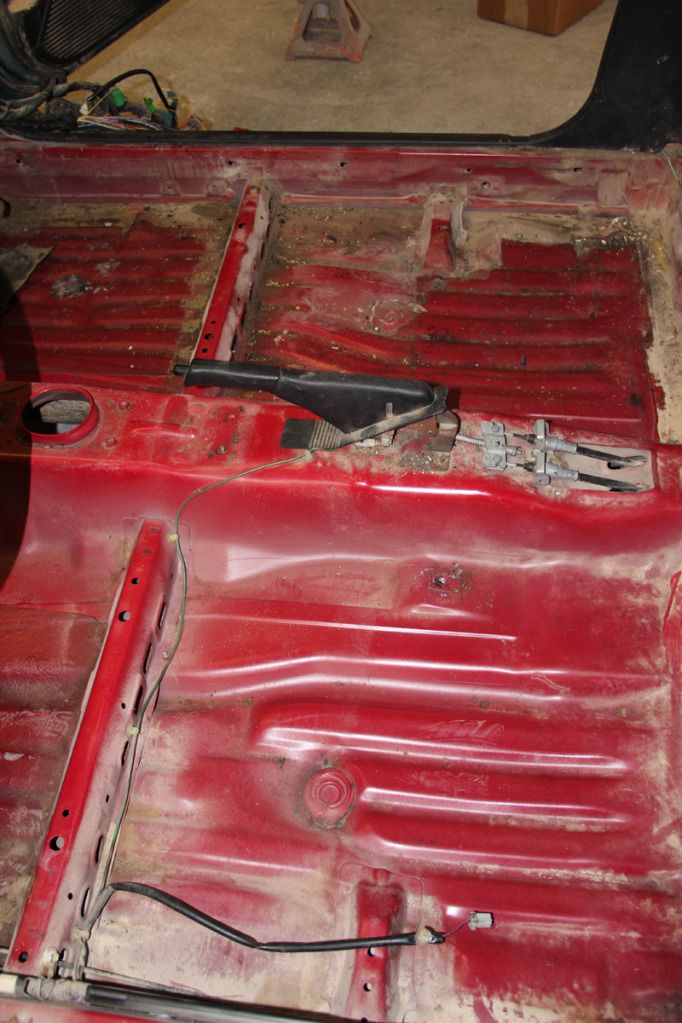
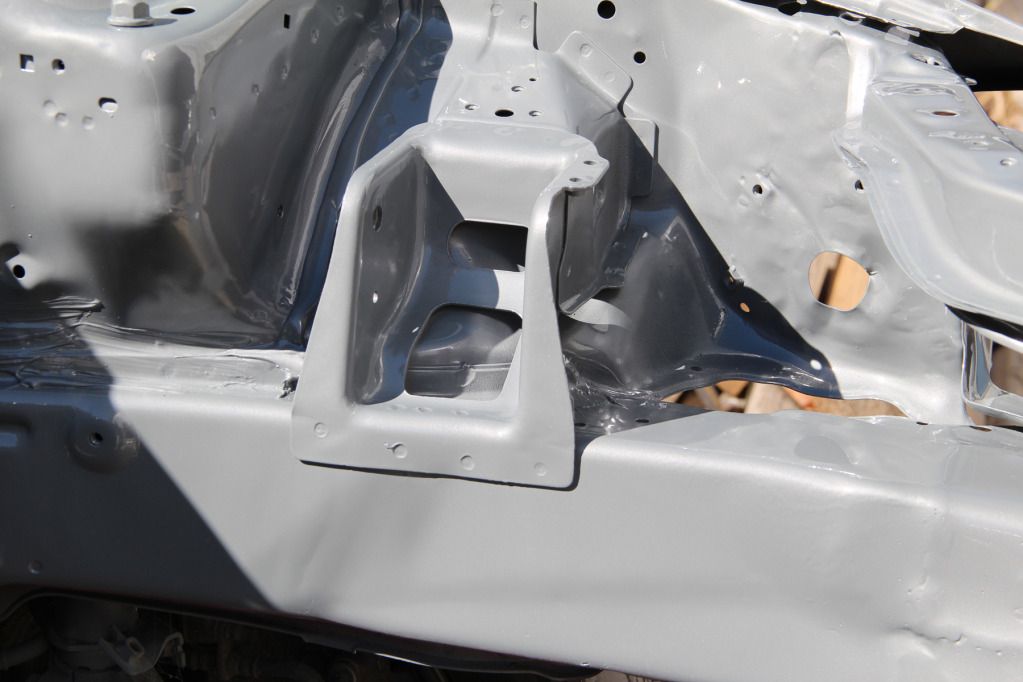
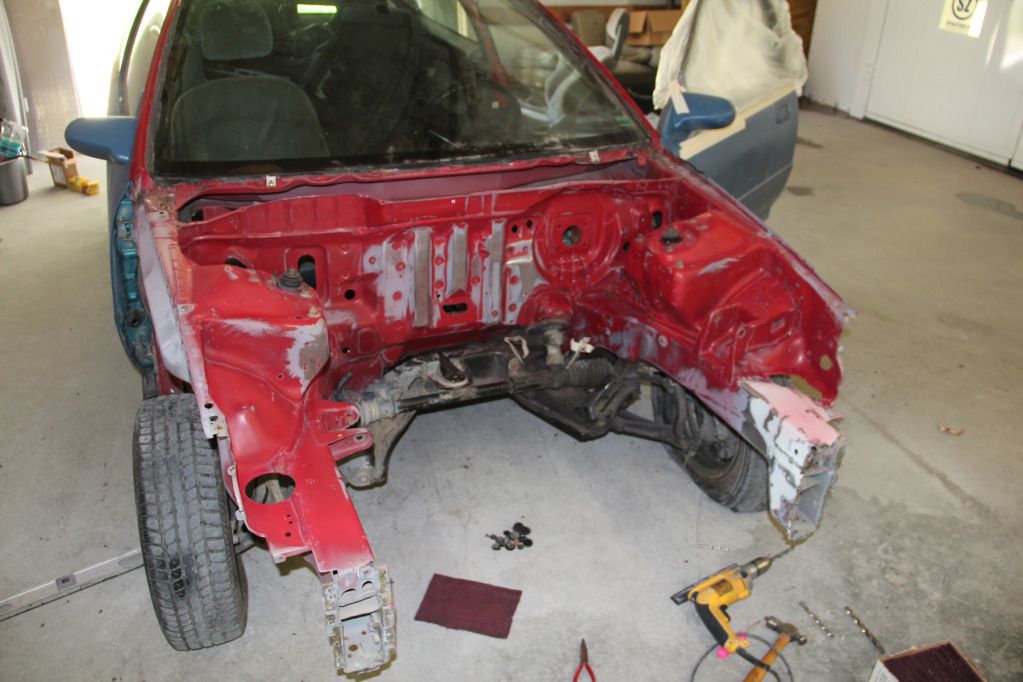
Then I drilled out the spot welds on the radiator support and removed it, revealing a lot more damage to that driver's side frame rail than I thought.
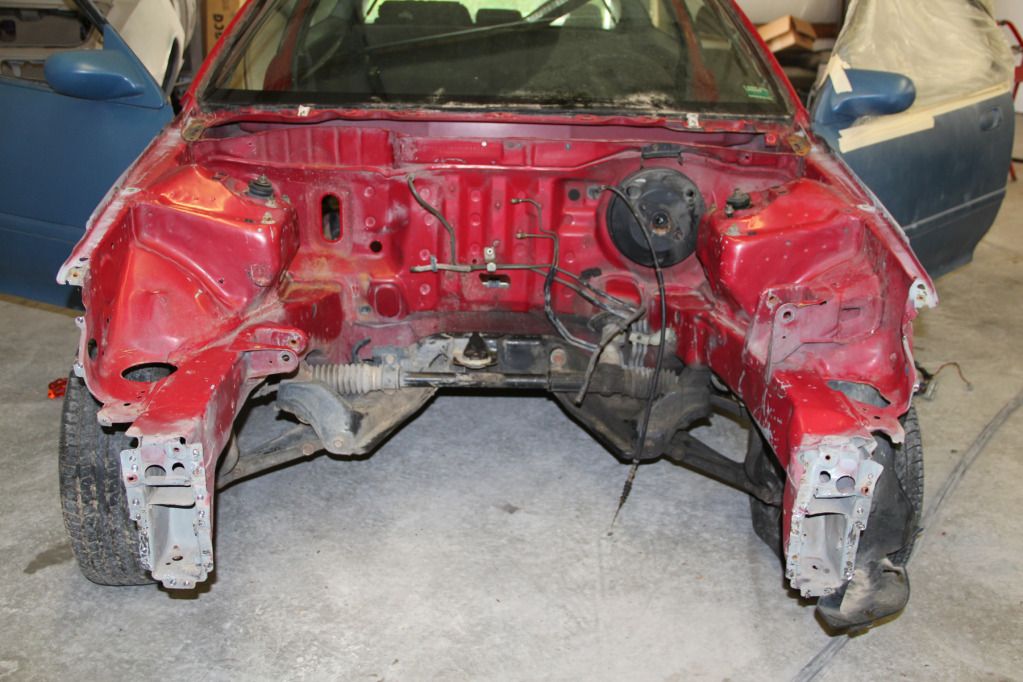
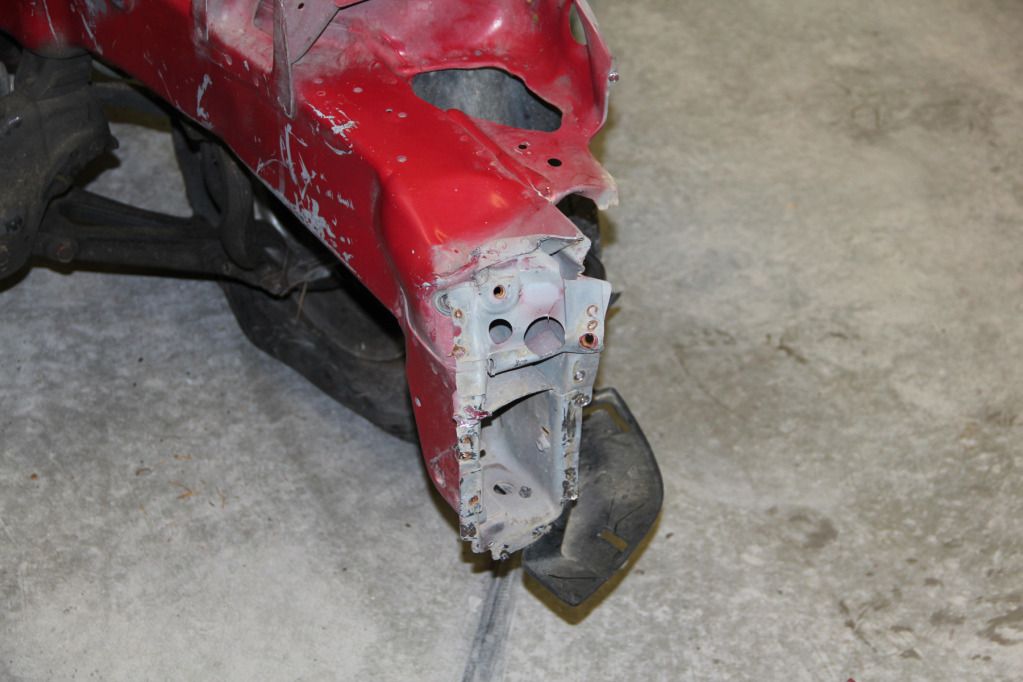
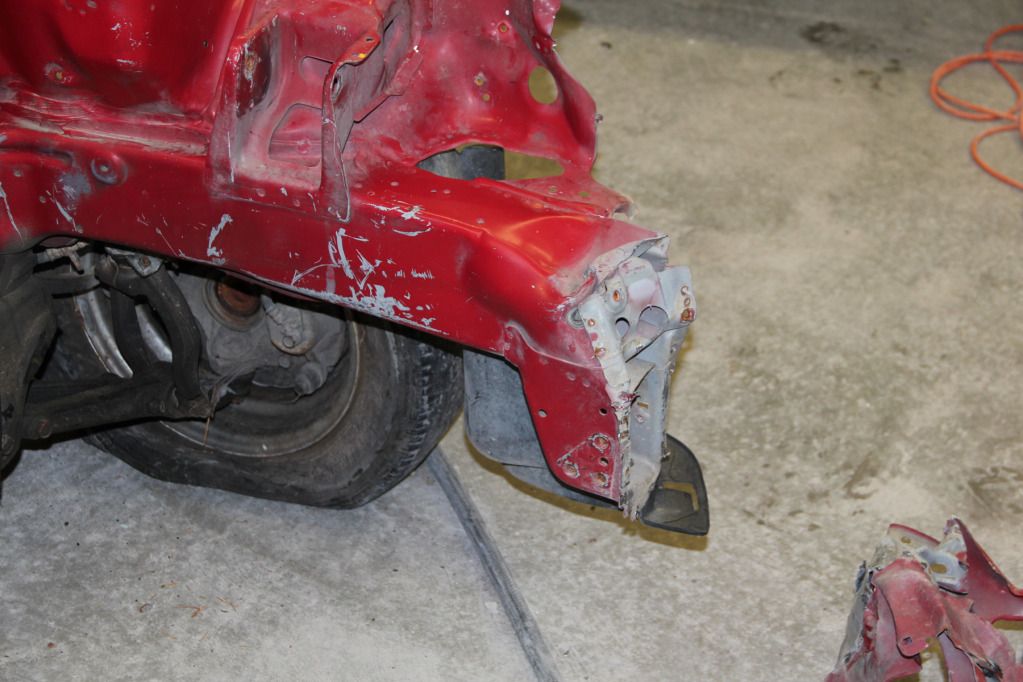
I tried working that sheet metal as much as possible, but I couldn't get it to a place where I felt comfortable welding the new support to it, or safe driving with it crunched so far already. So, I removed the bent part, and reformed it off the car where it was a lot easier to deal with.

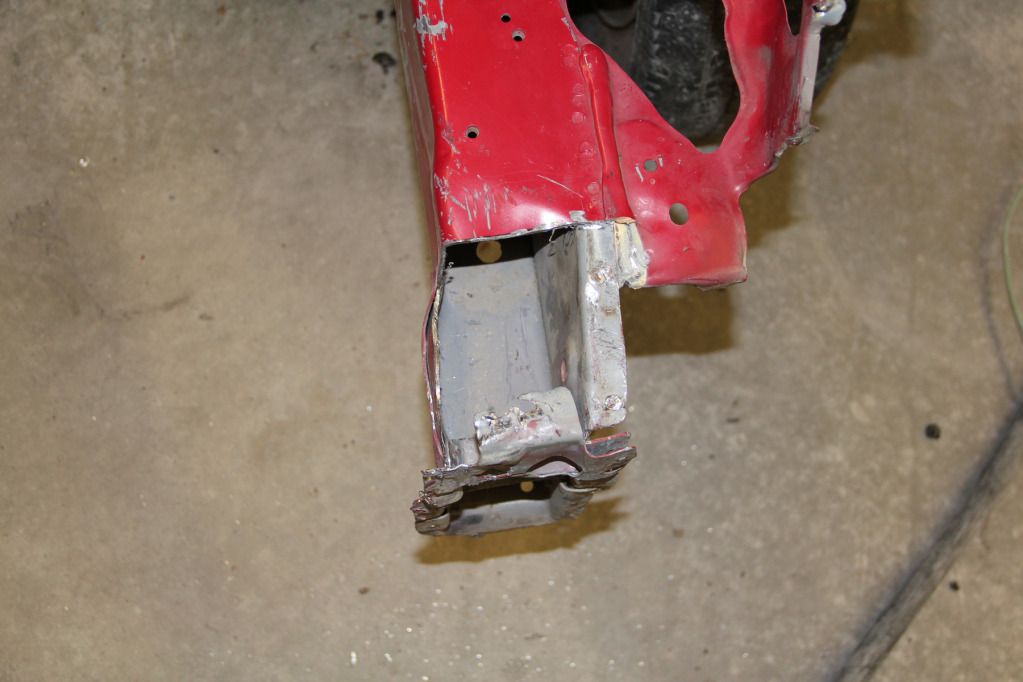
And after working it some:


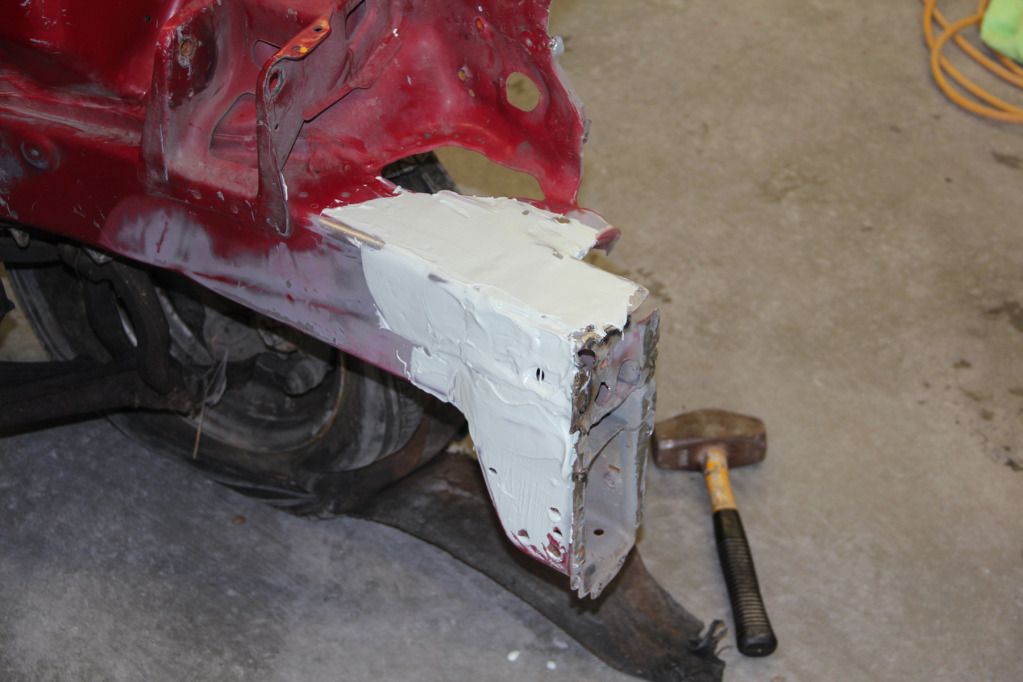
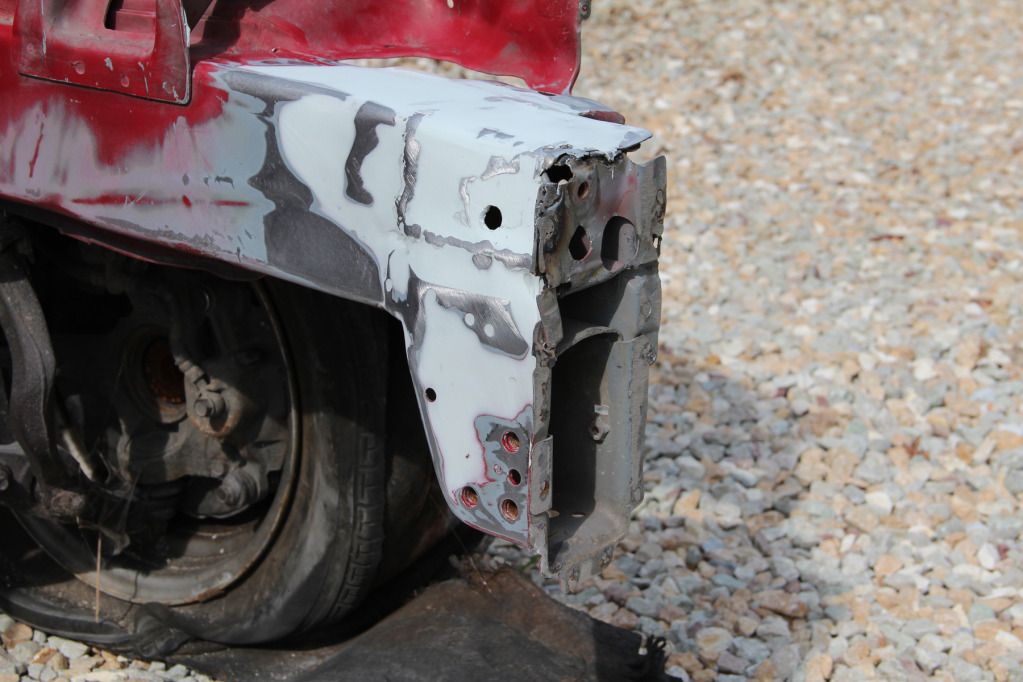
Thursday morning, I laid a solid bead along every cut line, and also along every other seam in the area, even if it wasn't welded from the factory. Covered up the welds with some body filler, and even though it's not perfect, it's better than the passenger side from the factory, so after it's primed and painted, I'll be happy.
Removed the Brake Booster and the Clutch Slave for when I go to paint:


I test fit the radiator support but didn't get around to actually welding it since I wanted to leave it off while doing the body work on that frame rail. Doesn't look like the accident messed up much more than the front tip of the rail since the fender support on the driver's side lines up awfully well with the rad support.
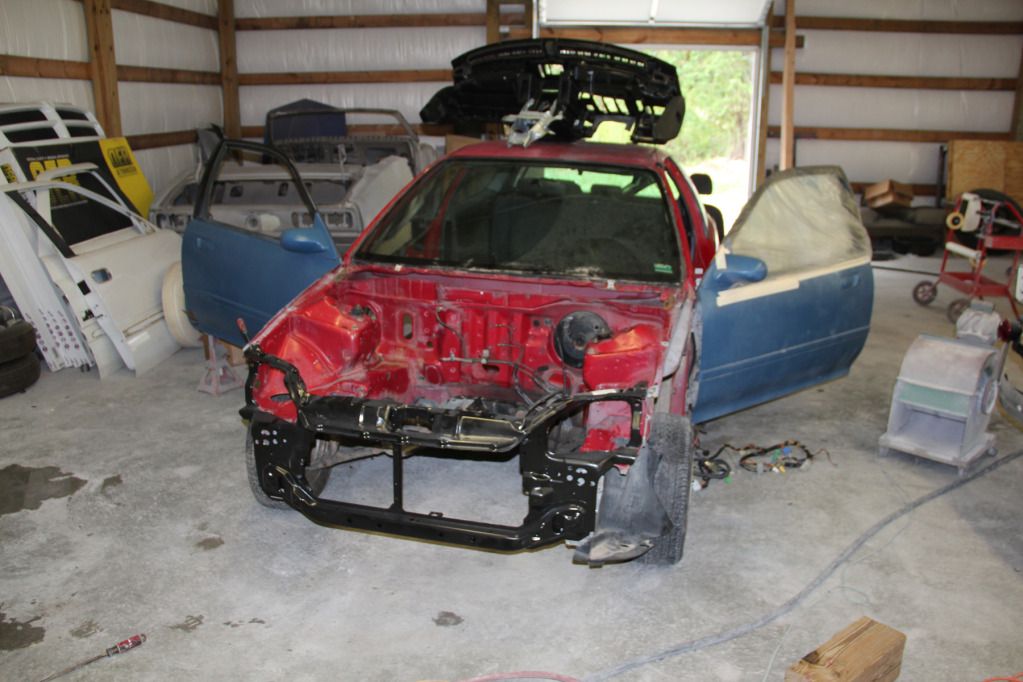

Removed the rear lower seats and the SRS as well (SRS is gone permanently, and as of this moment, I'm planning a rear seat delete. That could change though).
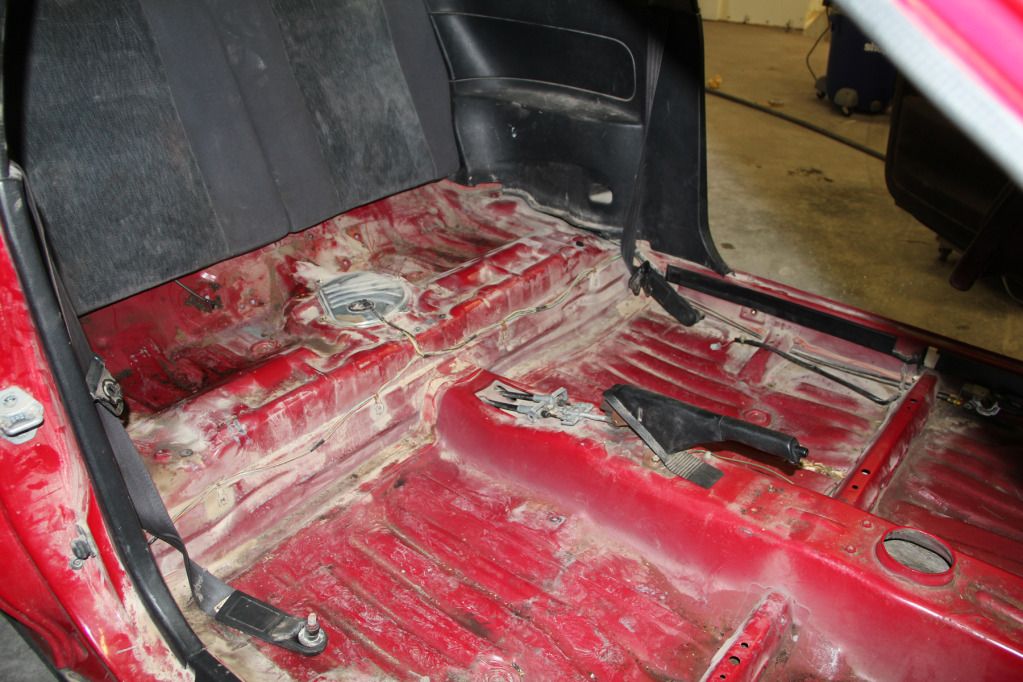
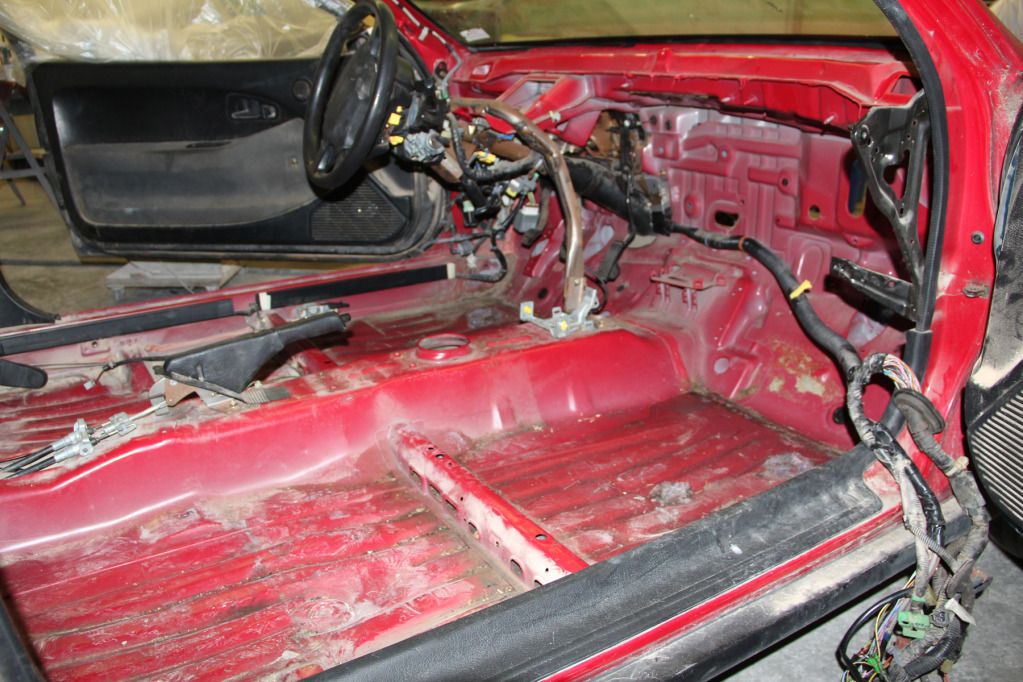
It's interesting to note that below the rear seats it's wet with so much mouse urine. The entire interior will be getting a THOROUGH cleaning before anything goes back in.
Trimmed back the fuel line to where I'll be converting to SS braided (I think. I might start it under the car if this way looks dumb). Also trimmed the rear brake lines, just to get them out of the bay since they'll eventually be cut towards the middle of the car and routed into bulkheads to the interior where the prop valve will be relocated. This is about as bare as the bay will get before primer and paint start getting laid.
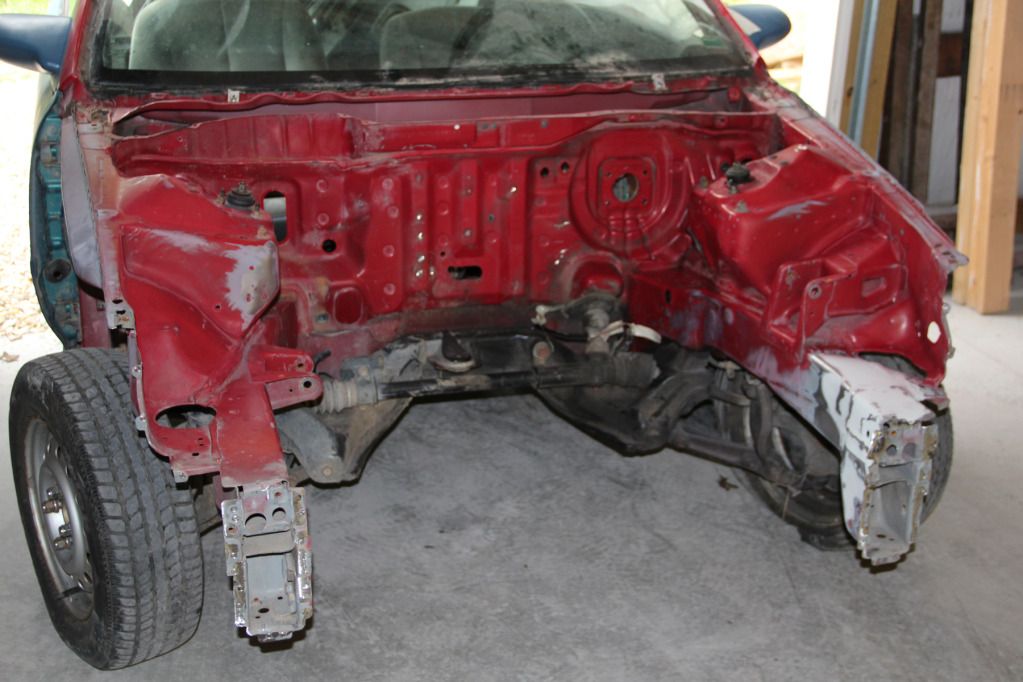

It's a far cry from where it was:

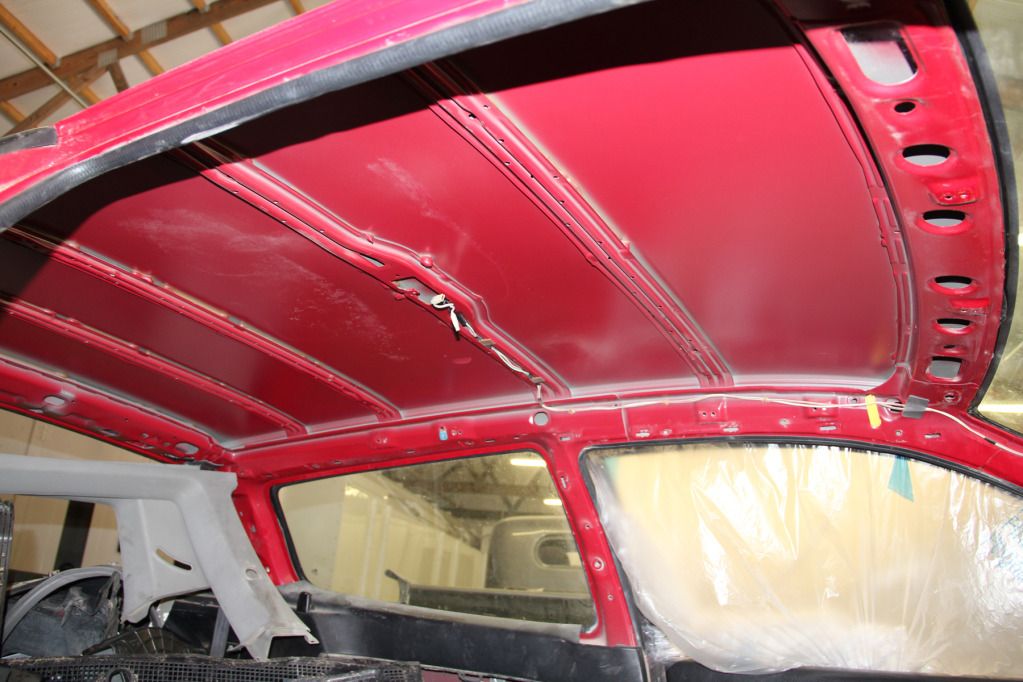
Finished removing the rear seats and the headliner, along with a few other interior pieces. Considering redoing the headliner in a more 'inviting' fabric since the vinyl is pretty shot as it is. Sorry for the pile of parts in the rear. They have to be easily moved in and out of the shop to save room for other cars. :shrug:


That's about it. It's not much, but it puts me in a REALLY good position for my next few days of work on the car (next week) when I go to route the brake lines, and maybe start priming the bay? I'll leave you with some pics of the hatch sitting with a few roommates. Lol.
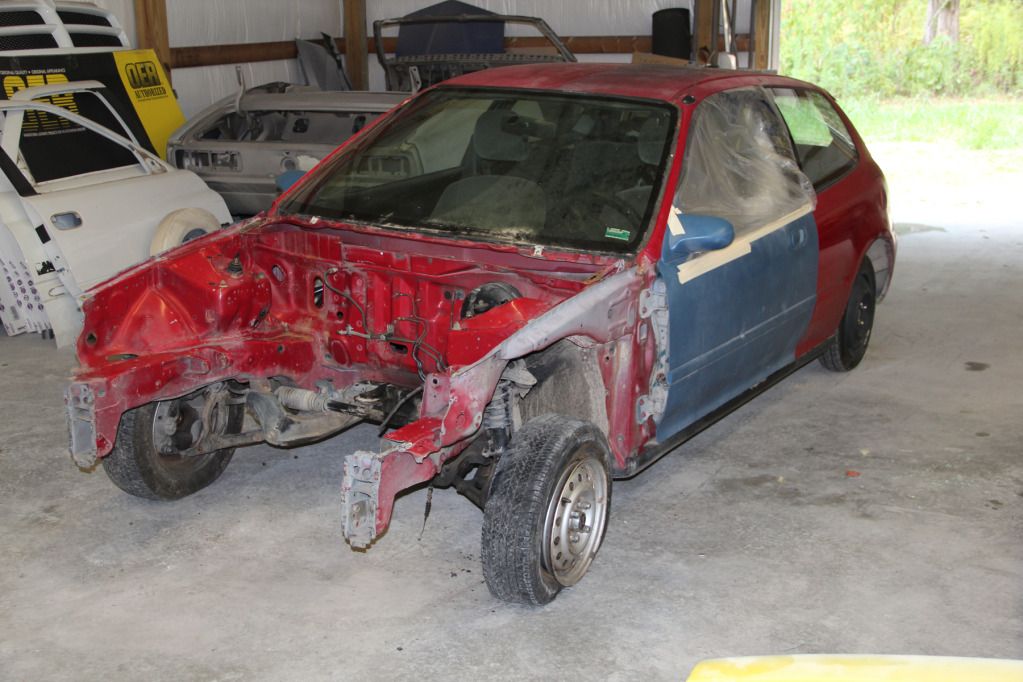
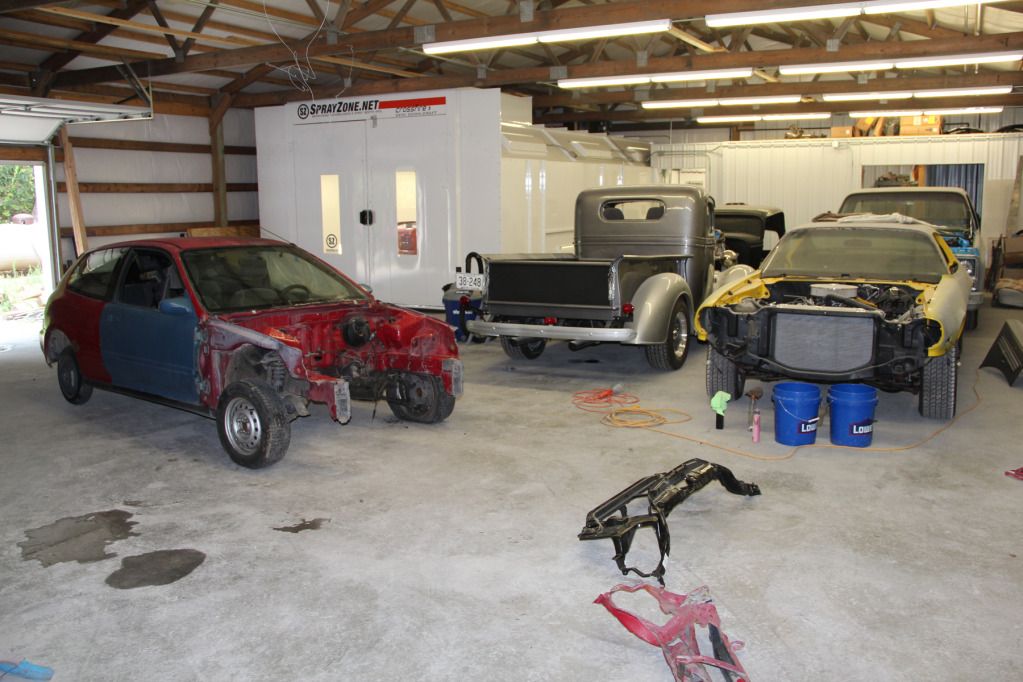
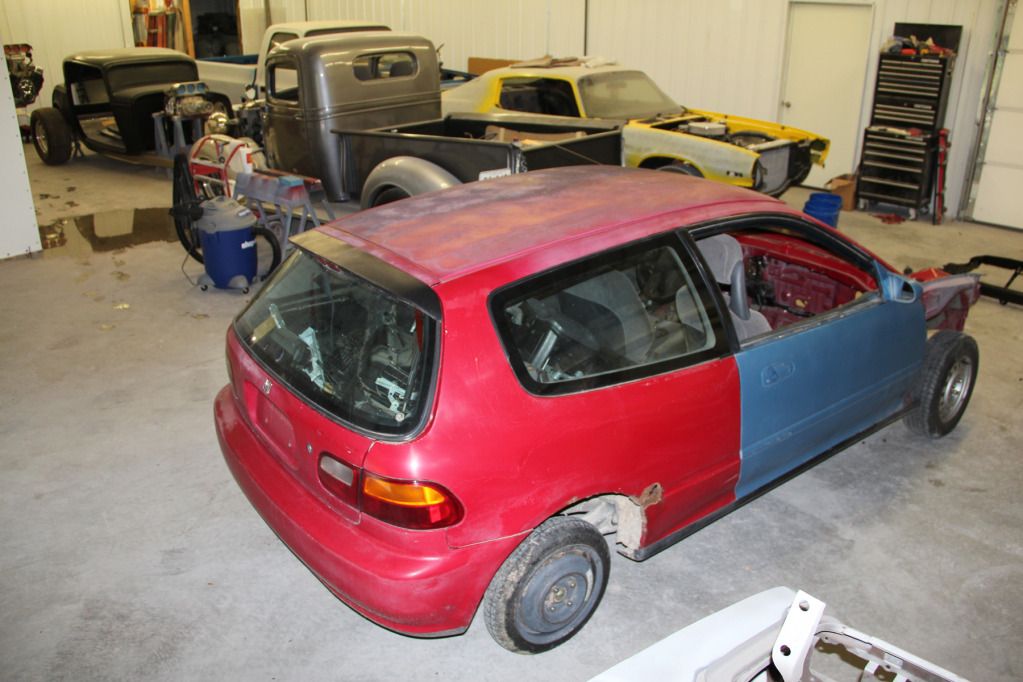
More to come soon I'm sure. Might start tearing a motor apart in the next few days.
August 3rd, 2012
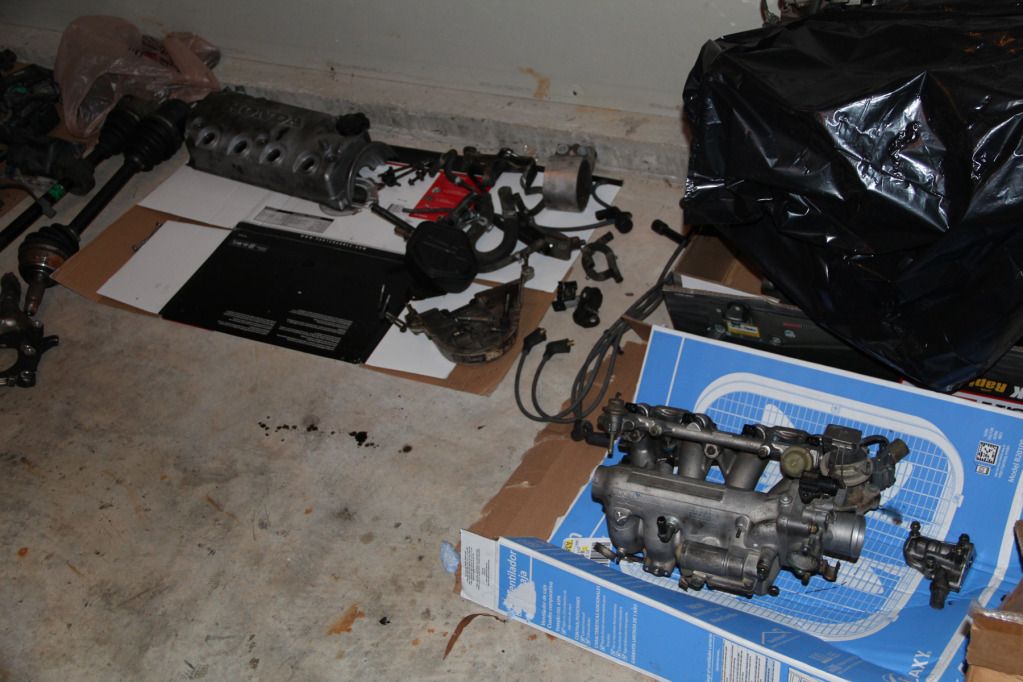
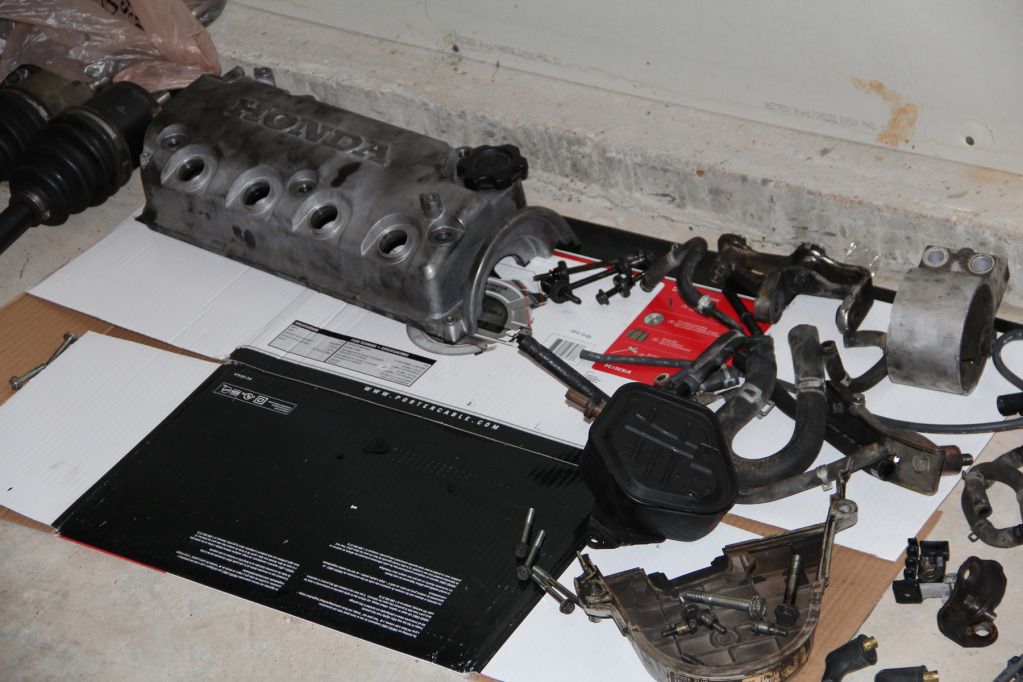
Started tearing down the motor. Didn't get very far before I ran into some bolts that I needed air assistance for, and that was out of the question at 3 am, so I called it a night and cleaned up. Got most of the brackets, the VC, the intake, and a few other things off. Anyone have any tips or tricks on how to remove the crank pulley and the timing belt pulley with the motor out of the car? Going to be doing that soon. Thanks again for looking!
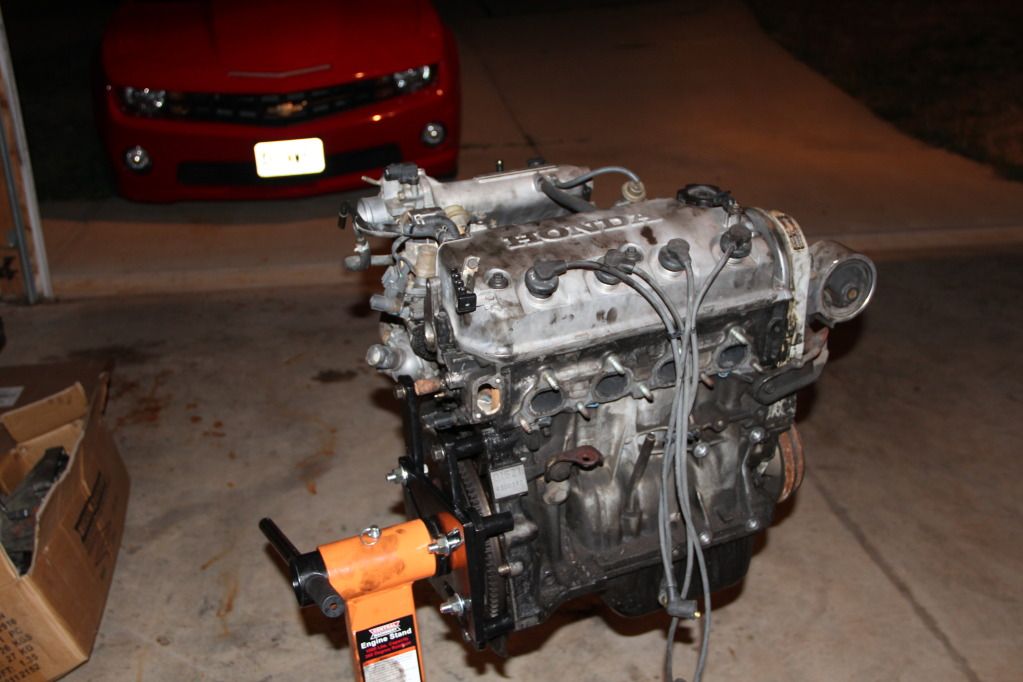
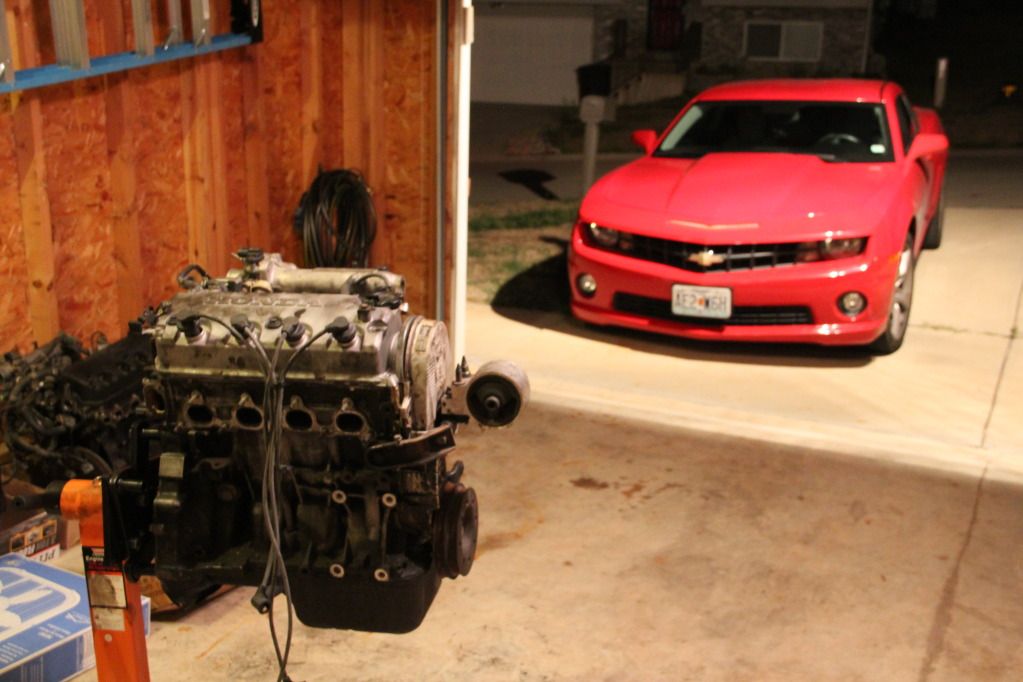

After:
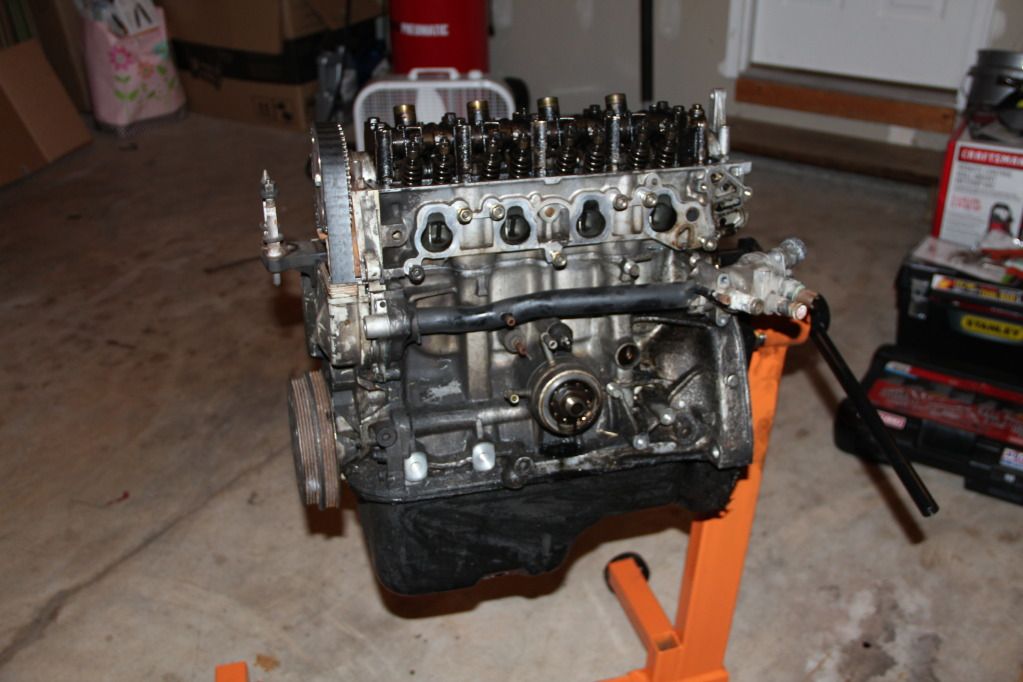
August 8th, 2012
Got a little bit more done on the car yesterday (Tuesday). Just to give you an idea of what I started with for the day, here's the load of materials I picked up from Licari Auto Body yesterday morning, along with my new hood latch. I'm using Omni products through the primer, then using DBU on the paint. Omni is a little lower quality, but works great for primer. DBU is higher quality and will last.

I started out the day by grinding off the studs on the firewall. These were originally used to mount the fuel filter, brake proportioning valve and other random bits of hardware that won't be there anymore. Grinding them off worked much better then pulling them out with a pair of vice grips. The hole left by pulling them out was too large to just overlook, while grinding them left a semi-smooth surface after sanding it with 80 and 150 grit paper on the DA.
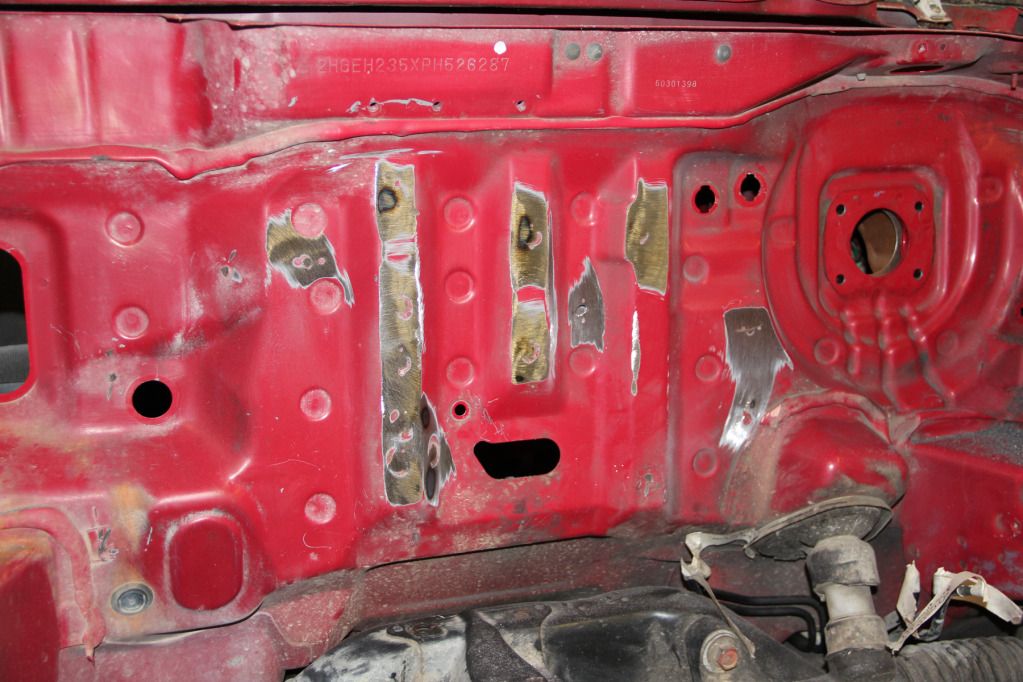
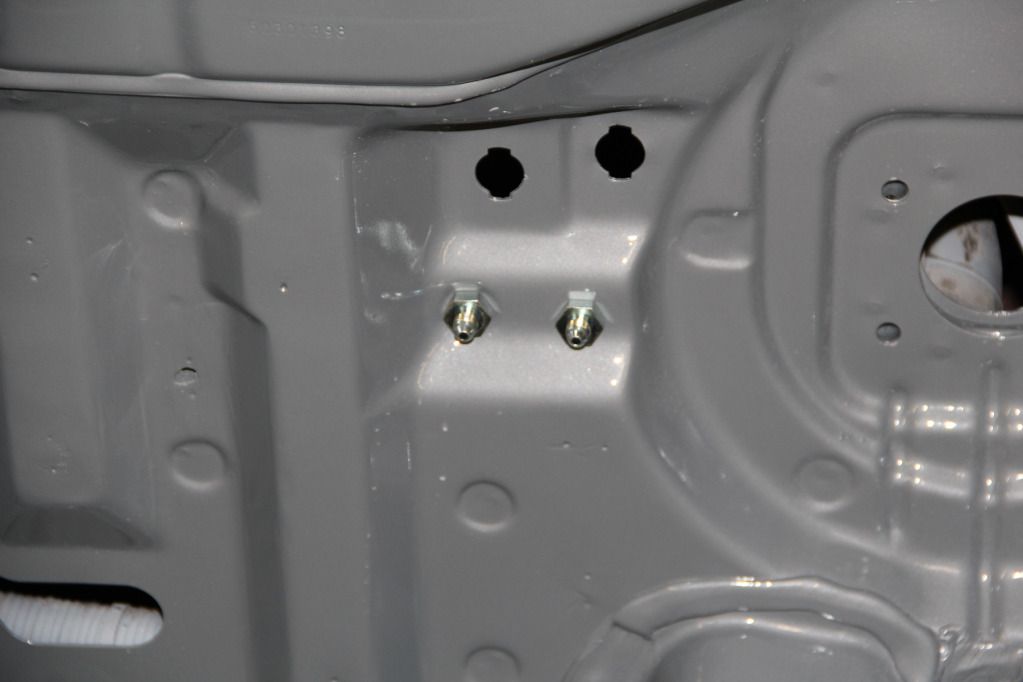
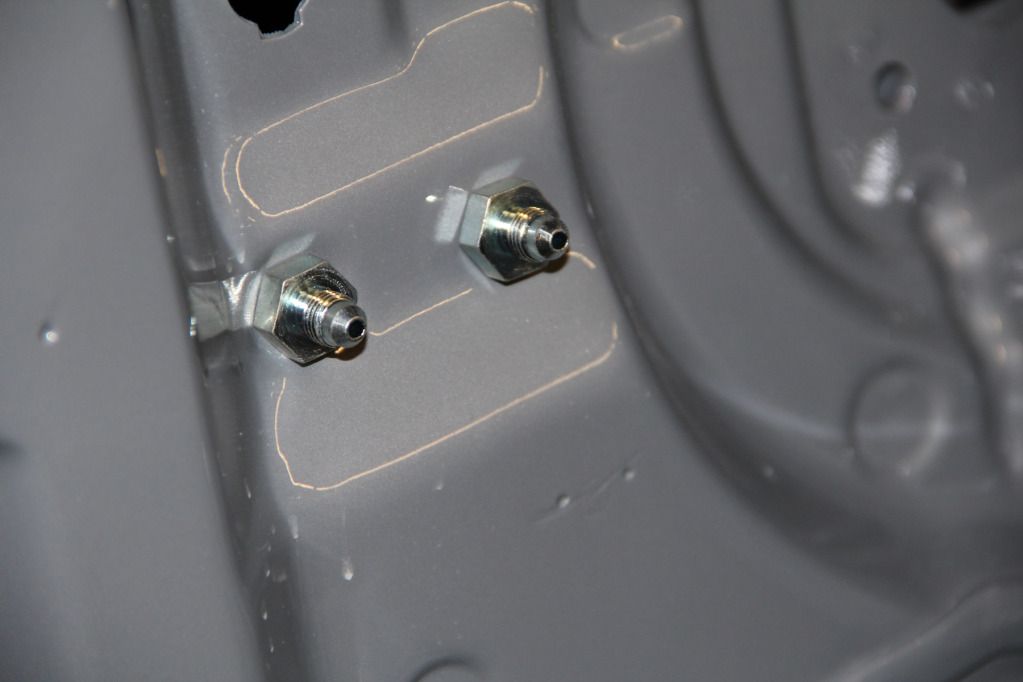
Then I drilled two new holes next to where the brake booster will mount, and below where the throttle cable comes through the firewall at. -3 AN bulkheads will mount in these holes and the new brake lines will come from the master cylinder and right into these bulkheads (then to the PV and everywhere else). No more mess of lines in the bay. Here's a few photos of the bulkheads mocked up.


I took a red Scoth Brite (sort of like a Brillo pad for washing dishes, but made for scuffing up paint in auto body shops) and scuffed the entire bay.
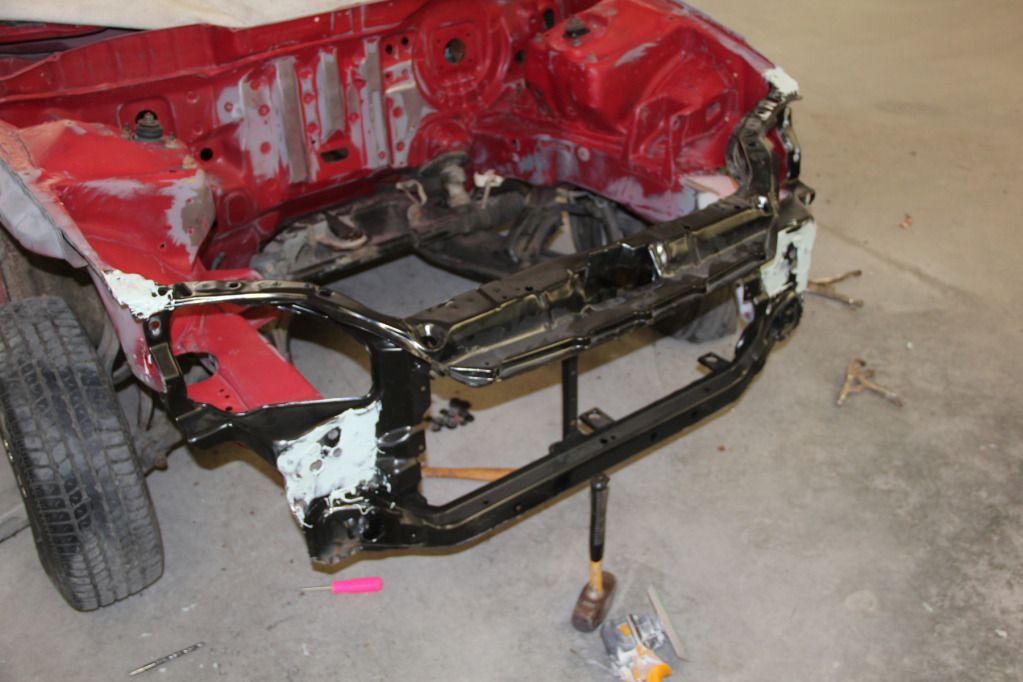
Then mounted the radiator support and welded it on for good. No pics before the body work on the welds, but I then smoothed the welds out with body filler, knocked it down with a DA, and called it good.
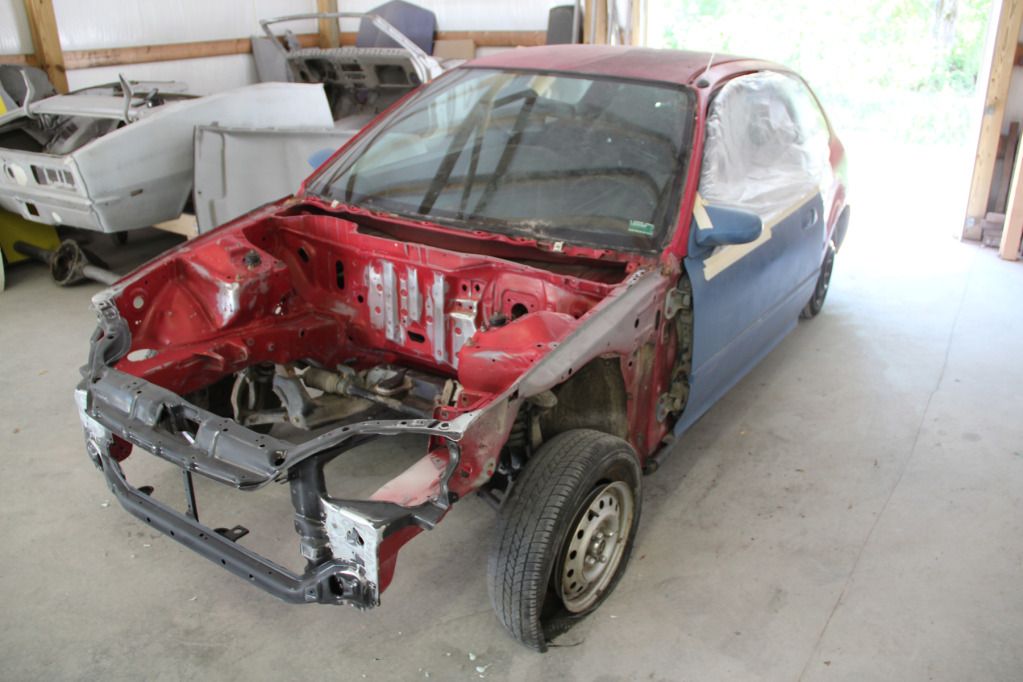
Measuring corner to corner with this new support welded in, I was off by 1/16", so all things considered, I'd say the frame rail fix and everything went pretty well. Shouldn't have any issues with the front end (bumper, fenders, hood, lights, etc) fitting properly. But we'll know for sure once I get those parts.
Using one of the original holes in the front passenger corner, and drilling out a second, I mounted the new battery terminals since it'll be relocated underneath this spot.
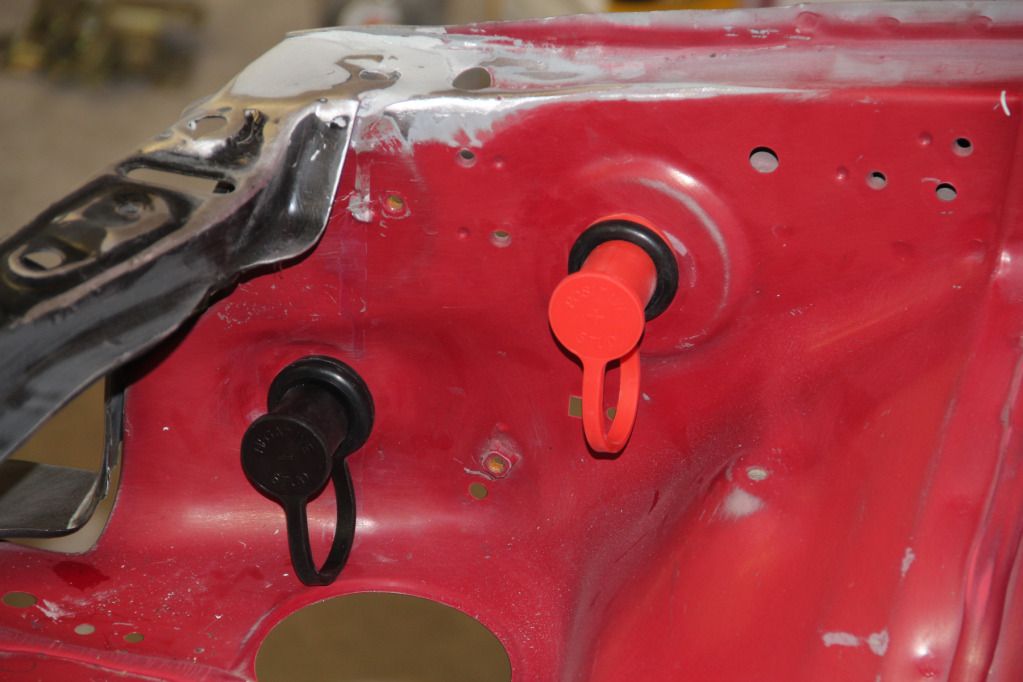
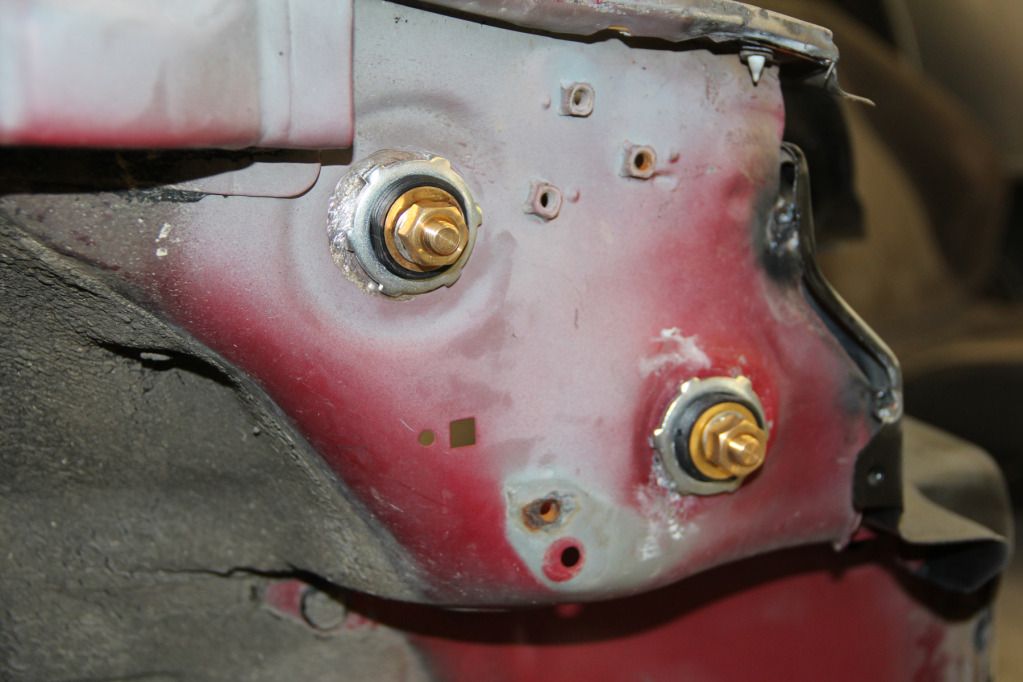
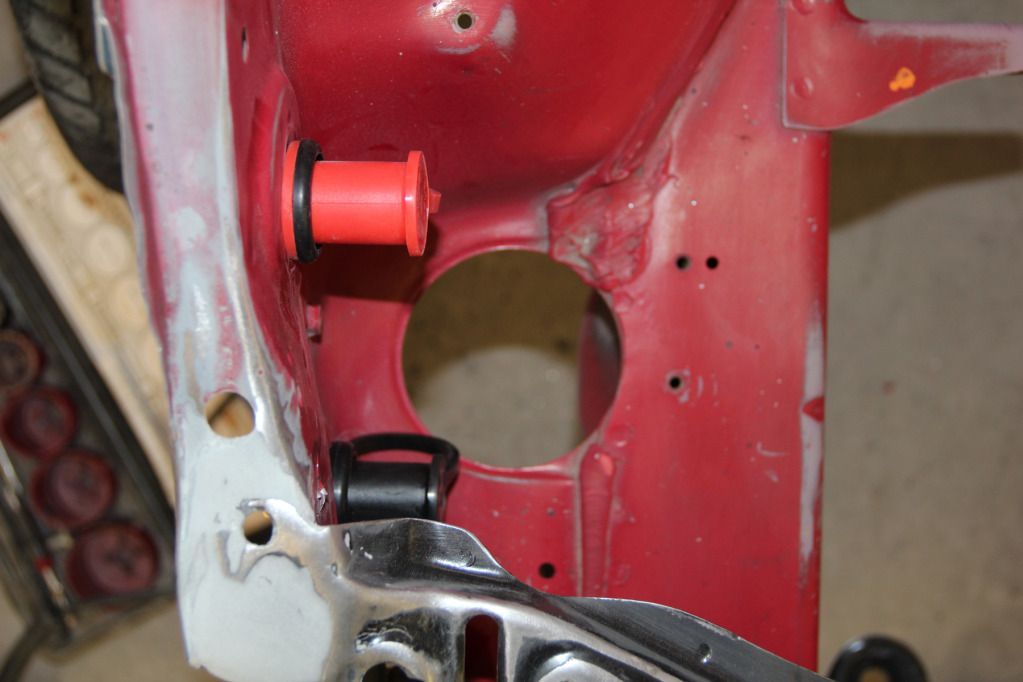
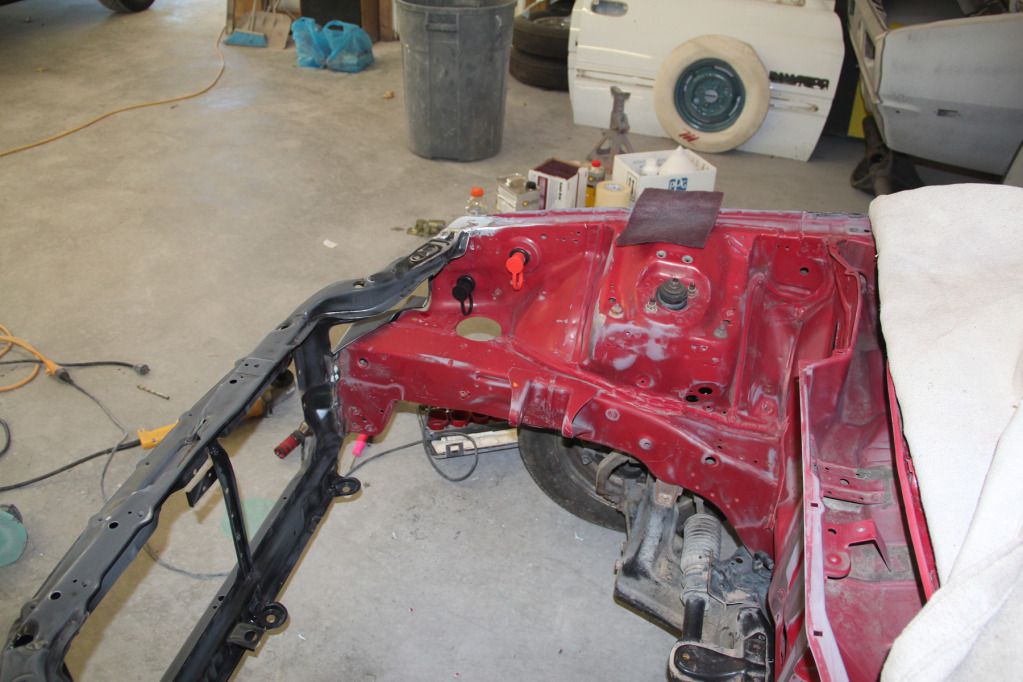
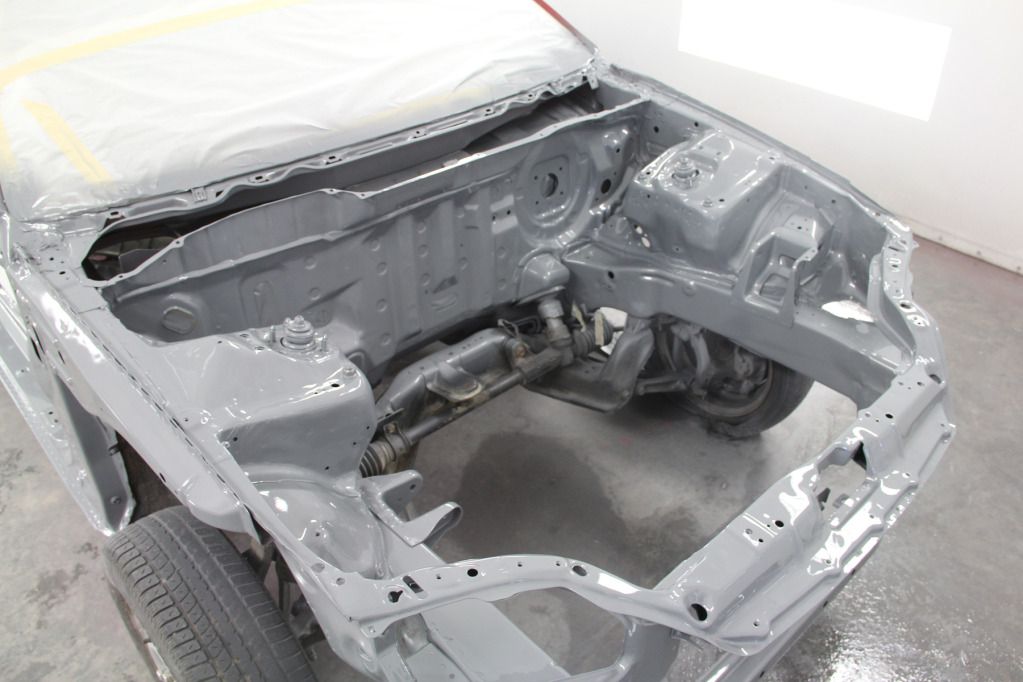
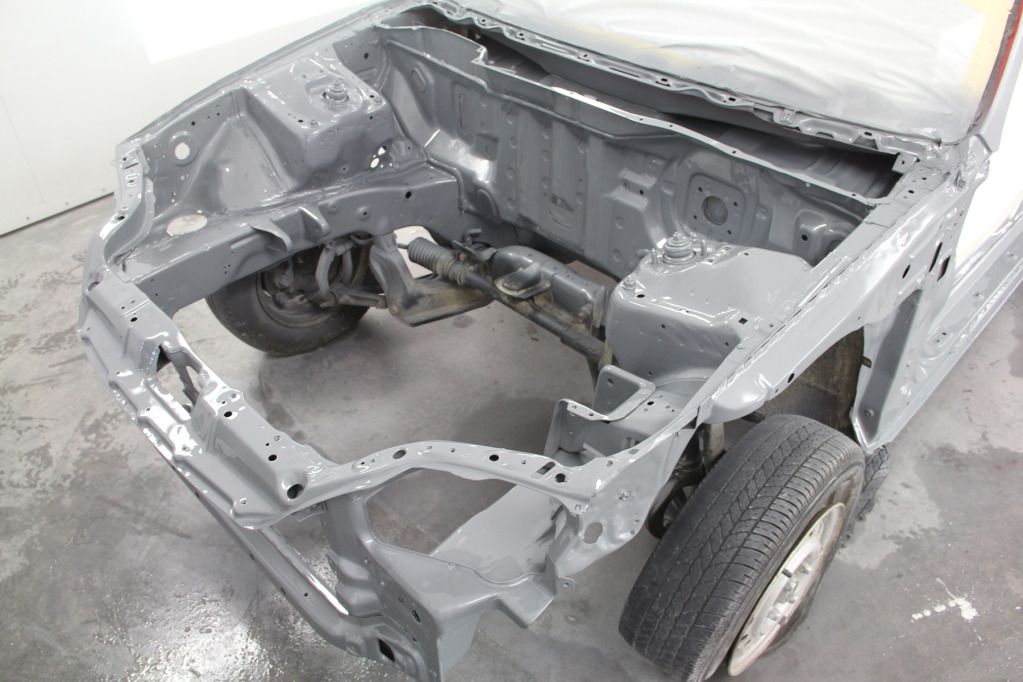
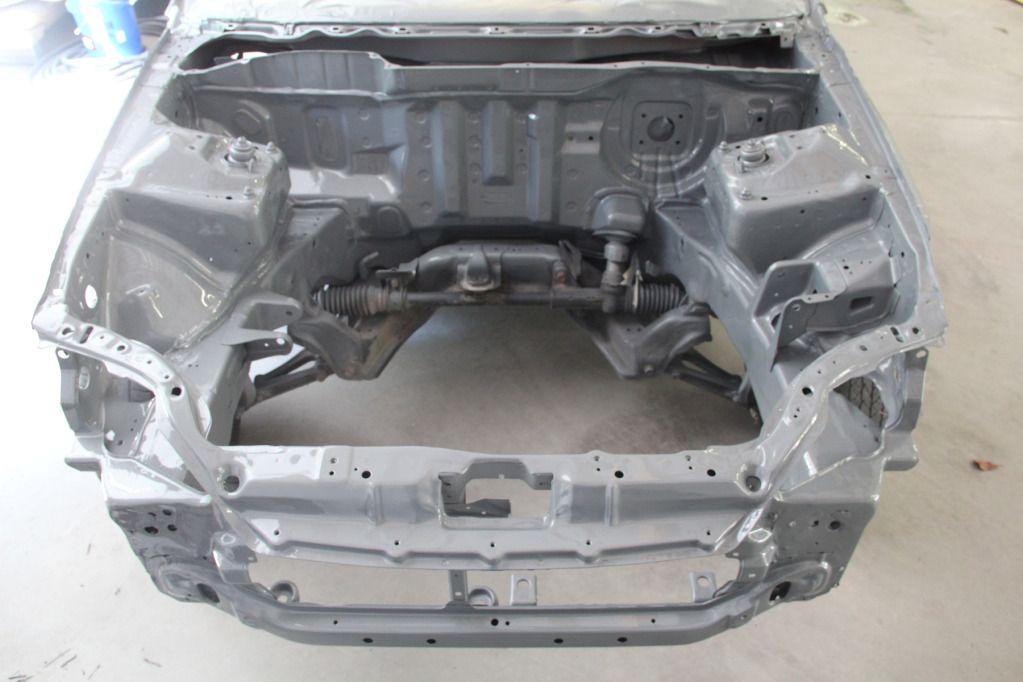
Then I rescuffed that area, taped off the windshield (that lower support will be coming out to be cleaned and repainted so I didn't bother taping it off), and primed the bay.

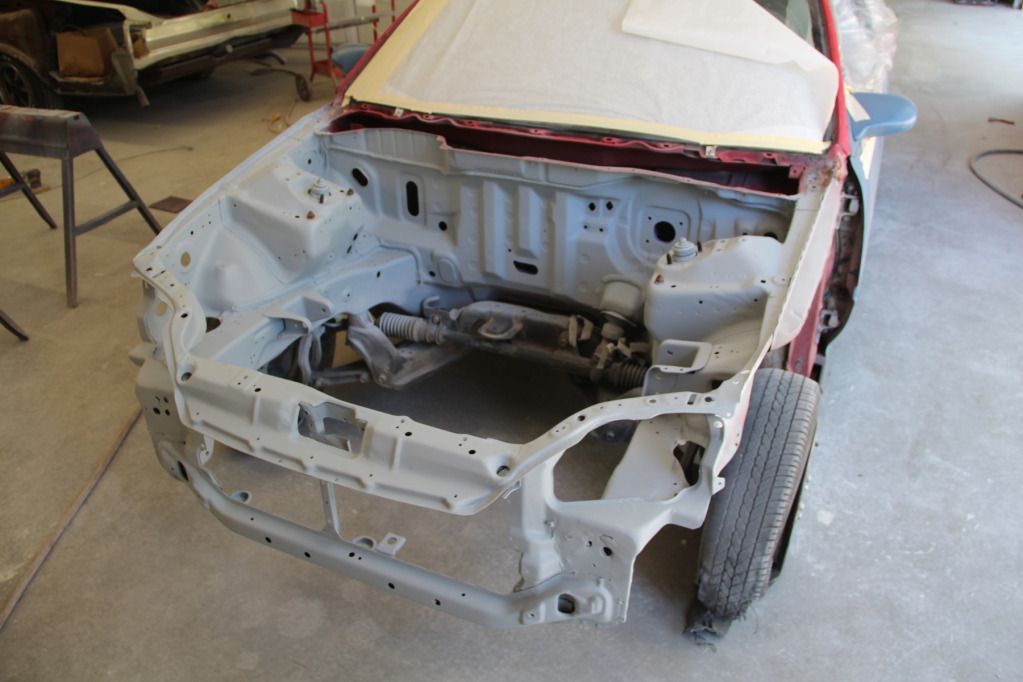
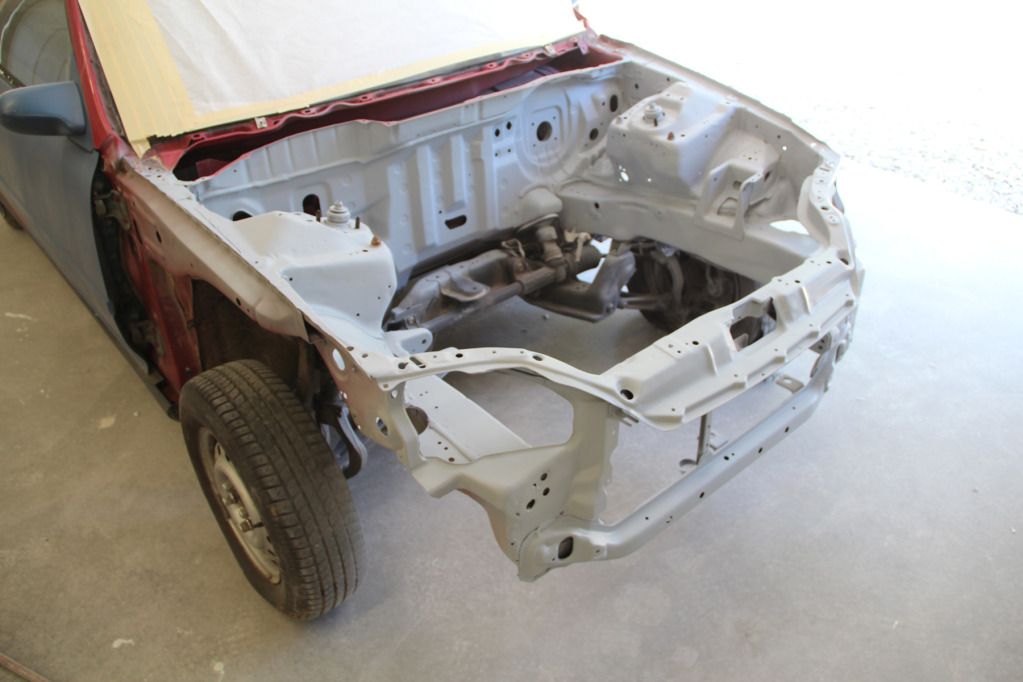
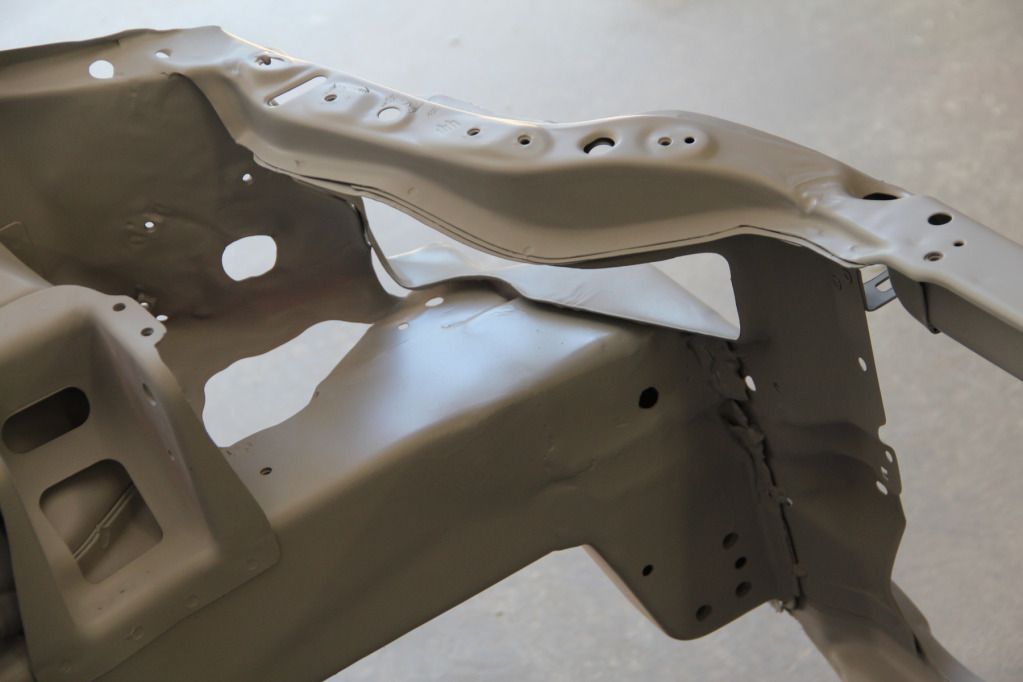
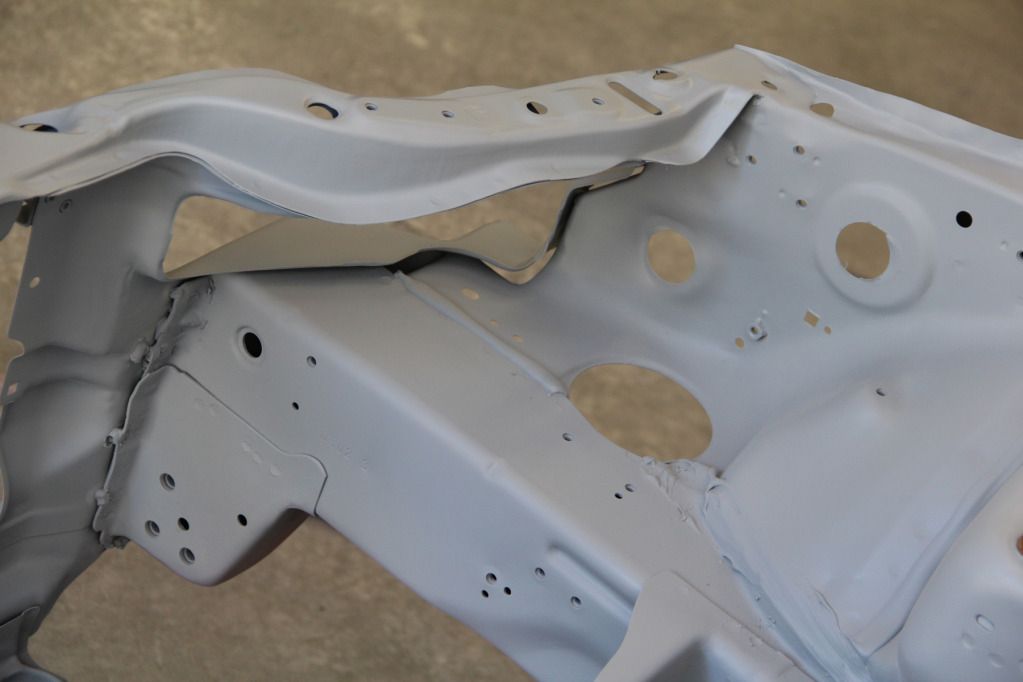
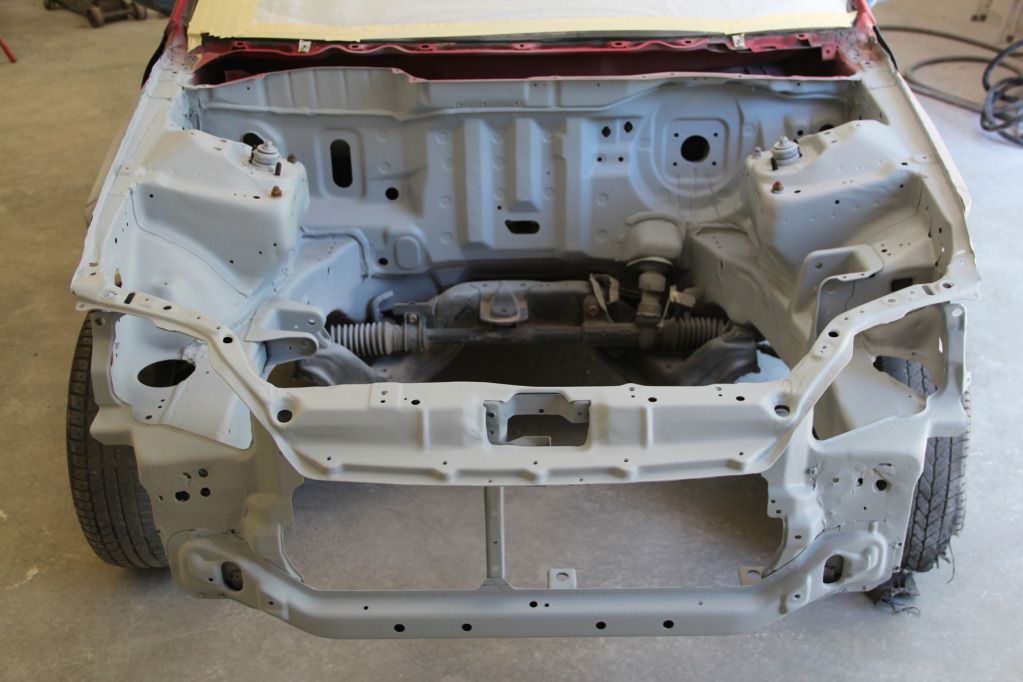

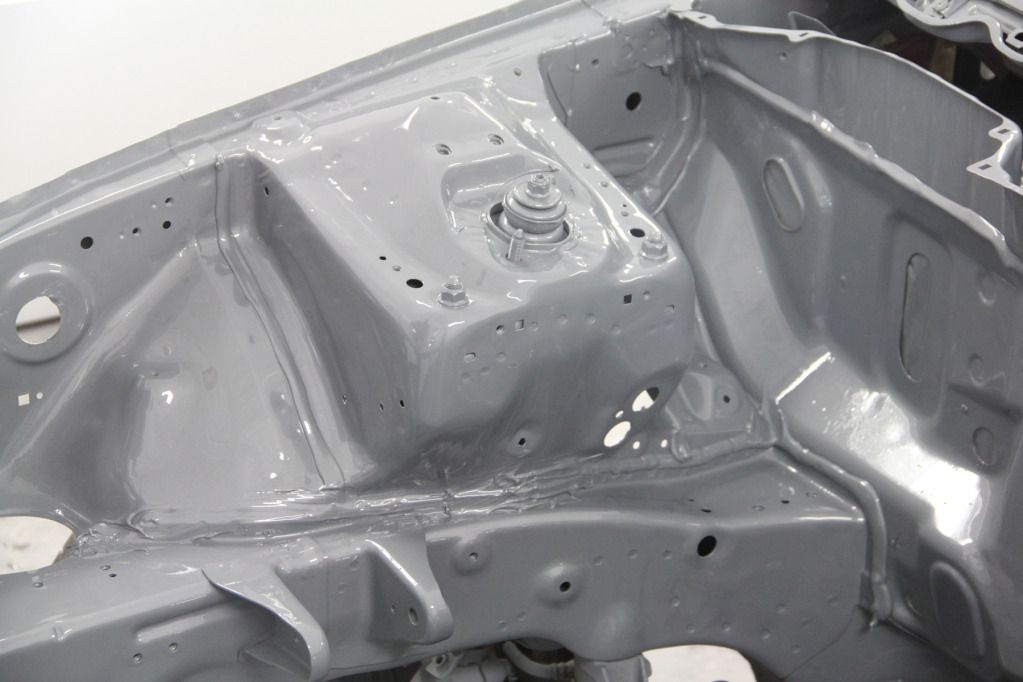
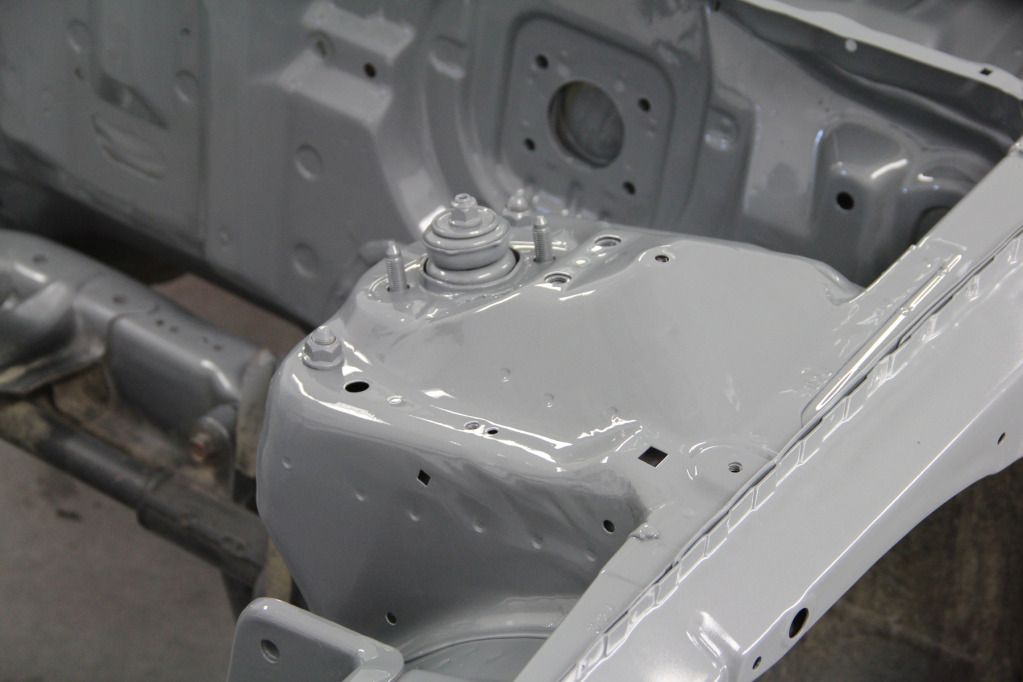
The color is oddly similar to primer color, but it's a gloss color, so this makes me pretty excited to see the bay getting all one color in it. The engine compartment should be all downhill from here. Once the body work on the car is done, I'll be able to paint the bay and drop the motor in, but it's finally reached a point where it's all putting stuff back in to the bay instead of tearing things out.
I also tried working on the engine last night. Couldn't get the crank pulley bolt out, and broke my 3/8" ratchet trying to get it off of there. I was pretty frustrated by that point considering I had been up for over 24 hours (worked 3p - 7a at work the night before, and worked on the car all day) so I said screw it, covered the block and stand back up and took a shower before passing out.
Should be more progress before too long. Just need to go get a breaker bar, a new ratchet, and a torque wrench before I start cleaning and putting the engine back together. It should be all downhill once this crank pulley comes off.
Got a call from my powder coat guy saying my valve cover was ready to pick up, so when I go to get that, I'll be dropping off a few brackets to him for the engine to coat as well. It's all starting to finally come together!
August 11th, 2012
I also had kind of a sad moment when I had to cut a few corners on this build due to time/budget. :angry7:
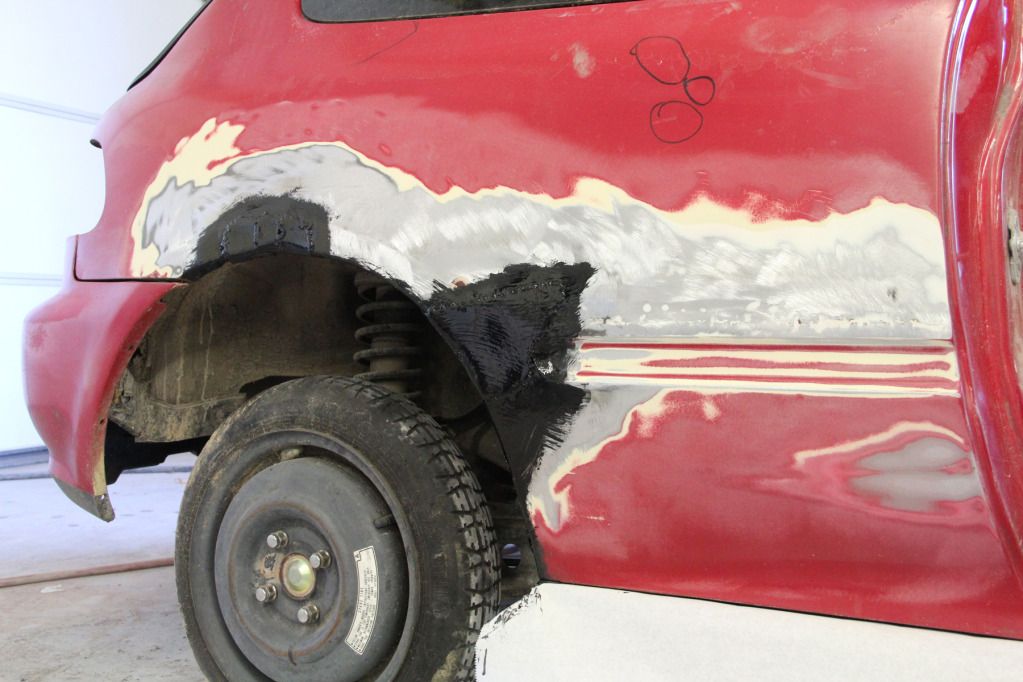
I took a closer look at my quarters yesterday to see what I was in for on the body work, and I definitely wasn't happy with what I found. Here's a few pics. Black marker circles the main areas of body work.
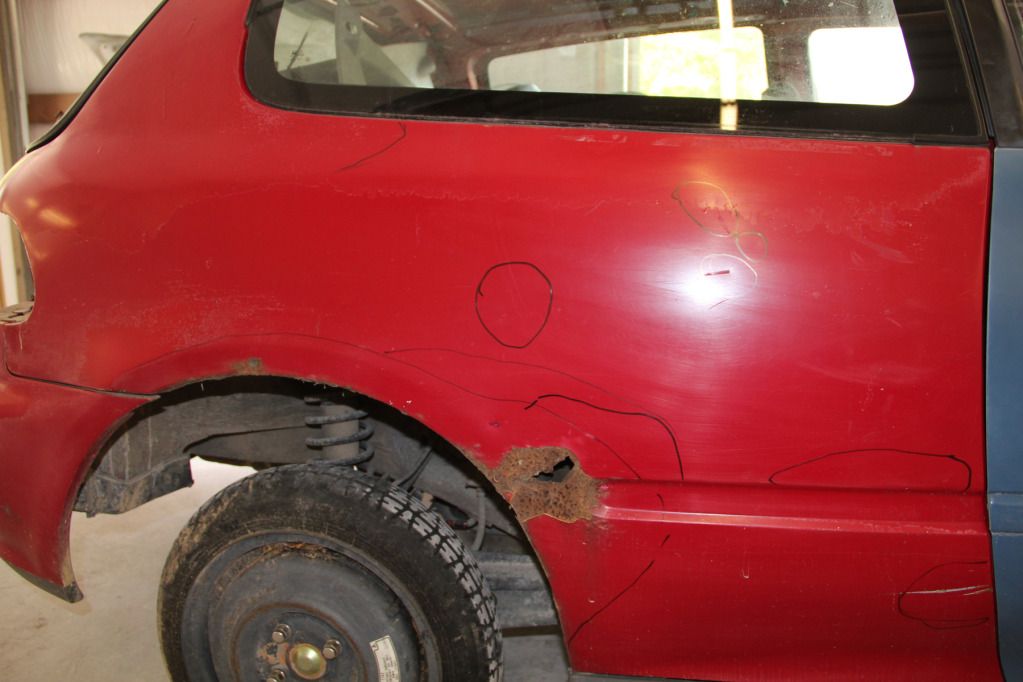
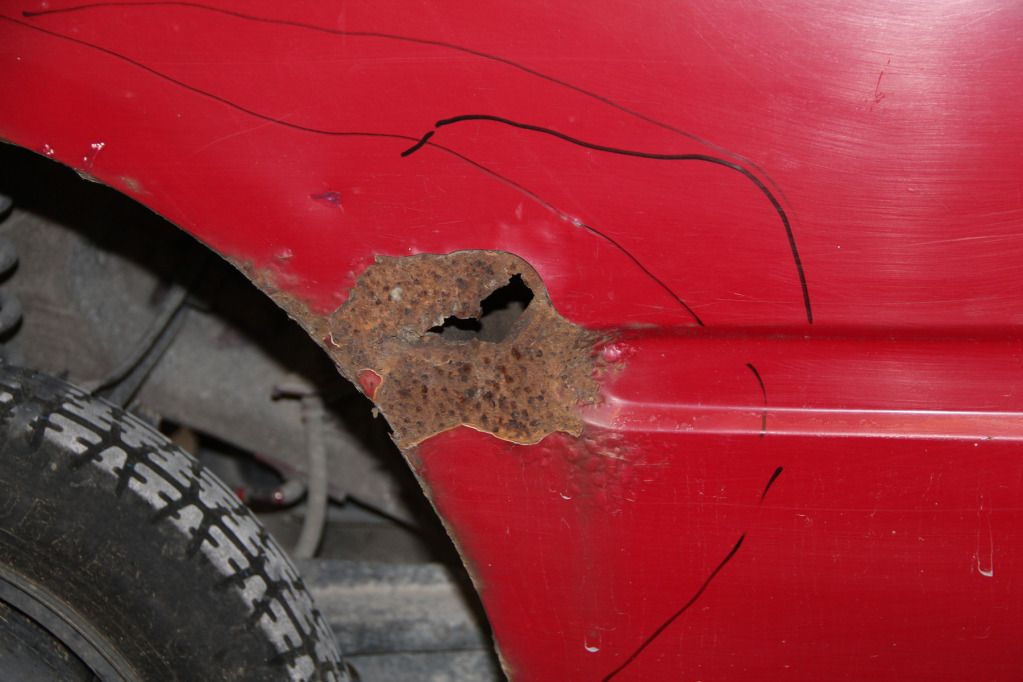


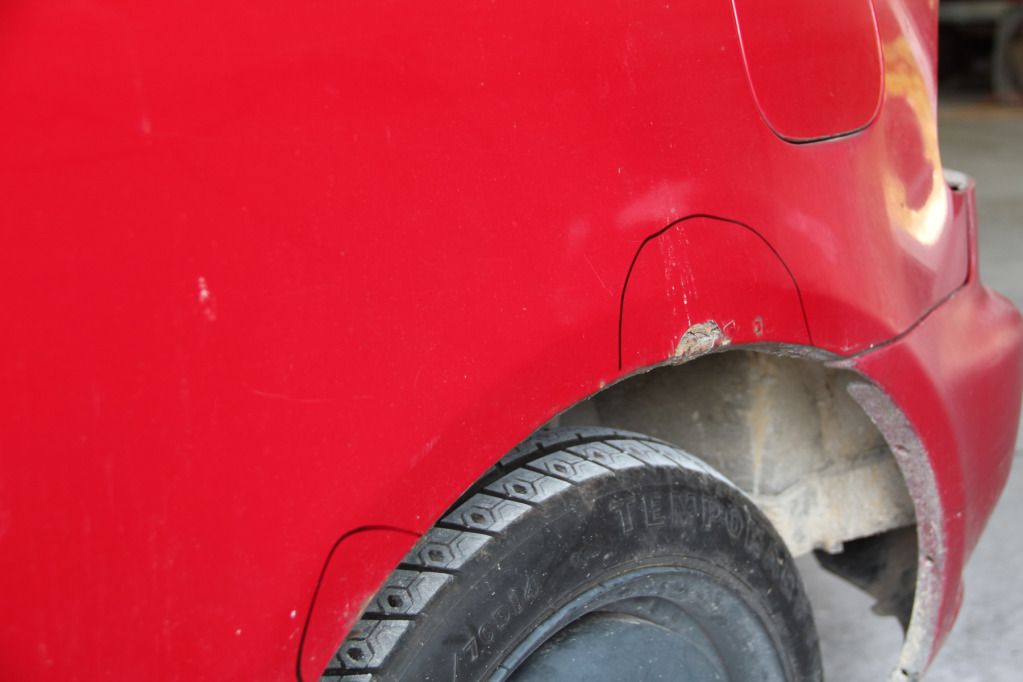
The passenger side is definitely worse than the driver's side, but they both suck. They both have Honda cancer that needed to be handled, but I also found quite a bit of body filler and a heavy fill primer on top of it when I started sanding. The passenger side has had a patch welded in at the bottom and a little sanding revealed the tops of welds that were already sort of starting to show through. They looked like rust bubbles starting, which is why I sanded that area in the first place. I took a grinder to both sides to reveal what I was really working with. Not pictured is the LARGE area of past body work done behind the passenger side quarter glass. That whole area is cracking and chipping from being filled with body filler, so that will all be removed eventually as well.
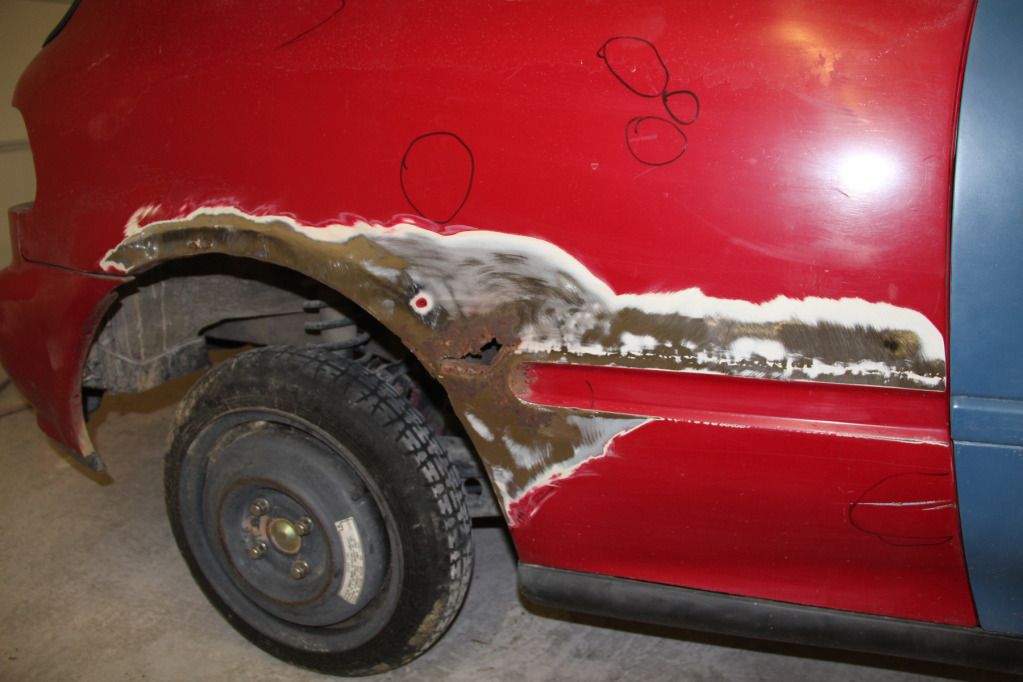

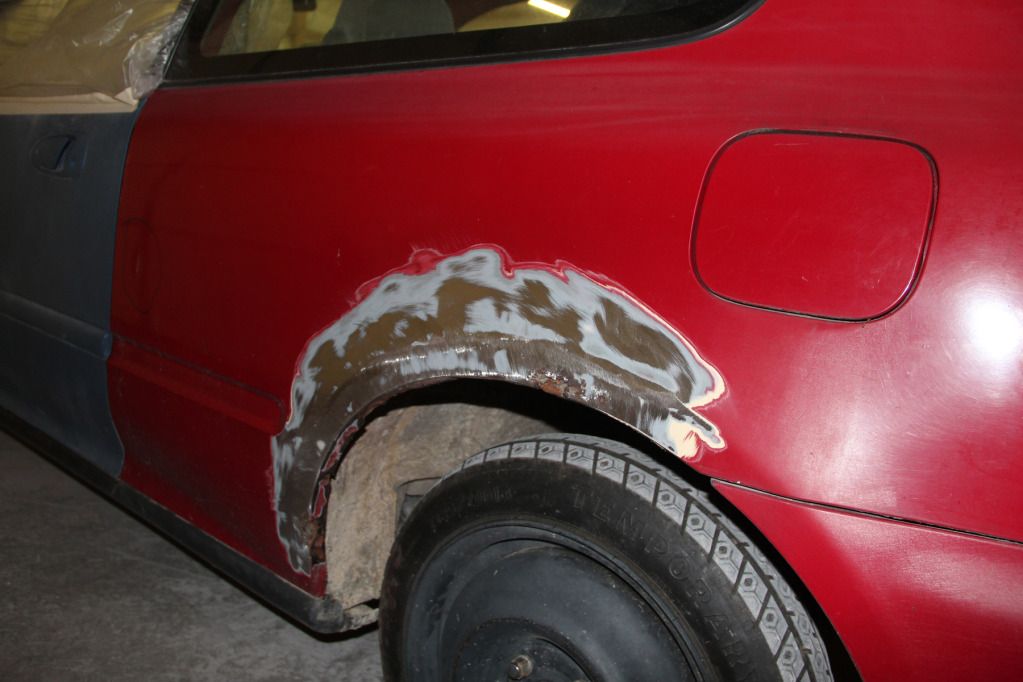

Here's where I had to cut some corners. The RIGHT way to fix this much rust is to replace both quarters. This, while I'd love to do that, doesn't fit into the budget or the timeframe. So, I'm cutting out the rust and patching it, while also coating it all with a POR-15 type product. It's called Chassis Saver, but it's made by the same chemical company that makes POR-15. I went with Chassis Saver since it comes in 1/2 pints as opposed to the POR-15 that only comes in pints and quarts. This way isn't completely wrong, but it's definitely not right. You'll also see some rough patches I've cut and coated the backs of. More forming will go into these when I start to weld.


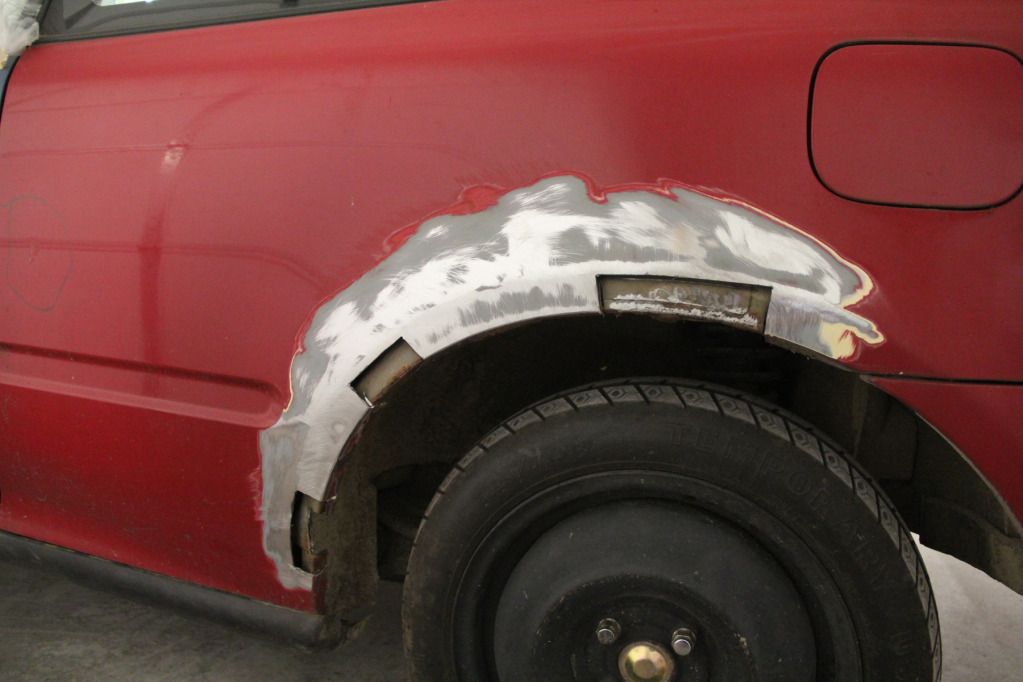
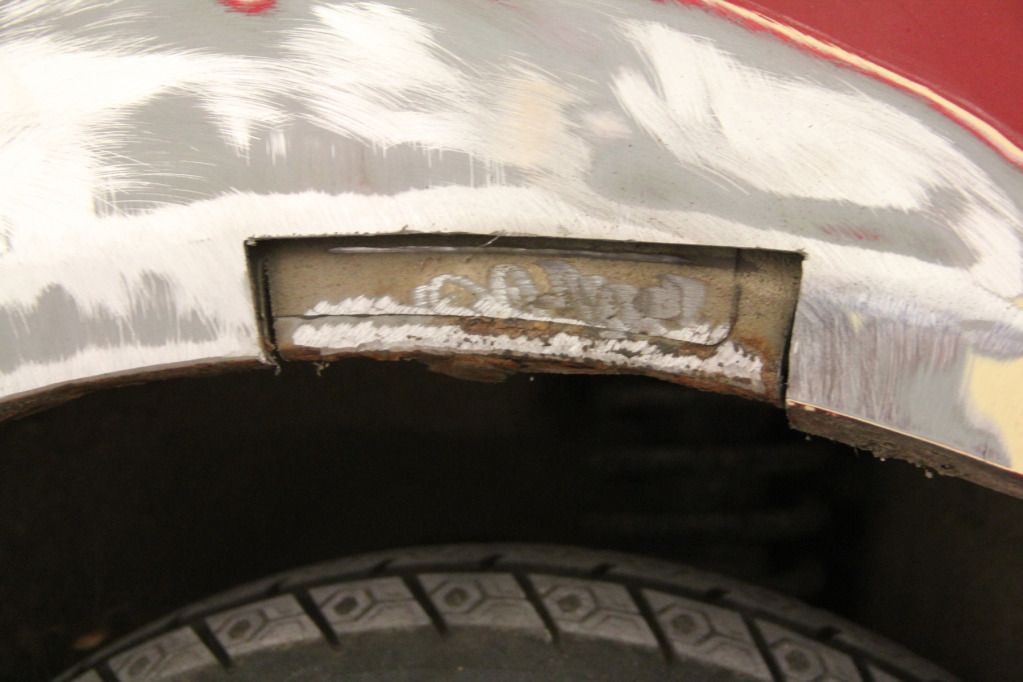

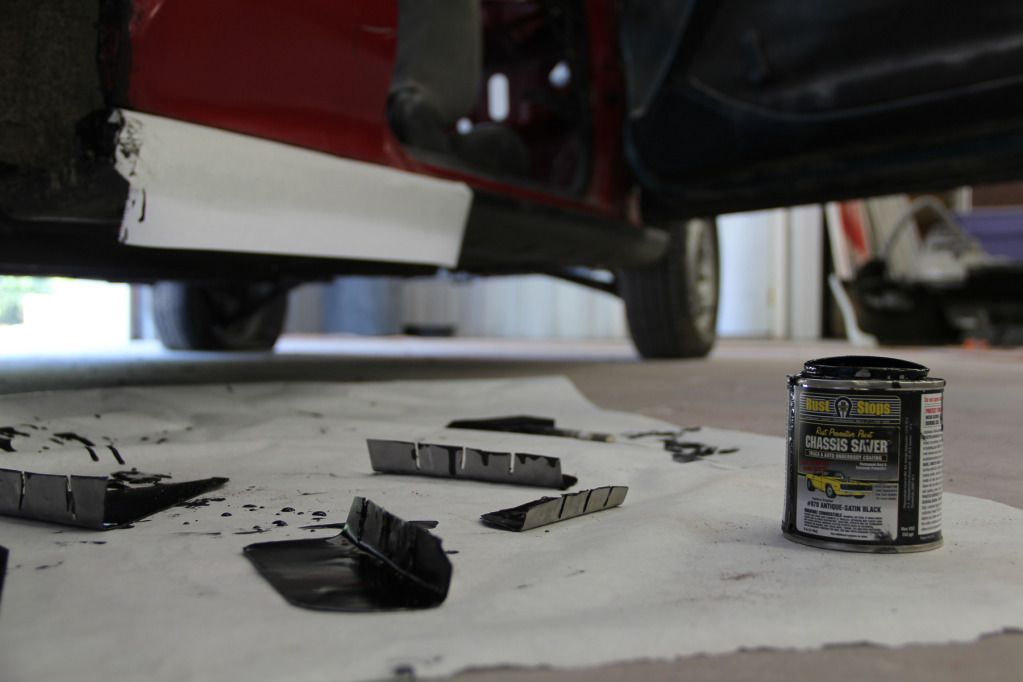
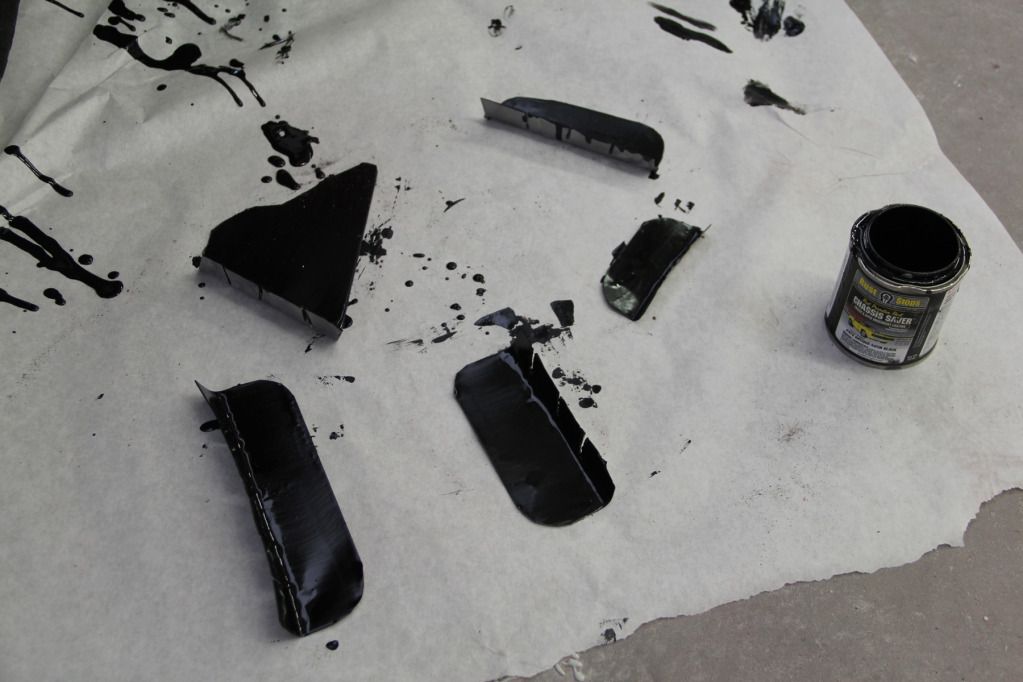
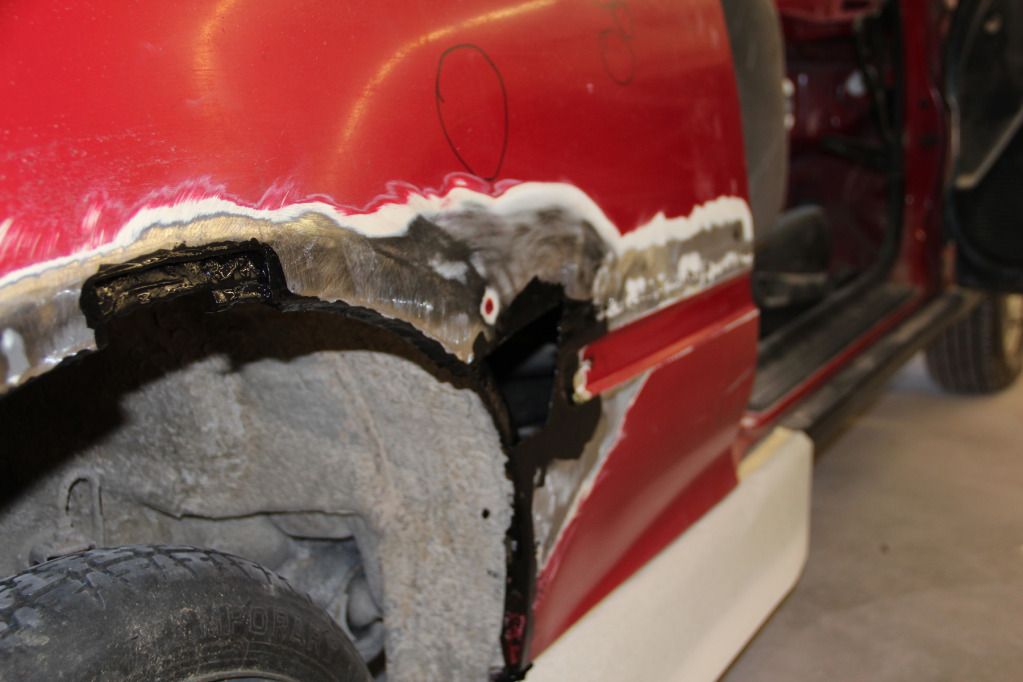

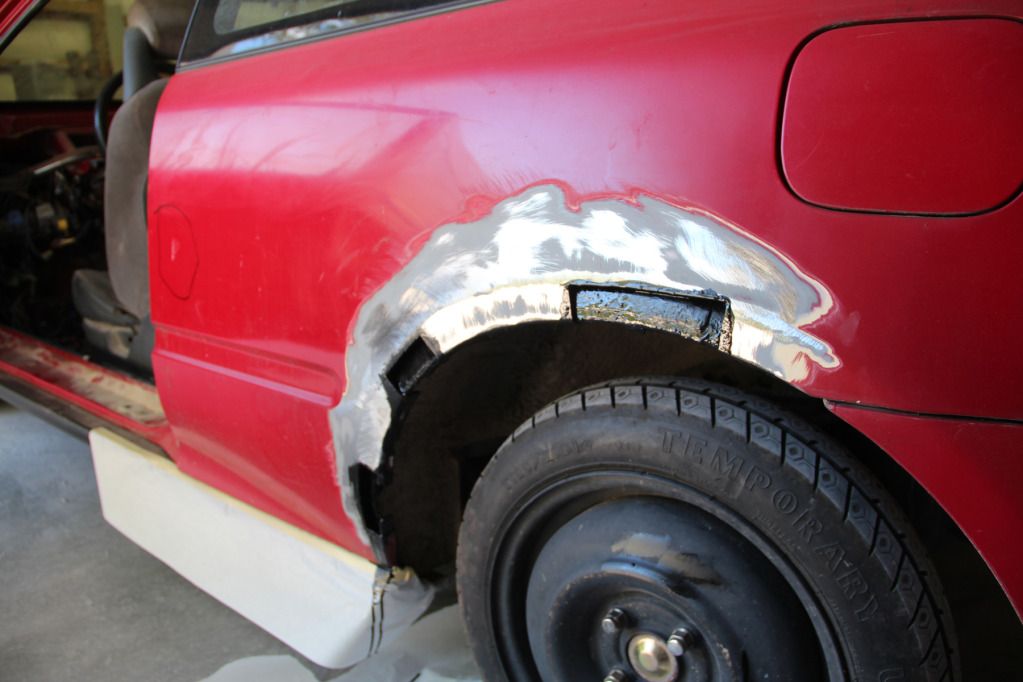
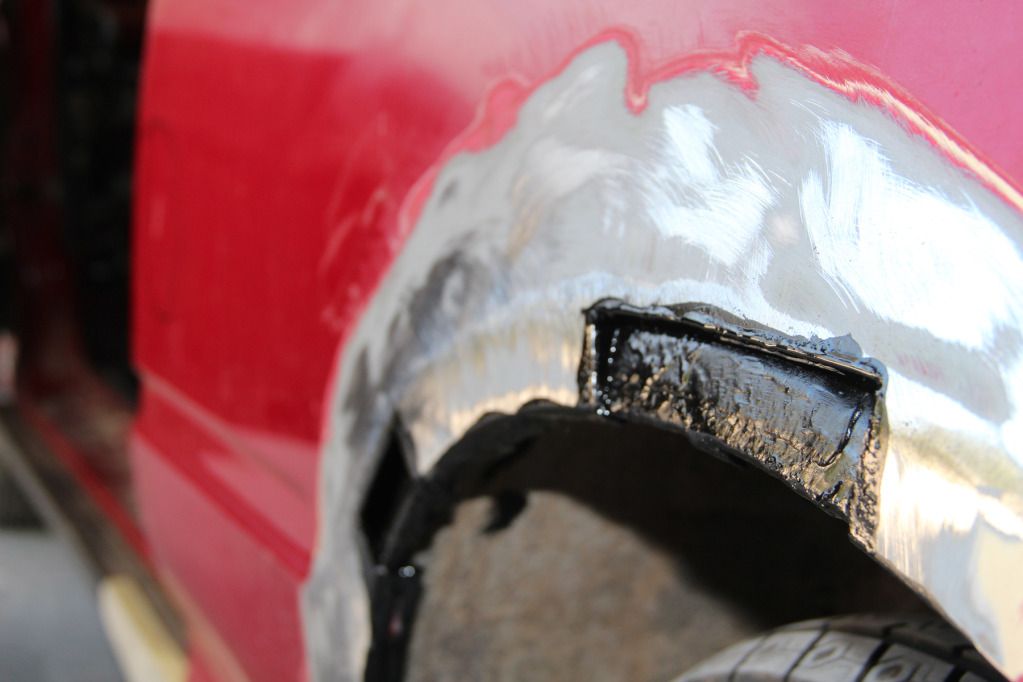
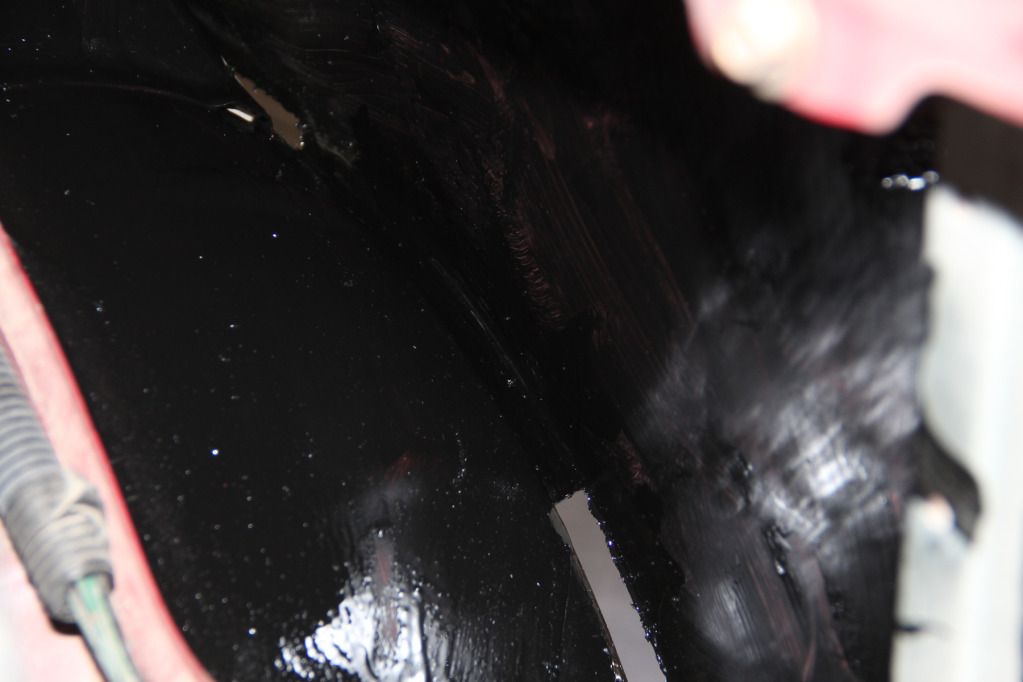
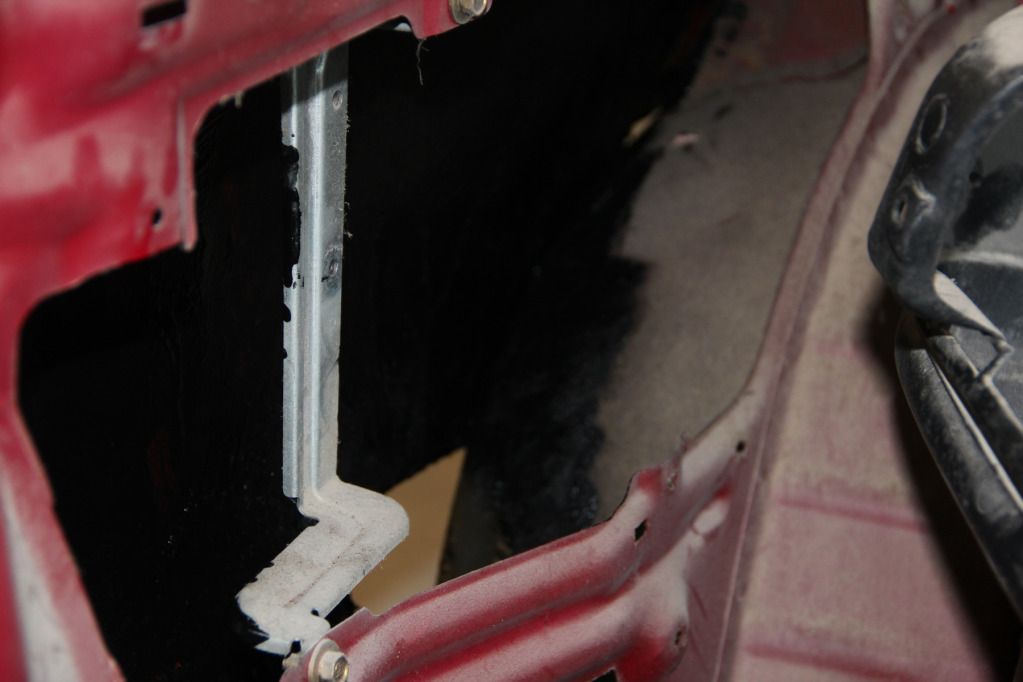
You'll also see that I coated pretty much the entire back side of each quarter. This SHOULD help to avoid future 'Honda cancer' problems, but when dealing with rust and reusing the same quarters, there's no telling when it might come back. Hopefully I never have to deal with rust in these quarters again. We'll see.
I feel like this is a boring update with a lot of pics, but maybe it'll help someone who needs to treat rust in this area. Again, this isn't the right way, but it's easy, quick, and hopefully effective. More updates soon.
August 16th, 2012
Had a couple days to work on the car. Still not making the amount of progress that I want (and need) to be making, but it's slowly getting there.
First, I worked more on the rust problem on the rear quarters. I cut new notches in the patches I had made since I cut them on the wrong side last time, then welded them on, ground them down, and coated them in Chassis Saver, being sure to get down behind the patches and in each little gap. You can do body work directly over the Chassis Saver, so without putting new quarters on the car, this is about the best way to seal it all up and hopefully prevent future rust from coming back. The welds are spaced apart to avoid overheating and warping the quarters. I'm also not a welder, so they're not the prettiest things in the world.
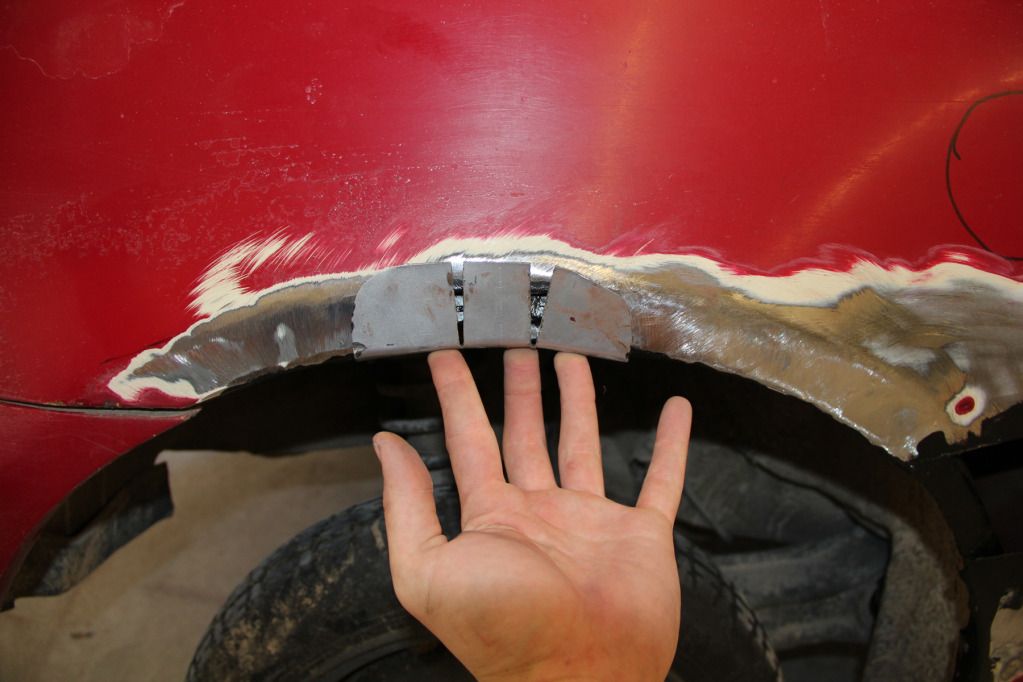
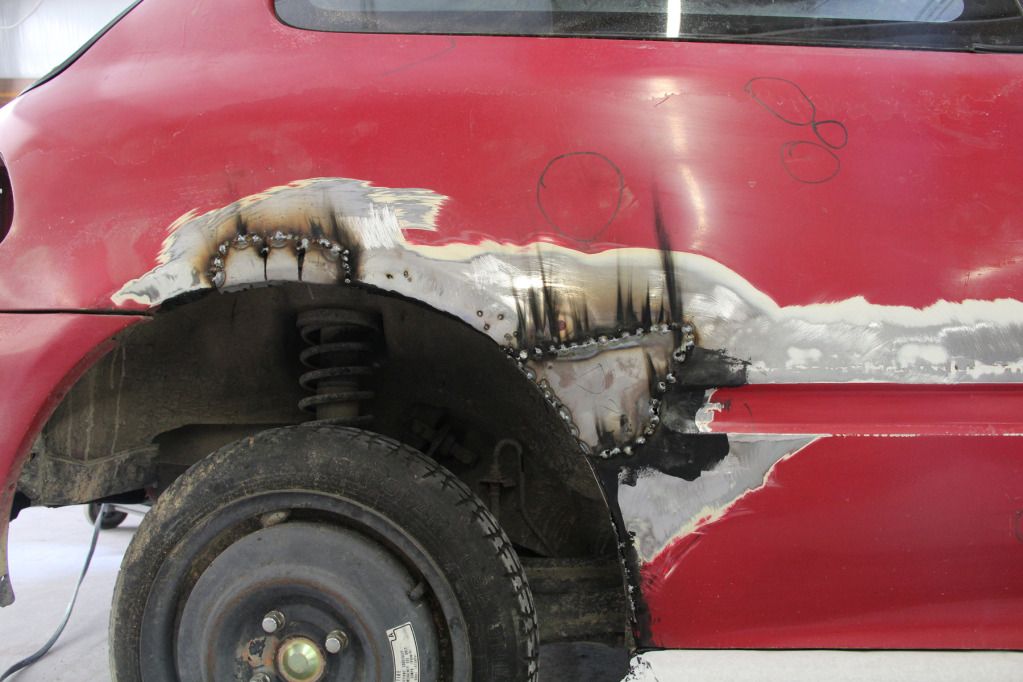
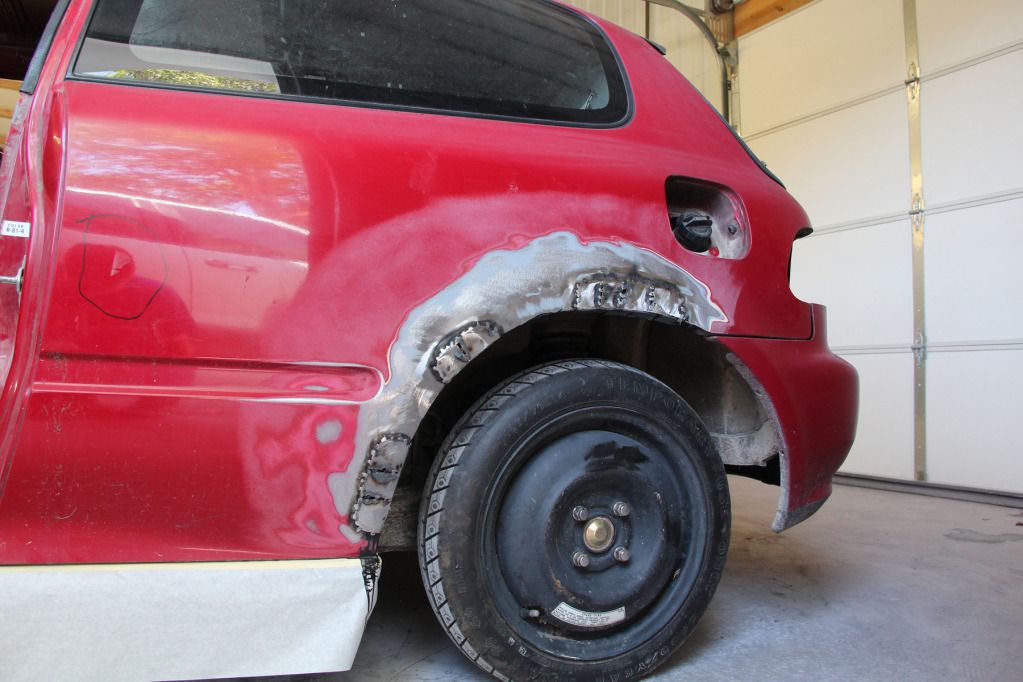
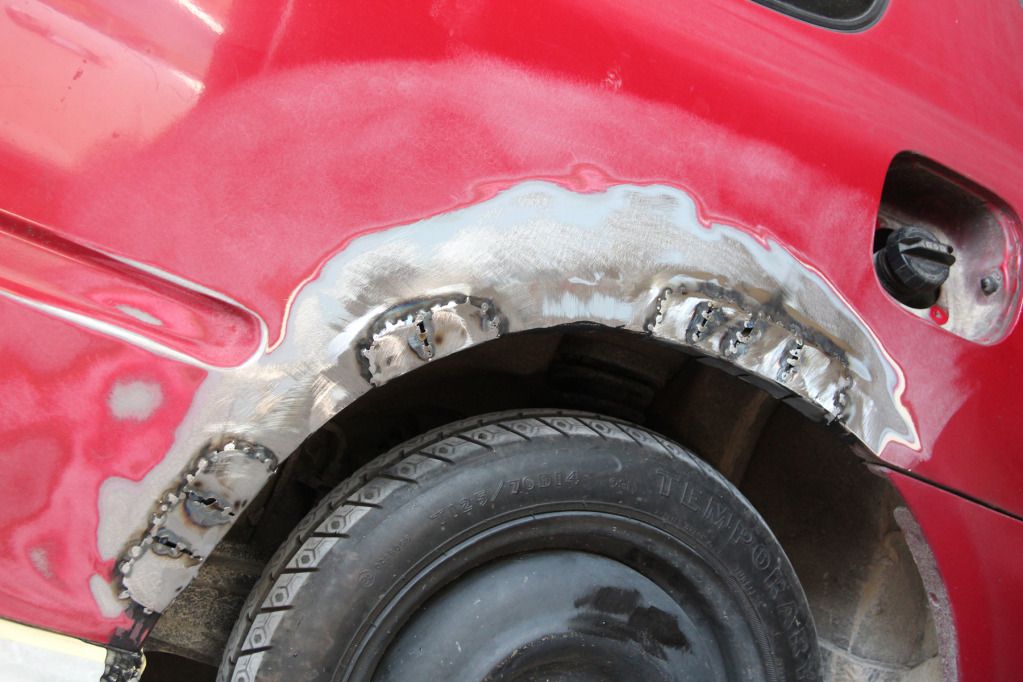
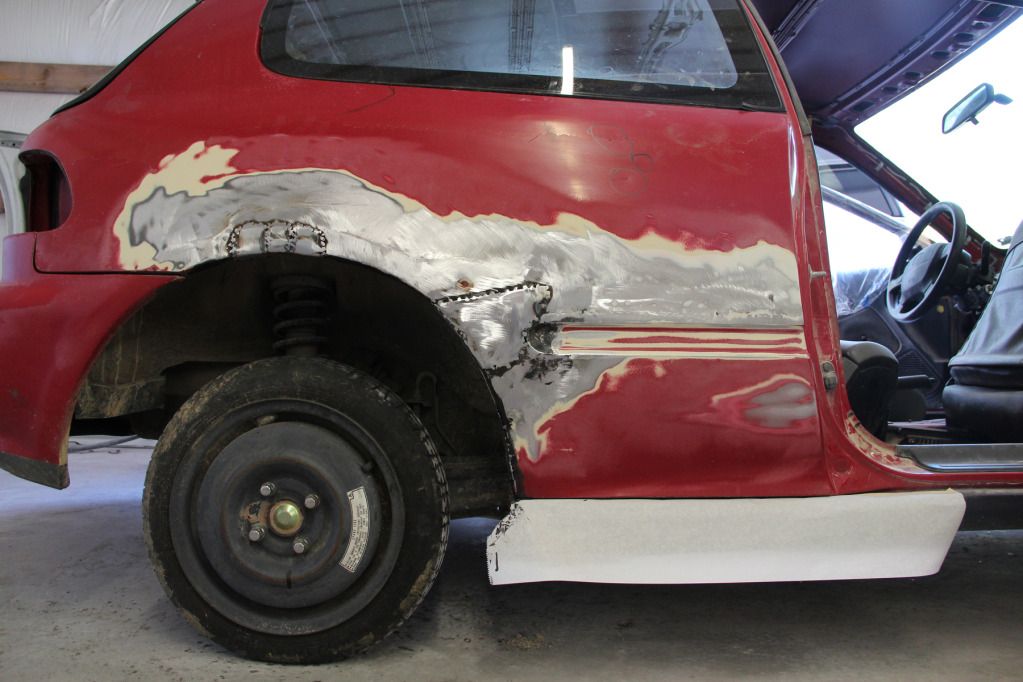
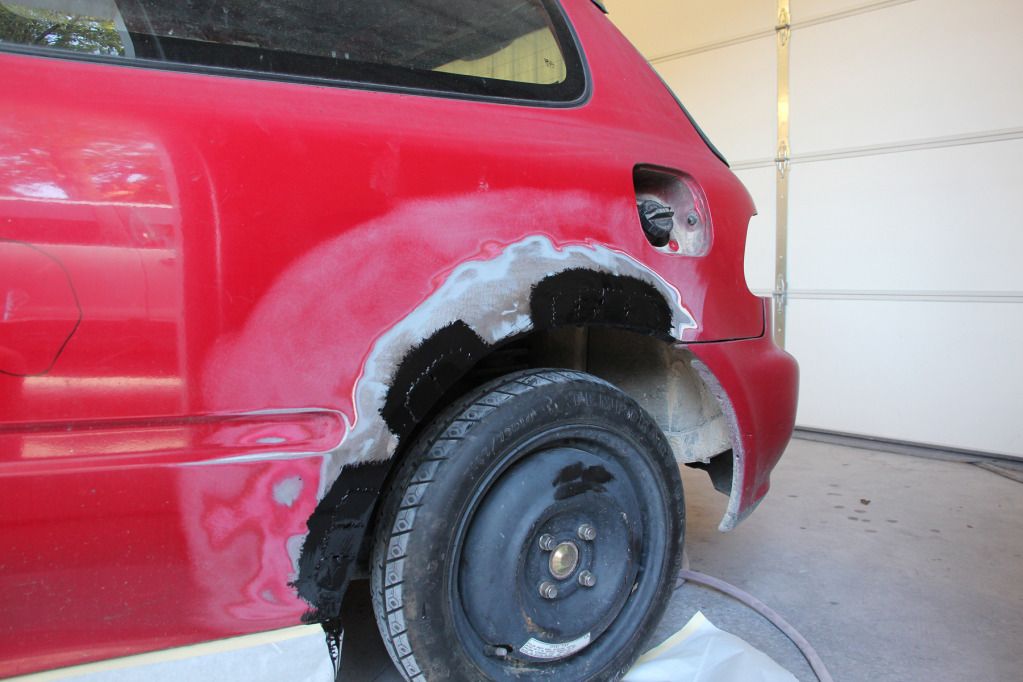
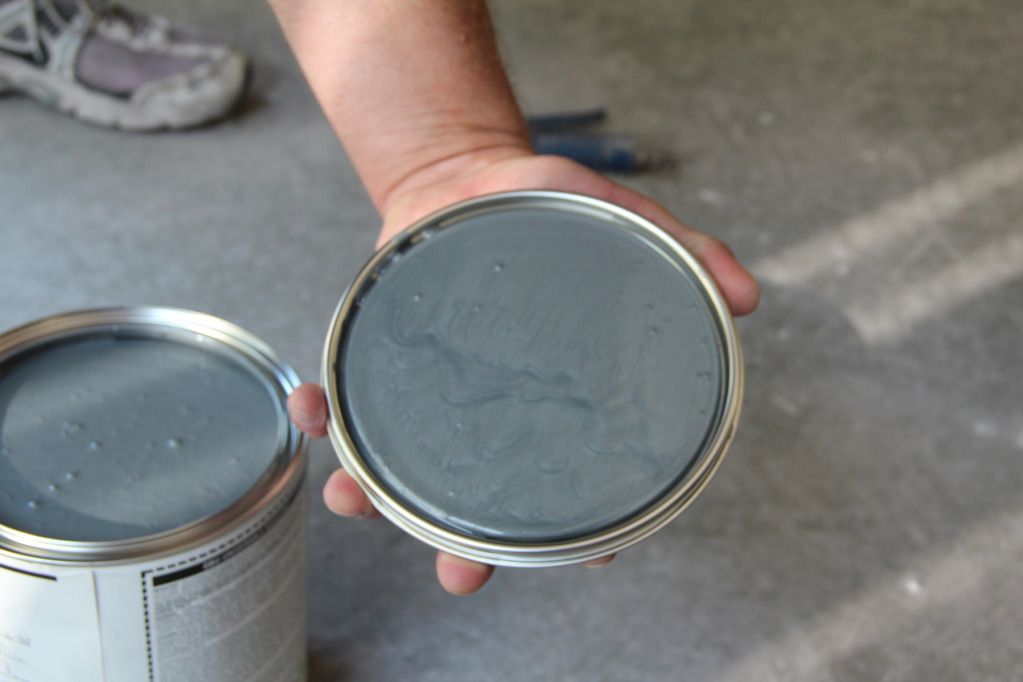
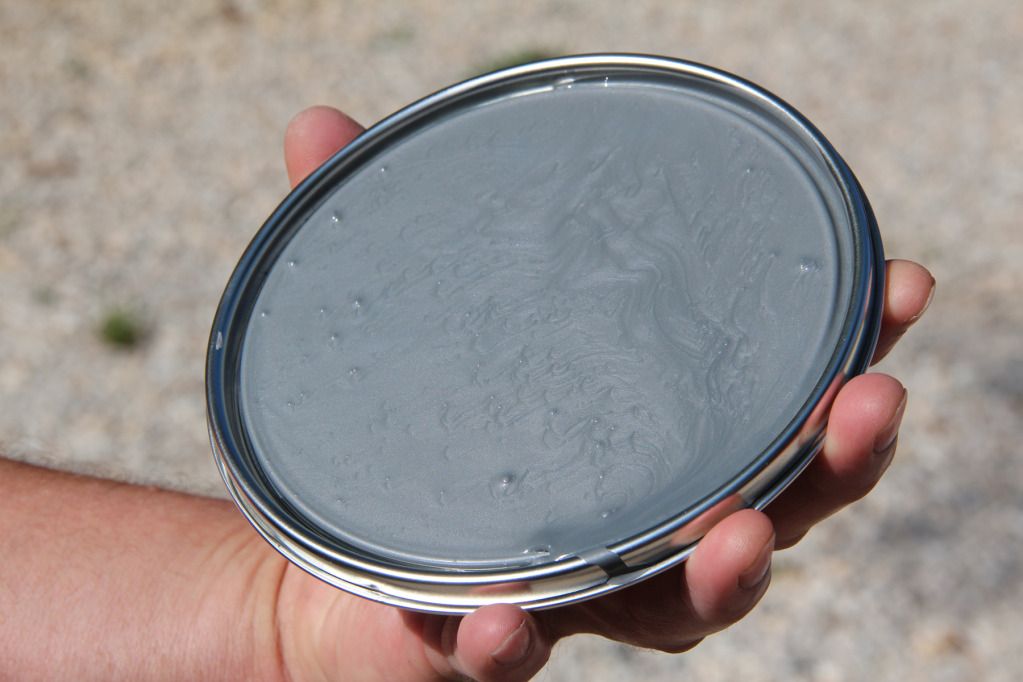
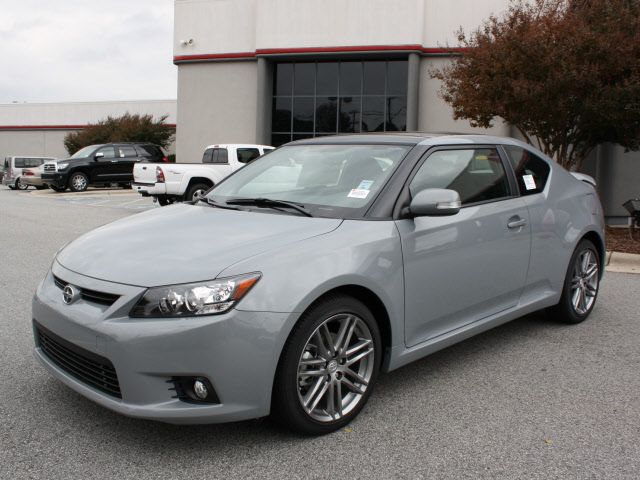
The next time I work on the car, body filler will for sure go on, starting the final steps of getting the rust fixed and the quarters primed. I had to make a few trips to the paint store, so while I was there, I picked up my paint. *Drumroll Please* I'm going with the Scion tC2 Cement color. Paint code 1H5 I believe. It looks silver in the can, but I've attached a photo of a Cement tC2 so you can see the color.
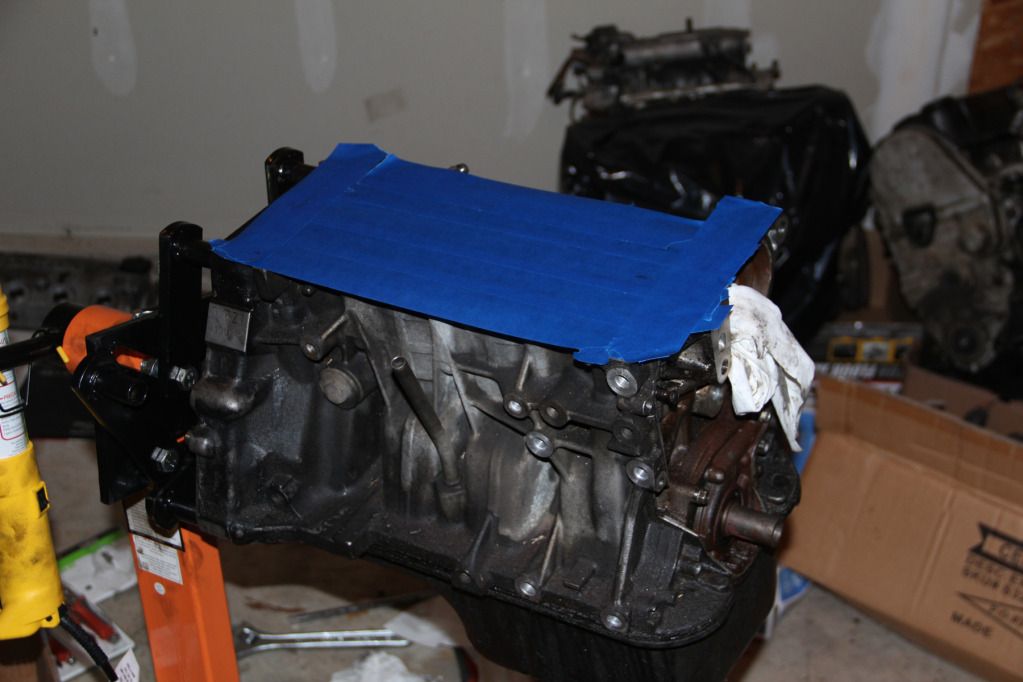
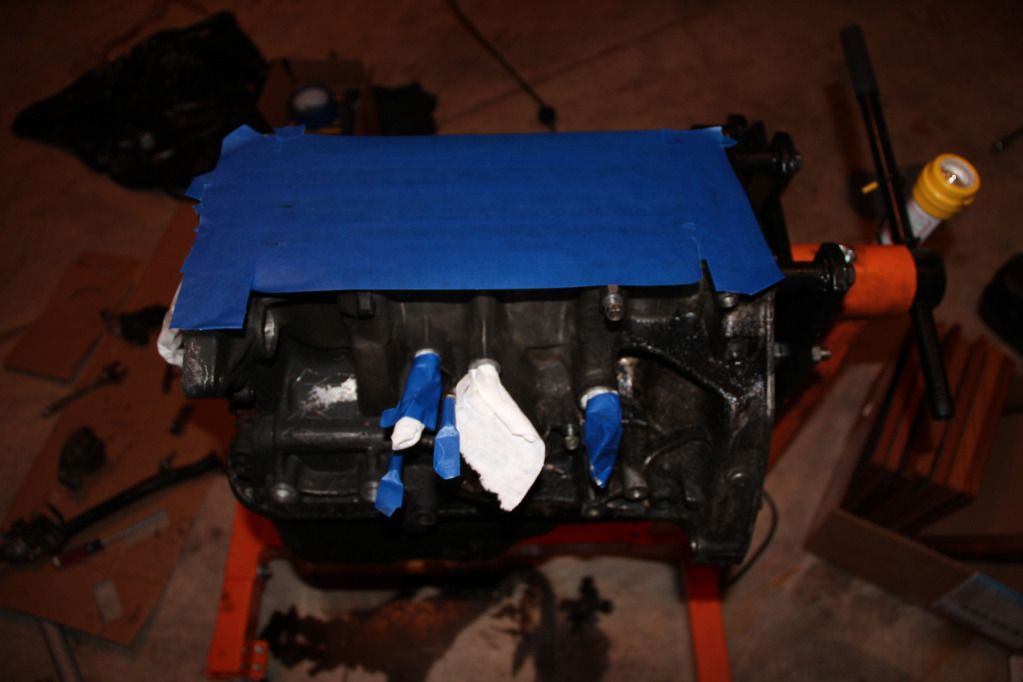
On the engine, I started out with a filthy block, pan, head, etc. So I removed the head per the service manual, and placed it in a clear, plastic container to keep it protected. Then I taped off the cylinder head, as well as everything else potentially important and susceptible to water, and I used degreaser/oven cleaner to clean the outside of the block. I scrubbed it with kitchen scrubbers, then carefully rinsed it off.
Before
After
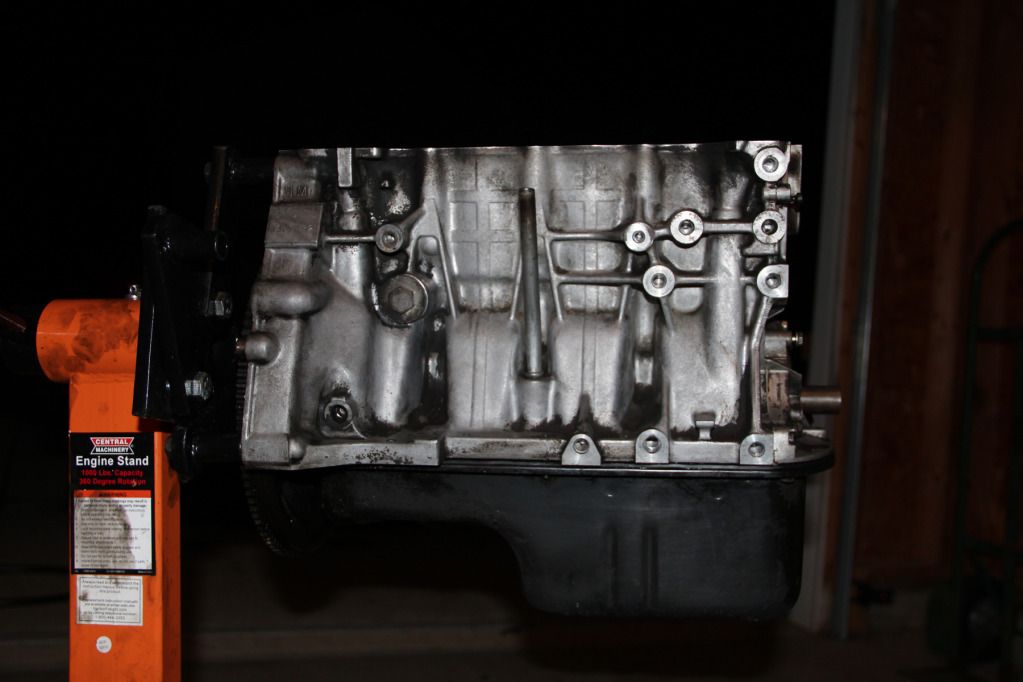
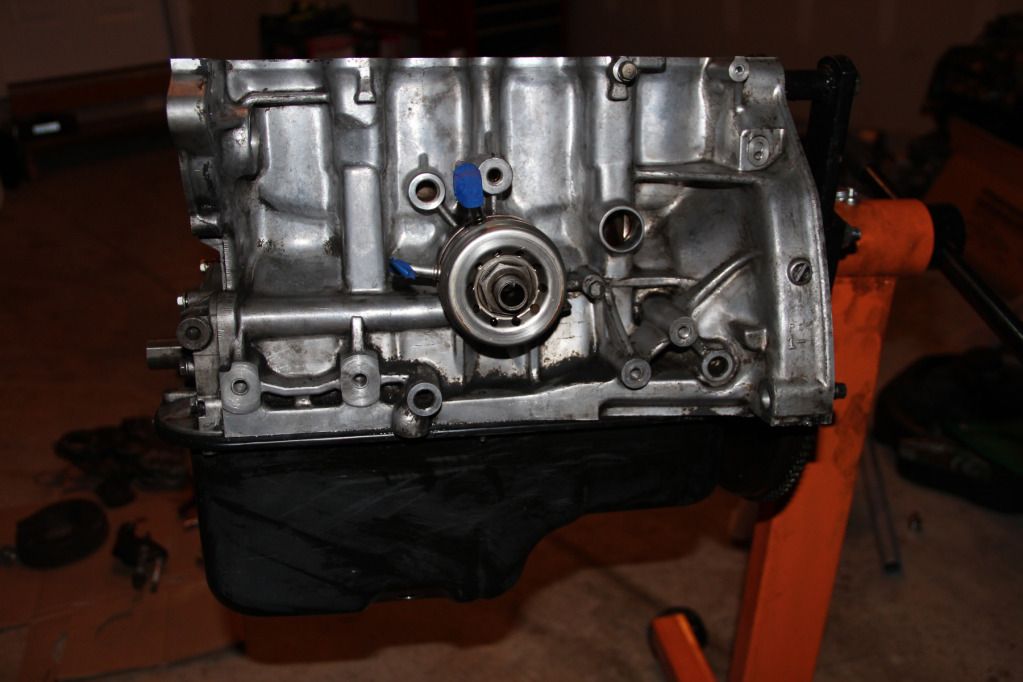
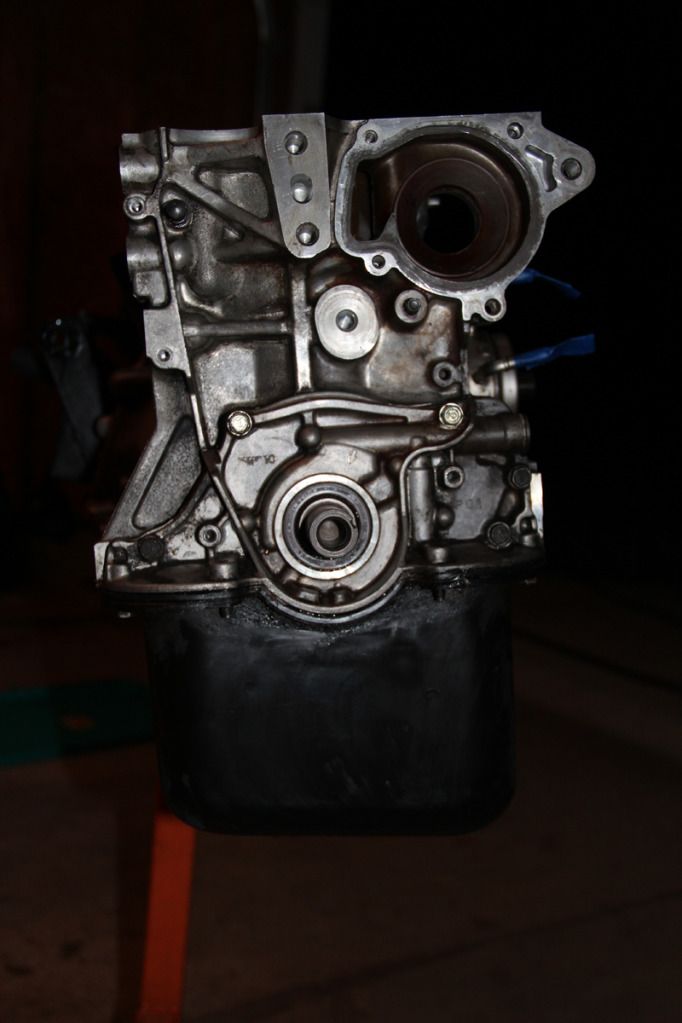
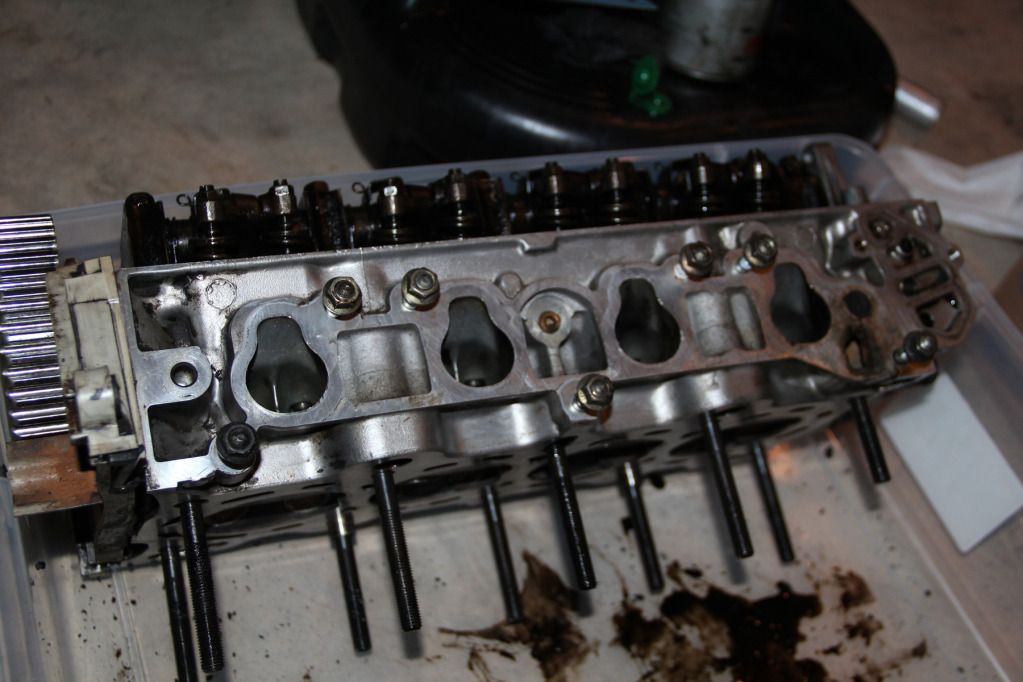
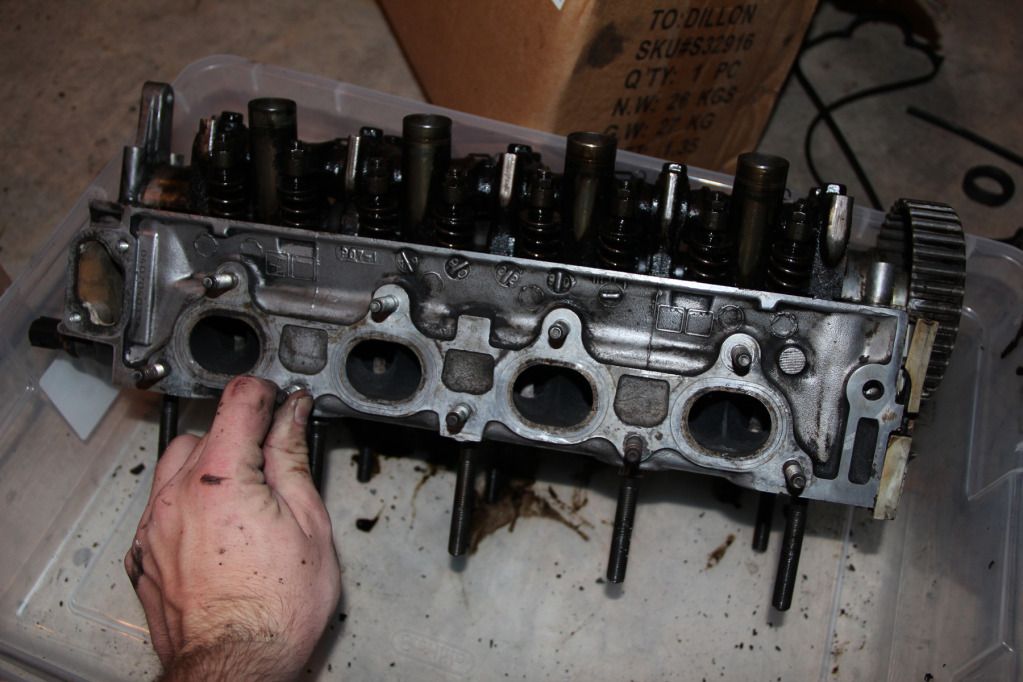
I removed the tape and worked for an hour or two with shop towels, wiping it all off and being sure everything was dry, but it still needed some work in the corners and what not, so I used a wire wheel to get back in there and knock off the rest of the gunk. The engine probably lost a pound or two just by cleaning the crap off.
I retaped everything and covered it over night. The next day I pulled the oil pan, scraped off the old gaskets, cleaned the pan a little more, replaced the oil pan gasket, and bolted it back on, per service manual instructions. I also scraped the old gasket material and junk from the head mating surfaces, coated the new head gasket in copper gasket spray, and installed the head. I placed a junk valve cover on the engine, taped everything off really well, and painted the engine.
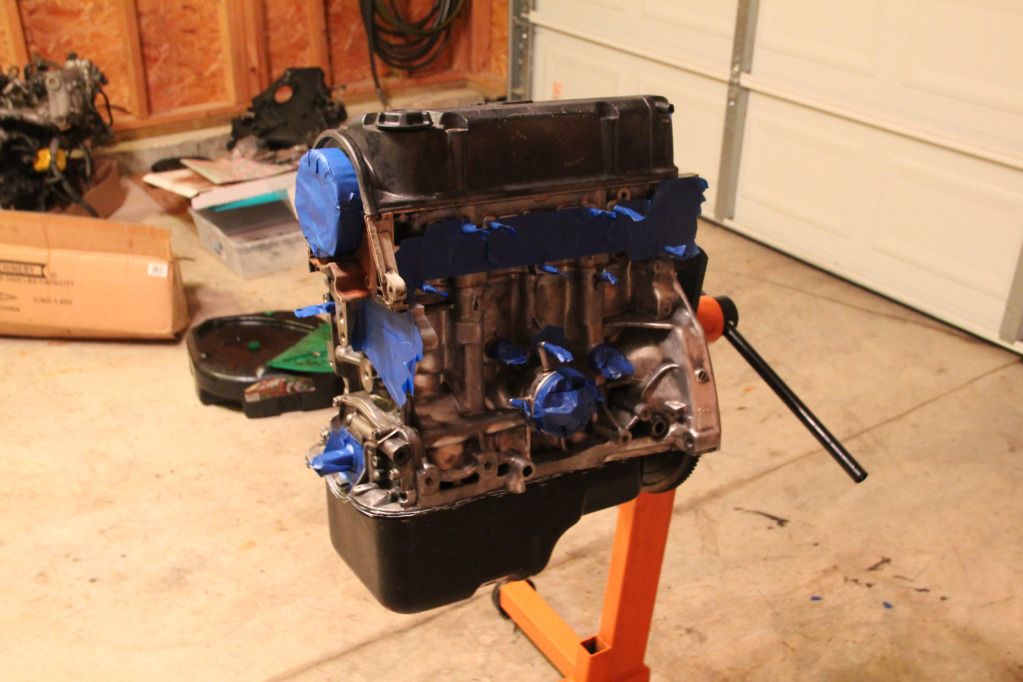
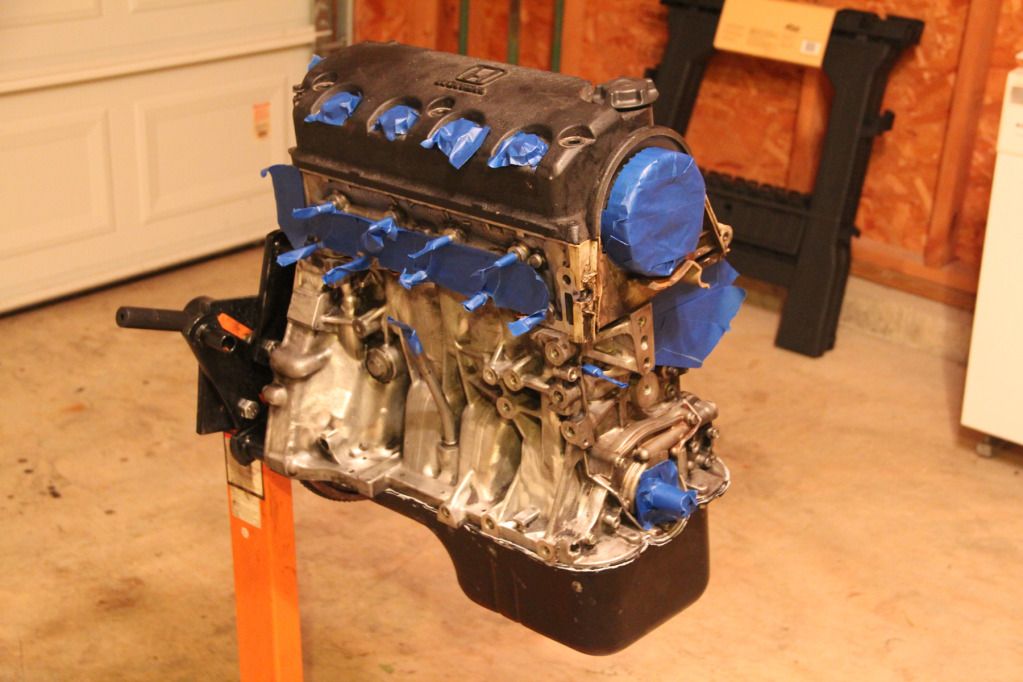
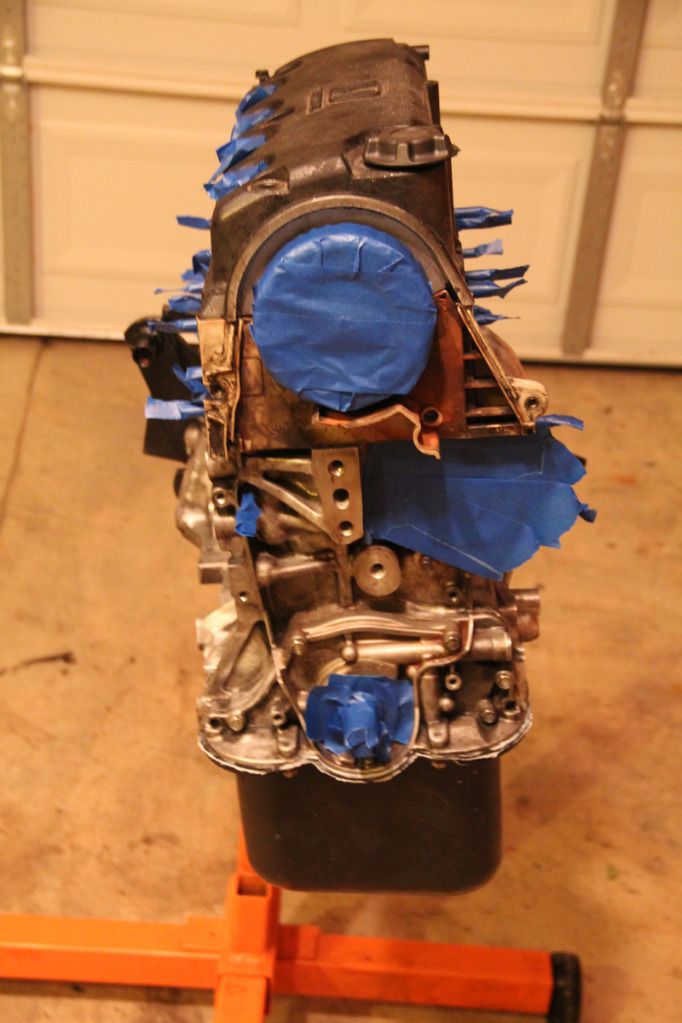
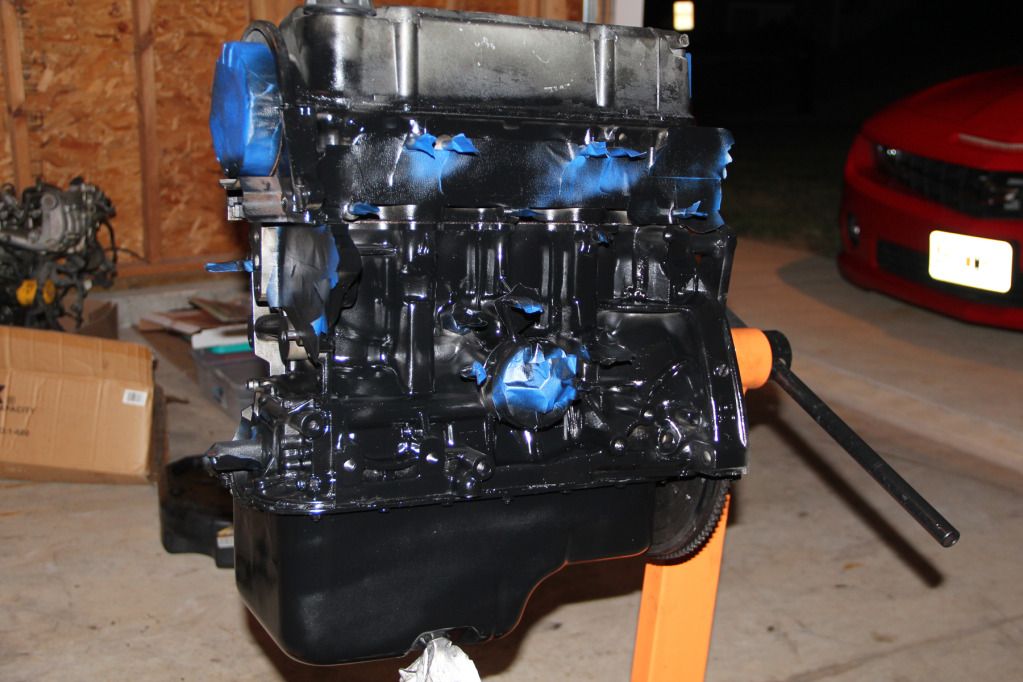
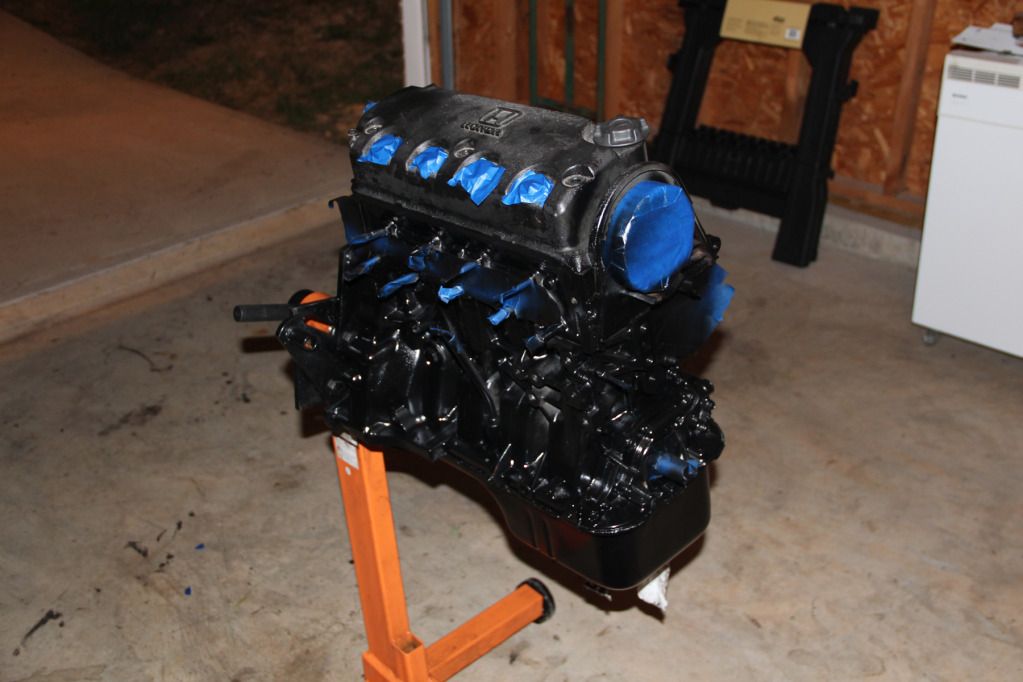
There are spots that look bare, like I missed them with paint, but that's just the flash causing a glare. I let the engine sit overnight to dry before messing with anything. Next step is untaping it all, replacing the water pump, tensioner, timing belt, and timing belt cover. I'll also probably install the new Valve Cover in the near future. Needs to have a new gasket and new spark plug gaskets installed, but I already have those ready to go. This was coated by Gateway Powder Coating in St. Charles. They chemical dipped it, sandblasted it, coated it in Wrinkle Red, and sanded the letters for $75. I'm pretty much in love. The other photo is of the mail I got yesterday. New Blox magnetic plugs for the oil and tranny. And a new fuel fitting so I can do away with the stock fuel filter and mate stainless braided lines to the VX fuel rail. :thumbsup2:
That's all for now. Hopefully I'll have more photos and updates for everyone soon. I work the next 7 days, then I'm out of town for 2 days, then I work another 7, so I'm not sure when I'll have time to work and post, but I'll do my best. As always, thanks for checking this out!
August 20th, 2012
So, I've decided that since I only have two full days to work on my piece each week, it'll be done sometime around my 40th birthday. To make up for that, I've decided to start working on it for a few hours in the mornings when I have 12 hours between getting off work at 7am, and getting back to work at 7pm (as opposed to having to be back at 11am or 3pm). Today was the first day of this and I did some body work on the driver's quarter. Needs one final skim coat and it'll be ready for primer! iPhone pics.


It's messy. Sorry. But it looks a million times better than a big rust hole! More updates to come!
September 1st, 2012
Had a couple days to work on the car again. Made some decent progress I suppose. Thank the Lord. :worthy:
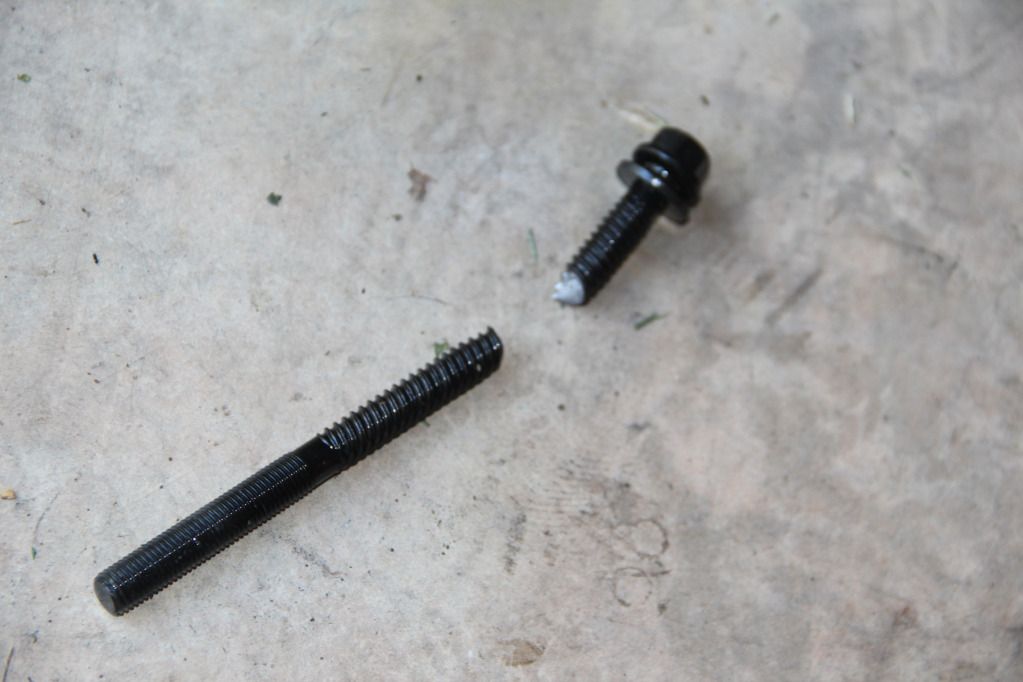
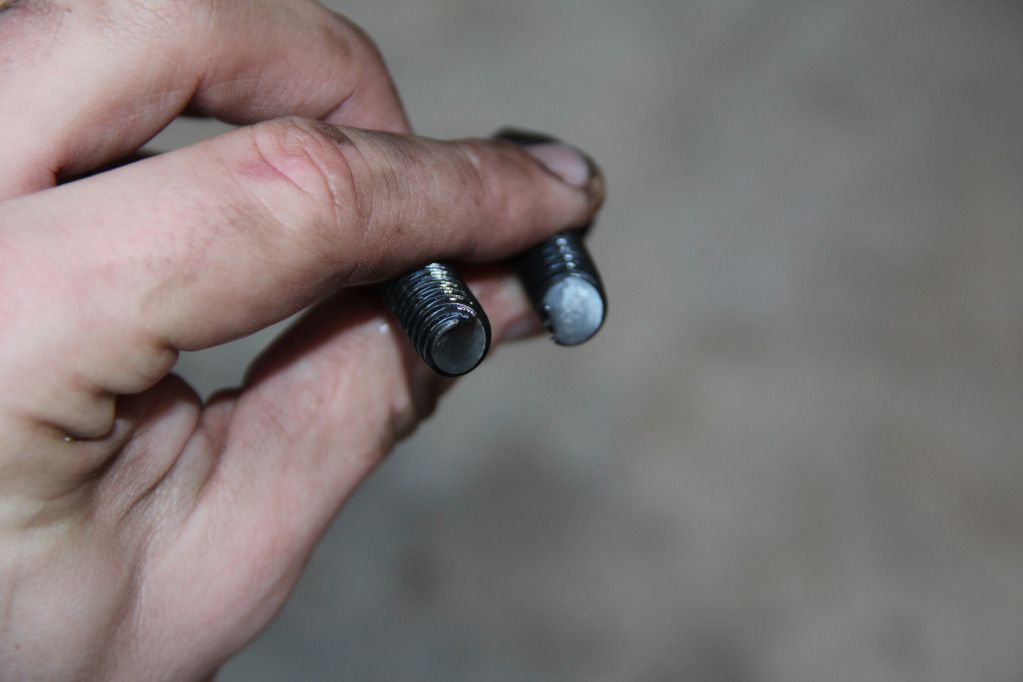
I mentioned in an earlier post that I snapped a head bolt. Realized it was due to me messing up the operation of a clicker-style torque wrench. My apologies to Dan for assuming it could have been his tool. My bad. Here's a shot of that bolt though.
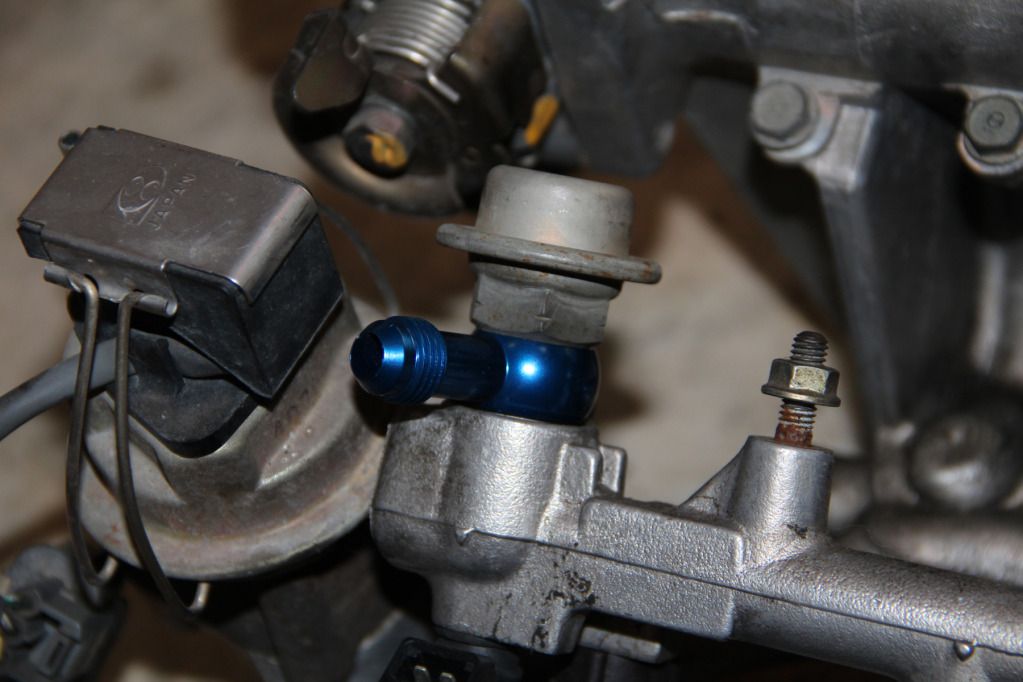
I got that fitting in the mail as well for my fuel system (also previously mentioned), and test fit it to my fuel rail:
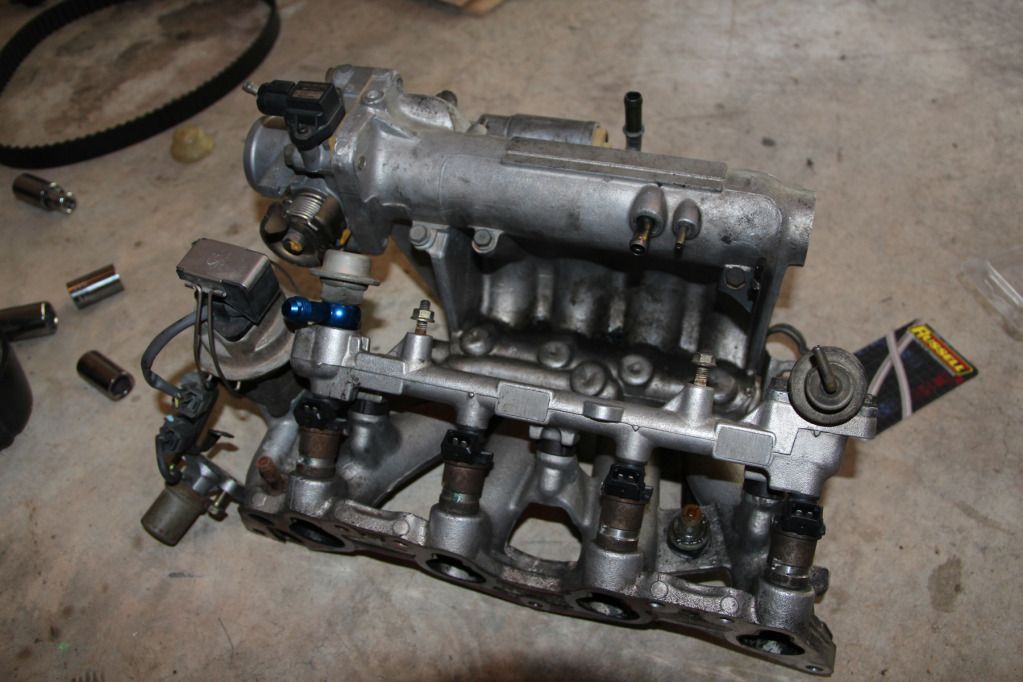
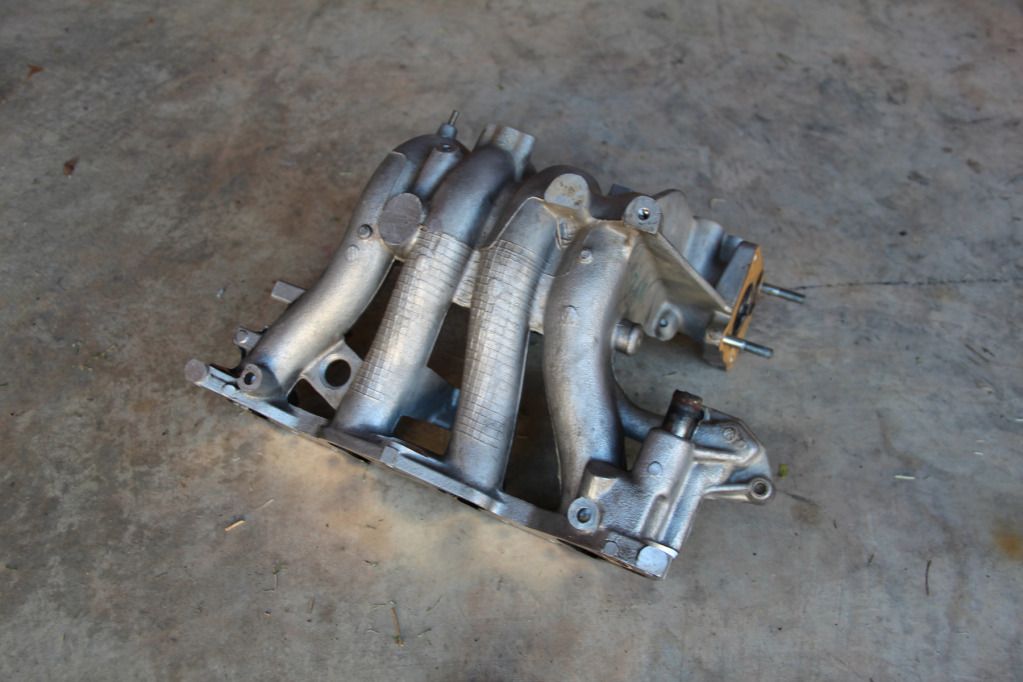
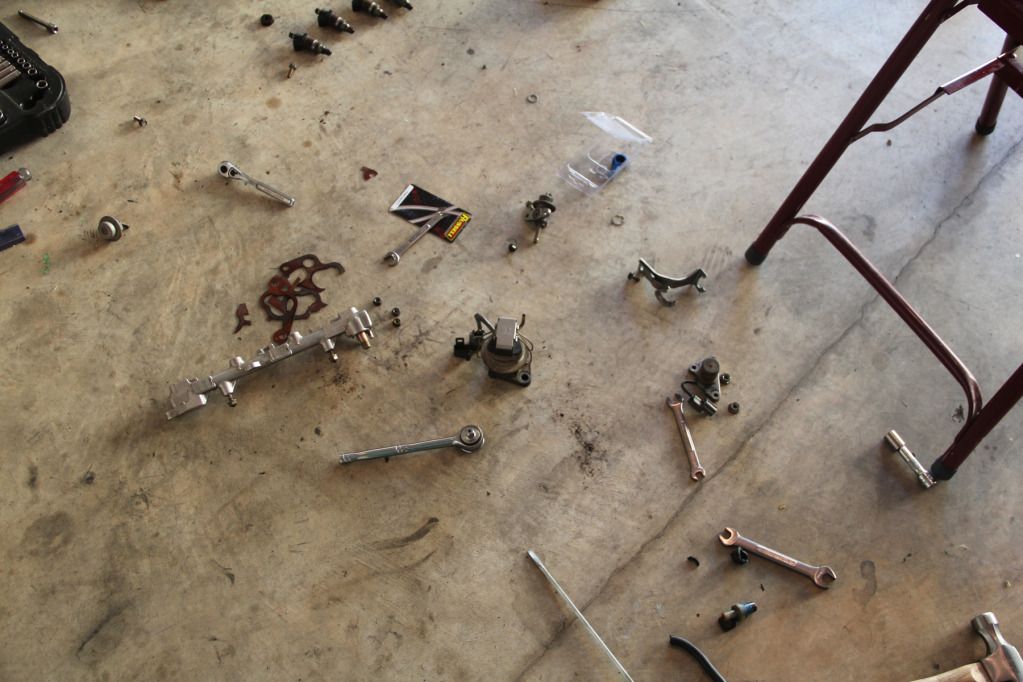
Disassembled and cleaned a few engine parts:
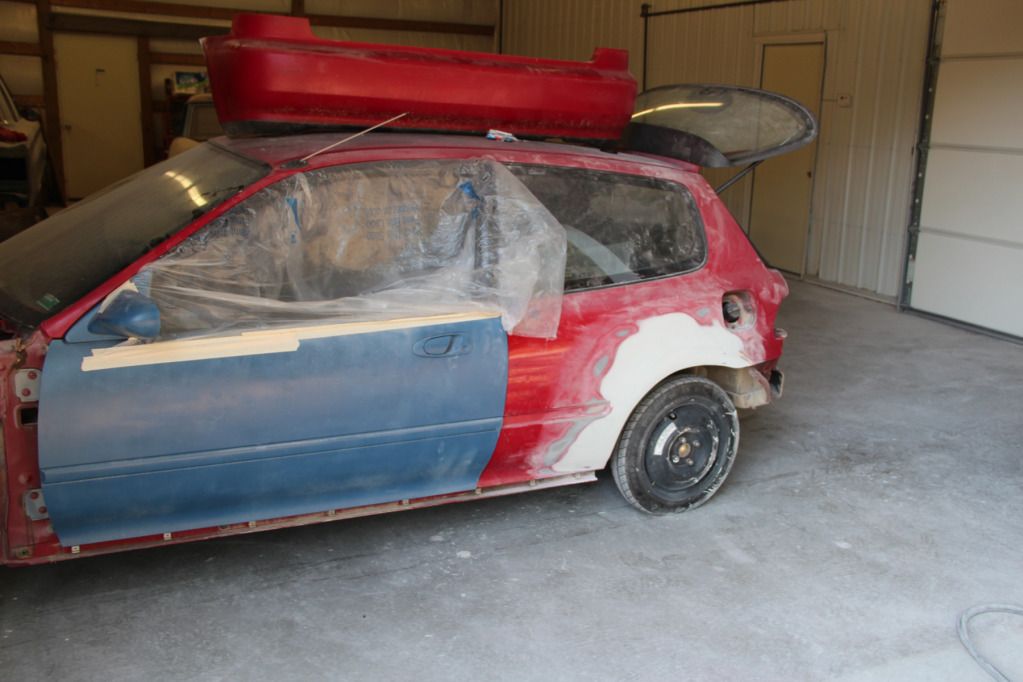
During one day last week and two days this week I did a CRAP LOAD of body work. Instead of typing what I did, then a pic, then typing, then a pic, I'll group it all together. Just understand that a few days work went into it all...
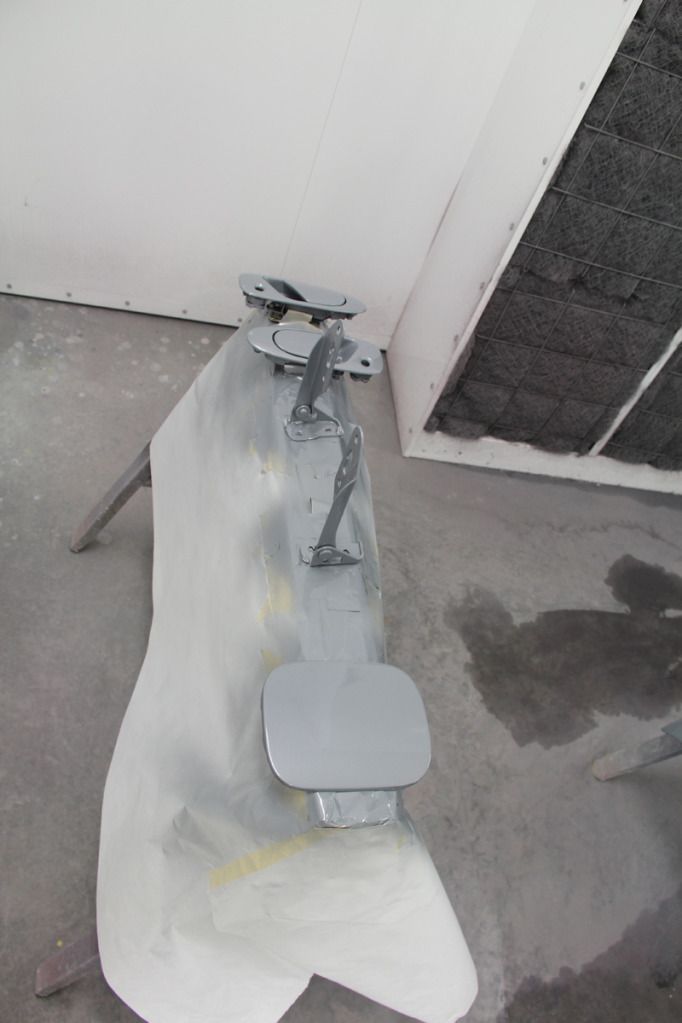
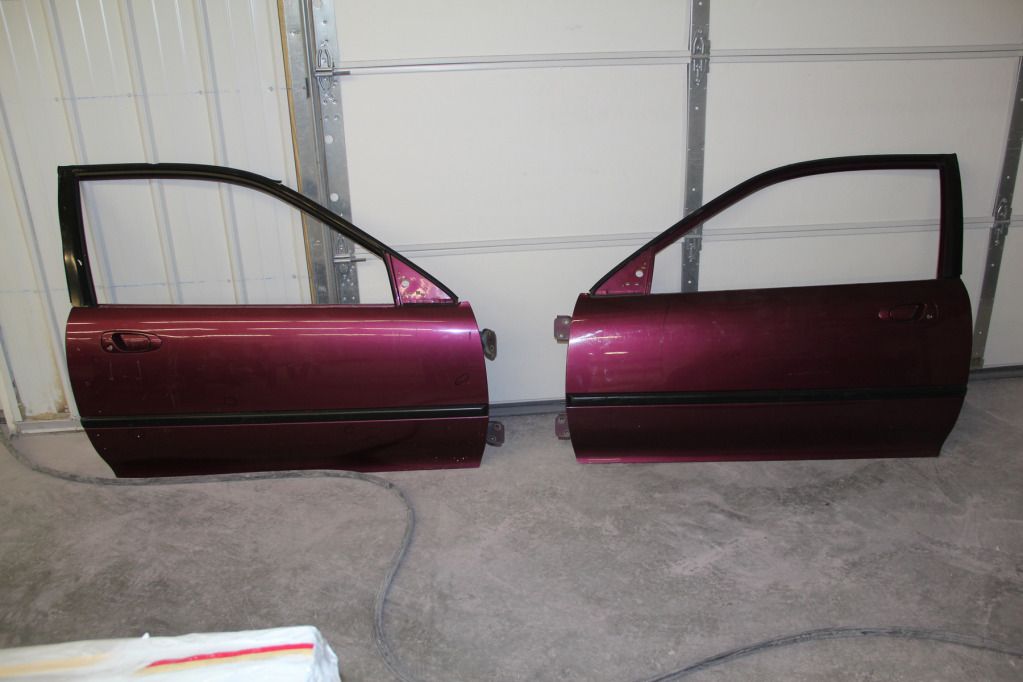
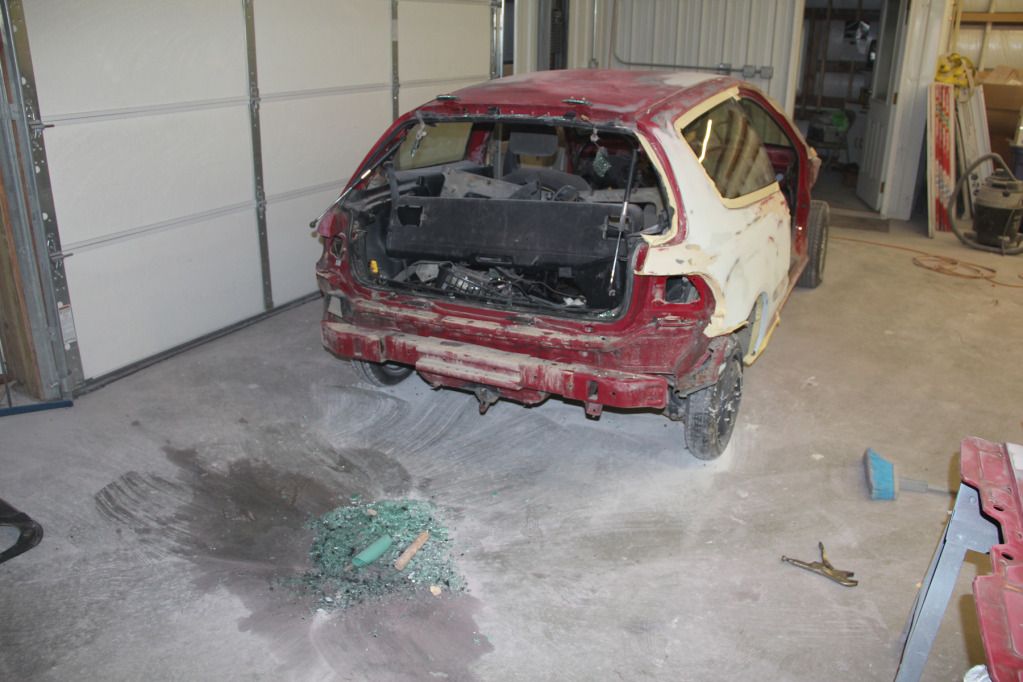
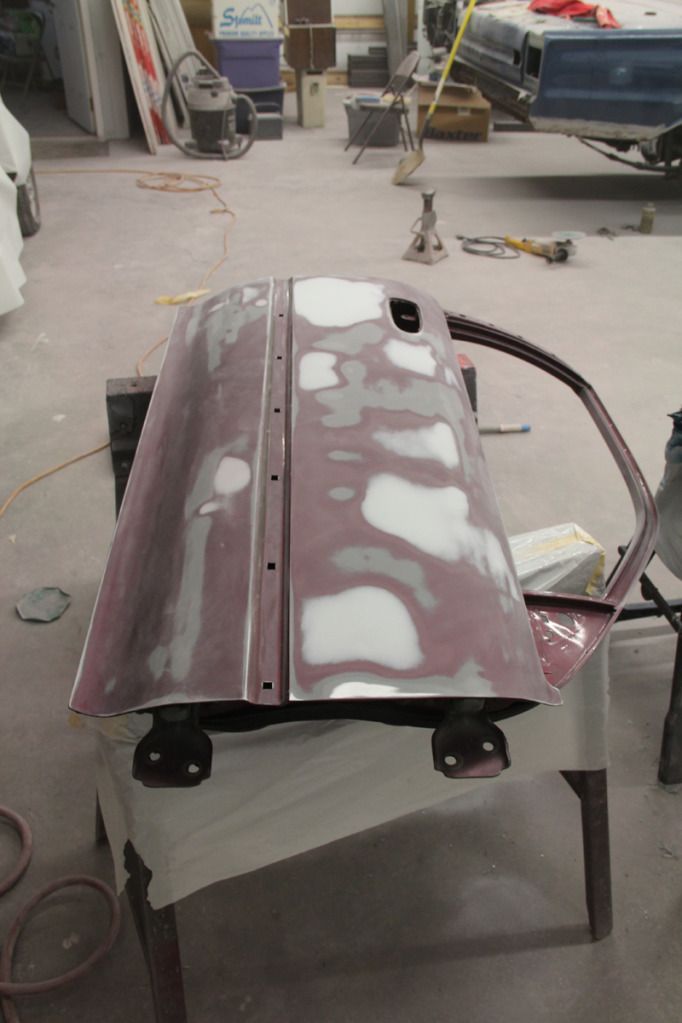
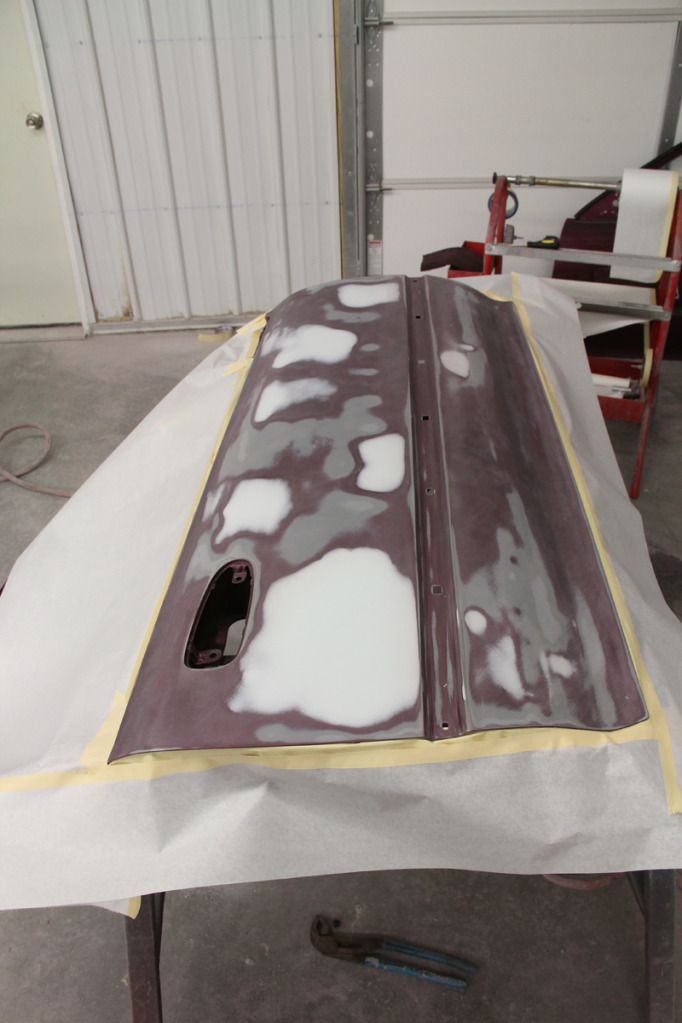
I finished straightening the driver's side quarter panel. I removed the rocker panel trim pieces on both sides to give me more room to work. I removed the rear bumper. I removed the rear hatch. I broke the hatch glass (need one now...). I straightened the rear hatch (large dent near the emblem) and accidentally shaved the emblem while I was at it (filled the holes, lol). I didn't mean to do that, but I might leave it like this. I sort of like it. If I want the emblem, I'll re-drill the holes. I straightened the roof dents and dings. I stripped somewhere in the neighborhood of 1/2" on body filler from various parts of the passenger quarter panel. It's been replaced before, and straightened. Wasn't too bad of a job other than wayyyy too much filler and it started to crack. I pulled out the metal, and straightened it all. I removed both doors. I removed the door panels from both doors. I realized the blue doors were horribly wavy, and decided I'd be using both purple doors that I bought from 5thGen. I straightened one of the doors (the other one needs a lot of work. Coming soon...) I removed the rear spoiler and metal piece. I straightened the metal piece due to what looked like several small hail dings. I taped the car off for primer. I primed the car. I THINK that's all. Ask me questions if you have any or if I missed anything. Now for the mother-load of pics.
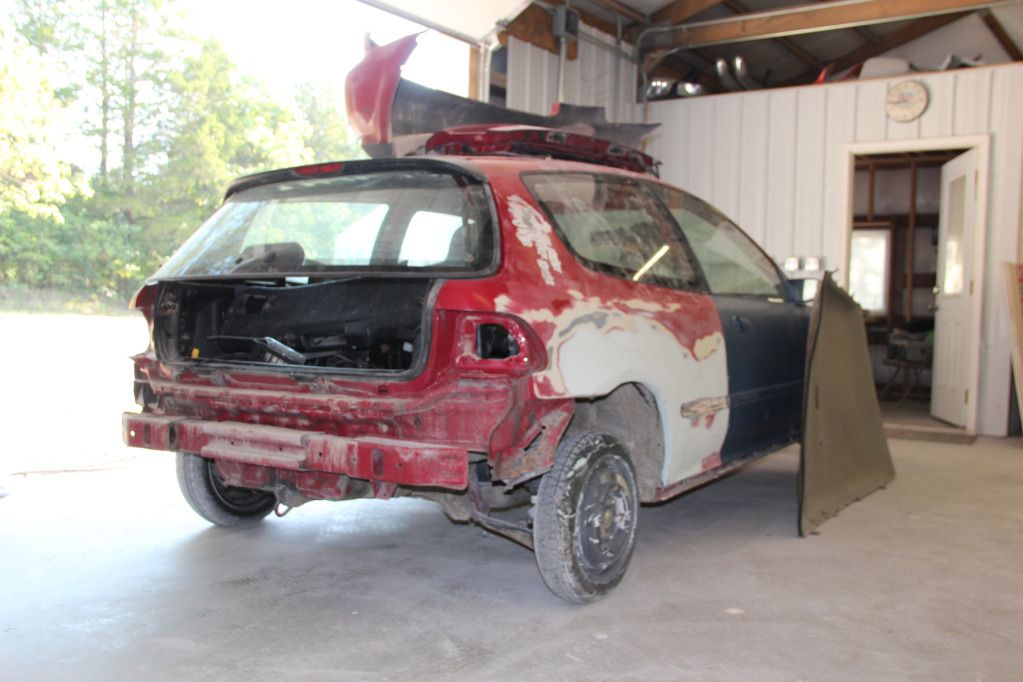
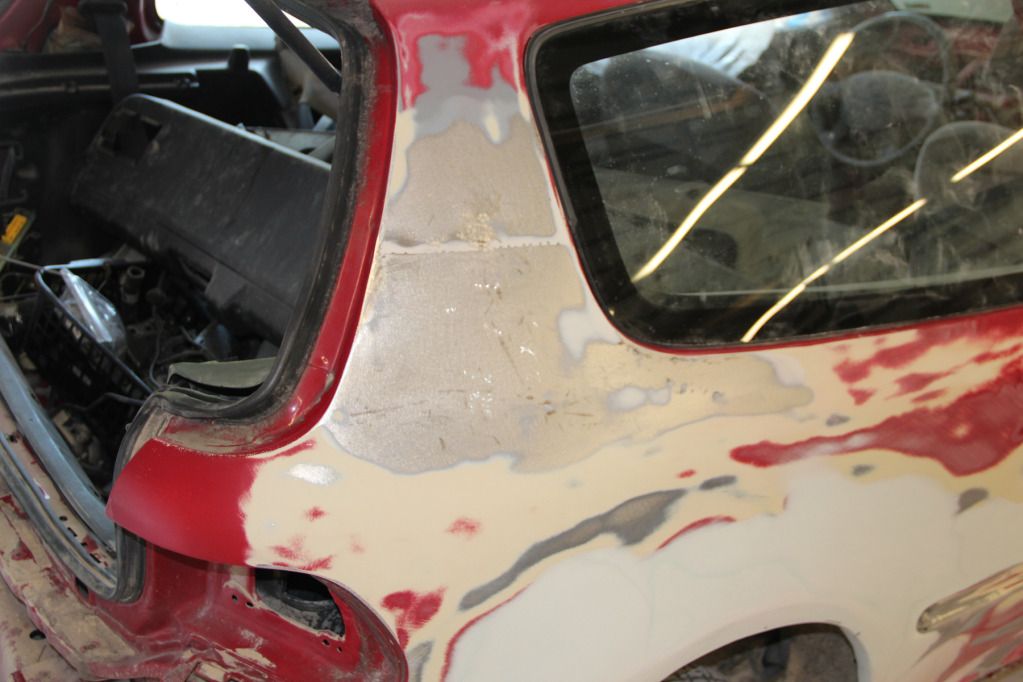
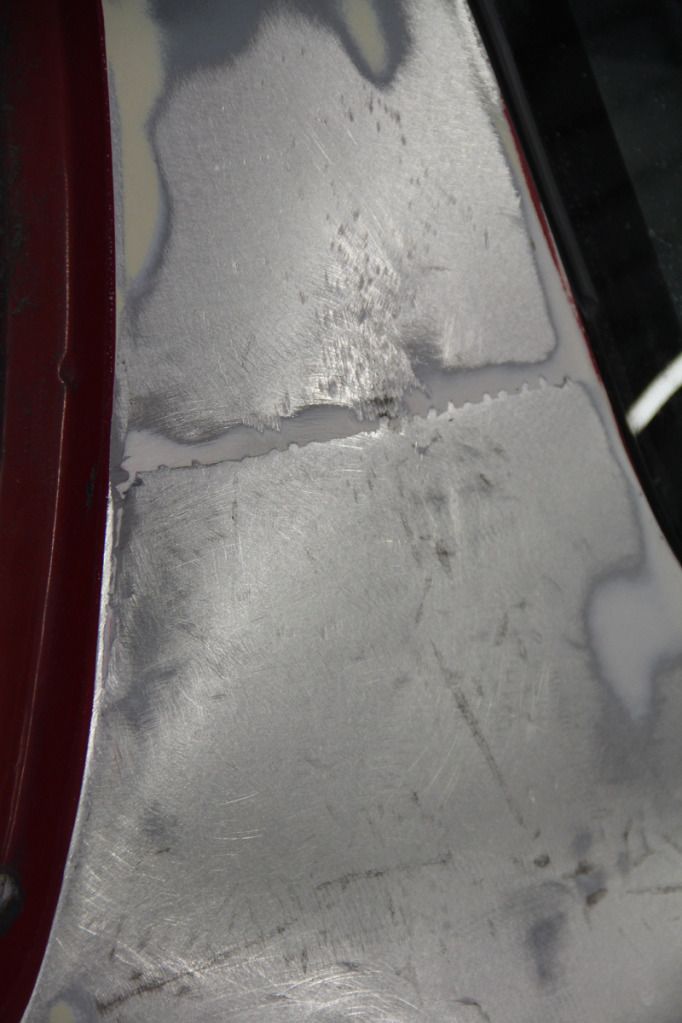
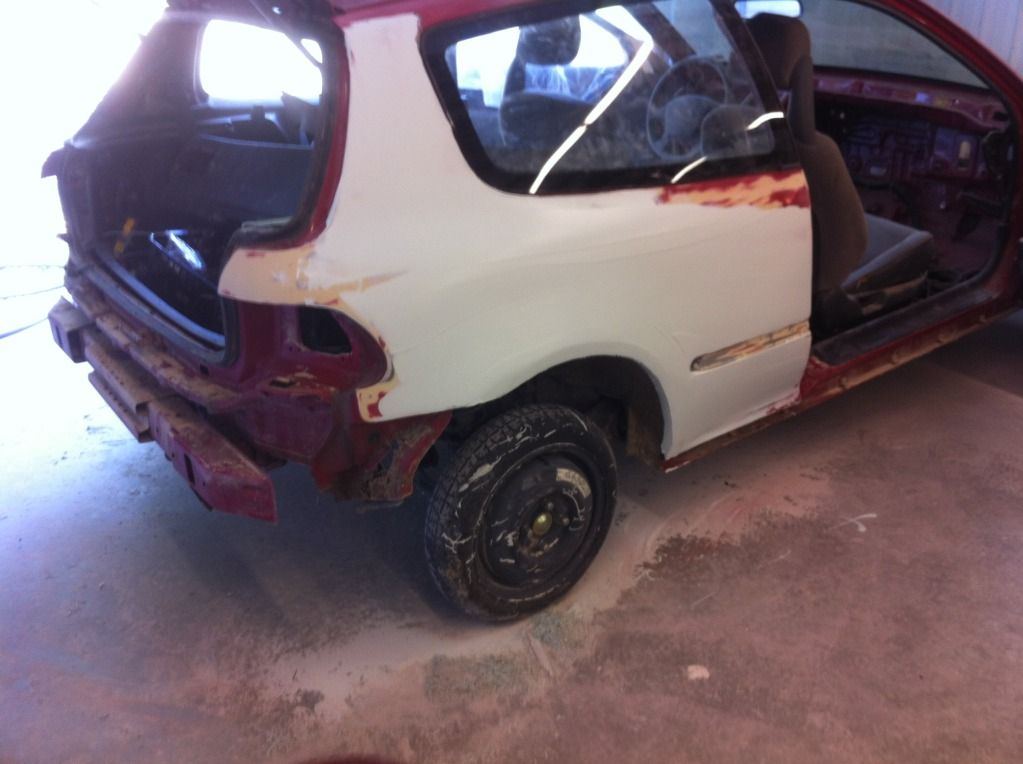
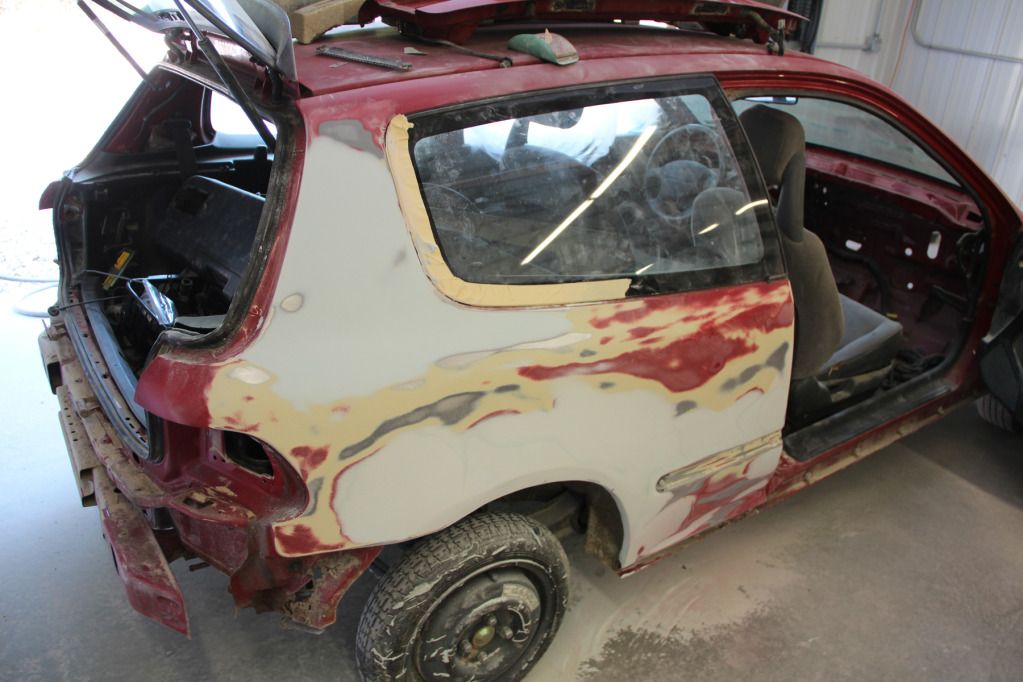
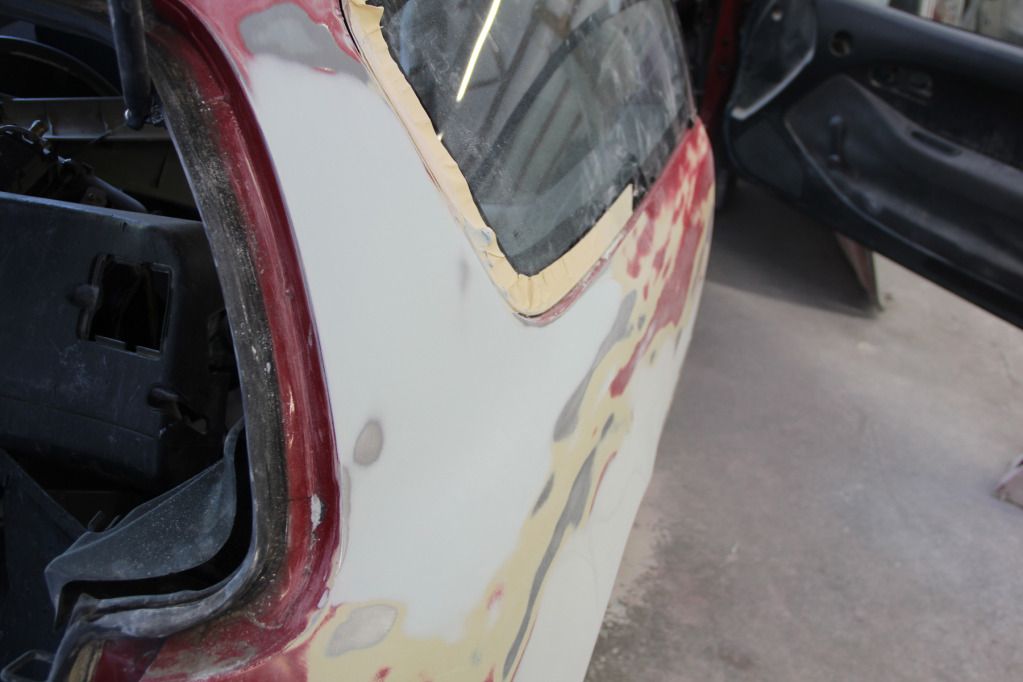
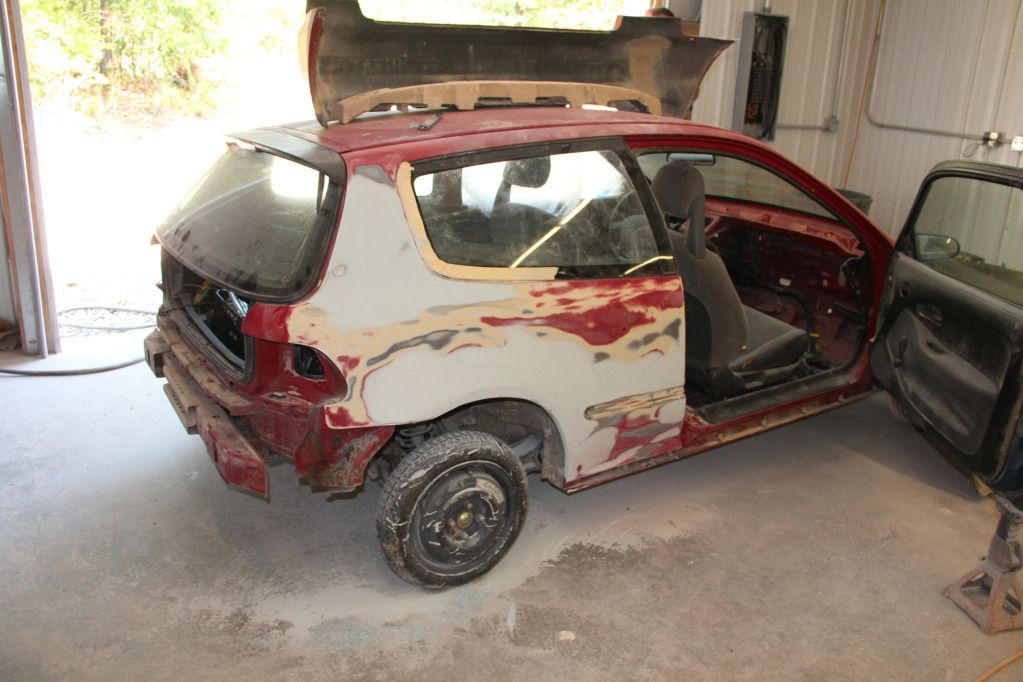
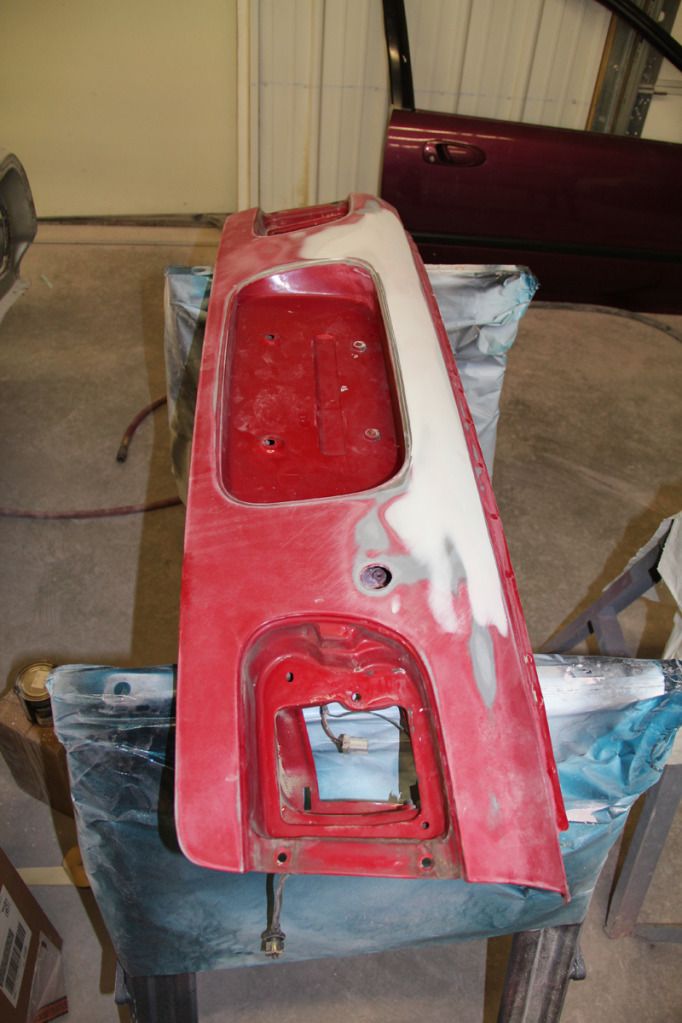
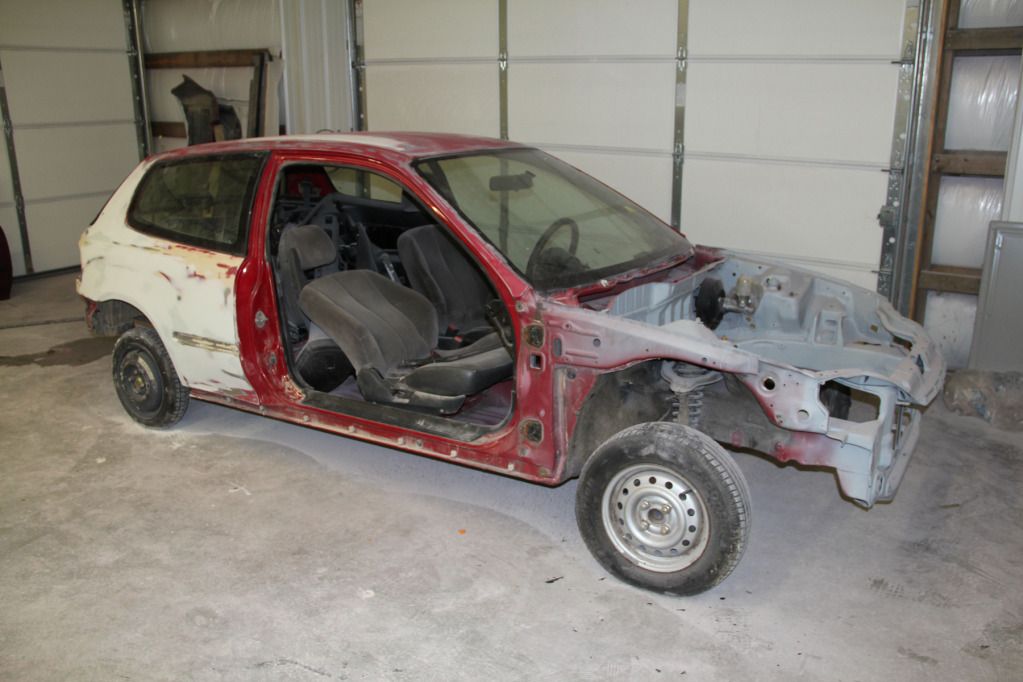
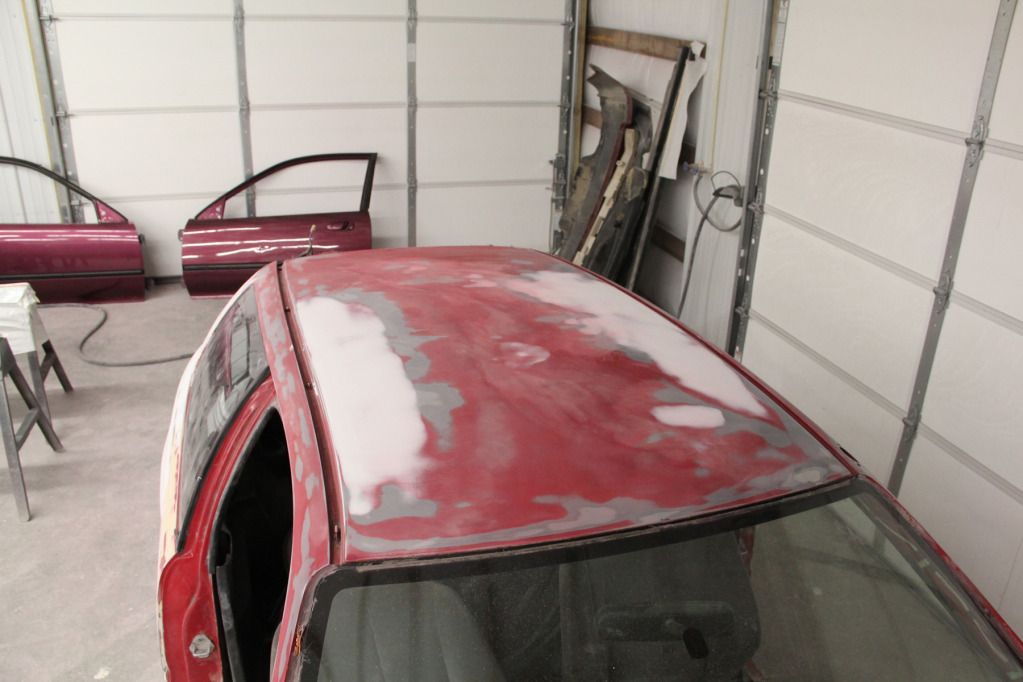
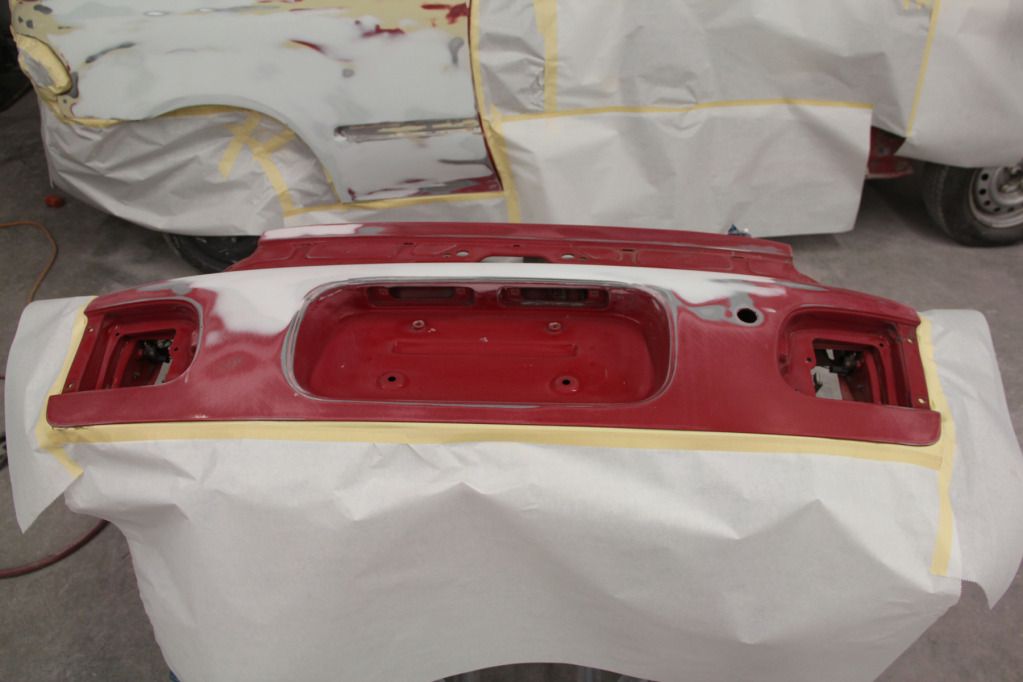
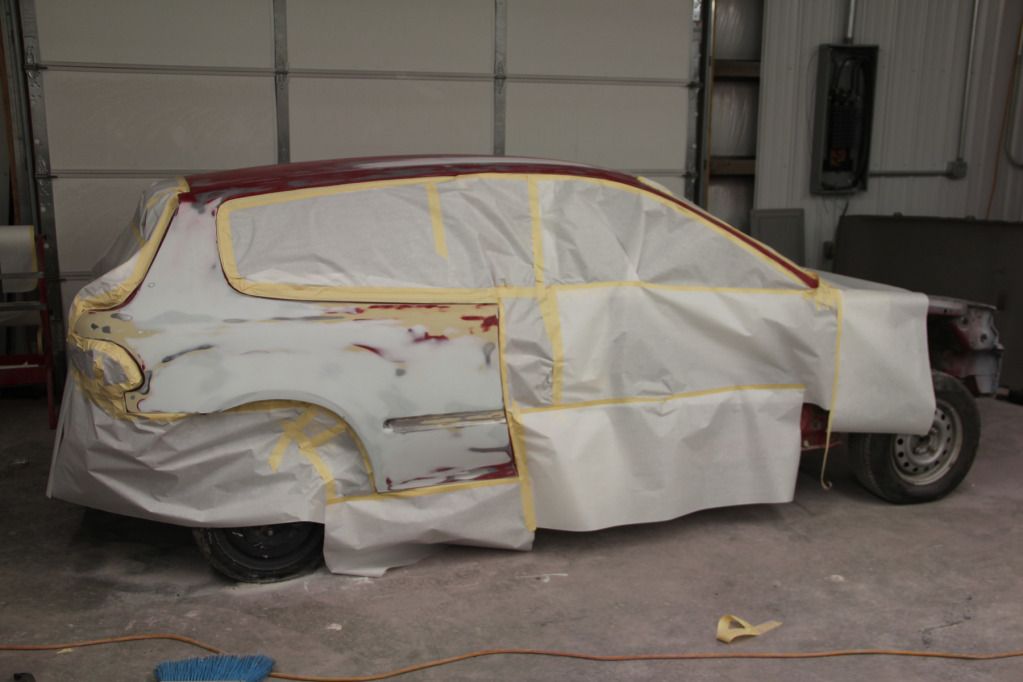
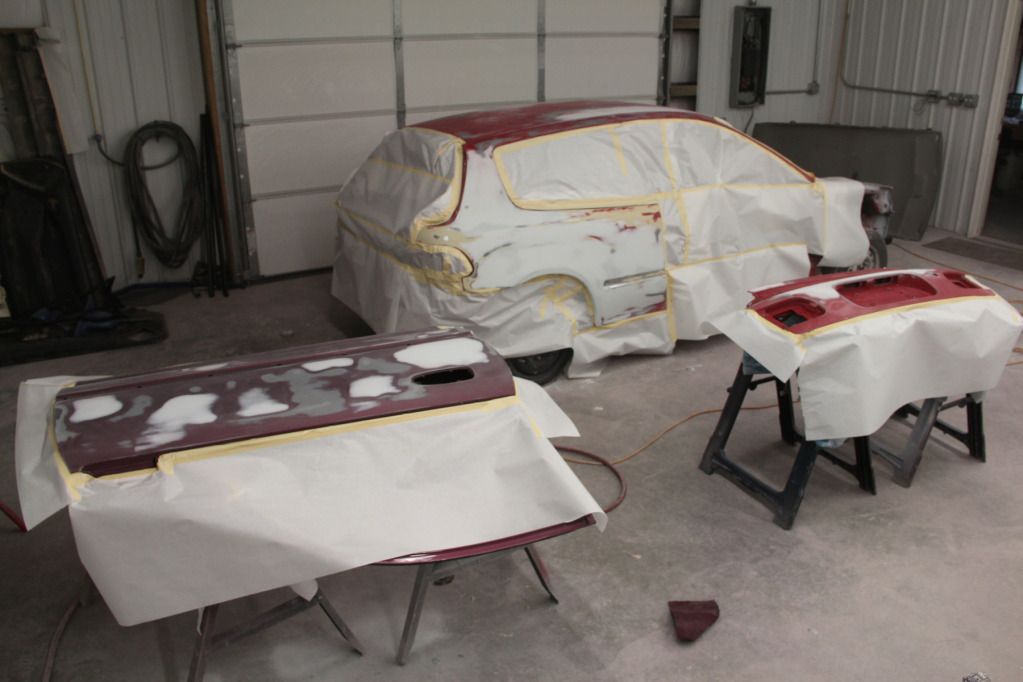
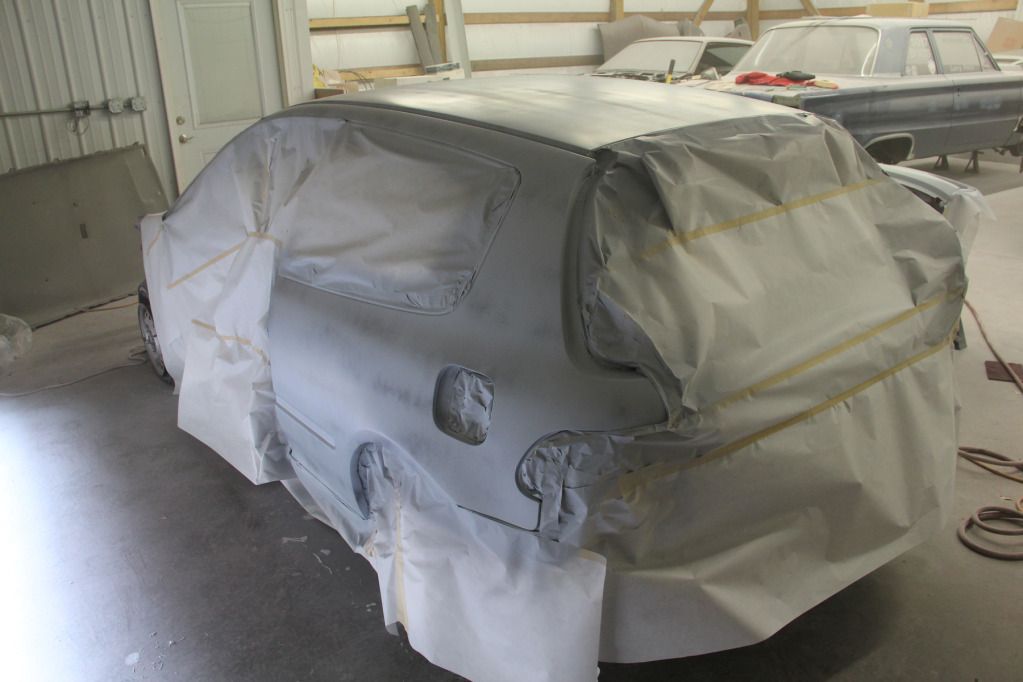
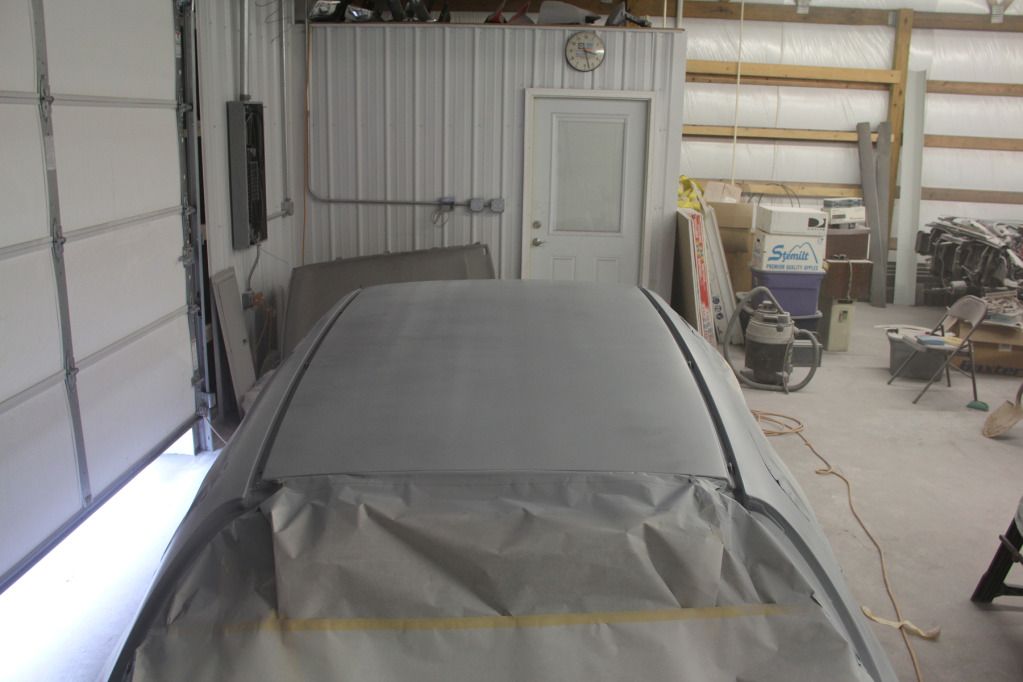
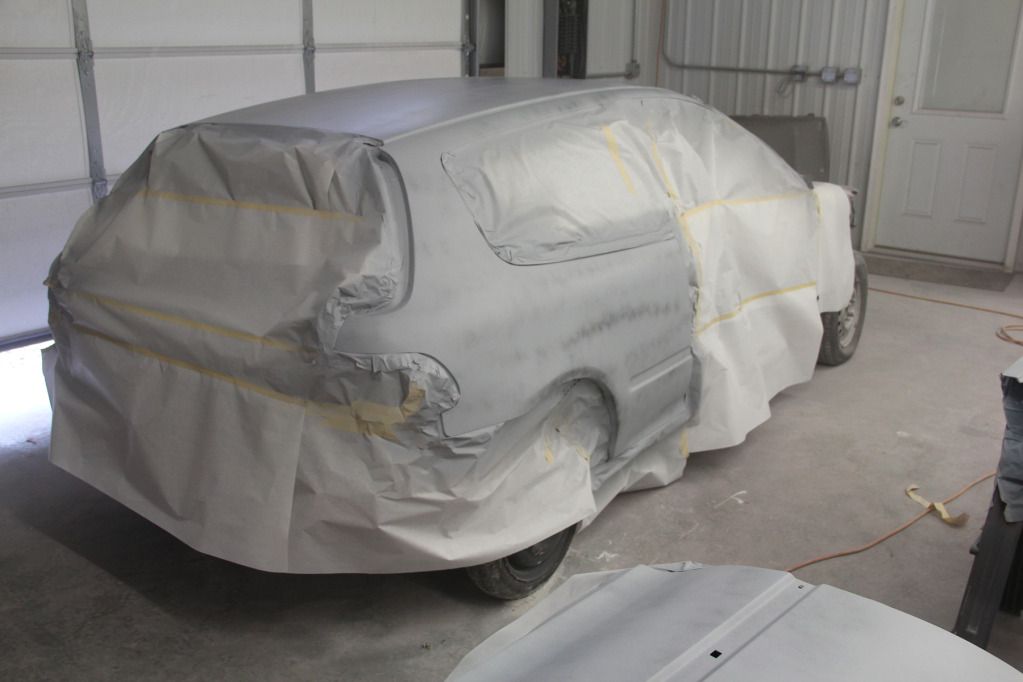
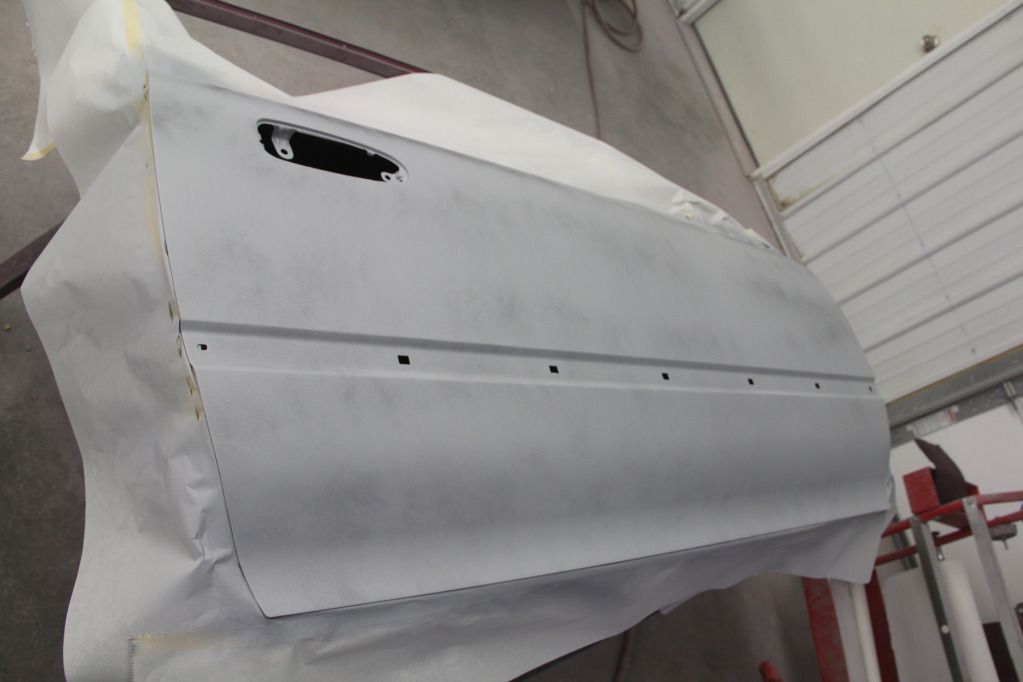
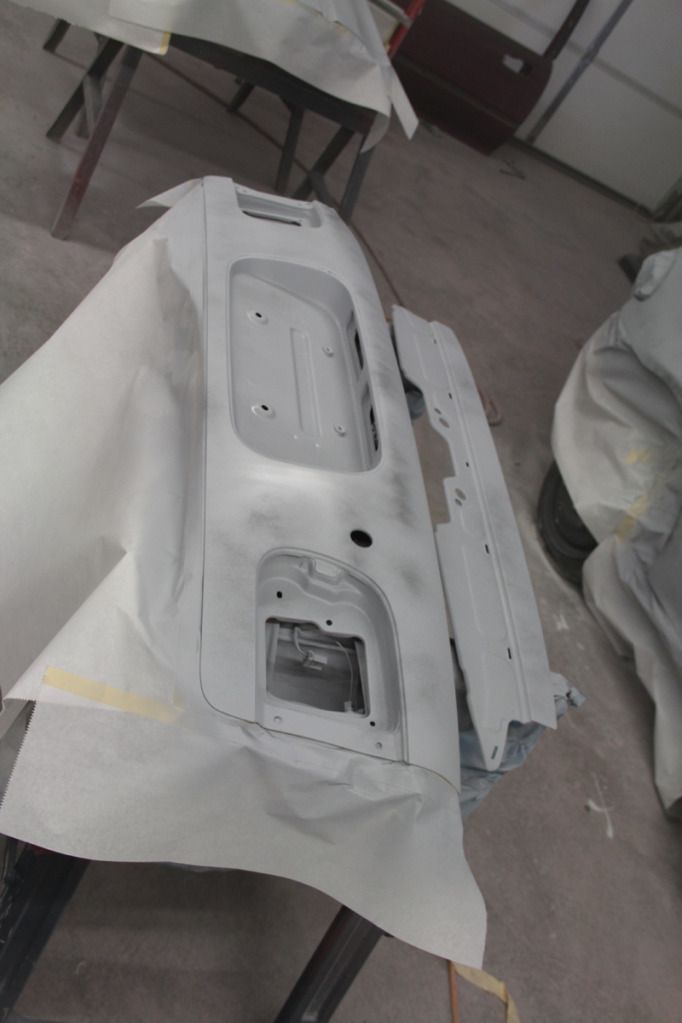
Up next on the body is straightening the other door, blocking and repriming the entire thing to make sure it's pretty straight (I'm NOT a body man. I work in a hospital, not a shop. This car will NOT be perfect.), buying the new bumpers, fenders, hood, lights, etc. and edging the body pieces in (spraying color on the edges and jambs), and reinstalling everything. This process may get broken up into 1)Reinstall everything, 2)Remove it, 3)Jamb it, if I take so long that the car needs to be moved outside. Hopefully, that won't happen and I can jamb it THEN install everything and be able to roll it back outside while it waits for the engine. Which leads me to my next point...
After messing with my car for several days, I figured it was about time to work on the engine again. So, cleaned off the head mating surface. I carefully cleaned out the antifreeze channels due to dirt/grime/gasket collecting there. I checked to make sure that all of the head bolts would now screw all the way into the head BEFORE putting the head on, which turned out to be an amazing idea since something like 7/10 of them had metal shavings in them. I reinstalled the head with a new gasket and copper Spray-a-Gasket. I properly torqued the head bolts using a bar style torque wrench to 22 lbs then 53 lbs on the D15Z1. I then ran to AutoZone for a feeler gauge since I didn't previously own one, and reset the Valve Clearance. Next, I reinstalled the spark plug seals on the new valve cover, and reinstalled the valve cover. I ended up only having 4 bolts to it unfortunately... Need to order another set as soon as I finish typing here. Oh, and I changed my mind about the intake staying bare. The intake and the exhaust were both painted black tonight. I imagine the exhaust will burn off since the paint is only rated at 500 degrees, but at least it will look good on the stand, right? Lol. Those will be reinstalled once the paint dries and I buy new, nicer looking nuts. I installed my new water pump, tensioner, and timing belt. Tried cleaning my old timing belt cover and it wouldn't come clean, so I might be ordering a new one, or painting the one I have with plastic paint. I THINK that was it on the engine. Here's a few of pics of that:
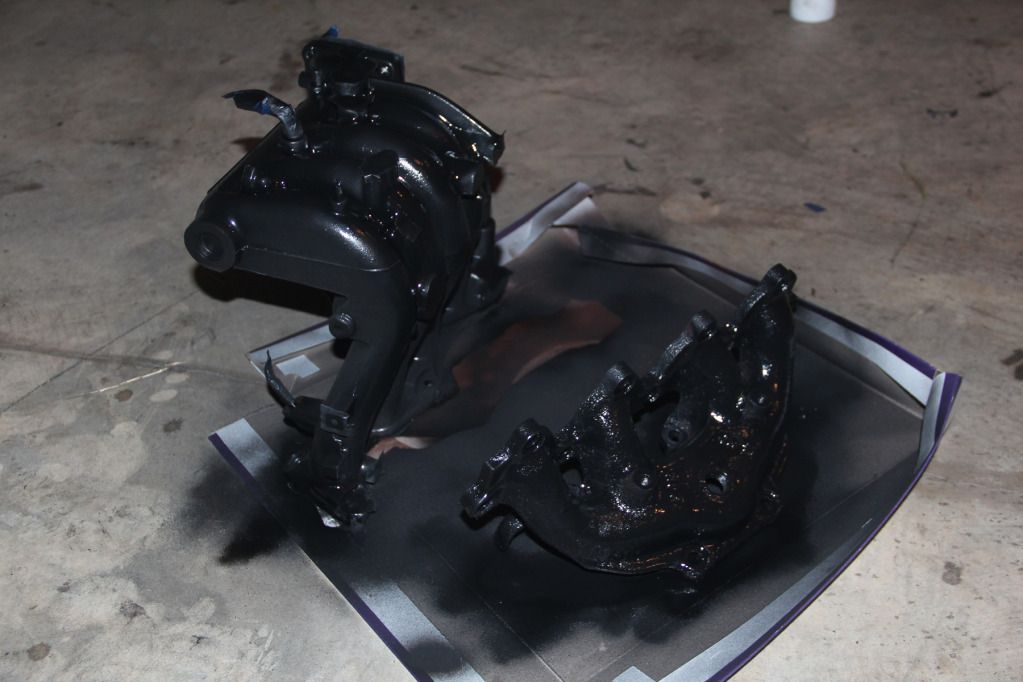
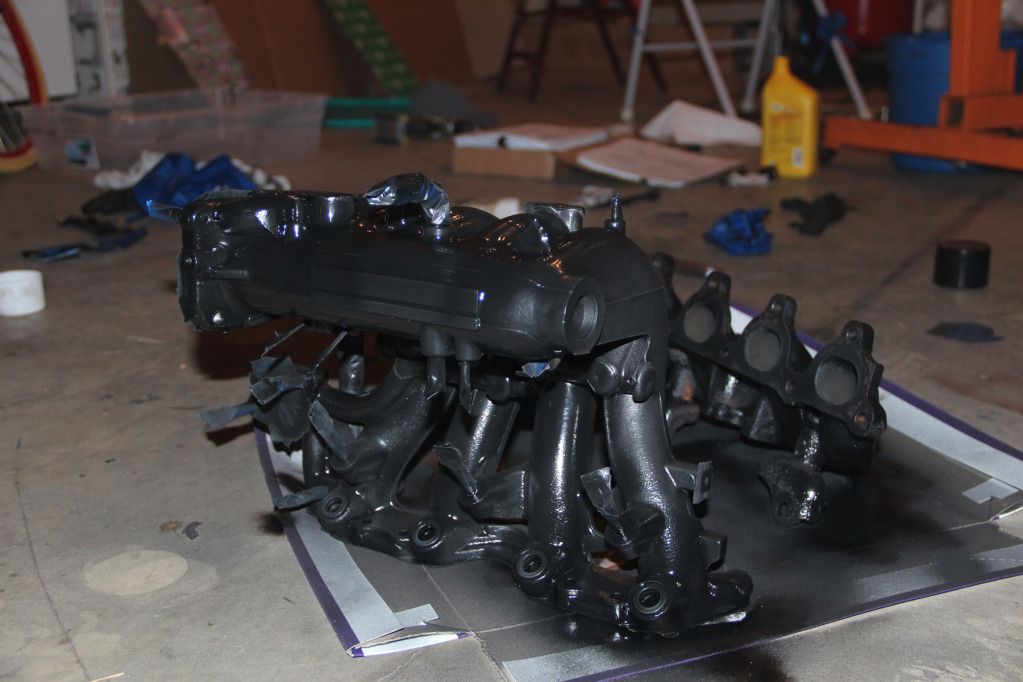
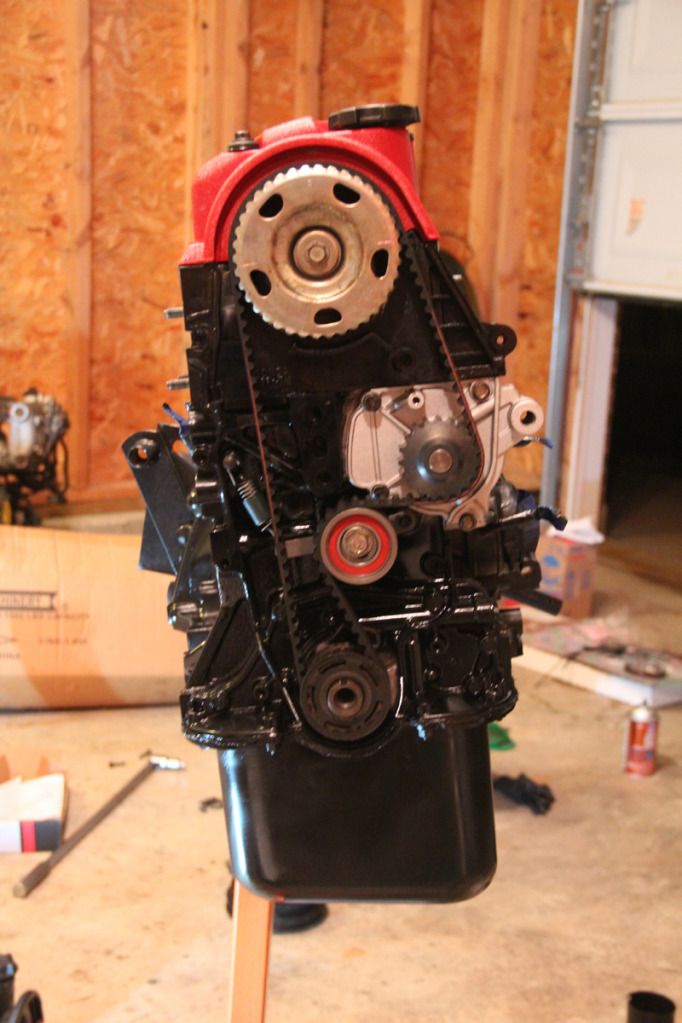
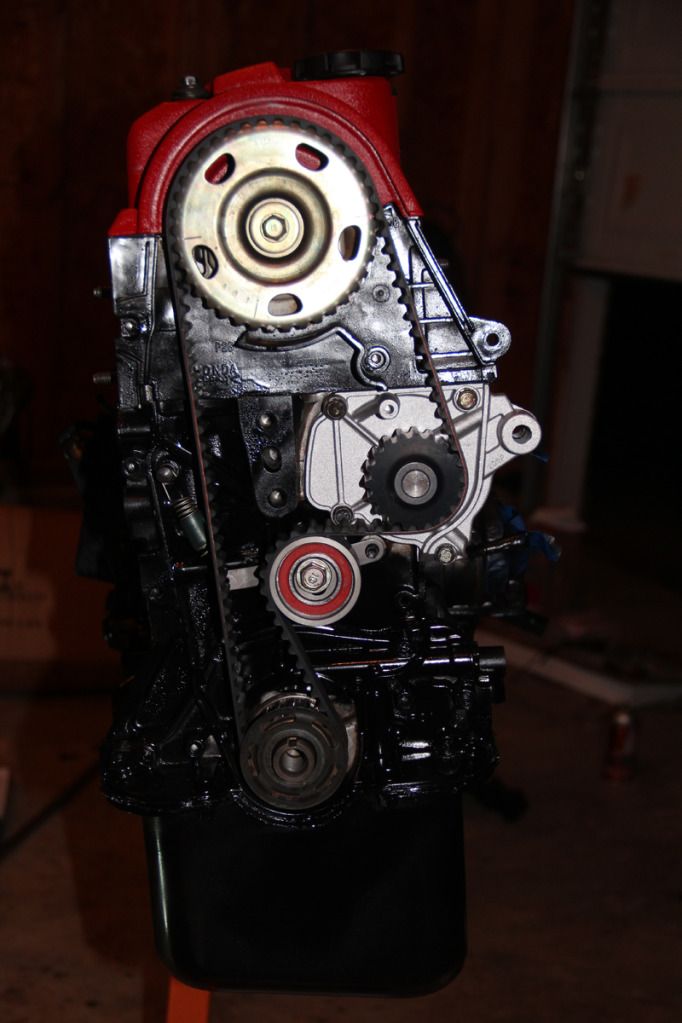
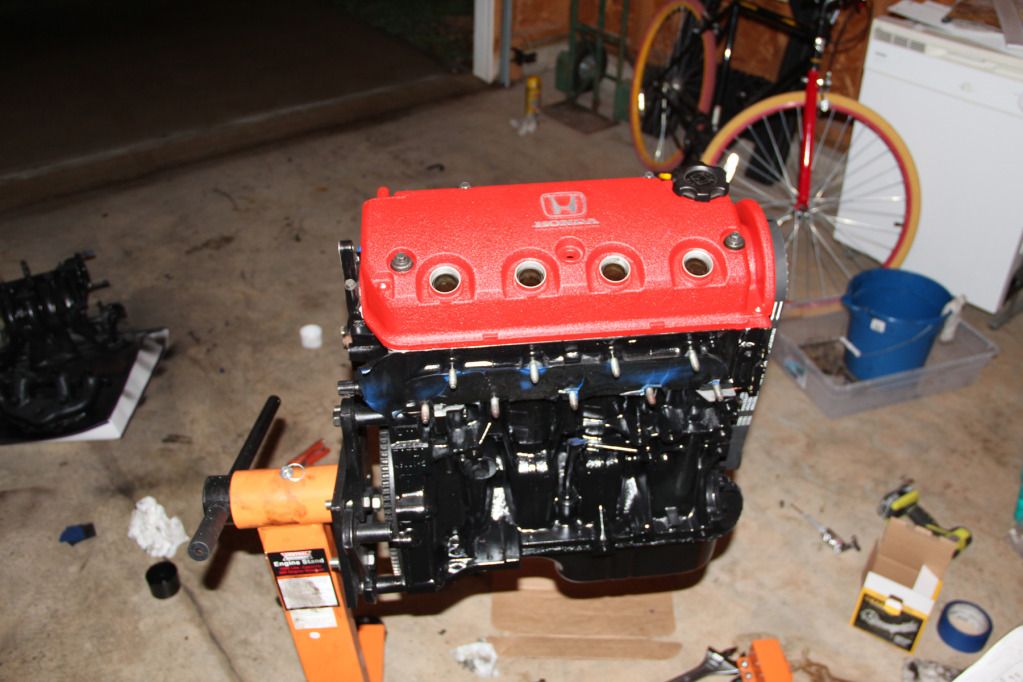
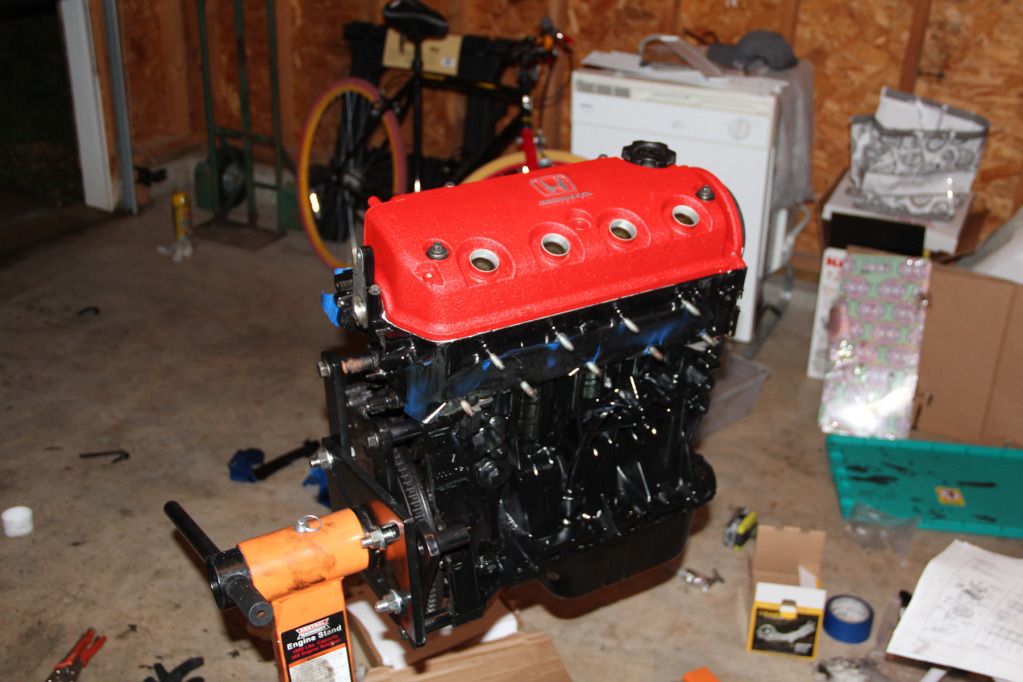
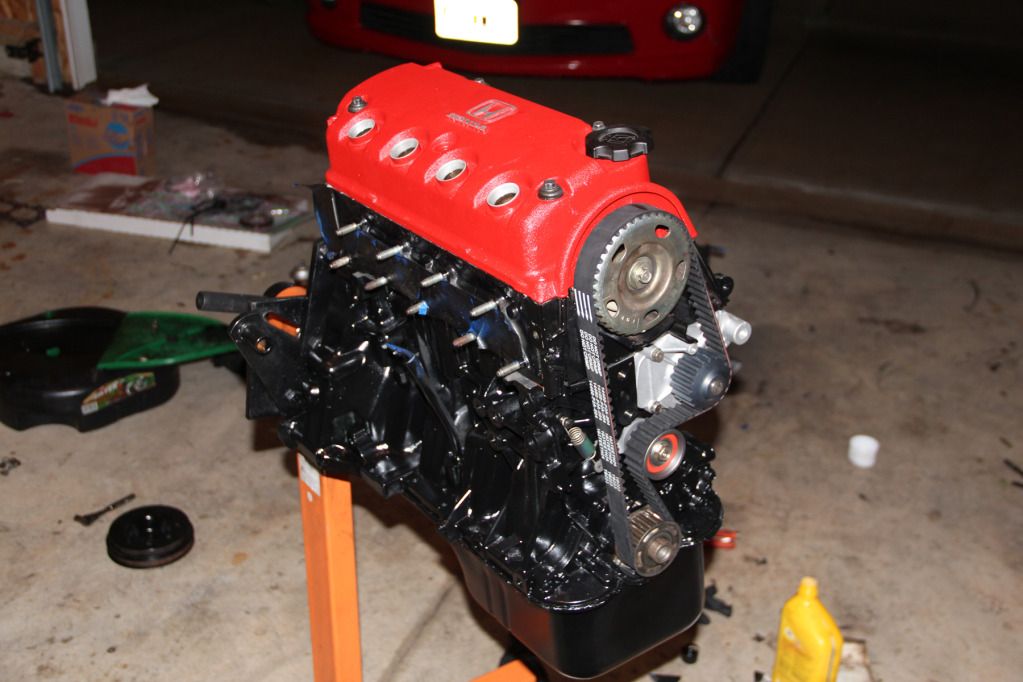
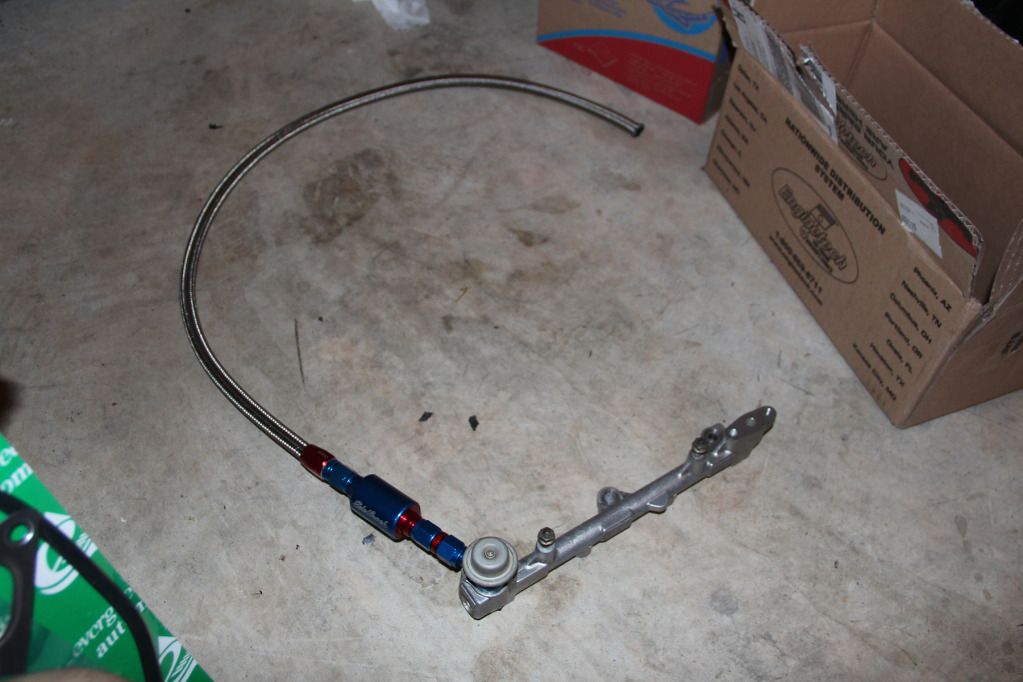
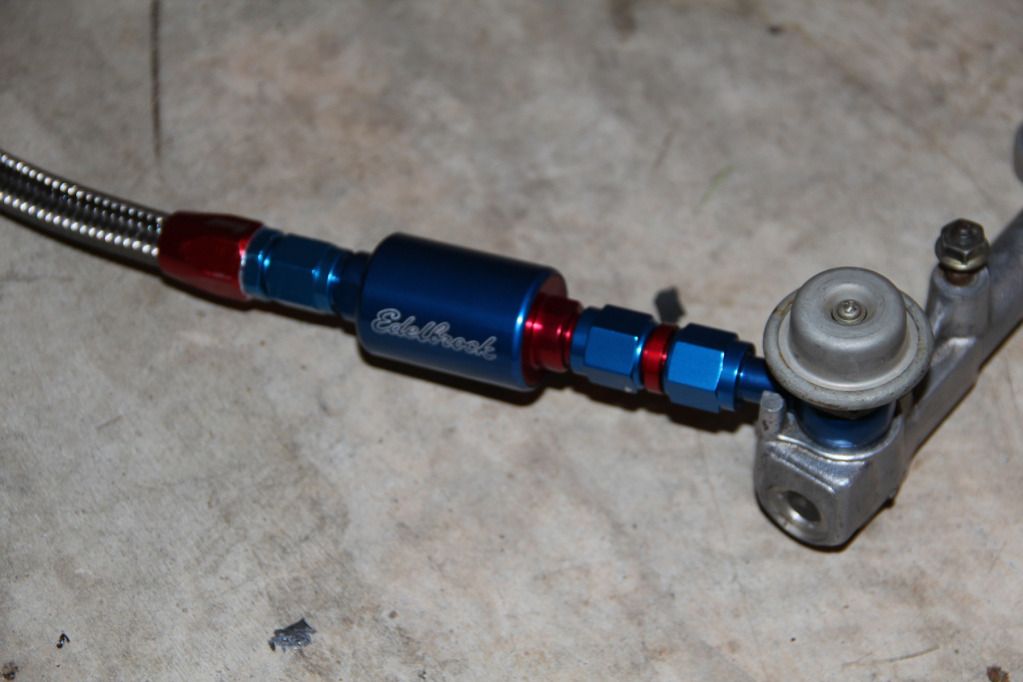
Finally, I did just a little bit of work on the fuel system. To save some time, I'm going to have the fuel lines all ready to go in the car when I drop the motor, to where all I'll have to do is flare the stock line, and adapt it to the hose. So what I did tonight was assemble the stainless braided hose with an -6 AN hose end, and finished assembly of the banjo fitting, to -6 AN union, to Edelbrock fuel filter (MUCH nicer than that old piece of junk), to stainless braided hose. Here's a few shots. I have parts numbers of anyone wants them. I only paid like $50 or $60.

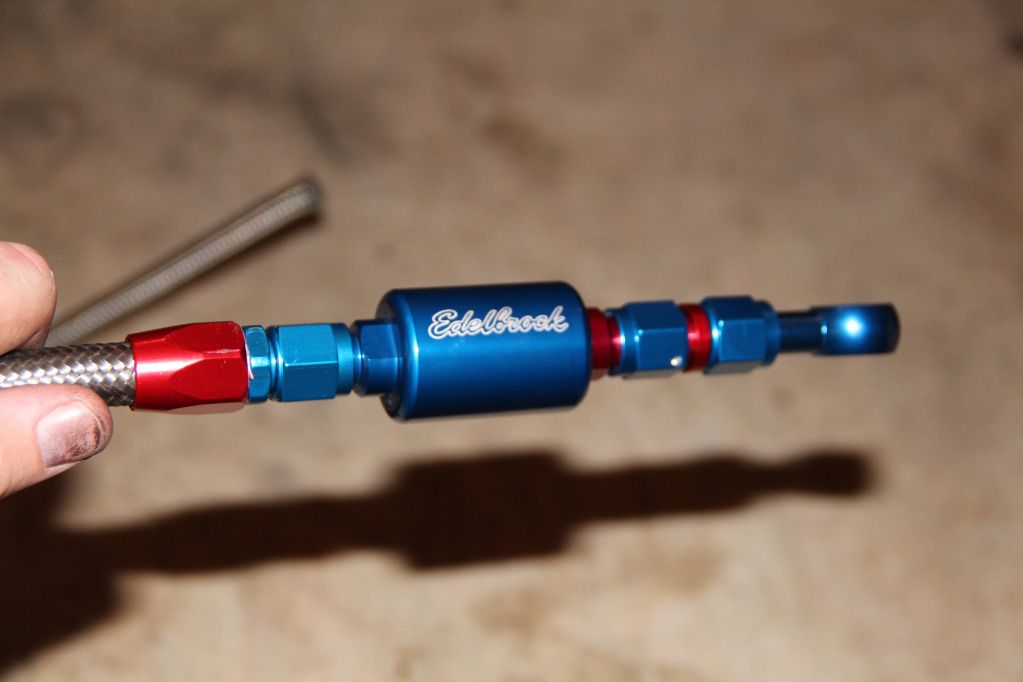
Oh, I also got new Energy Suspension motor mount inserts in the mail. And ordered my coilovers, so now I'm broke. Lol.
So, that's been the work I've gotten done. Hoping to knock out the rest of the body work soon. And to get this silly engine fully assembled. I'm just a bit short of time with a wedding in three weeks, work, and a new house! I need a rear hatch glass though if anyone knows where I can get one. And fairly cheap if possible! (I can hope, right?) Sorry for so many pics. Hope to get more updates soon. Thanks for checking in.
September 6th, 2012
Worked a little on the engine tonight. Bolted up the intake, exhaust, fuel rail (injectors, etc), various sensors and fittings, and maybe a few other small things. Need to install the crossover tube from the water pump still and the entire thermostat assembly, then the motor mounts, timing belt cover, crank pulley, and accessory brackets and the engine will pretty much be ready to drop in. Might work out the wiring harness with the engine out of the car. But it's getting SOOOO close. Taking a two hour nap right now, then going to block and reprime the car (maybe just block and then reprime tomorrow morning depending on how much gets done today). Might be able to snap a few pics. So ready for this thing to hit the streets. Seeing the engine just about ready has me VERY excited. It's not quite as pretty with so many ugly pieces bolted up to it, but it's a heck of a lot more functional!
Quick update with no photos (again). Sanded the entire car down with dry 180 grit on a foot long block, which keeps everything straight so that you don't gouge the finish with your finger tips. It had to be blocked and reprimed to check for any dings I missed, or for mistakes in the body work. There are a few waves in the roof that I noticed, but the rest of the car looks pretty good in my opinion. Didn't bother with pictures since it looks the same as last time. It's just a few days away from getting color. Can't wait. Will try to get pics soon.
September 7th, 2012
Just wanted to update and say that I placed my last parts order for the next month or so since I get married in two weeks. <-- To the last parts order. HUGE thumbs up to the marriage.
I ordered a new carbon fiber spoiler, a carbon fiber antenna plug/gasket, a new catalytic converter (very stock-ish build so I'm keeping the cat), new black side moldings, and a new clutch/flywheel/pressure plate set. These things should be enough to get the body almost completely done once it's painted, and to get the engine down in the car and maybe even moving around under its own power. At that point, I can trailer it home so it's not stuck in the shop anymore and it can sit there until I get the new wheels and tires in. This car is getting really close despite only being in primer. I feel like it's starting to be all downhill luckily!
September 8th, 2012
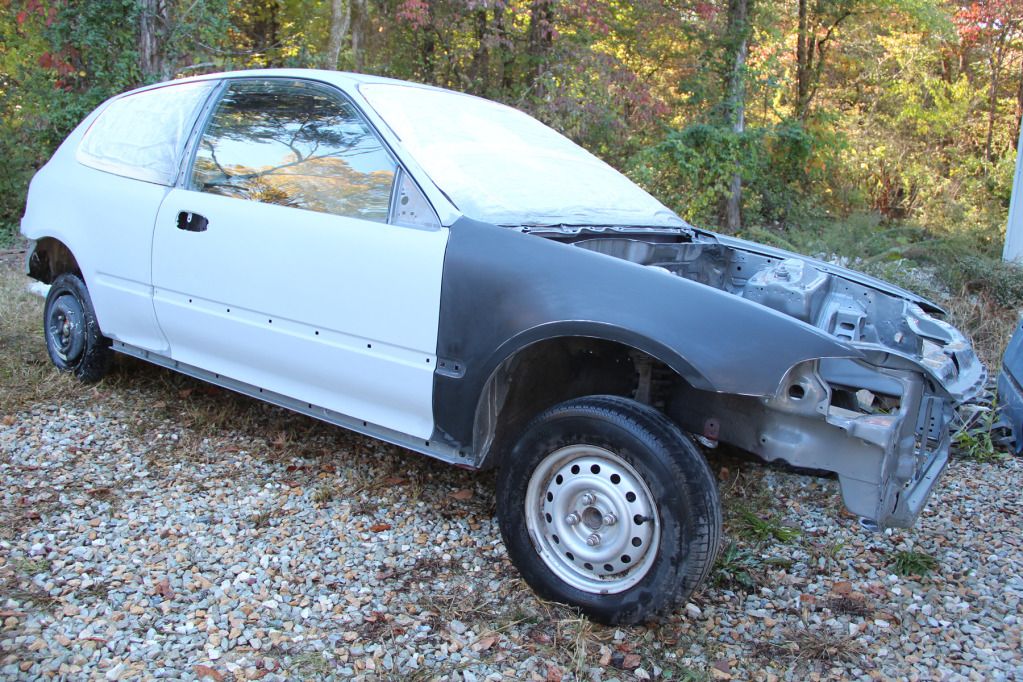
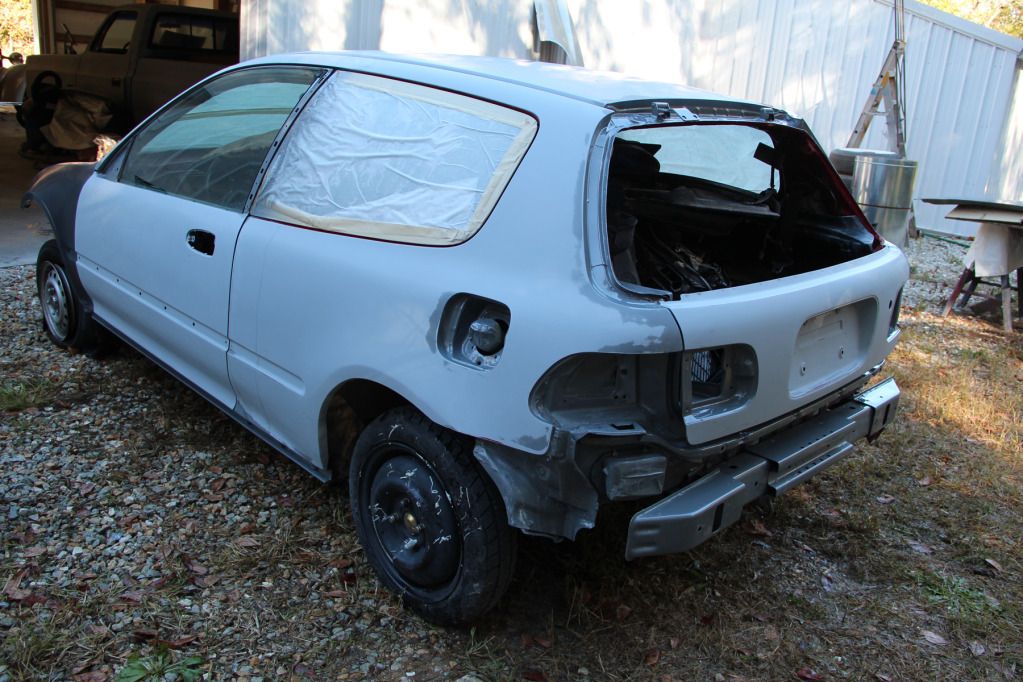
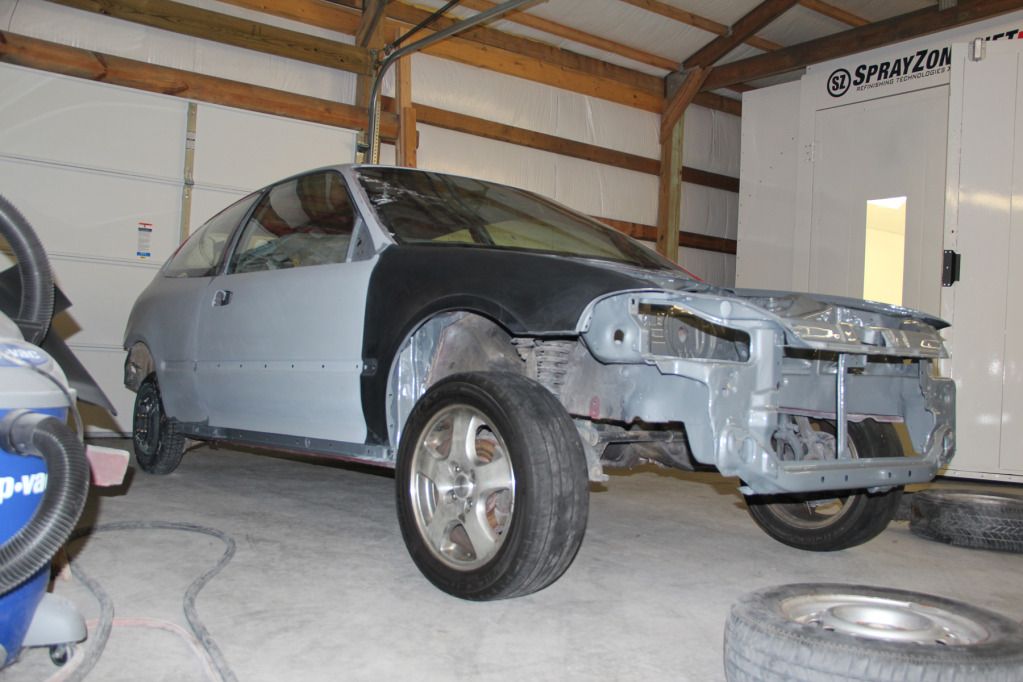
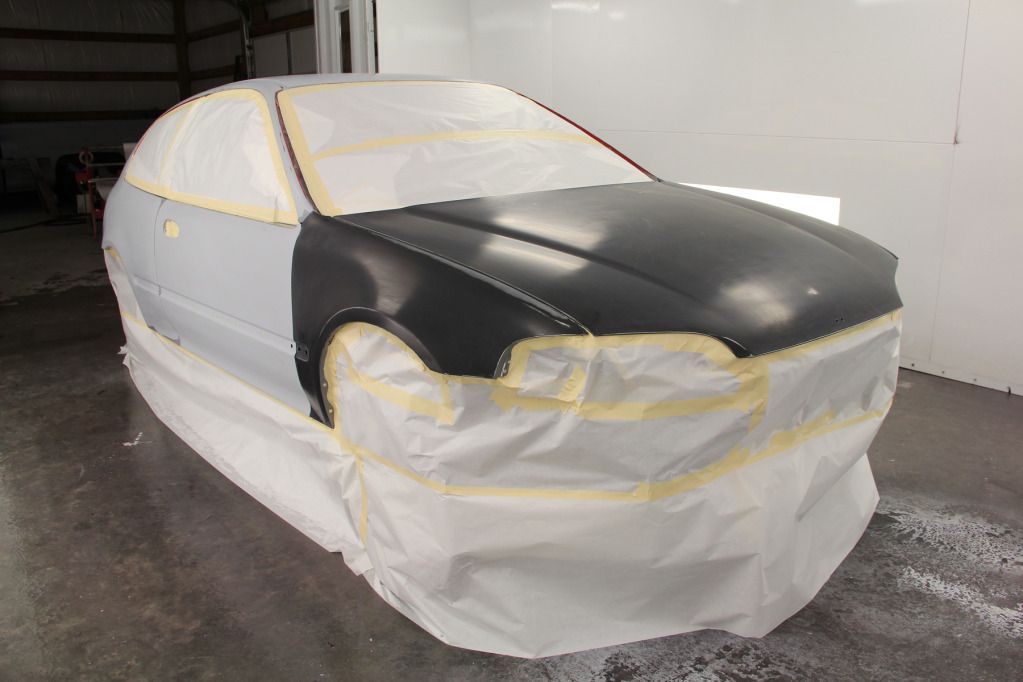
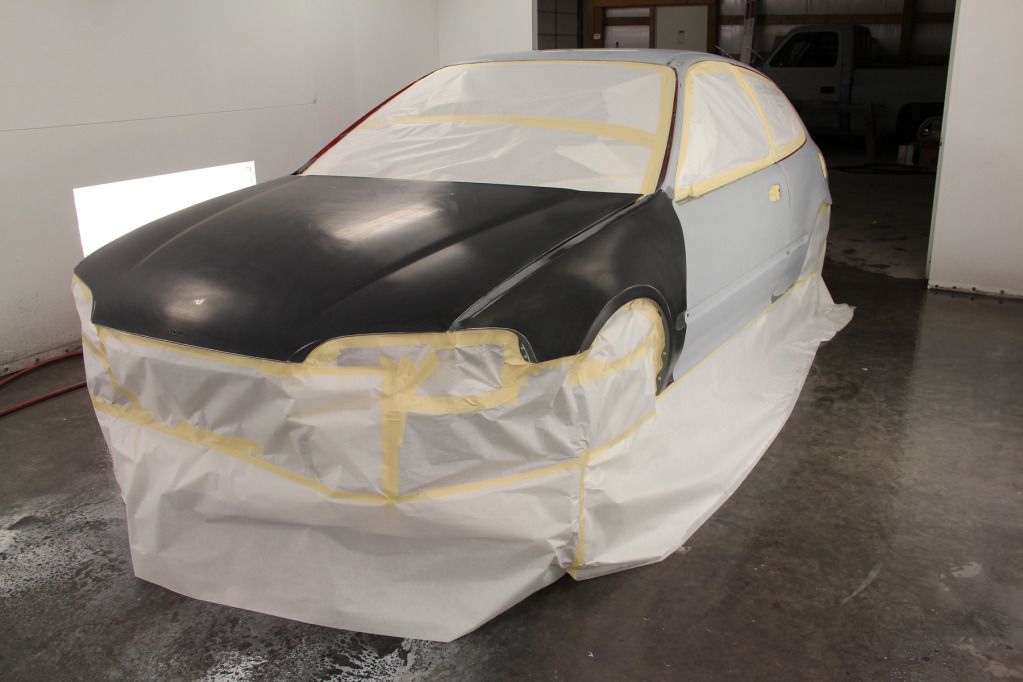
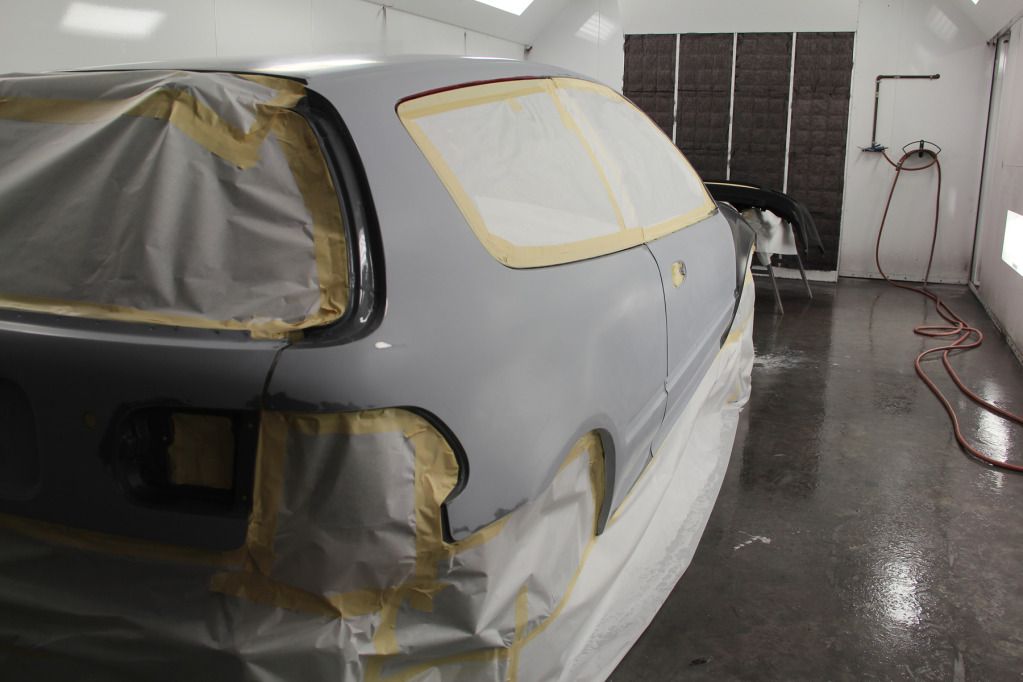
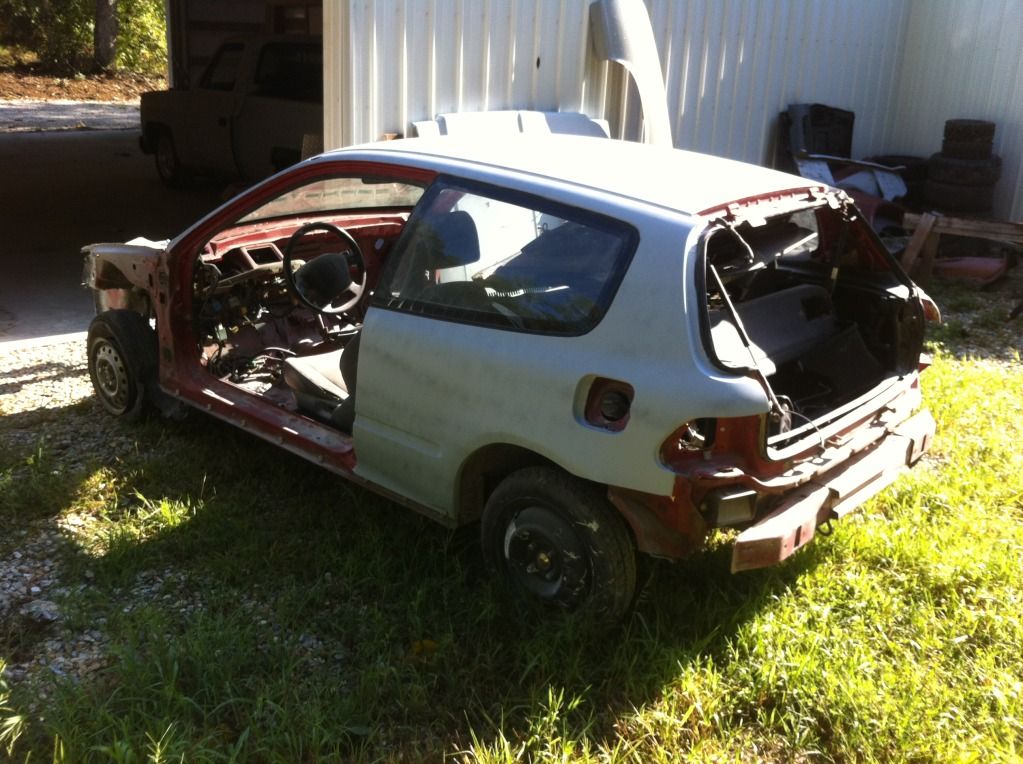
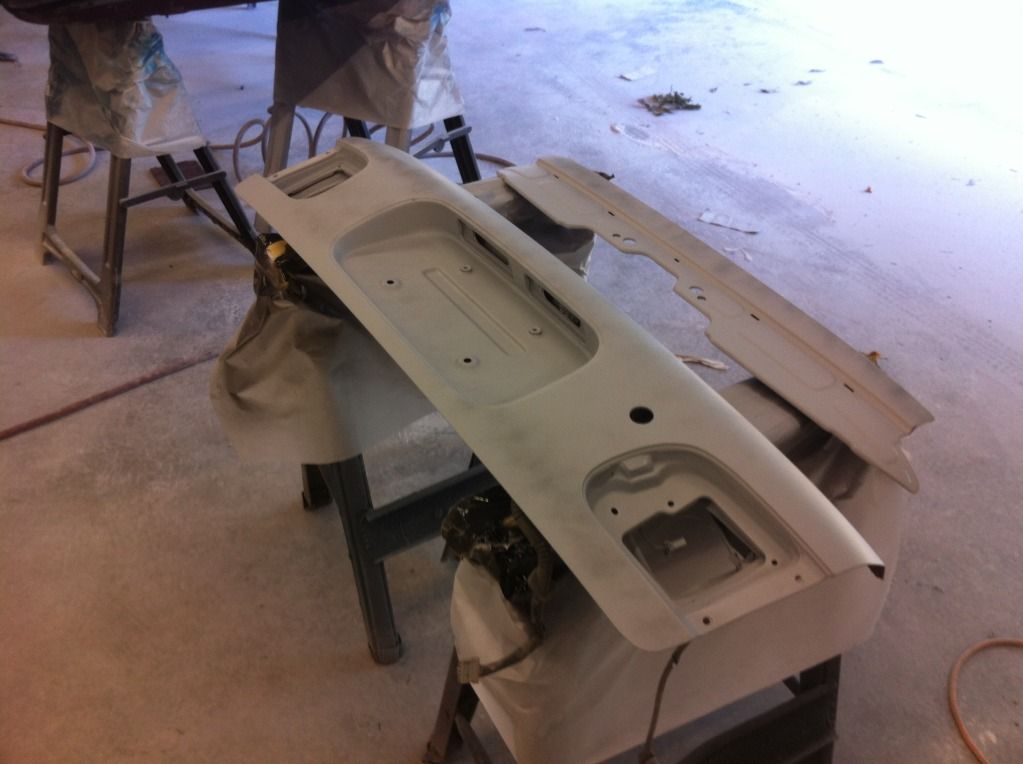
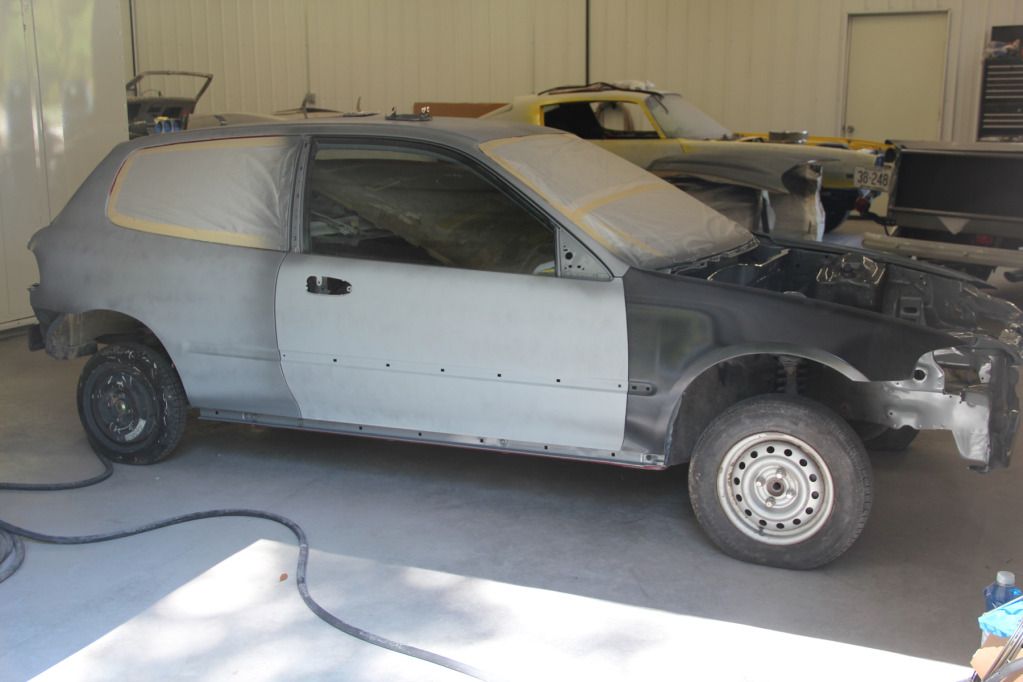
New pics of the car untaped after being primed.

Next step is jambing it and reassembling everything.
Worked on the engine some more tonight. Realized I need pretty much all of my motor mounts, since I don't have any of the lower/rears. The only two I have are the tranny mount and the driver's upper. Got quite a bit put back together on it though, and I'm down to just needing a few new sensors that have been broken off, and a few hoses to tie this mess together. Once I get those things, and source new motor mounts, this will be ready to drop in the car. Here's a few shots from this evening.
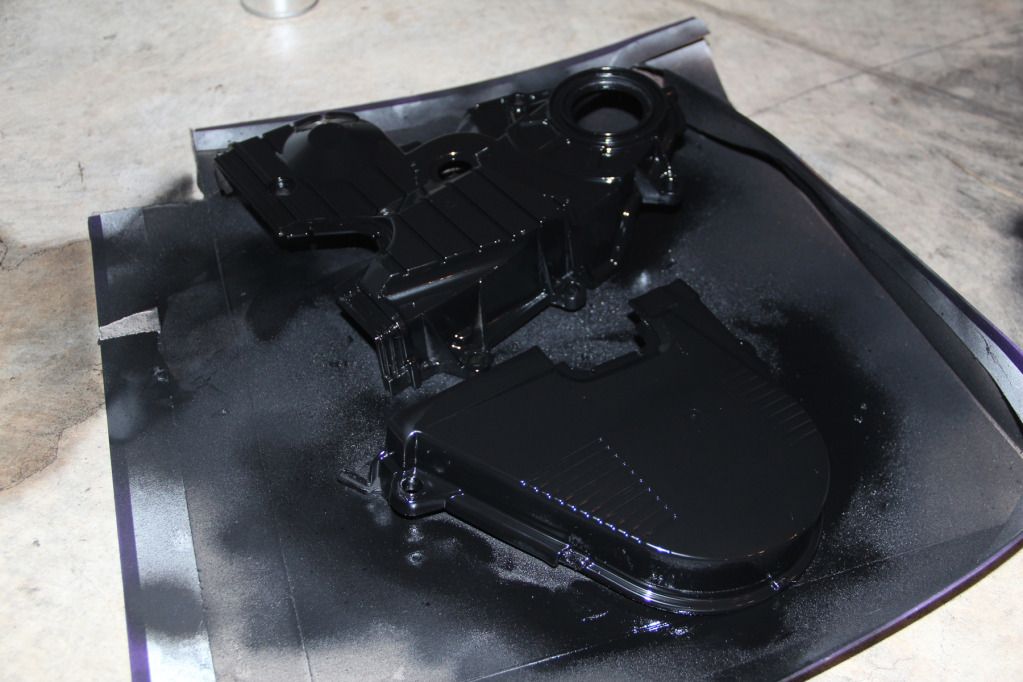
Painted my belt cover black. I used Rustoleum's plastic Fusion paint on it and it turned out really nice. Not sure how it'll hold up to the heat, but it was cheaper, and better looking, than a replacement. I removed the top sticker before painting it, and reglued it to the cover. Thought it looked nice there and gave the impression that the black cover was potentially stock.
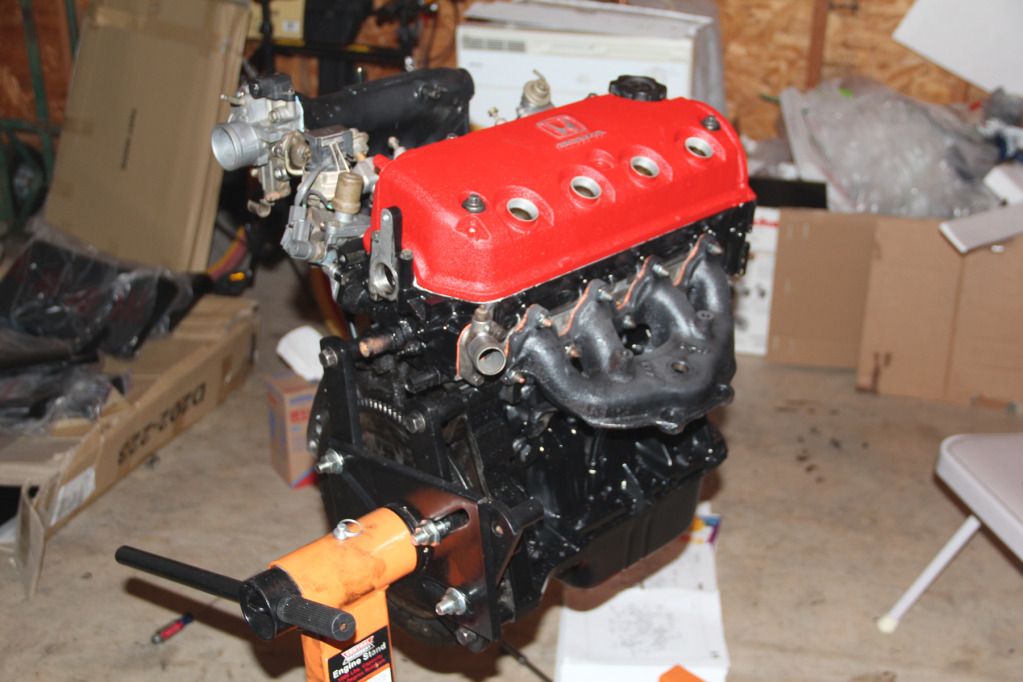
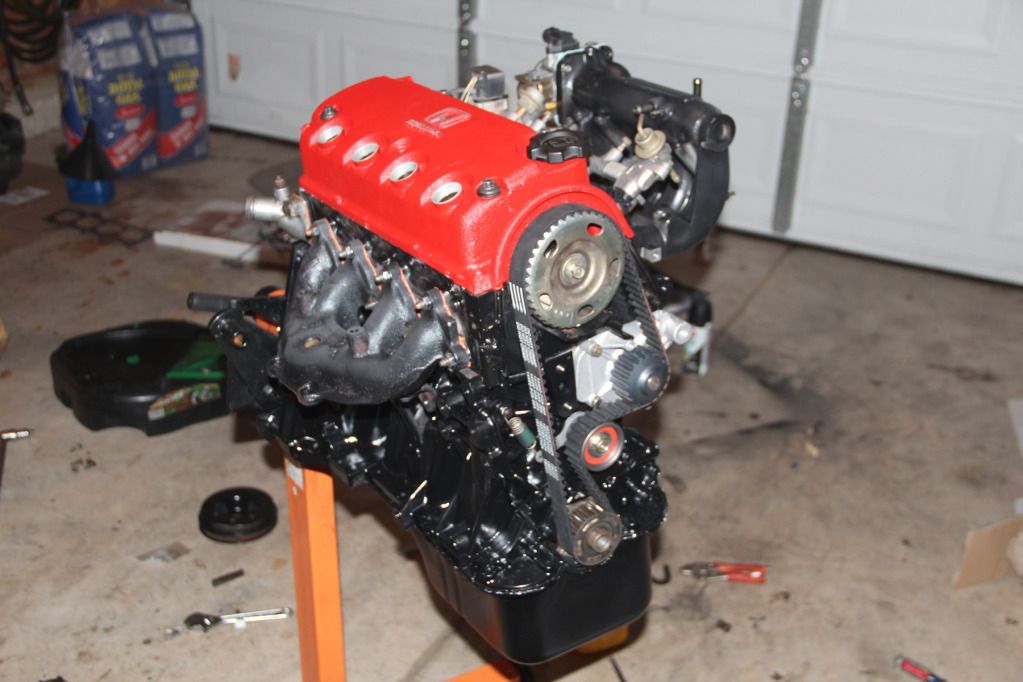
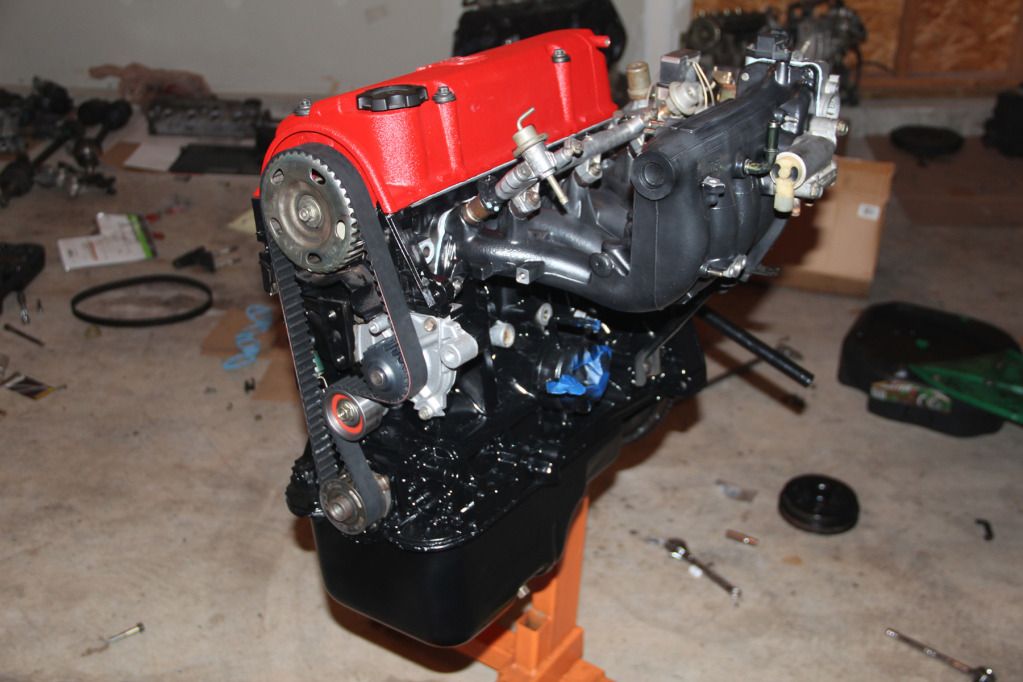

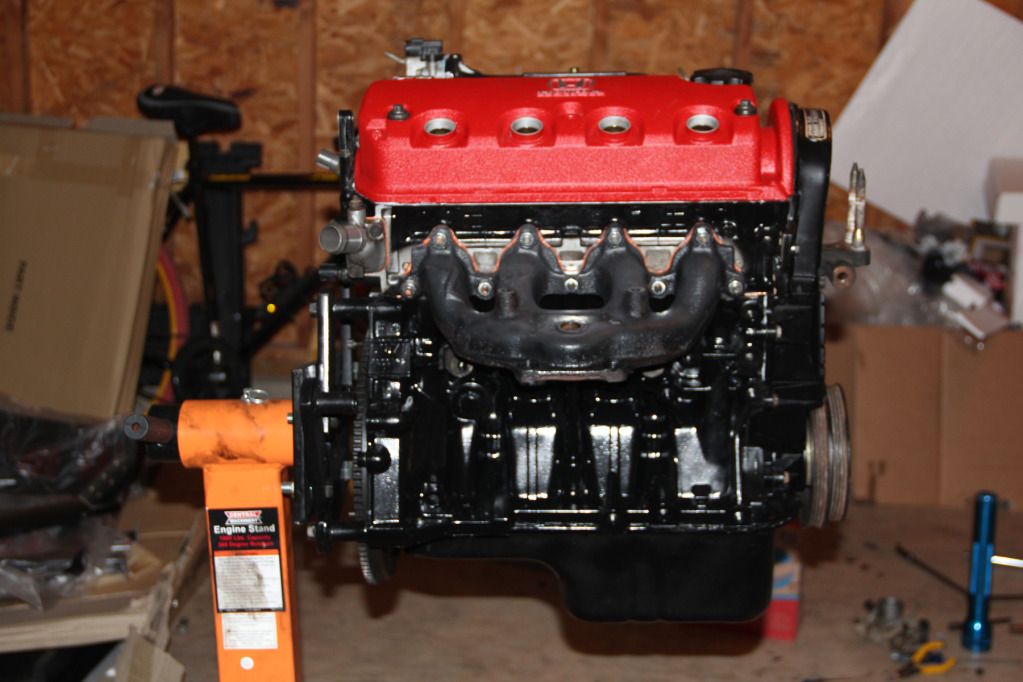
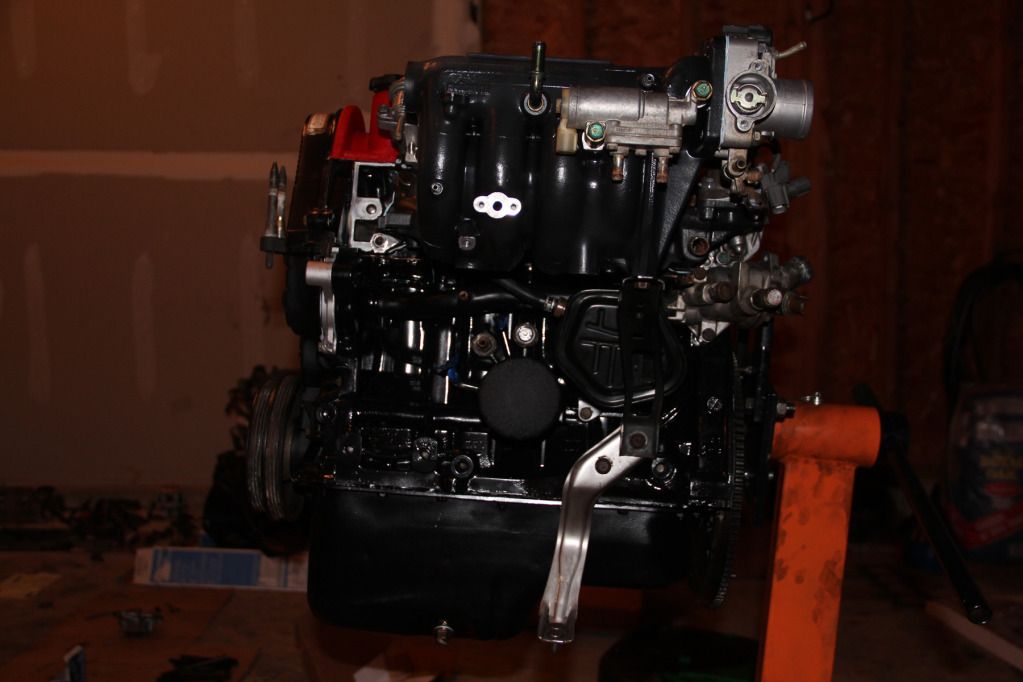
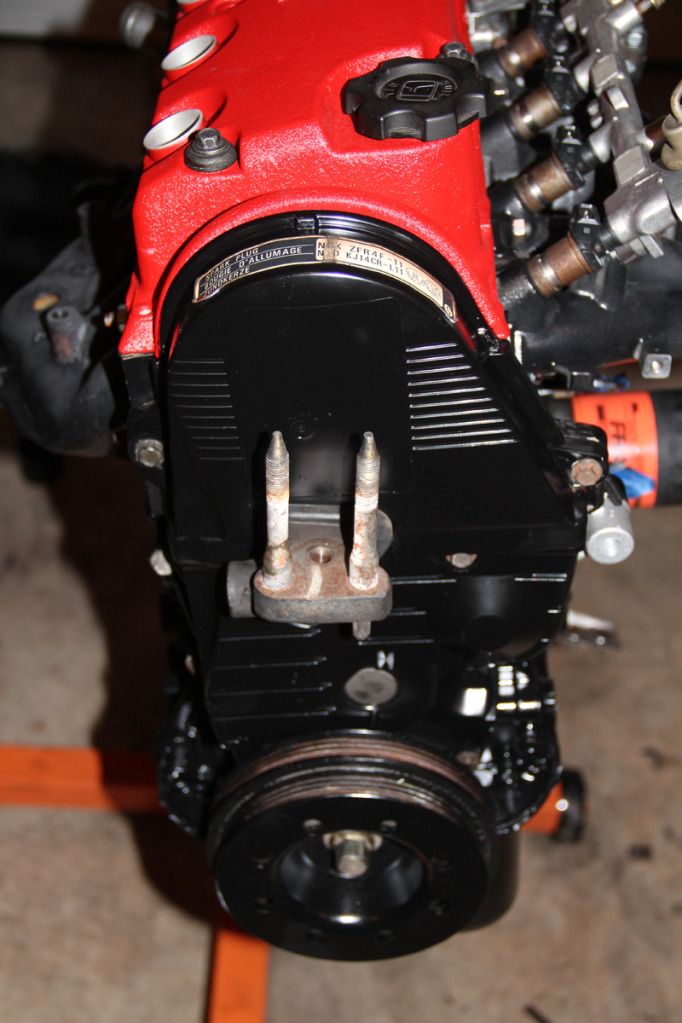
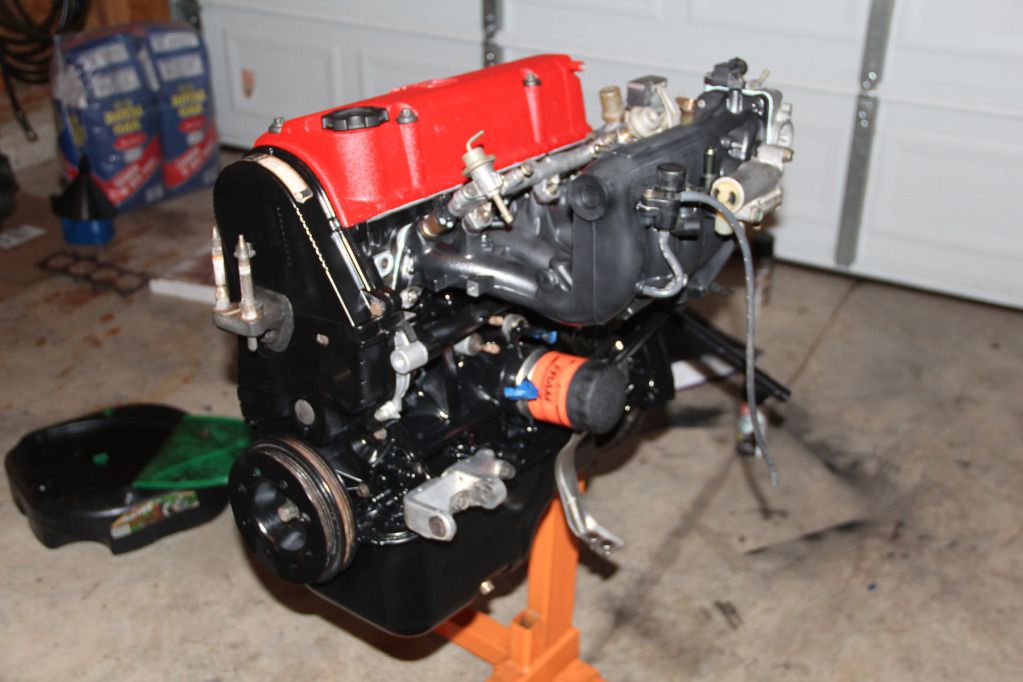
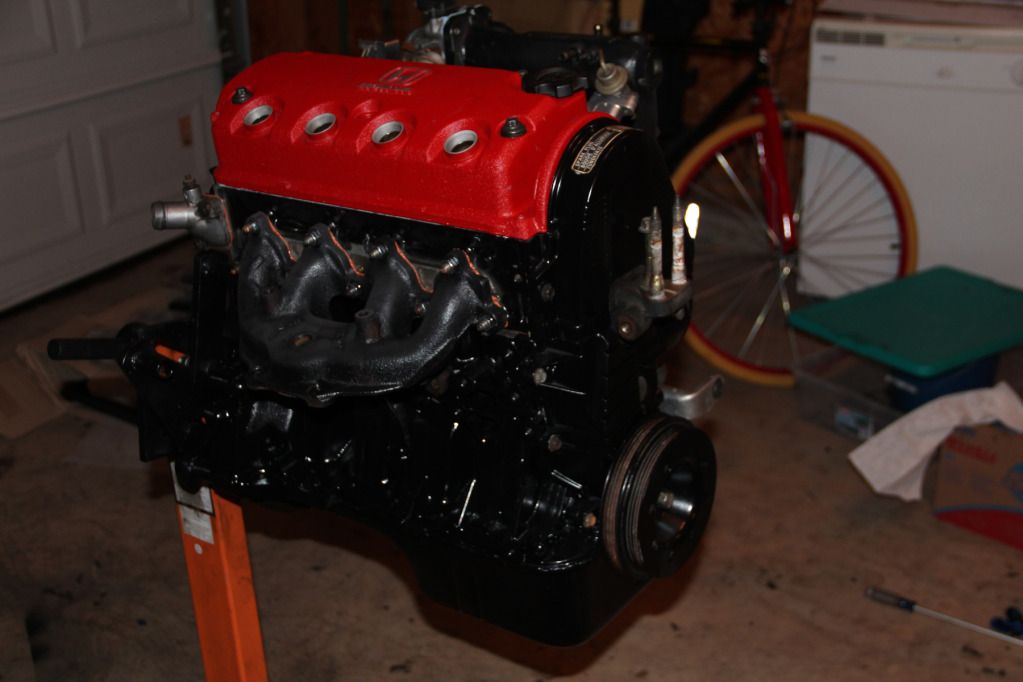
That's all for now. I have Monday through Wednesday off, so I'll be getting as much done as I can on the car.
September 11th, 2012
Did just a little bit on the car today since most of my time was spent running for parts. Thinking of going a different direction on the Civic with this front bumper...
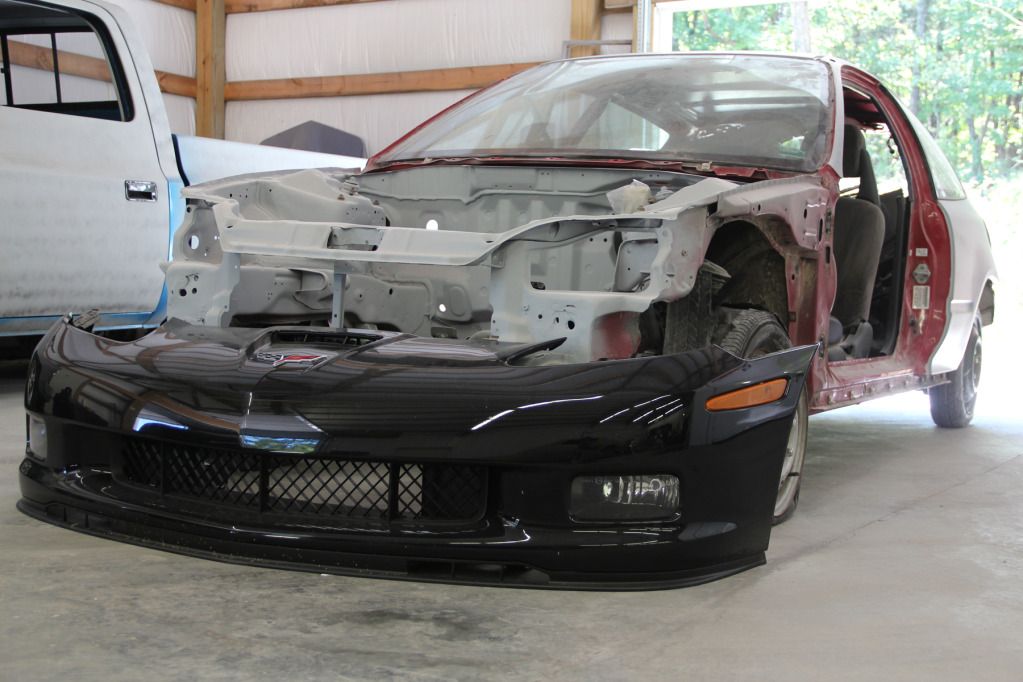
Lol. Just kidding. That Grand Sport front bumper is like a foot wider than the Civic... and belongs to Corvette.
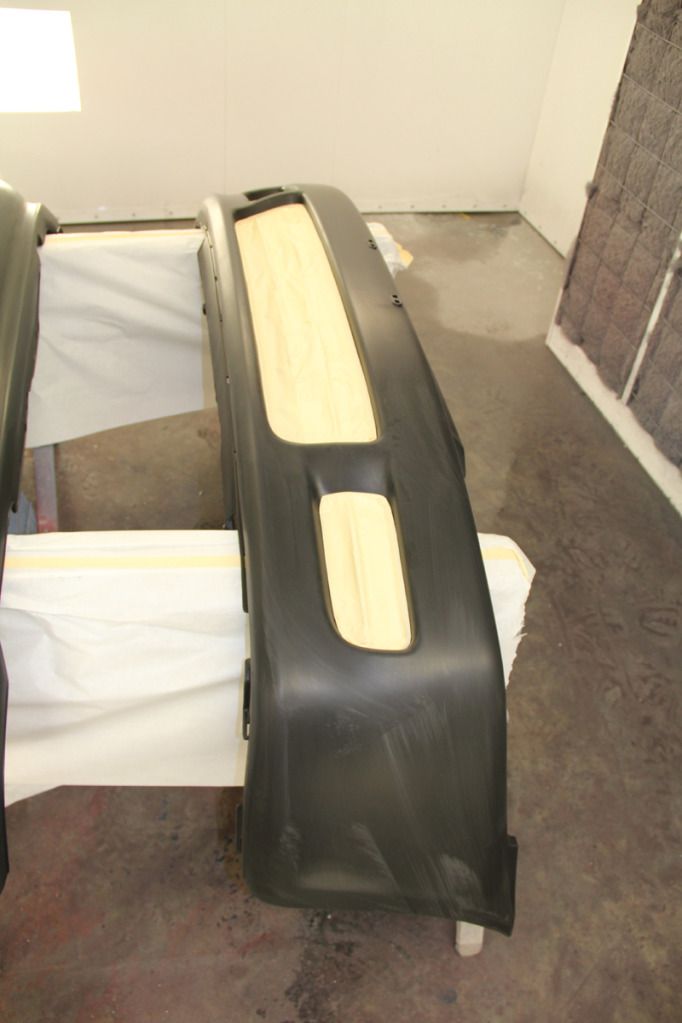
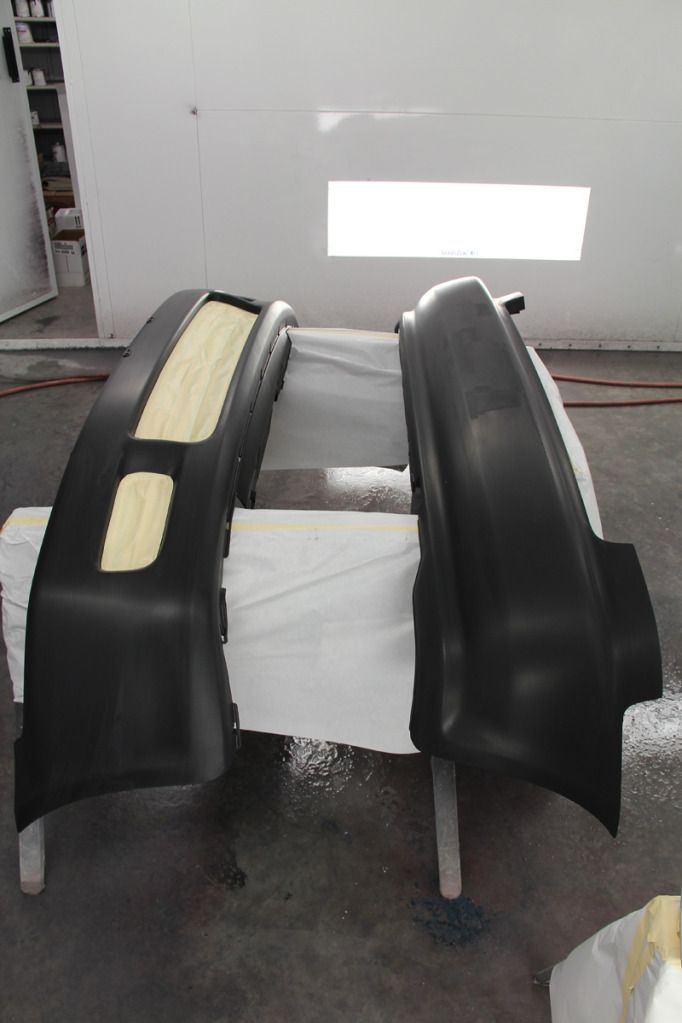
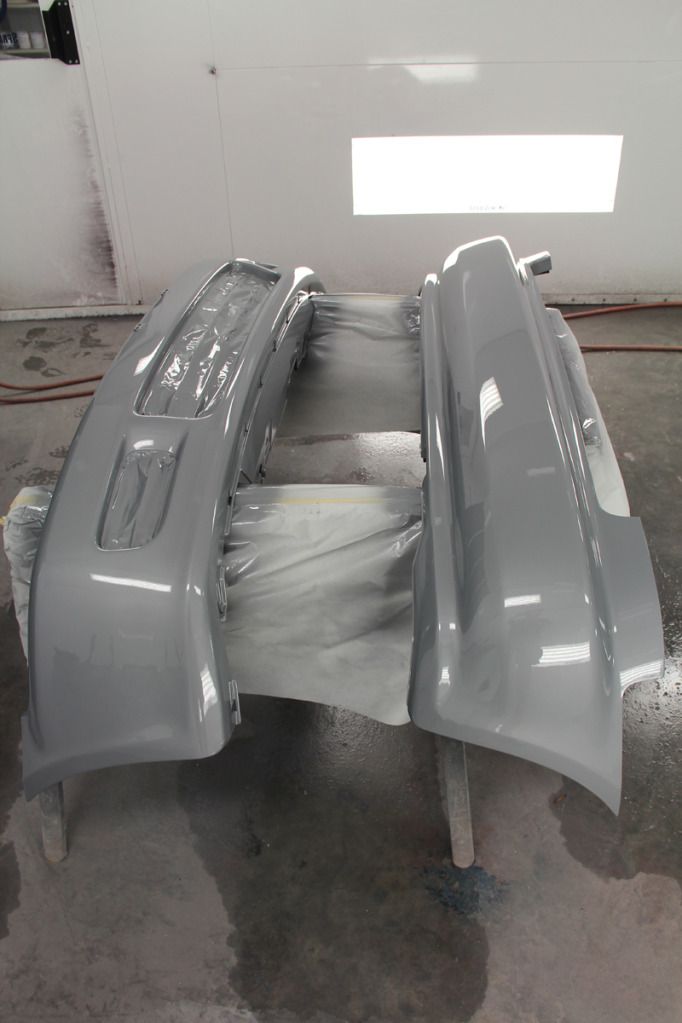
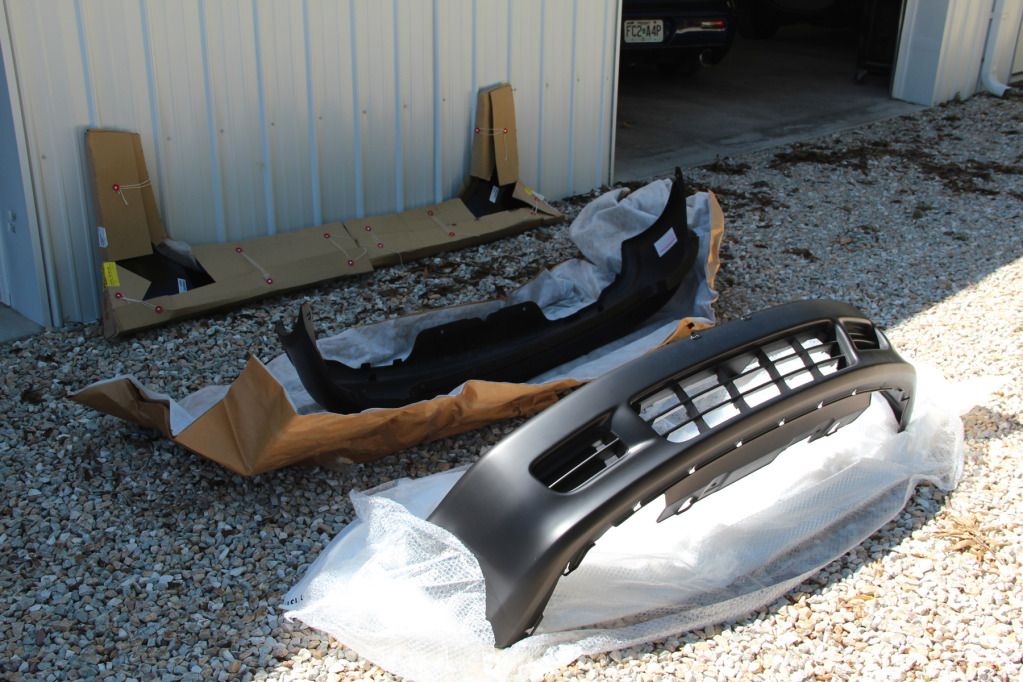
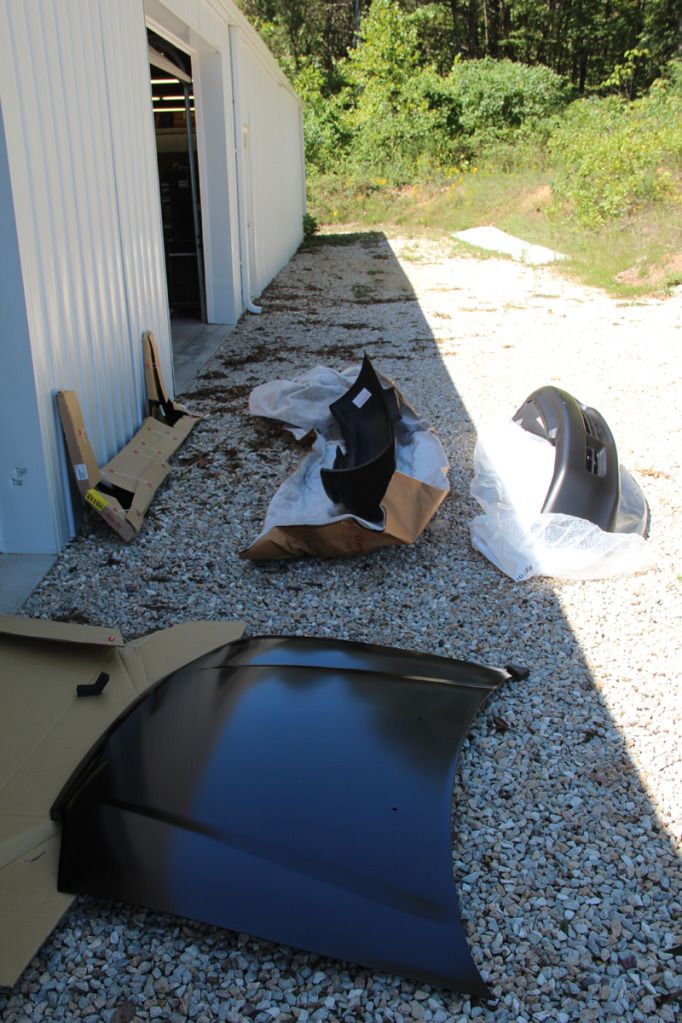
Here's my new pile of parts. They're scuffed now and ready to be edged in with color.
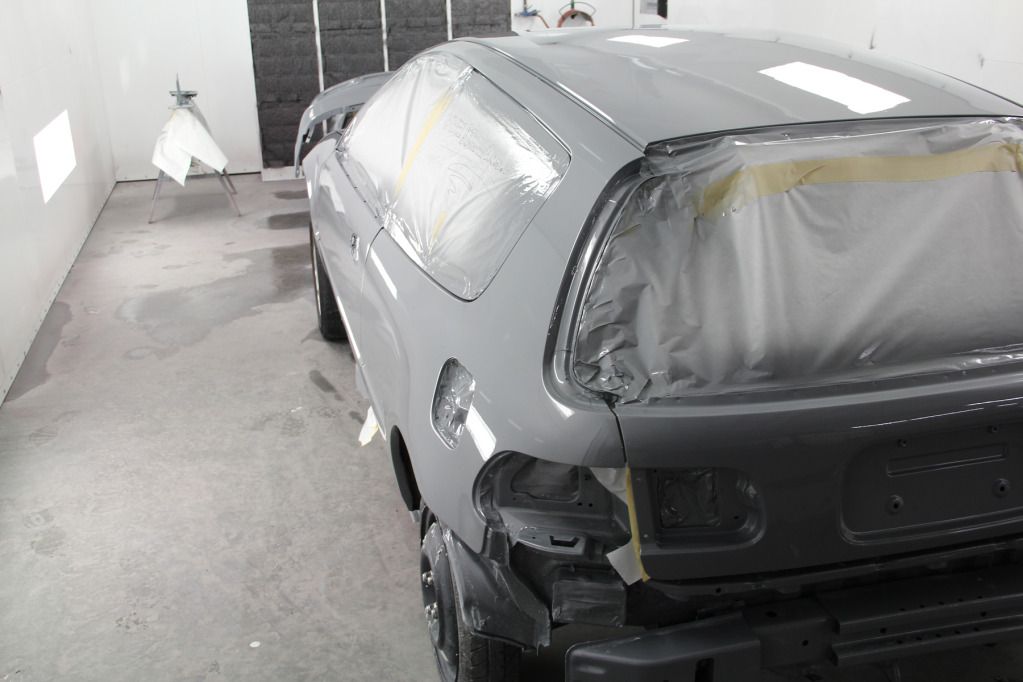
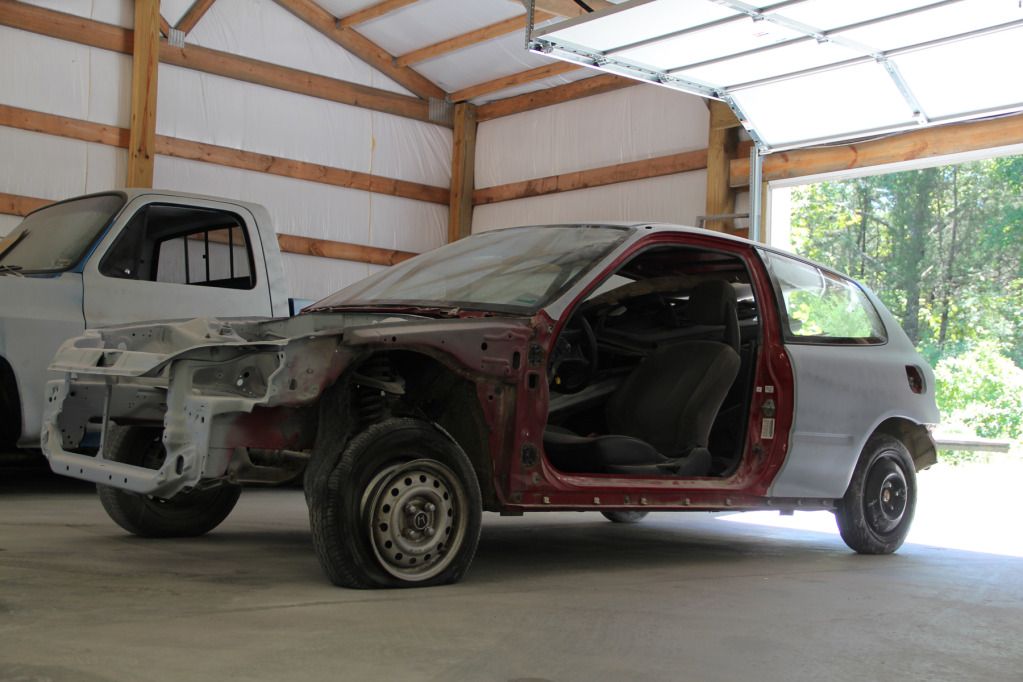
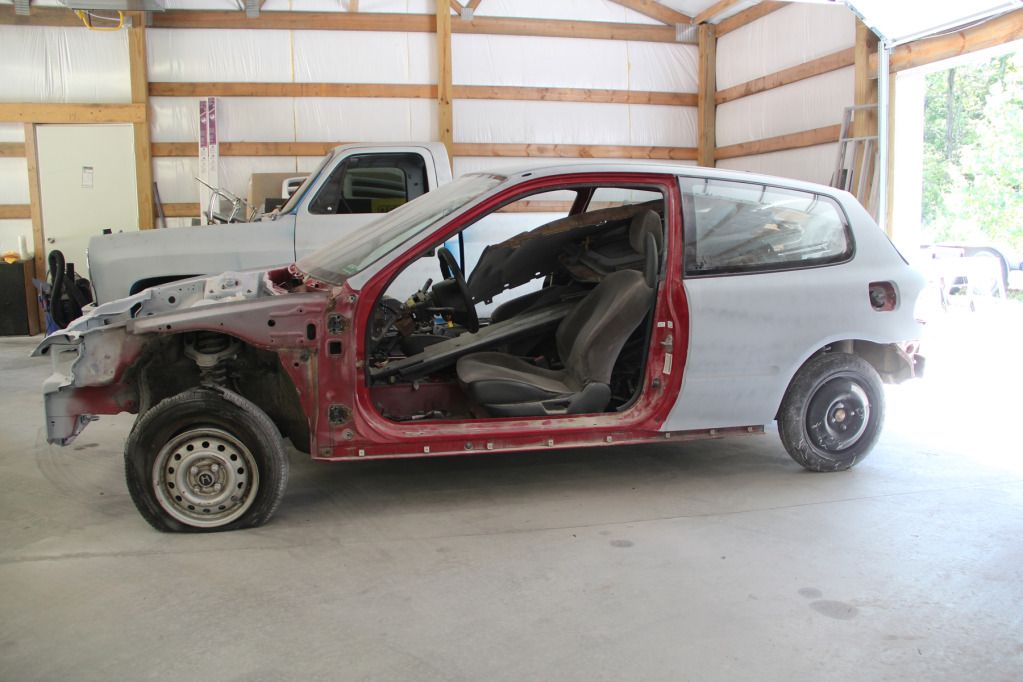
A few better pics of the primed shell:

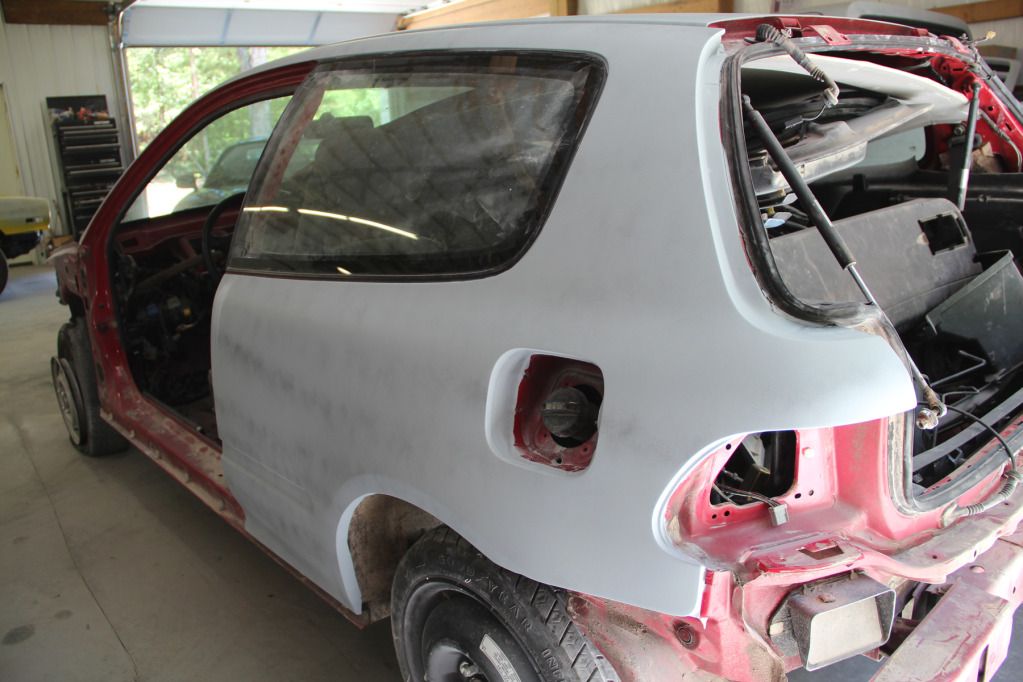
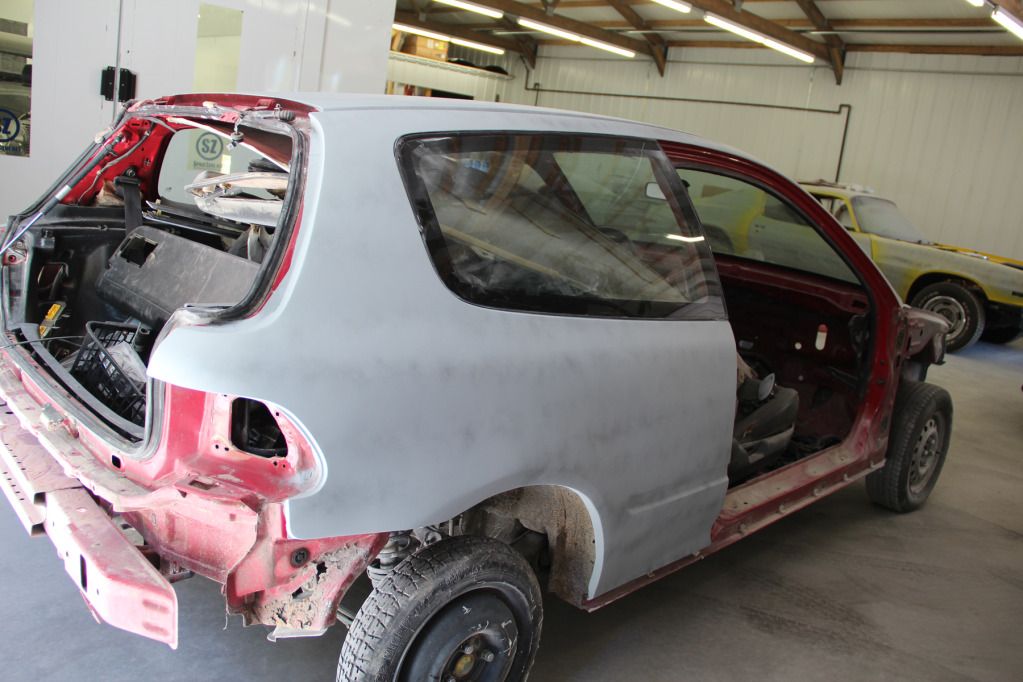
I also "shaved" my quarter window trim after finding out that the trim is part of the window and does nothing to seal the window. They're glued in from behind that the trim just sits on the edges (snugly...). My passenger side was halfway gone already, I didn't want to spend $150 for those windows to be removed and reinstalled, and I'm not interested in bucking up for new windows, so I just ditched the trim after confirming that it was ok with Presley Auto Glass. On the driver's side, I was able to press forward on the forward-most edge and the trim came loose. I then worked my way around the window SLOWLY, pulling straight away from the glass like this:
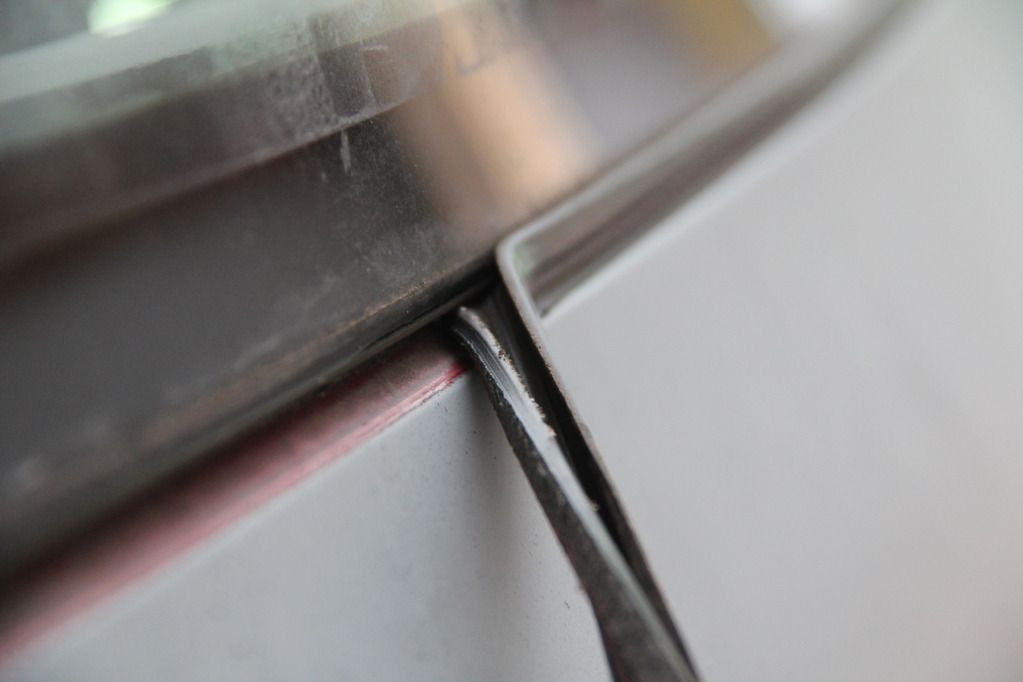
Even though the trim is just rubber, you can still break those rear windows by pulling on the edges wrong. The driver's side came off nice and clean and left a really nice edge around the window.
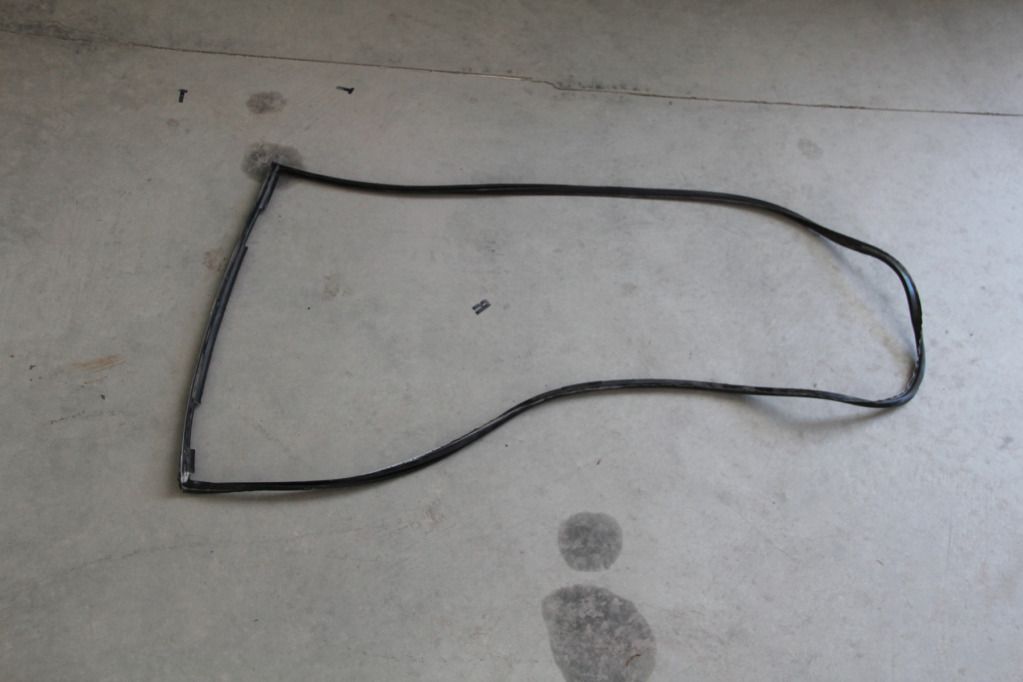
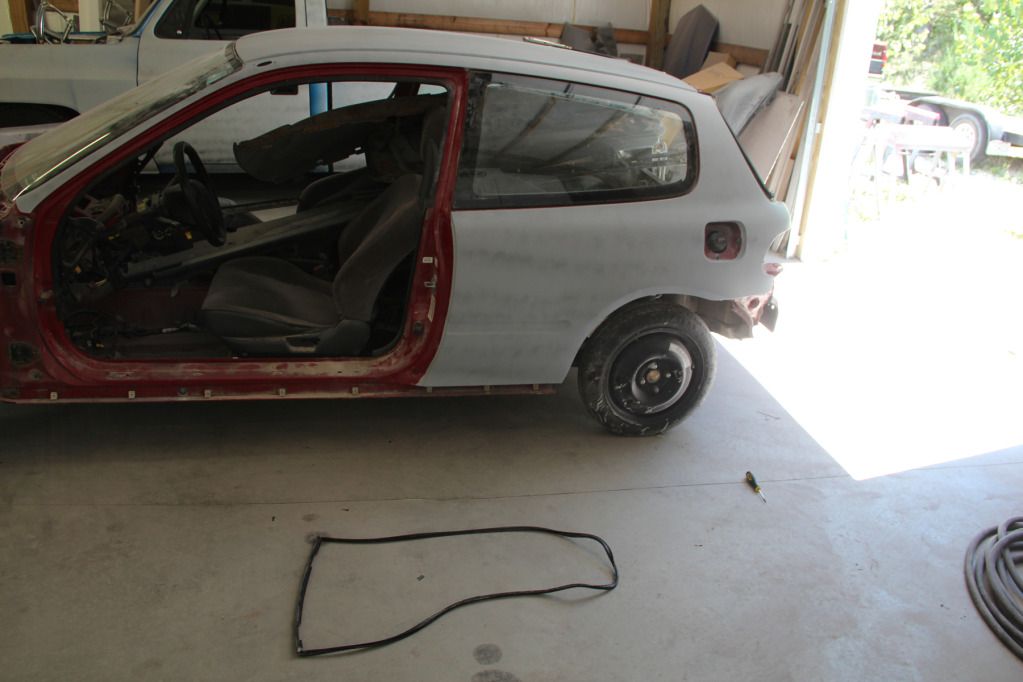
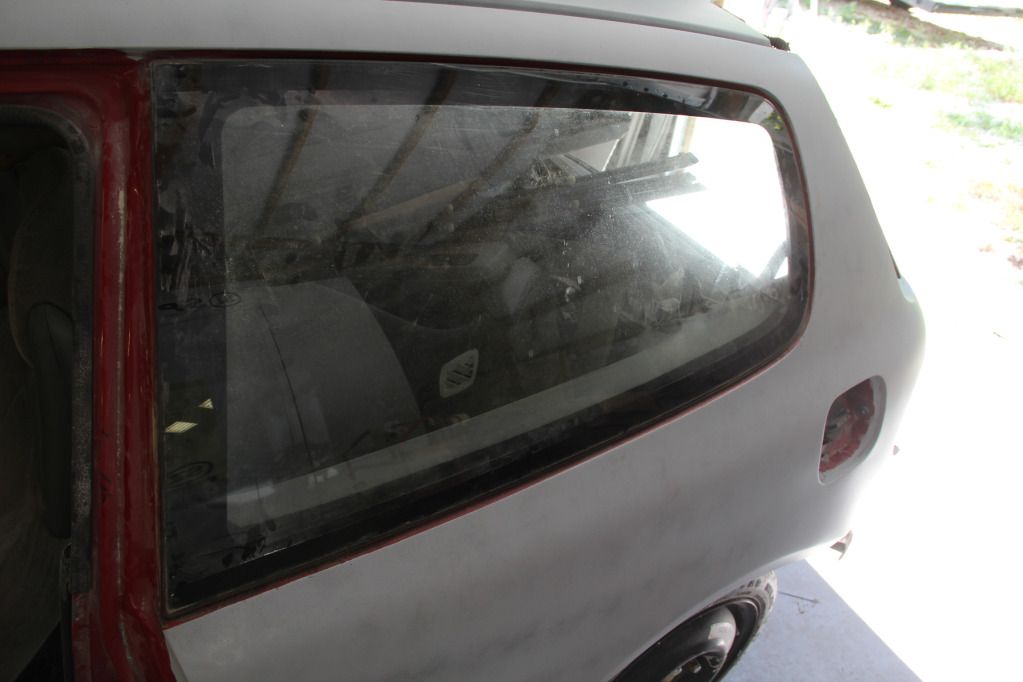
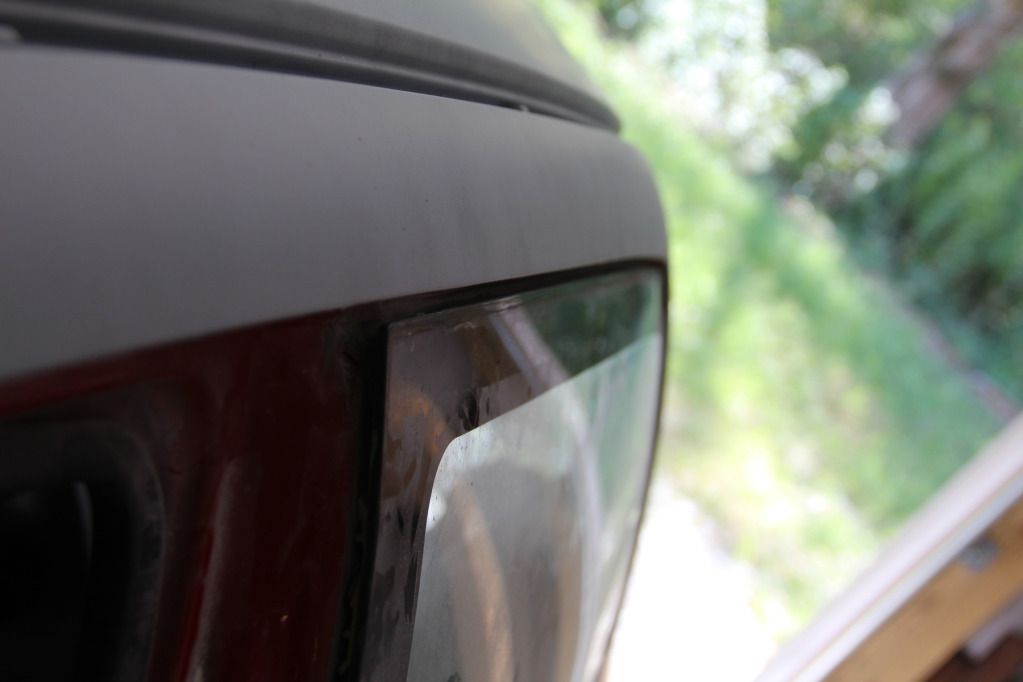
I had to use a tiny flat head screwdriver and a razor blade to CAREFULLY pry and remove the passenger side window since it was pretty rotted and had nothing to grab on to since it was already coming apart. I'll be sure to take pictures specifically of that gap after I paint the car so everyone can see it. Here's the only pic I have of the old trim on the passenger side and it's not very good. But, you can see the broken trim about halfway down the rear edge of the quarter window here.

Thought about doing a DIY thread if anyone might find it convenient, but ^^ That's all I'd write there as well. Figured other people must have this issue too, and since the glass is glued in anyways, that trim can come out without issue according to a reputable glass shop. Hope it helps.
More updates to come. Planning on a lot of prep work for jambing and paint. It won't see color this week since the paint booth is booked all week, but it's getting close.
September 13th, 2012
So, I got a lot more done this week than I expected. I also received a TON of parts. I'll start off with a list of parts I got in. Sorry if any of these have been mentioned in earlier posts:
OEM Door Moldings
Black Civic Emblem (for rear hatch, but it's the new style emblem as opposed to the vinyl that would have been stock)
Red Honda Emblems for hatch and hood
"High Flow" (empty) Catalytic Converter
Raceland Shirt
Raceland Coilover Tracking number (C/Os are on their way!)
Intake Temp. Sensor
Throttle Position Sensor
Carbon Fiber Antenna Delete Plate
New Antenna Delete Gasket and Plastic Delete Plate
Carbon Fiber Spoiler (Spoon Style?)
I think that's it. As far as the work on the car goes, I scuffed and wetsanded the jambs, wetsanded the bay, and taped it off on Tuesday/Wednesday. Here's a few pics:
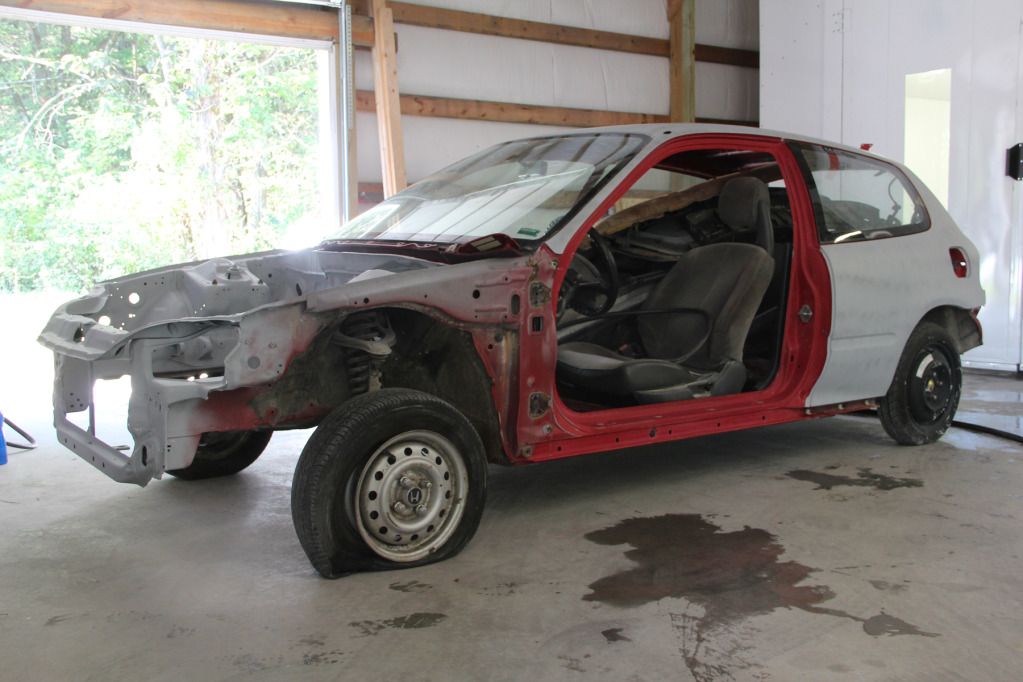
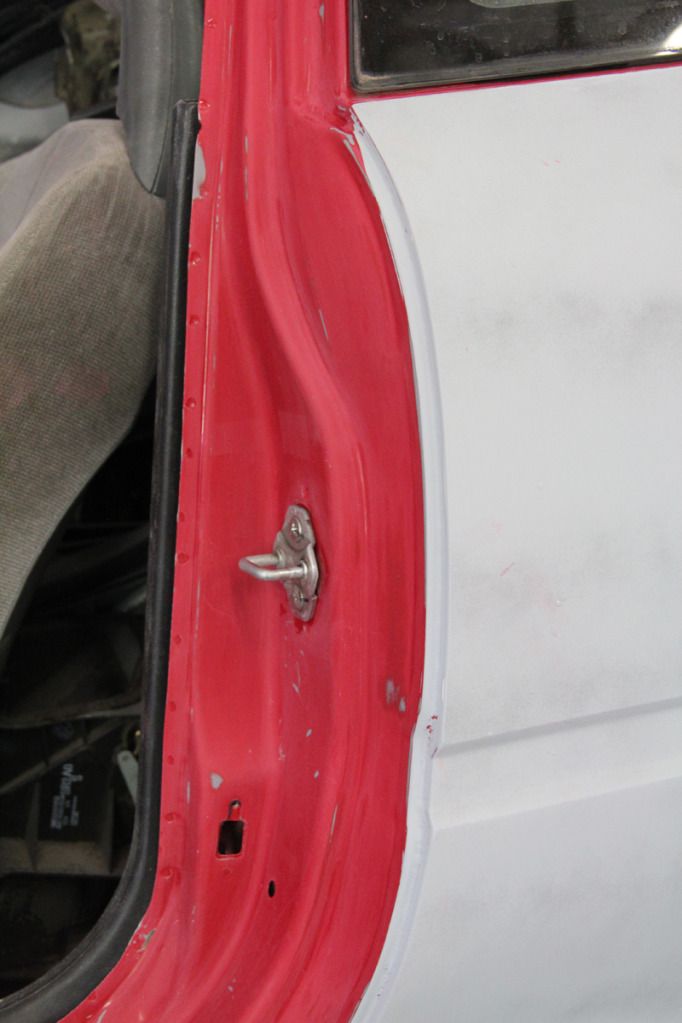
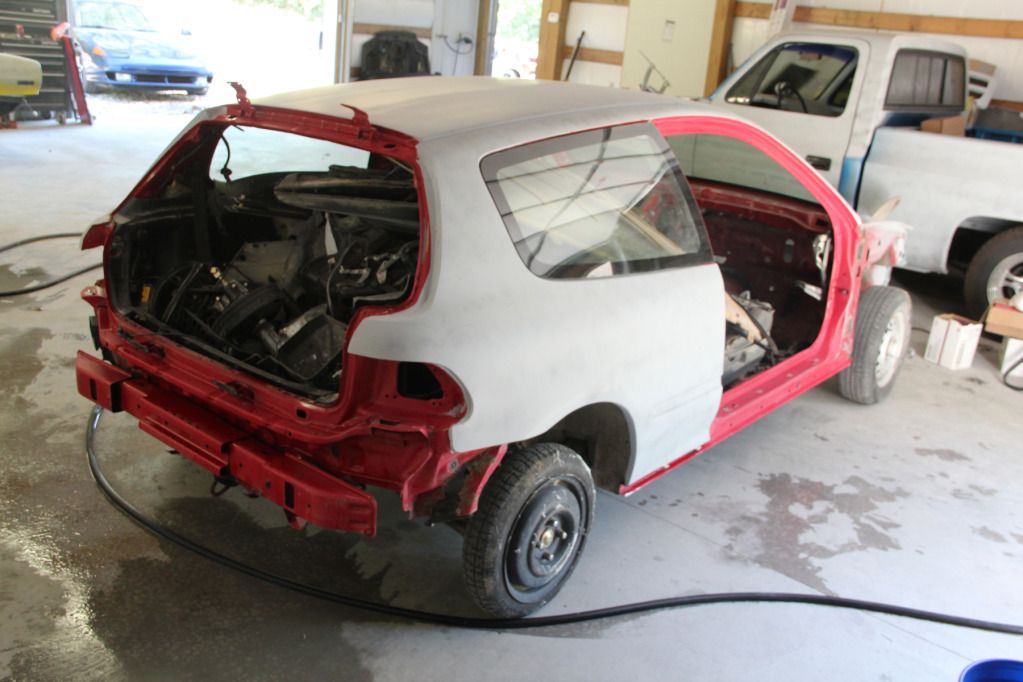
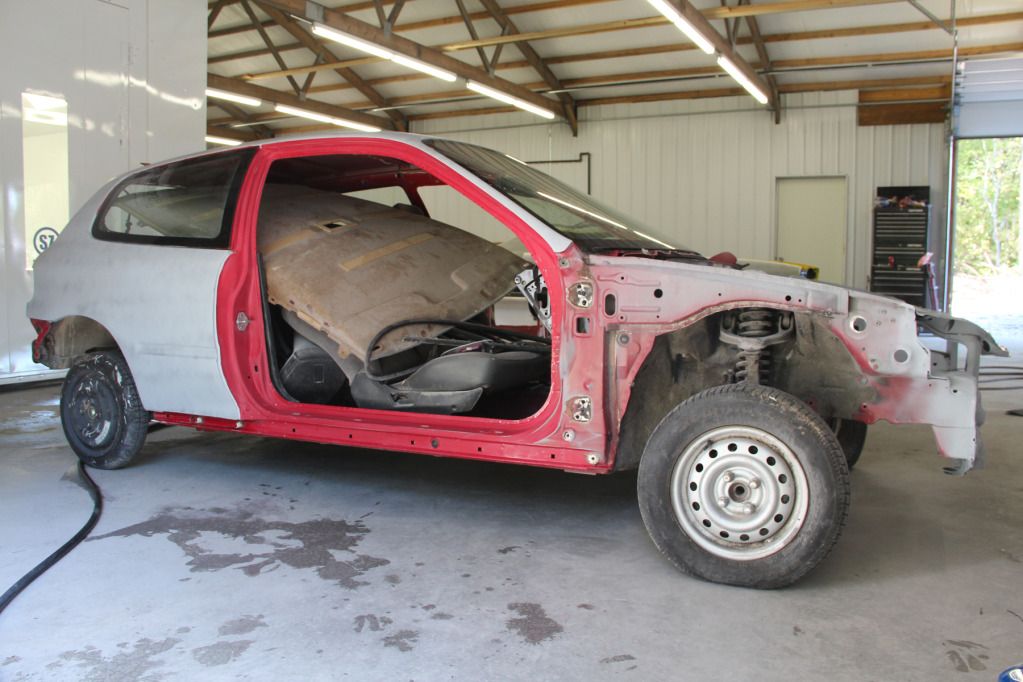
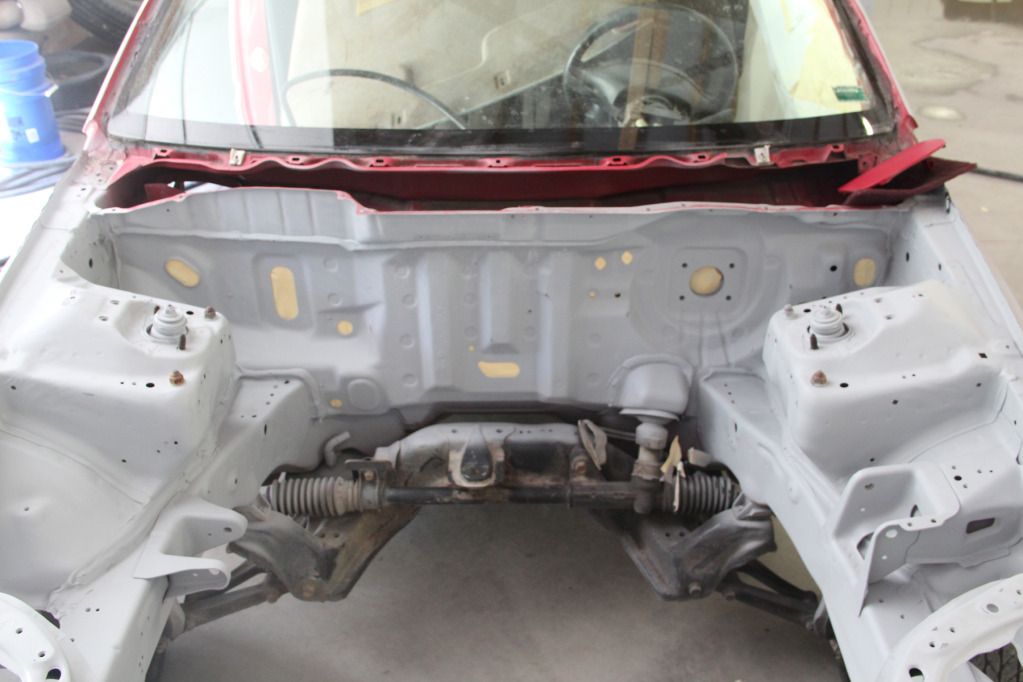

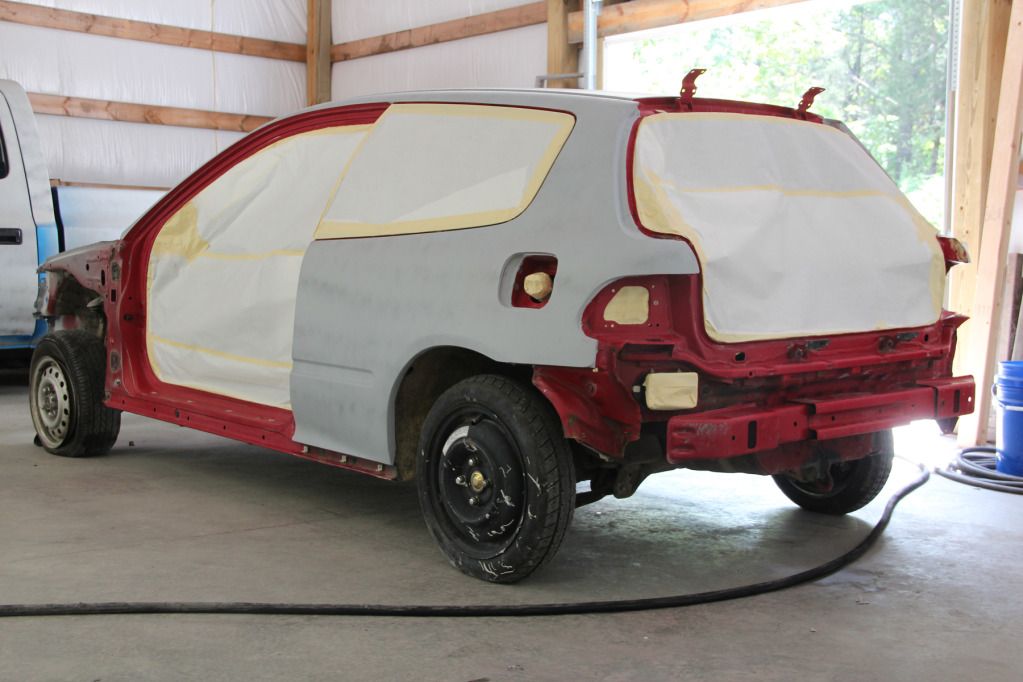
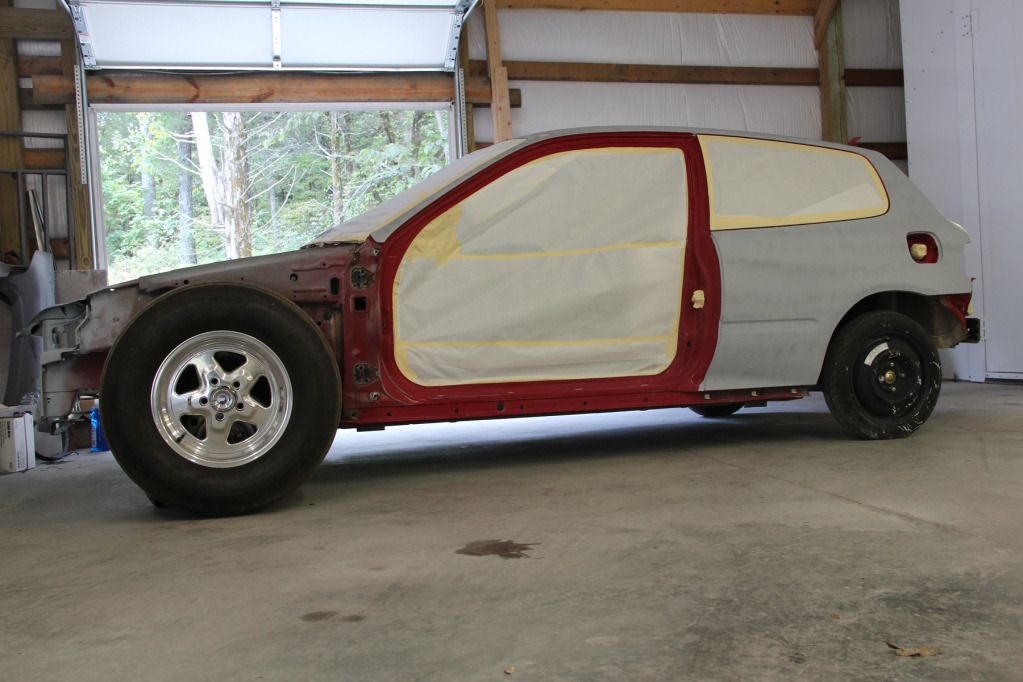
Then just for fun, I put one of the wheels/tires up to the car. New set up?... Lol. Kidding.
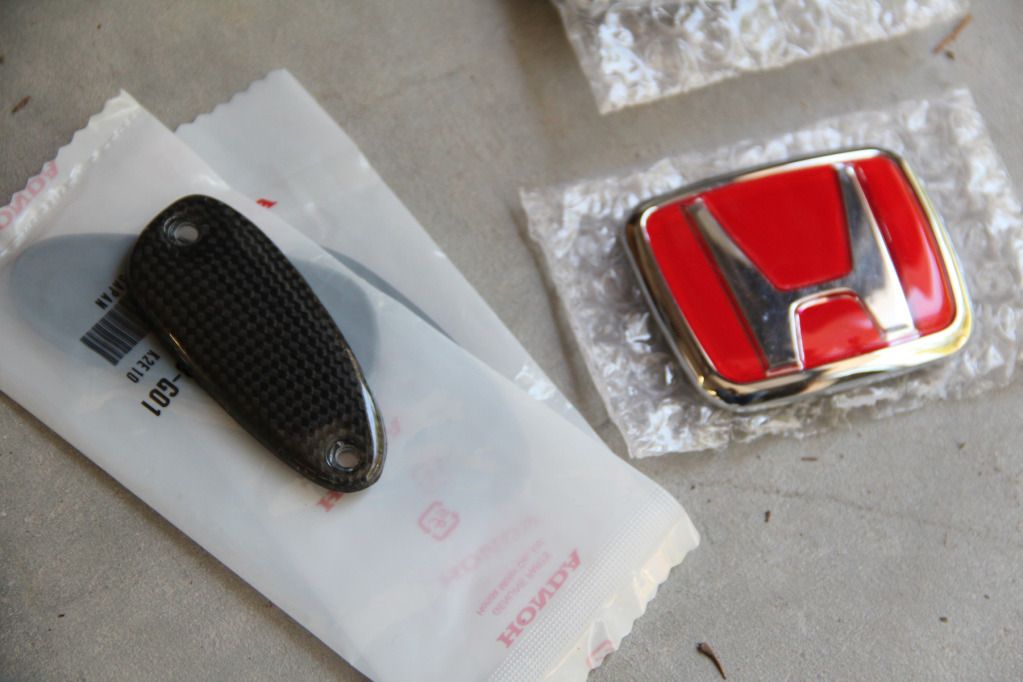
Then today (Thursday), I started off by taking a picture of a couple of my new parts:
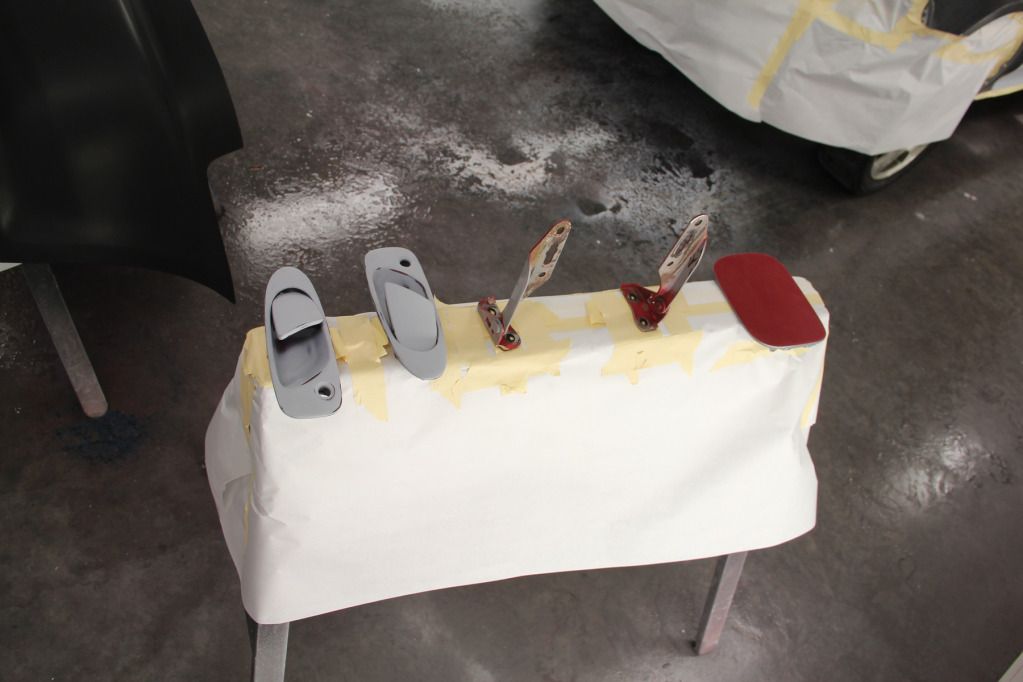
And got the car jambed, along with a few parts!
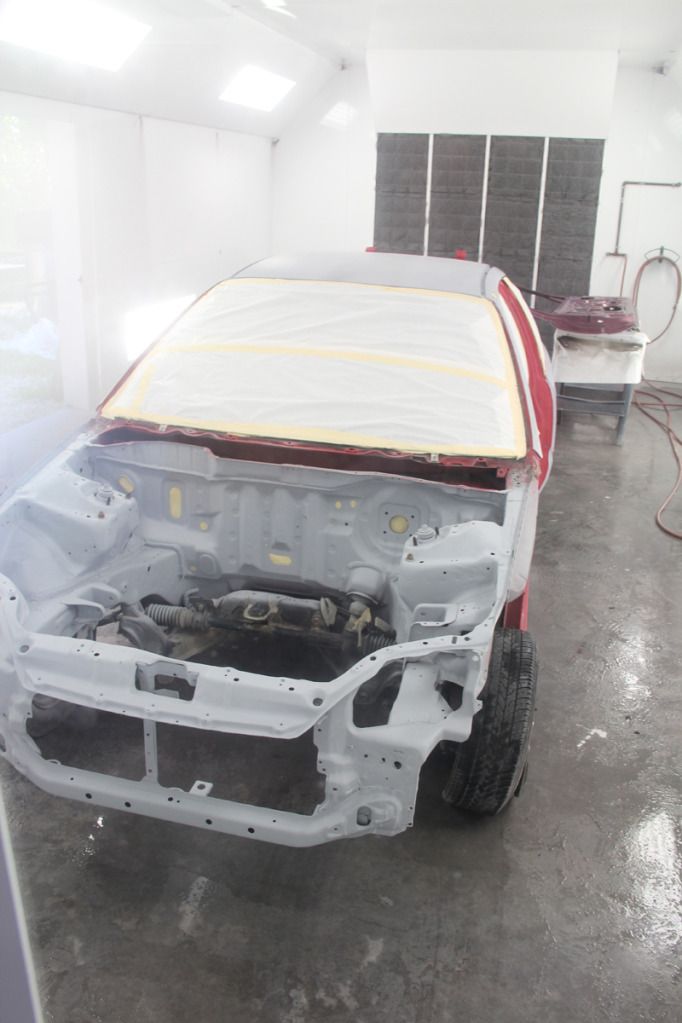

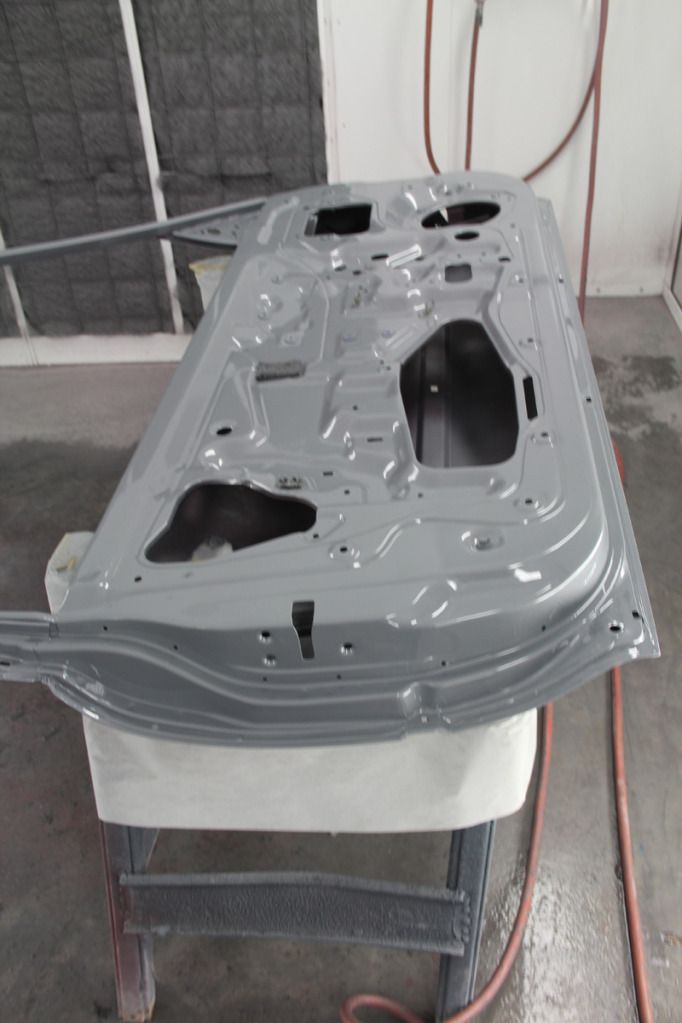
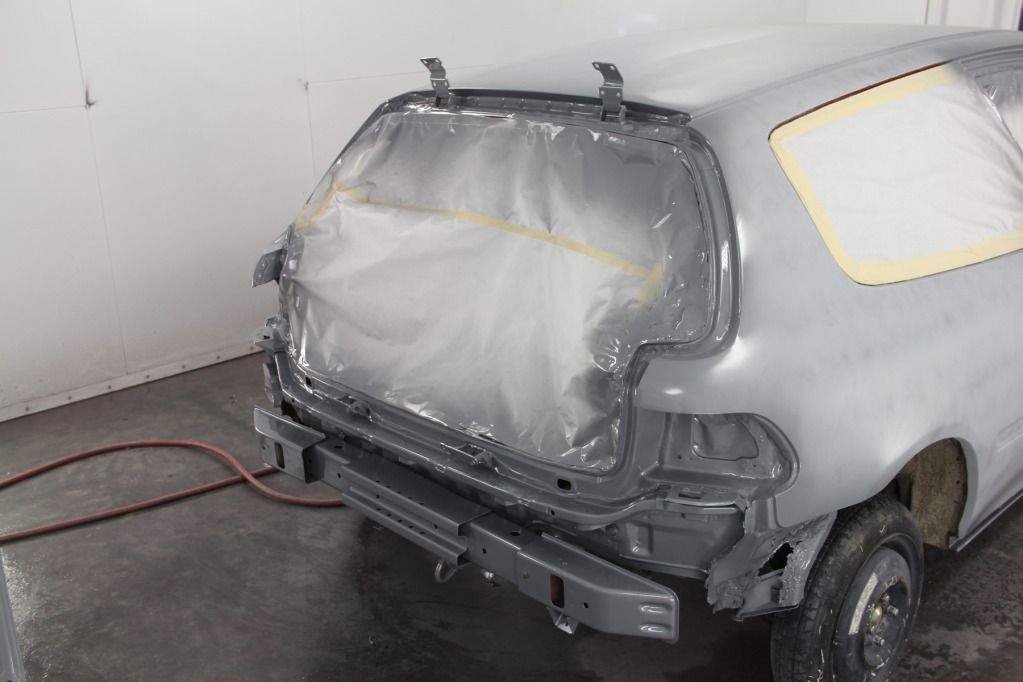
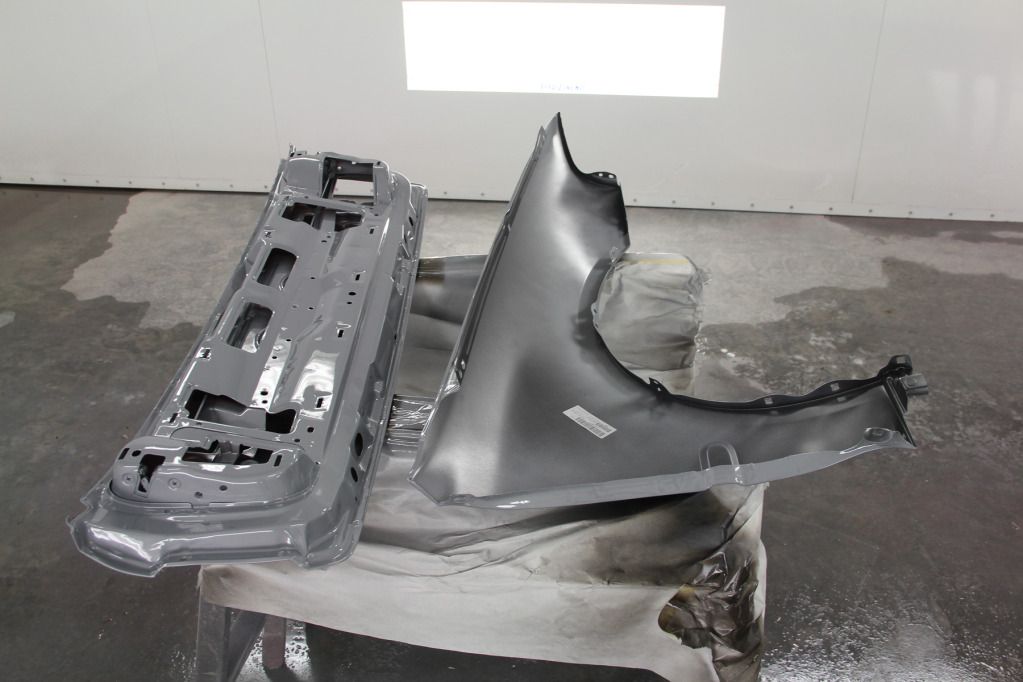


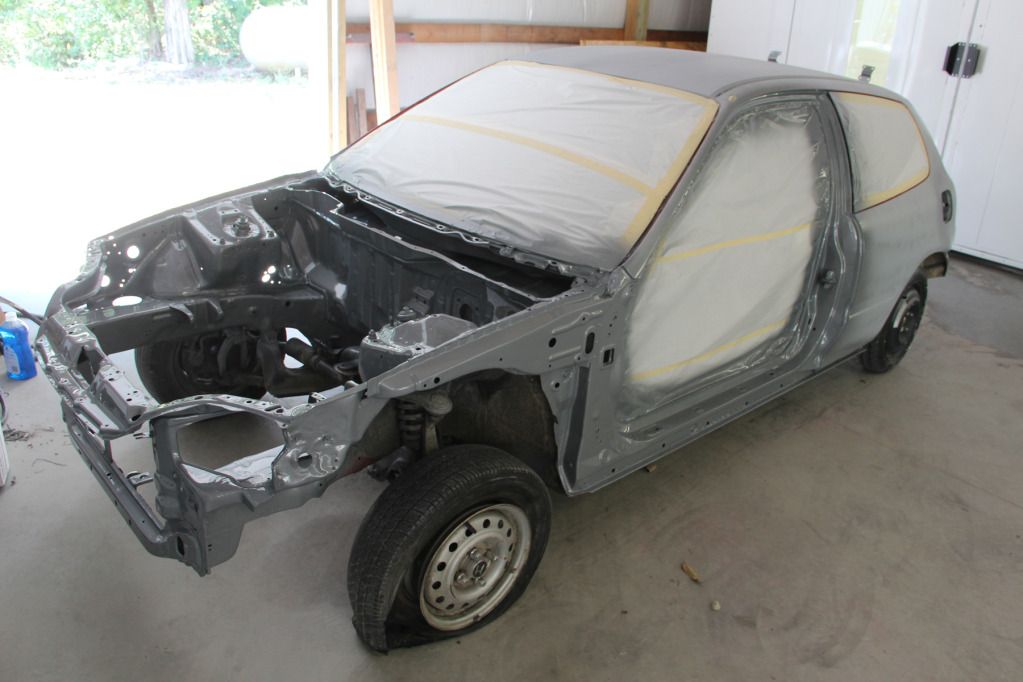


Last picture was just to see how the red and grey would look together. And I absolutely love it. Hopefully you all like the color too. And if not... Good thing it's not your car. Lol. As always, would love to hear opinions from everyone.
September 19th, 2012
Doors On:
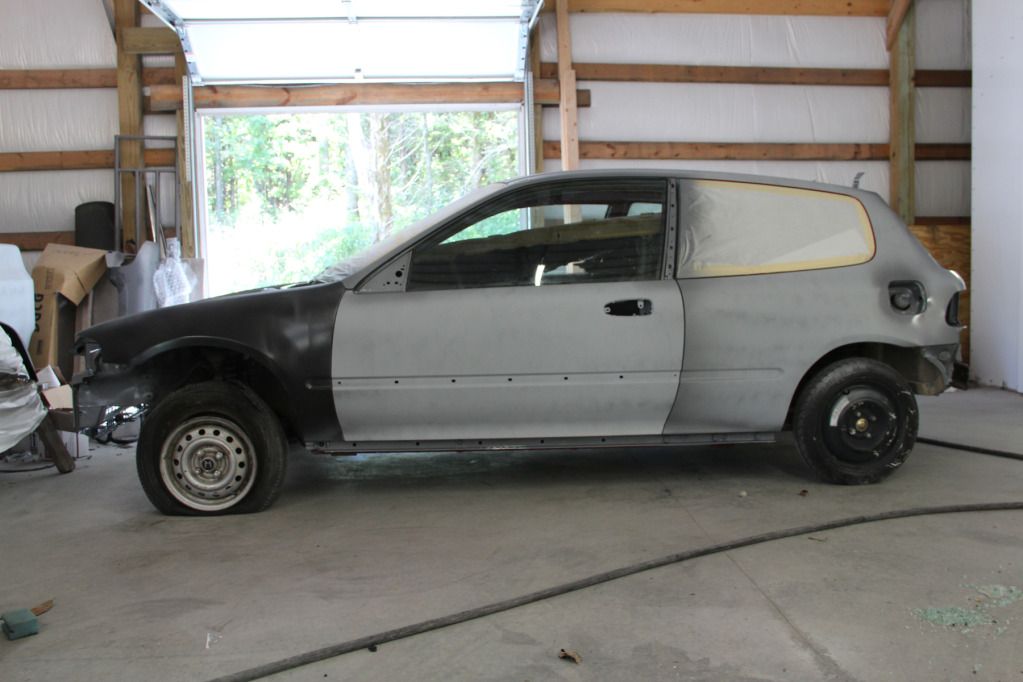
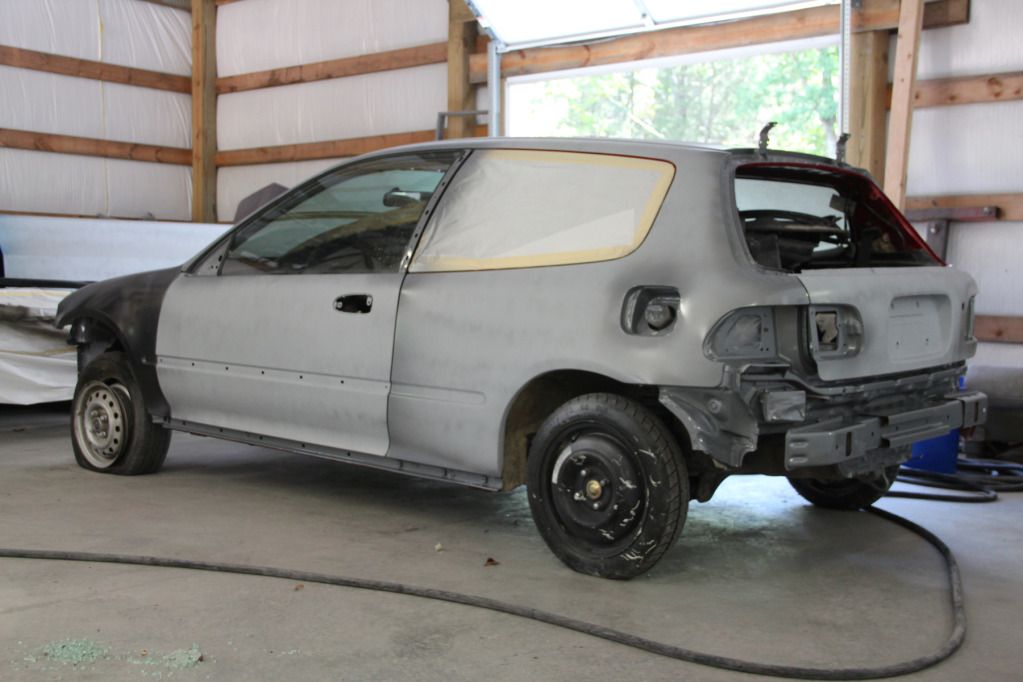
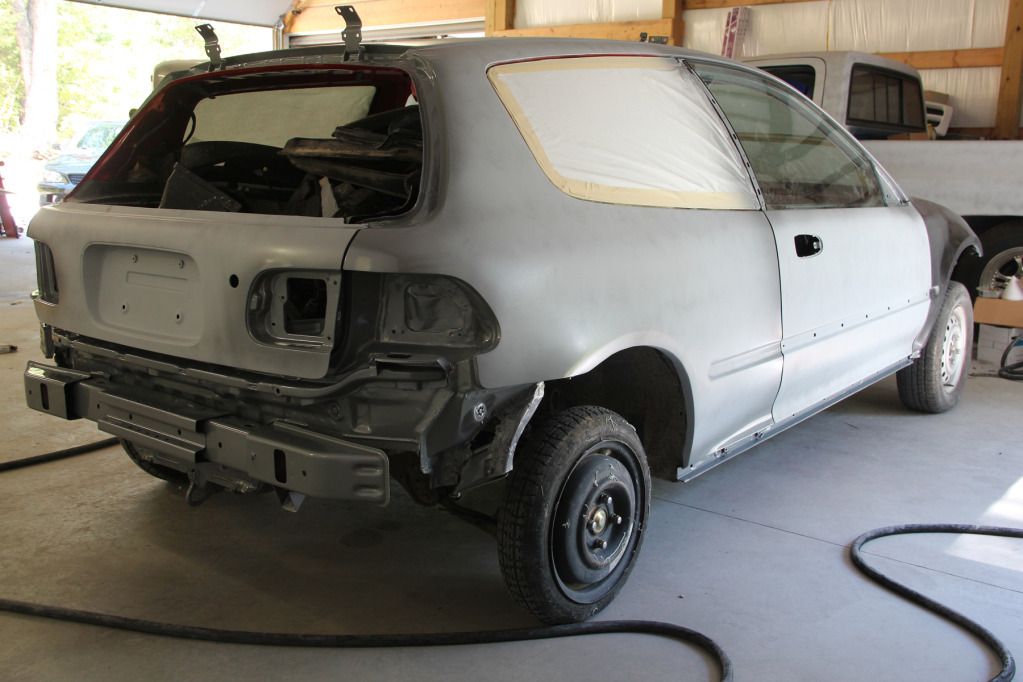
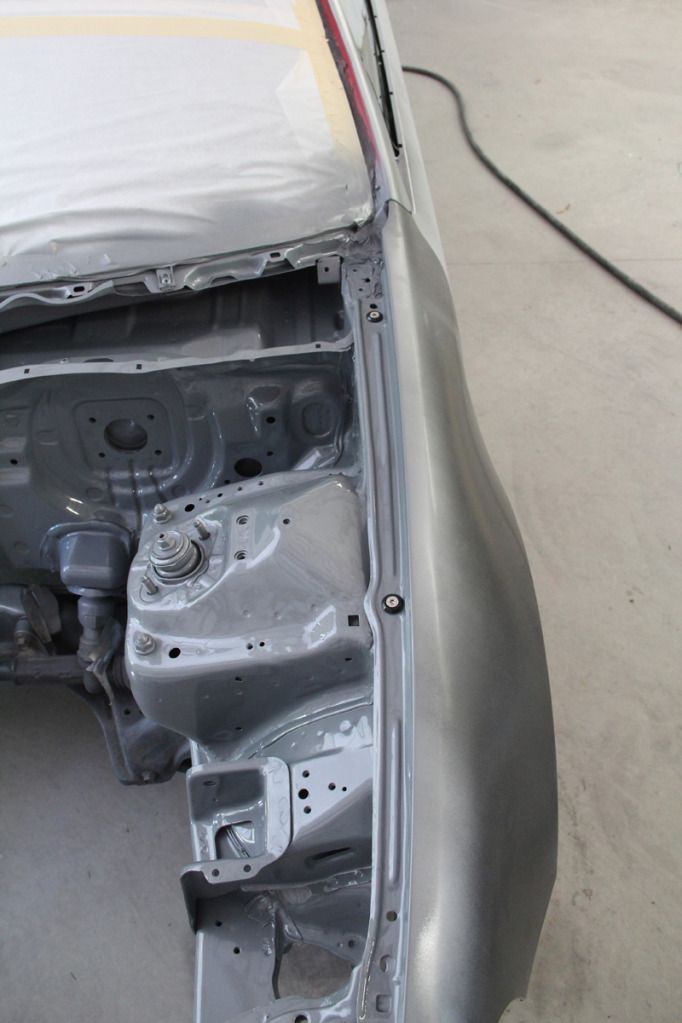
Fender Mounts:
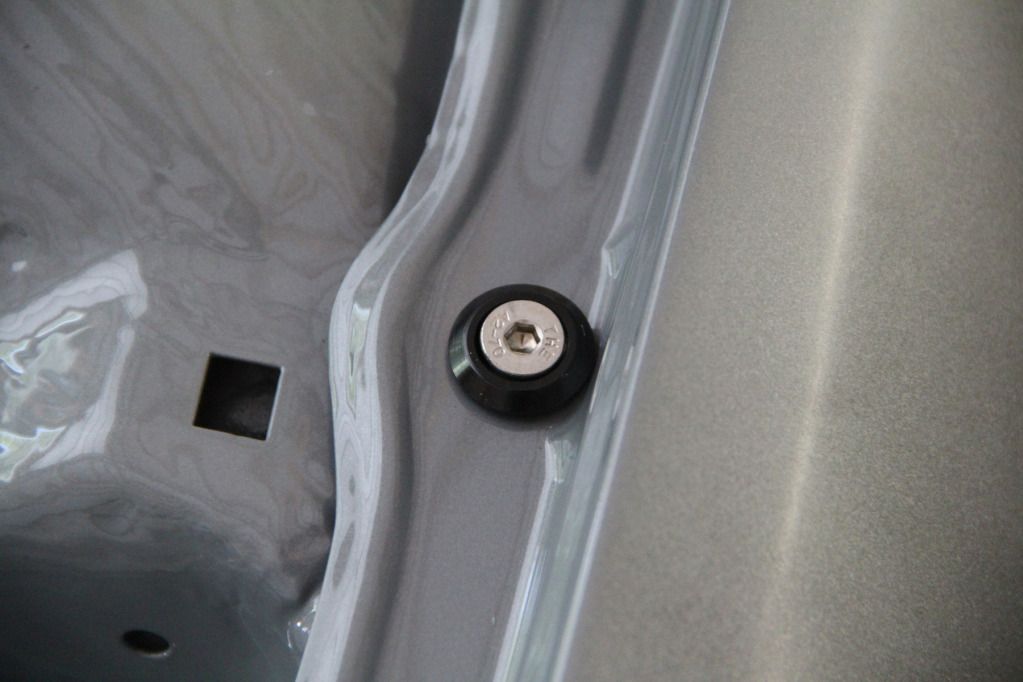
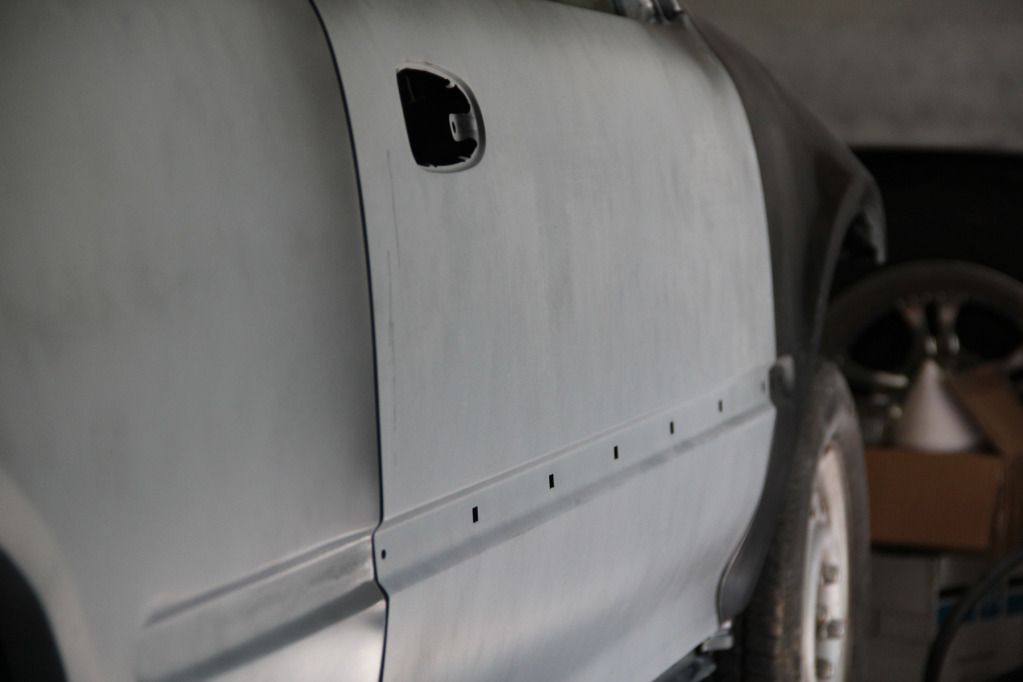
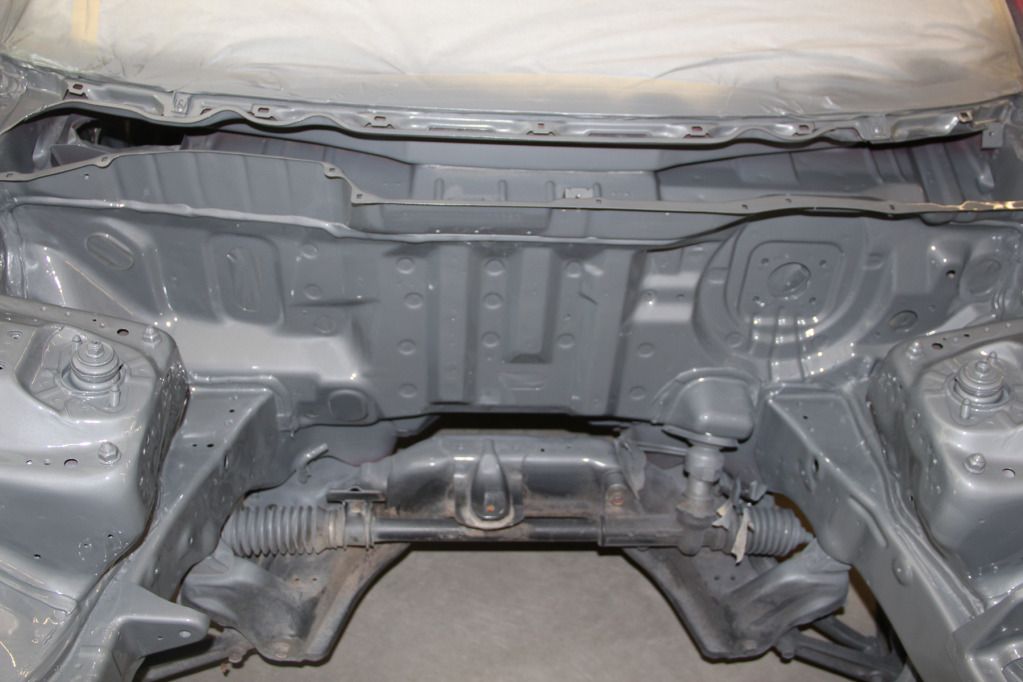
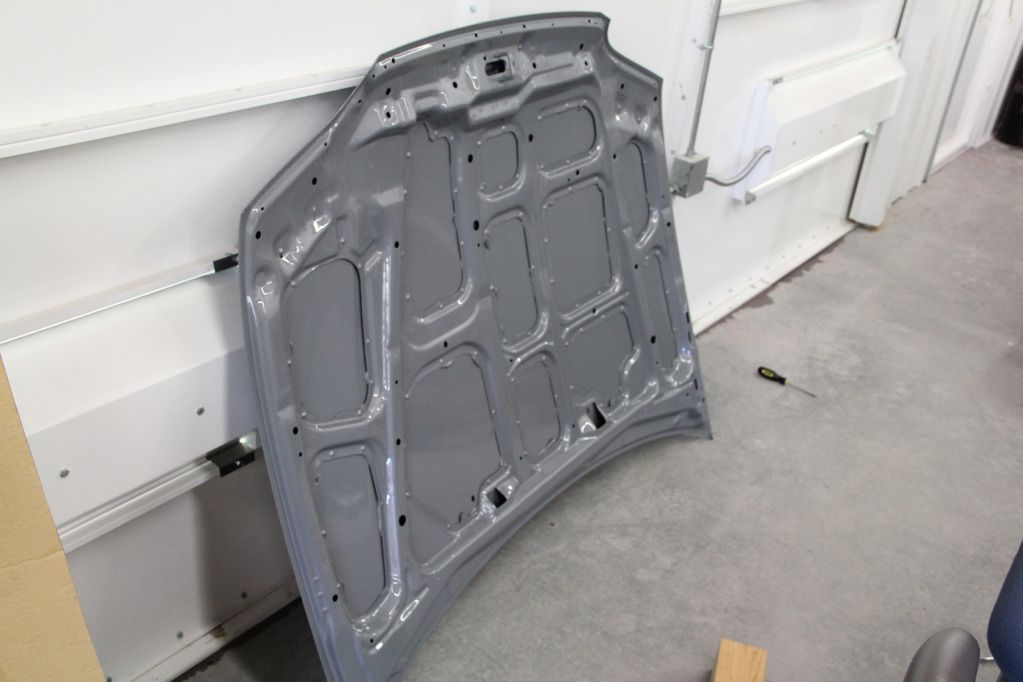
Other Random Shots:
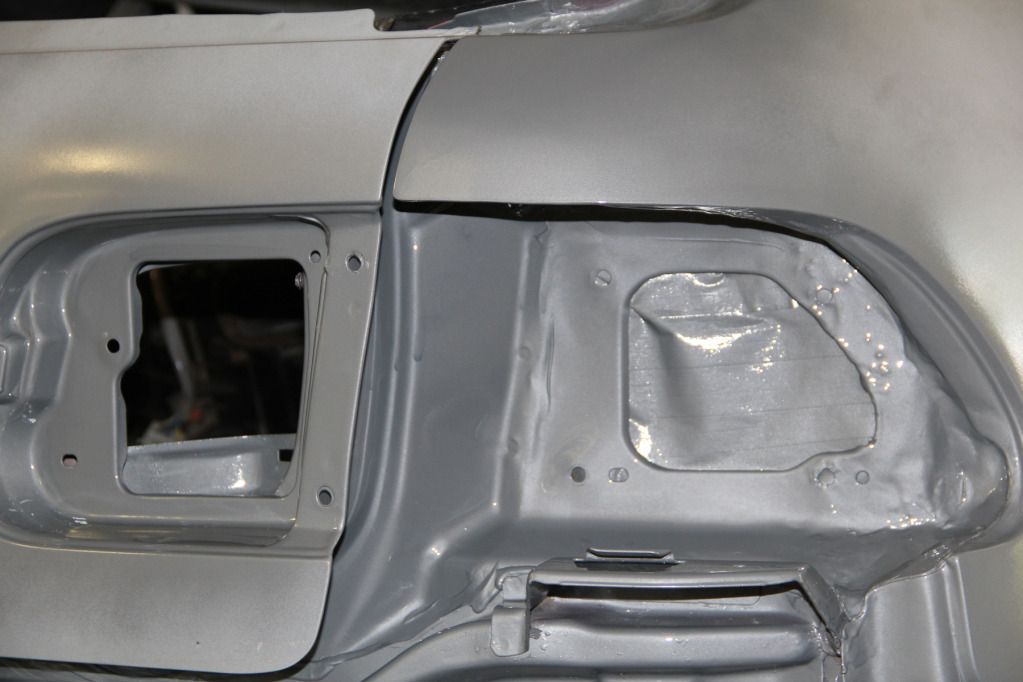
New Front Lip and CF Spoiler:
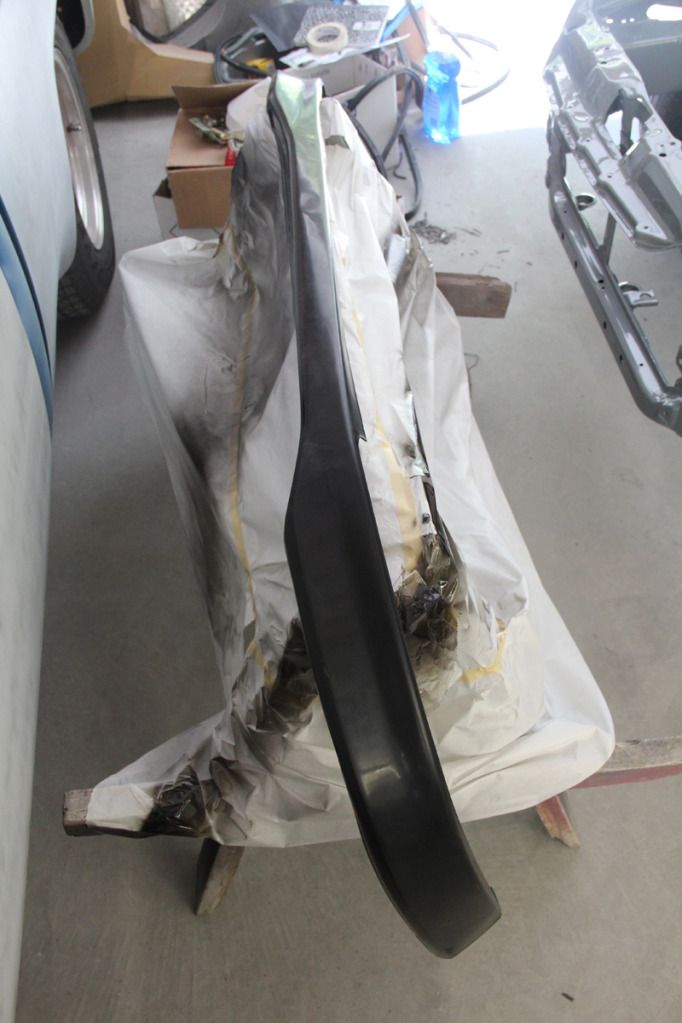
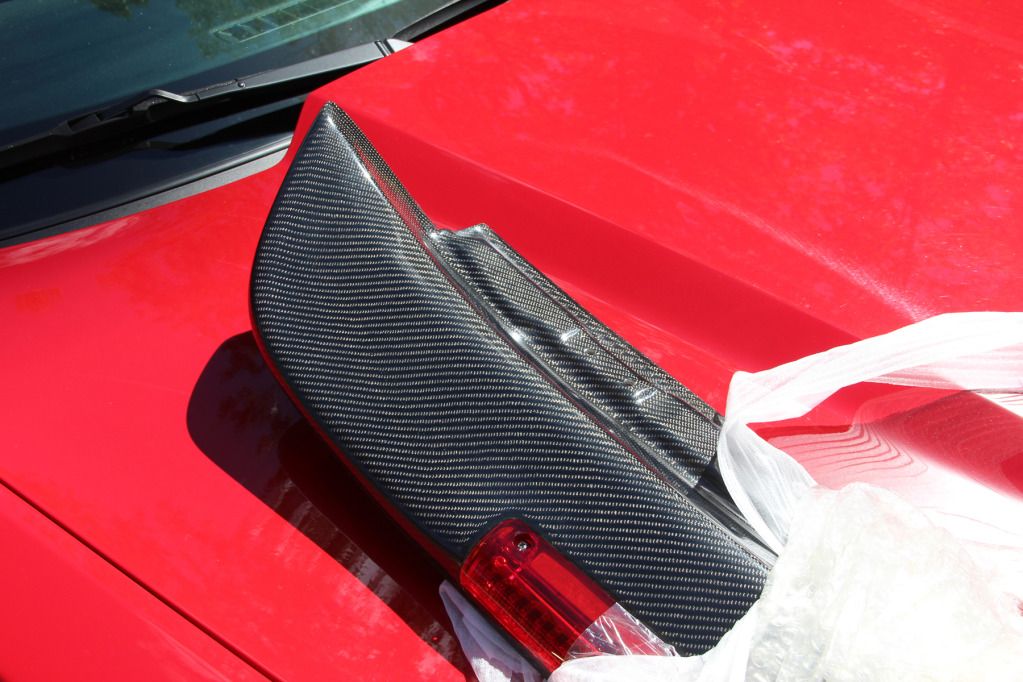
Does anyone have any tips on caring for that spoiler? I've seen too many nice CF pieces ruined by fading and hazing, and short of painting over it, what can I do to protect the part? I considered clearing over it, but these pieces tend to fisheye. That's not a huge deal, but I just don't know if clearing over it all is the best option. Do you buff it and wax it really well? Any help?
October 11th, 2012
Tiny, itty bitty update...
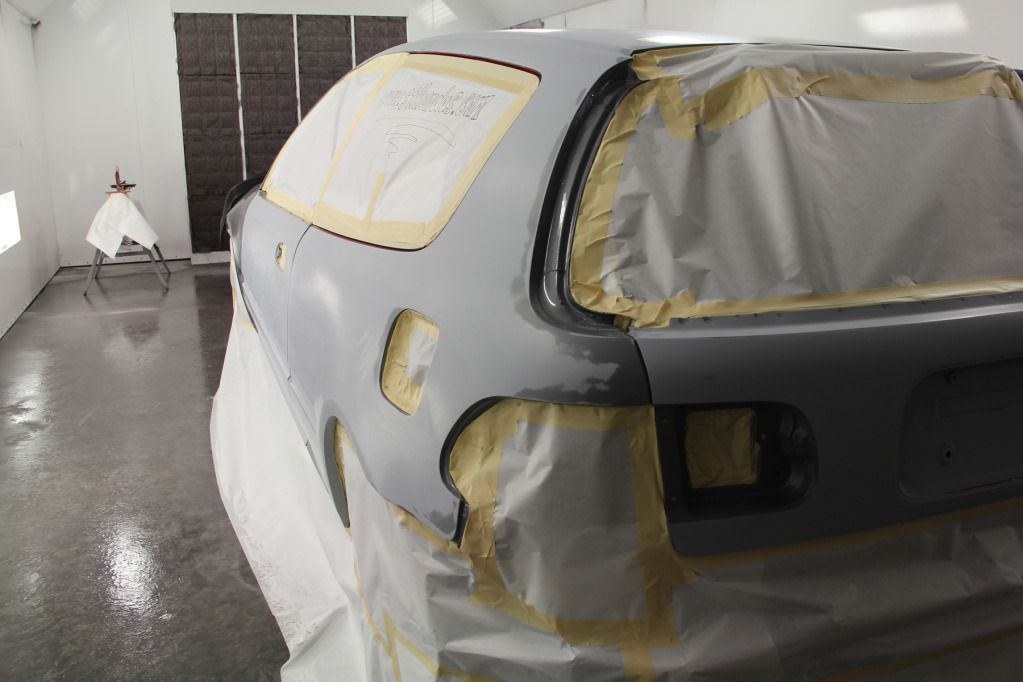
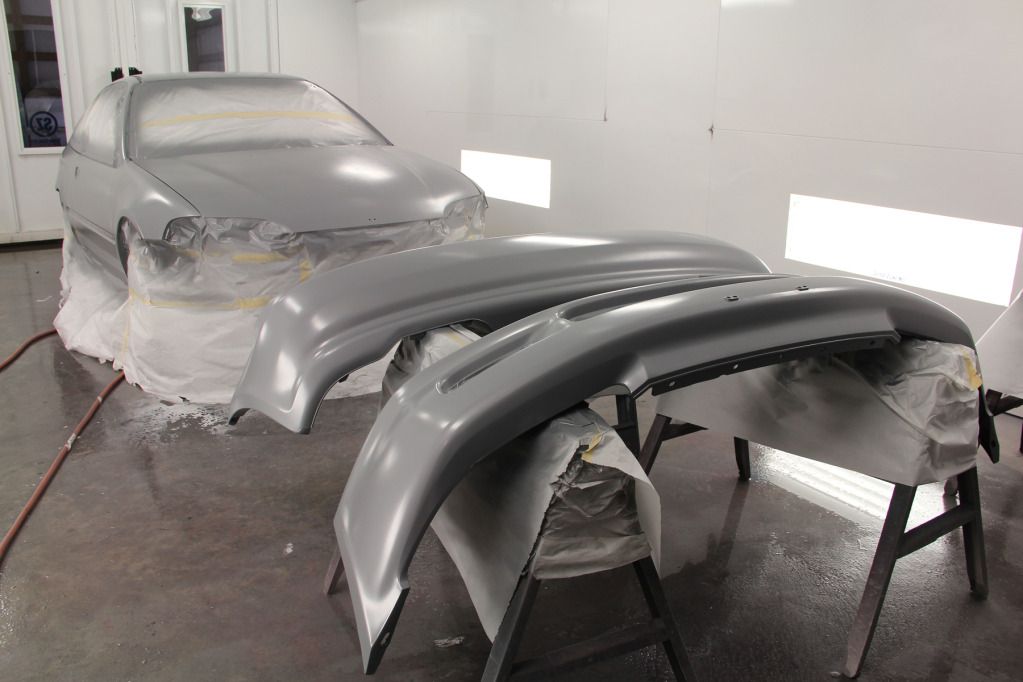
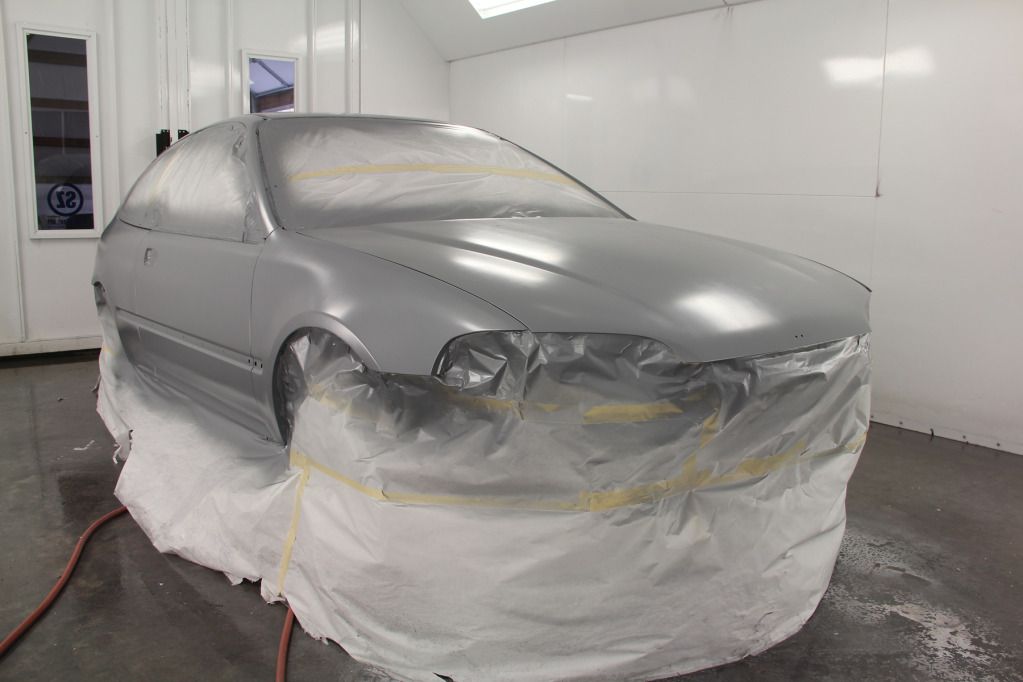
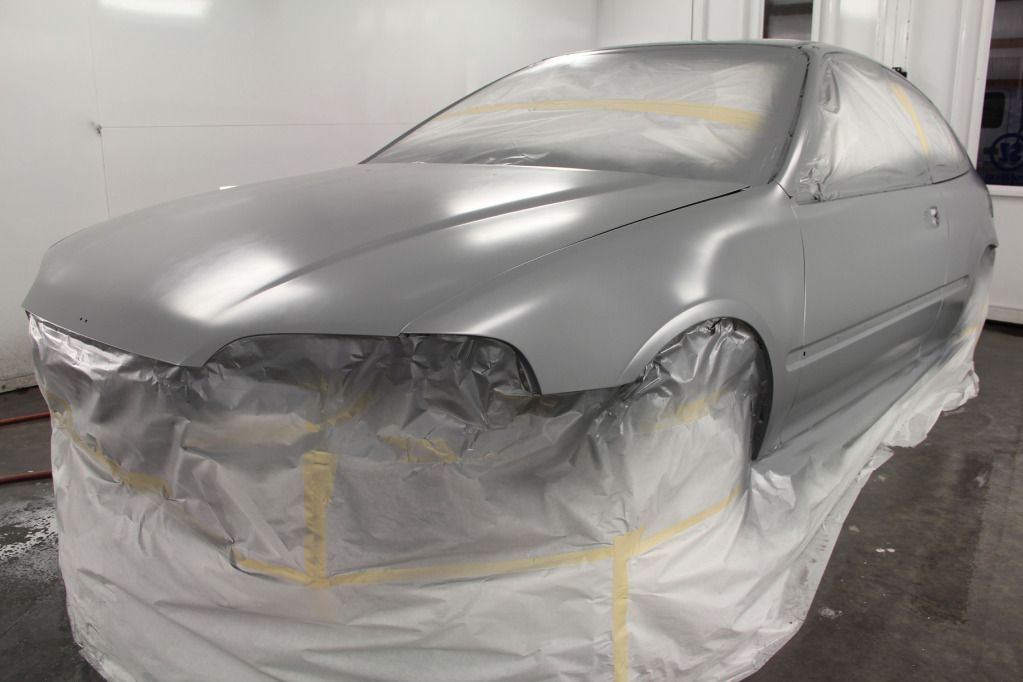
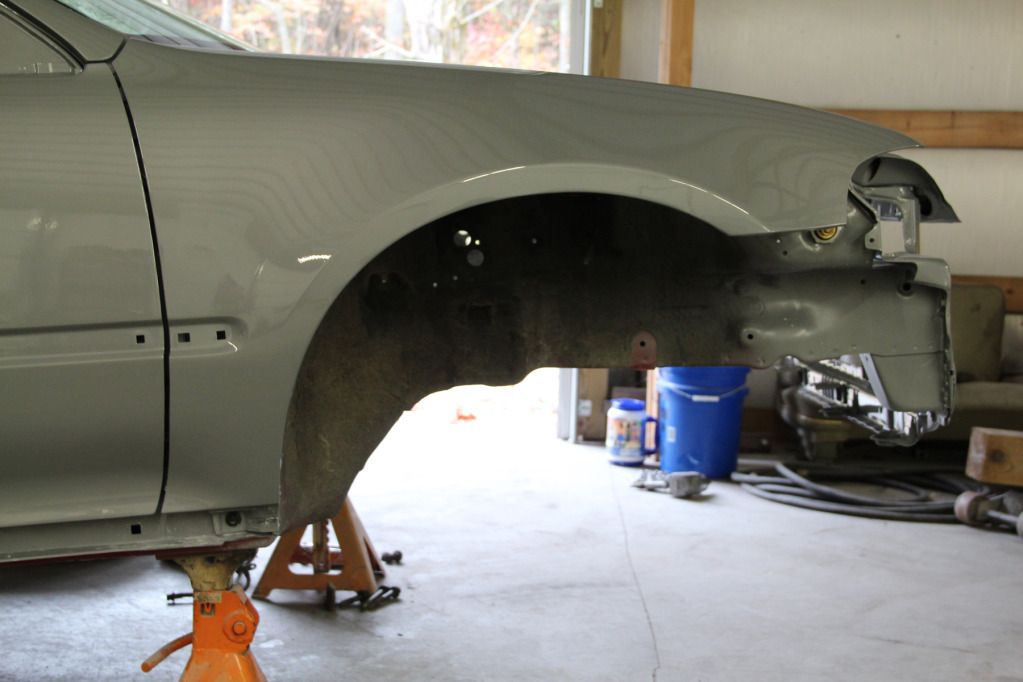
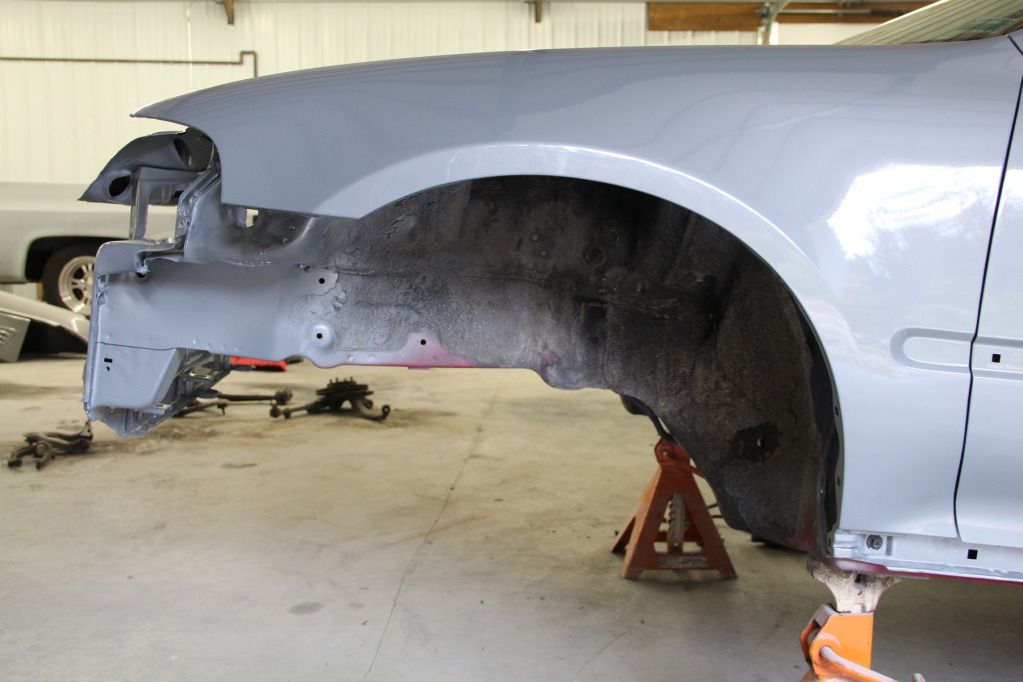
Spent the past couple days wetsanding and blocking the body one final time to prep it for paint. It felt really great, so hopefully the paint goes on as smooth as it felt. Should be clean! (SHOULD be...)
Decided that since this project is taking so long to finish, I'd try to save some money and just get it done for winter, so I chose to forego the new wheels and I bought a set of fat fives from a couple of guys down in the city. Pulled them off a teal EG hatch. The guy also had a black EJ1/2 on newer SI wheels, and a red 94+ teg on fat fives. Asked them if they were on any forums and they laughed at me...
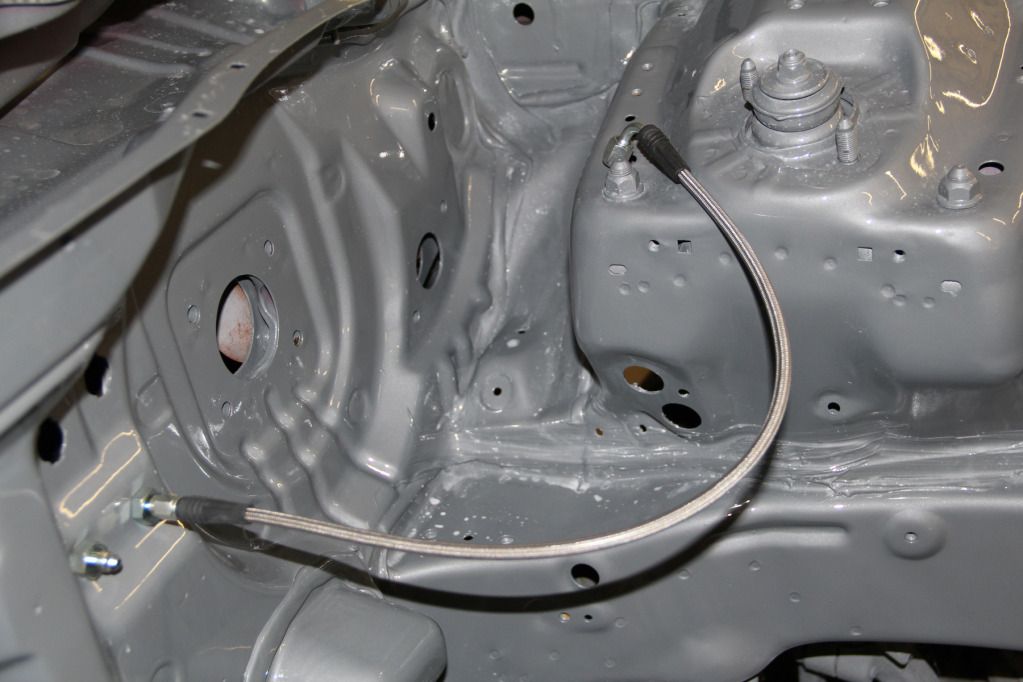
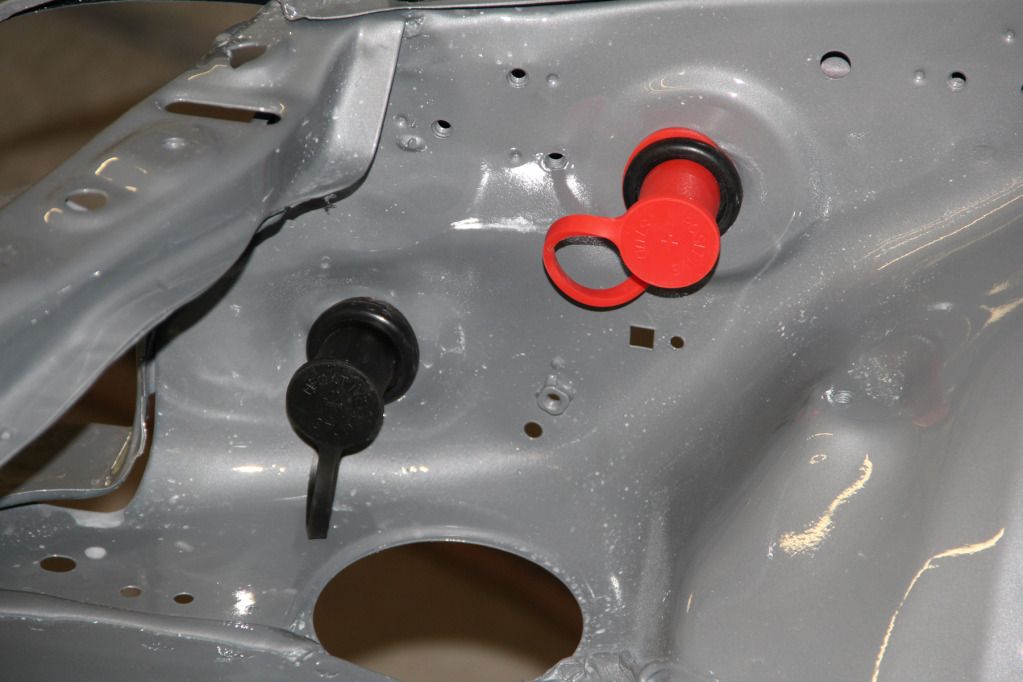
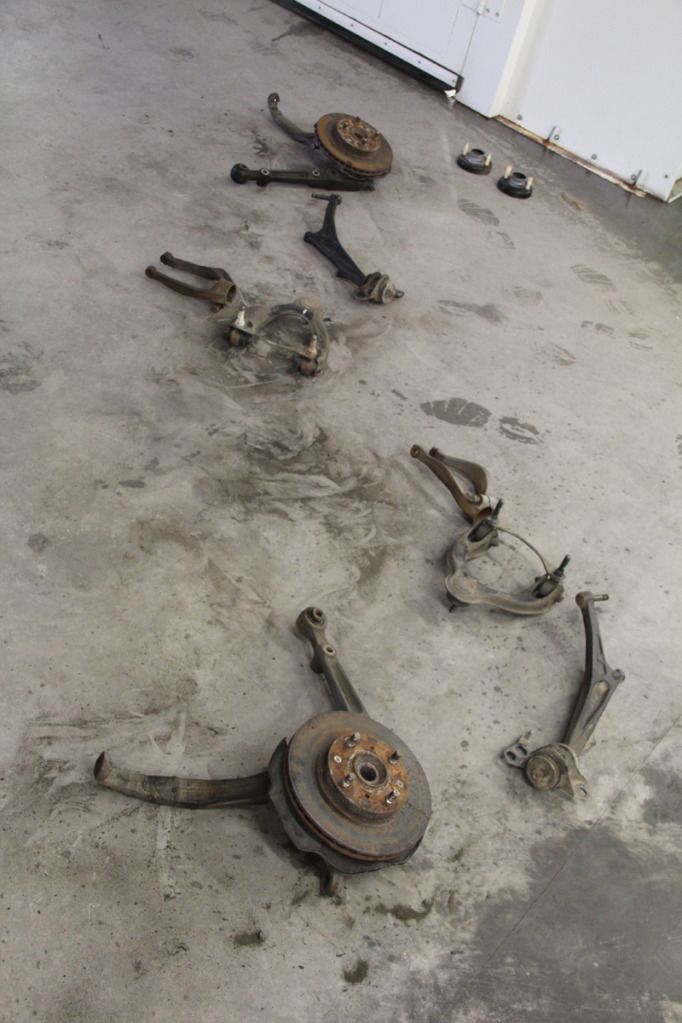
Got my new brake parts for the engine bay. I can't bend lines well enough to look right in the bay, so I went with Wilwood braided lines with AN ends. They also help to make the 90 degree bend between the MC and the shock tower, which was next to impossible with hard lines without expensive adapter fittings. The lines are SEXY. Think I might go with them in the wheel wells too. Then go with all hard lines inside the car. Easier to deal with for me I think.
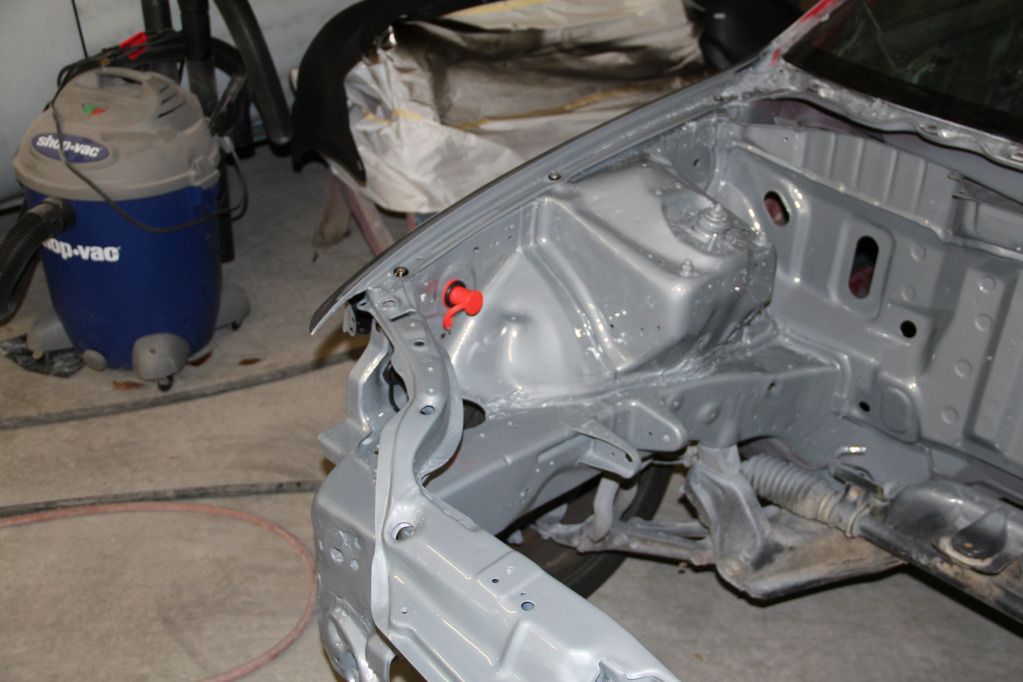
Set my battery terminals in the car as well. Got them mounted semi-permanently and test fit a headlight, which clears the posts without issue. Now as long as the corners clear the posts, I'll be just fine. :cool:
Before
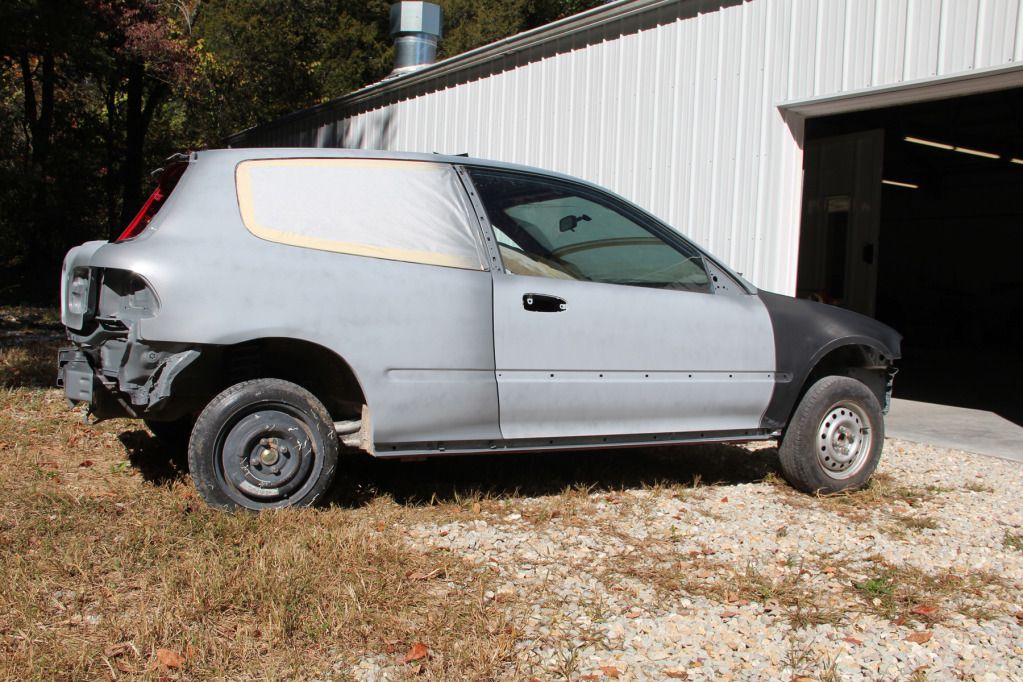
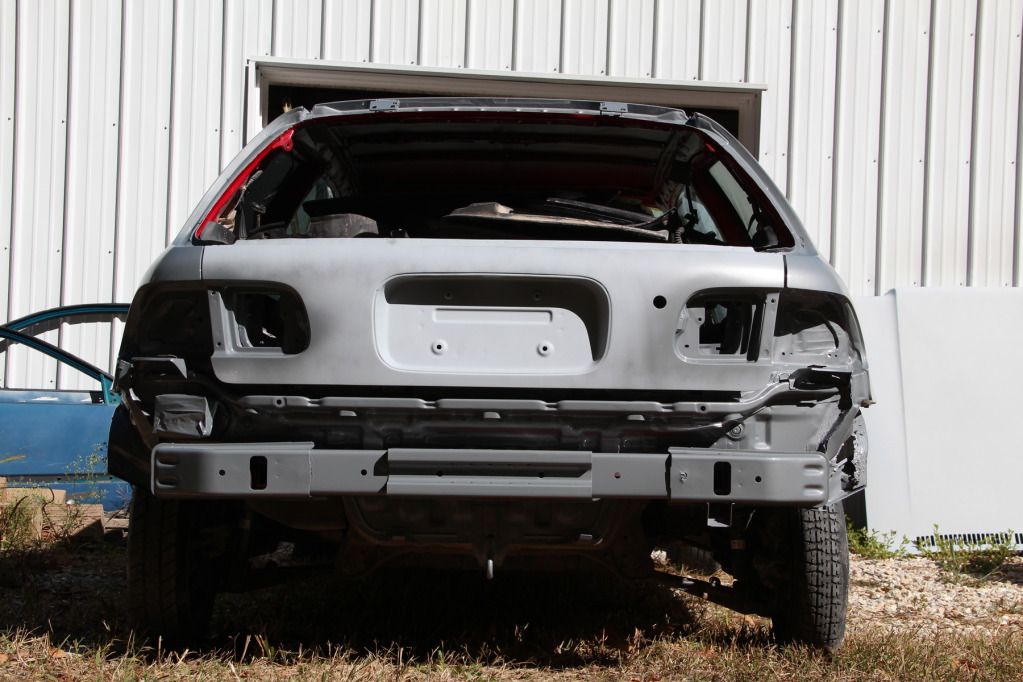
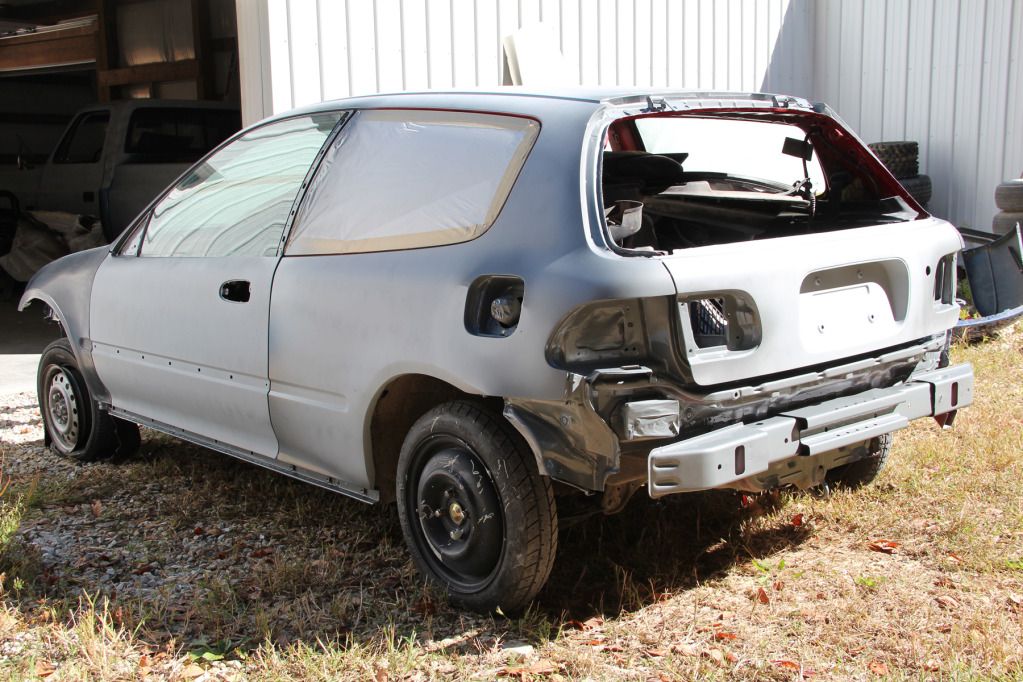
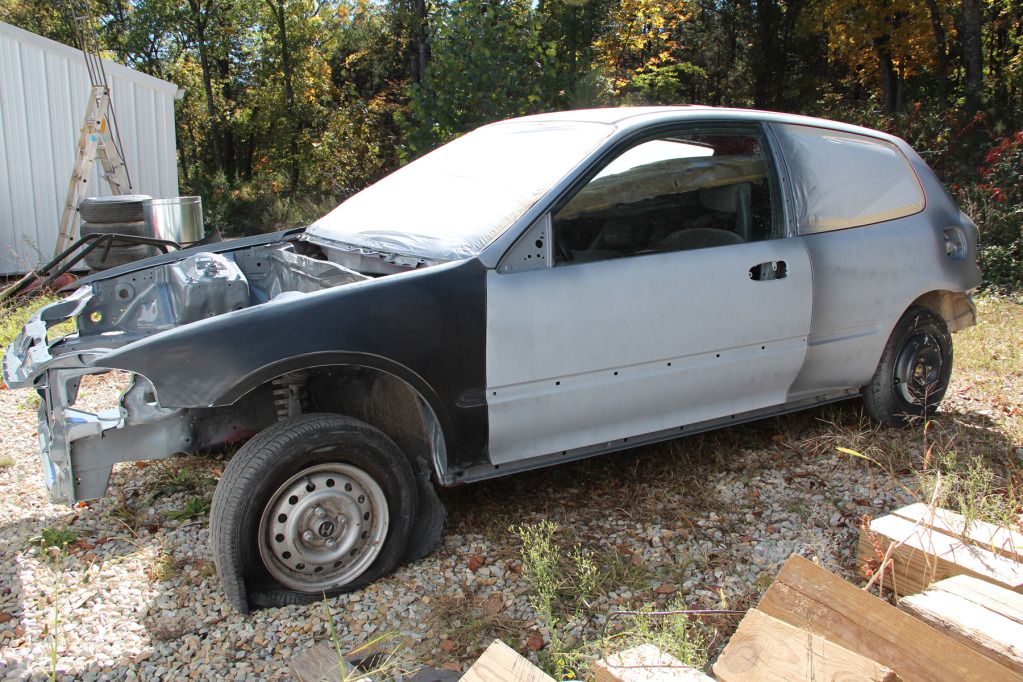
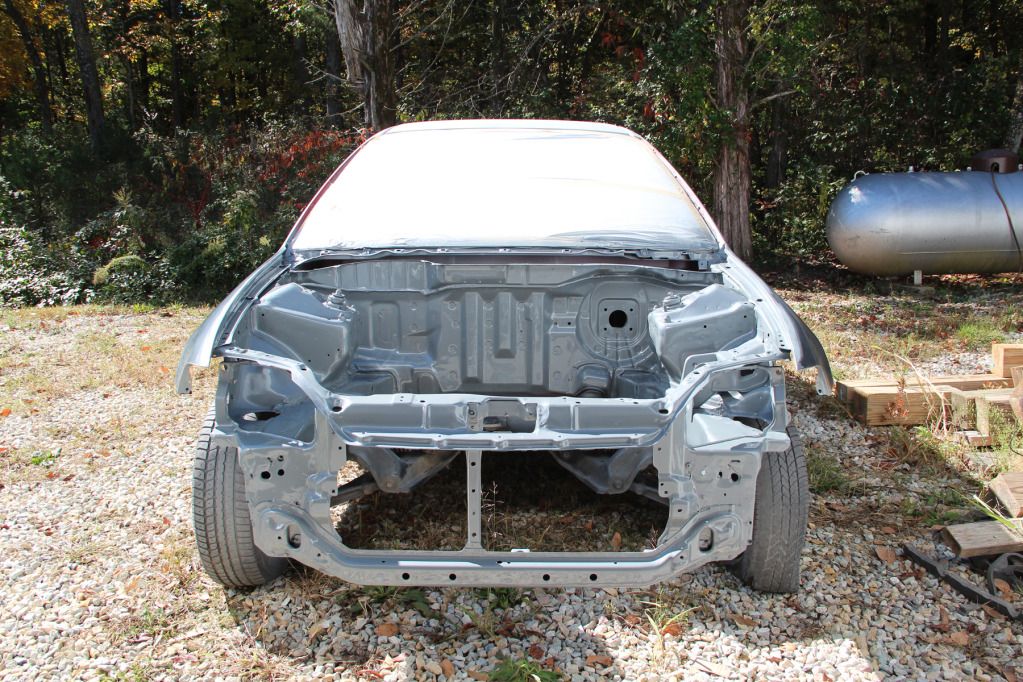
Bought the car from a guy who had it sitting next to his barn with no driver's side window in it, and all but gutted. I paid $250 for it, and got to work right away. The past few months have caused me to do a lot of thinking about what all to do with the car, and the final build for my new daily includes: D15Z1 swap (Civic VX motor) after a minor rebuild, lowered on coils, partial brake and wire tuck, polished GSR Fat Fives, a straight body sprayed in the new Scion tC2 color 'Cement', and a few practical improvements like more comfortable seats, HIDs, iPad mount, etc. This car will get me from home to work and back, and needs to last me the next few years as I finish nursing school. I got two bachelor's and decided I wanted to go back for a third. Lol. The rest of this first post will be mostly cut and paste from my other build thread with minor edits made to fit this forum in particular. I look forward to hearing everyone's opinions now and as I finish!
July 27th, 2012
So, I figured since I was doing quite a bit to this car, I'd log it in here and hope that it helps, inspires, explains, or at least gives someone something to troll. Never done a build thread before, but I'll do my best.
A little backstory: I'm not building this car to be quick. Not even a little bit. I just graduated with two bachelor's degrees, and have decided I'm going back for a third, so I need a decent DD to get me from home to work and to school. I also just bought a house and I'm getting married in September, so I sold my SRT Caliber to get out of most of my debt, and decided to start building.
The car is a '93 hatch that I bought as a roller. As a warning, anything I say about this car being rough, or junk, or anything else derogatory isn't intended towards the previous owners. I knew what I was getting into when I bought it. :hug: Here she is on the way home.

And here she is once we finally made it home (just a few shots for space sake)


I suppose now would be a good time to mention that I work overnights in the Emergency Room at Mercy (formerly St. John's Mercy), an average of six nights each week, so I don't have TONS of free time, but I make the most of the time I get. I'll update this thread accordingly.
I purchased a radiator support to get the front end straightened out a little:

But the day I was planning on replacing it, I ended up cleaning out the interior, and stripping the bay of everything I didn't want anymore, taking it from this:

To this:

And before/after of the interior:


Basic plans for the car include a brake tuck, partial wire tuck, a slightly freshened up D15Z1 swap (mpg all the way, and all maintenance items complete before going in the car), new paint in the bay and on the body, a COMPLETE body (fenders, bumper, lights, hood, etc), and either replacing several interior parts, or at least cleaning them up VERY well. We found a mouse in the car when we were loading it up on the trailer. It could use a good cleaning. Lol.
I also purchased my swap and a few 'extra parts'. Last photo is of the shipment I got from Summit this week for the new brake and fuel lines, the battery relocate, and a few other small items. (Sorry for the iPhone shots).


I'll be tearing into the Z1 next to start getting it ready to drop in. The seller believes it's solid and would be a reliable swap as-is, but I'd rather open it up and see for myself, and I'd like to replace basic things like the timing belt, water pump, F/R seals, clutch, flywheel, head gasket, oil pan and VC gaskets, etc. so that I'm not running into these things right away once it's up and running. After the initial swap is in and I'm partially done with the car (running/driving daily), I'll open up another one of the Z1s and do a complete rebuild with rotating assembly, just to have on hand if/when the original craps out. Right now, I'm slightly crunched for time, money and space with so many other things going on with the car, but I'll get there.
That's about it right now. Like I said, I'll take photos and update as I go. Feel free to comment, give suggestions, etc. I think it'll encourage me if I can ignore the trolls. Lol. Thanks for checking this out!
July 30th, 2012
...And the whole car is actually going to be a battle ship grey color. Gloss grey with no metallic/pearl/etc in it. I'm toying with the idea of just doing a gloss black bay (like you would do on the body, as opposed to a laquer or single-stage engine bay paint). It would match the gloss black wheels I'm planning on going with too. If I go this route, I'll likely do something at least a little eye catching on the VC, just so it's not a sea of grey and black. Still deciding... :chin:
I had mentioned buying new doors and windows. They aren't installed yet since I'm only able to work on the car on my days off (Wednesday and Thursday this week hopefully), but here they are. Not too bad!

Also pulled the VC from one of the extra blocks and quickly wire wheeled it. I decided to use this VC as opposed the the one on the engine currently since it has the Honda emblem in addition to the word 'Honda' on it, and there are also less bolt holes on the top of this one. The other VC has two extra threaded holes up top for mounting brackets on to, and I'd rather forego having those there since a lot will be shaved anyways. Here's the VC as it sits today (more work to come on it).

Finally, I pulled the stock fuel line after realizing that there wasn't a nice, pretty hole in the side of my fuel rail as described on most D-Series (another joy of the Z1), so I'm going to be purchasing another fitting to adapt the new SS fuel line to this input. It'll look better this way anyways I think, so it sort of works out. I just need to figure out what size banjo fitting this is, if anyone knows?

Not much to read about today, but my work schedule is sort of killing me. More pics to come soon.
August 2nd, 2012
So, I had a couple days off, and decided to spend them working on the body of the car instead of the engine. I didn't get anywhere near as far as I would have liked, but it's making progress.
I dropped my VC off at Gateway Powder Coating Wednesday morning after work. He's charging me $75 to chemical dip to remove the oil & grease, sandblast, powder coat the VC in a wrinkle red finish, and to brush the letters and H emblem after it's coated. I'm pretty ecstatic about the price and excited to see it finished. Turn around time is around 3 days for him, but I told him it's not a huge rush since I won't need it for at least a week or two. Very impressed with his customer relations so far.
I started off Wednesday morning with this view after removing my seats (they are just sitting in place, not bolted in or anything).

Then I removed the dash:

And I also removed the carpet since the whole car smelled like mouse urine. What I found behind the thick rubbery piece on the firewall was about 1,000 (literally) ants and winged bugs.

I sucked them all up with the ShopVac and was glad it was 'just' bugs, and not mice like I expected. After removing the carpeting though, there were shells everywhere; evidence that mice had definitely been in the car for a while, but I already knew that since we saw one when we loaded the car on the trailer at Caleb's. Here's a shot with the carpeting removed, and I think the driver's side was vacuumed already when I decided to take a pic.


Then I drilled out the spot welds on the radiator support and removed it, revealing a lot more damage to that driver's side frame rail than I thought.


I tried working that sheet metal as much as possible, but I couldn't get it to a place where I felt comfortable welding the new support to it, or safe driving with it crunched so far already. So, I removed the bent part, and reformed it off the car where it was a lot easier to deal with.


And after working it some:


Thursday morning, I laid a solid bead along every cut line, and also along every other seam in the area, even if it wasn't welded from the factory. Covered up the welds with some body filler, and even though it's not perfect, it's better than the passenger side from the factory, so after it's primed and painted, I'll be happy.


Removed the Brake Booster and the Clutch Slave for when I go to paint:


I test fit the radiator support but didn't get around to actually welding it since I wanted to leave it off while doing the body work on that frame rail. Doesn't look like the accident messed up much more than the front tip of the rail since the fender support on the driver's side lines up awfully well with the rad support.


Removed the rear lower seats and the SRS as well (SRS is gone permanently, and as of this moment, I'm planning a rear seat delete. That could change though).


It's interesting to note that below the rear seats it's wet with so much mouse urine. The entire interior will be getting a THOROUGH cleaning before anything goes back in.
Trimmed back the fuel line to where I'll be converting to SS braided (I think. I might start it under the car if this way looks dumb). Also trimmed the rear brake lines, just to get them out of the bay since they'll eventually be cut towards the middle of the car and routed into bulkheads to the interior where the prop valve will be relocated. This is about as bare as the bay will get before primer and paint start getting laid.


It's a far cry from where it was:


Finished removing the rear seats and the headliner, along with a few other interior pieces. Considering redoing the headliner in a more 'inviting' fabric since the vinyl is pretty shot as it is. Sorry for the pile of parts in the rear. They have to be easily moved in and out of the shop to save room for other cars. :shrug:


That's about it. It's not much, but it puts me in a REALLY good position for my next few days of work on the car (next week) when I go to route the brake lines, and maybe start priming the bay? I'll leave you with some pics of the hatch sitting with a few roommates. Lol.


More to come soon I'm sure. Might start tearing a motor apart in the next few days.
August 3rd, 2012
Started tearing down the motor. Didn't get very far before I ran into some bolts that I needed air assistance for, and that was out of the question at 3 am, so I called it a night and cleaned up. Got most of the brackets, the VC, the intake, and a few other things off. Anyone have any tips or tricks on how to remove the crank pulley and the timing belt pulley with the motor out of the car? Going to be doing that soon. Thanks again for looking!


After:


August 8th, 2012
Got a little bit more done on the car yesterday (Tuesday). Just to give you an idea of what I started with for the day, here's the load of materials I picked up from Licari Auto Body yesterday morning, along with my new hood latch. I'm using Omni products through the primer, then using DBU on the paint. Omni is a little lower quality, but works great for primer. DBU is higher quality and will last.

I started out the day by grinding off the studs on the firewall. These were originally used to mount the fuel filter, brake proportioning valve and other random bits of hardware that won't be there anymore. Grinding them off worked much better then pulling them out with a pair of vice grips. The hole left by pulling them out was too large to just overlook, while grinding them left a semi-smooth surface after sanding it with 80 and 150 grit paper on the DA.

Then I drilled two new holes next to where the brake booster will mount, and below where the throttle cable comes through the firewall at. -3 AN bulkheads will mount in these holes and the new brake lines will come from the master cylinder and right into these bulkheads (then to the PV and everywhere else). No more mess of lines in the bay. Here's a few photos of the bulkheads mocked up.


I took a red Scoth Brite (sort of like a Brillo pad for washing dishes, but made for scuffing up paint in auto body shops) and scuffed the entire bay.

Then mounted the radiator support and welded it on for good. No pics before the body work on the welds, but I then smoothed the welds out with body filler, knocked it down with a DA, and called it good.


Measuring corner to corner with this new support welded in, I was off by 1/16", so all things considered, I'd say the frame rail fix and everything went pretty well. Shouldn't have any issues with the front end (bumper, fenders, hood, lights, etc) fitting properly. But we'll know for sure once I get those parts.
Using one of the original holes in the front passenger corner, and drilling out a second, I mounted the new battery terminals since it'll be relocated underneath this spot.


Then I rescuffed that area, taped off the windshield (that lower support will be coming out to be cleaned and repainted so I didn't bother taping it off), and primed the bay.


The color is oddly similar to primer color, but it's a gloss color, so this makes me pretty excited to see the bay getting all one color in it. The engine compartment should be all downhill from here. Once the body work on the car is done, I'll be able to paint the bay and drop the motor in, but it's finally reached a point where it's all putting stuff back in to the bay instead of tearing things out.
I also tried working on the engine last night. Couldn't get the crank pulley bolt out, and broke my 3/8" ratchet trying to get it off of there. I was pretty frustrated by that point considering I had been up for over 24 hours (worked 3p - 7a at work the night before, and worked on the car all day) so I said screw it, covered the block and stand back up and took a shower before passing out.
Should be more progress before too long. Just need to go get a breaker bar, a new ratchet, and a torque wrench before I start cleaning and putting the engine back together. It should be all downhill once this crank pulley comes off.
Got a call from my powder coat guy saying my valve cover was ready to pick up, so when I go to get that, I'll be dropping off a few brackets to him for the engine to coat as well. It's all starting to finally come together!
August 11th, 2012
I also had kind of a sad moment when I had to cut a few corners on this build due to time/budget. :angry7:
I took a closer look at my quarters yesterday to see what I was in for on the body work, and I definitely wasn't happy with what I found. Here's a few pics. Black marker circles the main areas of body work.


The passenger side is definitely worse than the driver's side, but they both suck. They both have Honda cancer that needed to be handled, but I also found quite a bit of body filler and a heavy fill primer on top of it when I started sanding. The passenger side has had a patch welded in at the bottom and a little sanding revealed the tops of welds that were already sort of starting to show through. They looked like rust bubbles starting, which is why I sanded that area in the first place. I took a grinder to both sides to reveal what I was really working with. Not pictured is the LARGE area of past body work done behind the passenger side quarter glass. That whole area is cracking and chipping from being filled with body filler, so that will all be removed eventually as well.


Here's where I had to cut some corners. The RIGHT way to fix this much rust is to replace both quarters. This, while I'd love to do that, doesn't fit into the budget or the timeframe. So, I'm cutting out the rust and patching it, while also coating it all with a POR-15 type product. It's called Chassis Saver, but it's made by the same chemical company that makes POR-15. I went with Chassis Saver since it comes in 1/2 pints as opposed to the POR-15 that only comes in pints and quarts. This way isn't completely wrong, but it's definitely not right. You'll also see some rough patches I've cut and coated the backs of. More forming will go into these when I start to weld.


You'll also see that I coated pretty much the entire back side of each quarter. This SHOULD help to avoid future 'Honda cancer' problems, but when dealing with rust and reusing the same quarters, there's no telling when it might come back. Hopefully I never have to deal with rust in these quarters again. We'll see.
I feel like this is a boring update with a lot of pics, but maybe it'll help someone who needs to treat rust in this area. Again, this isn't the right way, but it's easy, quick, and hopefully effective. More updates soon.
August 16th, 2012
Had a couple days to work on the car. Still not making the amount of progress that I want (and need) to be making, but it's slowly getting there.
First, I worked more on the rust problem on the rear quarters. I cut new notches in the patches I had made since I cut them on the wrong side last time, then welded them on, ground them down, and coated them in Chassis Saver, being sure to get down behind the patches and in each little gap. You can do body work directly over the Chassis Saver, so without putting new quarters on the car, this is about the best way to seal it all up and hopefully prevent future rust from coming back. The welds are spaced apart to avoid overheating and warping the quarters. I'm also not a welder, so they're not the prettiest things in the world.


The next time I work on the car, body filler will for sure go on, starting the final steps of getting the rust fixed and the quarters primed. I had to make a few trips to the paint store, so while I was there, I picked up my paint. *Drumroll Please* I'm going with the Scion tC2 Cement color. Paint code 1H5 I believe. It looks silver in the can, but I've attached a photo of a Cement tC2 so you can see the color.


On the engine, I started out with a filthy block, pan, head, etc. So I removed the head per the service manual, and placed it in a clear, plastic container to keep it protected. Then I taped off the cylinder head, as well as everything else potentially important and susceptible to water, and I used degreaser/oven cleaner to clean the outside of the block. I scrubbed it with kitchen scrubbers, then carefully rinsed it off.
Before


After


I removed the tape and worked for an hour or two with shop towels, wiping it all off and being sure everything was dry, but it still needed some work in the corners and what not, so I used a wire wheel to get back in there and knock off the rest of the gunk. The engine probably lost a pound or two just by cleaning the crap off.
I retaped everything and covered it over night. The next day I pulled the oil pan, scraped off the old gaskets, cleaned the pan a little more, replaced the oil pan gasket, and bolted it back on, per service manual instructions. I also scraped the old gasket material and junk from the head mating surfaces, coated the new head gasket in copper gasket spray, and installed the head. I placed a junk valve cover on the engine, taped everything off really well, and painted the engine.


There are spots that look bare, like I missed them with paint, but that's just the flash causing a glare. I let the engine sit overnight to dry before messing with anything. Next step is untaping it all, replacing the water pump, tensioner, timing belt, and timing belt cover. I'll also probably install the new Valve Cover in the near future. Needs to have a new gasket and new spark plug gaskets installed, but I already have those ready to go. This was coated by Gateway Powder Coating in St. Charles. They chemical dipped it, sandblasted it, coated it in Wrinkle Red, and sanded the letters for $75. I'm pretty much in love. The other photo is of the mail I got yesterday. New Blox magnetic plugs for the oil and tranny. And a new fuel fitting so I can do away with the stock fuel filter and mate stainless braided lines to the VX fuel rail. :thumbsup2:


That's all for now. Hopefully I'll have more photos and updates for everyone soon. I work the next 7 days, then I'm out of town for 2 days, then I work another 7, so I'm not sure when I'll have time to work and post, but I'll do my best. As always, thanks for checking this out!
August 20th, 2012
So, I've decided that since I only have two full days to work on my piece each week, it'll be done sometime around my 40th birthday. To make up for that, I've decided to start working on it for a few hours in the mornings when I have 12 hours between getting off work at 7am, and getting back to work at 7pm (as opposed to having to be back at 11am or 3pm). Today was the first day of this and I did some body work on the driver's quarter. Needs one final skim coat and it'll be ready for primer! iPhone pics.


It's messy. Sorry. But it looks a million times better than a big rust hole! More updates to come!
September 1st, 2012
Had a couple days to work on the car again. Made some decent progress I suppose. Thank the Lord. :worthy:
I mentioned in an earlier post that I snapped a head bolt. Realized it was due to me messing up the operation of a clicker-style torque wrench. My apologies to Dan for assuming it could have been his tool. My bad. Here's a shot of that bolt though.


I got that fitting in the mail as well for my fuel system (also previously mentioned), and test fit it to my fuel rail:


Disassembled and cleaned a few engine parts:


During one day last week and two days this week I did a CRAP LOAD of body work. Instead of typing what I did, then a pic, then typing, then a pic, I'll group it all together. Just understand that a few days work went into it all...
I finished straightening the driver's side quarter panel. I removed the rocker panel trim pieces on both sides to give me more room to work. I removed the rear bumper. I removed the rear hatch. I broke the hatch glass (need one now...). I straightened the rear hatch (large dent near the emblem) and accidentally shaved the emblem while I was at it (filled the holes, lol). I didn't mean to do that, but I might leave it like this. I sort of like it. If I want the emblem, I'll re-drill the holes. I straightened the roof dents and dings. I stripped somewhere in the neighborhood of 1/2" on body filler from various parts of the passenger quarter panel. It's been replaced before, and straightened. Wasn't too bad of a job other than wayyyy too much filler and it started to crack. I pulled out the metal, and straightened it all. I removed both doors. I removed the door panels from both doors. I realized the blue doors were horribly wavy, and decided I'd be using both purple doors that I bought from 5thGen. I straightened one of the doors (the other one needs a lot of work. Coming soon...) I removed the rear spoiler and metal piece. I straightened the metal piece due to what looked like several small hail dings. I taped the car off for primer. I primed the car. I THINK that's all. Ask me questions if you have any or if I missed anything. Now for the mother-load of pics.


Up next on the body is straightening the other door, blocking and repriming the entire thing to make sure it's pretty straight (I'm NOT a body man. I work in a hospital, not a shop. This car will NOT be perfect.), buying the new bumpers, fenders, hood, lights, etc. and edging the body pieces in (spraying color on the edges and jambs), and reinstalling everything. This process may get broken up into 1)Reinstall everything, 2)Remove it, 3)Jamb it, if I take so long that the car needs to be moved outside. Hopefully, that won't happen and I can jamb it THEN install everything and be able to roll it back outside while it waits for the engine. Which leads me to my next point...
After messing with my car for several days, I figured it was about time to work on the engine again. So, cleaned off the head mating surface. I carefully cleaned out the antifreeze channels due to dirt/grime/gasket collecting there. I checked to make sure that all of the head bolts would now screw all the way into the head BEFORE putting the head on, which turned out to be an amazing idea since something like 7/10 of them had metal shavings in them. I reinstalled the head with a new gasket and copper Spray-a-Gasket. I properly torqued the head bolts using a bar style torque wrench to 22 lbs then 53 lbs on the D15Z1. I then ran to AutoZone for a feeler gauge since I didn't previously own one, and reset the Valve Clearance. Next, I reinstalled the spark plug seals on the new valve cover, and reinstalled the valve cover. I ended up only having 4 bolts to it unfortunately... Need to order another set as soon as I finish typing here. Oh, and I changed my mind about the intake staying bare. The intake and the exhaust were both painted black tonight. I imagine the exhaust will burn off since the paint is only rated at 500 degrees, but at least it will look good on the stand, right? Lol. Those will be reinstalled once the paint dries and I buy new, nicer looking nuts. I installed my new water pump, tensioner, and timing belt. Tried cleaning my old timing belt cover and it wouldn't come clean, so I might be ordering a new one, or painting the one I have with plastic paint. I THINK that was it on the engine. Here's a few of pics of that:


Finally, I did just a little bit of work on the fuel system. To save some time, I'm going to have the fuel lines all ready to go in the car when I drop the motor, to where all I'll have to do is flare the stock line, and adapt it to the hose. So what I did tonight was assemble the stainless braided hose with an -6 AN hose end, and finished assembly of the banjo fitting, to -6 AN union, to Edelbrock fuel filter (MUCH nicer than that old piece of junk), to stainless braided hose. Here's a few shots. I have parts numbers of anyone wants them. I only paid like $50 or $60.


Oh, I also got new Energy Suspension motor mount inserts in the mail. And ordered my coilovers, so now I'm broke. Lol.
So, that's been the work I've gotten done. Hoping to knock out the rest of the body work soon. And to get this silly engine fully assembled. I'm just a bit short of time with a wedding in three weeks, work, and a new house! I need a rear hatch glass though if anyone knows where I can get one. And fairly cheap if possible! (I can hope, right?) Sorry for so many pics. Hope to get more updates soon. Thanks for checking in.
September 6th, 2012
Worked a little on the engine tonight. Bolted up the intake, exhaust, fuel rail (injectors, etc), various sensors and fittings, and maybe a few other small things. Need to install the crossover tube from the water pump still and the entire thermostat assembly, then the motor mounts, timing belt cover, crank pulley, and accessory brackets and the engine will pretty much be ready to drop in. Might work out the wiring harness with the engine out of the car. But it's getting SOOOO close. Taking a two hour nap right now, then going to block and reprime the car (maybe just block and then reprime tomorrow morning depending on how much gets done today). Might be able to snap a few pics. So ready for this thing to hit the streets. Seeing the engine just about ready has me VERY excited. It's not quite as pretty with so many ugly pieces bolted up to it, but it's a heck of a lot more functional!
Quick update with no photos (again). Sanded the entire car down with dry 180 grit on a foot long block, which keeps everything straight so that you don't gouge the finish with your finger tips. It had to be blocked and reprimed to check for any dings I missed, or for mistakes in the body work. There are a few waves in the roof that I noticed, but the rest of the car looks pretty good in my opinion. Didn't bother with pictures since it looks the same as last time. It's just a few days away from getting color. Can't wait. Will try to get pics soon.
September 7th, 2012
Just wanted to update and say that I placed my last parts order for the next month or so since I get married in two weeks. <-- To the last parts order. HUGE thumbs up to the marriage.
I ordered a new carbon fiber spoiler, a carbon fiber antenna plug/gasket, a new catalytic converter (very stock-ish build so I'm keeping the cat), new black side moldings, and a new clutch/flywheel/pressure plate set. These things should be enough to get the body almost completely done once it's painted, and to get the engine down in the car and maybe even moving around under its own power. At that point, I can trailer it home so it's not stuck in the shop anymore and it can sit there until I get the new wheels and tires in. This car is getting really close despite only being in primer. I feel like it's starting to be all downhill luckily!
September 8th, 2012
New pics of the car untaped after being primed.


Next step is jambing it and reassembling everything.
Worked on the engine some more tonight. Realized I need pretty much all of my motor mounts, since I don't have any of the lower/rears. The only two I have are the tranny mount and the driver's upper.
 Got quite a bit put back together on it though, and I'm down to just needing a few new sensors that have been broken off, and a few hoses to tie this mess together. Once I get those things, and source new motor mounts, this will be ready to drop in the car. Here's a few shots from this evening.
Painted my belt cover black. I used Rustoleum's plastic Fusion paint on it and it turned out really nice. Not sure how it'll hold up to the heat, but it was cheaper, and better looking, than a replacement. I removed the top sticker before painting it, and reglued it to the cover. Thought it looked nice there and gave the impression that the black cover was potentially stock.


That's all for now. I have Monday through Wednesday off, so I'll be getting as much done as I can on the car.
September 11th, 2012
Did just a little bit on the car today since most of my time was spent running for parts. Thinking of going a different direction on the Civic with this front bumper...

Lol. Just kidding. That Grand Sport front bumper is like a foot wider than the Civic... and belongs to Corvette.
Here's my new pile of parts. They're scuffed now and ready to be edged in with color.


A few better pics of the primed shell:


I also "shaved" my quarter window trim after finding out that the trim is part of the window and does nothing to seal the window. They're glued in from behind that the trim just sits on the edges (snugly...). My passenger side was halfway gone already, I didn't want to spend $150 for those windows to be removed and reinstalled, and I'm not interested in bucking up for new windows, so I just ditched the trim after confirming that it was ok with Presley Auto Glass. On the driver's side, I was able to press forward on the forward-most edge and the trim came loose. I then worked my way around the window SLOWLY, pulling straight away from the glass like this:

Even though the trim is just rubber, you can still break those rear windows by pulling on the edges wrong. The driver's side came off nice and clean and left a really nice edge around the window.


I had to use a tiny flat head screwdriver and a razor blade to CAREFULLY pry and remove the passenger side window since it was pretty rotted and had nothing to grab on to since it was already coming apart. I'll be sure to take pictures specifically of that gap after I paint the car so everyone can see it. Here's the only pic I have of the old trim on the passenger side and it's not very good. But, you can see the broken trim about halfway down the rear edge of the quarter window here.

Thought about doing a DIY thread if anyone might find it convenient, but ^^ That's all I'd write there as well. Figured other people must have this issue too, and since the glass is glued in anyways, that trim can come out without issue according to a reputable glass shop. Hope it helps.
More updates to come. Planning on a lot of prep work for jambing and paint. It won't see color this week since the paint booth is booked all week, but it's getting close.
September 13th, 2012
So, I got a lot more done this week than I expected. I also received a TON of parts. I'll start off with a list of parts I got in. Sorry if any of these have been mentioned in earlier posts:
OEM Door Moldings
Black Civic Emblem (for rear hatch, but it's the new style emblem as opposed to the vinyl that would have been stock)
Red Honda Emblems for hatch and hood
"High Flow" (empty) Catalytic Converter
Raceland Shirt
Raceland Coilover Tracking number (C/Os are on their way!)
Intake Temp. Sensor
Throttle Position Sensor
Carbon Fiber Antenna Delete Plate
New Antenna Delete Gasket and Plastic Delete Plate
Carbon Fiber Spoiler (Spoon Style?)
I think that's it. As far as the work on the car goes, I scuffed and wetsanded the jambs, wetsanded the bay, and taped it off on Tuesday/Wednesday. Here's a few pics:


Then just for fun, I put one of the wheels/tires up to the car. New set up?... Lol. Kidding.

Then today (Thursday), I started off by taking a picture of a couple of my new parts:

And got the car jambed, along with a few parts!


Last picture was just to see how the red and grey would look together. And I absolutely love it. Hopefully you all like the color too. And if not... Good thing it's not your car. Lol. As always, would love to hear opinions from everyone.
September 19th, 2012
Doors On:


Fender Mounts:


Other Random Shots:


New Front Lip and CF Spoiler:


Does anyone have any tips on caring for that spoiler? I've seen too many nice CF pieces ruined by fading and hazing, and short of painting over it, what can I do to protect the part? I considered clearing over it, but these pieces tend to fisheye. That's not a huge deal, but I just don't know if clearing over it all is the best option. Do you buff it and wax it really well? Any help?
October 11th, 2012
Tiny, itty bitty update...
Spent the past couple days wetsanding and blocking the body one final time to prep it for paint. It felt really great, so hopefully the paint goes on as smooth as it felt. Should be clean! (SHOULD be...)
Decided that since this project is taking so long to finish, I'd try to save some money and just get it done for winter, so I chose to forego the new wheels and I bought a set of fat fives from a couple of guys down in the city. Pulled them off a teal EG hatch. The guy also had a black EJ1/2 on newer SI wheels, and a red 94+ teg on fat fives. Asked them if they were on any forums and they laughed at me...

Got my new brake parts for the engine bay. I can't bend lines well enough to look right in the bay, so I went with Wilwood braided lines with AN ends. They also help to make the 90 degree bend between the MC and the shock tower, which was next to impossible with hard lines without expensive adapter fittings. The lines are SEXY. Think I might go with them in the wheel wells too. Then go with all hard lines inside the car. Easier to deal with for me I think.
Set my battery terminals in the car as well. Got them mounted semi-permanently and test fit a headlight, which clears the posts without issue. Now as long as the corners clear the posts, I'll be just fine. :cool:
Before


Last edited by jpfeffer on Mon Oct 22, 2012 7:33 am, edited 4 times in total.

