- Tue Sep 14, 2010 6:49 am
#213580
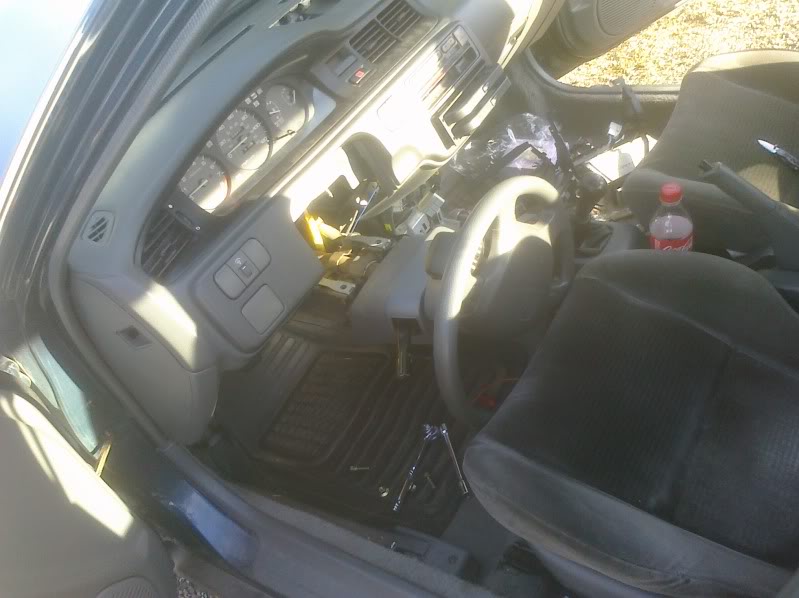
Took the dash out of the Sedan for some maintenance and prepping the daily for Winter Use. Figured I would take pics and make a DIY of Removal.
Tools Needed:
Ratchet(I Used 3/8")
Extension(I Used a 6" Extension)
10MM Socket
12mm Socket
Phillips Screw Driver
Plyers (To unconnect wire loom connectors)
Extra Person to help(starts @ step 10)
Step 1:
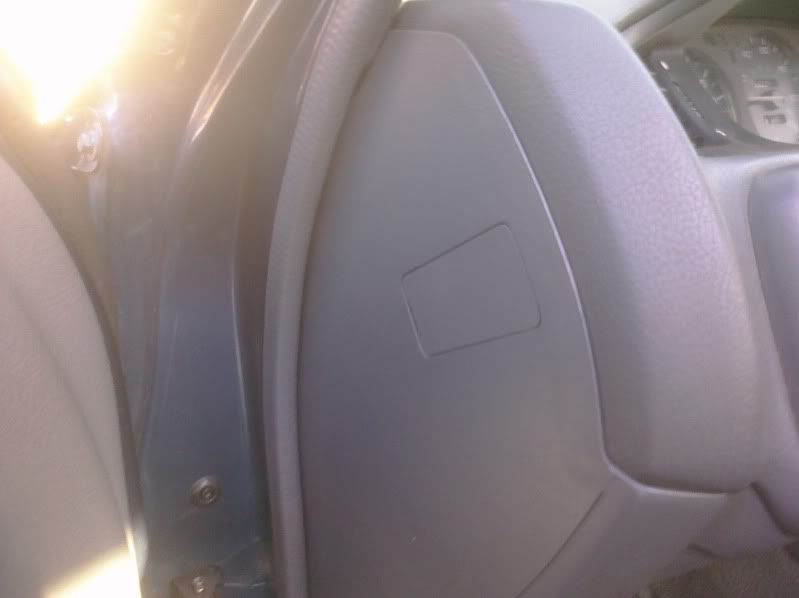
On both ends of the Dash is this end cap, use the end of a pocket knife or a screw drive to open it up, just slide it in and a slight press in pushed out the cover
Step 2:
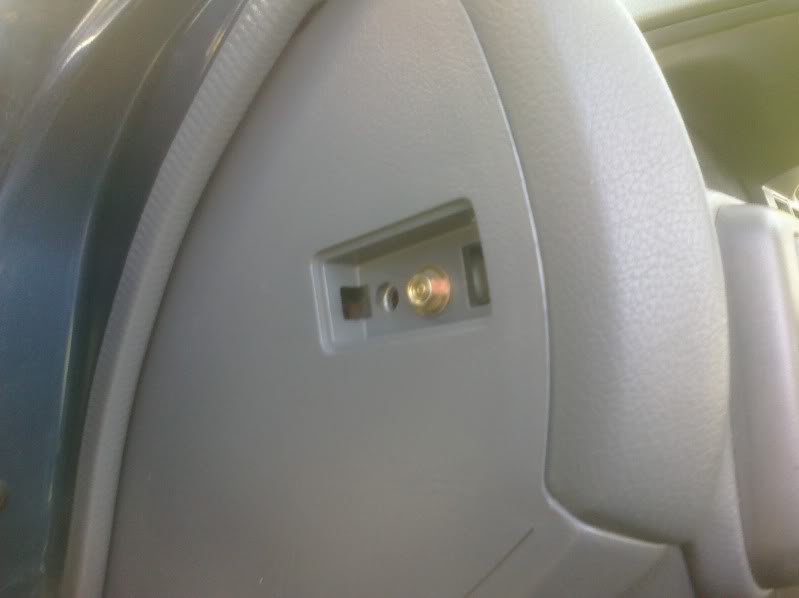
That leaves this. Take your Ratchet and 10MM Socket and remove this bolt on Driver and Passenger Sides
Step 3:
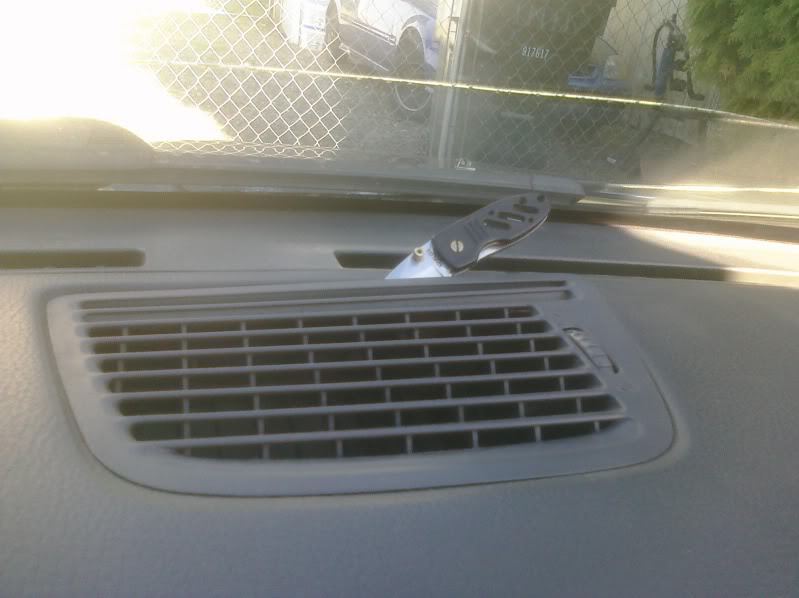
On the big vent by the window, Push in a Pocket Knife into the window side of the vent, a slight push in then pushing towards the glass will pop the side of the vent up, just move along the top then pull it out with your hang and your onto the next step
Step 4:

Once the Vent is removed, a very well hidden 10mm is waiting.
Step 5:
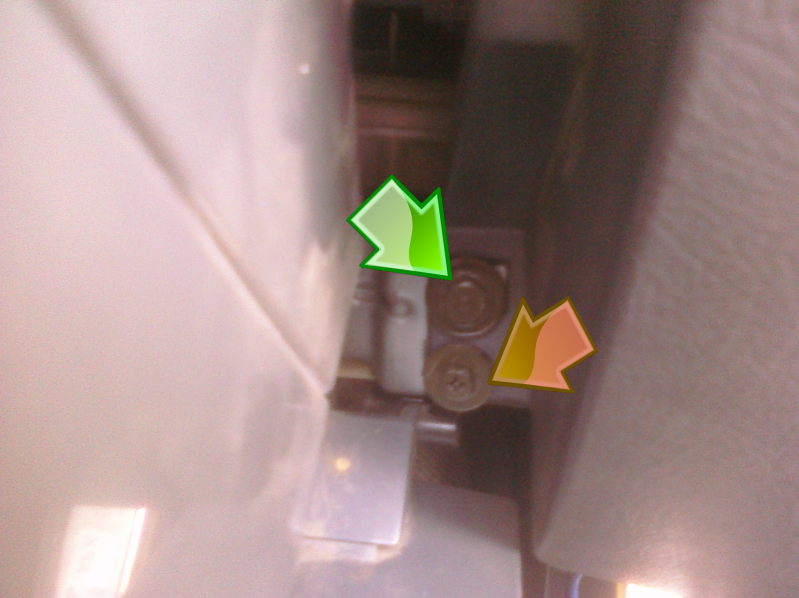
Open the Glove box and look in on Passenger Side, You will Notice these two bolts.
Take the green one out but leave the red/orange one in.
Step 6:
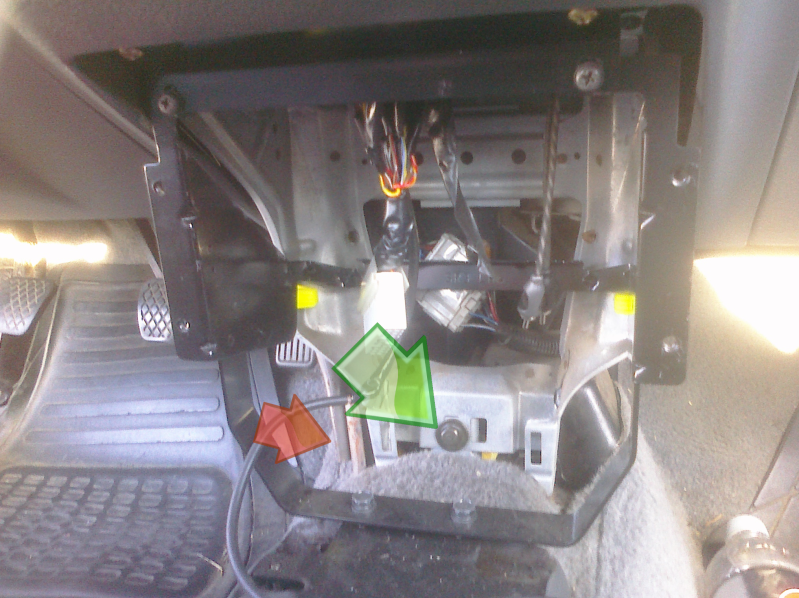
Remove your Center Console (2 screws or 12 Screws depending if you have the stock or optional one) and then you will find these two bolts. The Green one is obvous but the red one on the side needs to come out as well.
while your here, Use your plyers to press down the tabs on the brown wire loom connector and push it out. This will save you from having to do it with the dash out.
Steo 7:
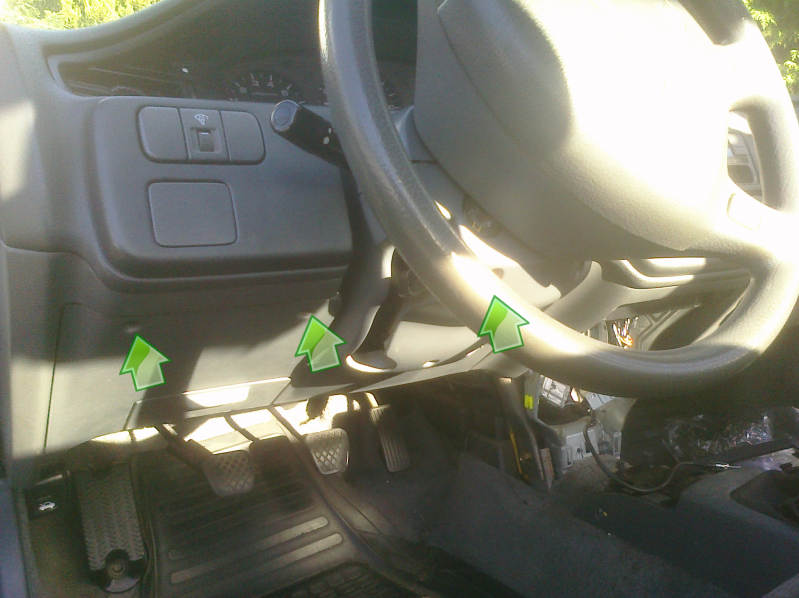
Time to get the Steering wheel out of the way so you can remove the dash.
Remove the 3 screws. and then pull down then set the cover aside for now.
Step 8:
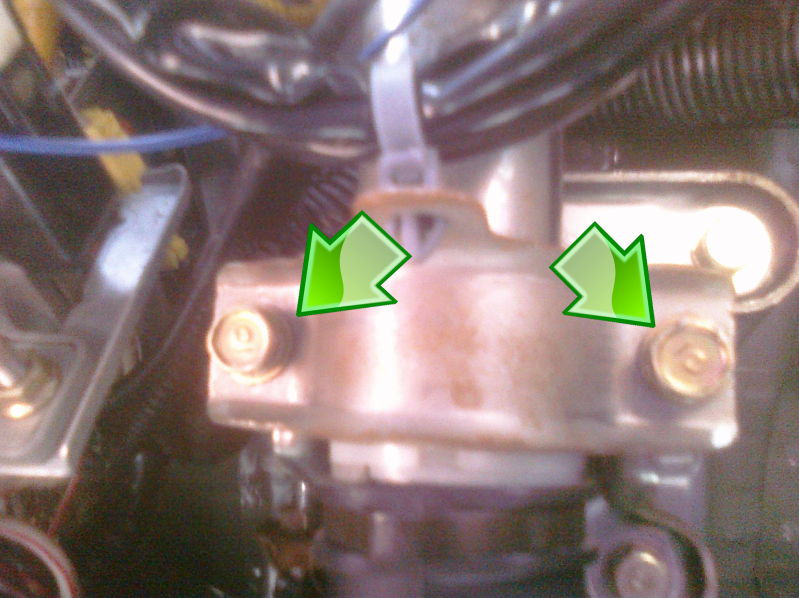
The two 12mm bolts here need to come out so the steering wheel can lay down
Step 9:
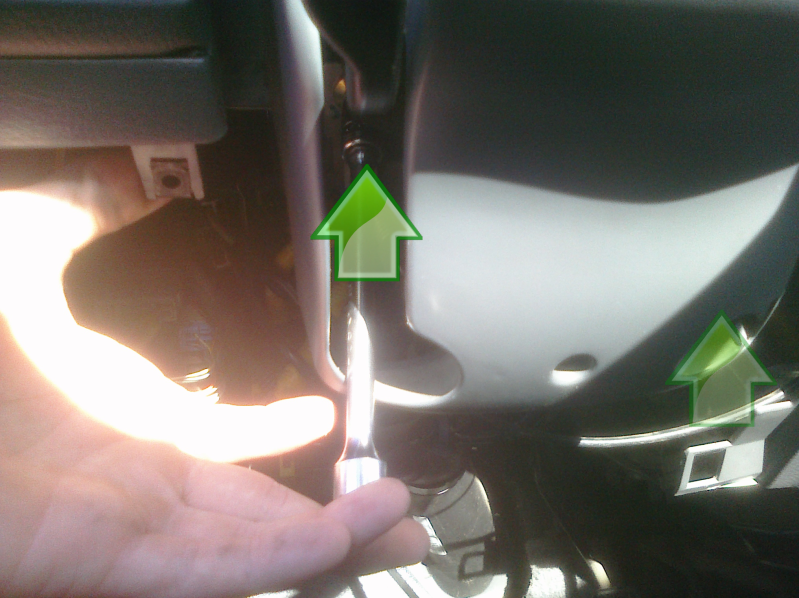
2 12mm bolts hold the steering wheel to the dash. they need to come out.
Step 10:
Pull Down on the steering wheel and it will come down as shown. You will want a second person to help remove the dash, go get them now.
Have both people pull the dash up and straight back
Step 11:
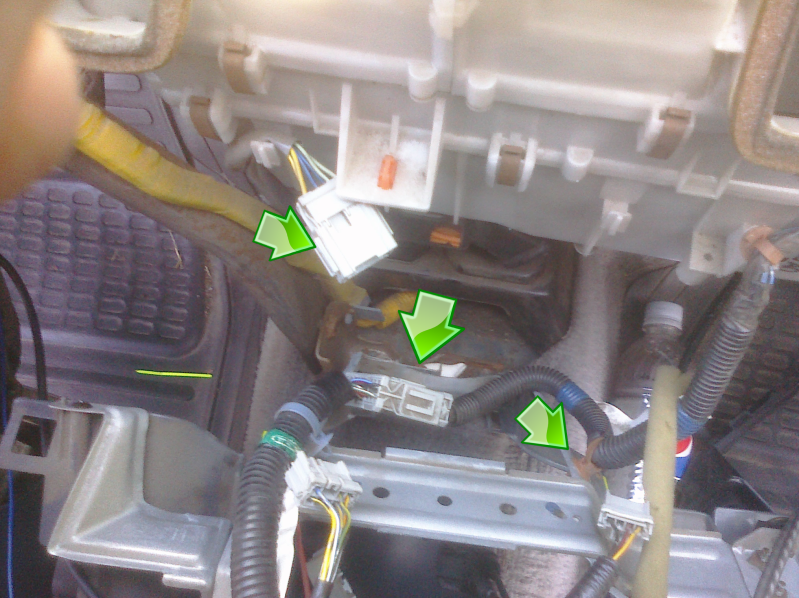
There will be lots of wires to undo. 3 connectors on driver side + the ground, 2 on passender, and multiple in the middle. In the middle towards passenger side there will be a the cable for the heater control, you need to unloop it from the heater box and un clip it,
Step 12: After everythings disconnected Pull the Dash out on of the doors and then set it down and get ready for whatever other project you where going to do. Be it installing alarm, Fixing broken panels, heater controls, etc...
Installation is reverse of removal. Dont forget to put the ground on the the steering column. If you dont put it on then none of the accessories, clock, radio, etc wont work.
This took me about 30mins to do it, However I have done it before as well. Give your self more time to do it if its the first time diving in. I finished my project and had everything back together in about an hour and half including a break before the dash back in.
Tools Needed:
Ratchet(I Used 3/8")
Extension(I Used a 6" Extension)
10MM Socket
12mm Socket
Phillips Screw Driver
Plyers (To unconnect wire loom connectors)
Extra Person to help(starts @ step 10)
Step 1:
On both ends of the Dash is this end cap, use the end of a pocket knife or a screw drive to open it up, just slide it in and a slight press in pushed out the cover
Step 2:
That leaves this. Take your Ratchet and 10MM Socket and remove this bolt on Driver and Passenger Sides
Step 3:
On the big vent by the window, Push in a Pocket Knife into the window side of the vent, a slight push in then pushing towards the glass will pop the side of the vent up, just move along the top then pull it out with your hang and your onto the next step
Step 4:
Once the Vent is removed, a very well hidden 10mm is waiting.
Step 5:
Open the Glove box and look in on Passenger Side, You will Notice these two bolts.
Take the green one out but leave the red/orange one in.
Step 6:
Remove your Center Console (2 screws or 12 Screws depending if you have the stock or optional one) and then you will find these two bolts. The Green one is obvous but the red one on the side needs to come out as well.
while your here, Use your plyers to press down the tabs on the brown wire loom connector and push it out. This will save you from having to do it with the dash out.
Steo 7:
Time to get the Steering wheel out of the way so you can remove the dash.
Remove the 3 screws. and then pull down then set the cover aside for now.
Step 8:
The two 12mm bolts here need to come out so the steering wheel can lay down
Step 9:
2 12mm bolts hold the steering wheel to the dash. they need to come out.
Step 10:
Pull Down on the steering wheel and it will come down as shown. You will want a second person to help remove the dash, go get them now.
Have both people pull the dash up and straight back
Step 11:
There will be lots of wires to undo. 3 connectors on driver side + the ground, 2 on passender, and multiple in the middle. In the middle towards passenger side there will be a the cable for the heater control, you need to unloop it from the heater box and un clip it,
Step 12: After everythings disconnected Pull the Dash out on of the doors and then set it down and get ready for whatever other project you where going to do. Be it installing alarm, Fixing broken panels, heater controls, etc...
Installation is reverse of removal. Dont forget to put the ground on the the steering column. If you dont put it on then none of the accessories, clock, radio, etc wont work.
This took me about 30mins to do it, However I have done it before as well. Give your self more time to do it if its the first time diving in. I finished my project and had everything back together in about an hour and half including a break before the dash back in.


 .... i might do this, or just be lazy and not do it. Ill let you know how it goes


 compile this up and make a color civic shop manual...