- Mon Sep 05, 2011 11:59 am
#270438
Okay so since i got my car i had this problem, not a major problem but can lead to you getting stuck without fuel. Anyway been asking around on most forums and everyone said its either the light in my cluster (which i changed) or my float- when i ask (even my auto) they said the whole float must be changed, ya i can also say that but what causes it...i now know, and will let you guys know. YOU STILL NEED TO CHANGE YOUR WHOLE FLOAT!!!
Materials/Parts Needed:
-a new Float (OEM: R1100 no stock only jhb)
-second hand Float (I paid R200-you will know what to look out for when done with this thread)
* note: any float will work -not sure in other countries, so just check.
Tools Needed:
-Star screwdriver
-Flat screwdriver
-Hammer
-A cloth/rag
-Cleaning Detergents
-paint brush
E.T.A:
-Start Time: 10h30
-End Time: 13h10
This was including running to the scrap yard
Pros:
- You Know you need fuel
-Get to clean all the dust that settles on top of the tank, causing you to sneez not knowing why
Cons:
- My F*#cking back aches...
- And my finger lol
The DIY
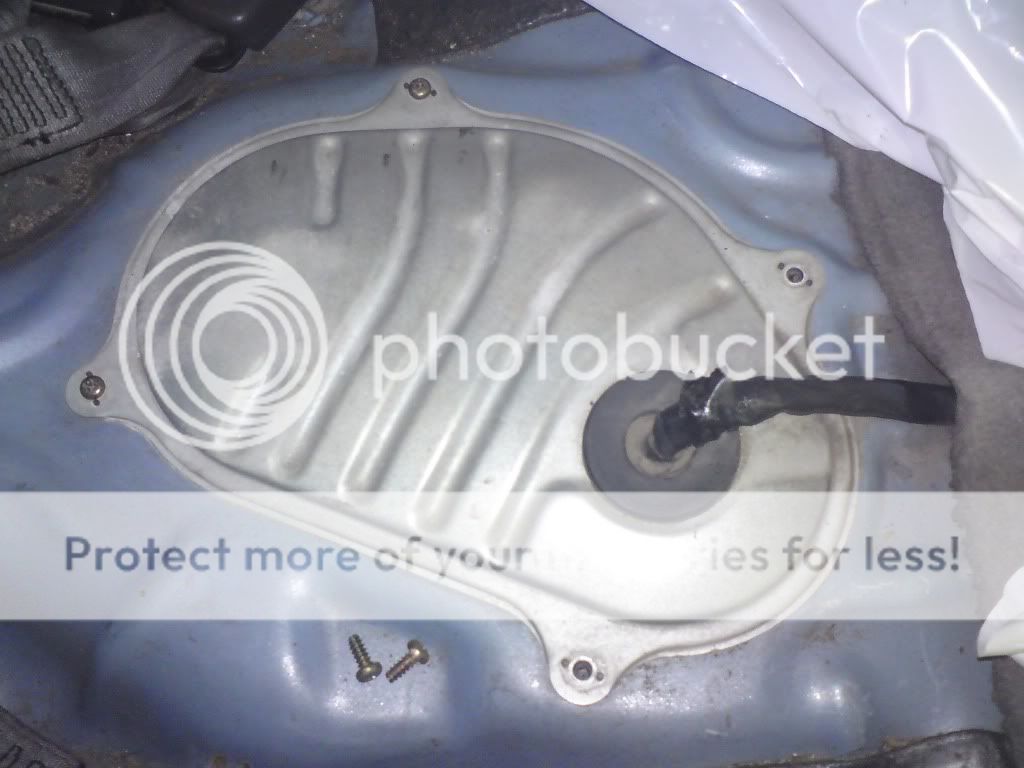
ABOVE- Lift up bottom of rear seat, you will see this cover. Remove four screws with your star screwdriver
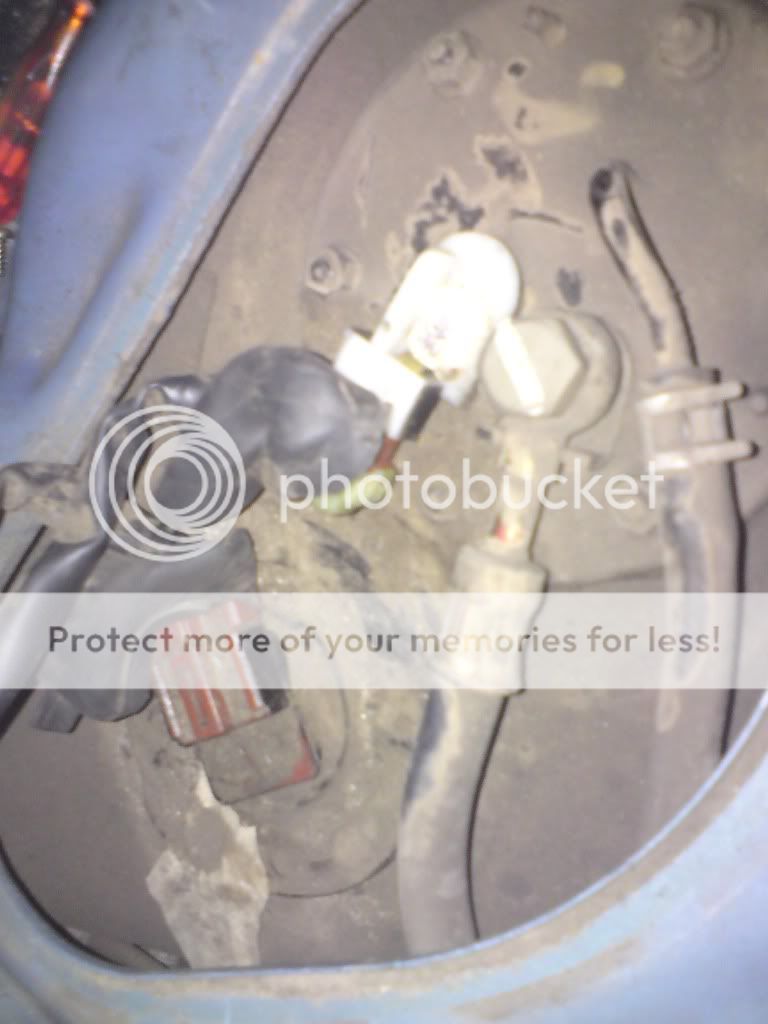
ABOVE- sorry pic is slightly mis-rotated (not sure if theres such a word) and can't straighten it, but you will understand. Okay once the cover is off you will see this, see that dust (16 years of it lol) take your paint brush and sweep it slowly towards the front of your car, you will see a hole where the ground is visible, then once most of the dust is gone take your cleaning detergents and spray it and clean with a cloth. Now ...
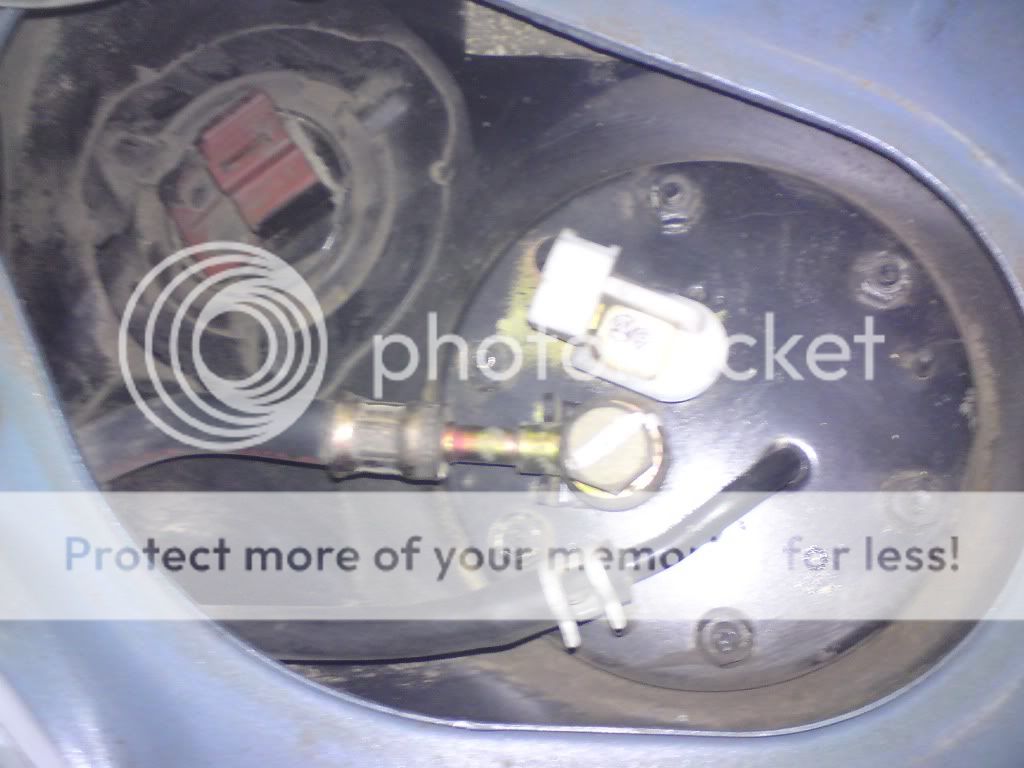
ABOVE- ...it should start to look like this (you can get it more cleaner, i did not take a pic of how clean i got it sorry), see the plugs are unplugged... :thumbup: , then you see three prongs , take your flat and hammer and hit this in an anti clockwise direction and should loosen up- if its tight like mine was then spray some silicon spray

ABOVE- when you done the above you should end up looking like this...

ABOVE- carefully pull out the float, watch out for the big black float as it just makes it out the hole...hey this thing still looks good right??? look at that rectangular box, remember it and go to the next pic
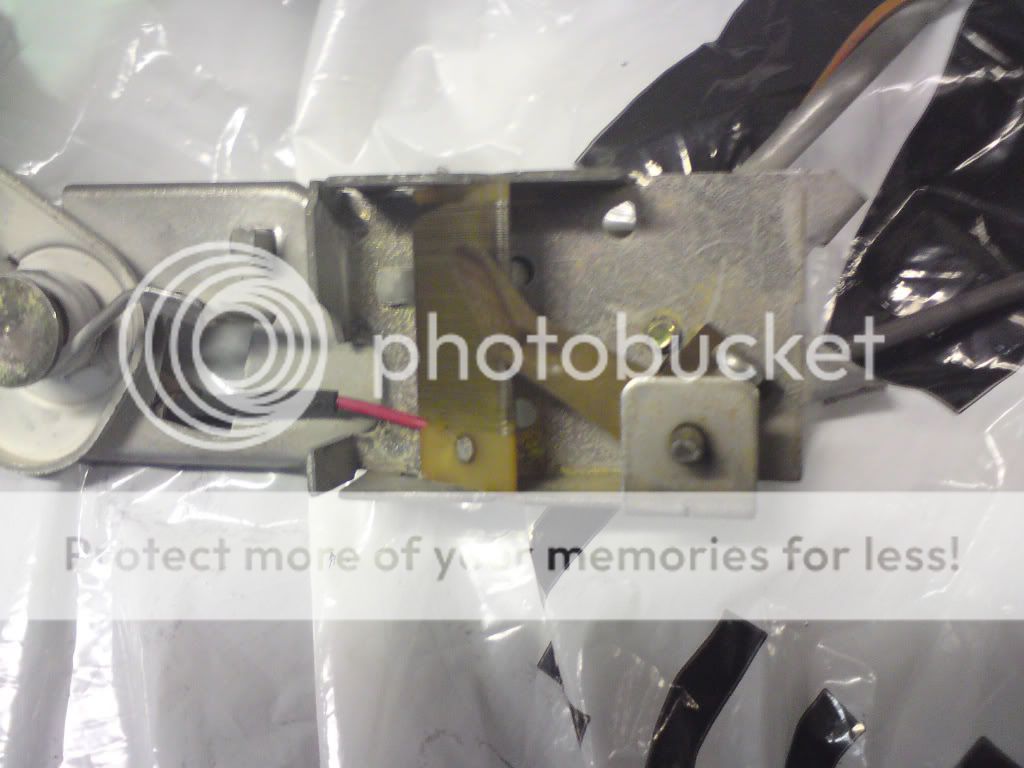
ABOVE- open it using you flat- it has three clips at the bottom of it and once opened- look at those wires- they are burnt, so that tells you when you have reached max or min aswell as kicks the reserve light on...YIPPEEE now we all know whats the cause...
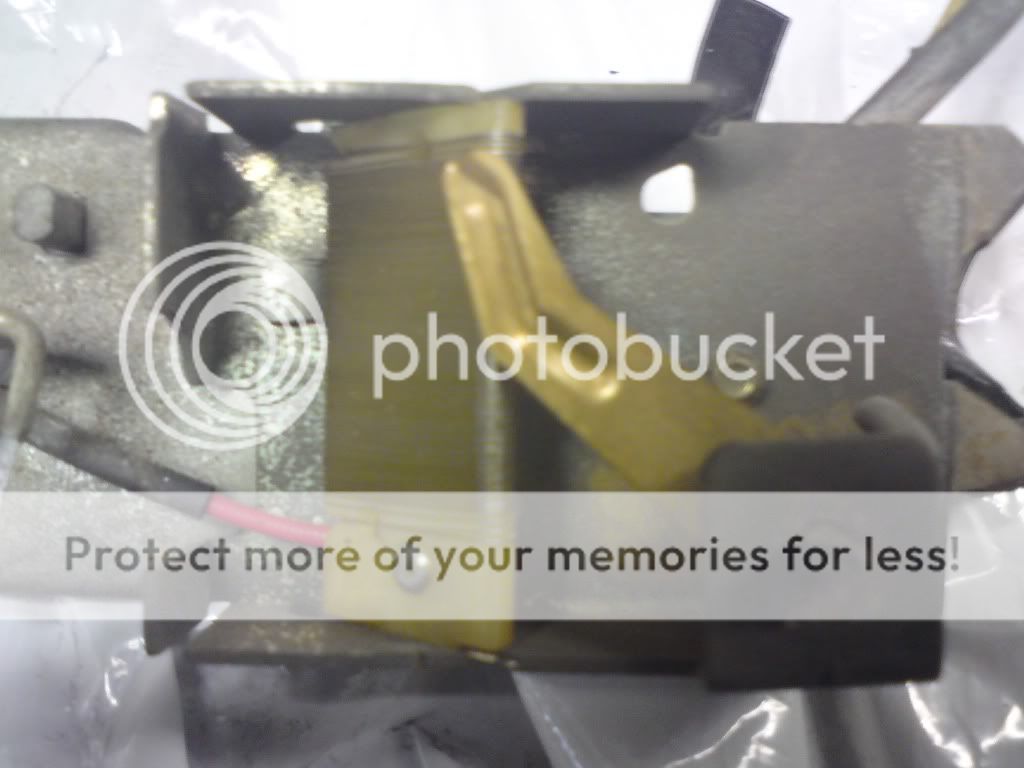
ABOVE- so i took out that electrode whatever its called, out of my second hand one as my one looked better...and lets see what happened
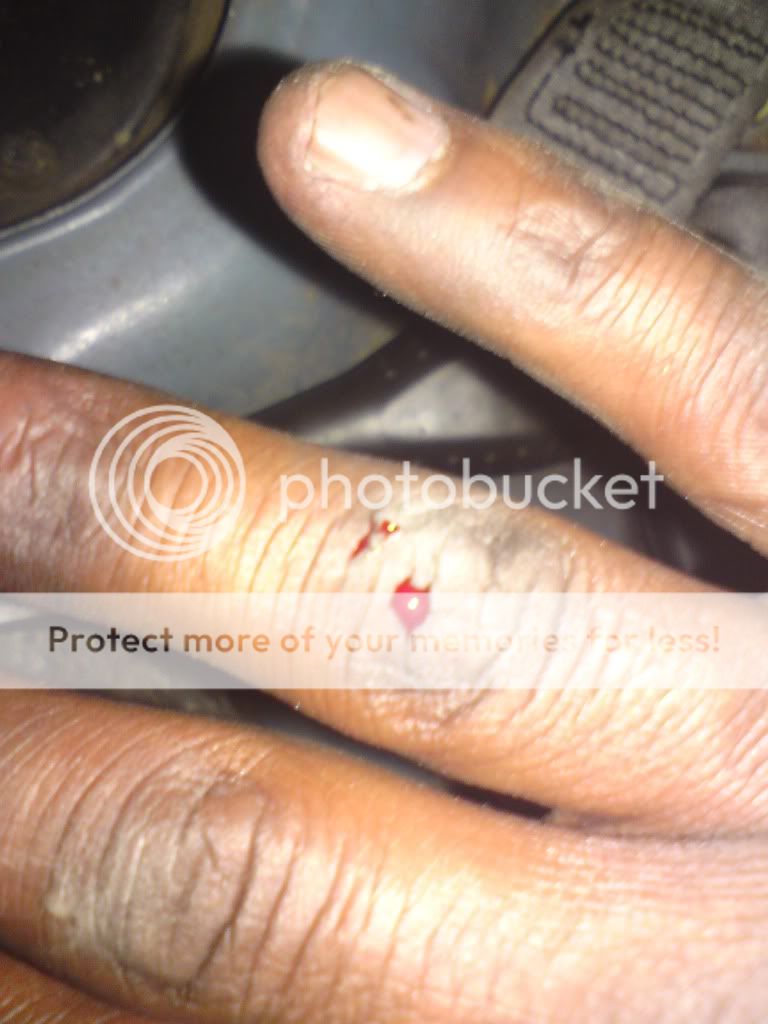
ABOVE- I F#*cking cut my fingers, as the saying goes; "no pain no gain"- so carefully put everything back and clean your sh!t as you put it back. and look what happens...

ABOVE- i hit reserve, now i had to drive my car till my fuel ran out - luckily it was almost empty lol.
:thumbup: :wave:
Materials/Parts Needed:
-a new Float (OEM: R1100 no stock only jhb)
-second hand Float (I paid R200-you will know what to look out for when done with this thread)
* note: any float will work -not sure in other countries, so just check.
Tools Needed:
-Star screwdriver
-Flat screwdriver
-Hammer
-A cloth/rag
-Cleaning Detergents
-paint brush
E.T.A:
-Start Time: 10h30
-End Time: 13h10
This was including running to the scrap yard
Pros:
- You Know you need fuel
-Get to clean all the dust that settles on top of the tank, causing you to sneez not knowing why
Cons:
- My F*#cking back aches...
- And my finger lol
The DIY
ABOVE- Lift up bottom of rear seat, you will see this cover. Remove four screws with your star screwdriver
ABOVE- sorry pic is slightly mis-rotated (not sure if theres such a word) and can't straighten it, but you will understand. Okay once the cover is off you will see this, see that dust (16 years of it lol) take your paint brush and sweep it slowly towards the front of your car, you will see a hole where the ground is visible, then once most of the dust is gone take your cleaning detergents and spray it and clean with a cloth. Now ...
ABOVE- ...it should start to look like this (you can get it more cleaner, i did not take a pic of how clean i got it sorry), see the plugs are unplugged... :thumbup: , then you see three prongs , take your flat and hammer and hit this in an anti clockwise direction and should loosen up- if its tight like mine was then spray some silicon spray
ABOVE- when you done the above you should end up looking like this...
ABOVE- carefully pull out the float, watch out for the big black float as it just makes it out the hole...hey this thing still looks good right??? look at that rectangular box, remember it and go to the next pic
ABOVE- open it using you flat- it has three clips at the bottom of it and once opened- look at those wires- they are burnt, so that tells you when you have reached max or min aswell as kicks the reserve light on...YIPPEEE now we all know whats the cause...
ABOVE- so i took out that electrode whatever its called, out of my second hand one as my one looked better...and lets see what happened
ABOVE- I F#*cking cut my fingers, as the saying goes; "no pain no gain"- so carefully put everything back and clean your sh!t as you put it back. and look what happens...
ABOVE- i hit reserve, now i had to drive my car till my fuel ran out - luckily it was almost empty lol.
:thumbup: :wave:
Spoon Sports
1995 Frost White EG9 SiR

1995 Frost White EG9 SiR