old guy, new sol

Post YOUR Del Sol here

Postby Ajax1989 » Thu Jul 02, 2009 3:47 pm

wow looks good

i wanna do this now :thumb:
Image
User avatar
Ajax1989
Nissan Primera
Nissan Primera
 
Posts: 4762
Joined: Sun May 24, 2009 5:48 am
Location: CA

Postby the ghoul » Fri Jul 03, 2009 9:32 pm

thecrow wrote:how do you like the blue while driving? seems like it would be kind of dull. maybe thats just the pics. but i like where you headed once again keep up the good work

at dusk its kinda annoying because i didnt get the wide angle led's so there is slight dark spots on diffrent places on the guage faces...
once its all dark it isnt as noticable..
yeah the blue bleaches out the red... basically the red on the guages just look like dark spots... but they are sweet while driving... no complaints.

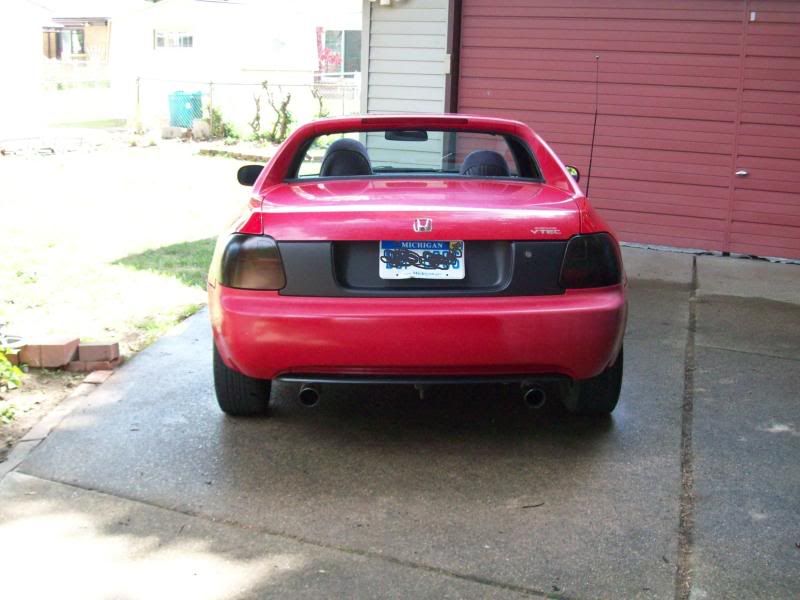
well its been an eventfull day
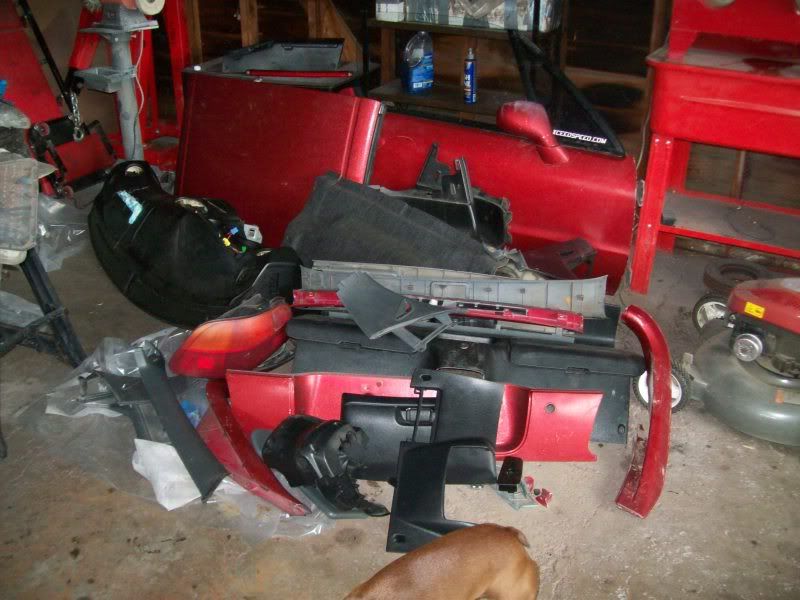
buddy of mine hooked me up with one of his friends who recently wrecked his sol. He was nice enough to let me pick tru the wreckage before he had the shell halled off. I ended up with a door, targa top, tail panel, tailights, cowling around the rear window and almost the entire intirror.... can any one say carbon wrap?

Image


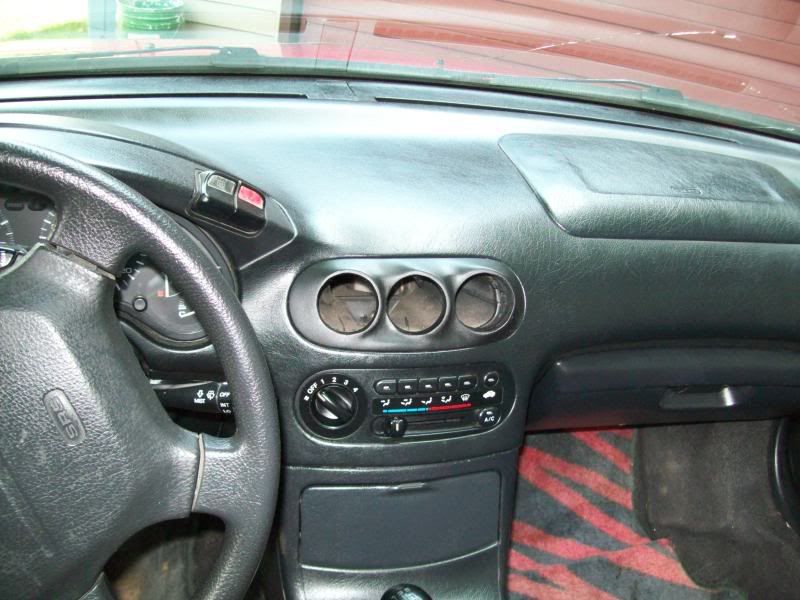
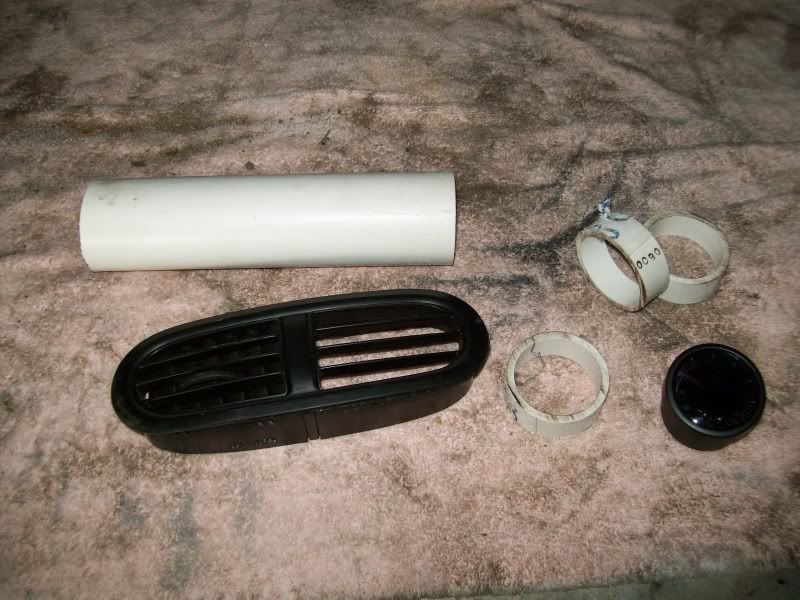
i also recieved in the mail the glowshift guage i didnt order!! I ordered an air fule guage and they sent me a boost guage... ah well... they are shipping out the new one... and i had a guage on hand to start fabbing my pod...

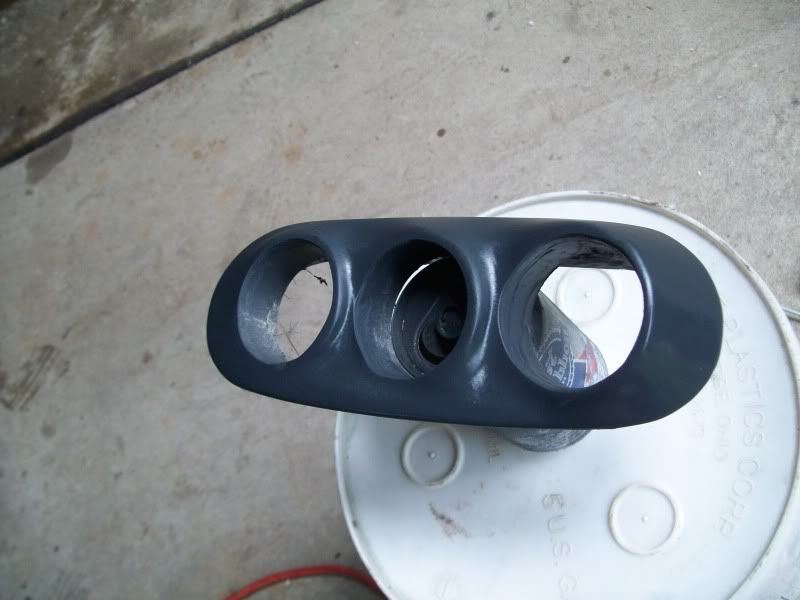
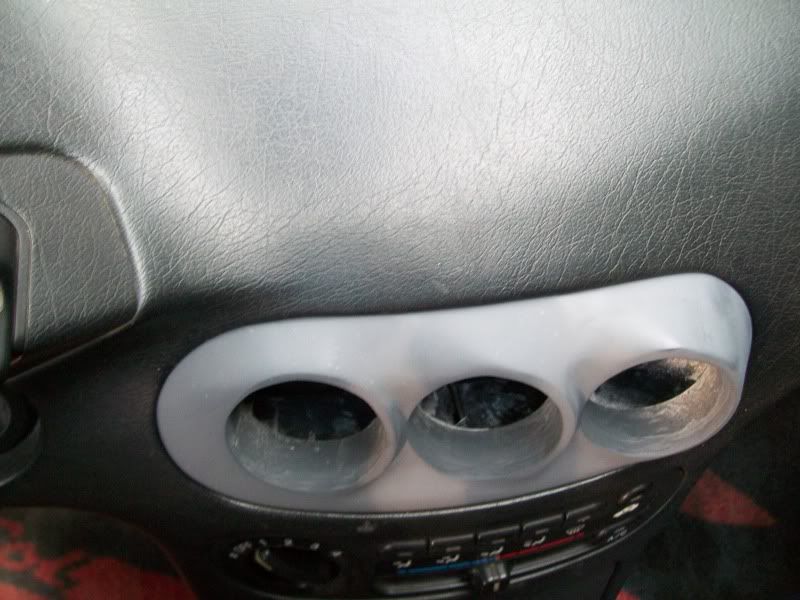
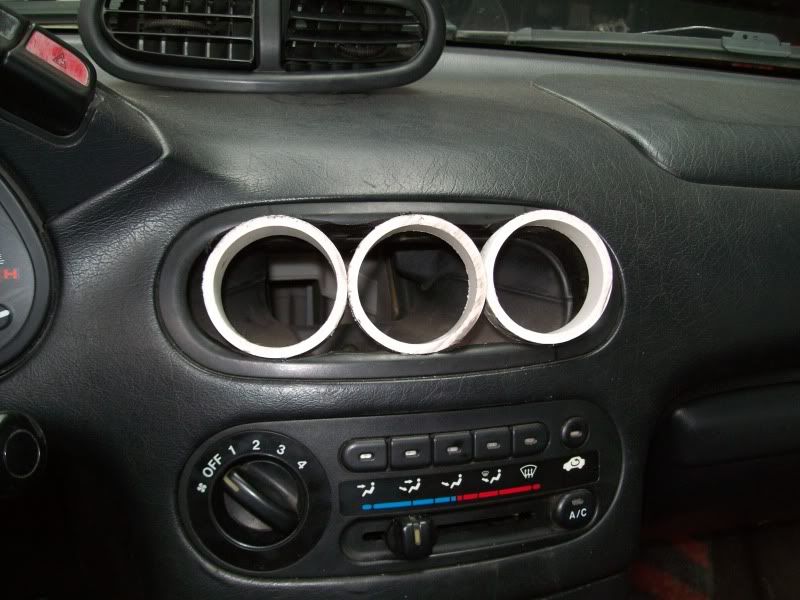
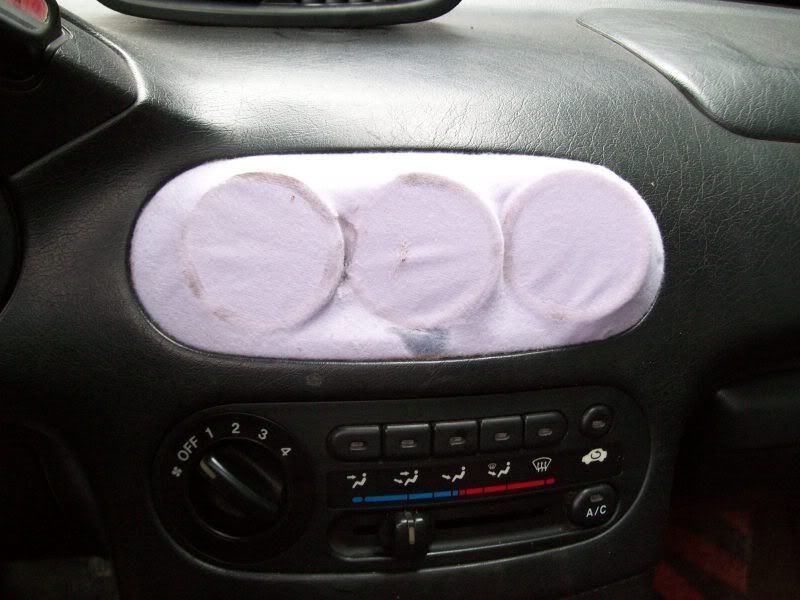
Im sick of a pillar mounts... they are just way too over done and advertise more than a 'boost inside' sticker.

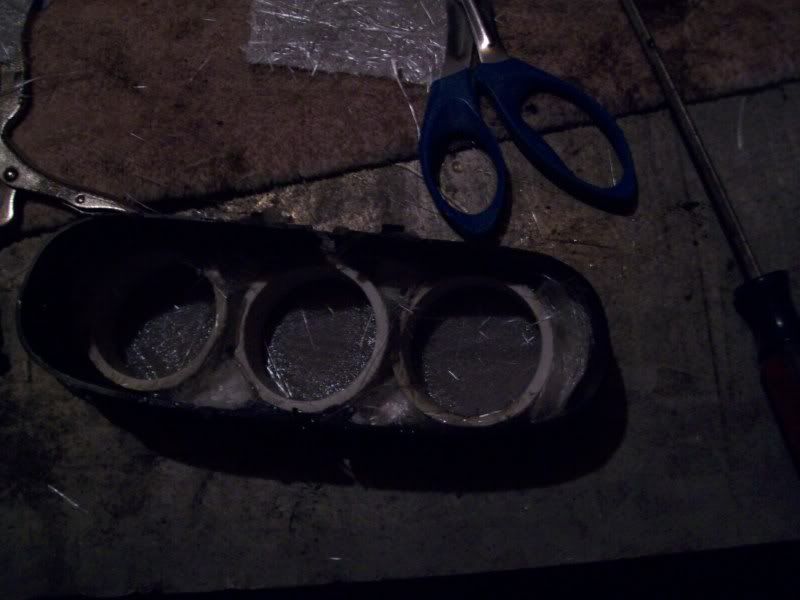
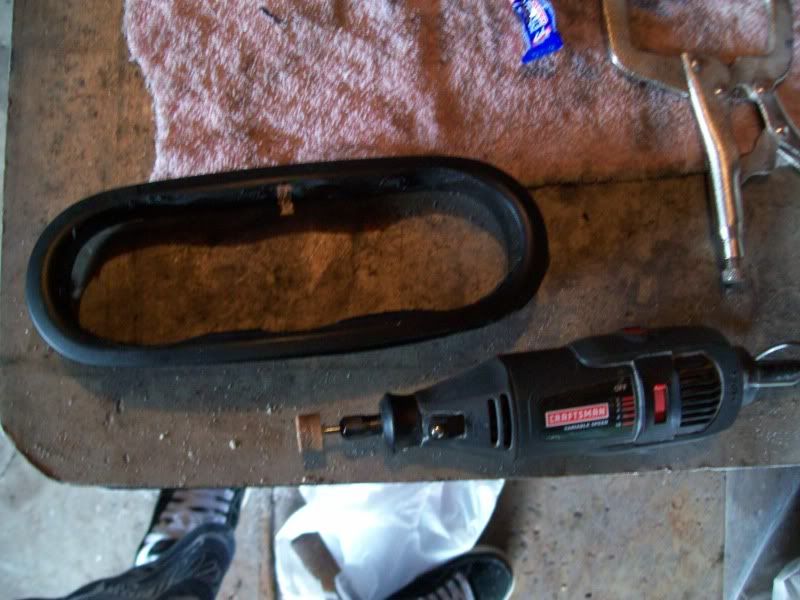
so i took the extra center airvent i snagged and got to work..

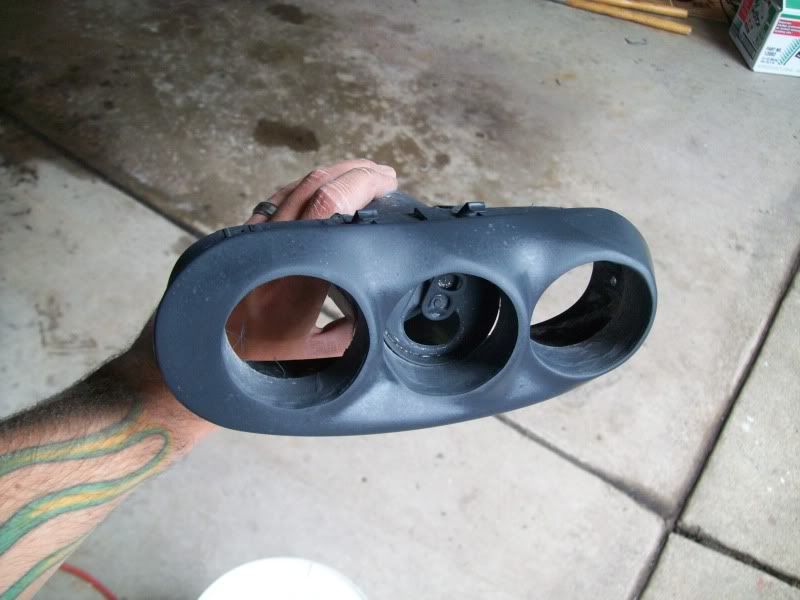
started off by picking up some pvc that the guage slid into snugly, and cutting out three chunks about 2 inches long

Image

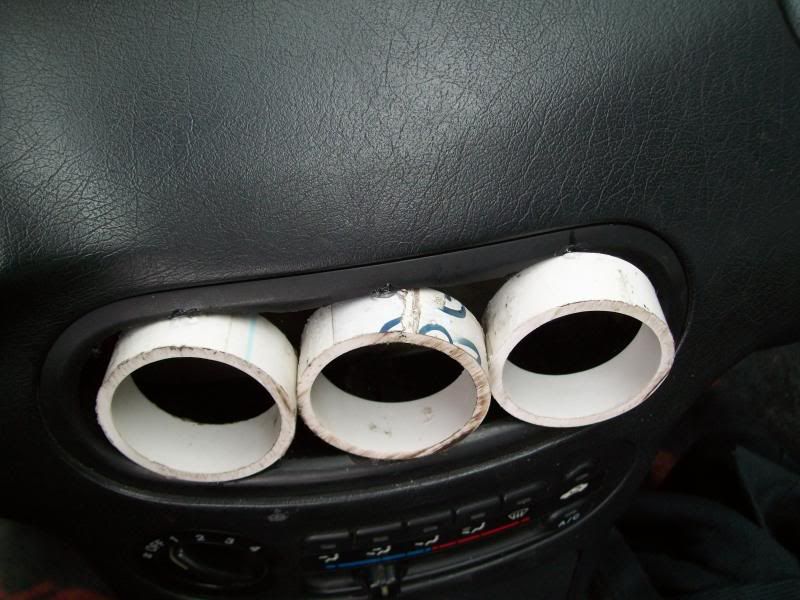
i then took my rotery tool and got to work cutting out the heater vent bits and grinding out a little bit of the eges to clearence for the rings.

Image

I then popped the remains of the heater vent into place, positioned and carefully superglued the rings in place

Image

Image

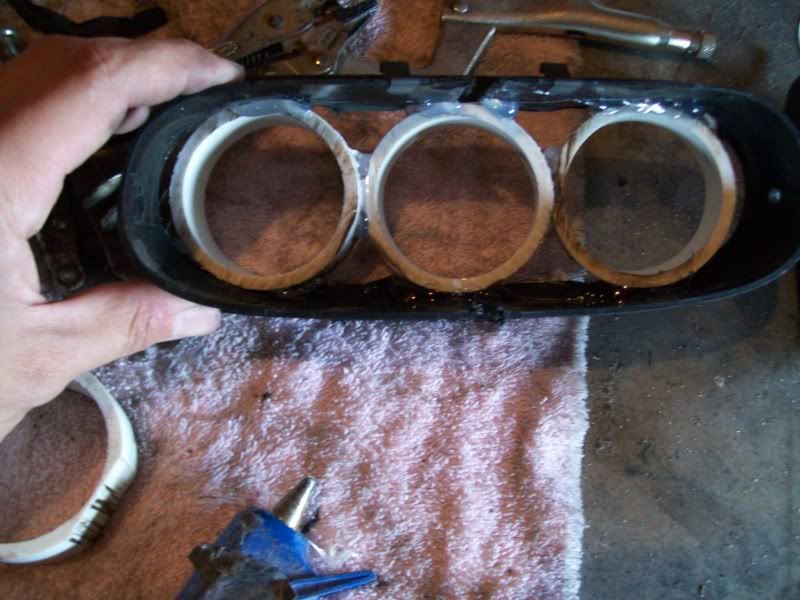
i then popped it out and stold my hot glue gun back from my wife! and started re-inforcing the rings

Image

i then wrapped some light thickness fleace fabric over the face and the rings, hotgluing the face of the rings and wrapped around and glued it along the back side of the heater vent lip... I must stress this, the more gay the fabric you buy the better your results will be, also you want to buy absorbent fabric that stretches alot!

when your hot-gluing make sure to take your time to stretch all the wrinkles out that you can... this will save you work down the road in the finishing stages...

Image

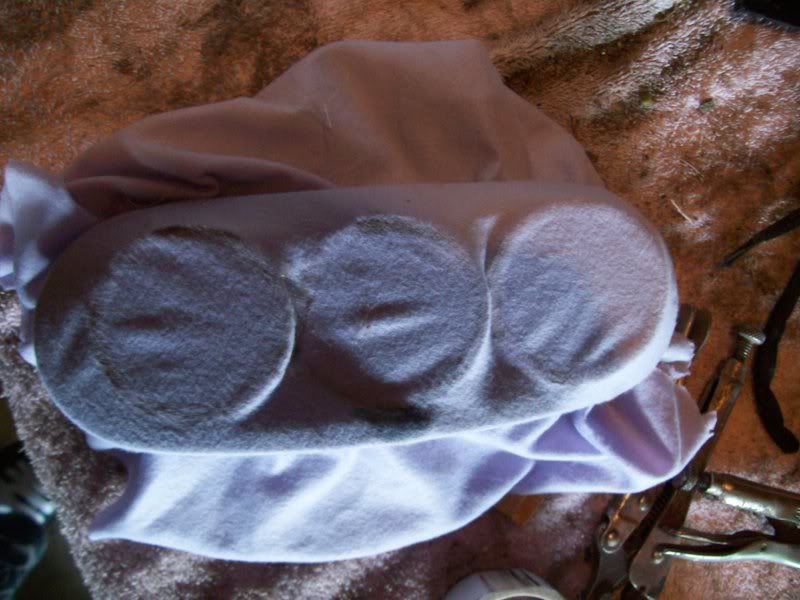
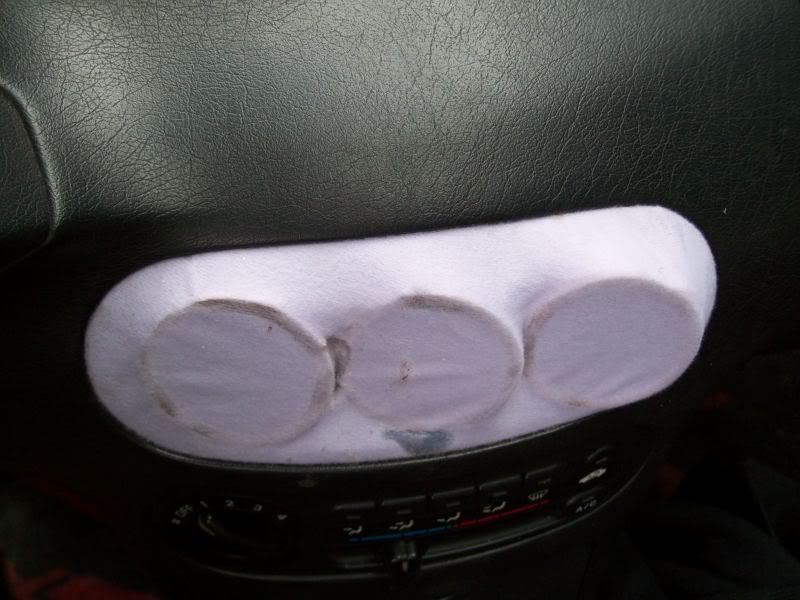
i then trimmed the excess fabric away and test-fitted it to make sure i liked the contours of it.

Image

Image

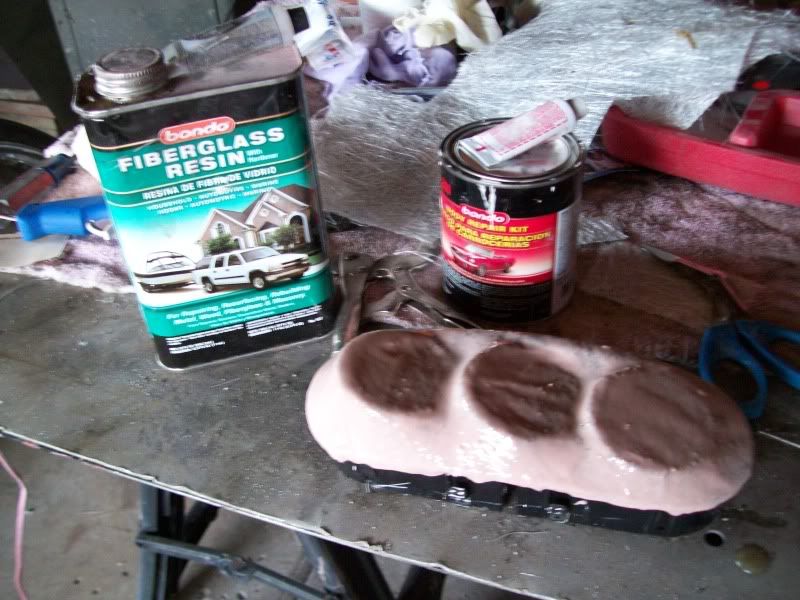
it looked good to me, so using some automotive repir fiberglass resin i wetted down the flece and built up excess in any low spots to make the smoothing process a little easier.

Image

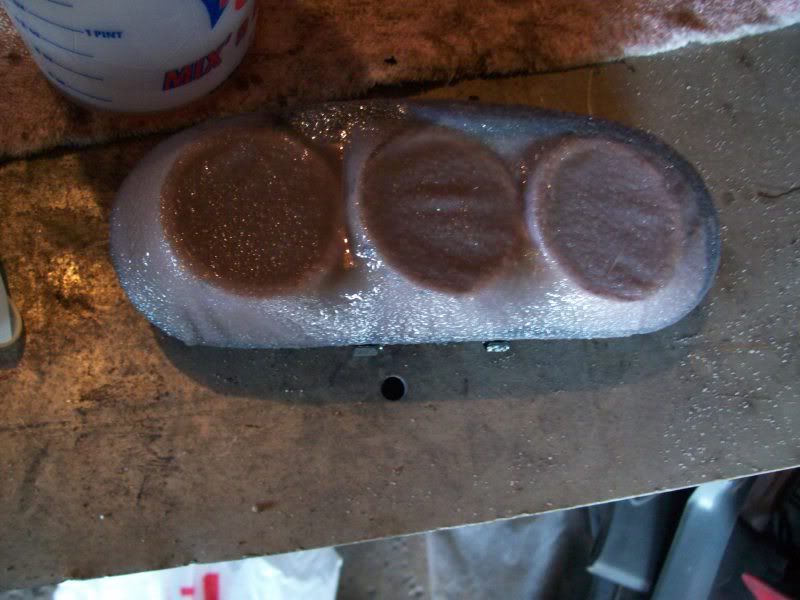
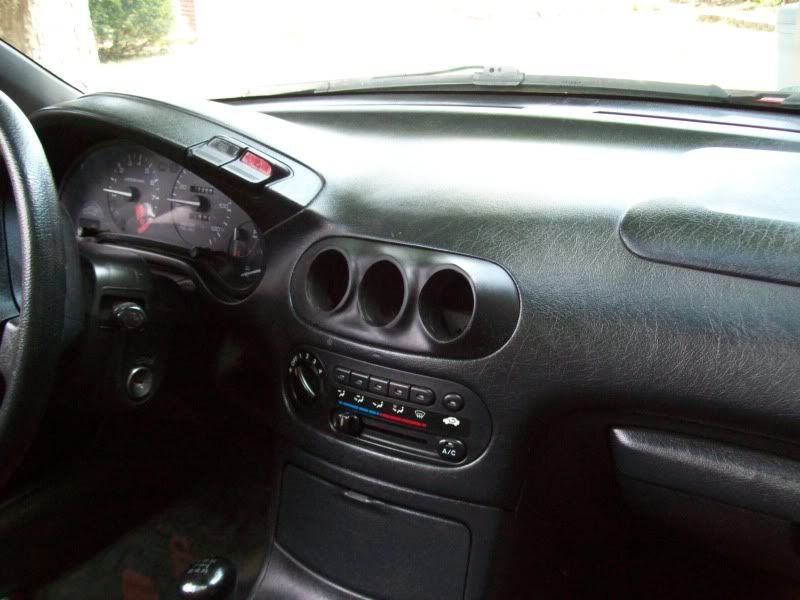
once the resen has cured ill flip it over, and lay some chop cloth on the back side...

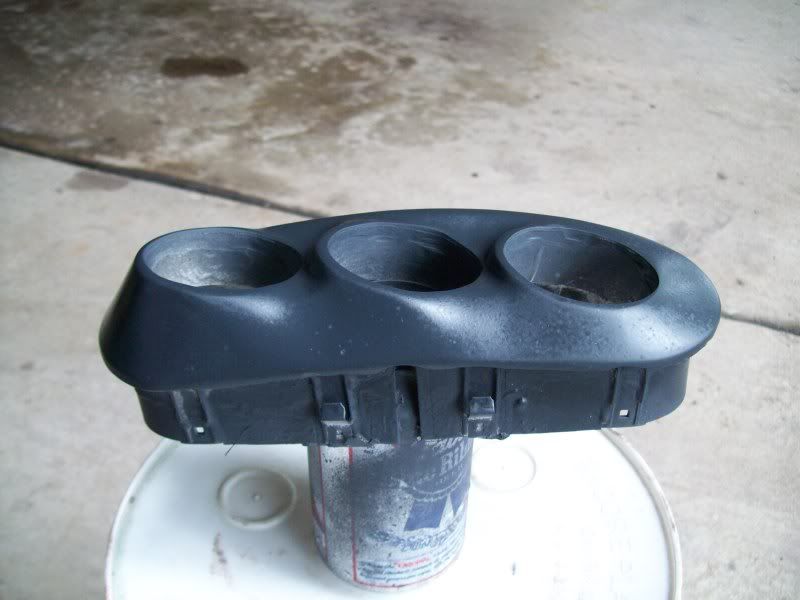
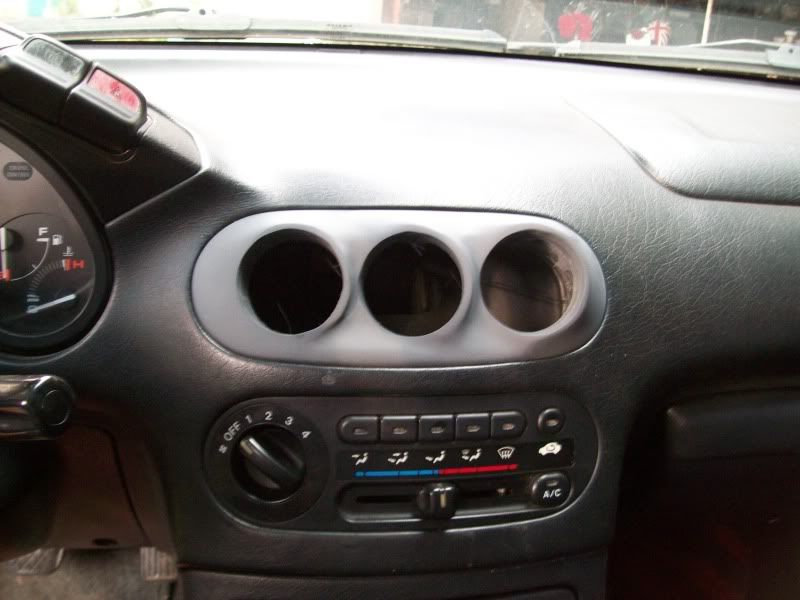
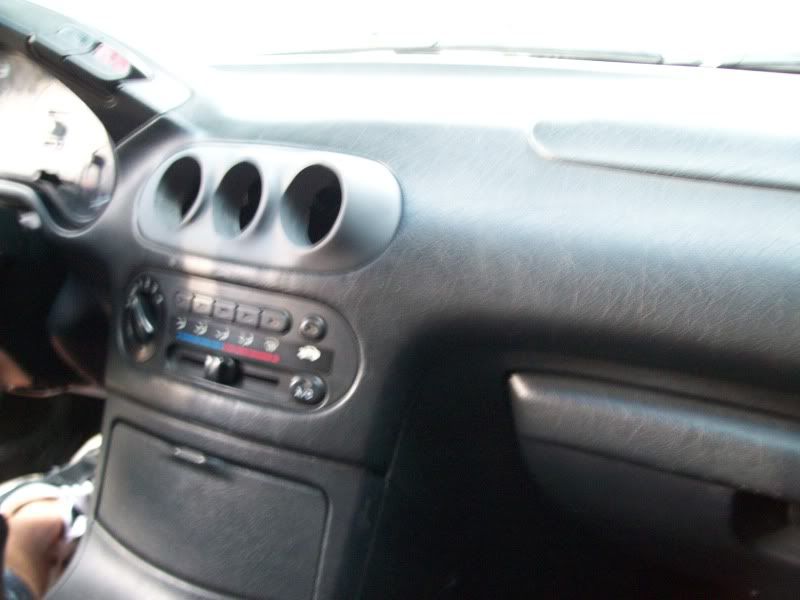
then smooth it out with some filler, and paint it flat black for now...

one day i will carbon wrap it at the same time as most my other extra intirror parts
the ghoul
EG Regular
 
Posts: 111
Joined: Fri Apr 17, 2009 10:44 am
Location: warren mi

Postby 92egdxhatch » Fri Jul 03, 2009 9:39 pm

i like the gauge pods man, and nice score on all the sol parts :thumb:
1993 Honda Civic VX - Street/Strip Project
1994 Honda Civic EX - Daily Driver

HYBRID Fabrication!
User avatar
92egdxhatch
EG Groupie
EG Groupie
 
Posts: 632
Joined: Sat Apr 11, 2009 11:37 pm
Location: STL

Postby Ajax1989 » Fri Jul 03, 2009 9:43 pm

looks good, u got lucky and got all that stuff for your sol :thumb:

i need to learn how to fiberglass things
:thumb:
Image
User avatar
Ajax1989
Nissan Primera
Nissan Primera
 
Posts: 4762
Joined: Sun May 24, 2009 5:48 am
Location: CA

Postby marquisdee1018 » Fri Jul 03, 2009 10:21 pm

I'm really liking the gauge pod.
1992 EG8
Image
User avatar
marquisdee1018
EG Groupie
EG Groupie
 
Posts: 397
Joined: Sat Mar 17, 2007 11:58 pm
Location: Dallas

Postby the ghoul » Sat Jul 04, 2009 2:54 am

thank you all,
basically go out to any major auto parts store, any hardwear store, any home improvement store and any craft store
buy the following at each
auto parts:
-woven fiberglass matt
-'chop' fiberglass matt
-fiberglass resin
-body filler
-glazing or 'finishing' putty
- sand paper (150 and 220 grit)
home improvement store
- 3/4" MDF (medium density fiberboard)
- saber saw (if you donot have one)
- 1/8" or thicker wood dowel (3 foot (ish) lengths)
hardwear store
-disposible brushes
- paint mixing buckets (small disposible plastic ones)
- laytex gloves
crafts store
- fleace fabric ( thin, absorbant, must be very stretchy, preferibly a very gay pattern)
- hot glue gun
- siccisor set
- a small tuperwear bin ( for the leftover fiberglass)

-basically you use the mdf and the wood dowels to make the structure of what ever you want to make (cut a ring for a subwoofer and use the hotglue and dowes to suspend it where ever you want)
-stretch the fabric over it and hotglue it in place
-soak the fabric with resin
-after resin hardens flip your creation over and cover the back side with a bunch of layers of fiberglass bits (dosent have to be full sheats, just cut up scraps will work, you will never see this side so dont worry, be messy) make sure to place alot of fiberglass holding the ring for support
- after the backing resen is hardned smooth out the face of your creation with body filler and glazing putty as directed....

it honestly is that simple...
all it takes is some pratce and imagination...


speaking off,
the facad layer was hardened so i flipped it over and stuffed scrap chop matt in ever nook and cranny i could and soaked it in resin, making sure not to get any on the inside of the pvc rings.
Image
the ghoul
EG Regular
 
Posts: 111
Joined: Fri Apr 17, 2009 10:44 am
Location: warren mi

Postby the ghoul » Sat Jul 04, 2009 3:25 pm

here is a little trick for all who want to fiberglass...its called the 'milk shake'
this has worked well for me in the past... basically you mix up some body filler in the resin till you get something nice and thick (thick enough so it gives you coverage but not thick to the point that it wont level out once applied). once you get a good consistancy add the body filler hardener and resen hardenener, mix up and apply....

i like this becase i hate working with body filler, its too thick and nasty and always ends up drying out half way thru the process.

that and you have to do alot of sanding to reveal the contours you wanted...
Image
the ghoul
EG Regular
 
Posts: 111
Joined: Fri Apr 17, 2009 10:44 am
Location: warren mi

Postby chrono404 » Sat Jul 04, 2009 4:43 pm

That Gauge pod will be sick when done.
Awesome DIY Work. :thumb:
Image
2017 Chevy BoltEV DD |2001 Honda CRV SE
User avatar
chrono404
DIY Tranny Guru
DIY Tranny Guru
 
Posts: 4319
Joined: Tue Jan 15, 2008 12:16 am
Location: Washington State, USA

Postby the ghoul » Sat Jul 04, 2009 10:20 pm

chrono404 wrote:That Gauge pod will be sick when done.
Awesome DIY Work. :thumb:

hey thanx!
im very pleased with it so far...
i got the first sanding (with 150 grit) done, got some thick sandable primer on it..
Image
Image
Image
the ghoul
EG Regular
 
Posts: 111
Joined: Fri Apr 17, 2009 10:44 am
Location: warren mi

Postby Ajax1989 » Sat Jul 04, 2009 11:03 pm

looks awesome dude :thumb:
Image
User avatar
Ajax1989
Nissan Primera
Nissan Primera
 
Posts: 4762
Joined: Sun May 24, 2009 5:48 am
Location: CA

Postby the ghoul » Sun Jul 05, 2009 12:17 am

94_jdm_ferio wrote:looks awesome dude :thumb:

thank you very much!
i think its comming along nicely... i just cant wait for all the *correct* guages to show up so i can be total ricer boy and have a boost guage not connected to any thing!
might just put a barbed fitting onto my CAI so i can see how much my car sucks! :lol:

OK two quickies,

test fitted the pod, very snug but looks great.

Image

Image

Image

i touched up the little spots still left with some glazing putty. tomorrow i will sand it down, and shoot some semi-gloss black on it and call it good for now...

I took a min or so and sanded down the extra set of tail lights and shot them with some rc car window tint....

They were already painted a red at one time? and had some stickers stuck to them... well i didnt prep them all that great and some sticker gum got left behind, but they will work for now until i get some cheap-o clears that i can spray tint...

Image
the ghoul
EG Regular
 
Posts: 111
Joined: Fri Apr 17, 2009 10:44 am
Location: warren mi

Postby eg_turbo_hatch » Sun Jul 05, 2009 1:14 am

looks like everything is coming along very nicely :thumb:
i really like the gauge pod 8)
User avatar
eg_turbo_hatch
EG Regular
 
Posts: 181
Joined: Sat Mar 29, 2008 4:18 am
Location: vancouver wa

Postby the ghoul » Sun Jul 05, 2009 2:39 am

eg_turbo_hatch wrote:looks like everything is coming along very nicely :thumb:
i really like the gauge pod 8)

thank you,
i think its a much better solution to the over used a pillar mount...
i think since there is so much intrest in this i might just start a how-to thread for it...
be a good way to teach basics of fiberglassing at the same time....
BTW,
did the finish sanding and painted it flat black...
will have some pics up tomorrow when it goes into place
the ghoul
EG Regular
 
Posts: 111
Joined: Fri Apr 17, 2009 10:44 am
Location: warren mi

Postby eg_turbo_hatch » Sun Jul 05, 2009 2:41 am

looking forward to seeing the pics :thumb:
User avatar
eg_turbo_hatch
EG Regular
 
Posts: 181
Joined: Sat Mar 29, 2008 4:18 am
Location: vancouver wa

Postby the ghoul » Sun Jul 05, 2009 2:55 pm

guage pod painted and installe,
tail lights installed,
car clean for onece!
looking forward to the bbq's this afternoon!
Image
Image
pic thru the windshield
Image
Image
the ghoul
EG Regular
 
Posts: 111
Joined: Fri Apr 17, 2009 10:44 am
Location: warren mi

PreviousNext

Return to Your ride - Del Sol

Who is online

Users browsing this forum: No registered users and 1 guest