

- Wed Jan 20, 2010 4:46 am
#169679
haha i will soon for sure
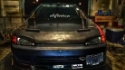
 Sexy
Sexy 

- Wed Jan 20, 2010 7:57 am
#169724
the last few pic of the car wet i could have swarn that was a condom hanging off your antenna  ... i looked a bit closer though just a bunny...
... i looked a bit closer though just a bunny...
- Wed Jan 20, 2010 4:01 pm
#169752
thank guys
appreciate the comments
thats no condom or bunny
Thats Barbie with pigtails
I <3 MY Blades
anyone know where i can get some tein,skunk 2,....... so on
some nice riding suspension for cheap or a more reasonable price then password..?
appreciate the comments
thats no condom or bunny
Thats Barbie with pigtails
I <3 MY Blades
anyone know where i can get some tein,skunk 2,....... so on
some nice riding suspension for cheap or a more reasonable price then password..?
- Wed Jan 20, 2010 4:53 pm
#169768
the blackworks ebay coilovers (its a full coilover) ride nice aka they wont make your back hurt but still stiffen the car up. their like 400 bux shipped


- Sat Jan 23, 2010 11:18 pm
#170606
So this is is so stupid and way upsetting
Just bought that seibon oem style Carbon fiber hood and I put on a brand new oem hood bra on it. Just because i thought it looked sweet. It rained for like two days and the car sat outside and wasnt driven for those couple days just because. So i took the bra off to dry it out and didnt see anything at the time. two days later i see the stupid foggy spot where the bra was. not everywhere that it coverd only one part .. I dont get how at all. or how to fix it . What a waste of money. FML
anyone have any idea
- Sun Jan 24, 2010 7:54 pm
#170789
for the request:
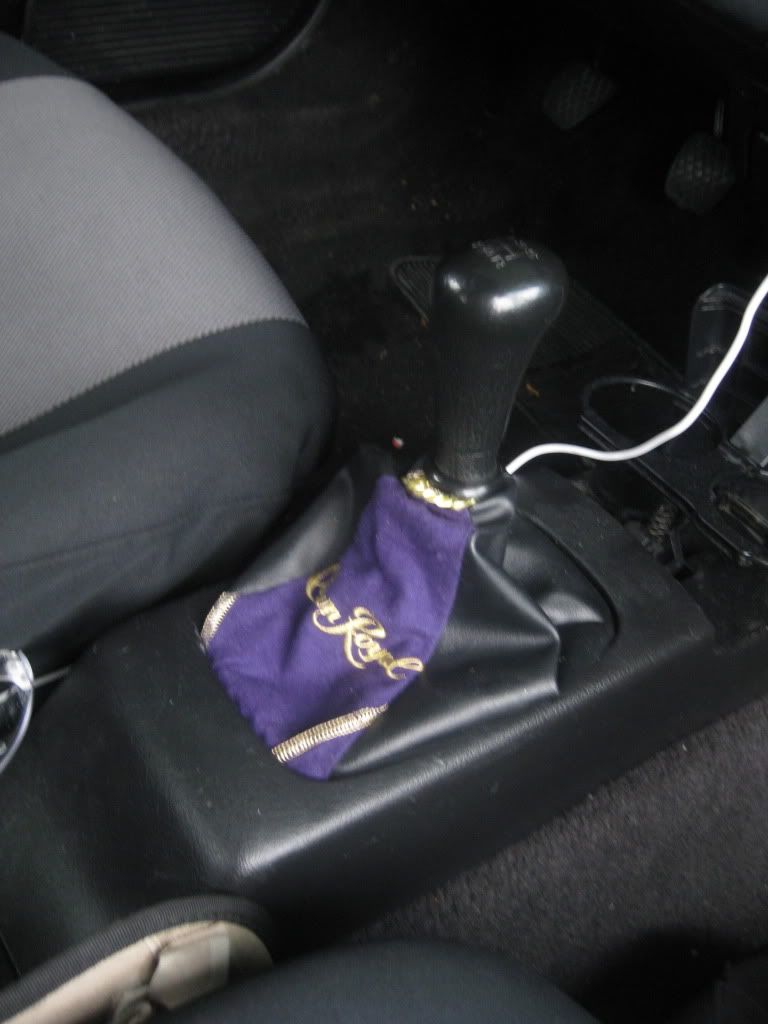
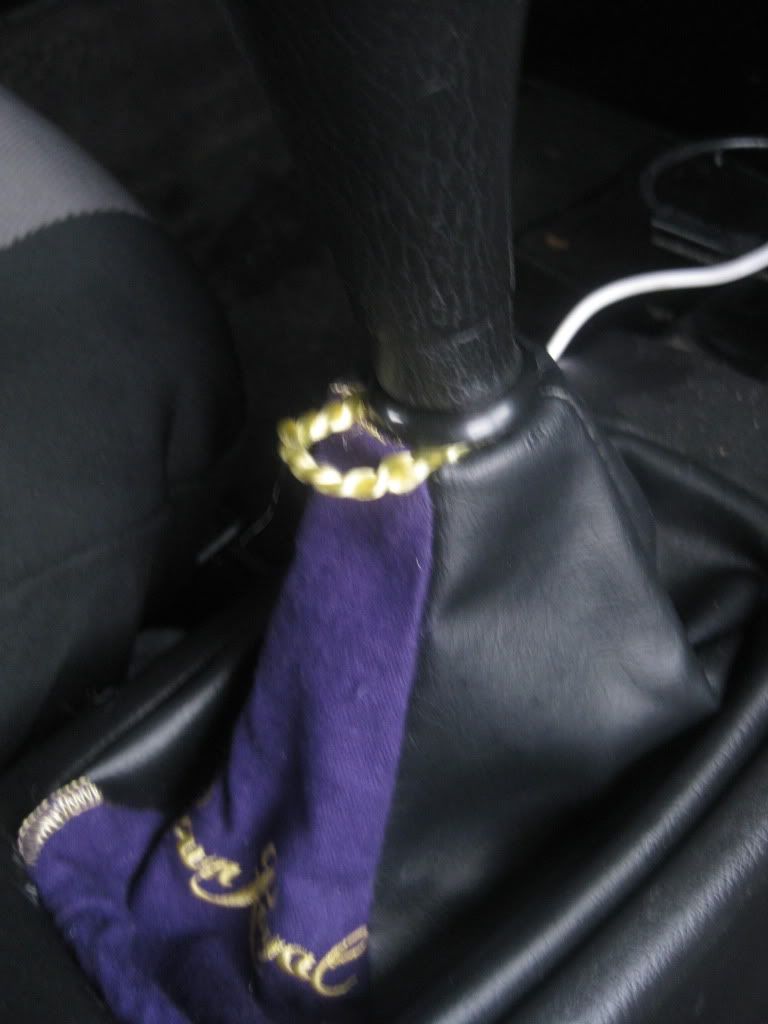
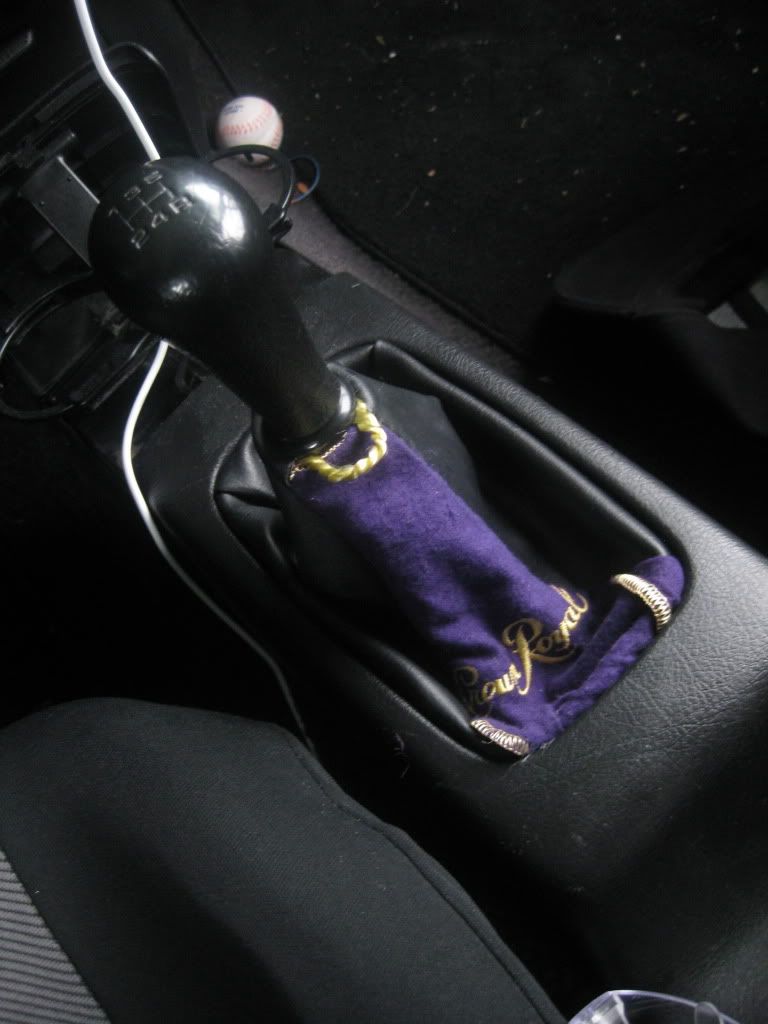
egsedanguy wrote:dude get some pics of that shift boot installed. that tight.
for the request:
- Tue Feb 02, 2010 6:00 am
#172627
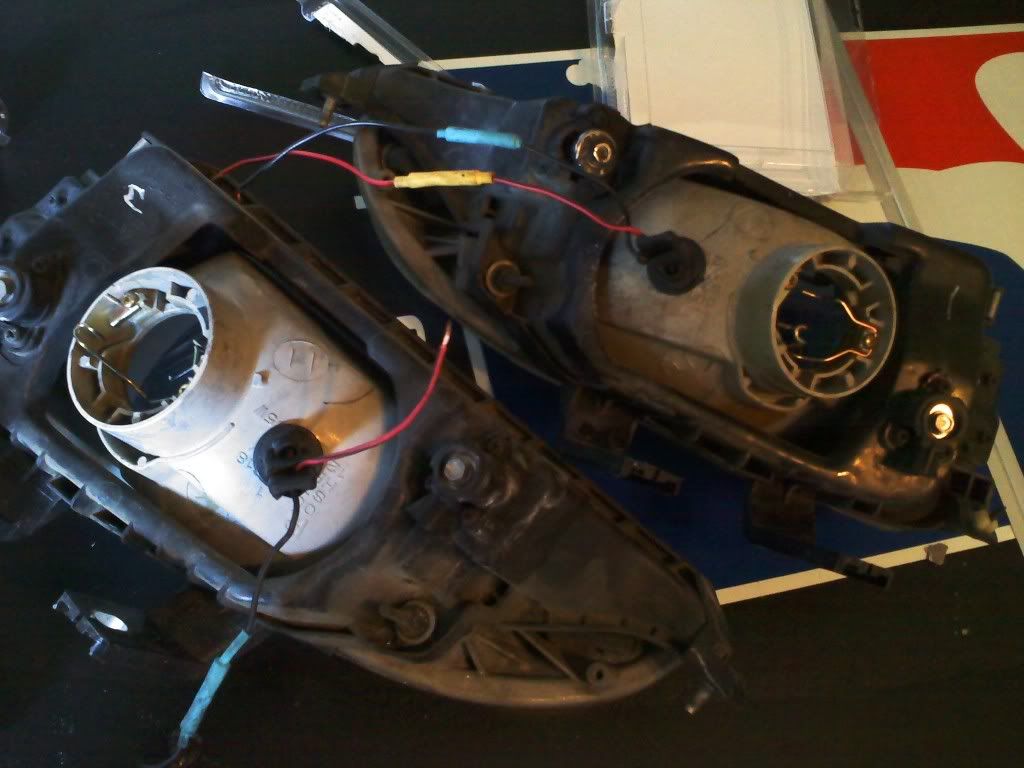
City lights : well here we go
i got a stock set of headlights and some of these ..
This is a Add to the city light thread , just puttin alittle of my input on this subject, Its basically the same, Just throwing out a couple more ideas ..
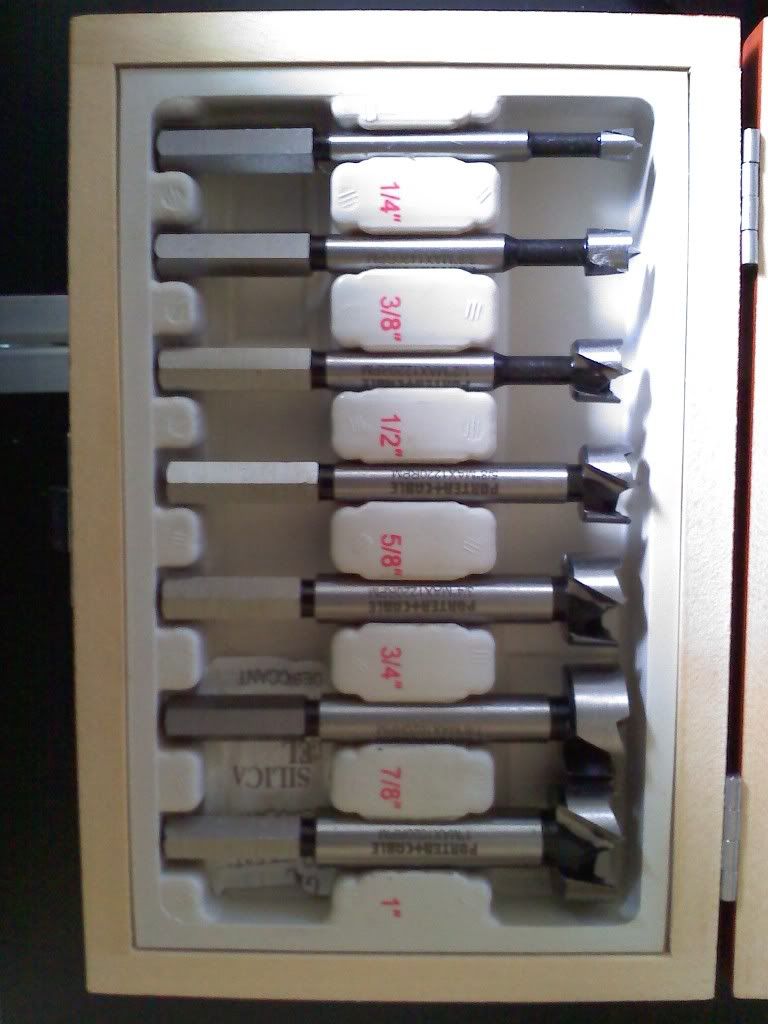
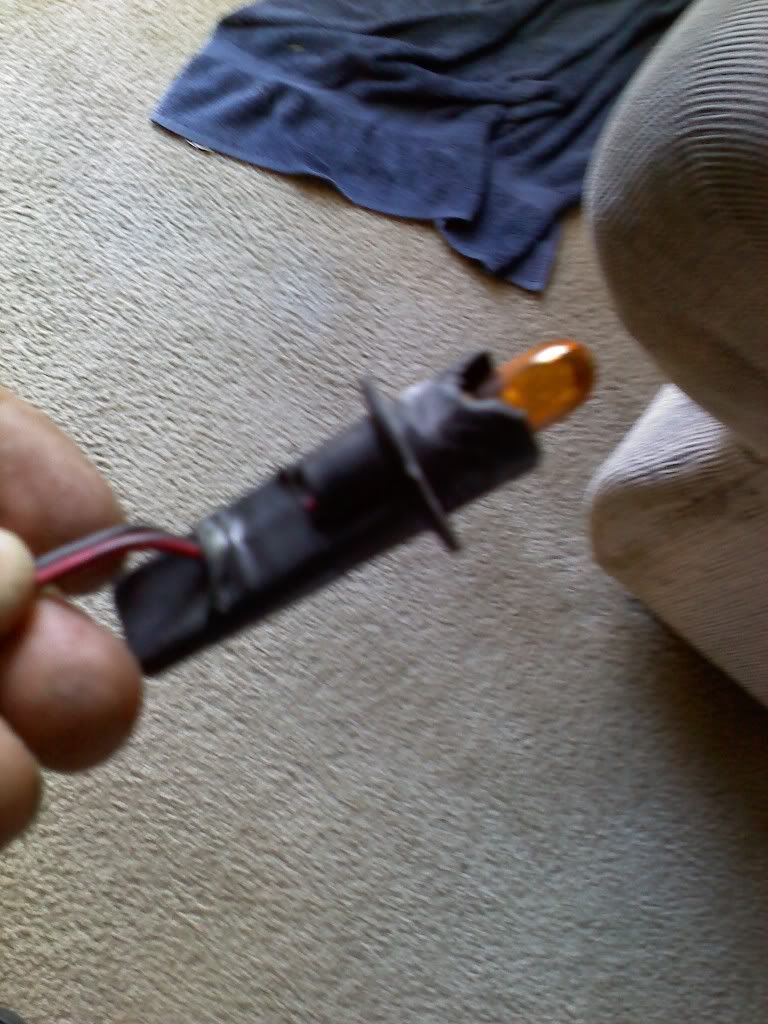
I Used sockets from the tailight harness that I had spare such as these.
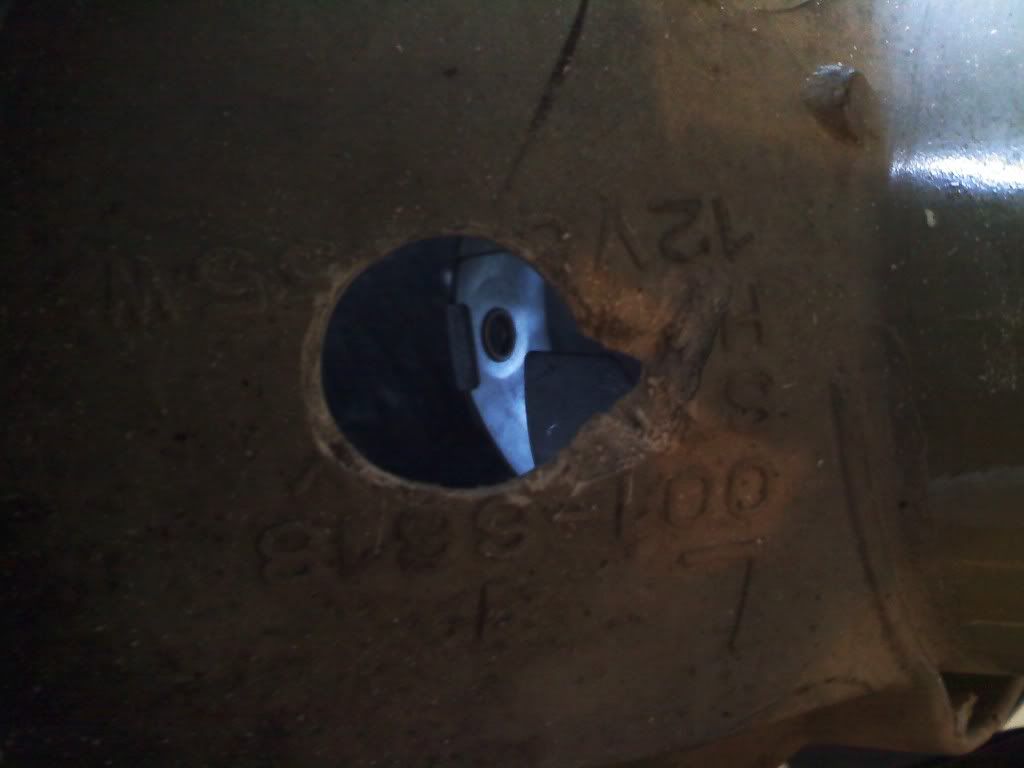
Then instead of drilling on that little circle right next to the bracket (See Pic) on the inside I went over here (Red 'X") for the extra clearence and now worries or trimming the socket later.

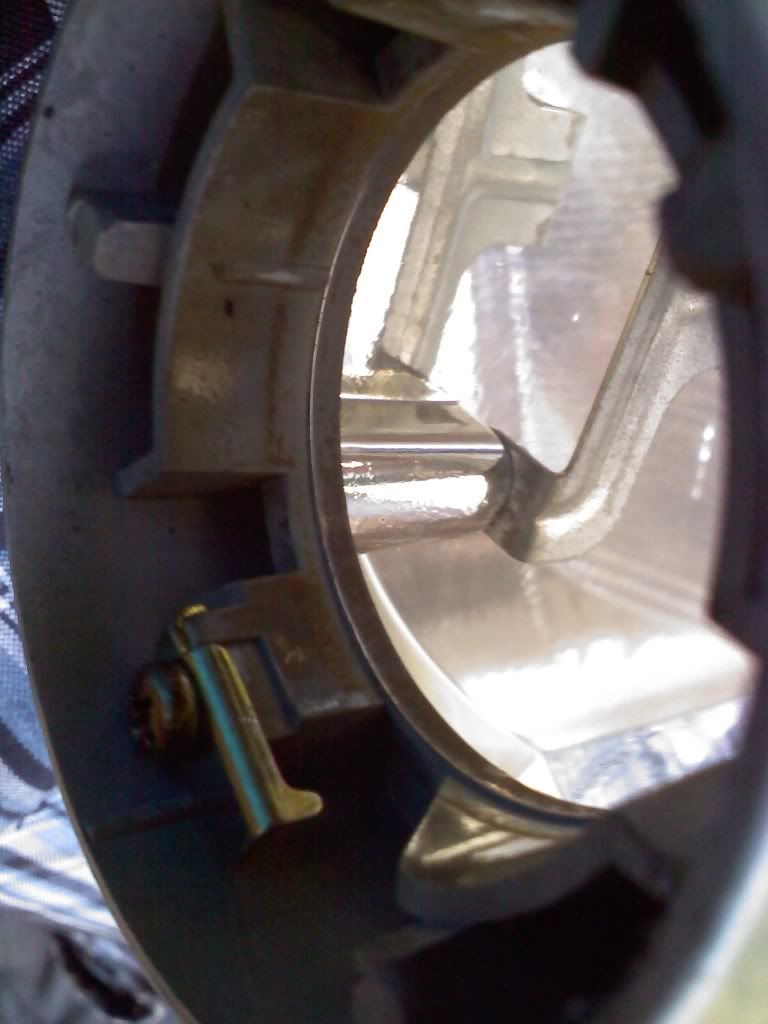
Then with the 1/2" Bit i drilled right on the "X"

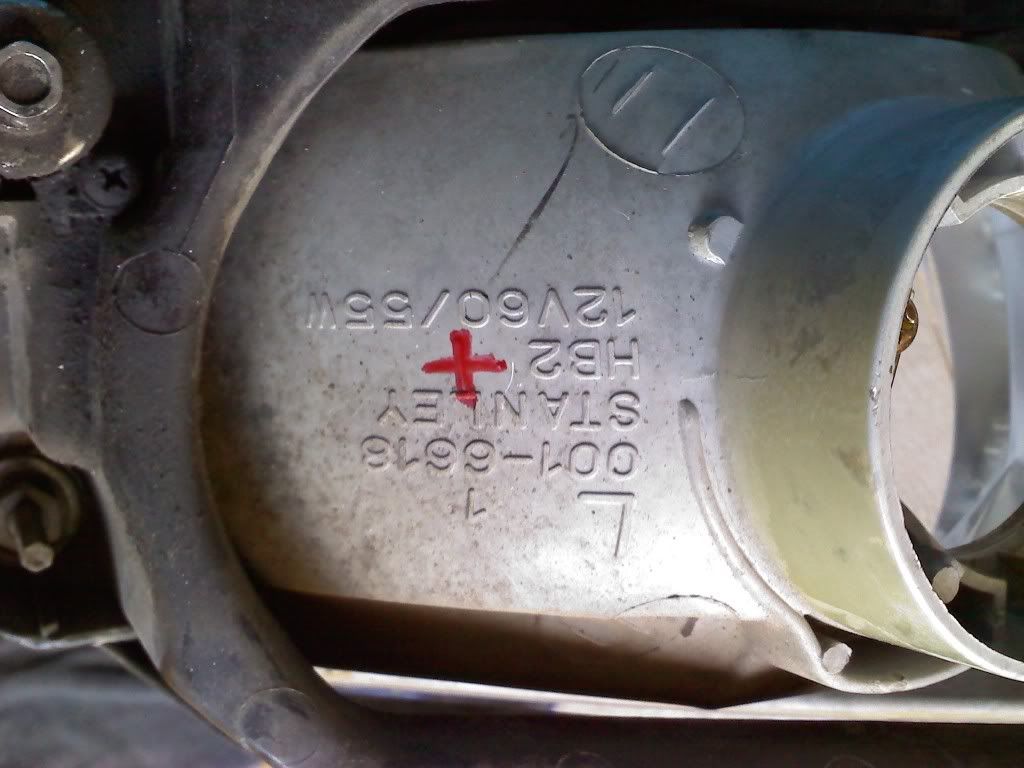
Cant even see the socket. Nice for Clearence
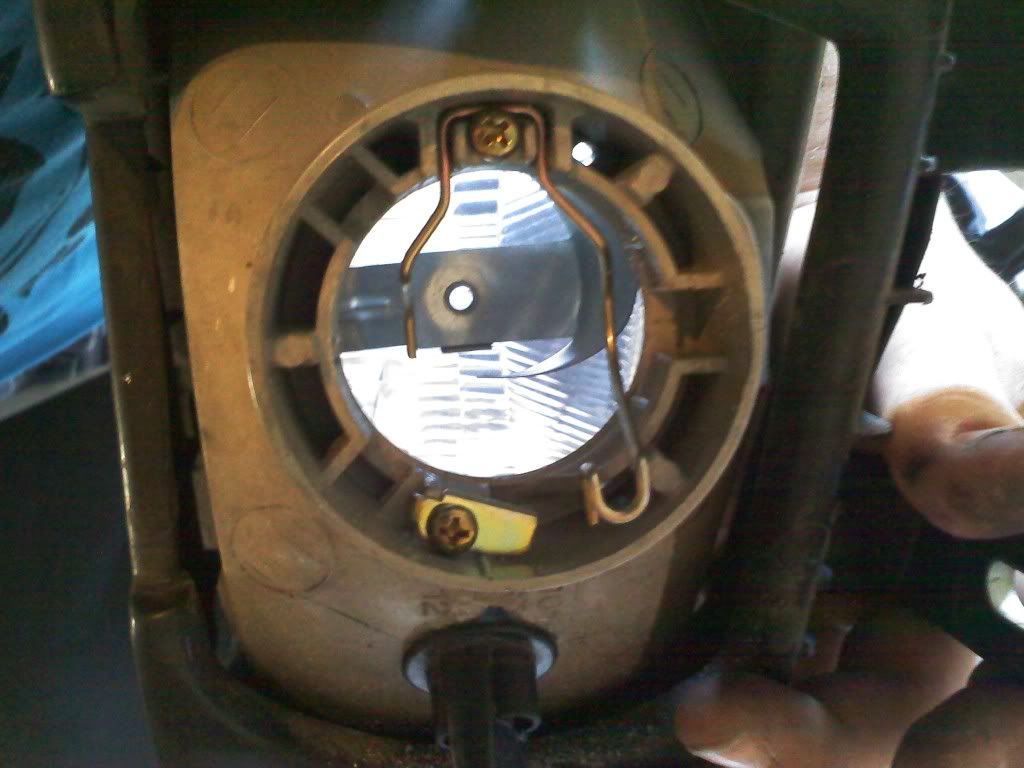
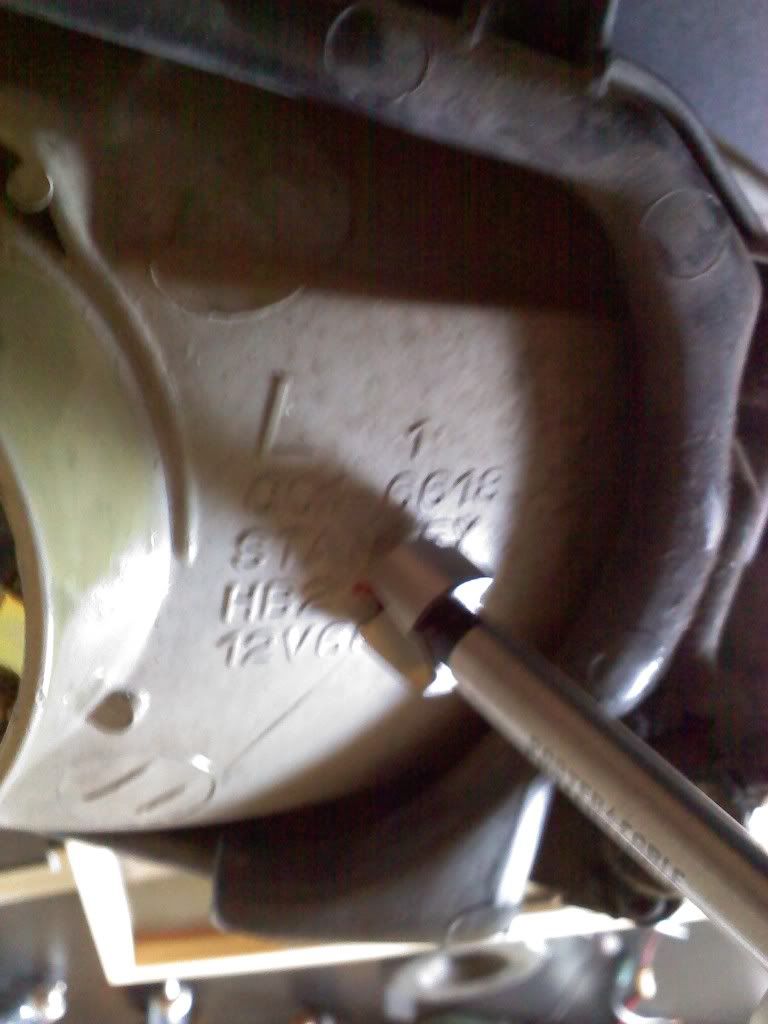
Bulb way over in the housing
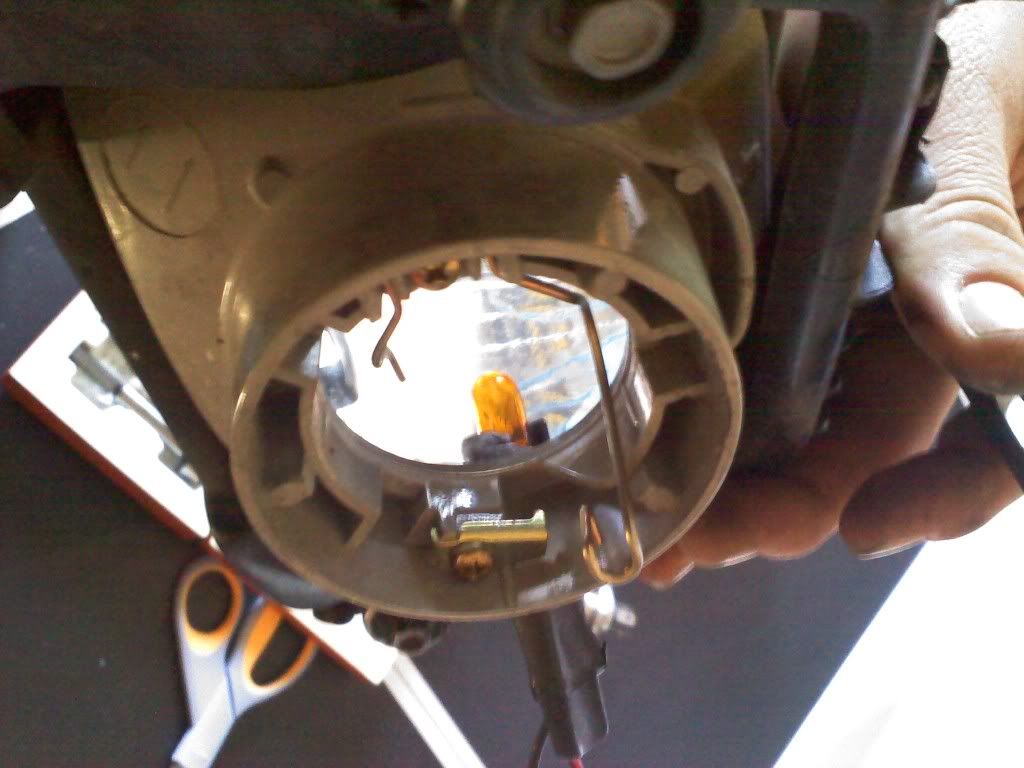
Made alittle notch to turn and Lock ( I did cut 2 of the three notches off the socket)
bulbs in and locked
I also used amber bulbs for the match of the corners (Installed)These pic are in the middle of the day.
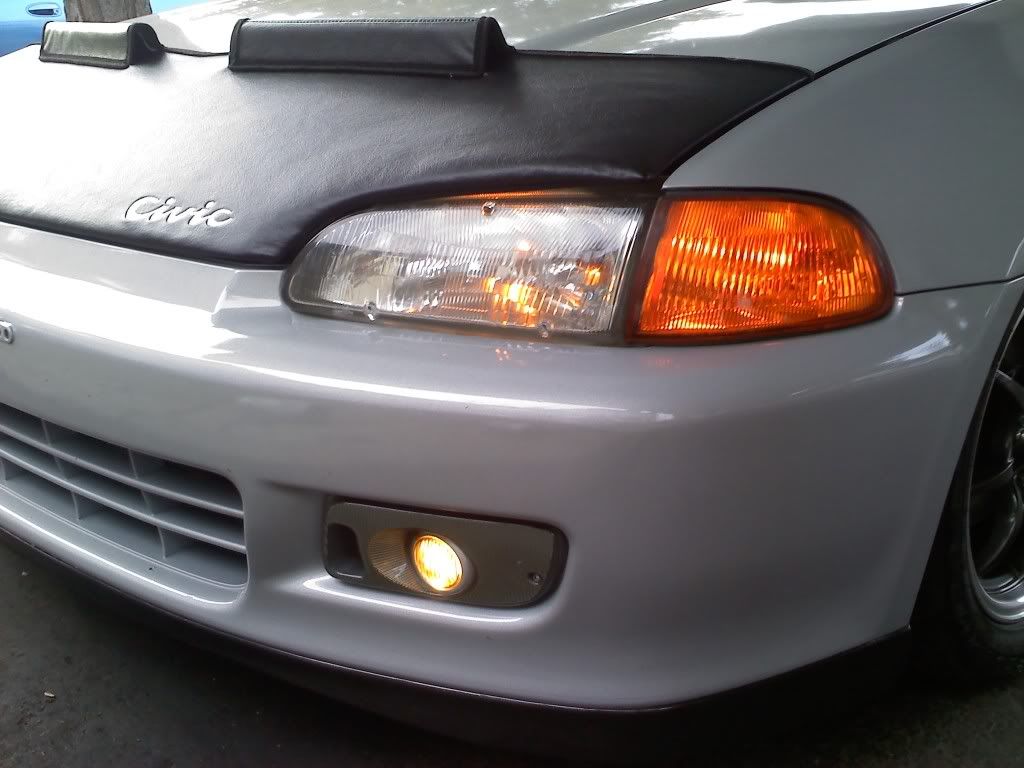
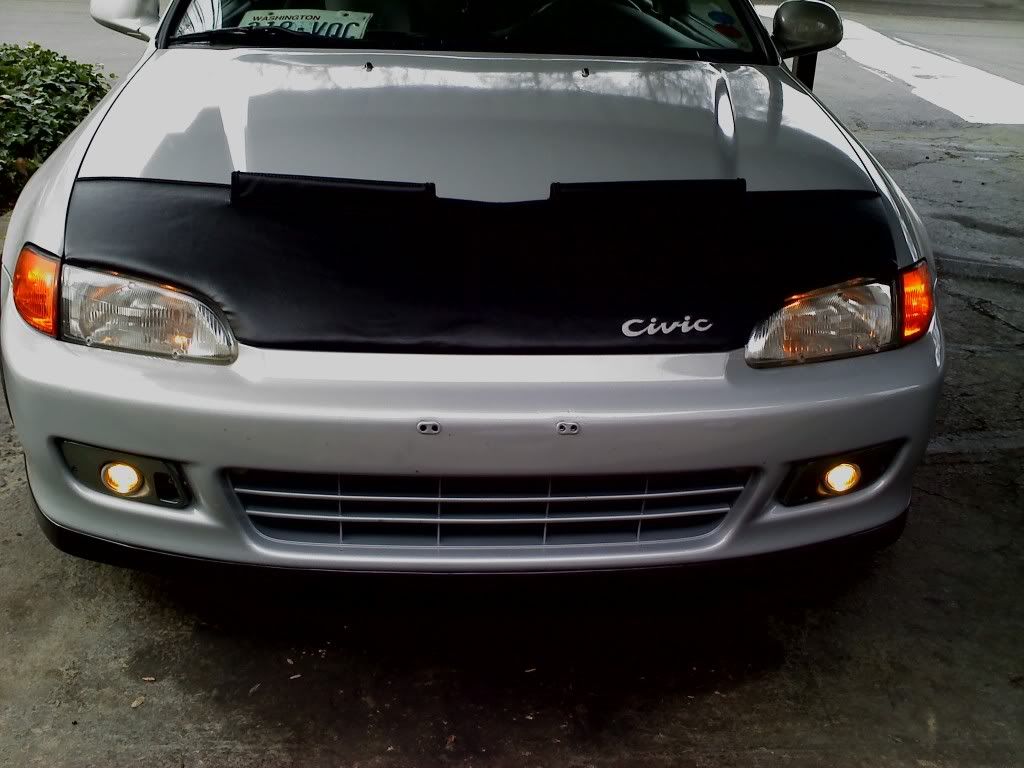
Just to let you know as the City light DiY states basically: These dont project light just iluminate the headlight housing and glass . kinda like another marker light, so your seen easier and what not .
I should also reference that I spliced into my foglight harness so i can infact turn them off . just to throw the idea out there.
Let me know what you think
i got a stock set of headlights and some of these ..
This is a Add to the city light thread , just puttin alittle of my input on this subject, Its basically the same, Just throwing out a couple more ideas ..
I Used sockets from the tailight harness that I had spare such as these.
Then instead of drilling on that little circle right next to the bracket (See Pic) on the inside I went over here (Red 'X") for the extra clearence and now worries or trimming the socket later.
Then with the 1/2" Bit i drilled right on the "X"
Cant even see the socket. Nice for Clearence
Bulb way over in the housing
Made alittle notch to turn and Lock ( I did cut 2 of the three notches off the socket)
bulbs in and locked
I also used amber bulbs for the match of the corners (Installed)These pic are in the middle of the day.
Just to let you know as the City light DiY states basically: These dont project light just iluminate the headlight housing and glass . kinda like another marker light, so your seen easier and what not .
I should also reference that I spliced into my foglight harness so i can infact turn them off . just to throw the idea out there.
Let me know what you think
- Tue Feb 02, 2010 6:27 am
#172633
Nice pics of the DIY Citylights setup. I didn't know there was a spot clearly marked like that. Thats cool. 


- Tue Feb 02, 2010 6:52 am
#172641
awesome city lights!
i would like to give some output - paint the center grill black! that will look awesome with a front lip!
i would like to give some output - paint the center grill black! that will look awesome with a front lip!
- Tue Feb 02, 2010 7:09 am
#172642
I dont know the exact reason for that circle ..which there are 4 of on each light. The circles are almost eactly on the brackets so they get in the way when you insert your bulb. Thats why i moved it over.
And I want to paint the grille but the paint shop i just went to sucks at taping so idk if i trust them and i dont wanna spray paint it . haha
But I too want it black
And I want to paint the grille but the paint shop i just went to sucks at taping so idk if i trust them and i dont wanna spray paint it . haha
But I too want it black
My Build Thread:
http://civic-eg.com/viewtopic.php?t=12208
http://civic-eg.com/viewtopic.php?t=12208