- Fri Sep 04, 2009 7:25 pm
#141874
Turbo Rebuilding and You - Garrett T3
There are different brands of turbochargers so this will not apply directly to all types.
You hear about it all the time "shaft play" or "smoking" when discussing used turbos.
A turbocharger has very specific tolerances which wear slowly over time, or wear very quickly when something goes wrong.
For example...
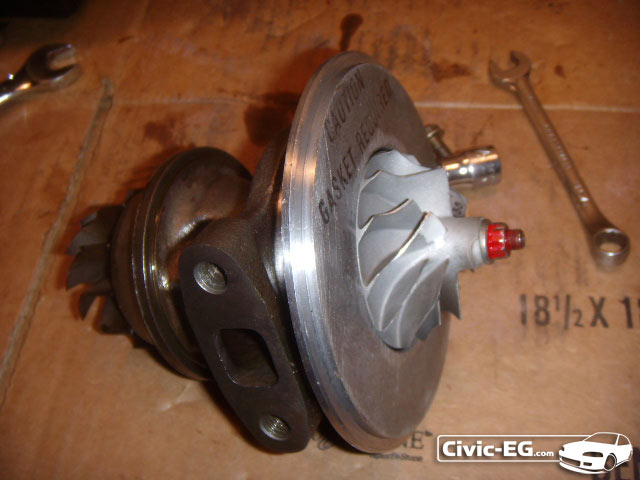
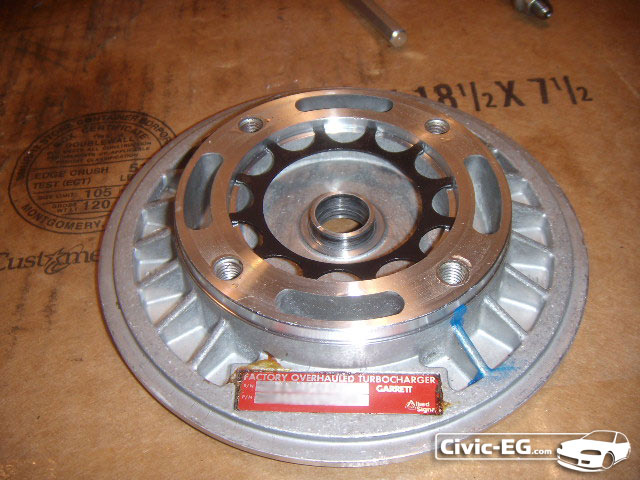
This was a factory reconditioned turbo by Garrett, no shaft play, tight as can be.
I installed the turbo and my drain line was too restrictive. So after it idled for a few minutes, the oil backed up into the turbo, forcing it to leak through the seals and into the hot side.
I fixed the drain line and the turbo was okay, but would send a little puff of oil smoke out the exhaust at high rpm. I figured I would be rebuilding it down the road. A week or so later, a couple blocks from my house (luckily) at high rpm, the seal went completely and I left a nice thick cloud of oil back to my driveway. I heard a slight metallic sound when it first happened which was the turbine contacting the housing. The blown seal was sending the oil through the downpipe rather than lubricating the turbo. No oil makes things get hot! Things can go from bad to worse in just a few minutes.
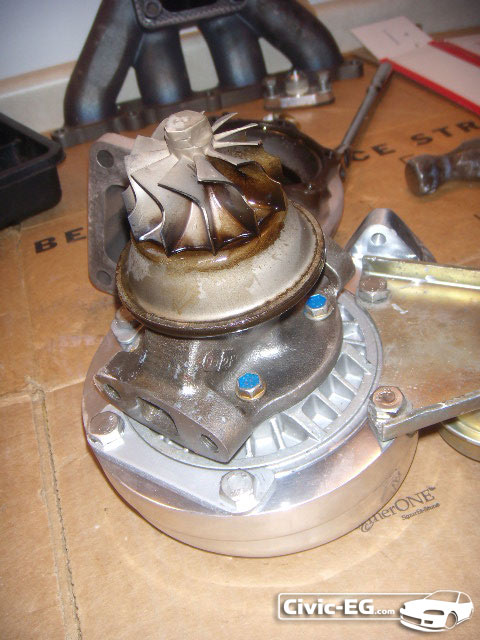
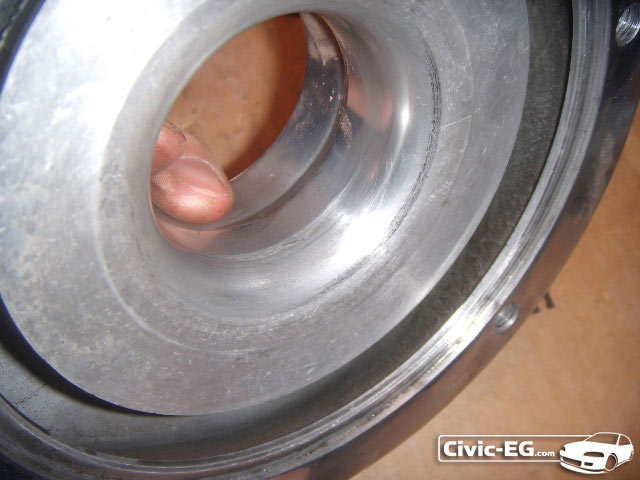
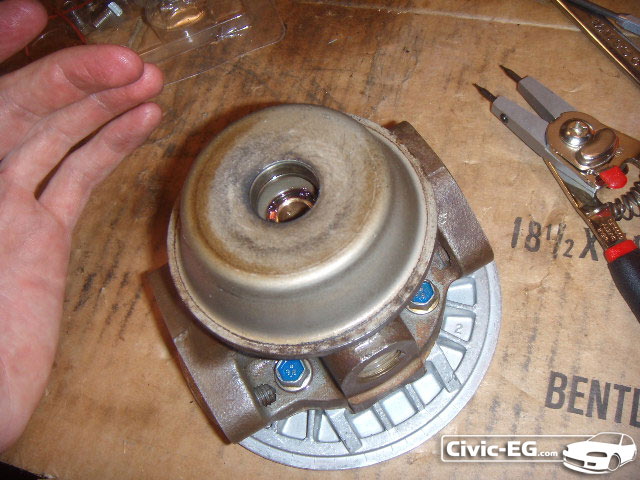
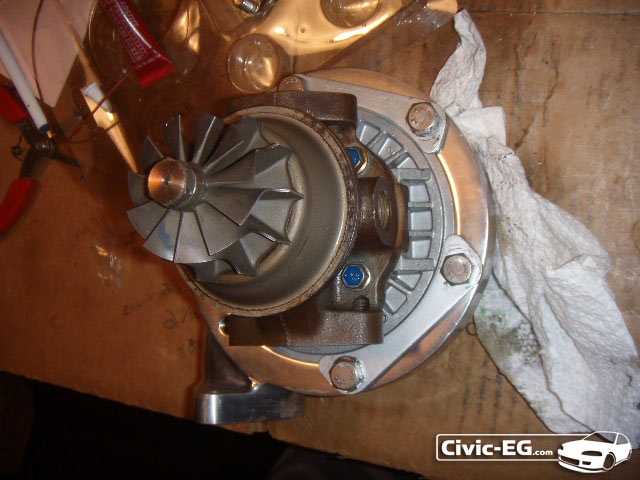
After taking the turbo off, the wheel/turbine had plenty of wobble and has contacted the housings.
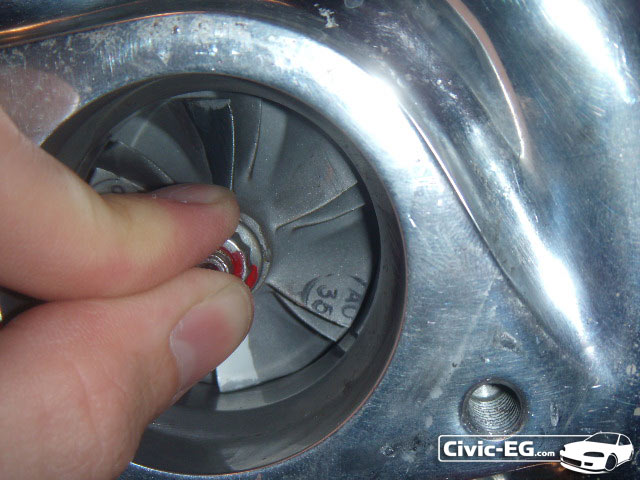
Here's the compressor wheel
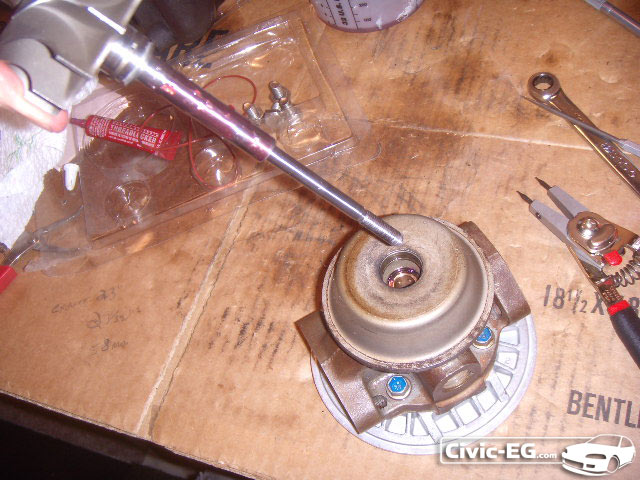
And here's an animated gif to show the play on the turbine!
So now, do I rebuild or buy new? Well, since I already had another t3 around, I figure I should be able to have enough parts between the two to come up with one good turbo.
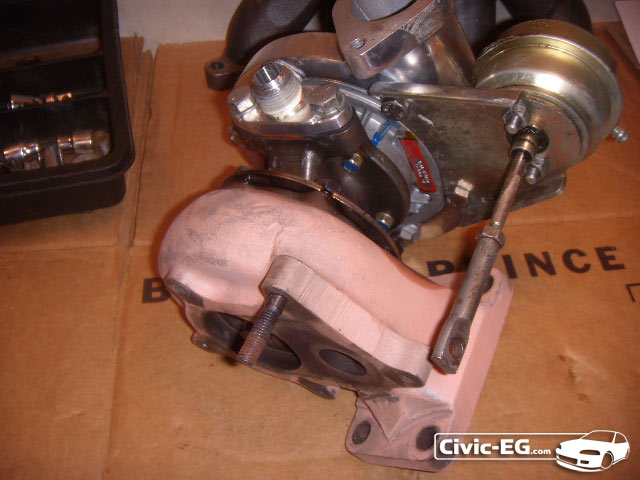
Get a clear, well lit, clean workspace ready before you begin to work.
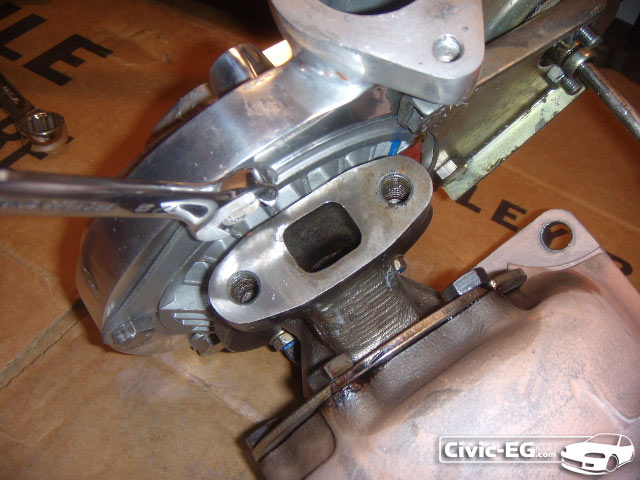
Start by evenly loosening the bolts on the compressor housing.
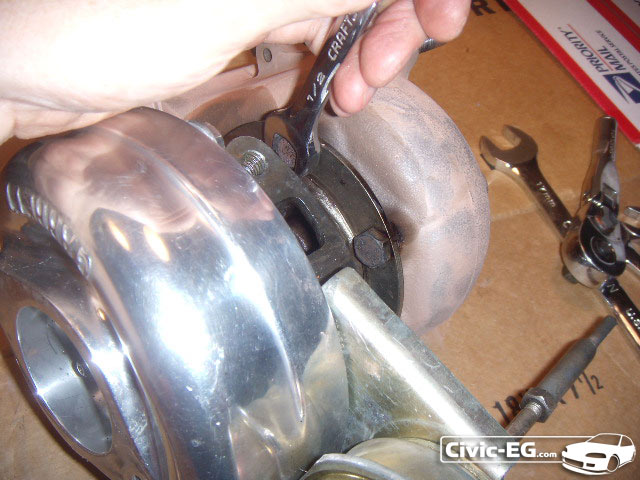
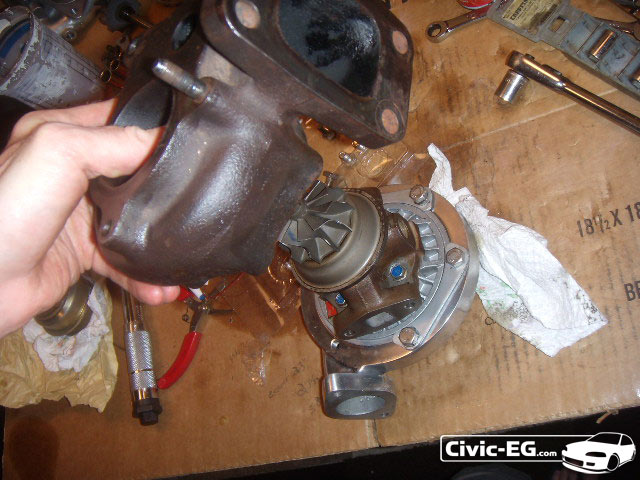
Then do the same with the bolts on the exhaust housing... these will be tight.
Once you get all of the bolts on the compressor and exhaust housings finger loose, remove the housings carefully.
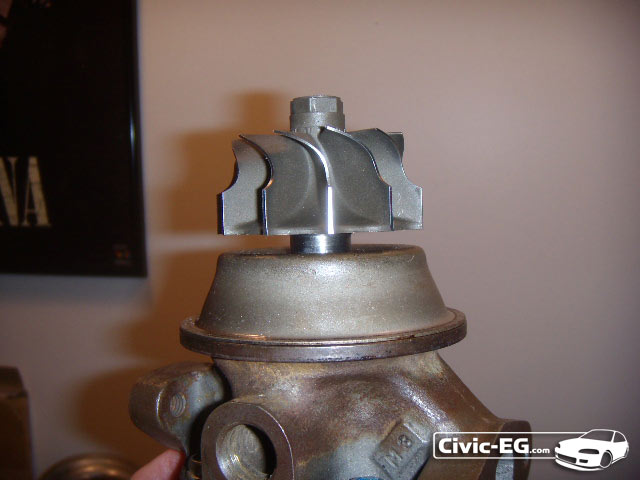
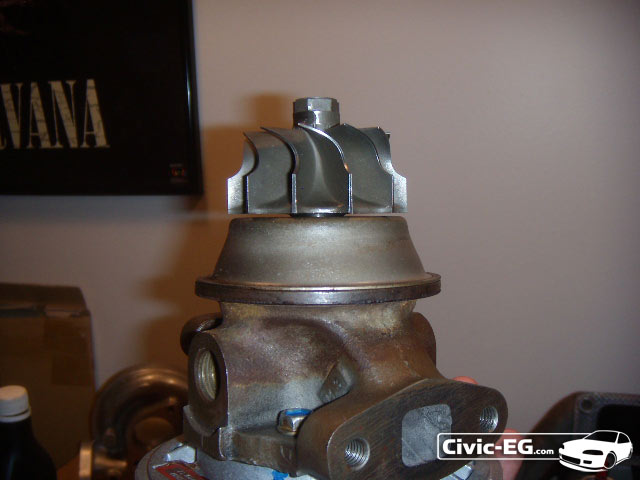
Here I see that the turbine blades did contact the housing. That means that the turbine is not able to be reused unless it is re-balanced.
And the compressor wheel slightly hit the compressor housing as well. The compressor wheel is soft aluminum, so it doesn't take much to do damage to it. I'm going to use the one from my other t3 in the rebuild, rebalancing of course since I don't know the history of that wheel.
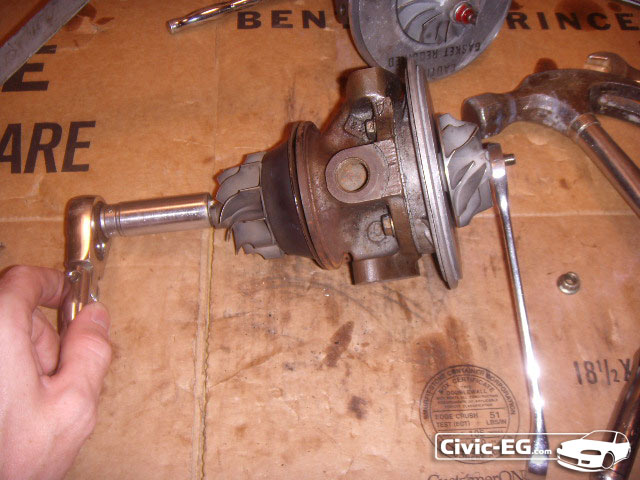
Now I'm going to remove the nut on the compressor wheel. NOTE: some turbos have a reverse thread nut and turbine shaft. My old t3's were both regular but the new turbine I ordered is reverse.
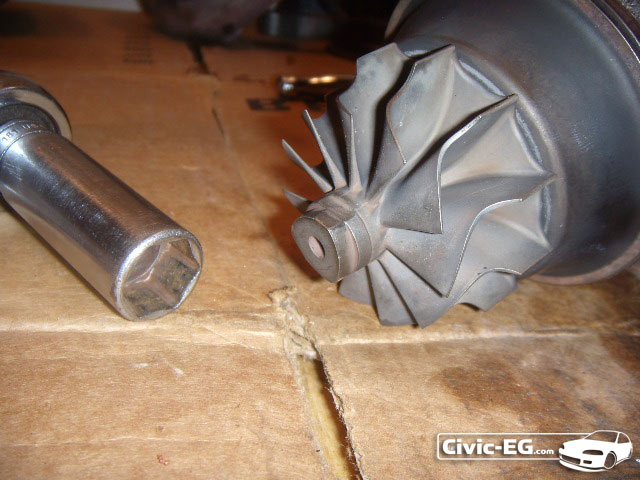
You'll need to hold the end of the turbine shaft. This one had been ground down a little when previously balanced, but the socket still fit.
Here's what worked.
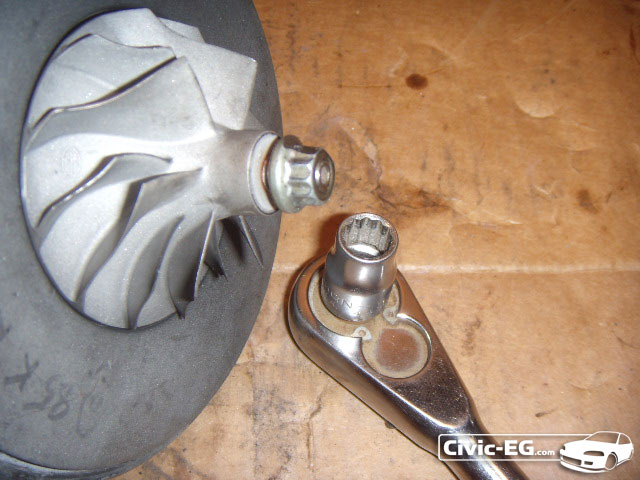
Loosen (or tighten) the nut to remove it. It is usually thread locked on so it may be tight.
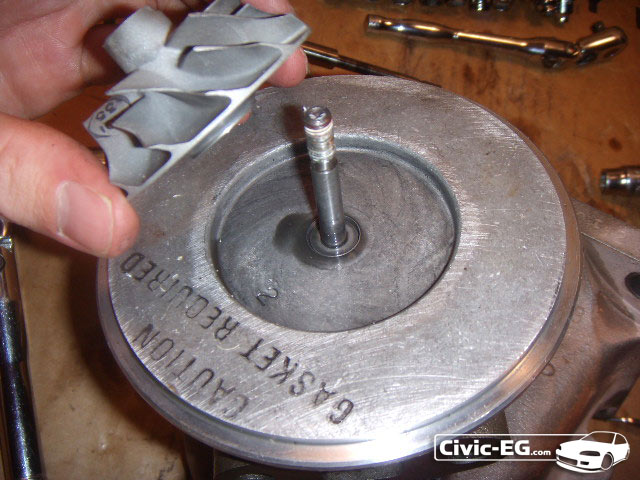
Here I have removed the wheel. You may need to twist at it because it can be on there tight.
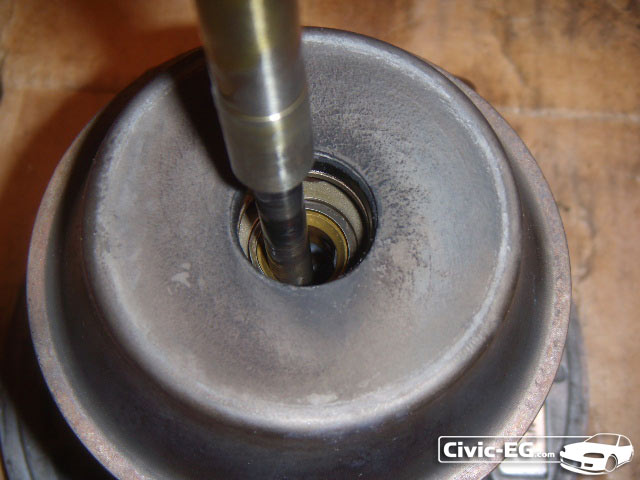
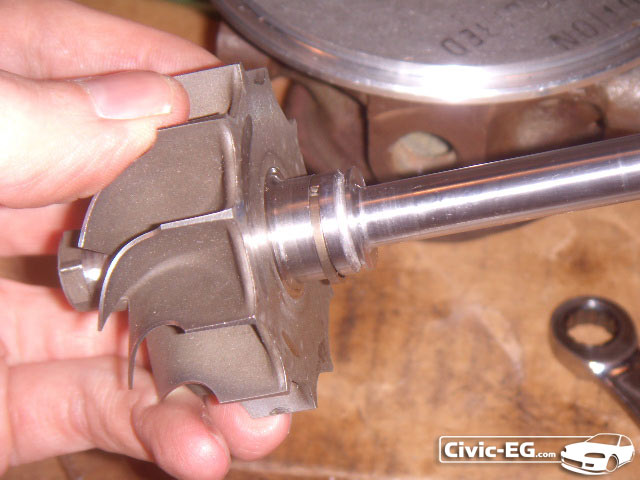
Now flip the assembly over and the turbine shaft will pull out.
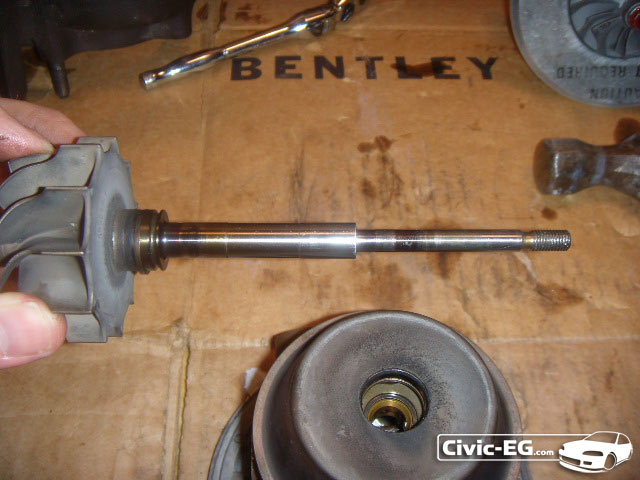
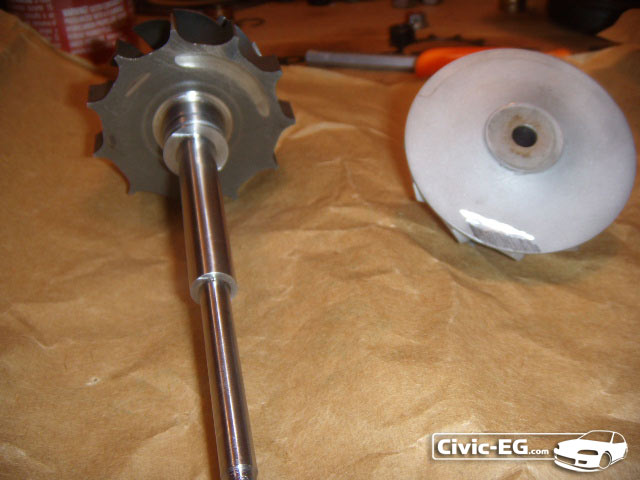
That blue coloring on the shaft means it saw some heat. This is the turbine from my old 'for parts' t3. It has a chip on the fin so it can not be used.
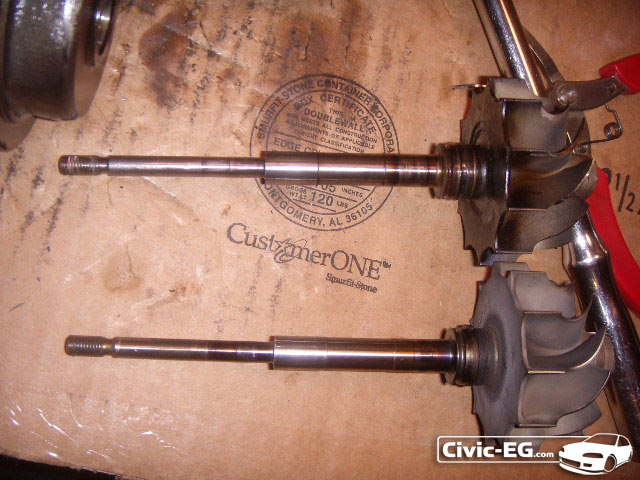
Here's a side by side comparison
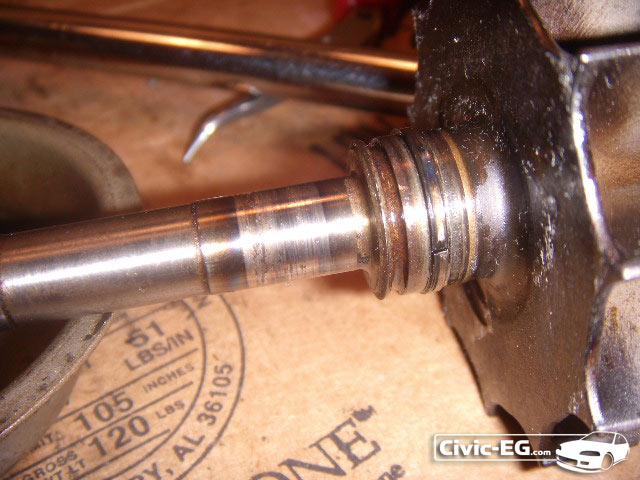
Here's the one that just blew, close up.
It got so hot that the retaining ring is stuck in the groove. Rather than get this cleaned up, I found a deal on a new 'stage 1' wheel which is for the modified housing from my old t3.
The previous one was a 'stage 0'.
So the plan in to use the Exhaust housing from my old t3 since the newer one was already cracking (they all will eventually).
Then use the compressor wheel from my old turbo since the newer wheel contacted the housing. I measured and they were identical.
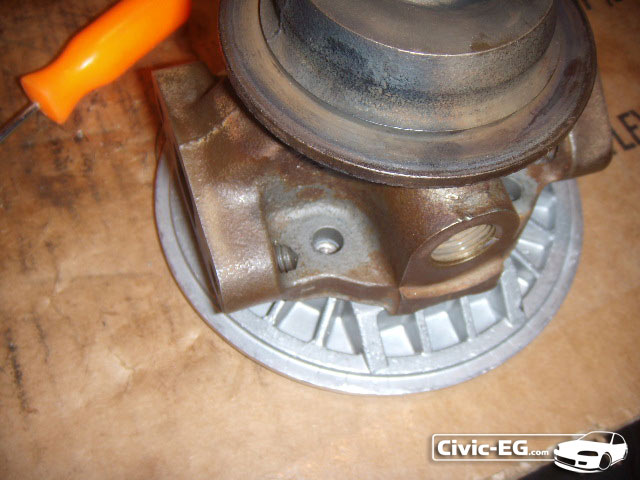
Next I am going to look at the center sections to decide which one I will use in my rebuild.
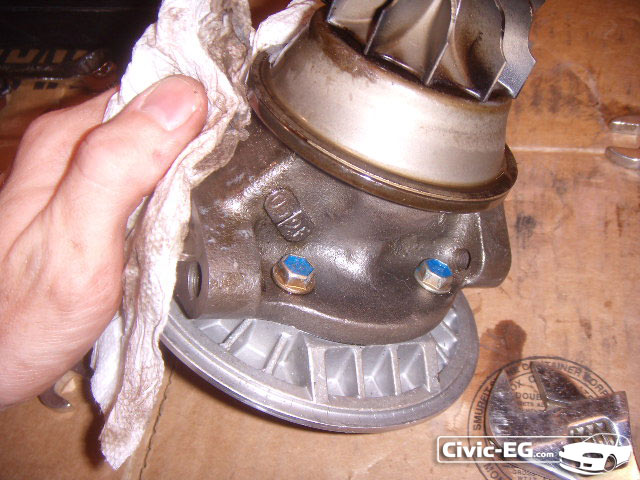
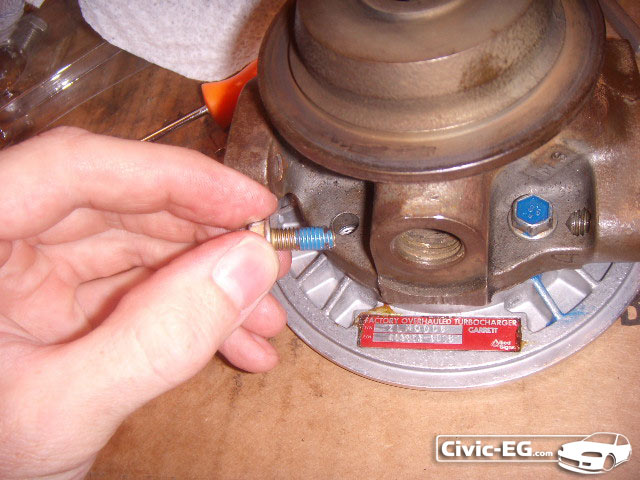
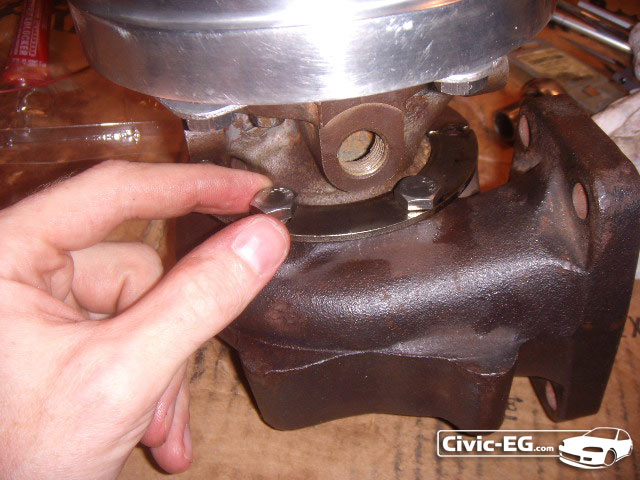
There's 4 bolts that should have thread lock in them, so they should be tight. Loosen them evenly, in a criss cross pattern as you did with the housings. Then you can remove the center section from the compressor backing plate.
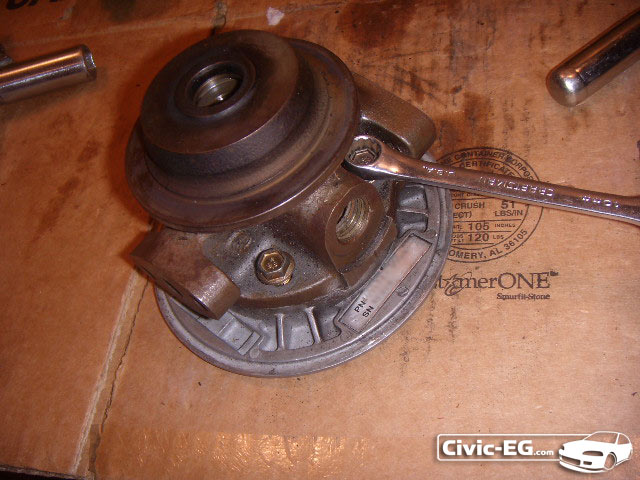
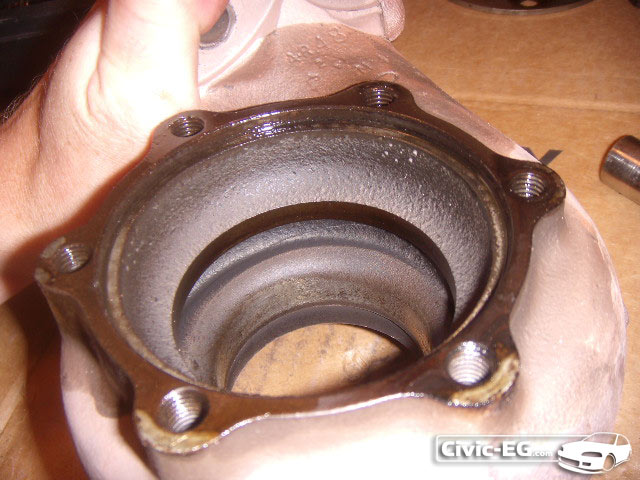
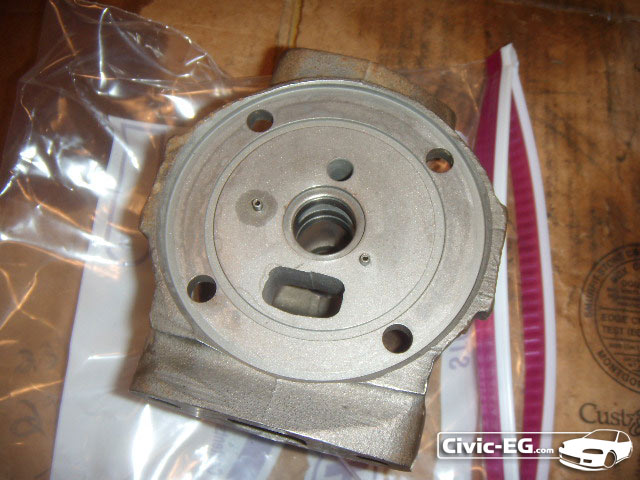
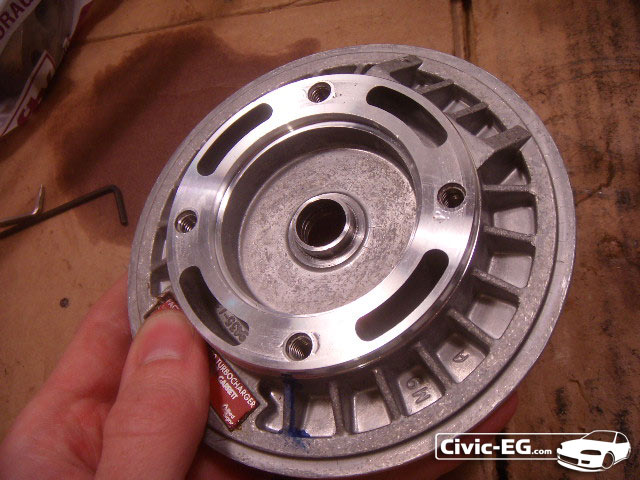
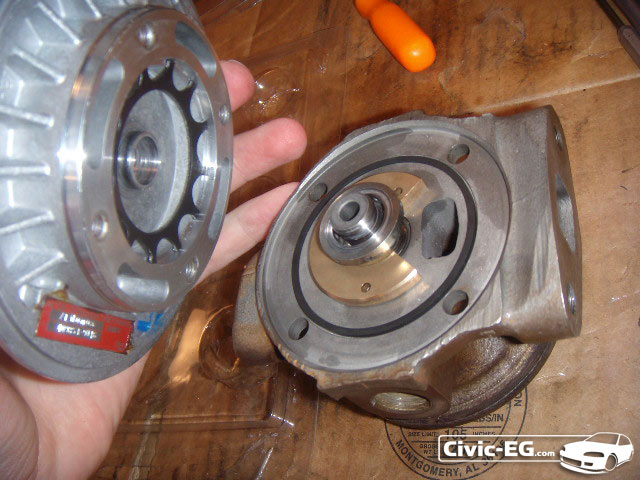
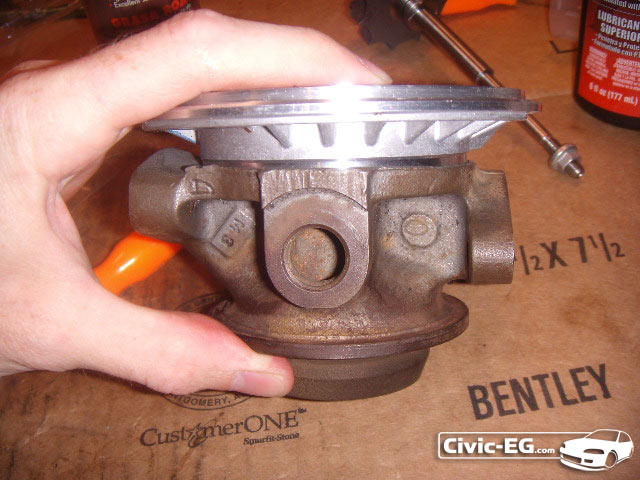
Here is the other center section from the old t3. Note the extra ports, it is water cooled. Many turbos used in OEM applications have this. It helps dissipate heat when someone turns their engine off without letting the turbo cool down from a couple minutes of idling first.
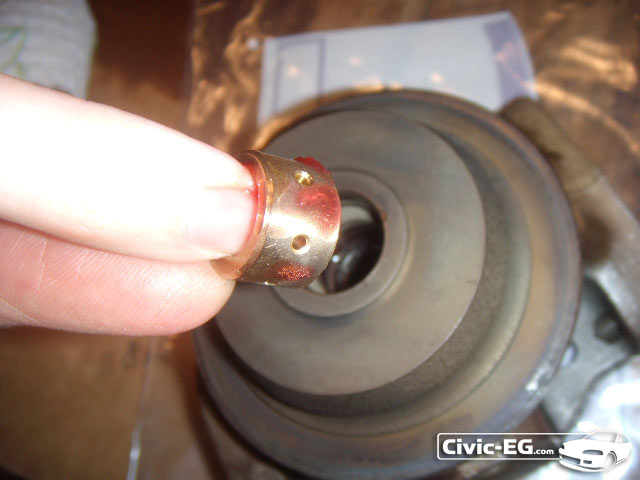
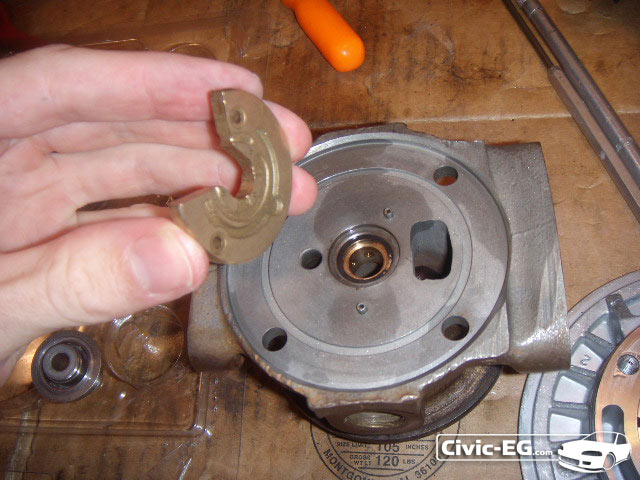
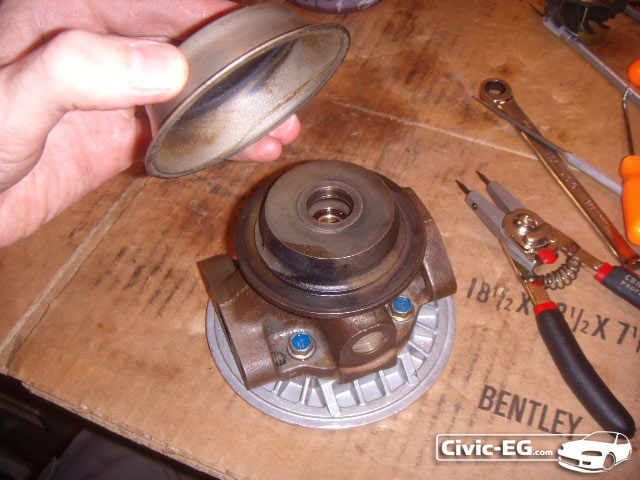
Now here's where these 2 turbos are different. The older t3 uses a Carbon seal, while the newer one uses a Dynamic seal. It is just 2 different designs, the Dynamic seal being the newer one. So I will use the Dynamic Seal in my rebuild.
The center housing separated from the compressor backing plate to reveal the carbon seal.
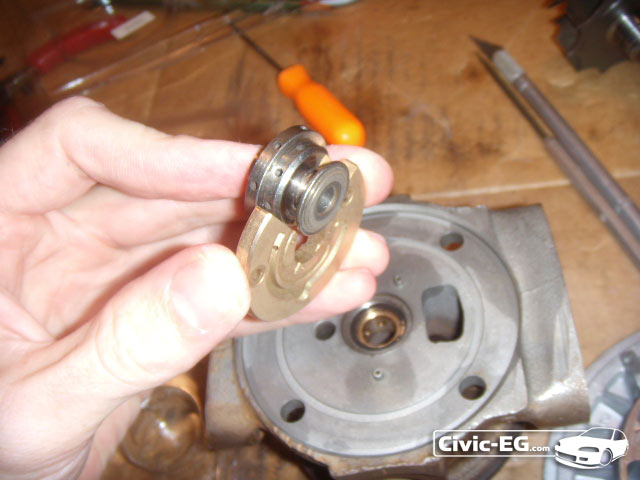
Carbon Seal up close.
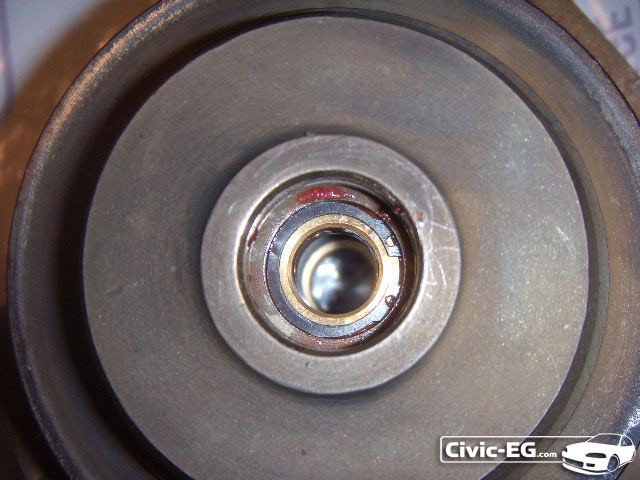
And the rest of the Carbon seal assembly, surrounded by the 270° Thrust Bearing.
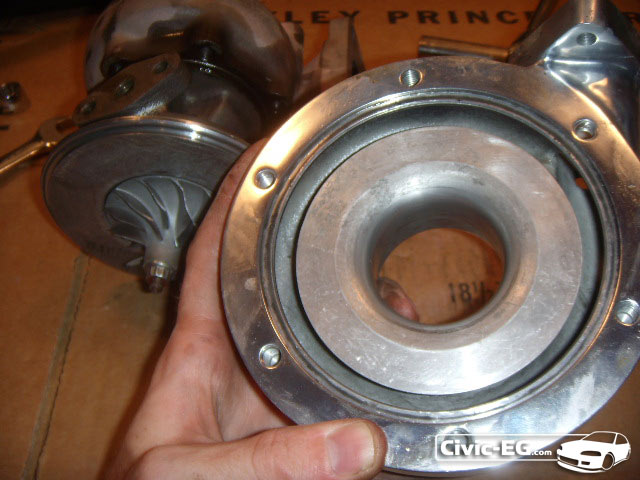
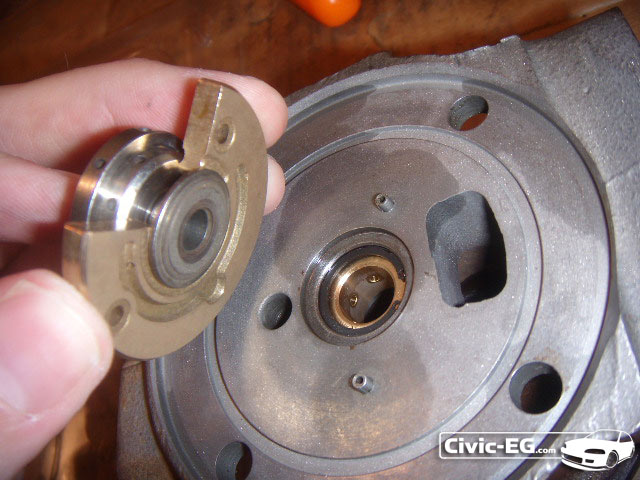
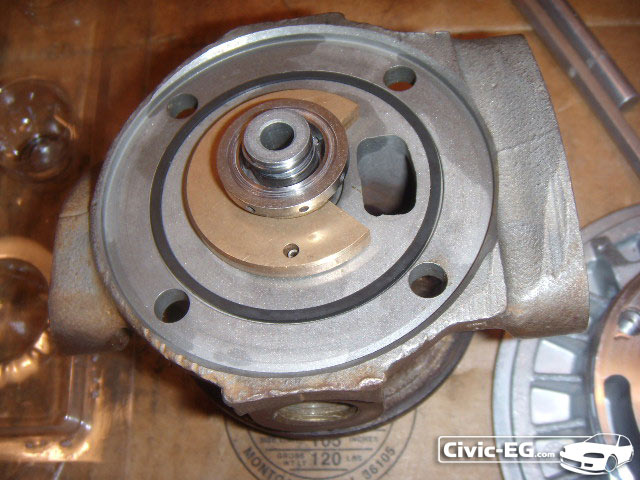
Now lets look at the Dynamic Seal setup...
Removing the compressor plate from the center section of the newer t3.
Looking at the Dynamic Seal. Much less moving parts and it uses the same 270° Thrust Bearing.
So back to disassembly of the center section...
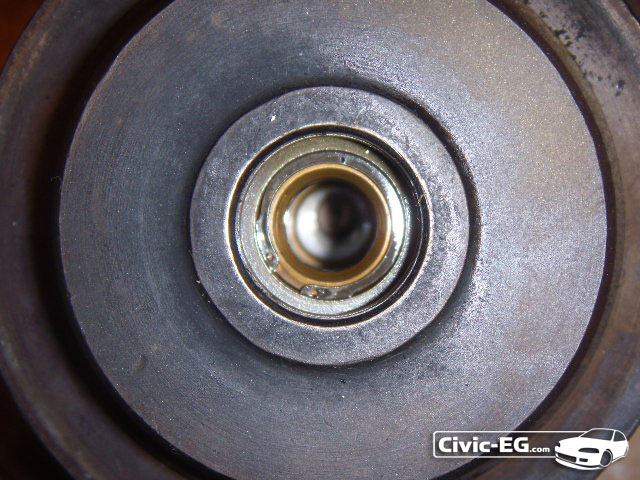
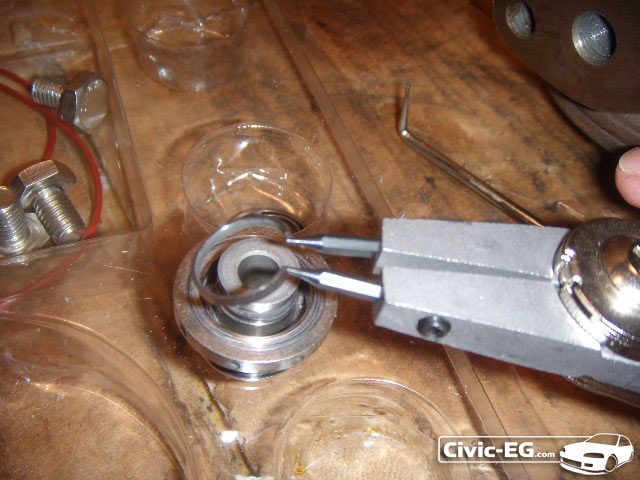
Looking into the center section where the turbine goes, you will see very tiny snap rings on both sides.
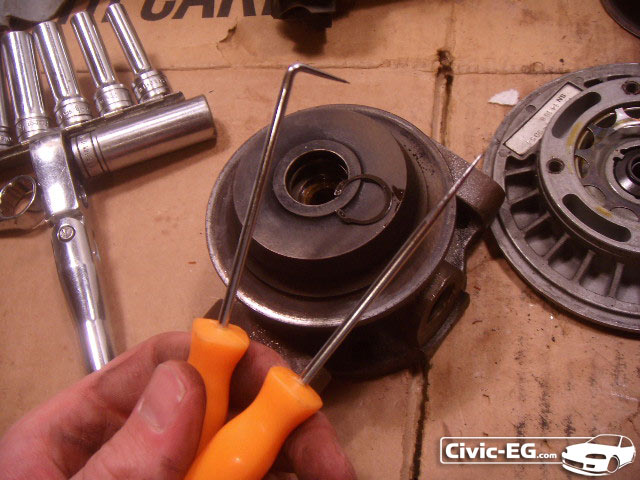
The tips on my snap ring pliers were not tiny enough, so I got by pulling the first one with a set of hooks.
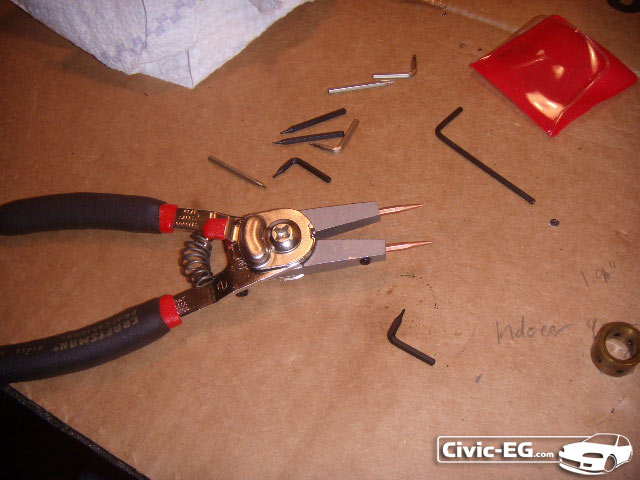
Then I got some new pliers after I realized what a PITA it was going to be.
$20 and they are reversible which was useful for installing the retaining rings. They come with a variety of tips too.
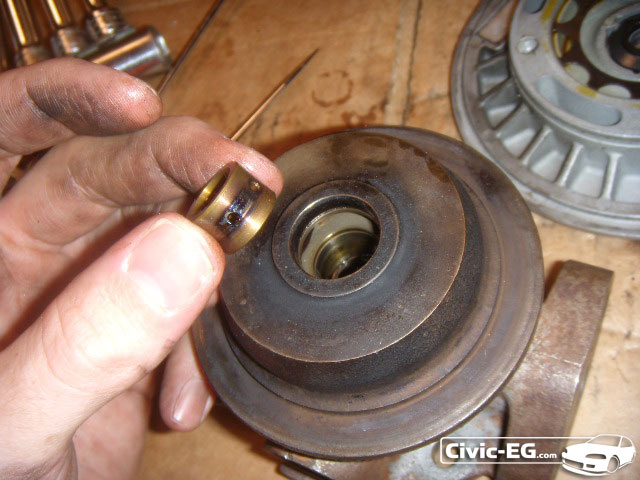
After you remove the first snap ring, you can pull the bearing out. Then there will be another snap ring behind the bearing.
Same situation on the other side... remove the outer snap ring.

Then the bearing.
Here you can see the snap ring on the other side of the bearing.
So a total of 4 snap rings and 2 bearings is all that goes inside the center section, all of which will be replaced.
I am using the Center section from the older t3 (water cooled) just in case I ever want to go that route eventually. And the Dynamic Seal components and compressor backing plate from the newer t3.
Here is the new stage 1 turbine I got on ebay.
And here they are after I had a local engine shop balance them.
The turbine had the large area of metal removed from the factory when I receive d it. The smaller notch at about 10:00 was additional removed by the machine shop. So ALWAYS balance the wheels, even if they are brand new. When spinning at high RPM, having them out of balance will greatly reduce the turbo's life span. Some turbos are balanced as an assembly, with the compressor wheel installed on the turbine, along with the nut. I read that Garrett components are balanced individually. So research your specific turbo.
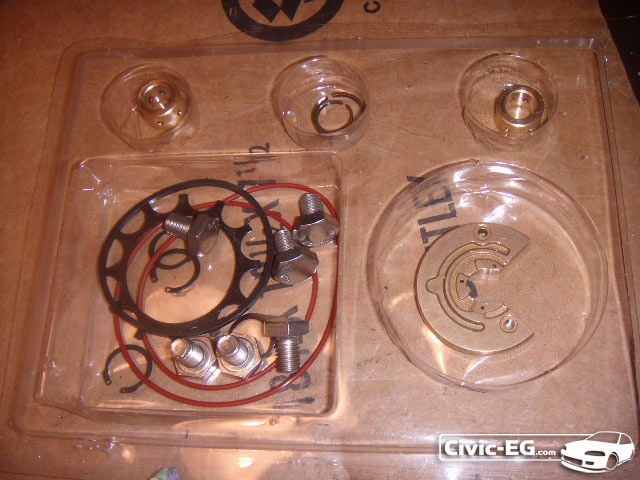
Here is your basic rebuild kit, also from ebay. There are also more complete kits available, but this is all I needed.
The turbine and kit total was almost $150, much cheaper than another Garrett t3 turbo.
Start with your spotless clean center section - carb cleaner helps to remove the old oil residue, followed by a good blasting of brake cleaner to clean everything else that is left. I read that you can soak parts in auto tranny fluid to break up the carbon and oil deposits, but this didn't work as good for me as the internet made it out to be.
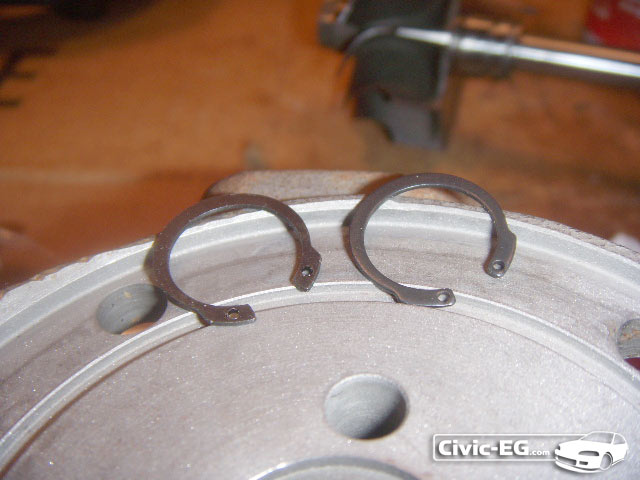
First notice that the snap rings have a hard edge (left) and a soft edge (right).
The softer edge is the side that should be facing into the journal bearings.
Installing the inner snap ring, you're lucky if you get it on the first try. My pliers were a little but shorter than needed so it took a few tries.
Check to be sure that the rings are all the way in the grooves.
Next I put assembly lube onto the journal bearing and dropped it down in.
And then install the outer snap ring, rounded side facing inward to the bearing.
Assembling the other side, do the exact same. Install the inner snap ring so that the rounded edge will face the bearing. Then drop in the bearing with some assembly lube. You can also use a heavy motor oil.
And then install the outer snap ring with the rounded edge facing the bearing.
Next is the dynamic seal.
First remove the old ring and install the new one. Don't over stretch the new one when installing.
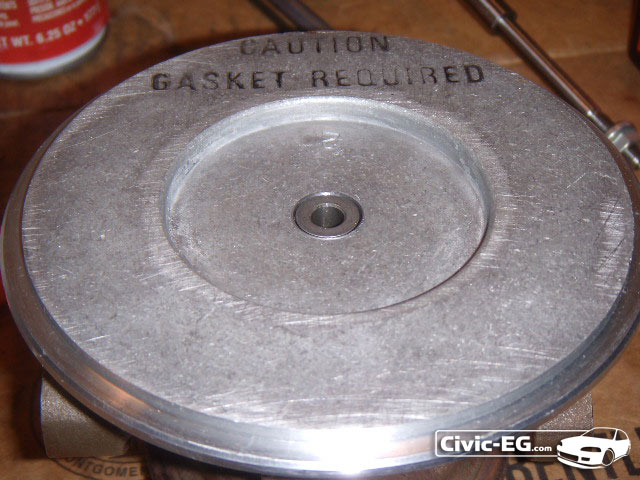
Take the compressor housing back plate.
Press the sprocket looking piece of metal into the center, all the way down as far as it will go.
Take your new 270° Thrust Bearing from the kit.
Slide the dynamic seal into the thrust bearing.
Line up the thrust bearing with the pins on the face of the center section, it only fits one way. Be sure the dynamic seal is sitting evenly over the hold in the center section.
Also note that I installed the new O ring in this step.
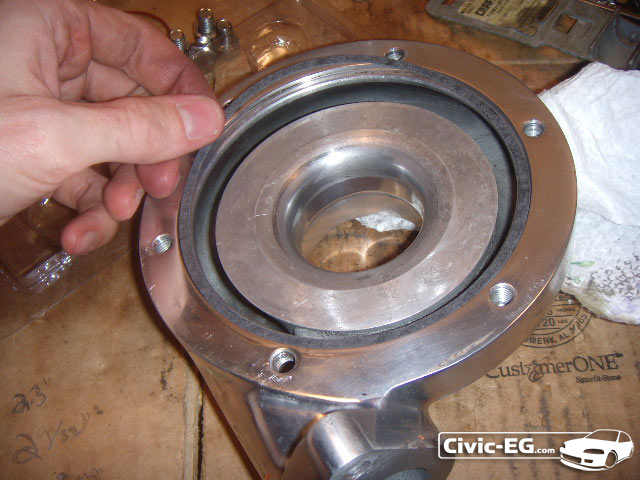
This part requires attention to be sure that everything stays in place as you line up the compressor housing backing plate.
It should go together smoothly and evenly. If the backing plate is wobbly, try again. Be sure it is seated all the way. The dynamic seal should be able to spin freely. If not, try again.

Line up the bolt holes and use thread sealer on these bolts. Torque them evenly.
Slide the new retaining ring over the turbine and expand it to fit into the groove the same way as with the dynamic seal.
Install the carbon shield (that's what I'll call it) just set it on for now. It will be secure once the exhaust housing in installed.
Next put plenty of assembly lube on the shaft and slide it though the housing.
There should be a little bit of resistance, that means the retaining ring is at the housing. Just push it a little bit and it should pop right in.
Check to be sure everything still spins freely.
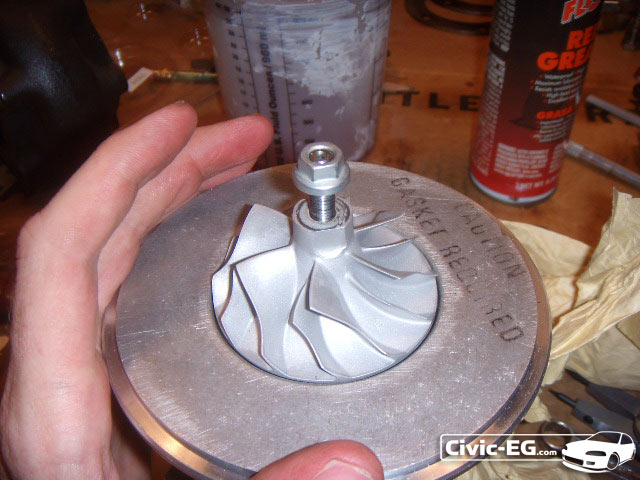
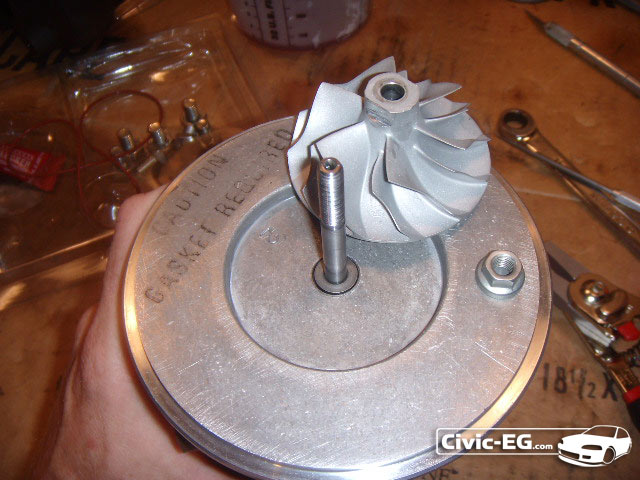
Slide the wheel on as far as you can (may be tight).
You can start threading the nut to help push the wheel on as well.
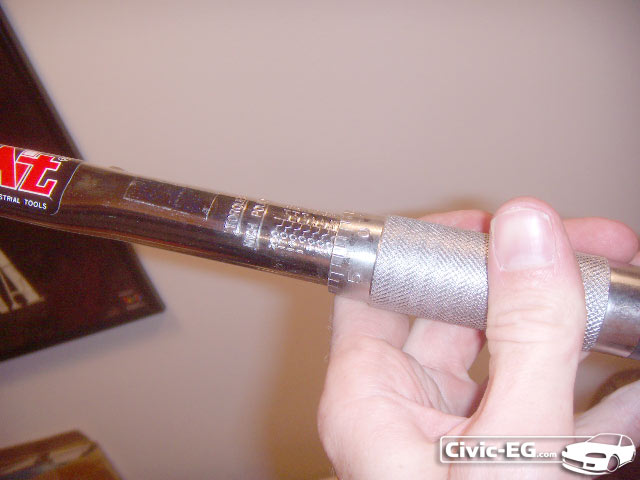
The nut here was to be torqued to 20 INCH/LBS. (not tq/lbs)
The new compressor housing gasket is placed before lining the housing back up to the backing plate for installation. Be absolutely careful you do not contact any of the fins on the wheel.
Put the brackets on and hand tighten them for now. You'll still need to clock the turbo to perfection when it is back on the car.
Place the exhaust housing on the hot side, again do not hit any part of the wheel on the housing.
I installed the bolts, but didn't bother tightening them down until I clock the turbo.
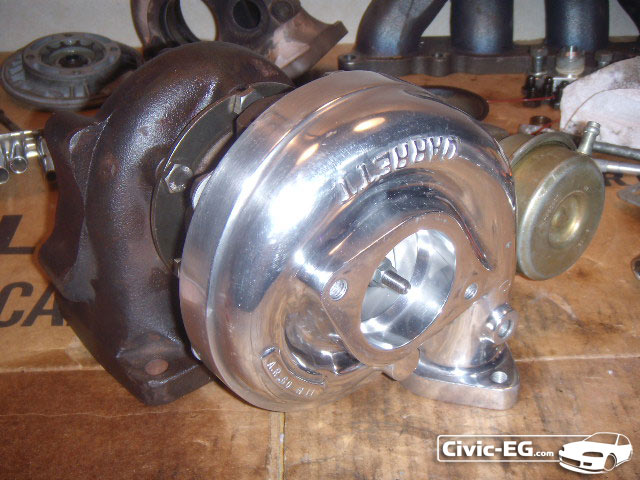
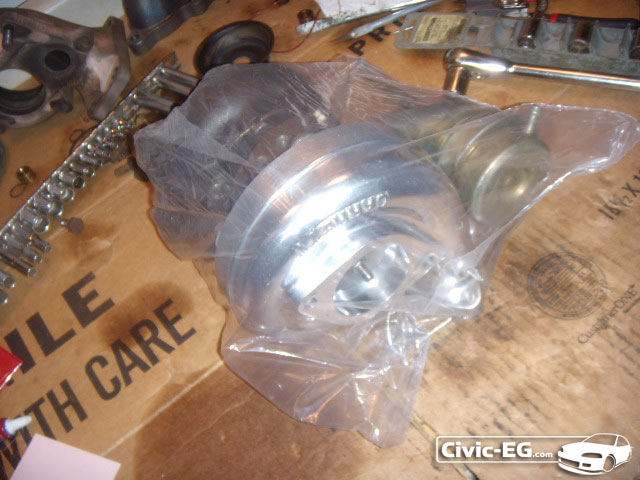
Sit back and think how much money you just saved! Then wrap it up to keep all the dirt away from your rebuilt turbo.
After re-installing, be sure to unplug ecu and crank your engine for a few seconds at a time, at least a few times. This will build oil pressure to the turbo to prevent a dry start.
There are different brands of turbochargers so this will not apply directly to all types.
You hear about it all the time "shaft play" or "smoking" when discussing used turbos.
A turbocharger has very specific tolerances which wear slowly over time, or wear very quickly when something goes wrong.
For example...
This was a factory reconditioned turbo by Garrett, no shaft play, tight as can be.
I installed the turbo and my drain line was too restrictive. So after it idled for a few minutes, the oil backed up into the turbo, forcing it to leak through the seals and into the hot side.
I fixed the drain line and the turbo was okay, but would send a little puff of oil smoke out the exhaust at high rpm. I figured I would be rebuilding it down the road. A week or so later, a couple blocks from my house (luckily) at high rpm, the seal went completely and I left a nice thick cloud of oil back to my driveway. I heard a slight metallic sound when it first happened which was the turbine contacting the housing. The blown seal was sending the oil through the downpipe rather than lubricating the turbo. No oil makes things get hot! Things can go from bad to worse in just a few minutes.
After taking the turbo off, the wheel/turbine had plenty of wobble and has contacted the housings.
Here's the compressor wheel
And here's an animated gif to show the play on the turbine!
So now, do I rebuild or buy new? Well, since I already had another t3 around, I figure I should be able to have enough parts between the two to come up with one good turbo.
Get a clear, well lit, clean workspace ready before you begin to work.
Start by evenly loosening the bolts on the compressor housing.
Then do the same with the bolts on the exhaust housing... these will be tight.
Once you get all of the bolts on the compressor and exhaust housings finger loose, remove the housings carefully.
Here I see that the turbine blades did contact the housing. That means that the turbine is not able to be reused unless it is re-balanced.
And the compressor wheel slightly hit the compressor housing as well. The compressor wheel is soft aluminum, so it doesn't take much to do damage to it. I'm going to use the one from my other t3 in the rebuild, rebalancing of course since I don't know the history of that wheel.
Now I'm going to remove the nut on the compressor wheel. NOTE: some turbos have a reverse thread nut and turbine shaft. My old t3's were both regular but the new turbine I ordered is reverse.
You'll need to hold the end of the turbine shaft. This one had been ground down a little when previously balanced, but the socket still fit.
Here's what worked.
Loosen (or tighten) the nut to remove it. It is usually thread locked on so it may be tight.
Here I have removed the wheel. You may need to twist at it because it can be on there tight.
Now flip the assembly over and the turbine shaft will pull out.
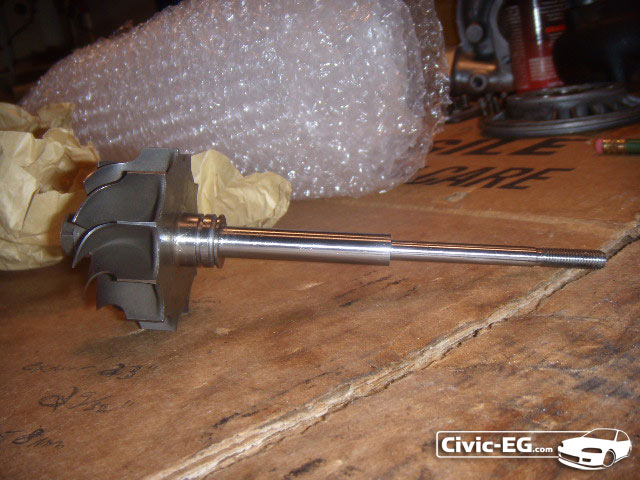
That blue coloring on the shaft means it saw some heat. This is the turbine from my old 'for parts' t3. It has a chip on the fin so it can not be used.
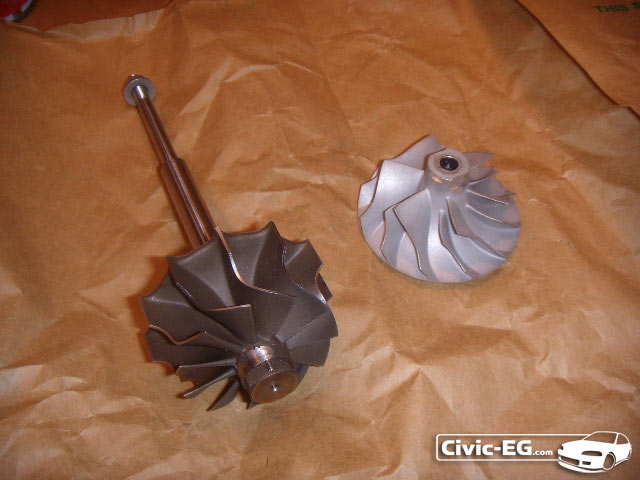
Here's a side by side comparison
Here's the one that just blew, close up.
It got so hot that the retaining ring is stuck in the groove. Rather than get this cleaned up, I found a deal on a new 'stage 1' wheel which is for the modified housing from my old t3.
The previous one was a 'stage 0'.
So the plan in to use the Exhaust housing from my old t3 since the newer one was already cracking (they all will eventually).
Then use the compressor wheel from my old turbo since the newer wheel contacted the housing. I measured and they were identical.
Next I am going to look at the center sections to decide which one I will use in my rebuild.
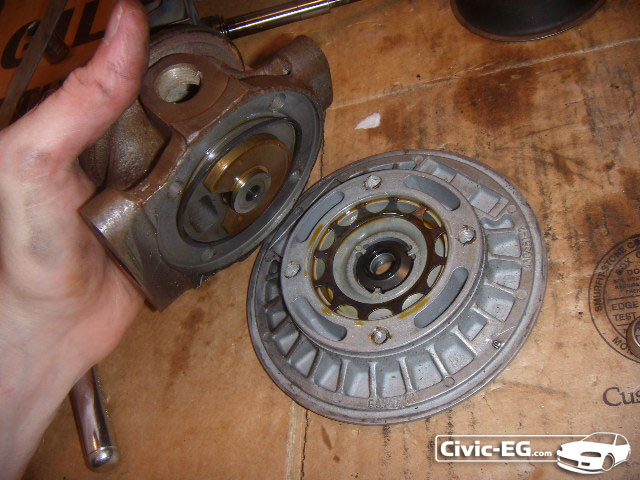
There's 4 bolts that should have thread lock in them, so they should be tight. Loosen them evenly, in a criss cross pattern as you did with the housings. Then you can remove the center section from the compressor backing plate.
Here is the other center section from the old t3. Note the extra ports, it is water cooled. Many turbos used in OEM applications have this. It helps dissipate heat when someone turns their engine off without letting the turbo cool down from a couple minutes of idling first.
Now here's where these 2 turbos are different. The older t3 uses a Carbon seal, while the newer one uses a Dynamic seal. It is just 2 different designs, the Dynamic seal being the newer one. So I will use the Dynamic Seal in my rebuild.
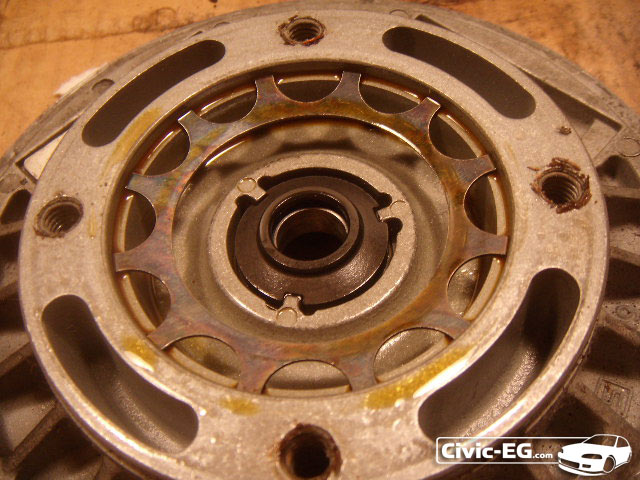
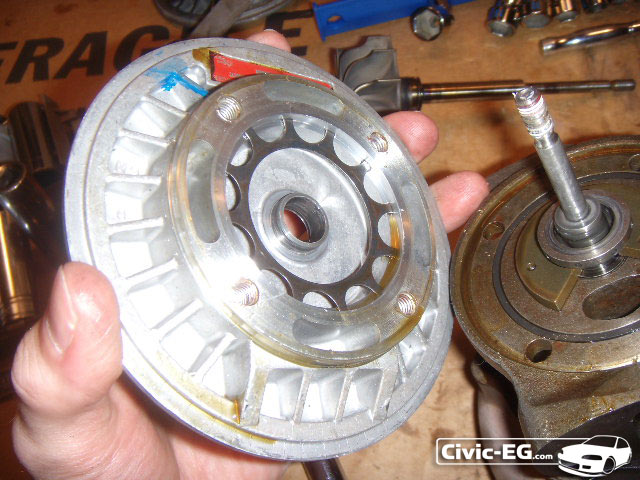
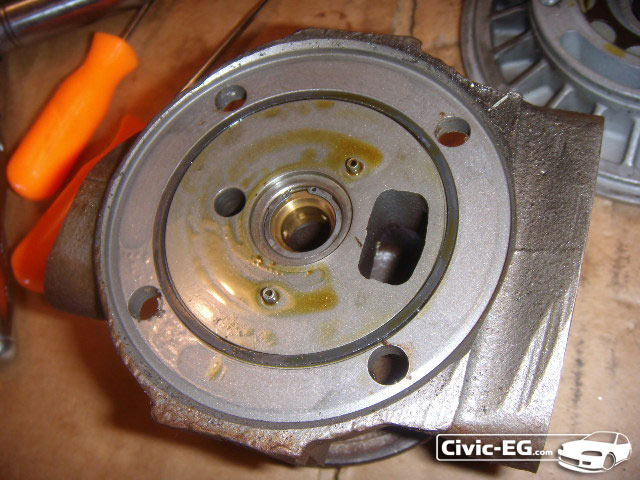
The center housing separated from the compressor backing plate to reveal the carbon seal.
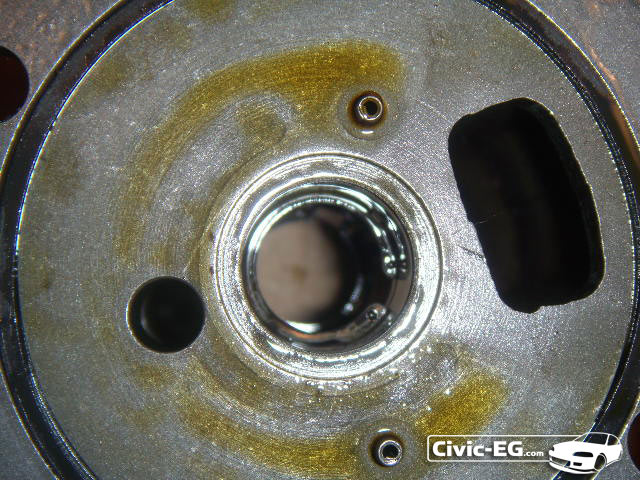
Carbon Seal up close.
And the rest of the Carbon seal assembly, surrounded by the 270° Thrust Bearing.
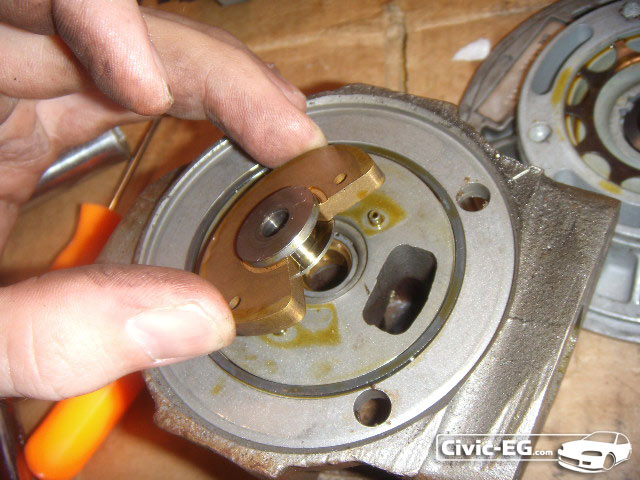
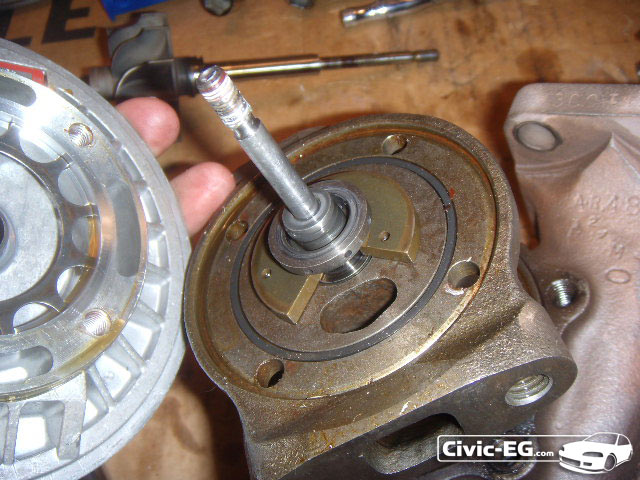
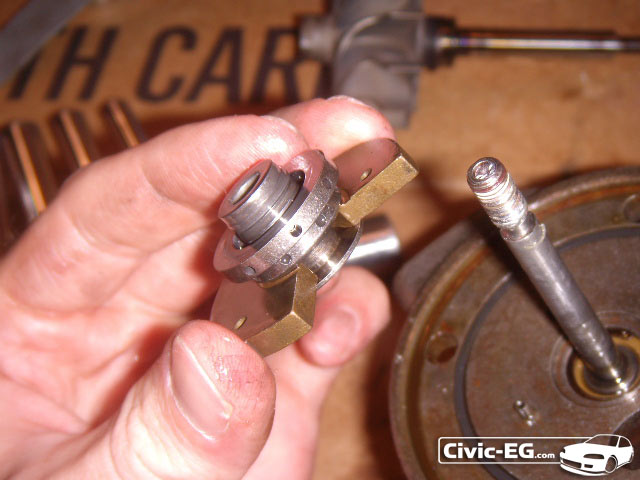
Now lets look at the Dynamic Seal setup...
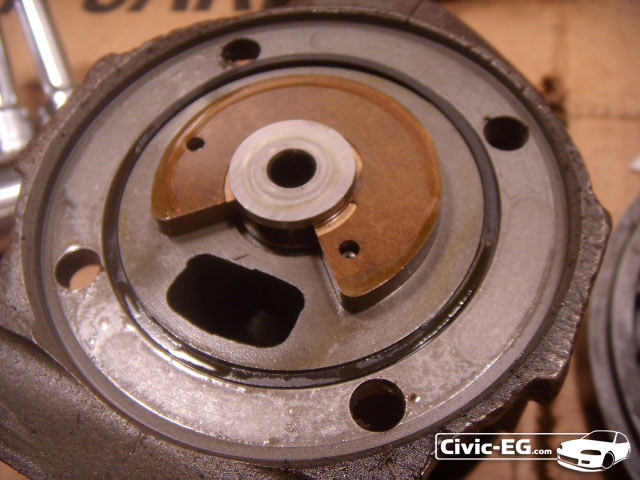
Removing the compressor plate from the center section of the newer t3.
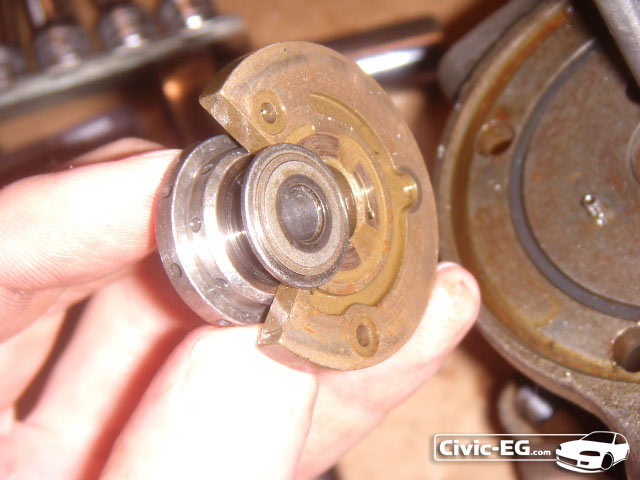
Looking at the Dynamic Seal. Much less moving parts and it uses the same 270° Thrust Bearing.
So back to disassembly of the center section...
Looking into the center section where the turbine goes, you will see very tiny snap rings on both sides.
The tips on my snap ring pliers were not tiny enough, so I got by pulling the first one with a set of hooks.
Then I got some new pliers after I realized what a PITA it was going to be.
$20 and they are reversible which was useful for installing the retaining rings. They come with a variety of tips too.
After you remove the first snap ring, you can pull the bearing out. Then there will be another snap ring behind the bearing.
Same situation on the other side... remove the outer snap ring.
Then the bearing.
Here you can see the snap ring on the other side of the bearing.
So a total of 4 snap rings and 2 bearings is all that goes inside the center section, all of which will be replaced.
I am using the Center section from the older t3 (water cooled) just in case I ever want to go that route eventually. And the Dynamic Seal components and compressor backing plate from the newer t3.
Here is the new stage 1 turbine I got on ebay.
And here they are after I had a local engine shop balance them.
The turbine had the large area of metal removed from the factory when I receive d it. The smaller notch at about 10:00 was additional removed by the machine shop. So ALWAYS balance the wheels, even if they are brand new. When spinning at high RPM, having them out of balance will greatly reduce the turbo's life span. Some turbos are balanced as an assembly, with the compressor wheel installed on the turbine, along with the nut. I read that Garrett components are balanced individually. So research your specific turbo.
Here is your basic rebuild kit, also from ebay. There are also more complete kits available, but this is all I needed.
The turbine and kit total was almost $150, much cheaper than another Garrett t3 turbo.
Start with your spotless clean center section - carb cleaner helps to remove the old oil residue, followed by a good blasting of brake cleaner to clean everything else that is left. I read that you can soak parts in auto tranny fluid to break up the carbon and oil deposits, but this didn't work as good for me as the internet made it out to be.
First notice that the snap rings have a hard edge (left) and a soft edge (right).
The softer edge is the side that should be facing into the journal bearings.
Installing the inner snap ring, you're lucky if you get it on the first try. My pliers were a little but shorter than needed so it took a few tries.
Check to be sure that the rings are all the way in the grooves.
Next I put assembly lube onto the journal bearing and dropped it down in.
And then install the outer snap ring, rounded side facing inward to the bearing.
Assembling the other side, do the exact same. Install the inner snap ring so that the rounded edge will face the bearing. Then drop in the bearing with some assembly lube. You can also use a heavy motor oil.
And then install the outer snap ring with the rounded edge facing the bearing.
Next is the dynamic seal.
First remove the old ring and install the new one. Don't over stretch the new one when installing.
Take the compressor housing back plate.
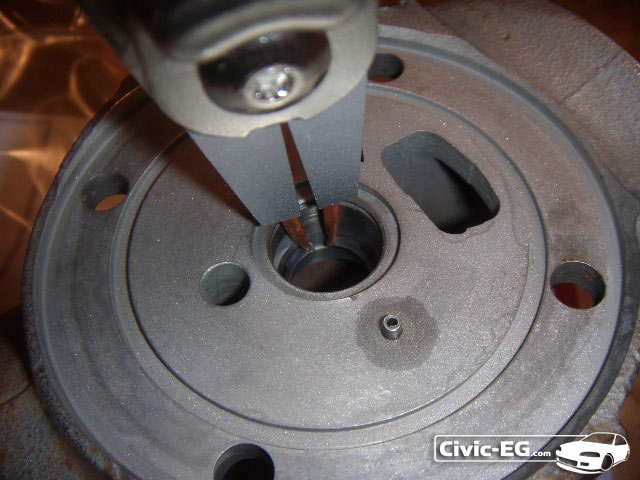
Press the sprocket looking piece of metal into the center, all the way down as far as it will go.
Take your new 270° Thrust Bearing from the kit.
Slide the dynamic seal into the thrust bearing.
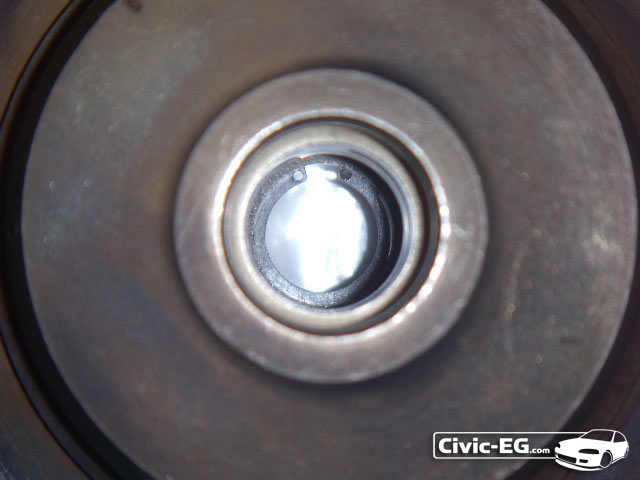
Line up the thrust bearing with the pins on the face of the center section, it only fits one way. Be sure the dynamic seal is sitting evenly over the hold in the center section.
Also note that I installed the new O ring in this step.
This part requires attention to be sure that everything stays in place as you line up the compressor housing backing plate.
It should go together smoothly and evenly. If the backing plate is wobbly, try again. Be sure it is seated all the way. The dynamic seal should be able to spin freely. If not, try again.
Line up the bolt holes and use thread sealer on these bolts. Torque them evenly.
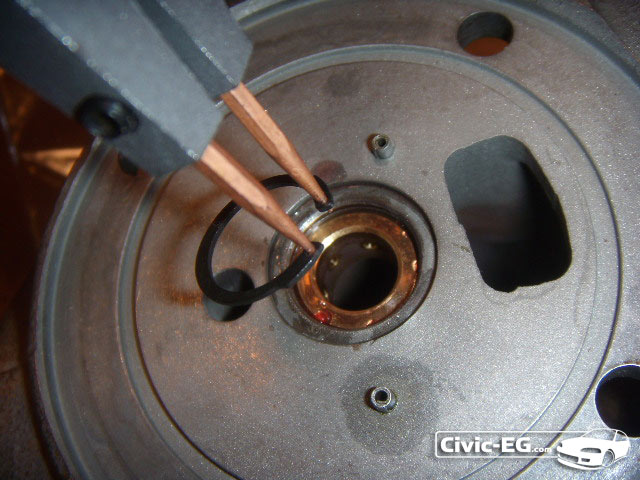
Slide the new retaining ring over the turbine and expand it to fit into the groove the same way as with the dynamic seal.
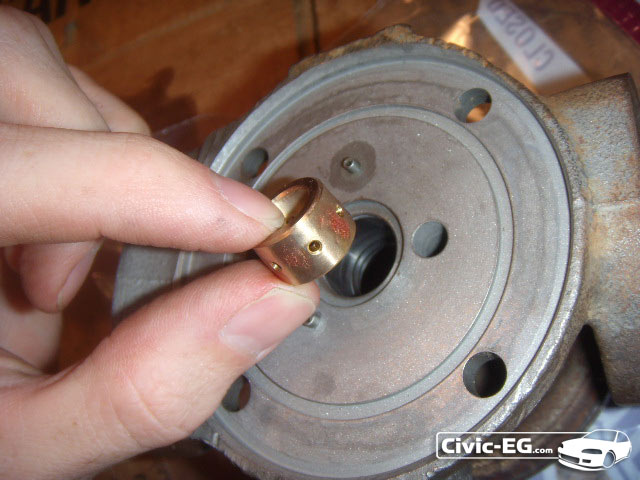
Install the carbon shield (that's what I'll call it) just set it on for now. It will be secure once the exhaust housing in installed.
Next put plenty of assembly lube on the shaft and slide it though the housing.
There should be a little bit of resistance, that means the retaining ring is at the housing. Just push it a little bit and it should pop right in.
Check to be sure everything still spins freely.
Slide the wheel on as far as you can (may be tight).
You can start threading the nut to help push the wheel on as well.
The nut here was to be torqued to 20 INCH/LBS. (not tq/lbs)
The new compressor housing gasket is placed before lining the housing back up to the backing plate for installation. Be absolutely careful you do not contact any of the fins on the wheel.
Put the brackets on and hand tighten them for now. You'll still need to clock the turbo to perfection when it is back on the car.
Place the exhaust housing on the hot side, again do not hit any part of the wheel on the housing.
I installed the bolts, but didn't bother tightening them down until I clock the turbo.
Sit back and think how much money you just saved! Then wrap it up to keep all the dirt away from your rebuilt turbo.
After re-installing, be sure to unplug ecu and crank your engine for a few seconds at a time, at least a few times. This will build oil pressure to the turbo to prevent a dry start.
Last edited by teal_dx on Fri Jan 10, 2014 8:48 pm, edited 3 times in total.
Do Not PM me your technical questions. Post them in the forum! 
My 1992 SOHC Turbo Hatch
My Youtube Channel: 6th Gear Garage
My 1992 SOHC Turbo Hatch
My Youtube Channel: 6th Gear Garage