Post YOUR Hatchback here
By EG6_rugby
#338959 
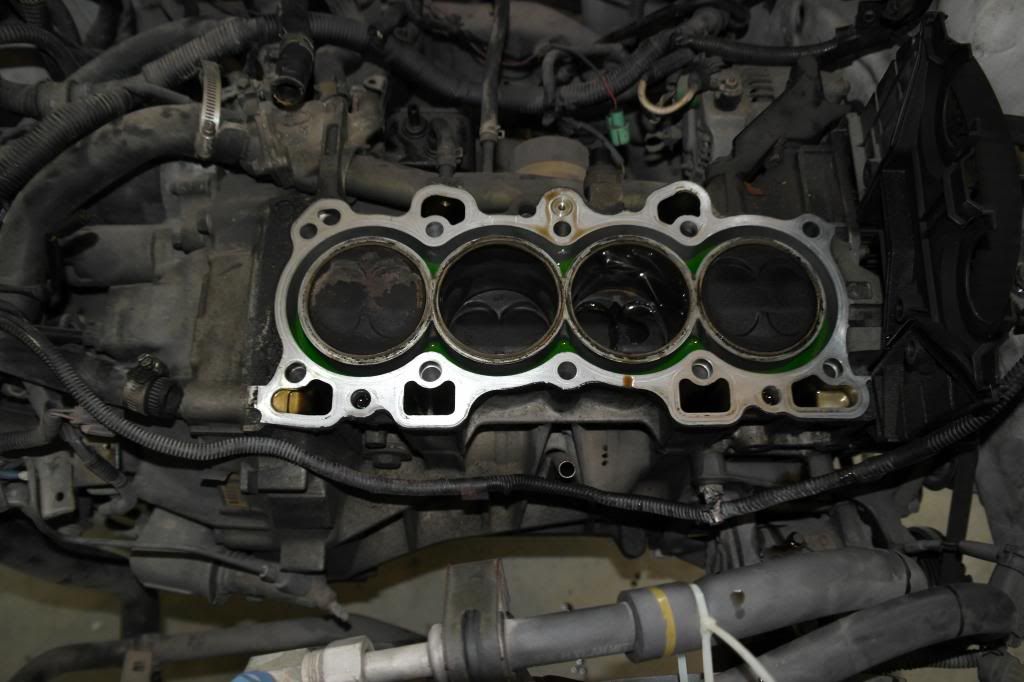
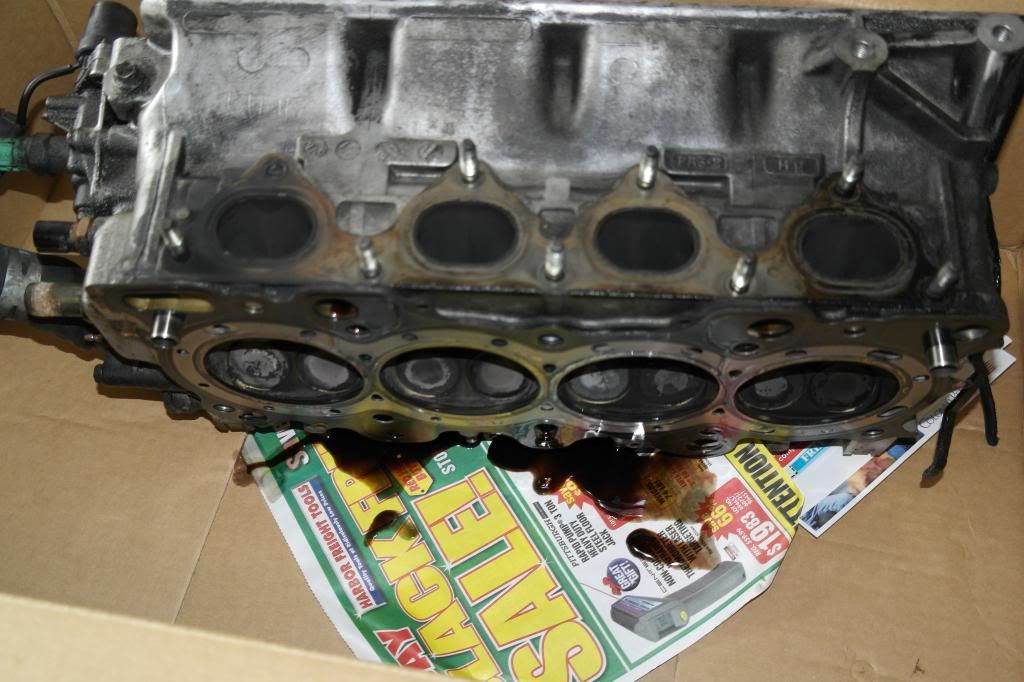
Few new tools later finally got the head bolts out. 1/2in drive is your friend for that. popped right off.

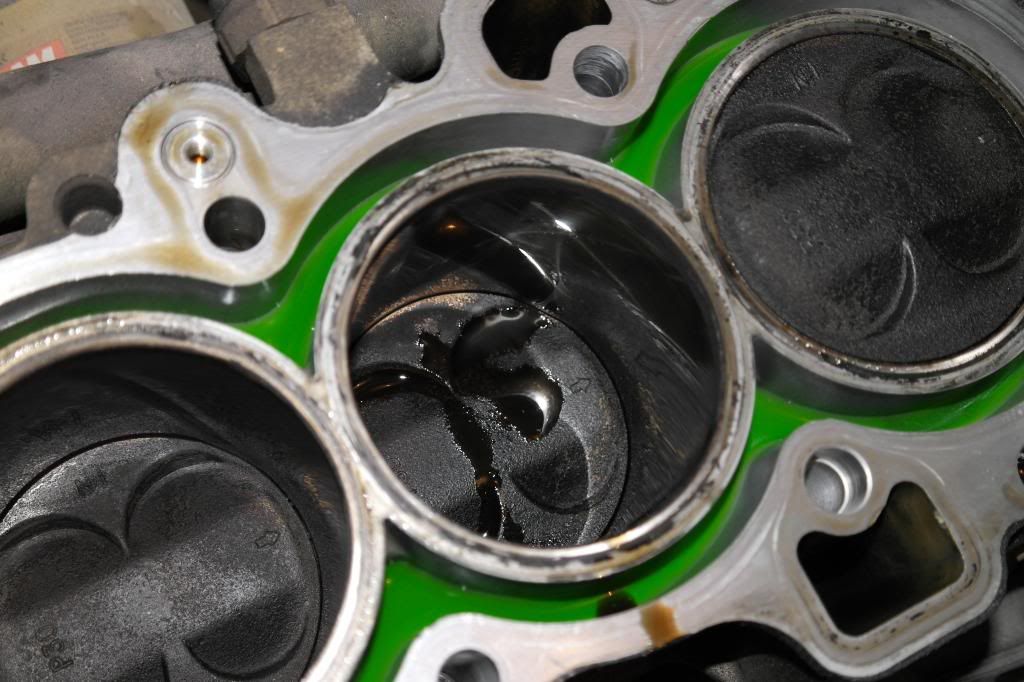
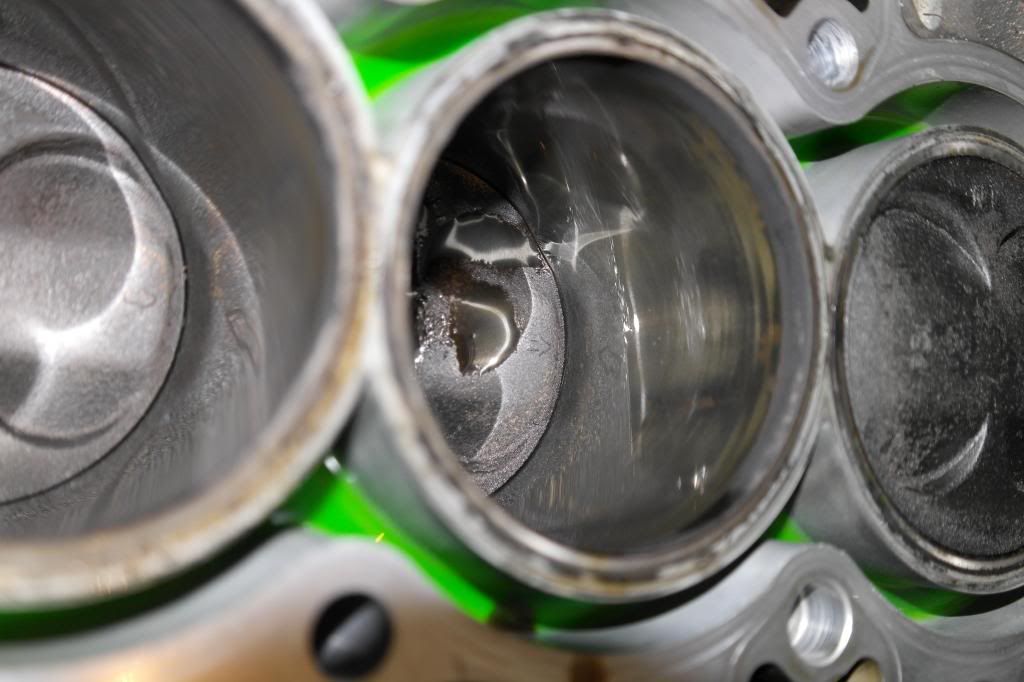
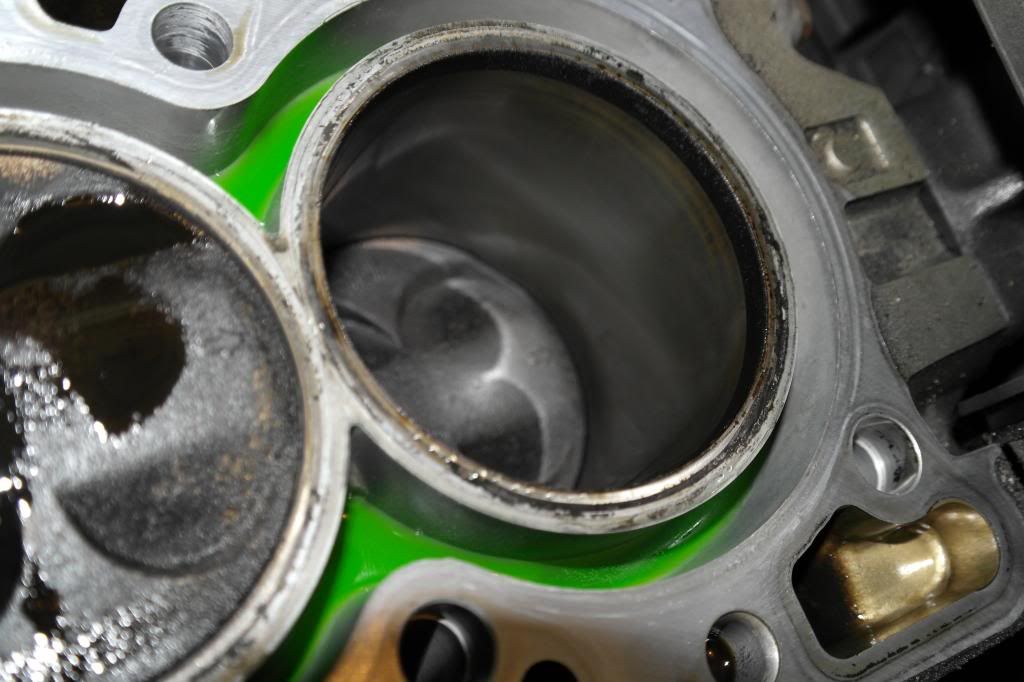
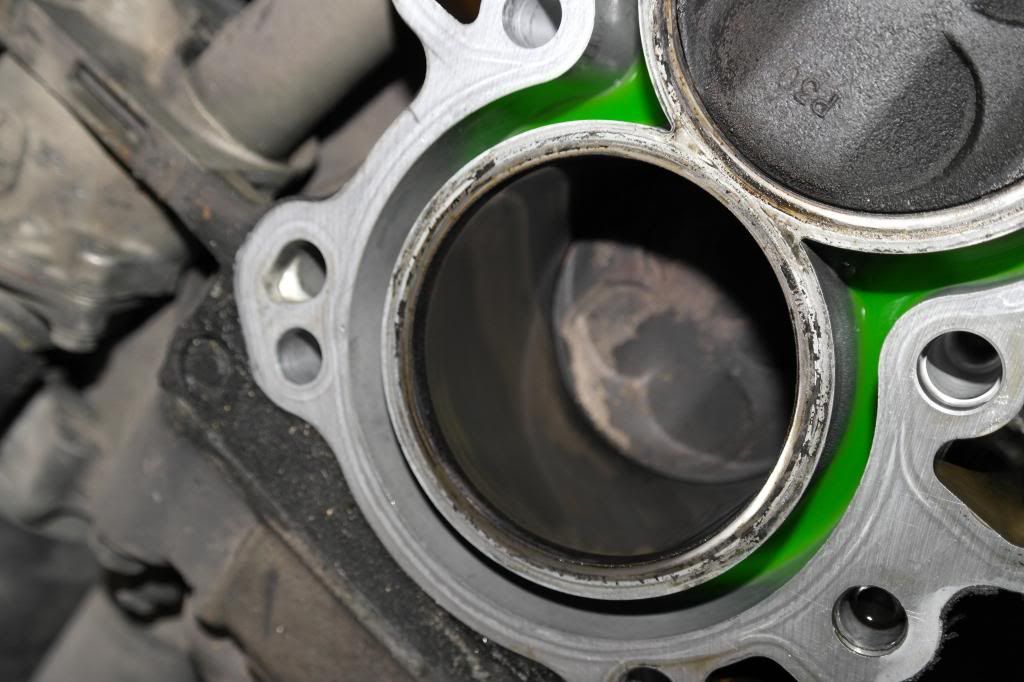
Next on the plate, remove oil pan and pull rods/pistons out of the top of block. hopefully once they are removed I wont have to do anything to the walls other then just measure and make sure they are in spec and hone.

Image

Image

Image

Image

Image

Image

Image
By EG6_rugby
#338967 So I had a few minutes before I headed to the bar to watch the redskins not show up against the eagles. I removed the oil pan, pickup, and windage. hopefully in the next day or two I can pull the rods/pistons.

Image

Image
By EG6_rugby
#339075 just a small update. pulled the rod/pistons. time to measure the cyclender walls and check the head for warping. hopefully they are still within spec and I can start ordering parts.

Image

Image

Image
By EG6_rugby
#340373 So finally made my first big purchase towards completing this bottom end build for my turbo. Went through real street performance, their customer service is excellent. I may be missing a gasket i believe go onto the back end of the sump. i have to double check. other then that pick up my baffled oil pan already fitted for oil return line and start putting this beast back together

K542M81AP Wiseco Pistons Integ-Wiseco Pistons Acura Integra LS GSR B18C1 B18A1 B18B1 81mm 9.5-9.8:1

CRS5290H3D Eagle HBeam Rods Ho-Eagle H-Beam Rods Honda Civic Si B16A1 B16A2 5.290

PRO2002T Cometic StreetPro Top-Cometic StreetPro Top End Gasket Kit B16A2 B16A3 B18C5 HONDA Civic Si 94-01

T227RB Gates Racing Timing Bel-Gates Racing Timing Belt Honda Civic Si B16A2 B16A3 B17A1

4B1946H ACL Race Rod Bearings -ACL Race Rod Bearings STD B18A1 B18B1 B16A2 B20B Integra LS Acura
By EG6_rugby
#340794 parts finally came in.
Image

I ordered my moroso baffled oil pan and should be here Saturday. couple more gaskets and i will be ready to put the bottom in back together
By EG6_rugby
#340980 So finally got around to assembling the pistons. pretty straight forward process.

Image
Image
Image
Image
Image

#1 assembled minus pistons rings
Image

Checking the ring gap. for future reference pay attention to the way the rings slide out the package. They come out in order starting with the top ring then 2nd ring etc. I didn't notice this the first time and freaked. had to scour the internet for hints on which was which. the directions suck

Image
Image

So then i ran into a problem. started cylinder #2 and the 2nd ring was good. Put the top ring in and i cant fit .50mm feeler between so now i have to read up on grinding the ring a little :x

How ever not all is lost, i got my baffled oil pan today from JHP USA.
Image
Image
Image
Image
By EG6_rugby
#341585 Lil downtown time from the build. had to wait on a part show up. So i attempted my first hone. I didnt really know what to expect maybe i thought it would be more then what it turned out to be. 6 passes forward and reverse with oil and a piece of cardboard to protect the crank
Image
Image
Image
Image

My part finally came. 8 bucks for shipping and this is what showed up. I am in the wrong business
Image
Image
Image

had to break out the big gun to get the pulley off.
Image
Image

Started installing the pistons this weekend. First and foremost the ring compressor with the allen wrench is horrible. the top ring slides out everytime so you have to stop and tighten down then push it in more. Make sure you rotate the crank so it is at its lowest point. makes life easy
Image
Image

now the shitty part. does anybody know a trick to getting the caps off after the initial torque to measure with plasigauge??????/ i was able to get the 1st off and now #4 wont budge
Image :x :x :x :x
By EG6_rugby
#341589
egsedanguy wrote:mabey a plastic pry tool. :?


sad part is i cant remember how i got the first one off.. damn rum and cokes :thumb:
By EG6_rugby
#341615 after all that i finally finished the what seemed to take months to do in one day. My clearance was between .015 and .018. That shit was a bitch but i ended up using a fine scaled flat head to pry the caps off. All the pistons are installed and torqued to spec
Image

this oil pan is already set up for return line from the turbo
Image
Image
User avatar
By egsedanguy
#341647 so was it easy doing the pistons from the bottom? Im thinking of doing the same when I do mine. just not sure if i wanna pull the whole engine out agin lol. But you car is dope. oil pan is nice. Is it also as deep as stock or no? looks shallow compared to stock.
By EG6_rugby
#341664
egsedanguy wrote:so was it easy doing the pistons from the bottom? Im thinking of doing the same when I do mine. just not sure if i wanna pull the whole engine out agin lol. But you car is dope. oil pan is nice. Is it also as deep as stock or no? looks shallow compared to stock.


Thanks man, almost got rid of it but decided to finish what i wanted to do. Sole based on the work i did, the hardest part was doing the bearing specs on the connecting rods. i did all the work by myself so yea alot of getting under the car then back up and so on. Other then that if i had all the parts before i started i could of easily did it in a weekend.

It looks pretty similar to the stock in size. i will have to look compare the 2 pans. it was only 150 bucks for the new one.
By EG6_rugby
#343001 Well first off, some how i managed to lose my intake nuts. so what should of been done two weeks ago is now waiting on the new parts to come in. on top of that i move in 2 weeks. :thumbdown:

New ARP headbolts and gasket by street pro
Image
Image
Image

Scrubbing the head where the valves are
Image
Image
Image
Image

Pic of my daily before an oil change and the hatch on blocks since dec.
Image
Image
By EG6_rugby
#343209 SO finally got around to getting the head torqued down in 3 steps. i believe i went 40-60-80 with ARP head studs
Image

INstalling the timing belt has been a major pain. Removed the motor mount ran the belt through installed motor mount. that was easy with my ghetto motor lift
Image

now the problem. I have the cams TDC or least very close to it
Image

The exhaust cam sits funny. see pic below. the pistons are at TDC judging by crank mark. and its very tight. I am assuming i need to loosen the slack a little. That the other problem i cant get the bolt on the tensor to come lose. Any suggetions on how to do with motor still in car??????
Image