DIY: oem-3spoke non srs steering wheel teardown
So i think ill dedicate this to the guy who got me this wonderful steering wheel which im so thankful for....
mxracer84 once again thank you for all your help in getting me this wheel.
Anyhow this DIY will be concentrating on the following
-The cdm/edm/jdm 3spoke non-srs eg steering wheel
-the complete teardown of the steering wheel and some helpful tips on reassembly
first off Why would I(you) wanna do this?
Maybe something internally isnt working correctly in your steering wheel, maybe you need to replace a part inside, or just maybe like me you wanted to clean the heck out of it lol....
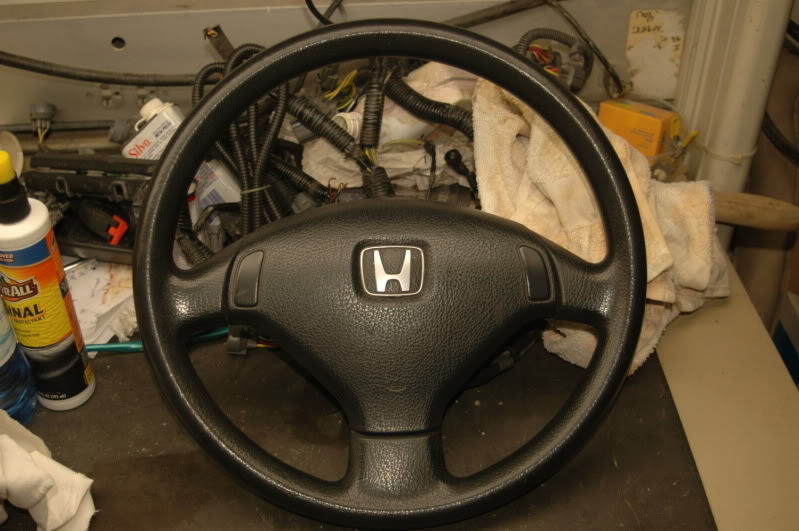
So lets start shall we....here we have a nice 3spoke steering wheel that is direct bolt-up for the eg and i do think this is one of my facorite steering wheels that is a direct bolt up much better than the stupid SRS 4spoke in america that i originally had on my car.
Ok so lets start this teardown
clean up your workspace and gather your materials and maybe get a couple of containers to hold the screws there are quite a few lol
Tools i used
-precision flat head(the small screwdrivers used by most computer people....this was to be used with a cloth to clean the crevasses i was unable to get to.....
-Small stubby phillips head
-long phillips head
(and if you wish to do some painting like i did 220g sand paper and flat black spray paint
A few rags (more than one so you can change out frequently as you clean so you dont contaminate or scratch the parts due to grit...
---------------------
-Liquids)
-Armor all spray
-Rubbing alcohol (to remove the grease from the back ring.....
Ok so now that we gathered our tools the next step would be to create a nice working area so you dont lose anything because nothings more frustrating than losing a screw....
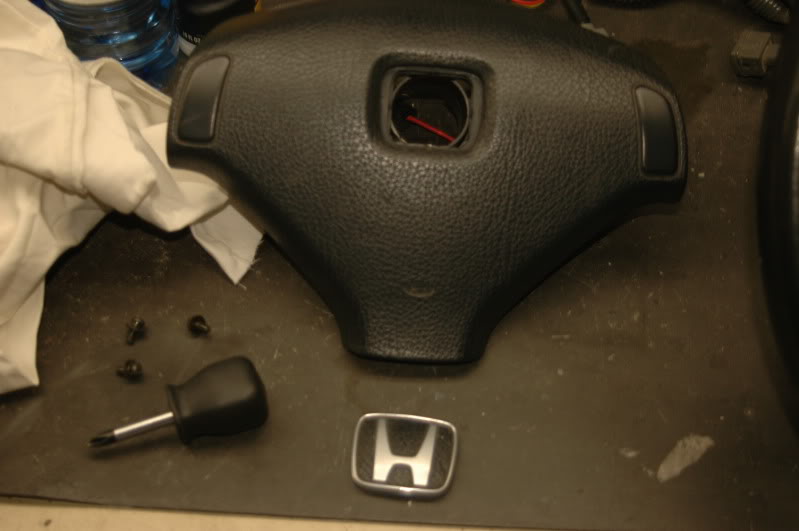
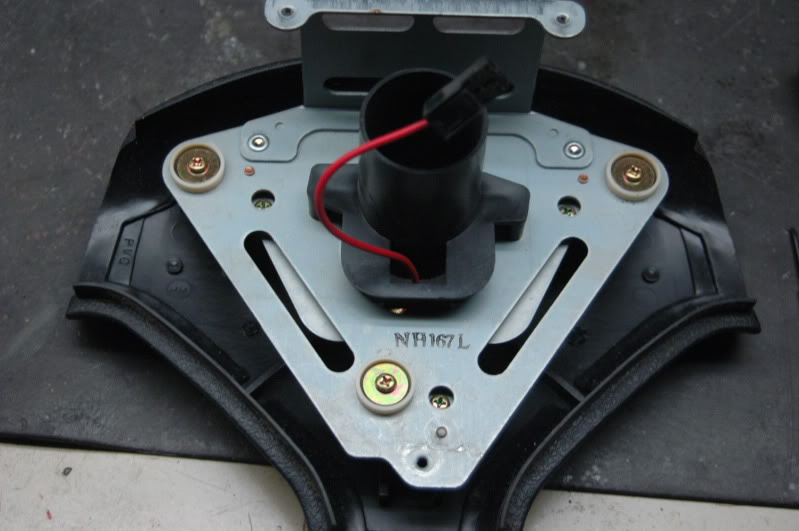
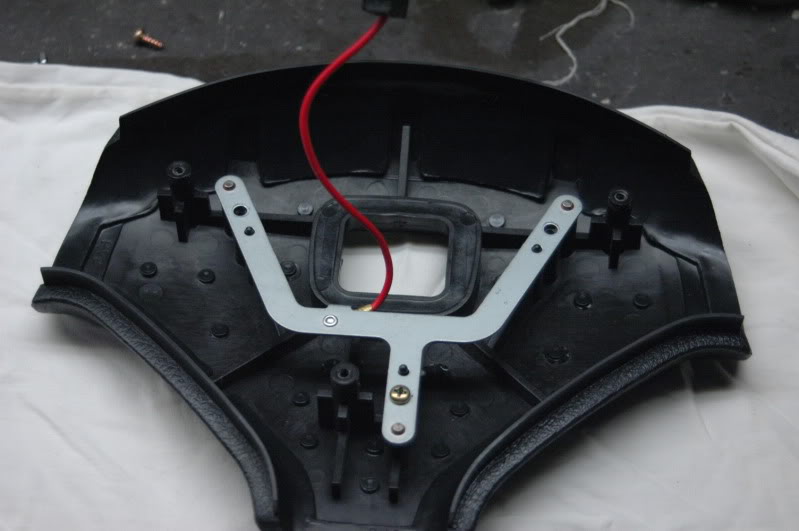
Ok lets start by turning the wheel onto its back and removing the 3 screws (this will remove the front horn set-up
Second support the horn setup and carefully turn the wheel faceing its normal front...then gently lift the horn up if you got all 3 screws you should be able to lift it enough to unplug the horn wire....
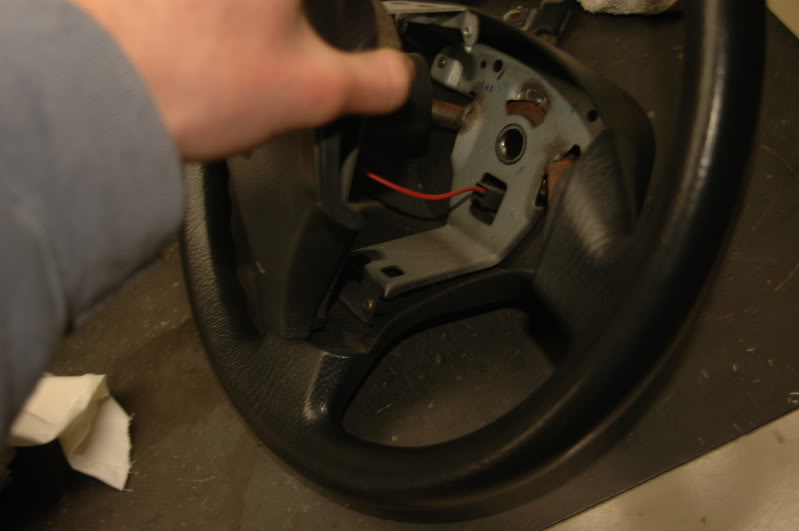
(its the only wire in the whole wheel (red)
Then carefully finish lifting off the horn assembly and you should be left with this...

Ok that there was probally the hardest part for me because the clip for the horn is a little funky you must depress the part thats towards the connector and not the back part like other clips ive run into....
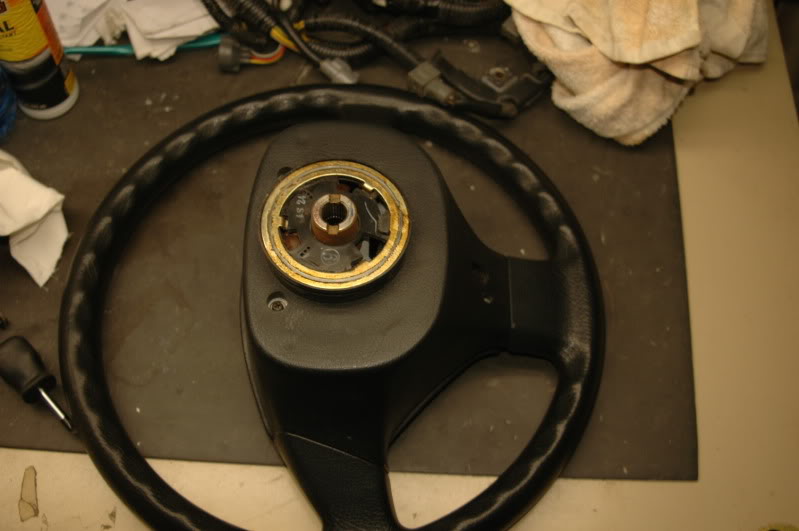
Ok next you can either do this with a small flat head if its on the car but just for right now i popped out the center emblem by pushing on it with my finger....
Ok now lets concentrate on the core of the steering wheel set the horn setup and the emblem in a safe place....
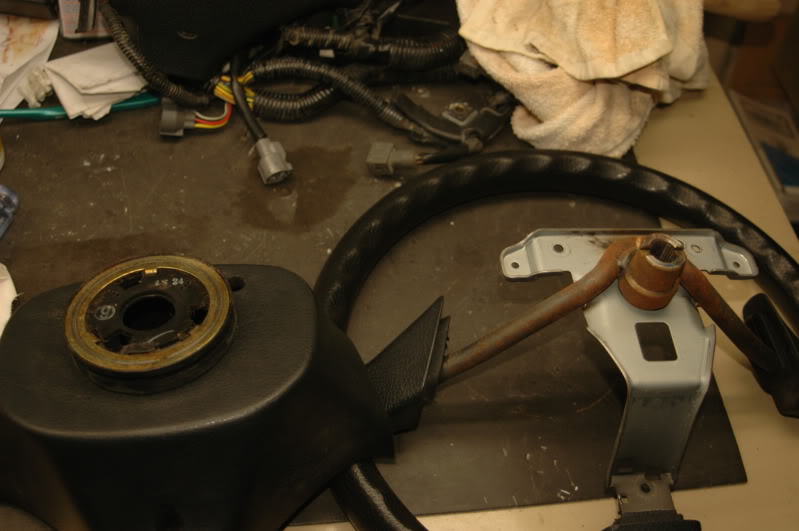
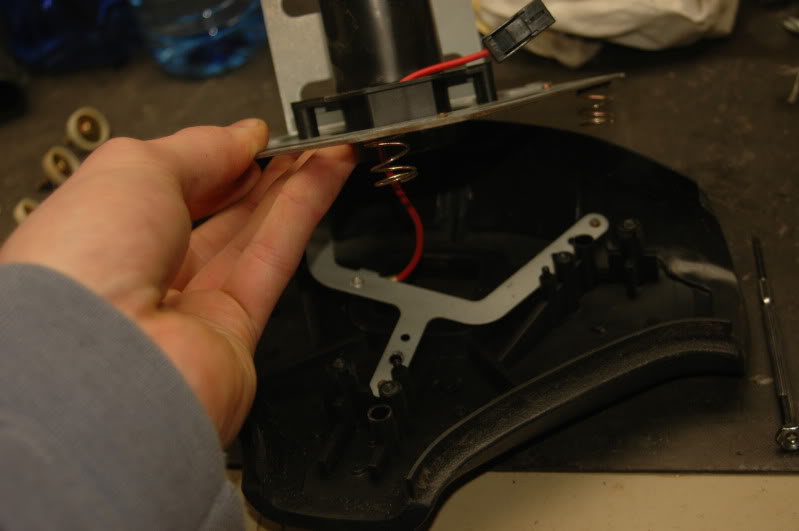
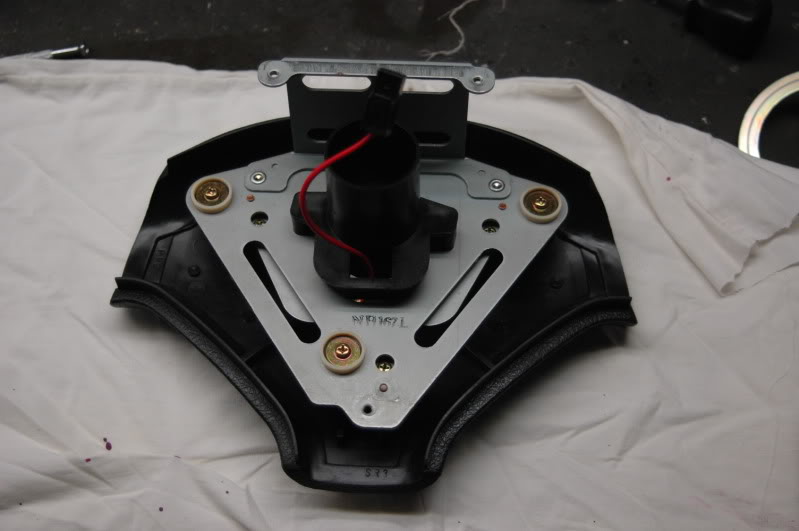
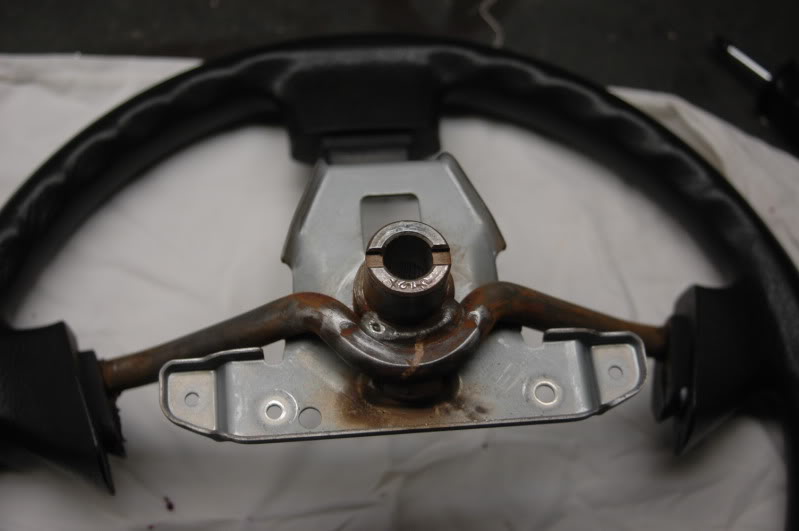
Ok so next locate the 3 screws holding the back plate in place
unscrew them and then slowly lift the frame of the wheel off the backing plate...
And you should have this


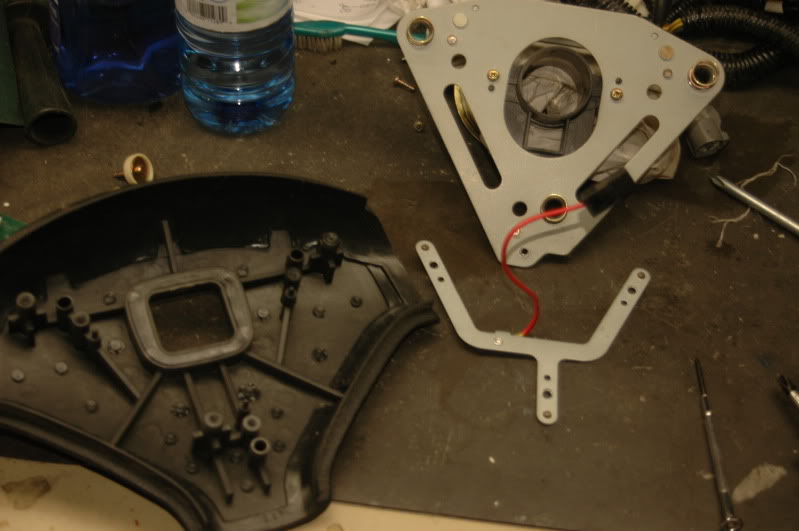
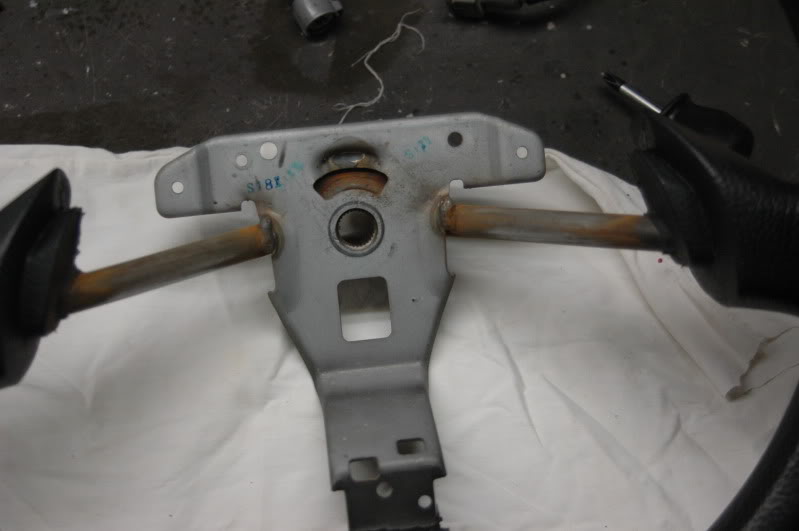
Ok now to dissassebly the back plate further....
Unscrew the only screw left and push the tabs of the ring clockwise (i think thats right lol) anyhow so they are able to un clip from their resting points and now you can pop the ring off

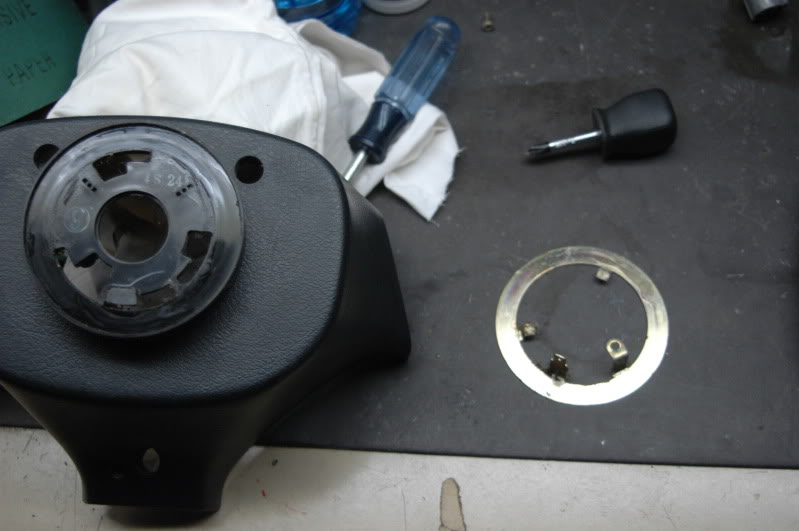

Ok now that thats off you should look carefully at the inside where you took the screw off you should notice two clips pinch those together and remove the last part on the backing plate...
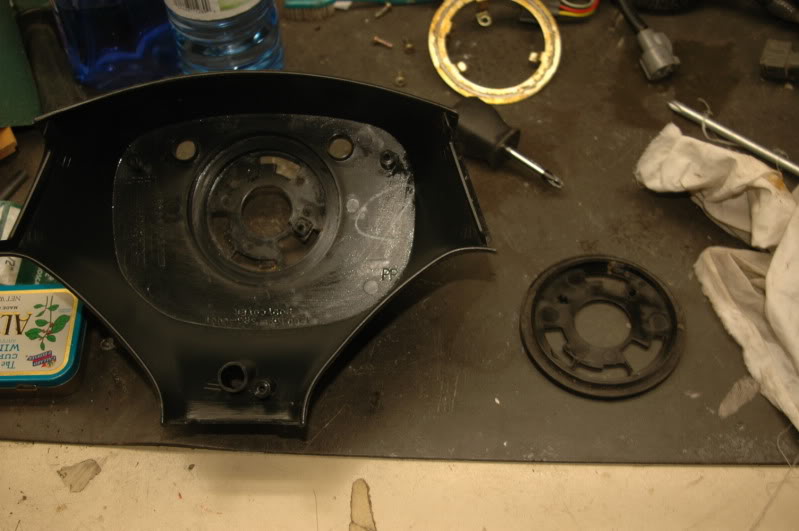
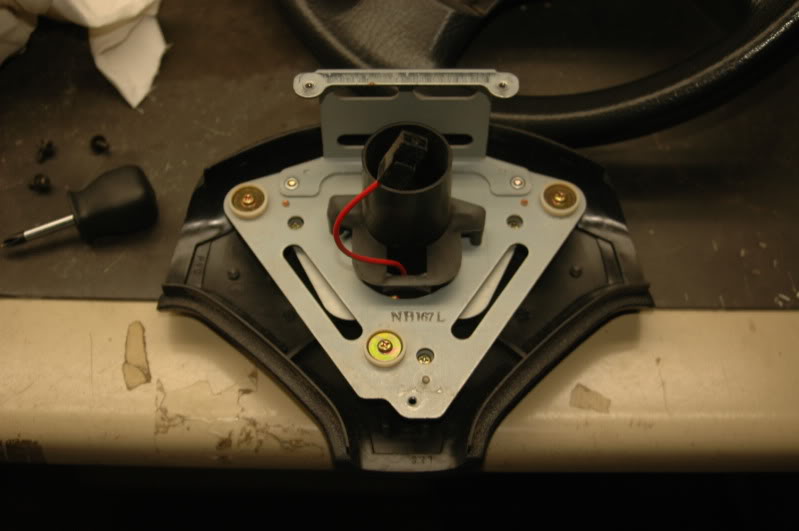
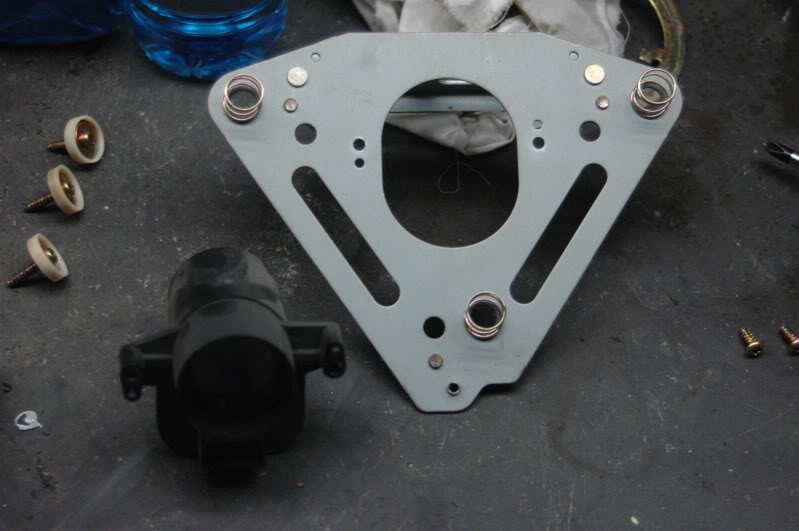
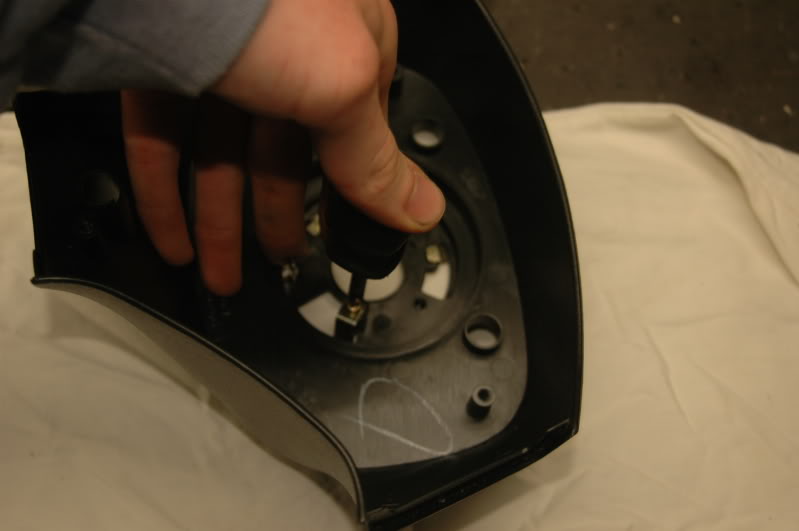
Next lets concentrate on the dis assembly of the horn button
There are 6 screws on here in general proxy to each other....the thing i did since it was my first time taking it apart was unscrew everyone but in reality all i had to do was to unscrew the screws that are holding the springs down...
easiest way to remove them is to depress the plate and unscrew then gently release your pressure

Then lift up on the top plate and slowly guide the wire thru the black plastic peice
And then if you unscrewed the other 3 screws you will be able to remove the last part of the horn assembly...
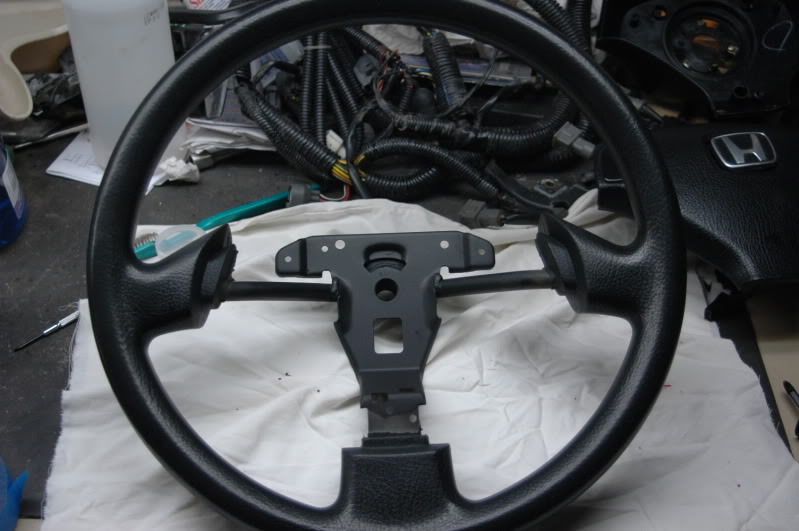
Now to remove the black tube there are just two more screws and there youve finally done it you have all the parts off the steering wheel assembly off......
Now clean clean check the condition of parts and clean lol....my wheel looked perfect except for it being dirty as heck on the inside as normal since no one ever thinks of disassembling the wheel or any other part to clean it perfectly...
Anyhow lets assume youve done what youve needed to do lets start the reassembly.....
-----------------------------------------------------------------------------
REASSEMBLY
pretty much you go backward from disassembly lol....So i will just post the pics and give helpful hints along the way....
Hint: the spring screws or screws that are thru the spring can be tightned all the way i wanted to go slowly making sure they wherent set at a height but the horn contacts would not come into contact with each other unless the plate was depressed when the screws where tightened so tighten away just not over tighten....
Next time to work on the backing plate --install the clipable back plate then place in the contact plate in place...
Hint: to hold the peice from flexing too much i suggest holding the tab in place as your screwing down this will allow you to be able to keep everything in place whilst screwing and prevent any damage....
Now the part you can either omit or do something a little different...like most steering wheels ive come into contact with there has been a bit of surface rust....so what i did was went ahead and used 220g sand paper and lightly sanded the bars and rust off....
Then i painted it to help prevent further rust etc.....
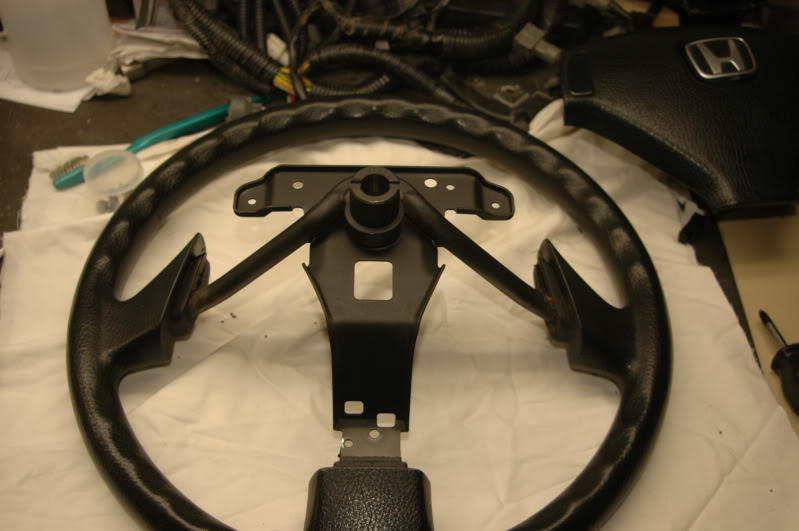
Then i installed the backing plate assembly....


Then came the horn assembly....
Hint: plug in the plug first lol....and it will be easier if you dont tighten the screws up until you get all of them in...

Then pop in the center emblem

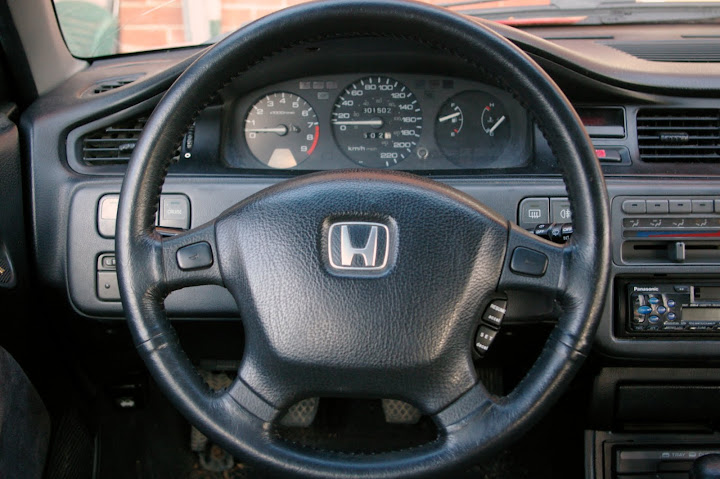
And youve finally completed the reassembly of the steering wheel.....
I will be making a JDM steering wheel install diy for this site but until my parts come this is something good to do while you wait....
mxracer84 once again thank you for all your help in getting me this wheel.
Anyhow this DIY will be concentrating on the following
-The cdm/edm/jdm 3spoke non-srs eg steering wheel
-the complete teardown of the steering wheel and some helpful tips on reassembly
first off Why would I(you) wanna do this?
Maybe something internally isnt working correctly in your steering wheel, maybe you need to replace a part inside, or just maybe like me you wanted to clean the heck out of it lol....
So lets start shall we....here we have a nice 3spoke steering wheel that is direct bolt-up for the eg and i do think this is one of my facorite steering wheels that is a direct bolt up much better than the stupid SRS 4spoke in america that i originally had on my car.
Ok so lets start this teardown
clean up your workspace and gather your materials and maybe get a couple of containers to hold the screws there are quite a few lol
Tools i used
-precision flat head(the small screwdrivers used by most computer people....this was to be used with a cloth to clean the crevasses i was unable to get to.....
-Small stubby phillips head
-long phillips head
(and if you wish to do some painting like i did 220g sand paper and flat black spray paint
A few rags (more than one so you can change out frequently as you clean so you dont contaminate or scratch the parts due to grit...
---------------------
-Liquids)
-Armor all spray
-Rubbing alcohol (to remove the grease from the back ring.....
Ok so now that we gathered our tools the next step would be to create a nice working area so you dont lose anything because nothings more frustrating than losing a screw....
Ok lets start by turning the wheel onto its back and removing the 3 screws (this will remove the front horn set-up
Second support the horn setup and carefully turn the wheel faceing its normal front...then gently lift the horn up if you got all 3 screws you should be able to lift it enough to unplug the horn wire....
(its the only wire in the whole wheel (red)
Then carefully finish lifting off the horn assembly and you should be left with this...
Ok that there was probally the hardest part for me because the clip for the horn is a little funky you must depress the part thats towards the connector and not the back part like other clips ive run into....
Ok next you can either do this with a small flat head if its on the car but just for right now i popped out the center emblem by pushing on it with my finger....
Ok now lets concentrate on the core of the steering wheel set the horn setup and the emblem in a safe place....
Ok so next locate the 3 screws holding the back plate in place
unscrew them and then slowly lift the frame of the wheel off the backing plate...
And you should have this
Ok now to dissassebly the back plate further....
Unscrew the only screw left and push the tabs of the ring clockwise (i think thats right lol) anyhow so they are able to un clip from their resting points and now you can pop the ring off
Ok now that thats off you should look carefully at the inside where you took the screw off you should notice two clips pinch those together and remove the last part on the backing plate...
Next lets concentrate on the dis assembly of the horn button
There are 6 screws on here in general proxy to each other....the thing i did since it was my first time taking it apart was unscrew everyone but in reality all i had to do was to unscrew the screws that are holding the springs down...
easiest way to remove them is to depress the plate and unscrew then gently release your pressure
Then lift up on the top plate and slowly guide the wire thru the black plastic peice
And then if you unscrewed the other 3 screws you will be able to remove the last part of the horn assembly...
Now to remove the black tube there are just two more screws and there youve finally done it you have all the parts off the steering wheel assembly off......
Now clean clean check the condition of parts and clean lol....my wheel looked perfect except for it being dirty as heck on the inside as normal since no one ever thinks of disassembling the wheel or any other part to clean it perfectly...
Anyhow lets assume youve done what youve needed to do lets start the reassembly.....
-----------------------------------------------------------------------------
REASSEMBLY
pretty much you go backward from disassembly lol....So i will just post the pics and give helpful hints along the way....
Hint: the spring screws or screws that are thru the spring can be tightned all the way i wanted to go slowly making sure they wherent set at a height but the horn contacts would not come into contact with each other unless the plate was depressed when the screws where tightened so tighten away just not over tighten....
Next time to work on the backing plate --install the clipable back plate then place in the contact plate in place...
Hint: to hold the peice from flexing too much i suggest holding the tab in place as your screwing down this will allow you to be able to keep everything in place whilst screwing and prevent any damage....
Now the part you can either omit or do something a little different...like most steering wheels ive come into contact with there has been a bit of surface rust....so what i did was went ahead and used 220g sand paper and lightly sanded the bars and rust off....
Then i painted it to help prevent further rust etc.....
Then i installed the backing plate assembly....
Then came the horn assembly....
Hint: plug in the plug first lol....and it will be easier if you dont tighten the screws up until you get all of them in...
Then pop in the center emblem
And youve finally completed the reassembly of the steering wheel.....
I will be making a JDM steering wheel install diy for this site but until my parts come this is something good to do while you wait....


 meh i do it for the love of my honda and the thought of helping someone out.....so no worries....