- Mon Jul 07, 2008 2:07 am
#61052
 Parts and Supplies
* trunk light holder and bulb from an Integra*
* 18 gauge female quick disconnect or option plug**
* 18 gauge wire
* 18 gauge inline fuse holder
* 10A blade fuse
* .032 solder or butt connectors
* electric tape
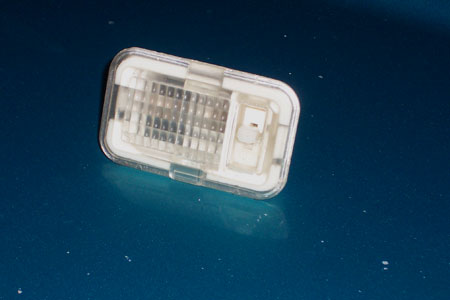
*You can get the light from a 90-01 Acura Integra and some other model Hondas.
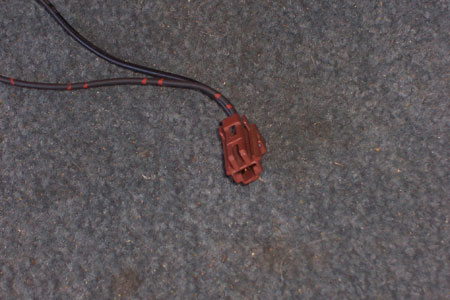
**A fuse box option connector can be found in the driver's door on 92-95 Civics and 94+ Integras that have power door locks. I've also found them near the AC on 94+ Integras. If you can't find this plug connector you can use an 18 gauge female quick disconnect aka speaker connector.
Tools
* 100-150 Watt Solder Gun
* Channel Lock 909 Crimp Tool
* Panel Popper
* Pick Tool
* #2 Phillips Screwdriver
* 10mm Socket, Ratchet, and short extension
* Razor Blade
* Reach Tool
* Multimeter*
*Decent multimeters with the continuity tone can be found at Sears for $15. You need this to verify that you have the right wire for the trunk trigger. Optionally you could follow the wire from where it is connected to the latch.
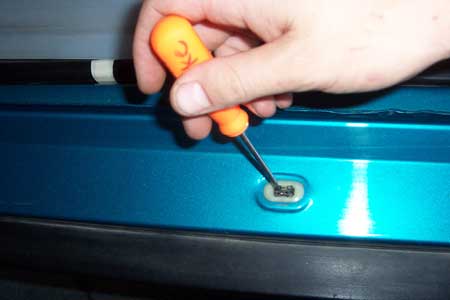
Get the panel popper under the driver's side running board and carefully pry against the clips. If the clips stay in the chassis you have to extract them with a pick tool and put them back on the plastic cover.
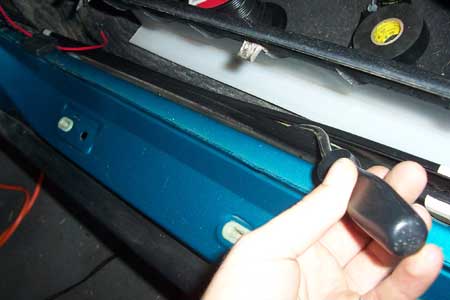
Beneath the carpet are two wire cases. Cut the electric tape and then pry them open with the pop tool.
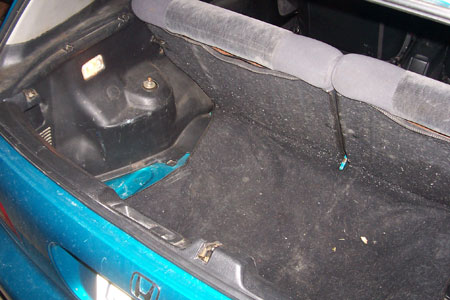
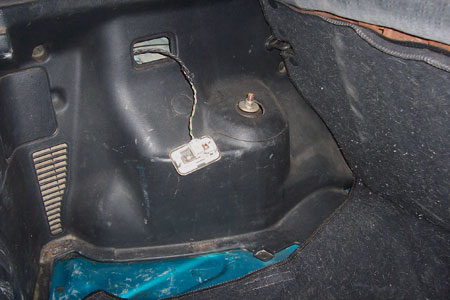
Remove the rear seat bottom. There is a 10mm bolt between the center seat belts. Lift the back of the seat bottom up and then swing it toward the front of the car so you can remove the two hooks.

Connect the inline fuse holder to the far left option plug connector. Leave the fuse out for now. Connect the 18 gauge wire to the other end of the fuse holder and begin running it down behind the kick panel, down the running board inside the wire cases and under the rear quarter panel plastic.
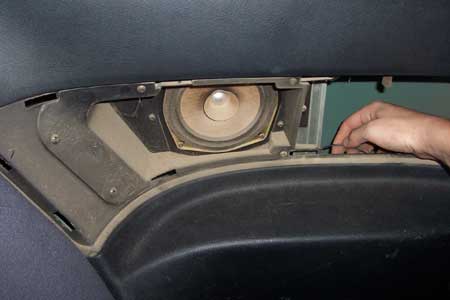
Pop off the rear speaker grill (or delete panel) and stick your reach tool in the cavity so you can pull the wire up out of the hole. We're doing this to avoid having to remove the entire panel.
Use the reach tool again to pull the wire through the light cavity. Connect this to one of the inputs on the light housing. The newer lights have a two pin plug connector. The older lights have two prongs. Polarity is not important, but for the record, white/red is power and green/black is ground.

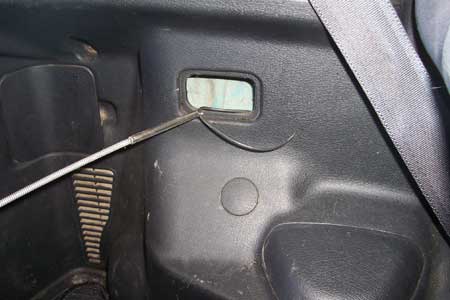
Pop out the tail light access cover so you can run the wire over to the light.
This is where you can tap into the green/black (solid color/stripe color) trunk trigger wire. This wire is what controls the light with the opening and closing of the hatch glass. Optionally you could simply ground the other light wire and control the light manually with the switch, but I think that is a cop-out.
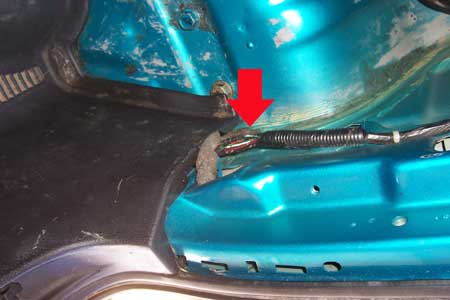
To verify that you have the right wire (sometimes there are multiple green/black wires), touch one of the meters probes to the bare wire, ground the other wire, and set the meter to continuity. The reading should go from 1 to 0 and the meter should make a tone. Close the hatch and the meter will read 1 and the tone will go out.
Now that you have the correct wire, connect it to the light housing. Then put the fuse in the fuse holder and test the light before snapping it into place.
Last edited by suspendedHatch on Mon May 21, 2012 4:12 am, edited 1 time in total.