- Sat Apr 26, 2008 10:05 am
#52709
Disclaimer: This is a reference thread, I have no liabilities for any damage done by following this thread. I also wrote this in Nov 05'. If it needs corrections feel free to PM me to enlighten me. 
DIY install NON-USDM sidemarkers onto a USDM fender.
i used a DIY How-To but i wanted to post my experience with it as it would be more than helpful to have more than one DIY to compare it to.
Tools:
Drill bit
metal cutter (this can be replaced with dremel)
extra wiring
metal coat hangar
masking tape (painting tape works great)
Scissors
Ruler
Solder Gun
Solder
Shrinkwrap
electrical tape
File
Touchup Paint (any color)
Anyways I found the template online here:
http://members.cox.net/ninety2sir/techref/.../sidemarker.htm
thanks to you Jacob!! I couldn't print out the template with the proper dimensions so I gave up and decided to juse use the dimensions given. Here goes!
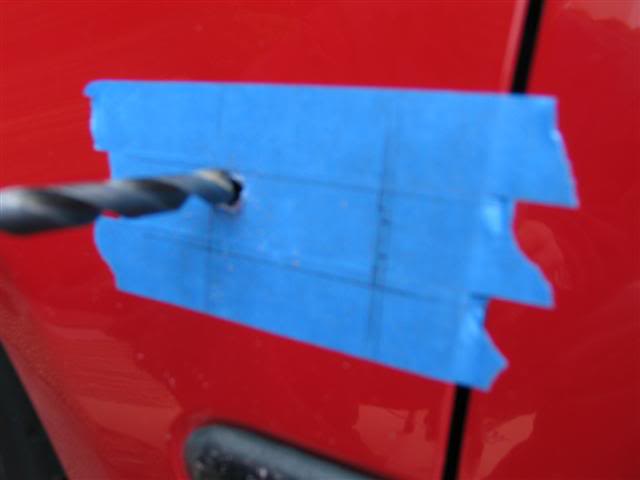
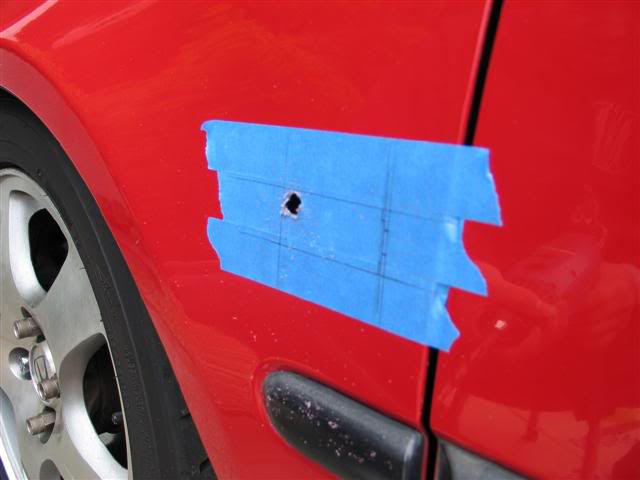
Use the template and mark all the dimensions on the masking tape like shown and drill a bit into it. The masking tape will help the paint from chipping as you cut into the car's fender.
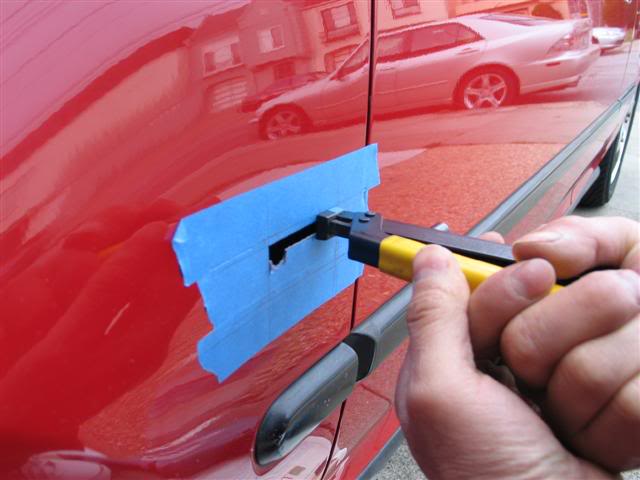
Then use the metal cutter to cut it or you can use a dremel but it is alot harder and easier to make mistakes!
Now you have a wonderful hole!!
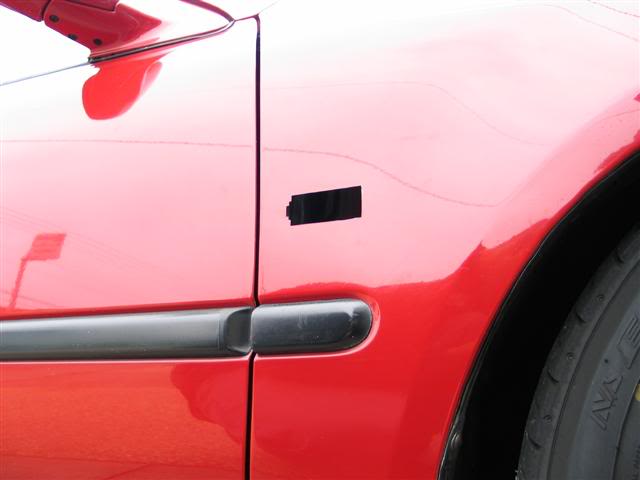
Test fit the sidemarker and make sure it is snug and doesn't require extra force to bend the fender. Make adjustments to make it fit snugg with a file if the hole is too small. If the hole is too big, try putting a piece of tape on the sidemarker to make it fit more snug. File down the edges to make it smooth and ready for paint!
****important****
Make sure to paint the freshly exposed fender so it doesn't rust. I used some silver touch up paint for my mom's lexus. (doesn't matter what color as it will be covered by the sidemarker anyways..)
I don't have any pictures of the wiring but remove the front corner and use a metal hanger and tie up the wire and run it through towards the sidemarker. Then splice it however you want to. I solder it and then put clear shrinkwrap on it.
Wiring Setup:
Green/yellow wire = Passenger side
Green/blue wire = Driver Side
Black = ground.
Red = Parking Light
If you bought the JDM sidemarkers with some wire to splice, it will show that it has a green one and a black one. It is Obvious to splice it to the corresponding ones on the USDM wiring for the corners.
Options:
Green/Black will give you turn signals only.
Green/Red will give you always on sidemarkers + alternating turn signals
Red/Black will give you parking lights only.
Once you wire that up, you are ready to go! Finish up wrapping with electrical tape then snap in the sidemarker!
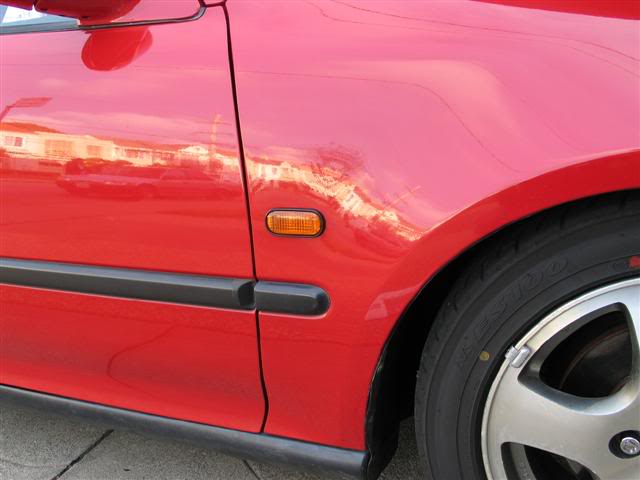
:thumb up:
Now do the other side making sure the clip side faces the rear of the car. Have fun! if you make any mistakes against the template just make it on the other side too to make it even. (ie. too high or too close to the door jam)
Congrats. Sidemarkers that SHOULD'VE been standard on our USDM cars.
DIY install NON-USDM sidemarkers onto a USDM fender.
i used a DIY How-To but i wanted to post my experience with it as it would be more than helpful to have more than one DIY to compare it to.
Tools:
Drill bit
metal cutter (this can be replaced with dremel)
extra wiring
metal coat hangar
masking tape (painting tape works great)
Scissors
Ruler
Solder Gun
Solder
Shrinkwrap
electrical tape
File
Touchup Paint (any color)
Anyways I found the template online here:
http://members.cox.net/ninety2sir/techref/.../sidemarker.htm
thanks to you Jacob!! I couldn't print out the template with the proper dimensions so I gave up and decided to juse use the dimensions given. Here goes!
Use the template and mark all the dimensions on the masking tape like shown and drill a bit into it. The masking tape will help the paint from chipping as you cut into the car's fender.
Then use the metal cutter to cut it or you can use a dremel but it is alot harder and easier to make mistakes!
Now you have a wonderful hole!!
Test fit the sidemarker and make sure it is snug and doesn't require extra force to bend the fender. Make adjustments to make it fit snugg with a file if the hole is too small. If the hole is too big, try putting a piece of tape on the sidemarker to make it fit more snug. File down the edges to make it smooth and ready for paint!
****important****
Make sure to paint the freshly exposed fender so it doesn't rust. I used some silver touch up paint for my mom's lexus. (doesn't matter what color as it will be covered by the sidemarker anyways..)
I don't have any pictures of the wiring but remove the front corner and use a metal hanger and tie up the wire and run it through towards the sidemarker. Then splice it however you want to. I solder it and then put clear shrinkwrap on it.
Wiring Setup:
Green/yellow wire = Passenger side
Green/blue wire = Driver Side
Black = ground.
Red = Parking Light
If you bought the JDM sidemarkers with some wire to splice, it will show that it has a green one and a black one. It is Obvious to splice it to the corresponding ones on the USDM wiring for the corners.
Options:
Green/Black will give you turn signals only.
Green/Red will give you always on sidemarkers + alternating turn signals
Red/Black will give you parking lights only.
Once you wire that up, you are ready to go! Finish up wrapping with electrical tape then snap in the sidemarker!
:thumb up:
Now do the other side making sure the clip side faces the rear of the car. Have fun! if you make any mistakes against the template just make it on the other side too to make it even. (ie. too high or too close to the door jam)
Congrats. Sidemarkers that SHOULD'VE been standard on our USDM cars.
Last edited by LowTEC-Derbo on Sat Apr 26, 2008 10:10 pm, edited 1 time in total.


 i will be doing this soon!