
- Thu Aug 04, 2011 8:18 am
#266207
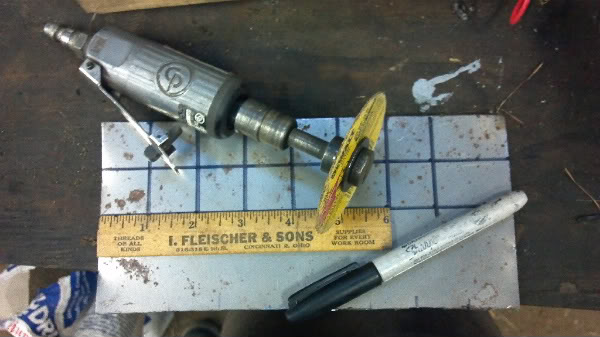
Tools:
-Screw Driver or Pliers
-Sandpaper
-Hammer
-Steel Plate
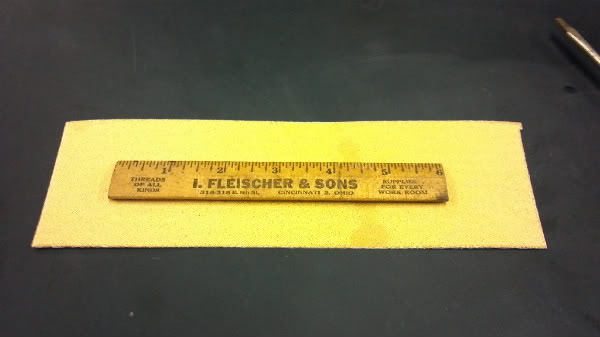
-Ruler, or something 1inch tall, few inches long, and flat
-Paint/Primer
-Safety Glasses
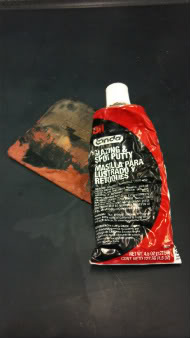
-Bondo/Spot Puddy
-Wax and Grease Remover
-Welding mask
-Welding Gloves
Optional Tools:
-Welder
-Acetalene/abrasion
-Diegrinder's
-Angle Grinder
-Resperator
This Requires 2 people!
Step 1:
-Roll up windows
-Remove Inside door panel (your going to need to do this no matter what)
-Remove thin plastic sheet between door panel and door
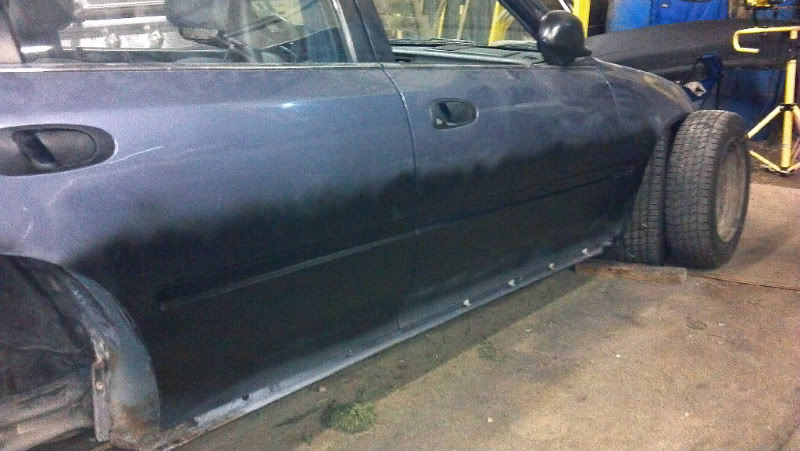
-Remove Side Molding.
*Option 1: If you dont care and dont plan on keeping the side molding a screw driver is the best choice. Just stick it in between the molding and the door and pry away at it, till it you hear a snap or a pop. There are 13 clips holding it in.
*Option 2: If you do care, on the inside the door there are clips. Take a Pliers and sqweez the clips and push or have somebody pull them out. Be careful to not push or pull to hard, dont want to bend the moldings (there is a thin sheet of metal inside of them)
-To get at the fender Clips/holes your going to need to take off any existing splash guards and a few more screw to be able to pull back the fender liner. From there you should have a good view. (take tires off if needed)
Step Back and look at your car. Make sure you want to continue, because there is no turning back.
Step 2:
-Sand Down paint
*Option 1: This is a slow and lengthy process by hand. 80 grit should work just fine.
*Option 2: Use a Die Grinder with Scotch-Brite Roloc Surface Conditioning Discs. This takes paint right off, quick and easy.
Step 3:
-Cut 13 or more 1inch by 1inch squares of a sheet of steel. (thickness is based on how much you want to spend vs. quality and weld/abrasion ability)
(I used 22gauge Steel in a 6x24inch sheet)

Step 4:
This is where it gets complicated!
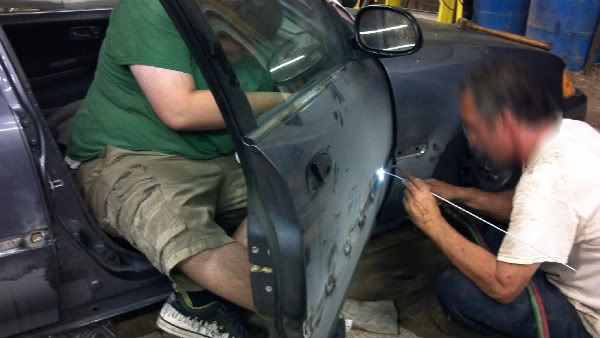
-Your going to need a freind for this part.
*You or your friend are going to need to know how to weld or abrase
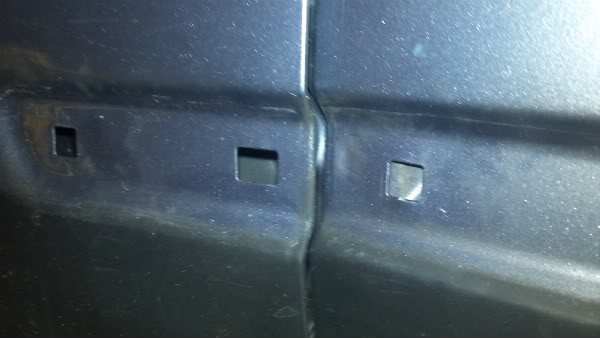
-1 person is going to need to be behind the door, inside of the car holding the 1x1inch pieces of sheet metal flush against the inside of the door over the holes where the clips once were.
-Hold in place with a screw driver or pliers. Thus not burning said persons hands.
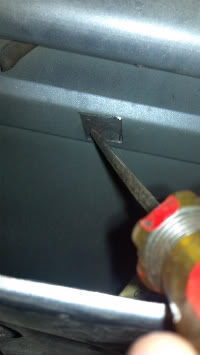
BE CAREFULL! The door metal will be hot after performing the next step! (as you can see)
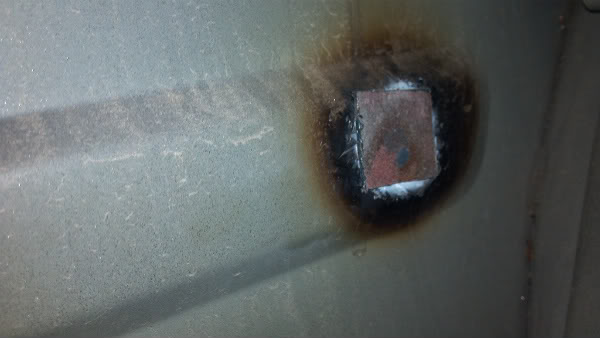
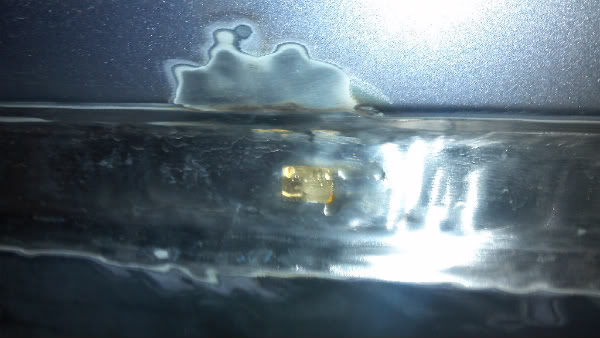
-Then the person on the outside is going to need to weld or abrase the sheet metal to the door.
Step 5:
-Flatten the material down to door metal level.
*Option 1: Use an angle grinder if you used weld.
*Option 2: Use an Die Grinder with the Scotch-Brite Roloc Surface Conditioning Discs if you used Abrasion.
Step 6:
-Bondo/Spot Puddy over every hole. Even if the hole is completely filled in with Weld or Abrasive you are going to want to do this to level out any existing and or hidden deformities.
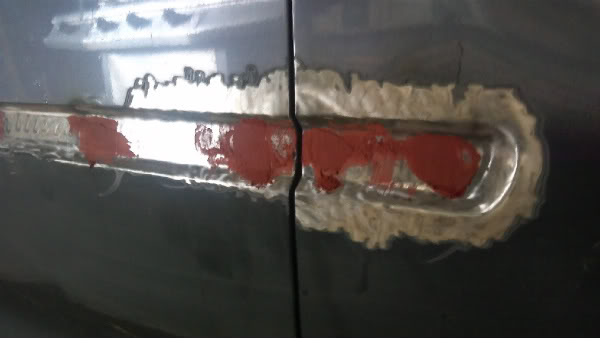
-Sand down Bondo/Spot puddy with 180grit (or what you want) wrapped around a flat 1inch tall and 6inch or longer surface, such as a ruler. This will help level out the Bondo/Spot Puddy and give it a nice flat smooth surface.
Step 7:
-Check over your work
-Repeat Step 6 if needed
-Sand down and level out paint around the area
-Clean with Wax and Grease Remover or Mineral Spirits (personal choice)
-Paint whole area with primer, rattle can or spray gun (personal choice)
-Paint over the metal squares inside the door to prevent rust. Anything should do.
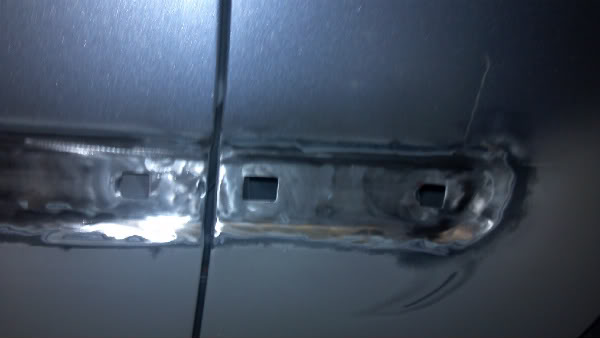
If you do it right it should look something like this:
-Screw Driver or Pliers
-Sandpaper
-Hammer
-Steel Plate
-Ruler, or something 1inch tall, few inches long, and flat
-Paint/Primer
-Safety Glasses
-Bondo/Spot Puddy
-Wax and Grease Remover
-Welding mask
-Welding Gloves
Optional Tools:
-Welder
-Acetalene/abrasion
-Diegrinder's
-Angle Grinder
-Resperator
This Requires 2 people!
Step 1:
-Roll up windows
-Remove Inside door panel (your going to need to do this no matter what)
-Remove thin plastic sheet between door panel and door
-Remove Side Molding.
*Option 1: If you dont care and dont plan on keeping the side molding a screw driver is the best choice. Just stick it in between the molding and the door and pry away at it, till it you hear a snap or a pop. There are 13 clips holding it in.
*Option 2: If you do care, on the inside the door there are clips. Take a Pliers and sqweez the clips and push or have somebody pull them out. Be careful to not push or pull to hard, dont want to bend the moldings (there is a thin sheet of metal inside of them)
-To get at the fender Clips/holes your going to need to take off any existing splash guards and a few more screw to be able to pull back the fender liner. From there you should have a good view. (take tires off if needed)
Step Back and look at your car. Make sure you want to continue, because there is no turning back.
Step 2:
-Sand Down paint
*Option 1: This is a slow and lengthy process by hand. 80 grit should work just fine.
*Option 2: Use a Die Grinder with Scotch-Brite Roloc Surface Conditioning Discs. This takes paint right off, quick and easy.
Step 3:
-Cut 13 or more 1inch by 1inch squares of a sheet of steel. (thickness is based on how much you want to spend vs. quality and weld/abrasion ability)
(I used 22gauge Steel in a 6x24inch sheet)
Step 4:
This is where it gets complicated!
-Your going to need a freind for this part.
*You or your friend are going to need to know how to weld or abrase
-1 person is going to need to be behind the door, inside of the car holding the 1x1inch pieces of sheet metal flush against the inside of the door over the holes where the clips once were.
-Hold in place with a screw driver or pliers. Thus not burning said persons hands.
BE CAREFULL! The door metal will be hot after performing the next step! (as you can see)
-Then the person on the outside is going to need to weld or abrase the sheet metal to the door.
Step 5:
-Flatten the material down to door metal level.
*Option 1: Use an angle grinder if you used weld.
*Option 2: Use an Die Grinder with the Scotch-Brite Roloc Surface Conditioning Discs if you used Abrasion.
Step 6:
-Bondo/Spot Puddy over every hole. Even if the hole is completely filled in with Weld or Abrasive you are going to want to do this to level out any existing and or hidden deformities.
-Sand down Bondo/Spot puddy with 180grit (or what you want) wrapped around a flat 1inch tall and 6inch or longer surface, such as a ruler. This will help level out the Bondo/Spot Puddy and give it a nice flat smooth surface.
Step 7:
-Check over your work
-Repeat Step 6 if needed
-Sand down and level out paint around the area
-Clean with Wax and Grease Remover or Mineral Spirits (personal choice)
-Paint whole area with primer, rattle can or spray gun (personal choice)
-Paint over the metal squares inside the door to prevent rust. Anything should do.
If you do it right it should look something like this:
Last edited by CamperCarl on Fri Aug 05, 2011 8:55 am, edited 1 time in total.


 F22C1 for FUN