- Fri Feb 13, 2015 6:07 am
#351846
DIY IN PROCESS
I know there's already a DIY stickied.
But I thought I'd post up another rear disc conversion that's based on my own personal experinces.
And hopefully it will answer questions that might not have been addressed in other tutorials.
It's going to a working thread, so bear with me until I finish my tutorial.
============================================================================================================================
Parts List: Condition Cost Parts Location
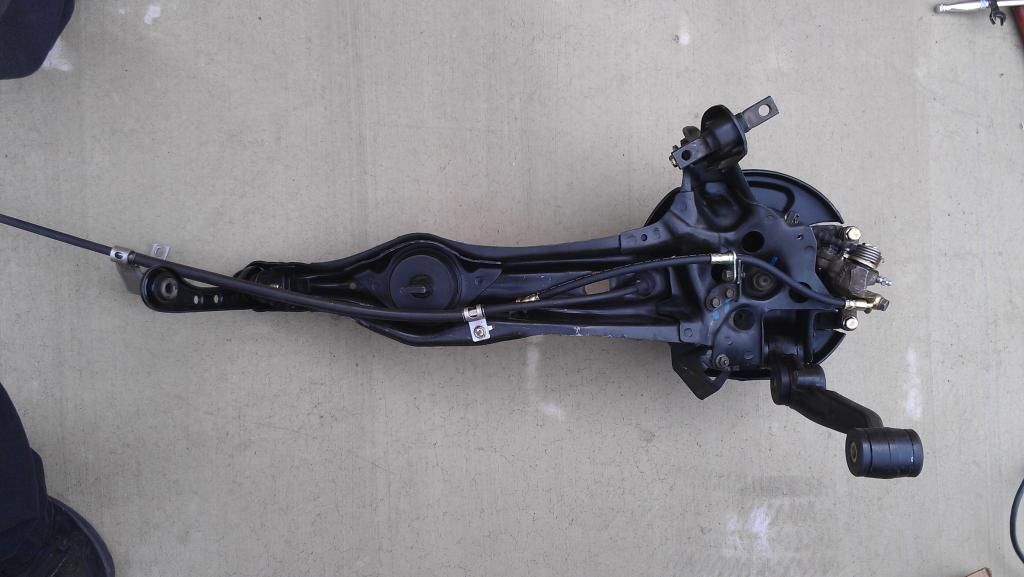
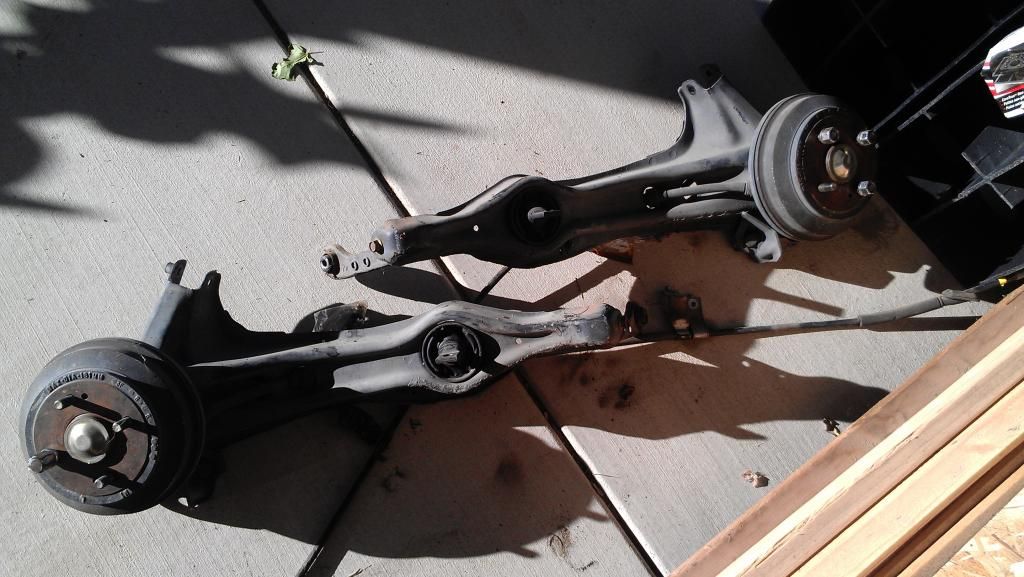
Rear Spindles (used) $200 (for 2) Junk Yard
(includes Lower & Upper Control Arm, Caliper, Rotor)
Rotors - Rear (new) $43.98 (for 2) Autozone / Part #31149
Energy Suspension Bushings Master Kit (new) $130 (kit) Ebay or Summit / ES Part #16-18103
Energy Suspension Bushings Trailing Arms (new) $35 (kit) Ebay or Summit / ES Part #16.7106G
Brake Master Cylinder 15/16 (from a 1991 EX) (new) $75.99 Autozone / Part #NM52517
Brake Hoses (new) $36 (L&R sides) Autozone / Part #70502 & 70504
Brake Fluid DOT3 (1 qt) (new) $6.59 Autozone
Carbureter Cleaner (new) $3.49 Autozone
Caliper Paint (new) $8.99 Autozone
----------------------------------------------------------------------------------------------------------------------------
Total Cost $540.04
============================================================================================================================
-----------------------------------------------------------------------------------
RETRIEVE PARTS
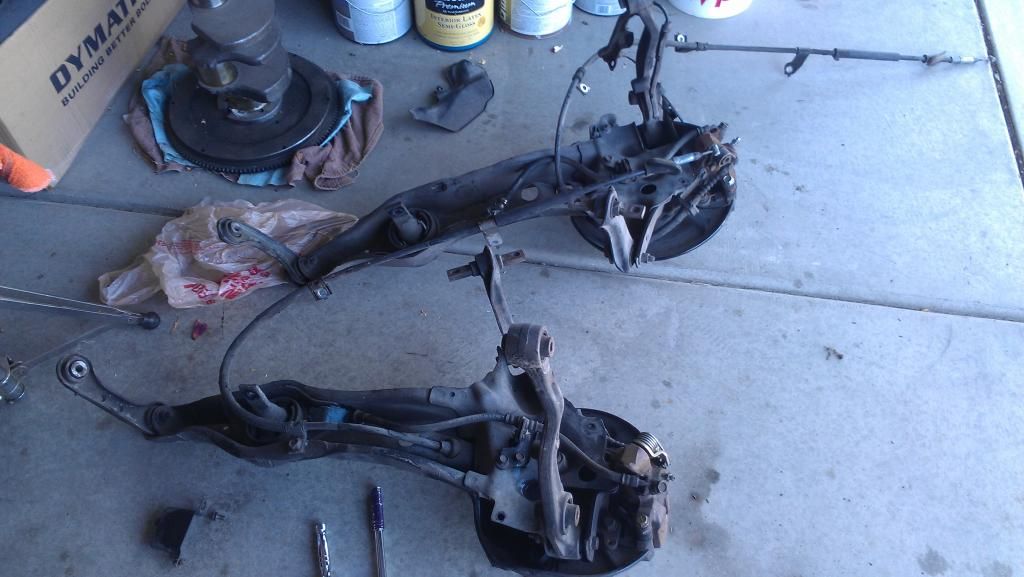
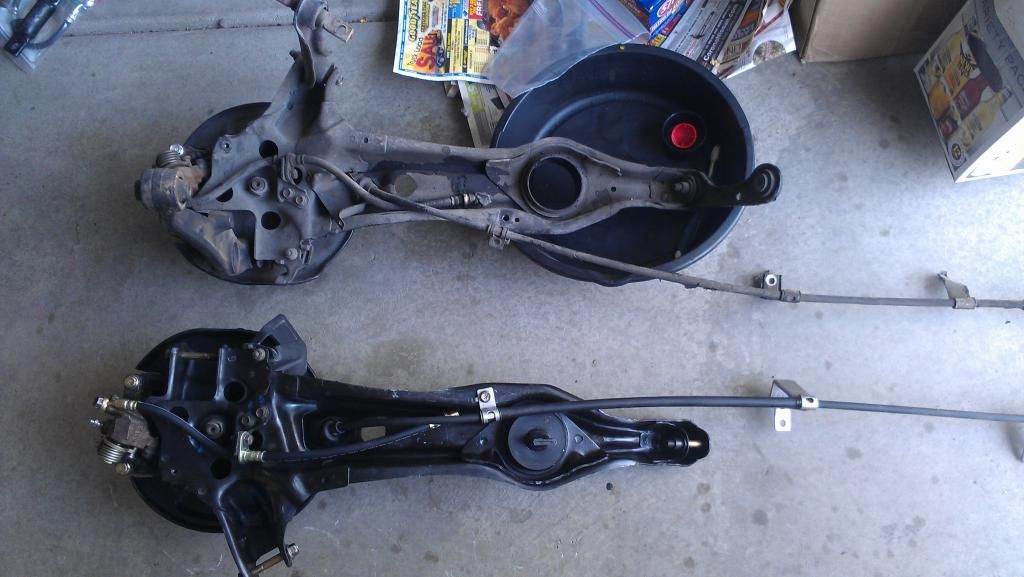
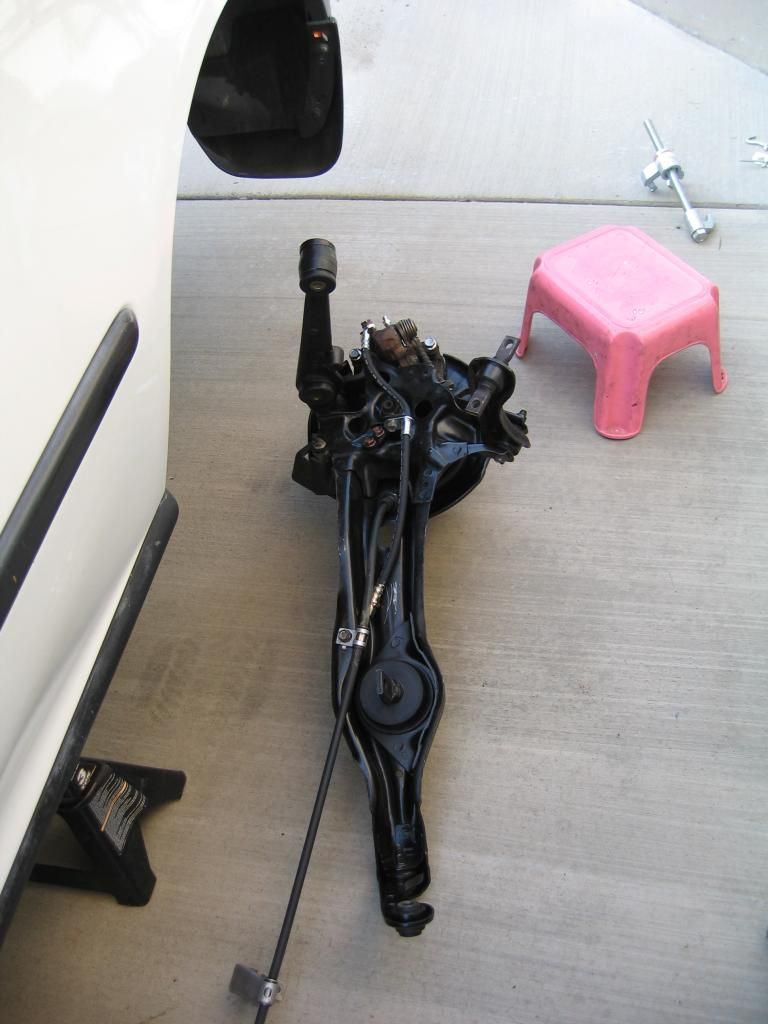
Acquire rear disc brake parts
Most likely you'll get most of your parts from the junk yard as there are plenty of hondas lurking the yard
Some parts I got brand new out of personal preference
See my parts list for a more comprehensive cost layout of this project.
I did spend a lot of time cleaning my parts because they accumulated a lot of dirt and grime
It's the most boring part of the process, but the visual payoff is rewarding
-----------------------------------------------------------------------------------
PREP NEW PARTS FOR INSTALLATION
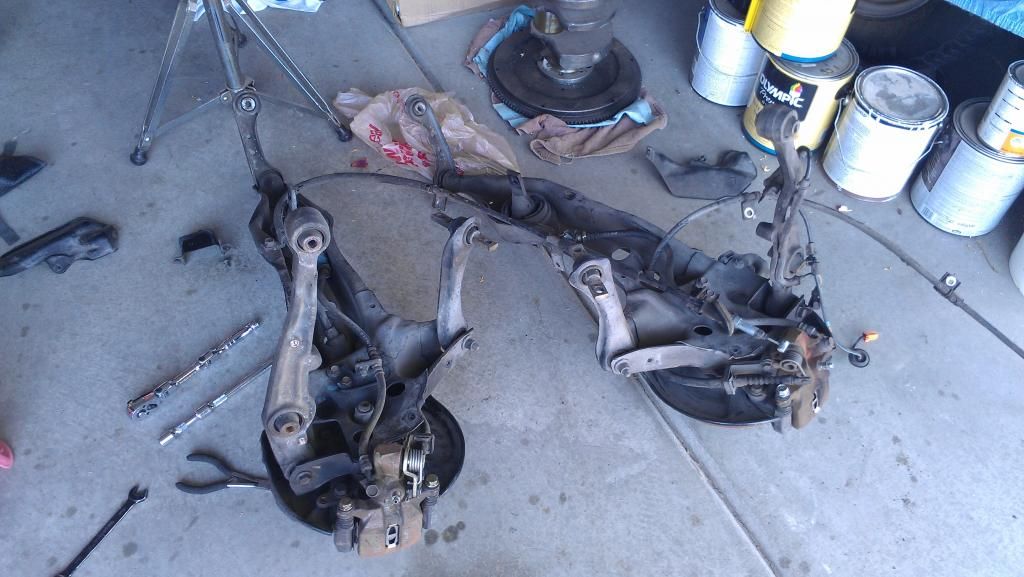
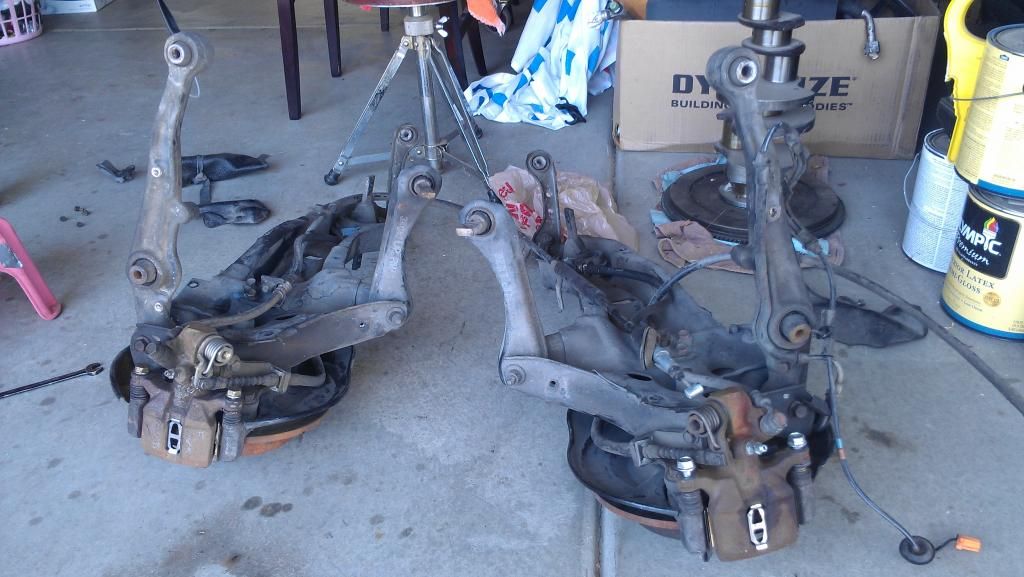
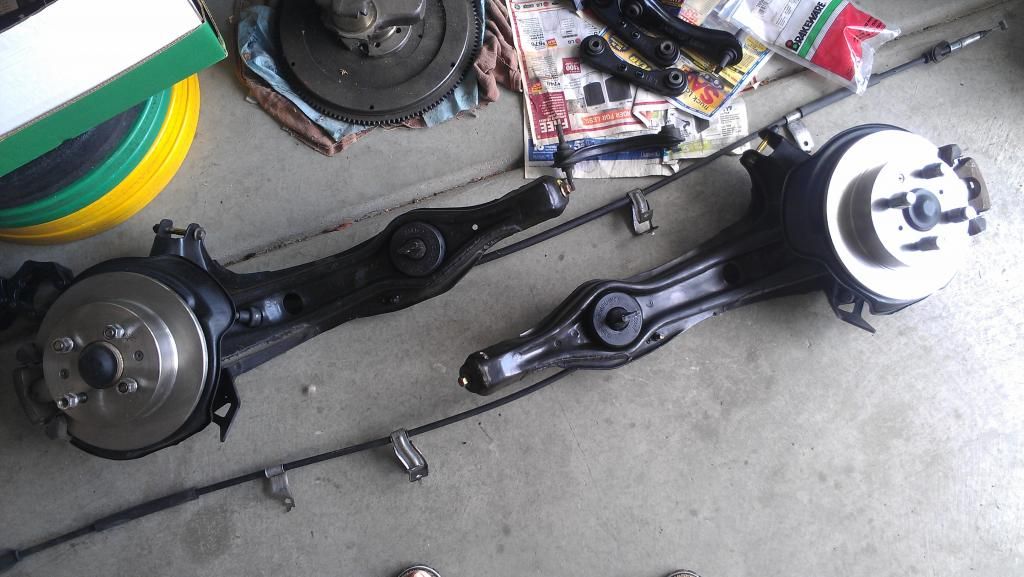
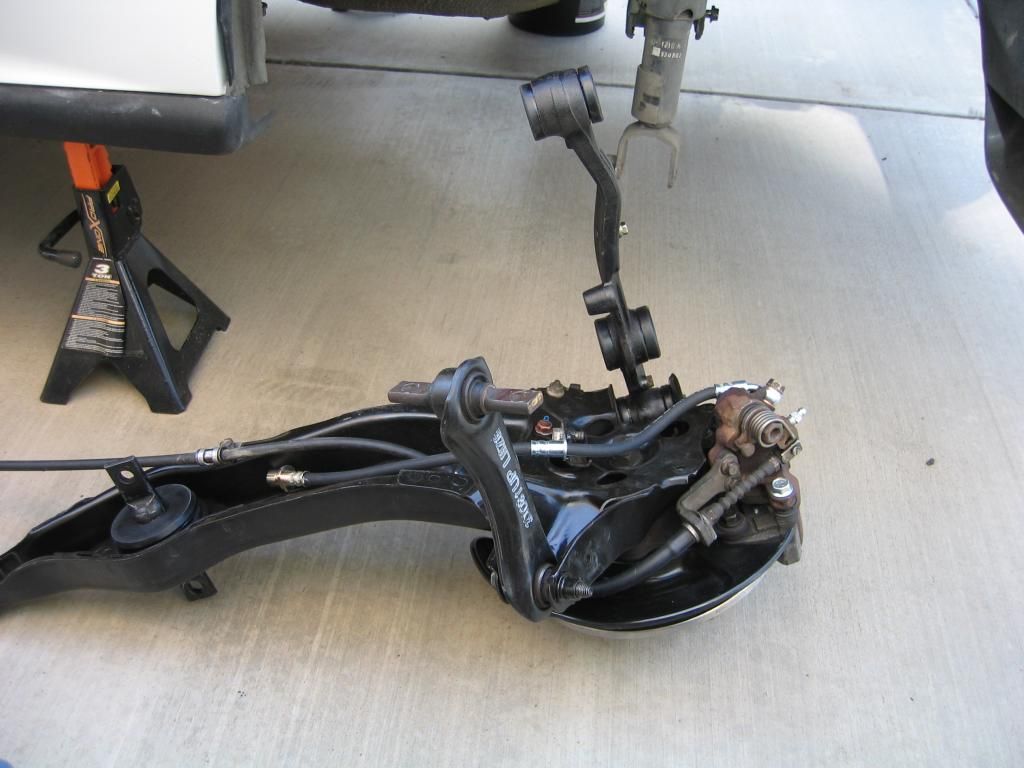
Clean up your parts (optional, but recommended)
You dont have to clean your parts, but you might as well freshen up your parts.
It makes the whole job a lot cleaner when you're doing the install
And it makes everything look nicer and cleaner
I also like to add that using a HEAT GUN loosens up the grim and makes the clean up process a lot easier!
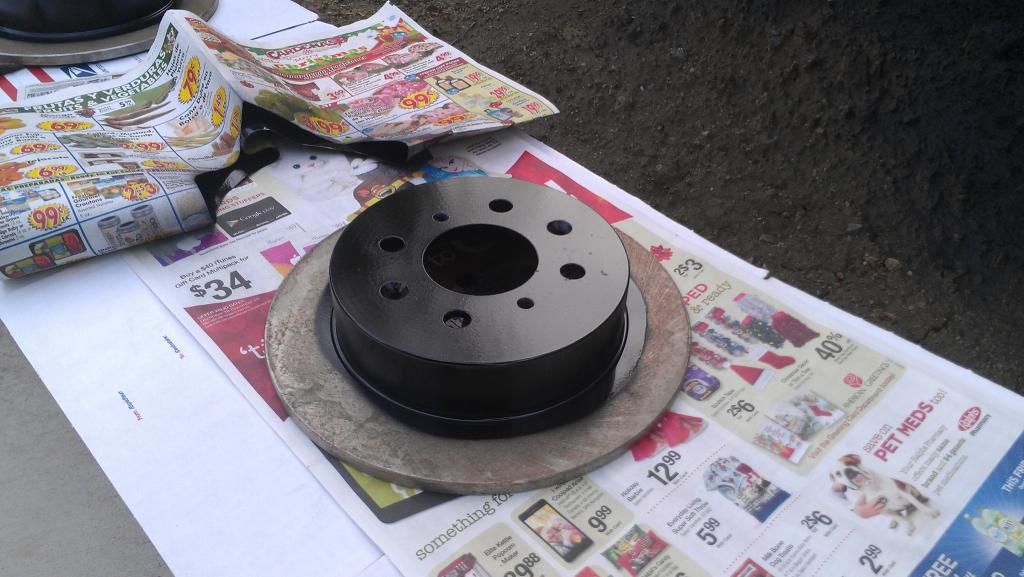
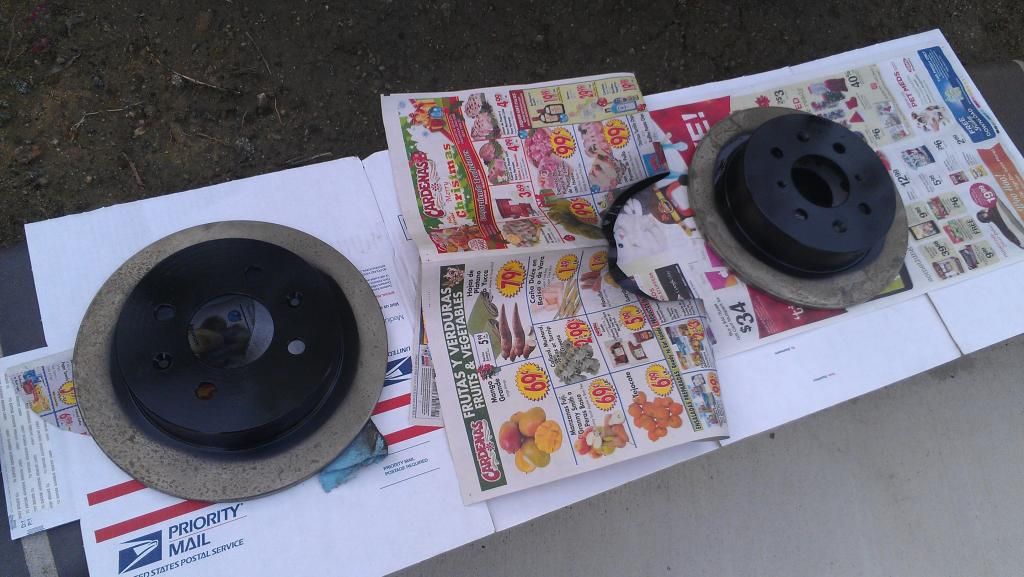
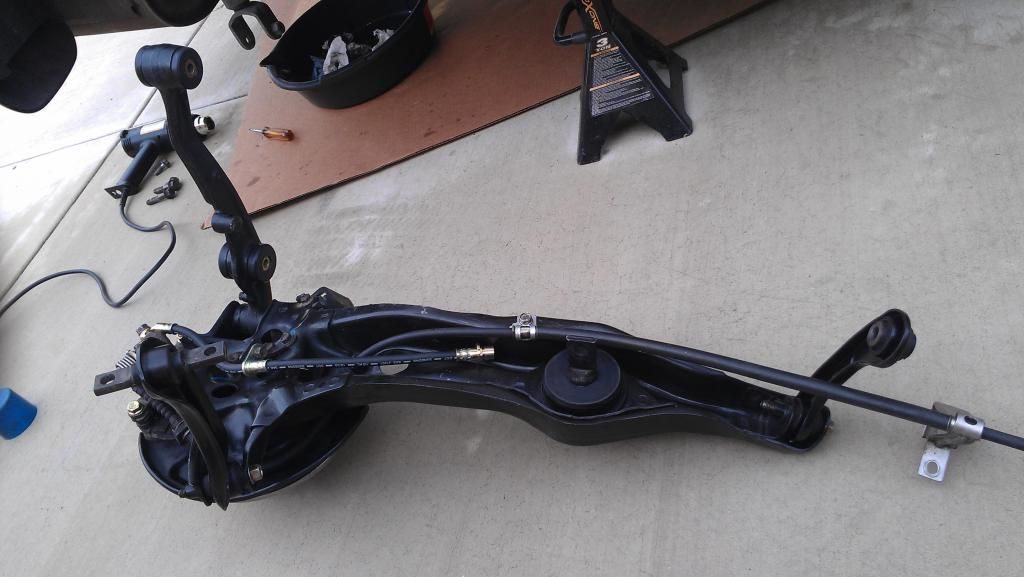
I ended up painting the hat of my new rotors to prevent them from water corrosion
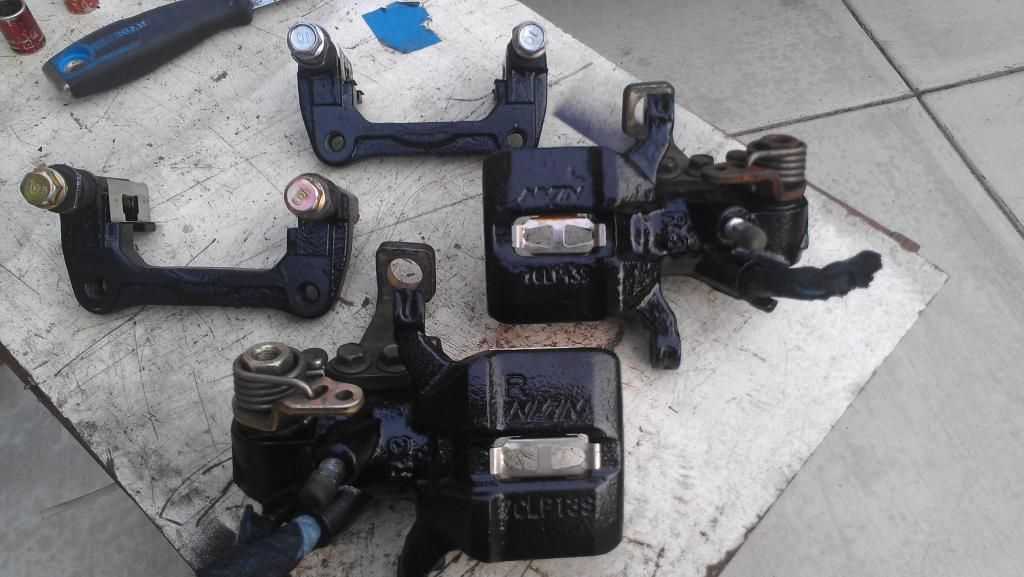
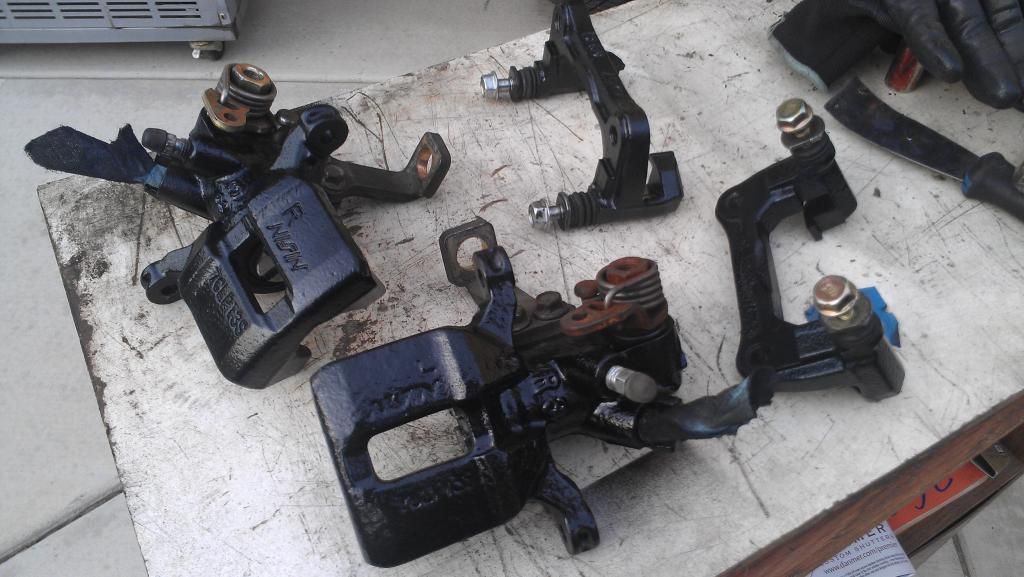
I also painted my calipers & brackets to give them a nice clean look as well.
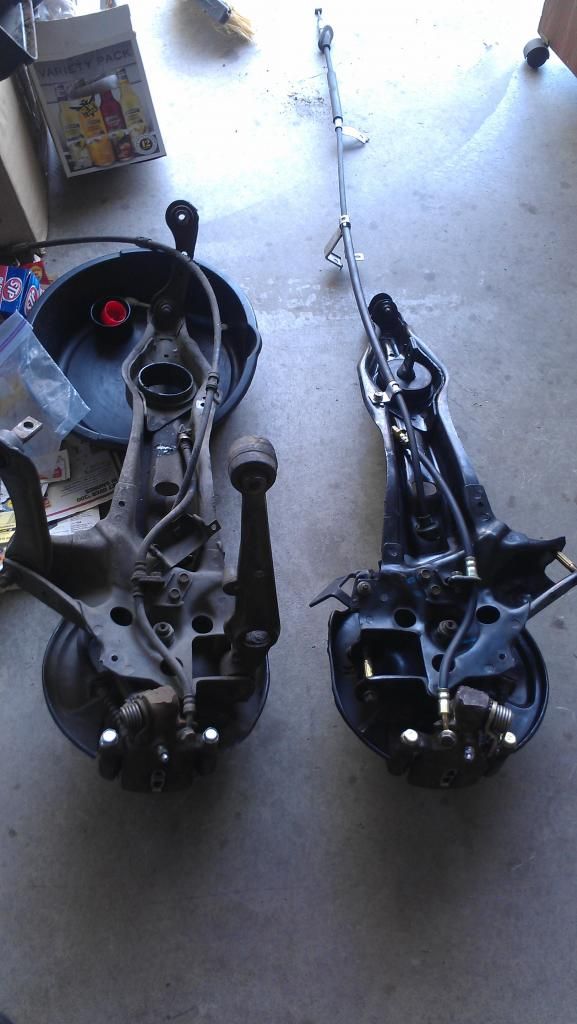
One clean spindle next to the dirty one, you can see the big visual difference it makes when you clean your parts
-----------------------------------------------------------------------------------
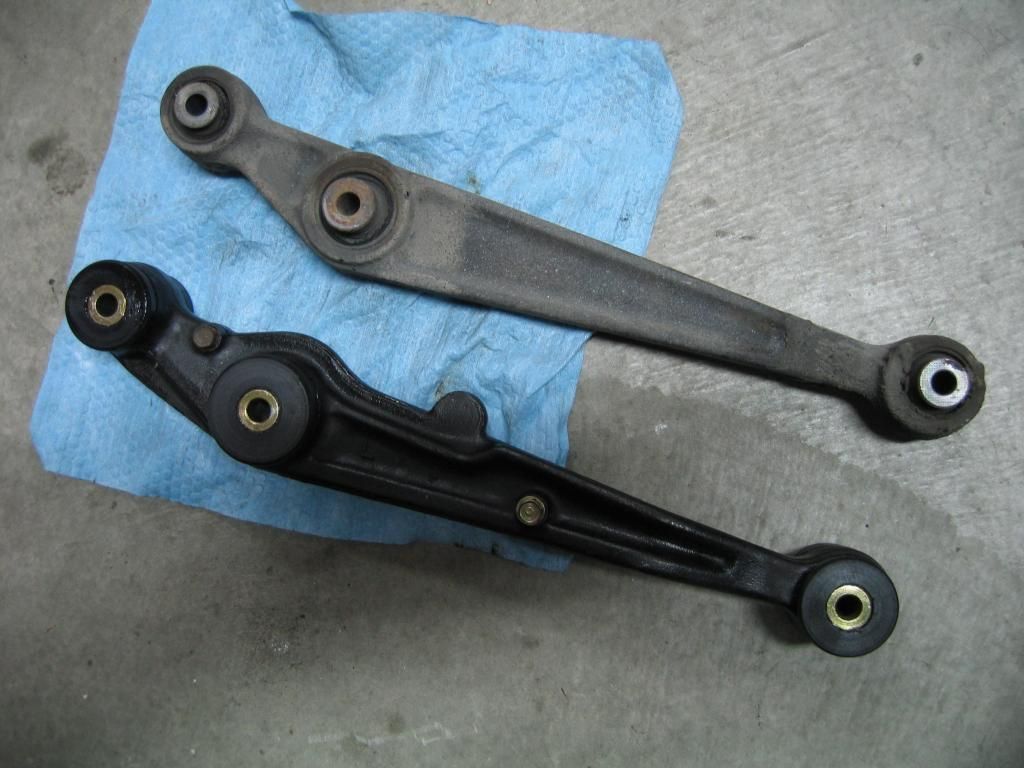
Replace bushings (Optional I guess)
Not required, but if you're going this far and dealing with 20+ year old parts, I can guarantee your rubber bushings are either shot or getting there.
All the the bushings on my acquired parts had a lot of visual signs of wear.
Energy Suspension Polyurethane bushings are a great purchase for the money.
If you're installing polyurethane bushings to replace the old rubber one, then the good news is that you do not have to remove the metal ring that holds it in place.
Usually you have to get the metal ring pressed out with a special tool.
I used the following tools to remove the rubber trailing arm bushing:
Electric drill
Carbureter cleaner
Flat head screw driver (medium sized)
C-Clamp
REMOVING BUSHINGS
Use a drill to cut/drill out pieces of each rubber bushing to weaken the bushing.
Spray carbureter cleaner on the bushing and scrape/poke/jab/pry the rubber bushing with a flat head screw driver
Once you actually get the carbureter cleaner to penetrate the bond between the rubber and the outer ring of the bushings, the rubber will loosen up very easily.
Use the C-clamp to help press the metal slot sitting inside each bushing
INSTALLING NEW POLYURETHANE BUSHINGS
Once you have all the bushings removed, the installation of the new polyurethane bushings are very easy and straight forward.
Make sure you use the recommended lubricant properly
The only one that's a little difficult to install is the trailing arm bushing
I had to make my own prop to help the bushing go all the way through the metal ring straight.
I recommend using a long bolt, some big washers and some sort of bracket to help pull the bushing through the metal ring housing

-----------------------------------------------------------------------------------
PREPARE CAR FOR INSTALLATION
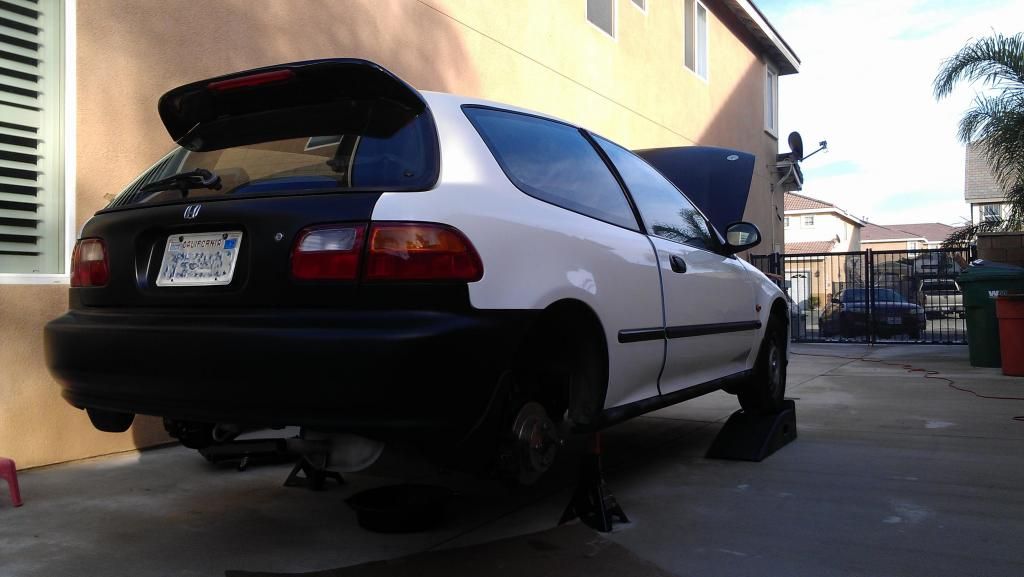
Set up car for swap - Lift car and place on jack stands
You'll need plenty of room, so lift your car up as high as you can
I used rhino ramps to lift of the front quickly.
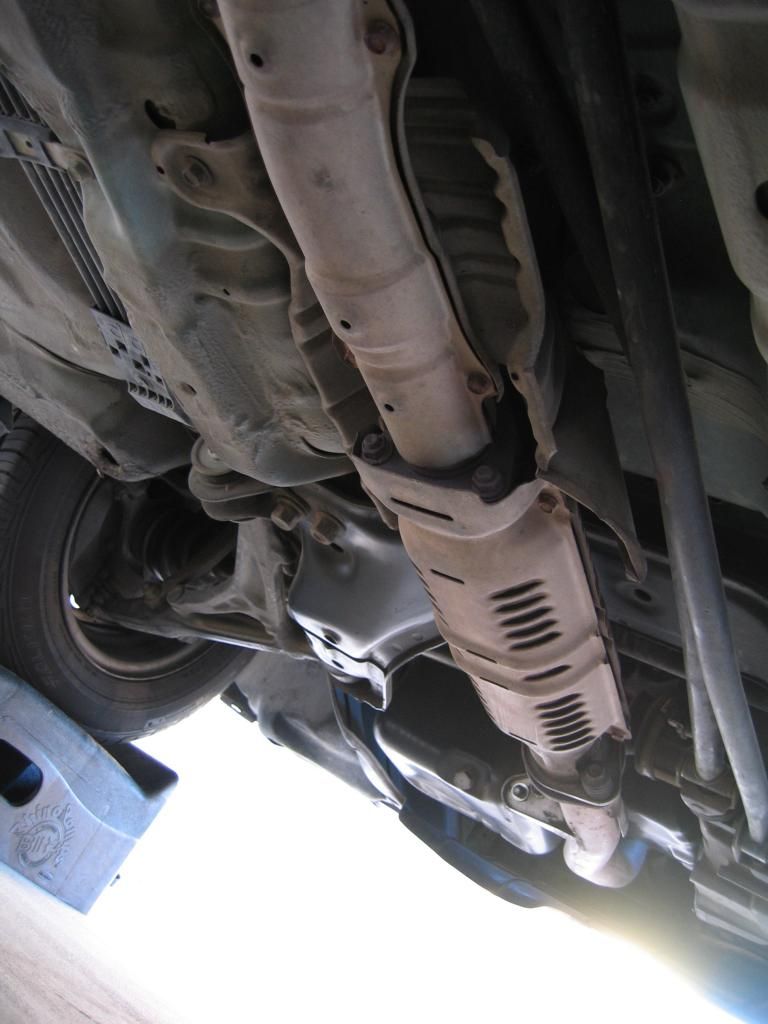
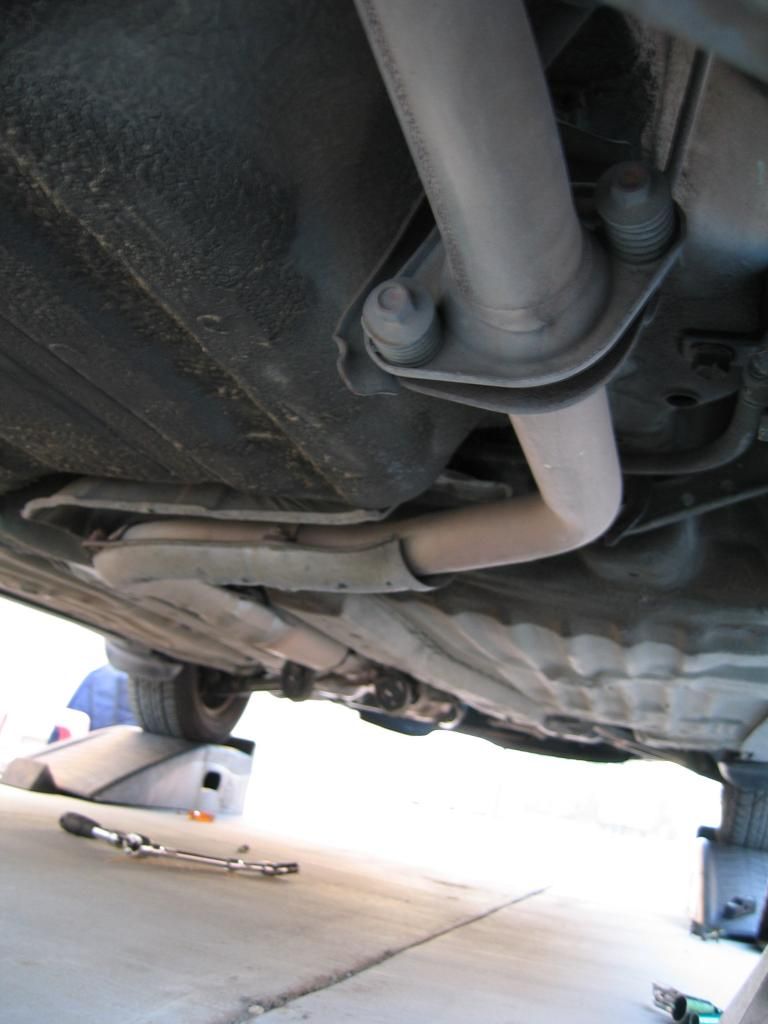
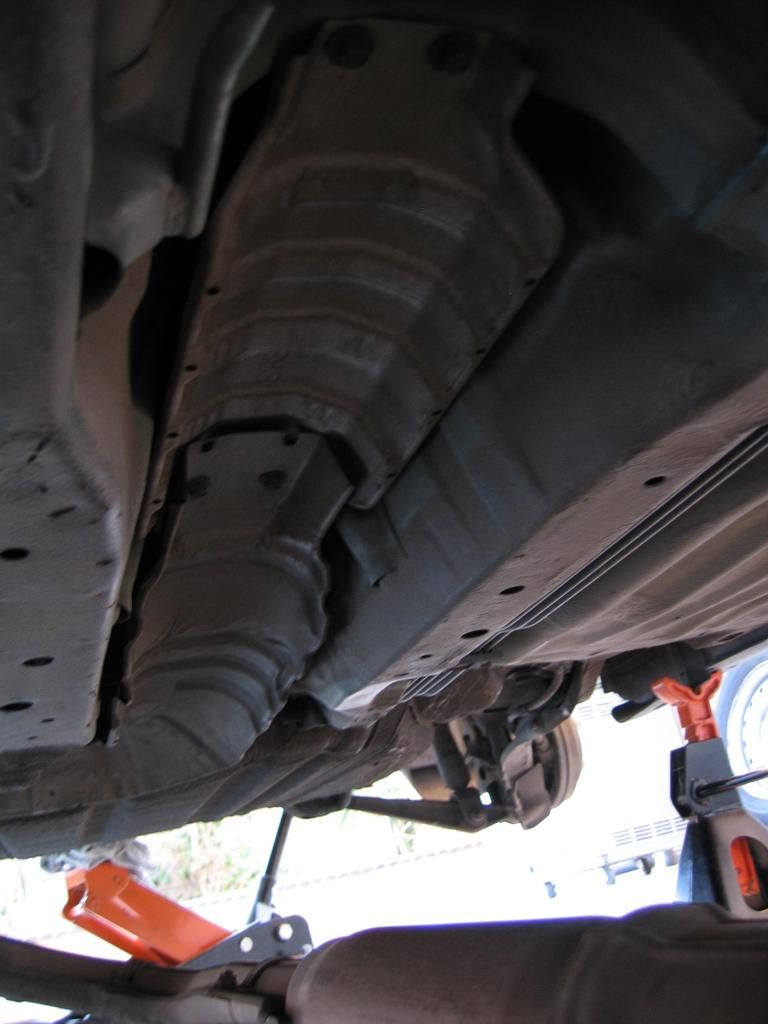
Remove exhaust pipe (everything between the headers and muffler)
You're gunna need to remove this in order to get the hand brake cables out of the cabin
-----------------------------------------------------------------------------------
REMOVE STOCK REAR DRUM SPINDLES
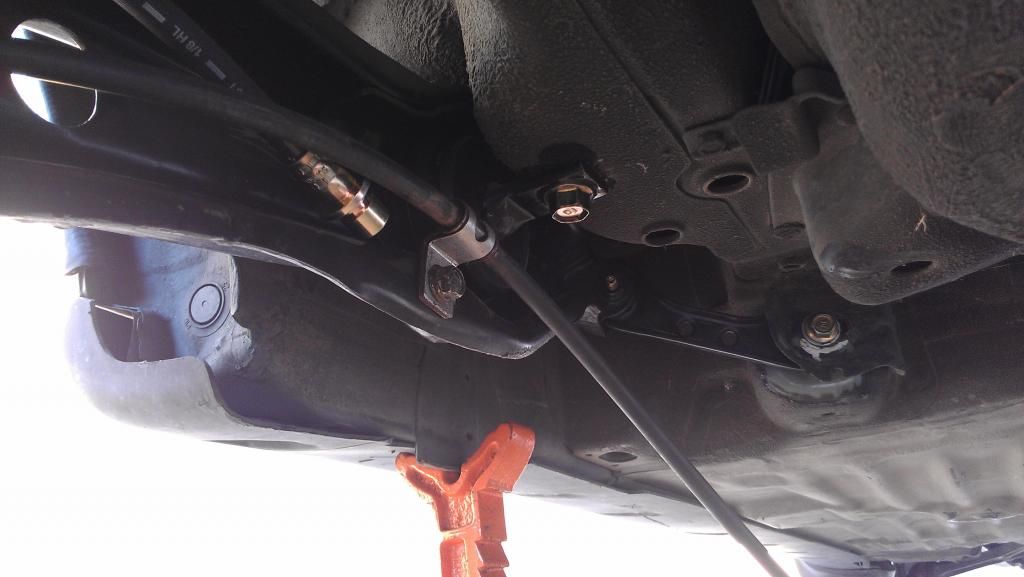
Detach brake hoses
Remove the retaining clip
Disconnect the brake hose
Have a plastic bag handy with a strong clip
Once you disconnect the brake line, you'll want to hang a bag on the hard line to capture leaking brake fluid
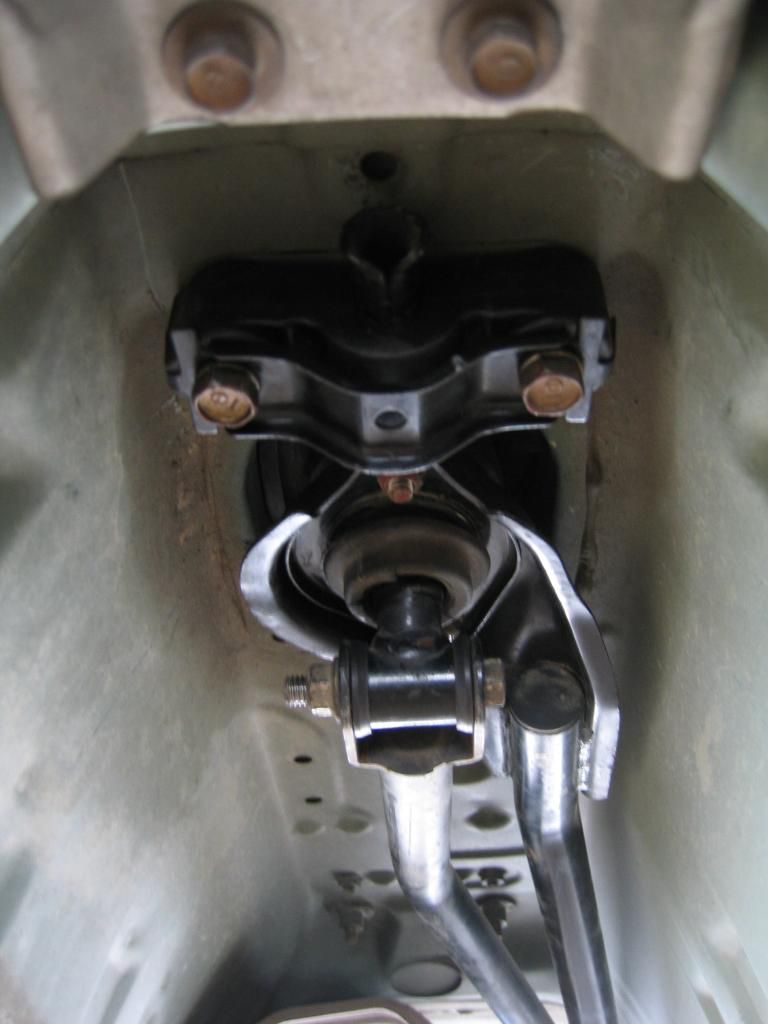
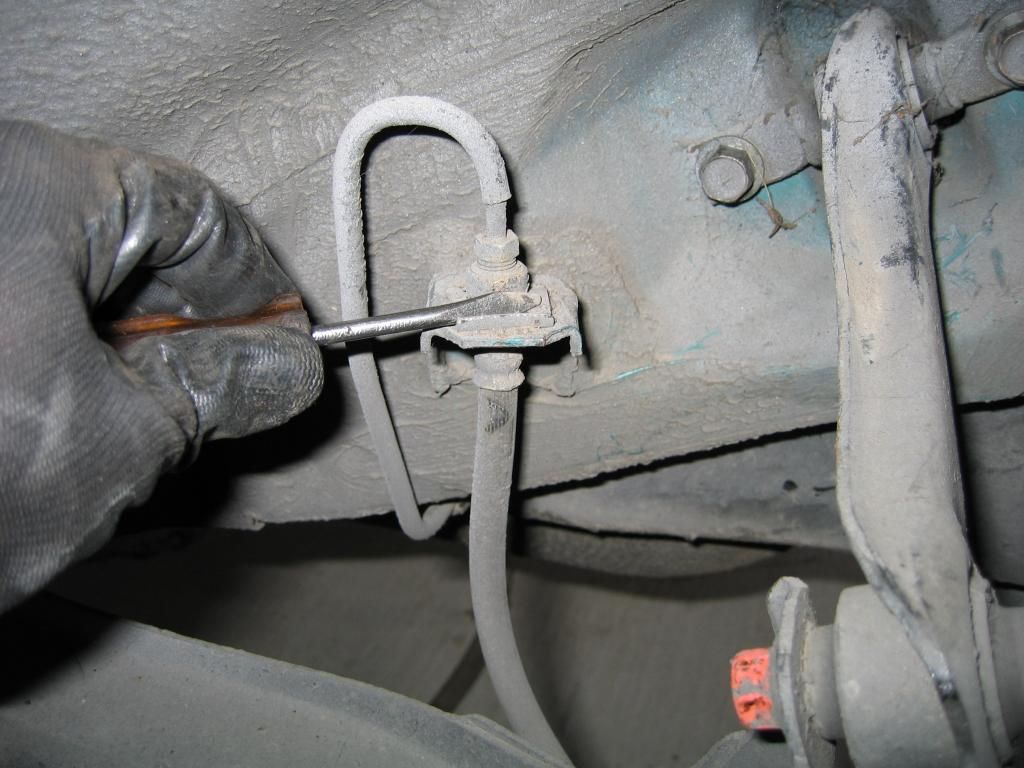
Remove hand brake cables
Go inside your car
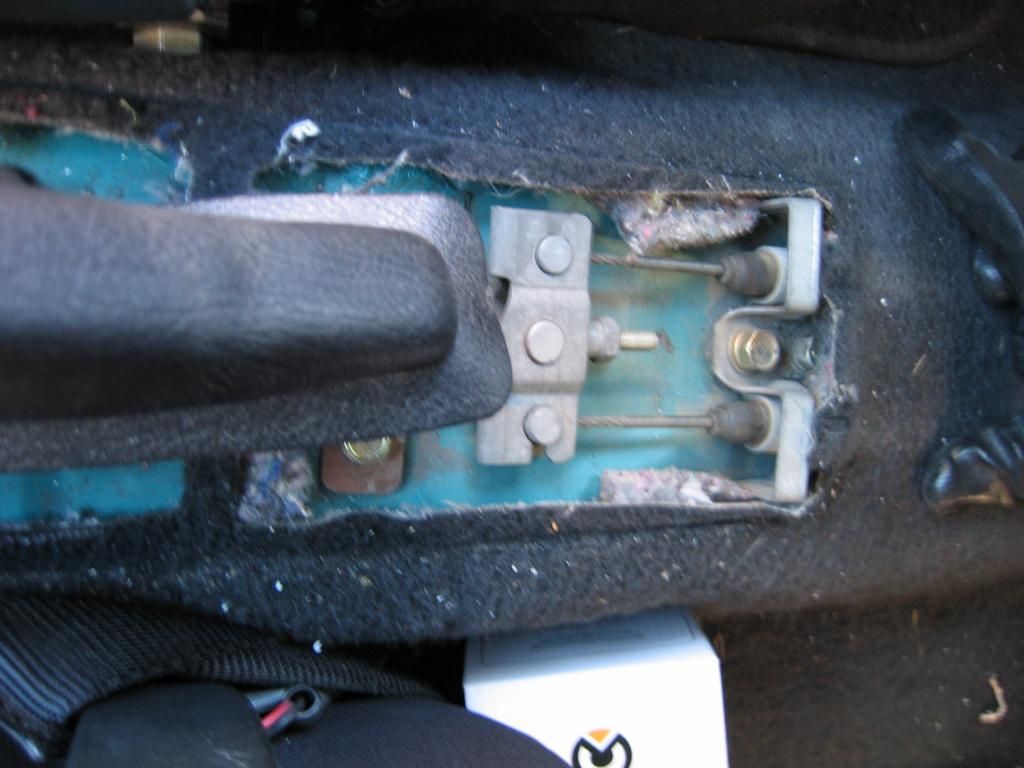
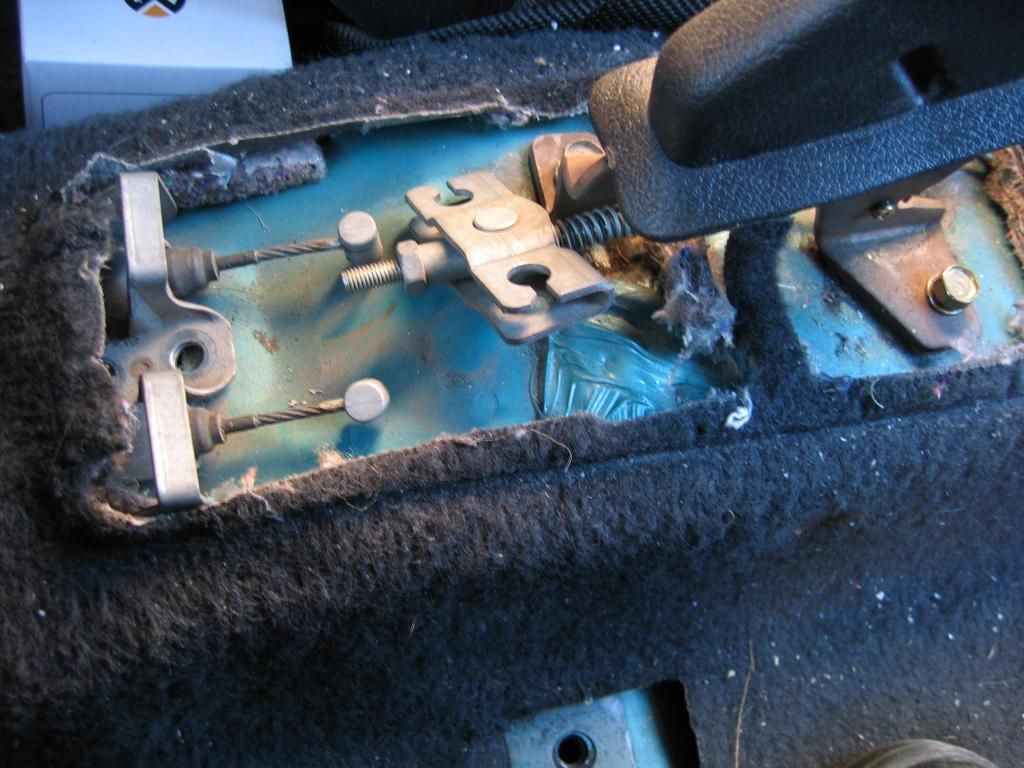
Remove center console
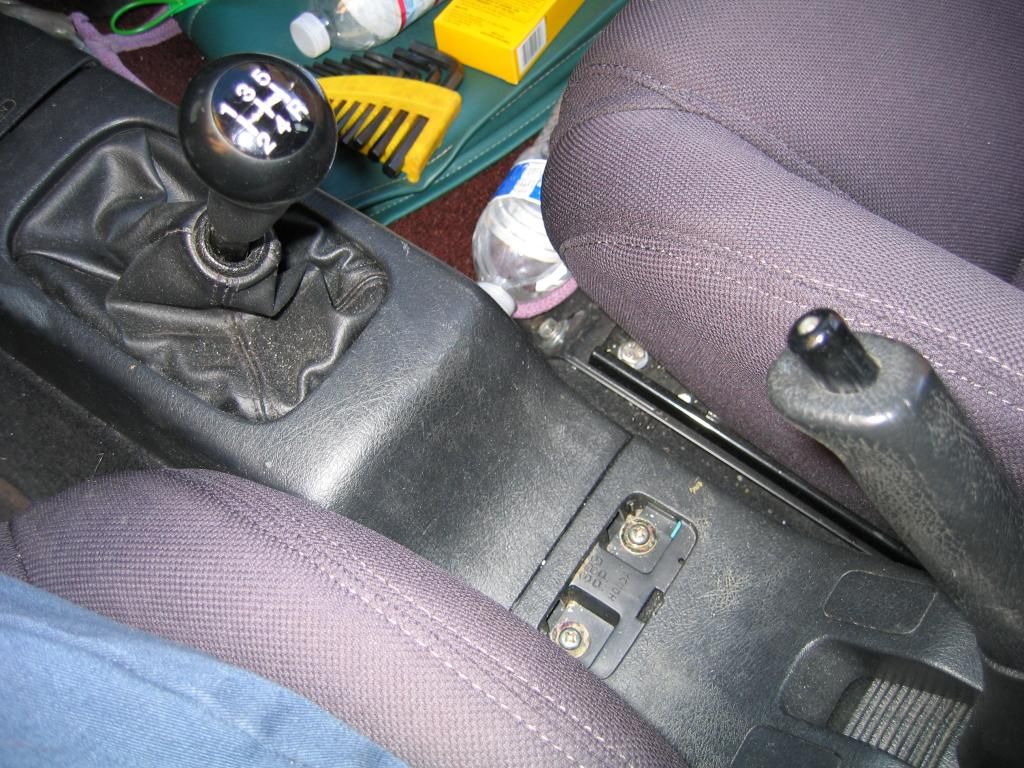
Loosen & remove the hand brake assembly
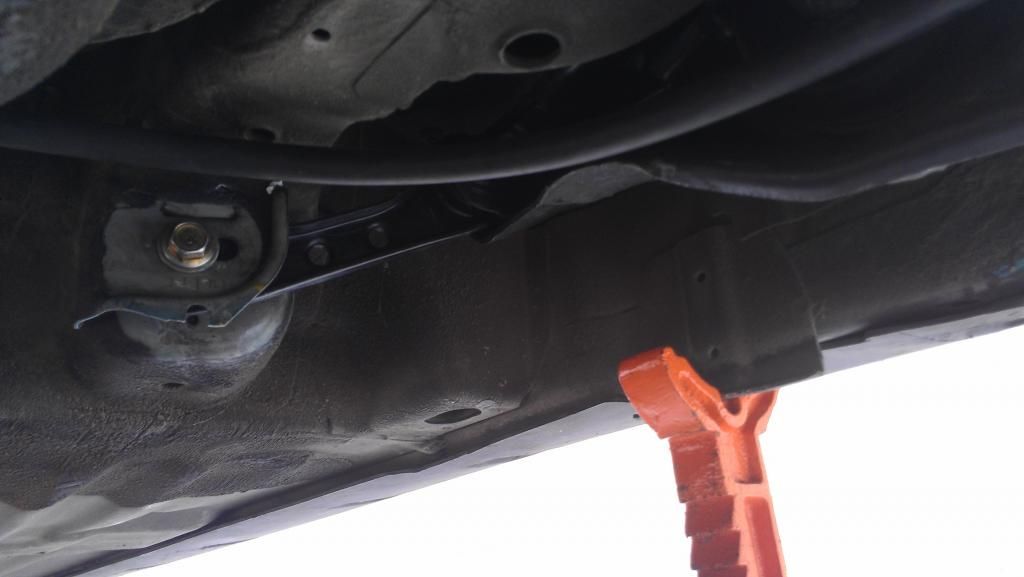
Go underneath car remove brackets that hold hand brake cables to the car chassis
Pull hand brake cables through the bottom of car
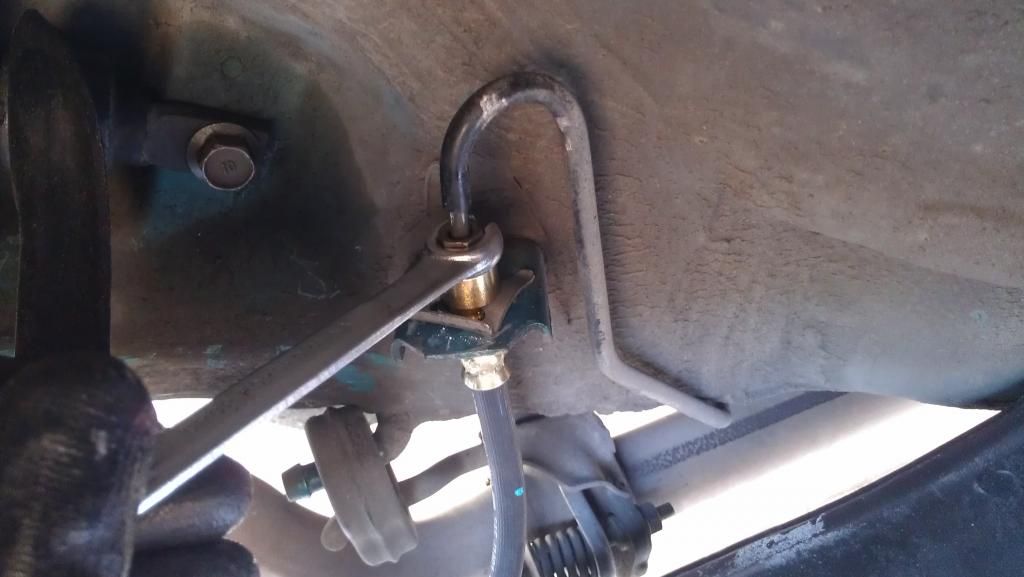
Remove lower control arm bolts
Remove compensator arm bolts (use a marker to label where the arm is supposed to be bolted at as a reference point for re-installation later)
Remove trailing arm bushing bolts
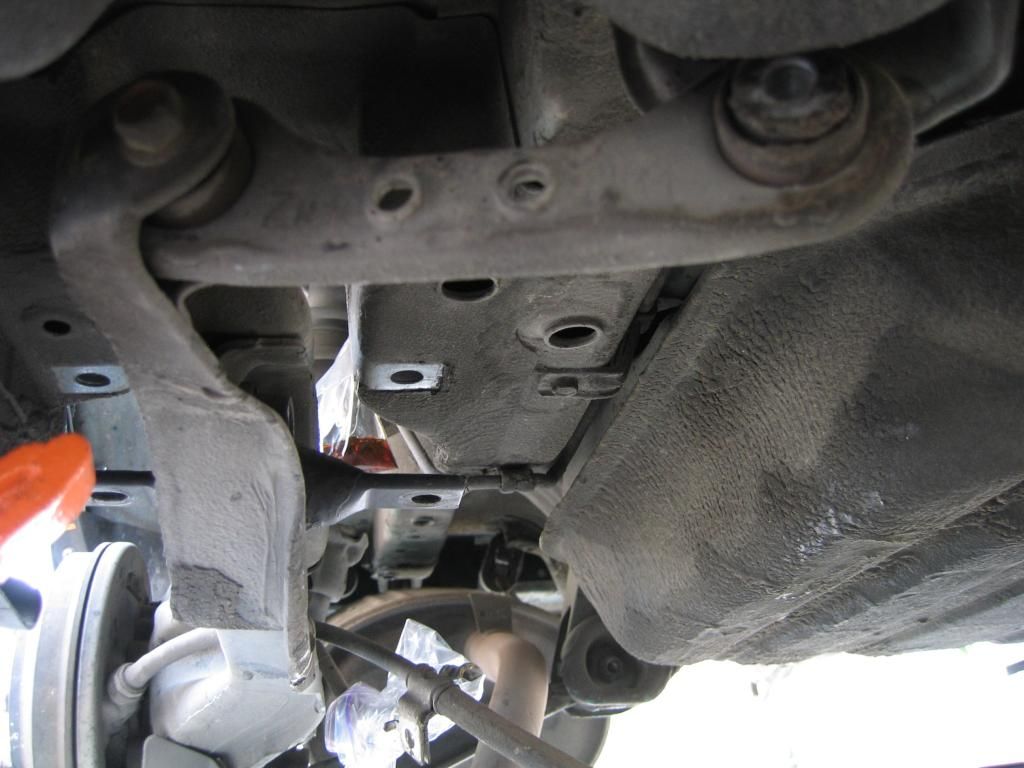
Remove upper control arm bolts
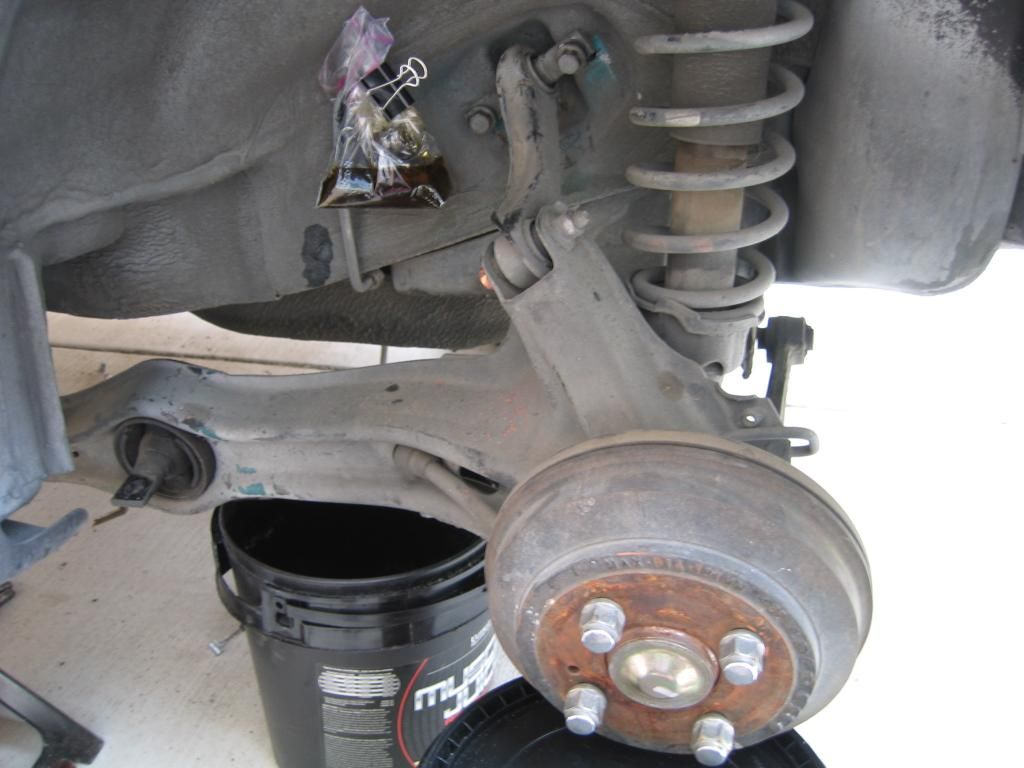
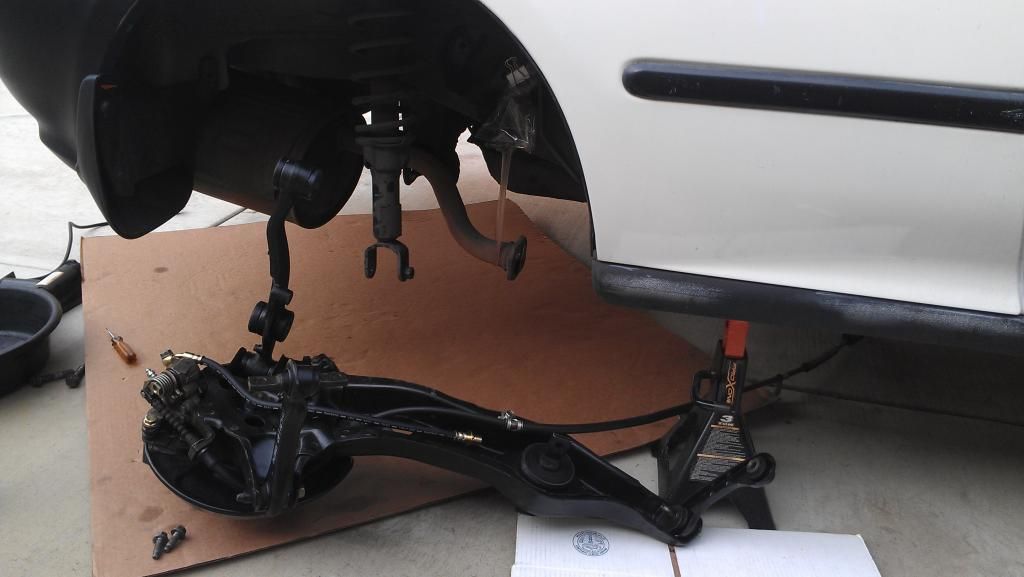
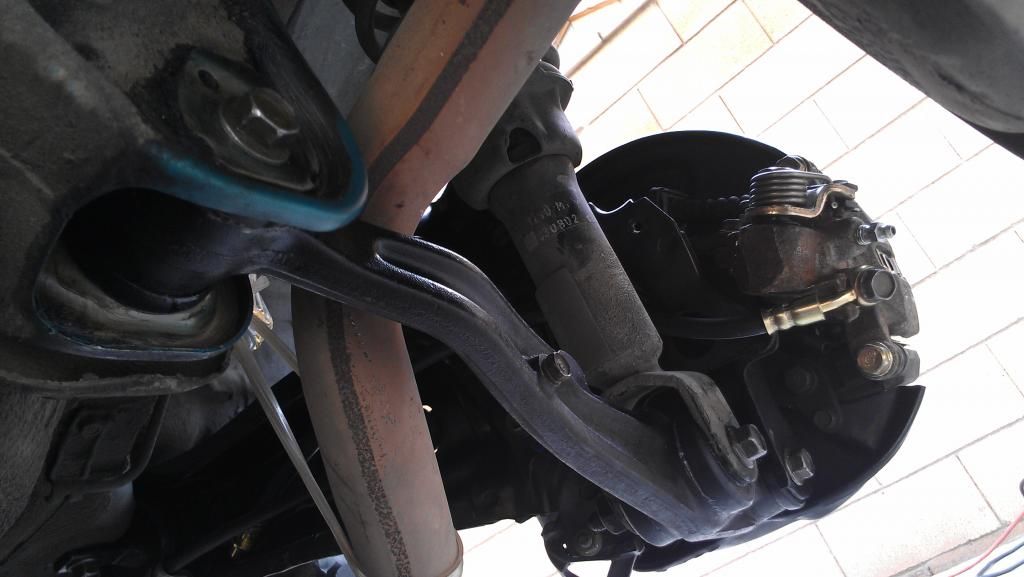
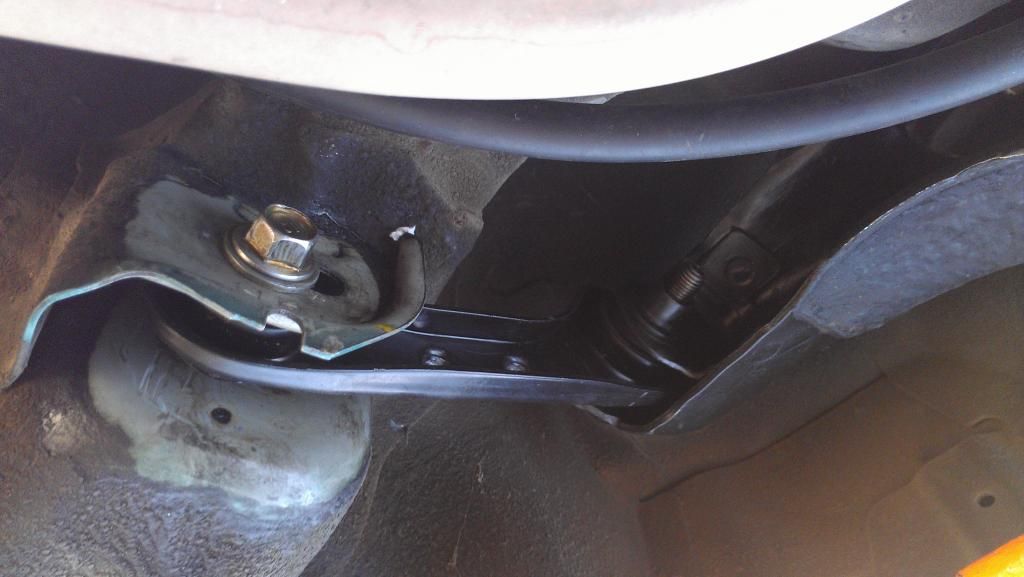
Remove rear spindle assembly
-----------------------------------------------------------------------------------
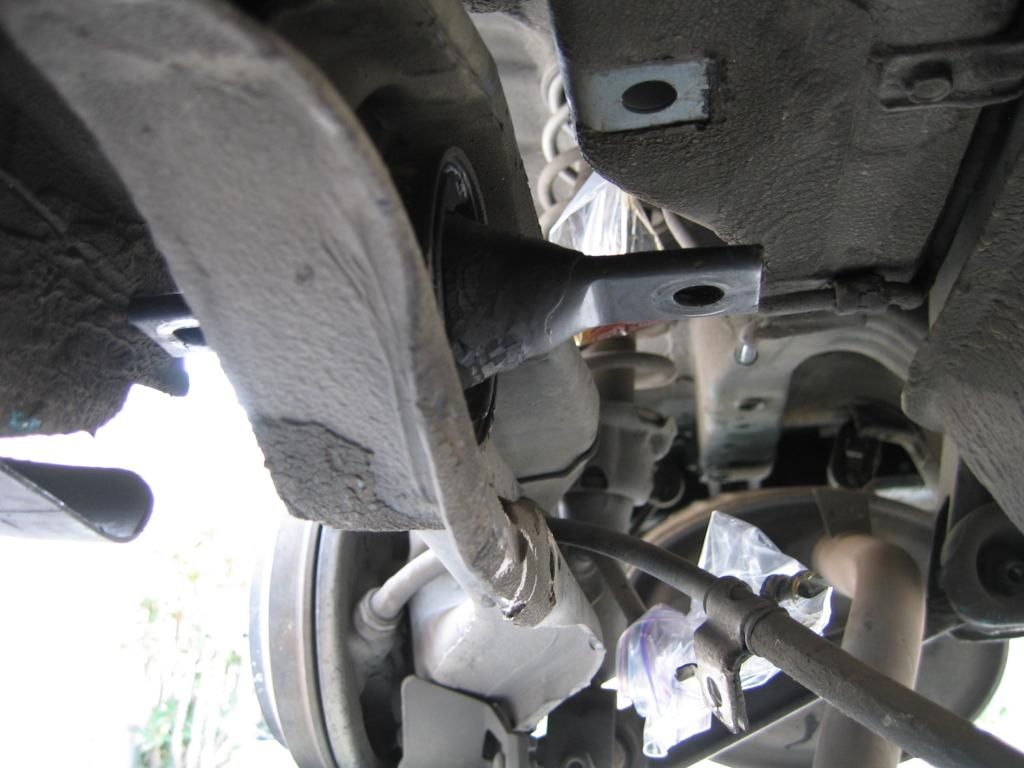
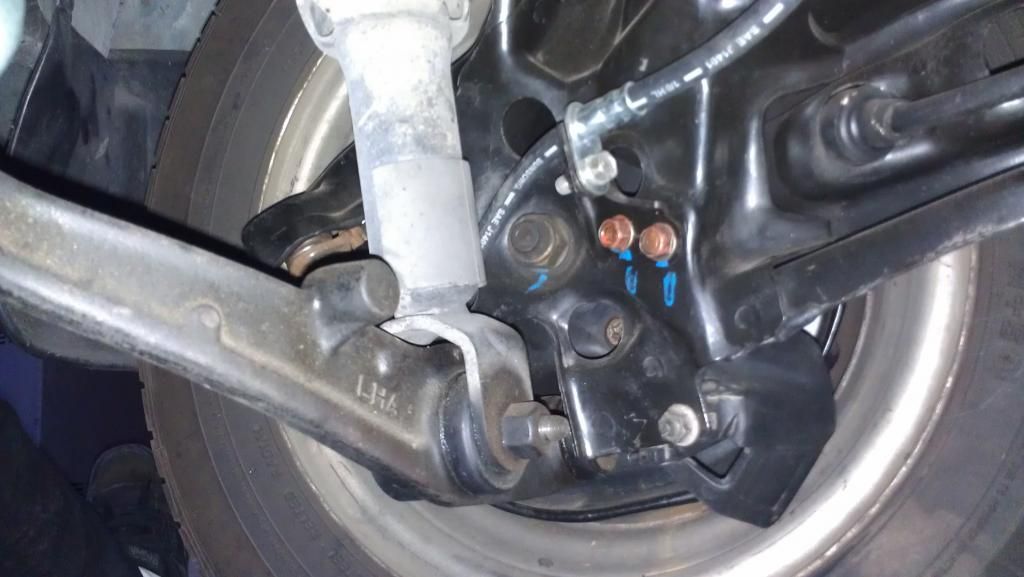
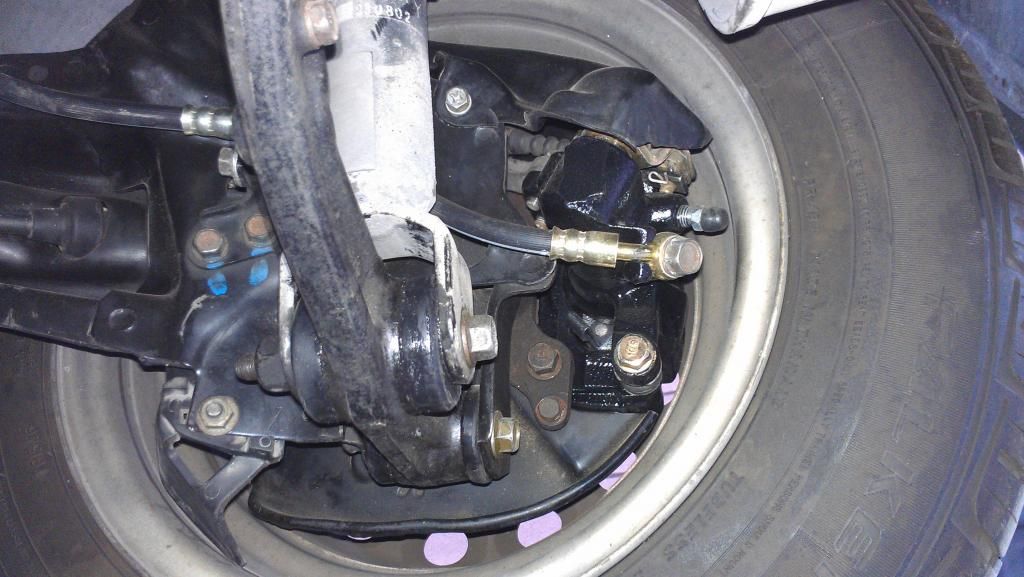
INSTALL REAR DISC BRAKES
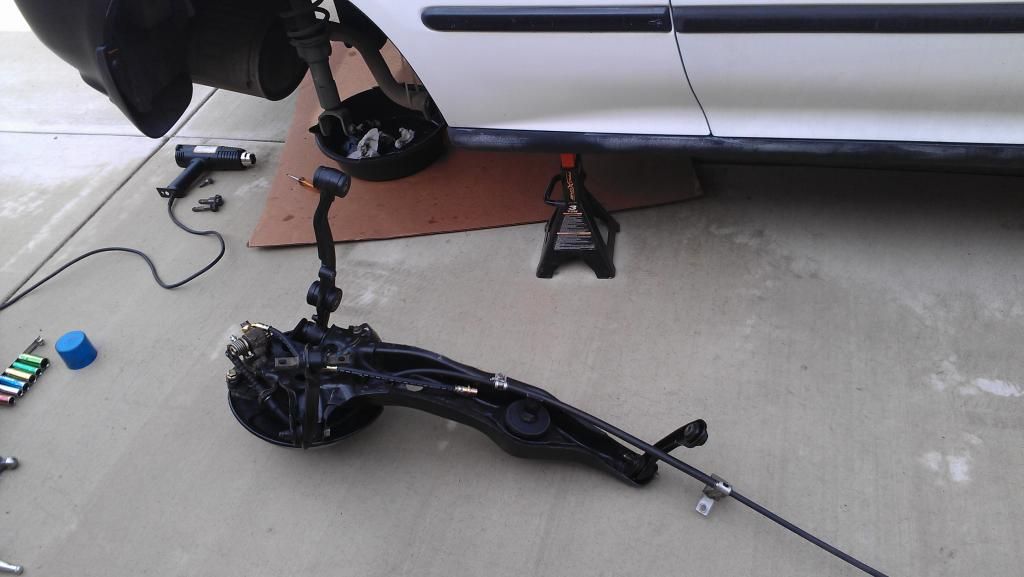
Prepare disc brakes for installation
You should have the rear disc spindle cleaned and prepped and ready to install by now
Attach hand brake cable to spindle
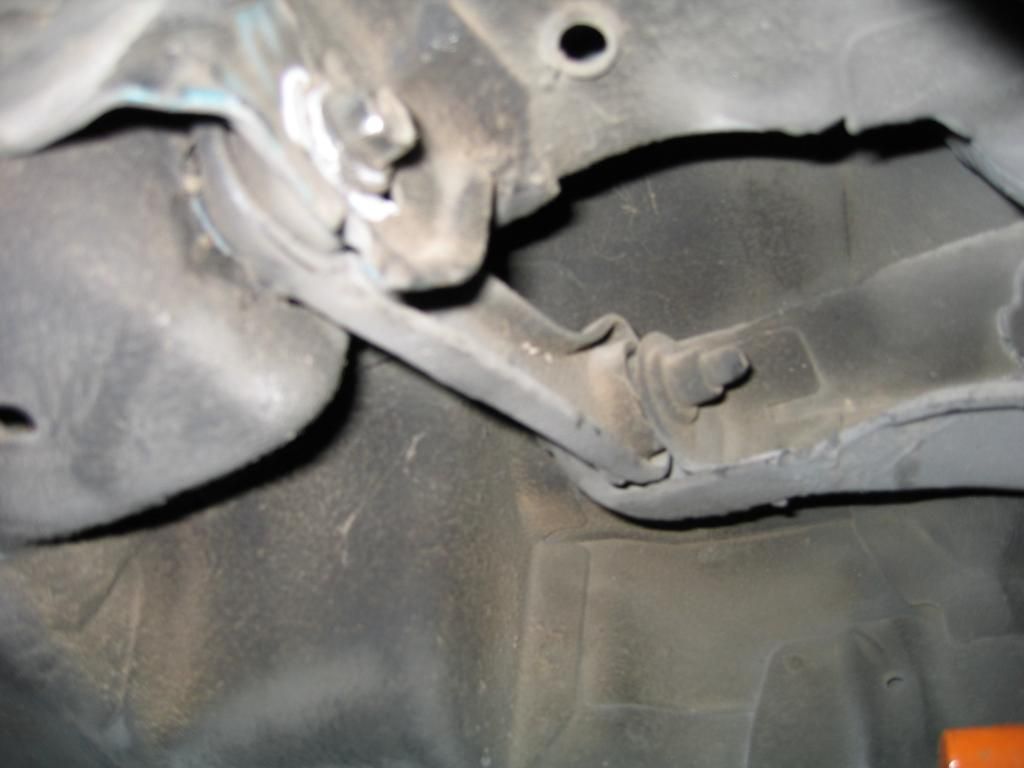
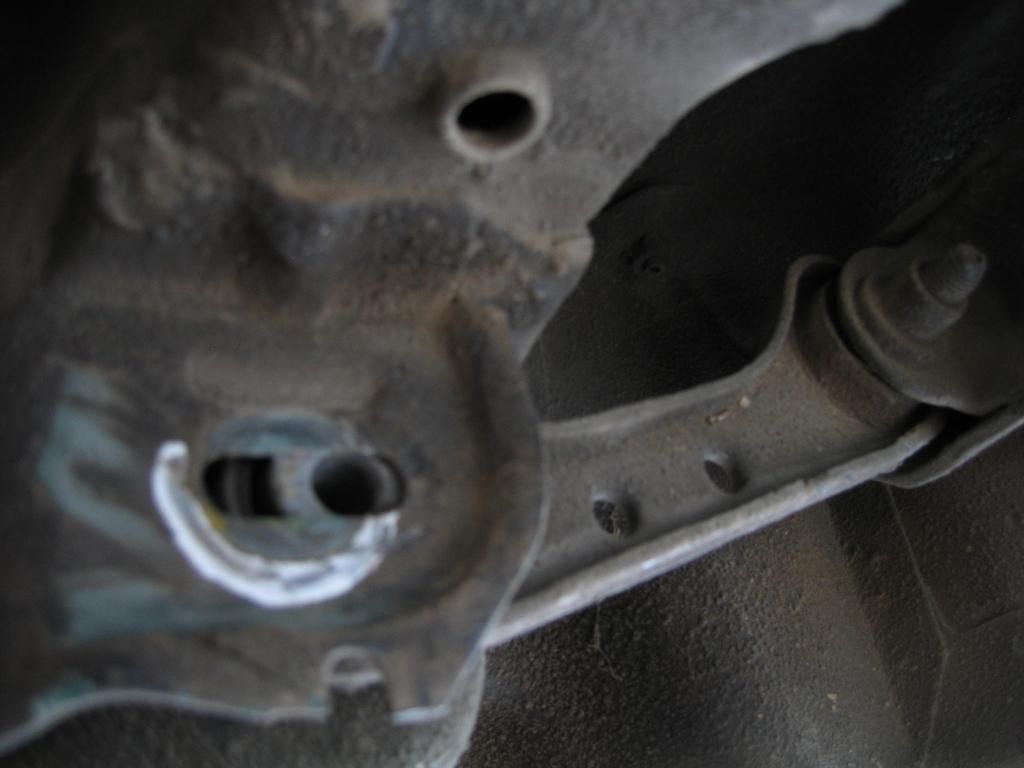
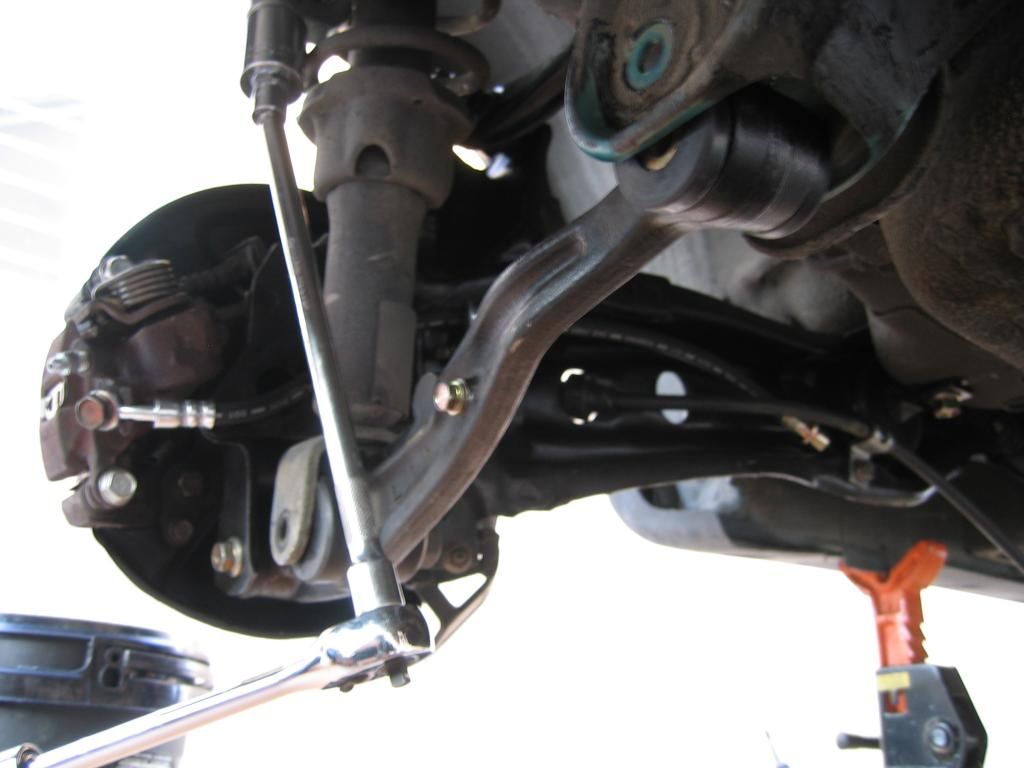
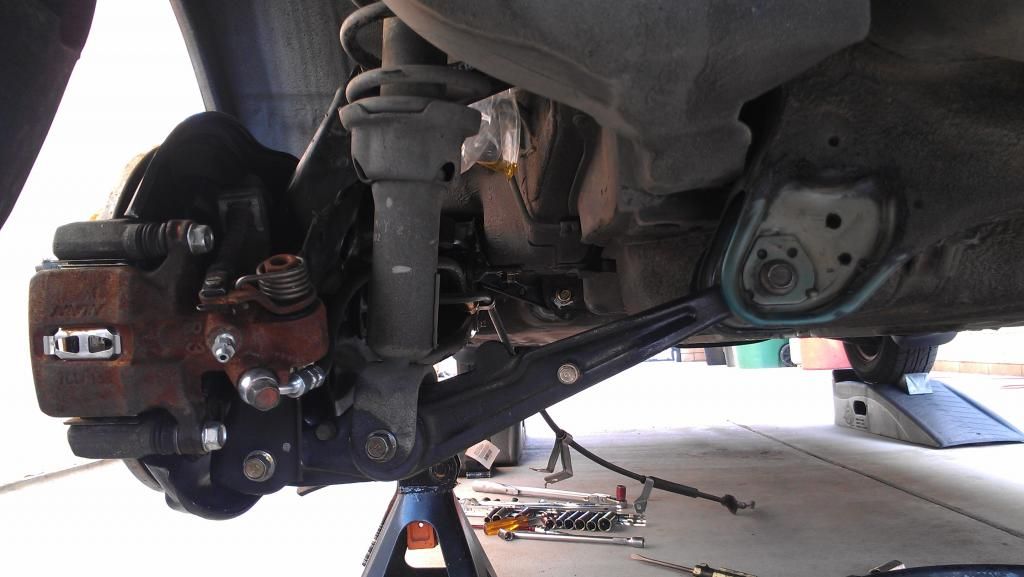
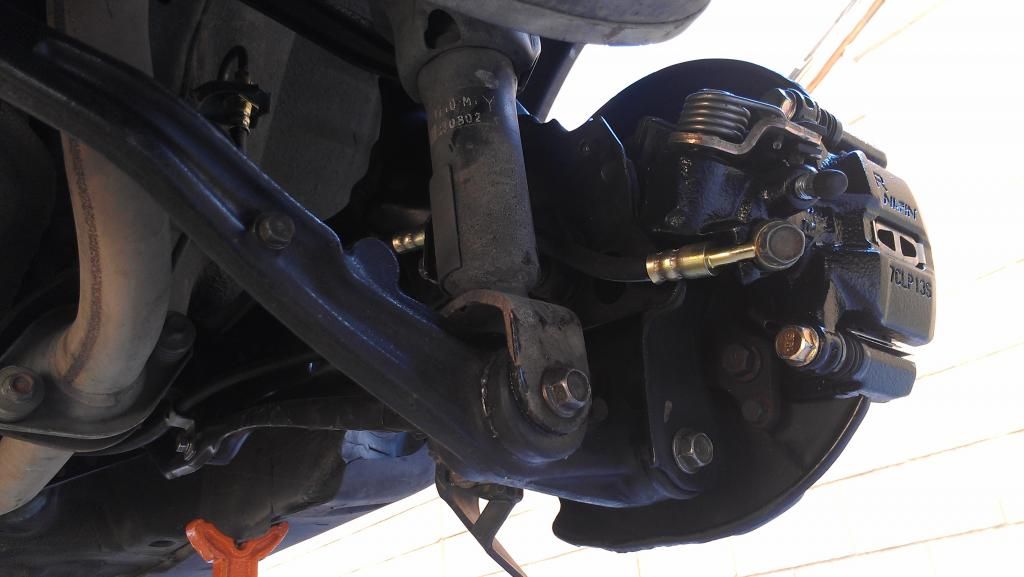
Attach upper and lower control arms to the spindle
Attach compensator arm to the spindle
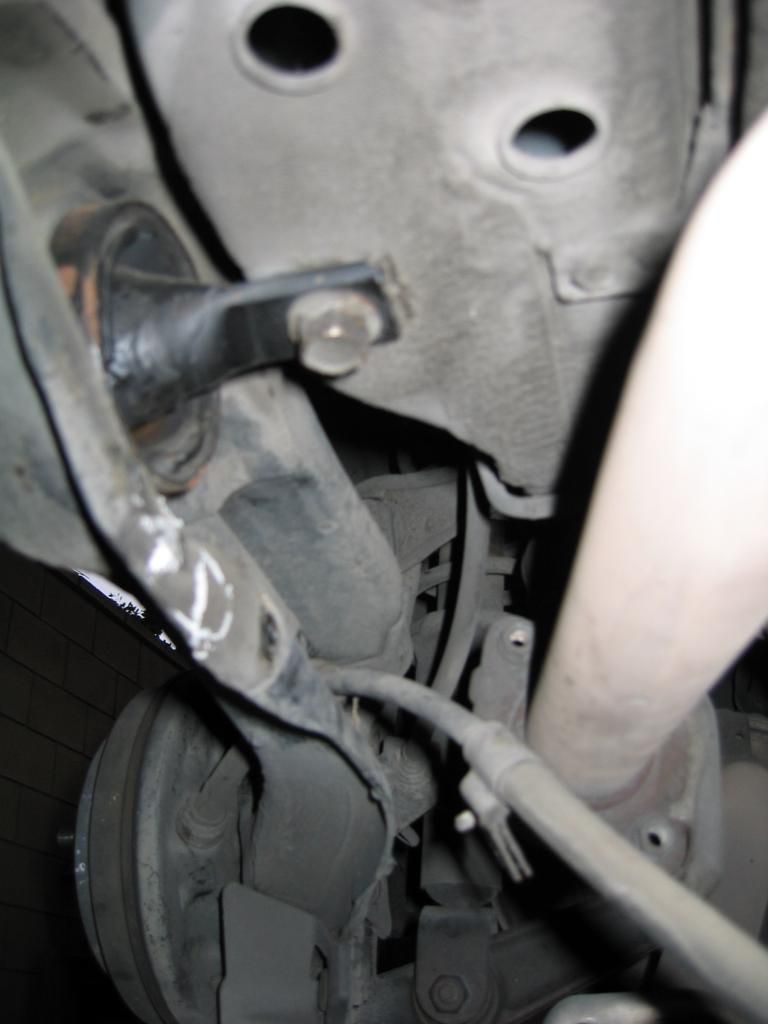
Attach new brake line to spindle
Attach caliper & bracket to spindle
Pre-install rear spindles
Hand bolt in lower & upper control arm, compensator arm, trailing arm bracket to car (for test fitting)
(I recommend attaching the upper control arm first so that the weight of the whole spindle can be supported while you test fit the rest of the parts)

Install hand brake cables to car
Push hand brake cables from underneath the car's center console area
Bolt in hand brake cable brackets underneath the car to make sure fitment is proper
I also like to note that I took my parts off of a 2dr EX coupe.
The hand brake cables are TOO LONG FOR THE HATCH!
In order to mitigate the excess cable length, I had to cross the cables over each other before I ran the cables through the chassis.
Most likely youll have to get shorter cables to make it fit better on a hatchback.
Anyway. It still worked. Now, going forward....
Finish assembling the hand brake cables from inside car
Test fit rear spindle
Hand bolt in:
Lower control arm
Compensator arm (Keep the compensator arm alignment the same as it was installed before you took it apart for proper rea wheel alignment)
Brake hose

Pre-load the suspension (use a jack stand to bring load the rear suspension as if it were sitting on the ground)
Torque down all your control arm bolts & brake hoses
Lower your suspension
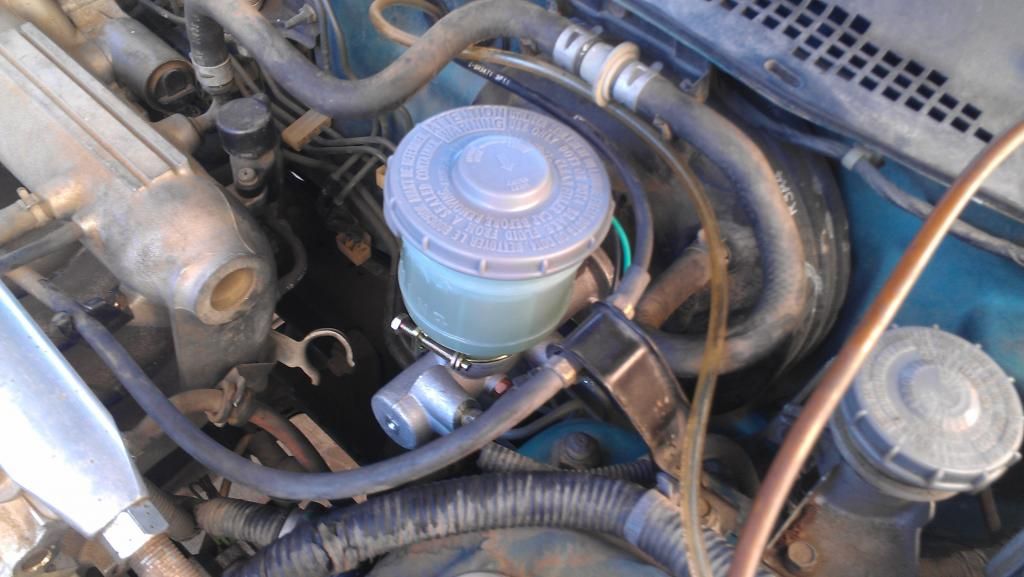
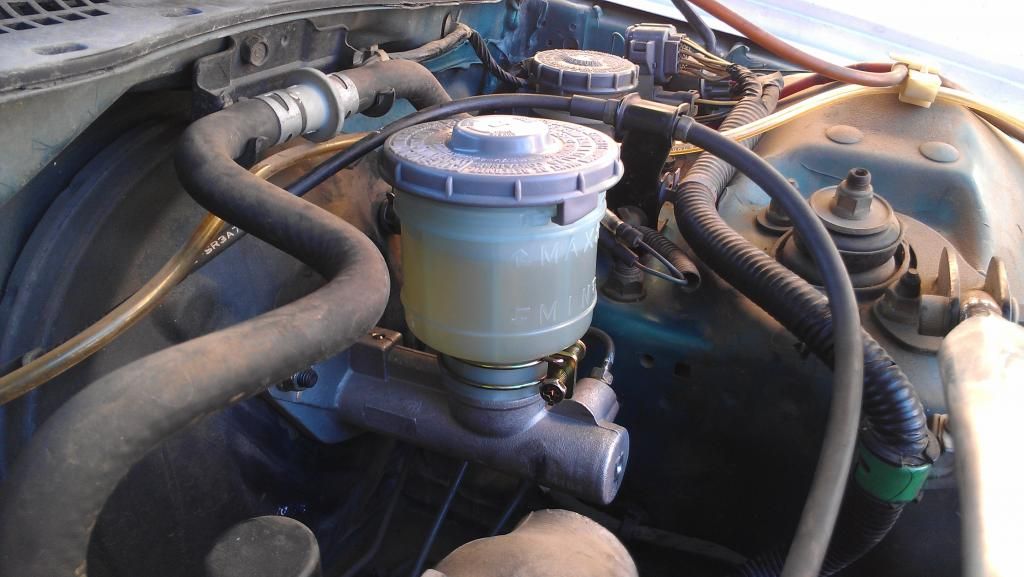
Replace brake master cylinder for 15/16 MC
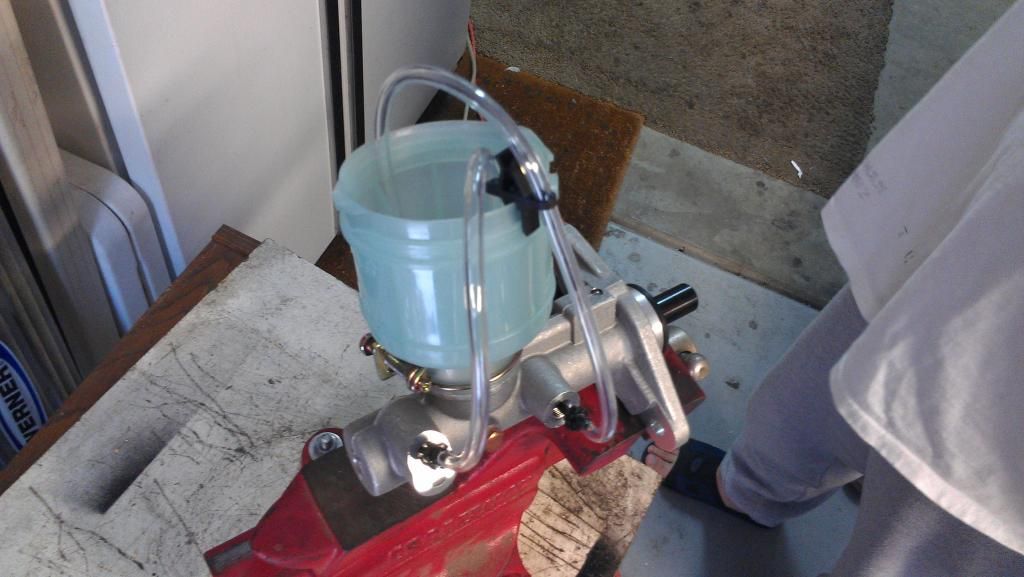
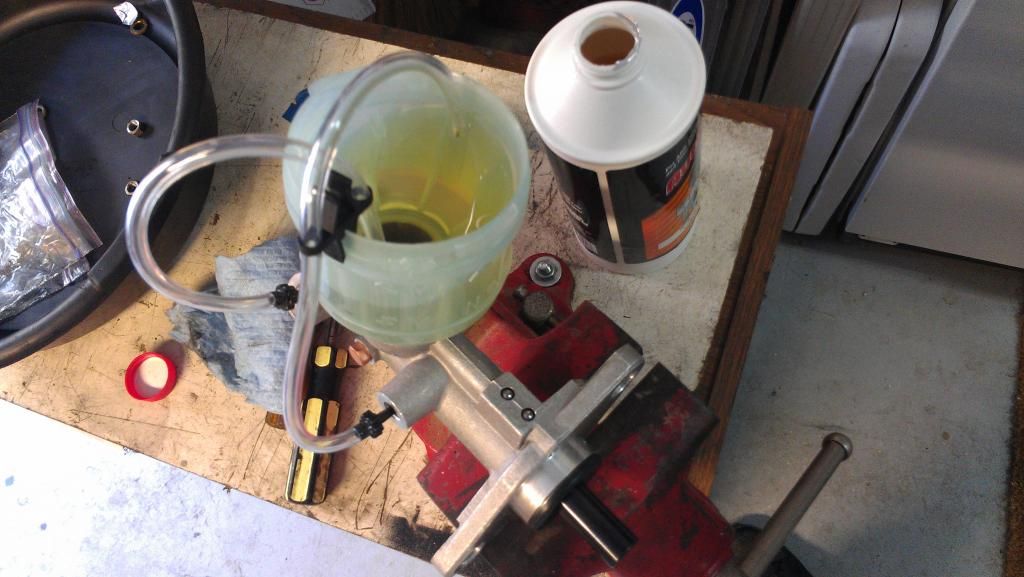
Bench bleed new brake master cylinder
Remove old brake master cylinder
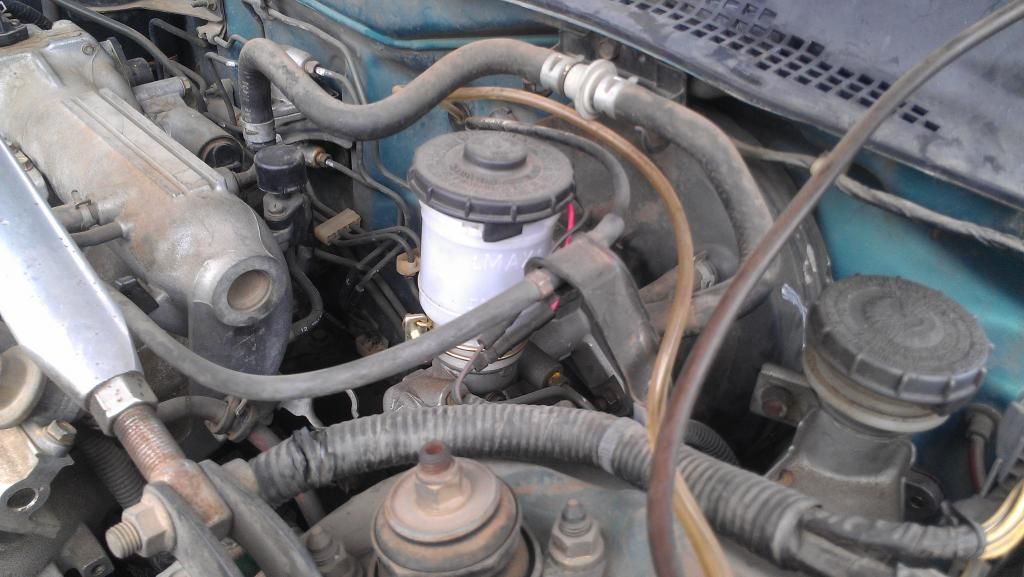
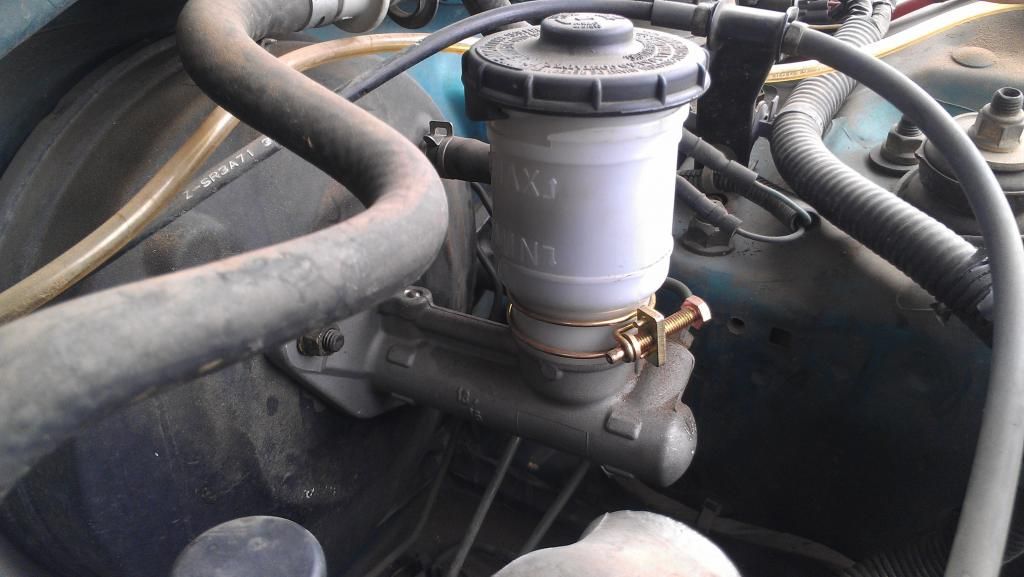
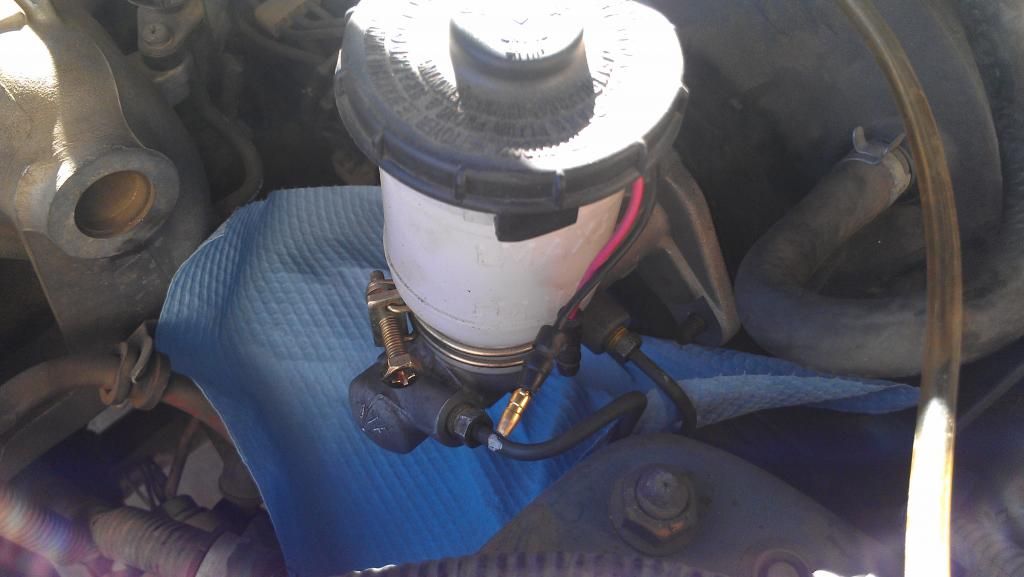
Install new brake master cylinder
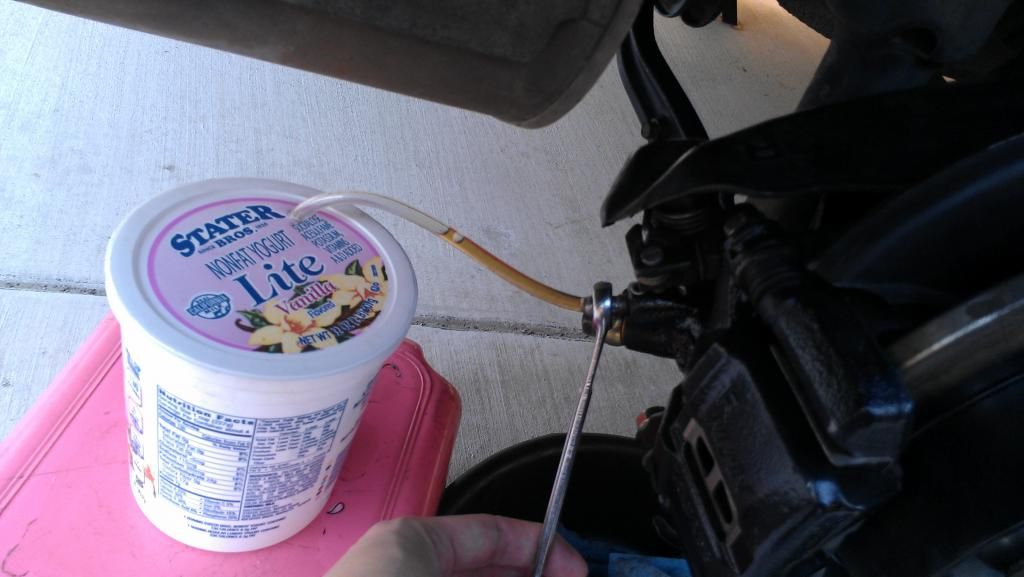
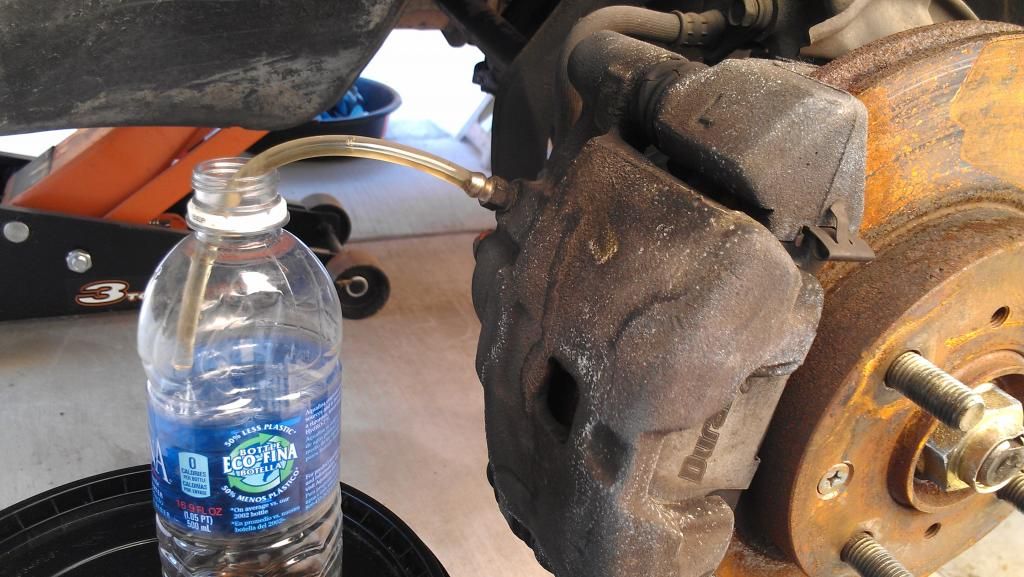
Bleed brake fluid from entire system
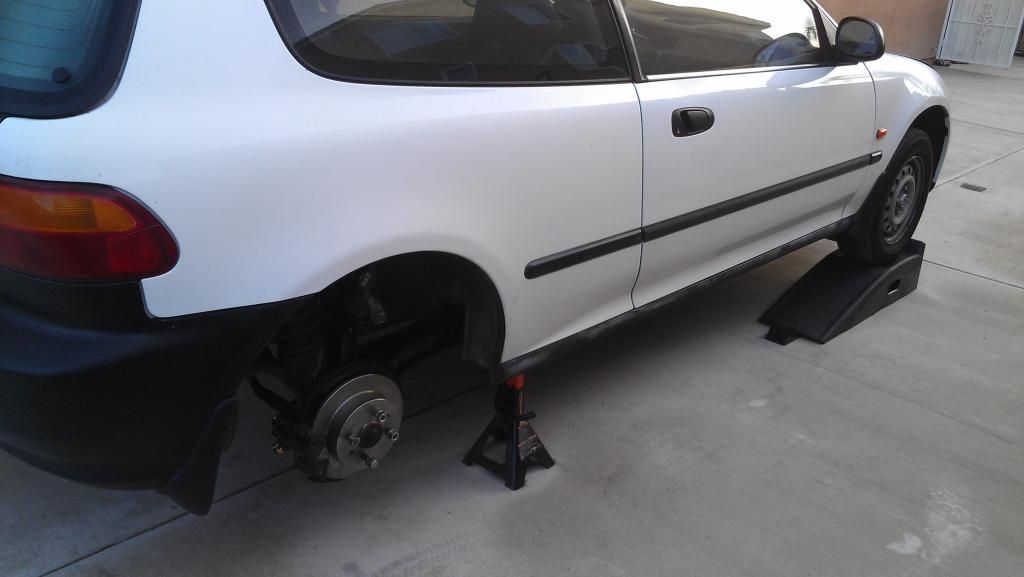
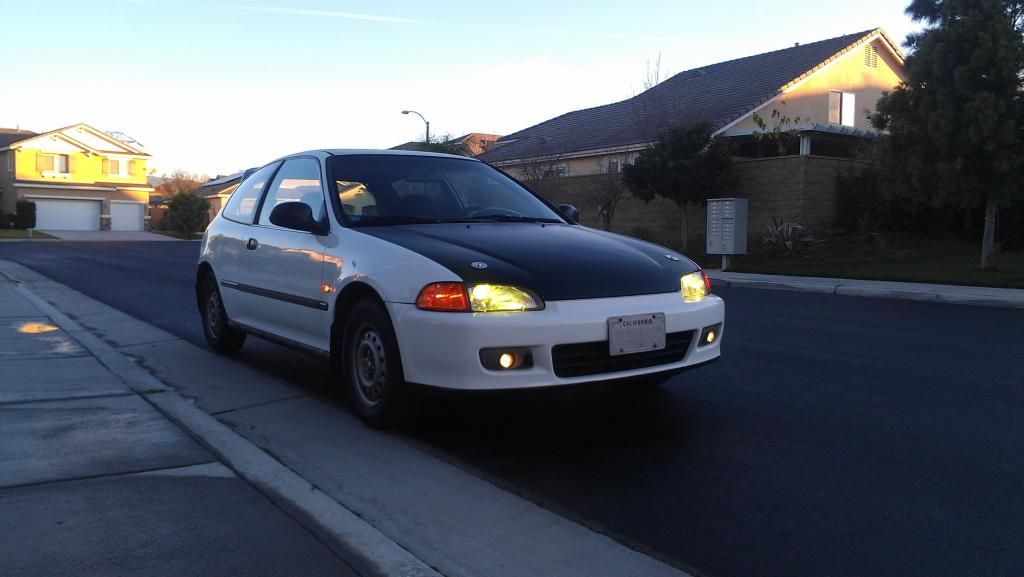
Install wheels back on car
After installing my 13" steelies, I noticed that the bottom rubber dust shield was rubbing on my rims.
All I did was clip the edge until I had enough clearance
Test drive car
I got a lot of help from great people from this forum
So here's me sharing what I have learned. Thanks guys!
DIY IN PROCESS
I know there's already a DIY stickied.
But I thought I'd post up another rear disc conversion that's based on my own personal experinces.
And hopefully it will answer questions that might not have been addressed in other tutorials.
It's going to a working thread, so bear with me until I finish my tutorial.
============================================================================================================================
Parts List: Condition Cost Parts Location
Rear Spindles (used) $200 (for 2) Junk Yard
(includes Lower & Upper Control Arm, Caliper, Rotor)
Rotors - Rear (new) $43.98 (for 2) Autozone / Part #31149
Energy Suspension Bushings Master Kit (new) $130 (kit) Ebay or Summit / ES Part #16-18103
Energy Suspension Bushings Trailing Arms (new) $35 (kit) Ebay or Summit / ES Part #16.7106G
Brake Master Cylinder 15/16 (from a 1991 EX) (new) $75.99 Autozone / Part #NM52517
Brake Hoses (new) $36 (L&R sides) Autozone / Part #70502 & 70504
Brake Fluid DOT3 (1 qt) (new) $6.59 Autozone
Carbureter Cleaner (new) $3.49 Autozone
Caliper Paint (new) $8.99 Autozone
----------------------------------------------------------------------------------------------------------------------------
Total Cost $540.04
============================================================================================================================
-----------------------------------------------------------------------------------
RETRIEVE PARTS
Acquire rear disc brake parts
Most likely you'll get most of your parts from the junk yard as there are plenty of hondas lurking the yard
Some parts I got brand new out of personal preference
See my parts list for a more comprehensive cost layout of this project.
I did spend a lot of time cleaning my parts because they accumulated a lot of dirt and grime
It's the most boring part of the process, but the visual payoff is rewarding
-----------------------------------------------------------------------------------
PREP NEW PARTS FOR INSTALLATION
Clean up your parts (optional, but recommended)
You dont have to clean your parts, but you might as well freshen up your parts.
It makes the whole job a lot cleaner when you're doing the install
And it makes everything look nicer and cleaner
I also like to add that using a HEAT GUN loosens up the grim and makes the clean up process a lot easier!
I ended up painting the hat of my new rotors to prevent them from water corrosion
I also painted my calipers & brackets to give them a nice clean look as well.
One clean spindle next to the dirty one, you can see the big visual difference it makes when you clean your parts
-----------------------------------------------------------------------------------
Replace bushings (Optional I guess)
Not required, but if you're going this far and dealing with 20+ year old parts, I can guarantee your rubber bushings are either shot or getting there.
All the the bushings on my acquired parts had a lot of visual signs of wear.
Energy Suspension Polyurethane bushings are a great purchase for the money.
If you're installing polyurethane bushings to replace the old rubber one, then the good news is that you do not have to remove the metal ring that holds it in place.
Usually you have to get the metal ring pressed out with a special tool.
I used the following tools to remove the rubber trailing arm bushing:
Electric drill
Carbureter cleaner
Flat head screw driver (medium sized)
C-Clamp
REMOVING BUSHINGS
Use a drill to cut/drill out pieces of each rubber bushing to weaken the bushing.
Spray carbureter cleaner on the bushing and scrape/poke/jab/pry the rubber bushing with a flat head screw driver
Once you actually get the carbureter cleaner to penetrate the bond between the rubber and the outer ring of the bushings, the rubber will loosen up very easily.
Use the C-clamp to help press the metal slot sitting inside each bushing
INSTALLING NEW POLYURETHANE BUSHINGS
Once you have all the bushings removed, the installation of the new polyurethane bushings are very easy and straight forward.
Make sure you use the recommended lubricant properly
The only one that's a little difficult to install is the trailing arm bushing
I had to make my own prop to help the bushing go all the way through the metal ring straight.
I recommend using a long bolt, some big washers and some sort of bracket to help pull the bushing through the metal ring housing
-----------------------------------------------------------------------------------
PREPARE CAR FOR INSTALLATION
Set up car for swap - Lift car and place on jack stands
You'll need plenty of room, so lift your car up as high as you can
I used rhino ramps to lift of the front quickly.
Remove exhaust pipe (everything between the headers and muffler)
You're gunna need to remove this in order to get the hand brake cables out of the cabin
-----------------------------------------------------------------------------------
REMOVE STOCK REAR DRUM SPINDLES
Detach brake hoses
Remove the retaining clip
Disconnect the brake hose
Have a plastic bag handy with a strong clip
Once you disconnect the brake line, you'll want to hang a bag on the hard line to capture leaking brake fluid
Remove hand brake cables
Go inside your car
Remove center console
Loosen & remove the hand brake assembly
Go underneath car remove brackets that hold hand brake cables to the car chassis
Pull hand brake cables through the bottom of car
Remove lower control arm bolts
Remove compensator arm bolts (use a marker to label where the arm is supposed to be bolted at as a reference point for re-installation later)
Remove trailing arm bushing bolts
Remove upper control arm bolts
Remove rear spindle assembly
-----------------------------------------------------------------------------------
INSTALL REAR DISC BRAKES
Prepare disc brakes for installation
You should have the rear disc spindle cleaned and prepped and ready to install by now
Attach hand brake cable to spindle
Attach upper and lower control arms to the spindle
Attach compensator arm to the spindle
Attach new brake line to spindle
Attach caliper & bracket to spindle
Pre-install rear spindles
Hand bolt in lower & upper control arm, compensator arm, trailing arm bracket to car (for test fitting)
(I recommend attaching the upper control arm first so that the weight of the whole spindle can be supported while you test fit the rest of the parts)
Install hand brake cables to car
Push hand brake cables from underneath the car's center console area
Bolt in hand brake cable brackets underneath the car to make sure fitment is proper
I also like to note that I took my parts off of a 2dr EX coupe.
The hand brake cables are TOO LONG FOR THE HATCH!
In order to mitigate the excess cable length, I had to cross the cables over each other before I ran the cables through the chassis.
Most likely youll have to get shorter cables to make it fit better on a hatchback.
Anyway. It still worked. Now, going forward....
Finish assembling the hand brake cables from inside car
Test fit rear spindle
Hand bolt in:
Lower control arm
Compensator arm (Keep the compensator arm alignment the same as it was installed before you took it apart for proper rea wheel alignment)
Brake hose
Pre-load the suspension (use a jack stand to bring load the rear suspension as if it were sitting on the ground)
Torque down all your control arm bolts & brake hoses
Lower your suspension
Replace brake master cylinder for 15/16 MC
Bench bleed new brake master cylinder
Remove old brake master cylinder
Install new brake master cylinder
Bleed brake fluid from entire system
Install wheels back on car
After installing my 13" steelies, I noticed that the bottom rubber dust shield was rubbing on my rims.
All I did was clip the edge until I had enough clearance
Test drive car
I got a lot of help from great people from this forum
So here's me sharing what I have learned. Thanks guys!
DIY IN PROCESS


 I would look at aftermarket big brake kits if you're spending that kind of money. You should be able to do this for under $200.