- Fri Feb 19, 2010 10:16 pm
#176484
If you have slop in your steering, hear a clunk from the front of your car, or have tire wear, it may be time for a new inner and/or outer tie rod end link.
The inner and outer tie rod end link your steering rack to the knuckle with the wheel of the car attached to it.
The inner is connected to the steering rack. The outer is connected to the knuckle. The inner & outer tie rod thread together and are adjustable so that the overall length of the two pieces may be increased or decreased. this is how Toe is adjusted in an alignment. A shorter length will mean more toe-out while a longer length will mean more toe-in.
Each tie rod has a ball joint on the end to allow pivoting between the knuckle and the steering rack due to suspension flex. These moving ball joints wear out eventually. If you ever see a car on the side of the road with both front wheels pointing opposite directions, that is most likely due to a neglected tie rod end snapping- more often the outer.
So if you notice any of the symptoms mentioned above, check for wheel play.
With the car on jack stands, grab the left and right sides of the tire and wiggle it as if you were trying to shimmy it off of the hub. If there's play, then you need to replace the inner and/or outer tie rod. (play from top to bottom is usually a ball joint - check upper and lower control arms. Play in all directions could be a very worn wheel bearing - you would hear this while driving)
I did this on my EK so there may be slight differences but the overall process is the same so I took pics...
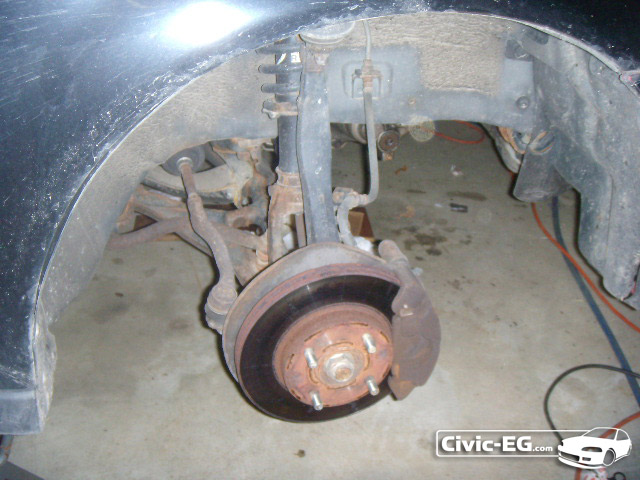
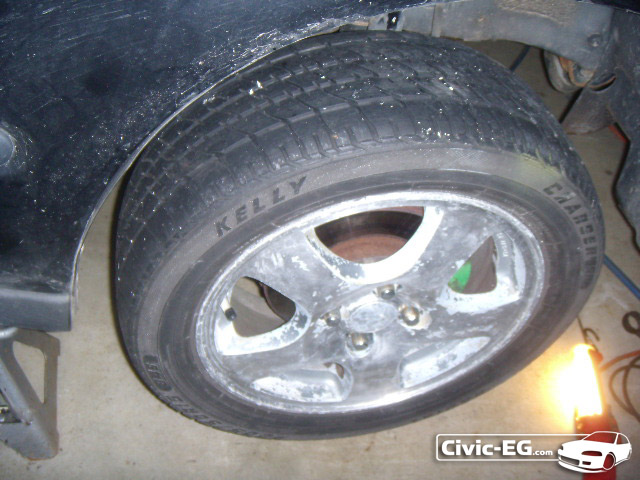
Put the front of your car on jack stands & remove wheels.
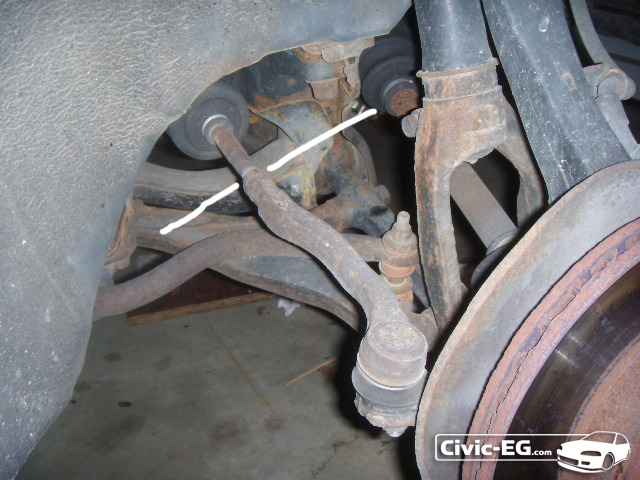
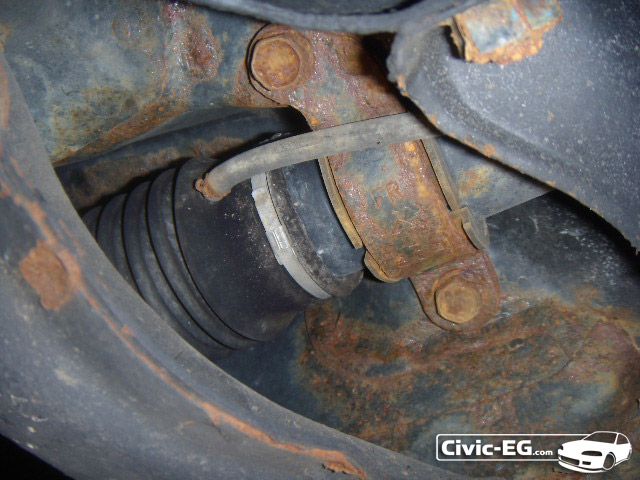
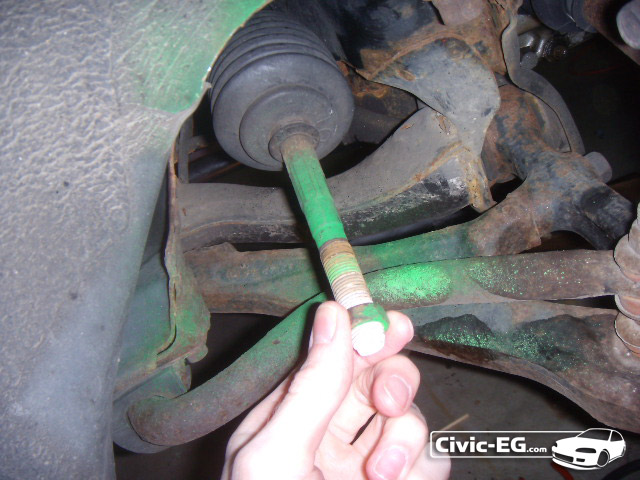
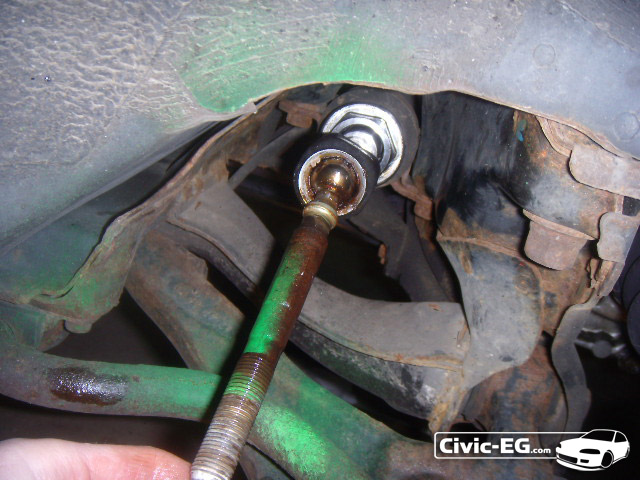
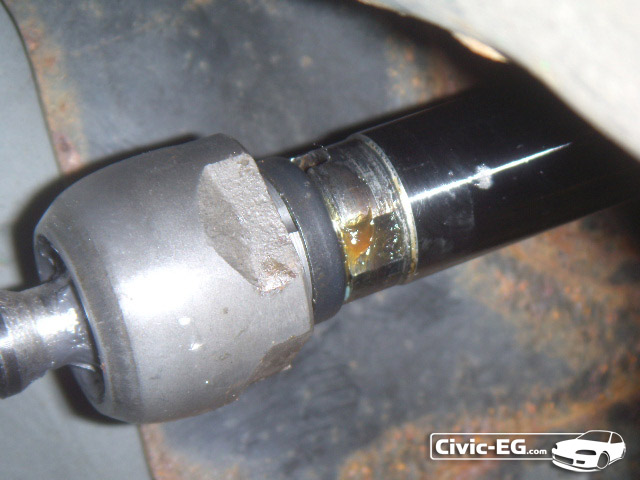
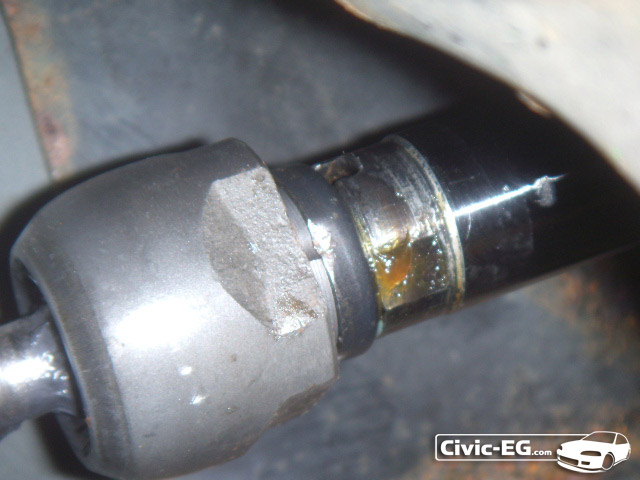
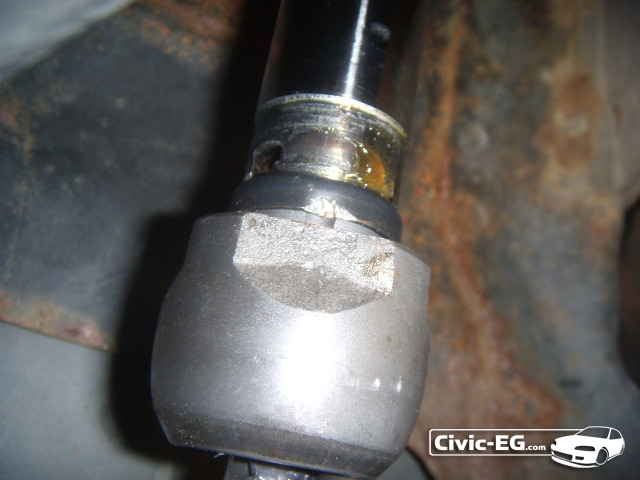
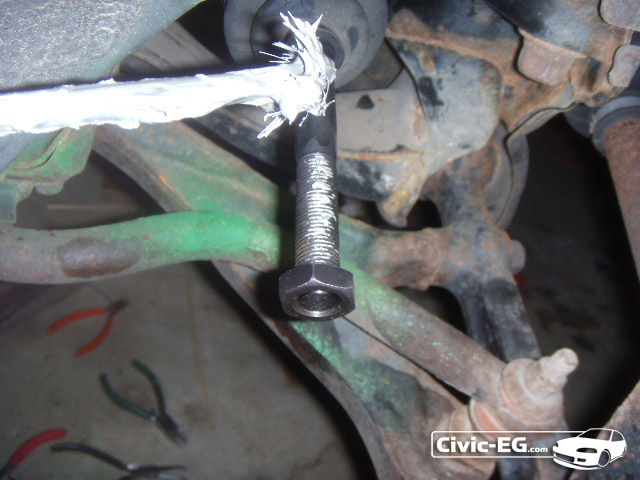
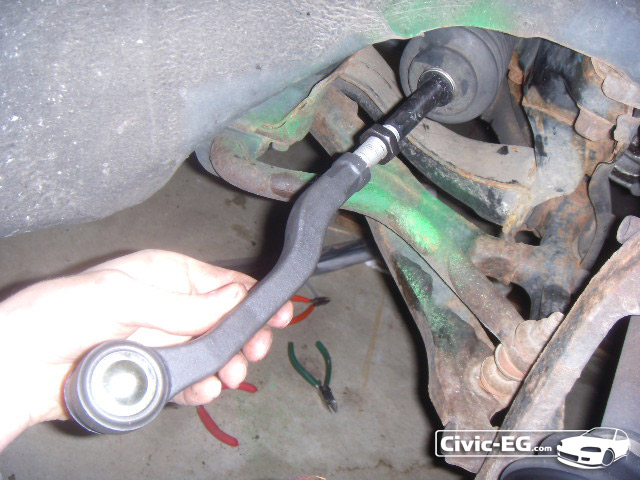
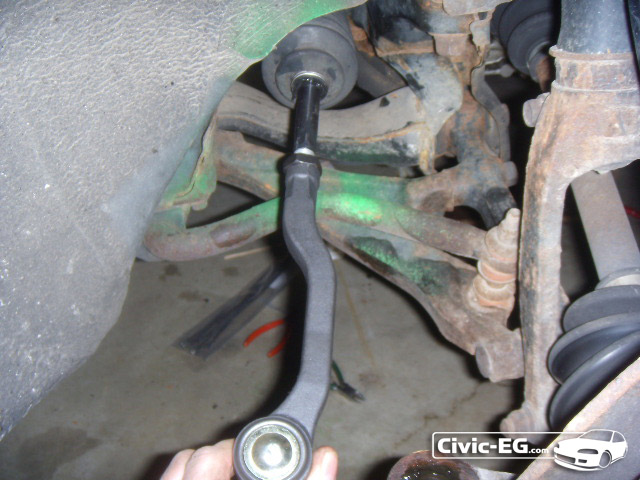
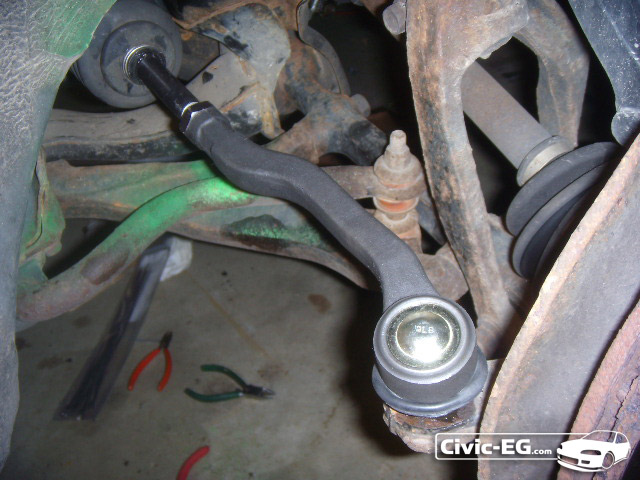
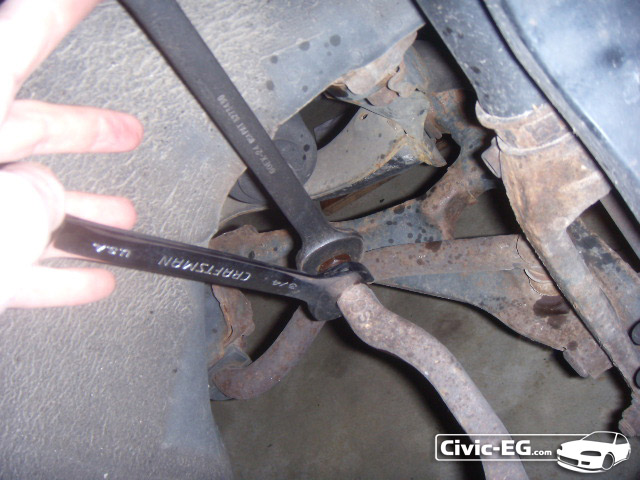
The inner & outer tie rod can be seen in this pic. The white line is where they connect. The part to the inside of the line is the inner tie rod. The part on the outside of the line is the outer tie rod.
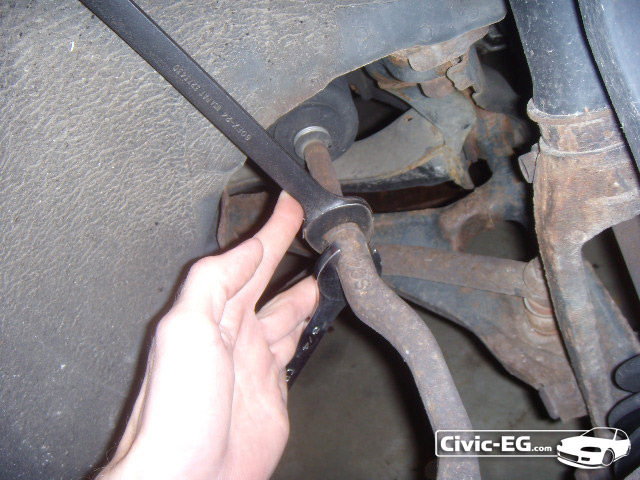
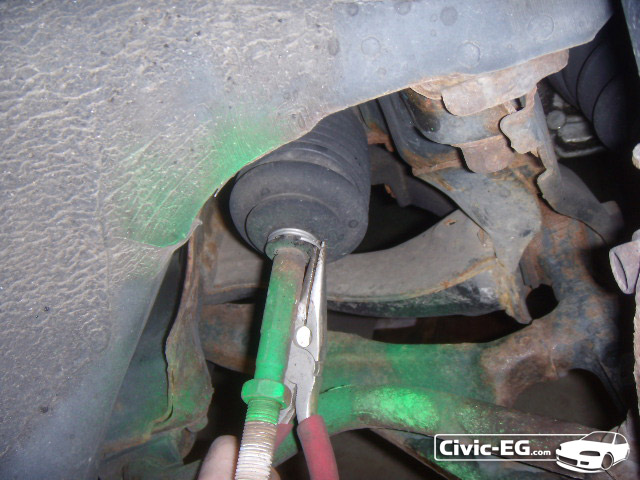
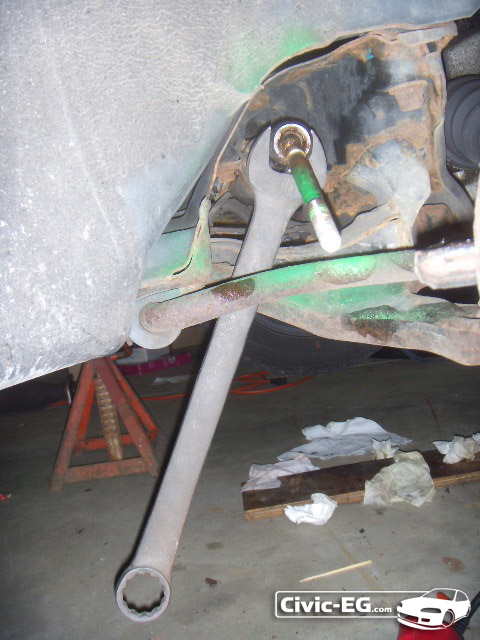
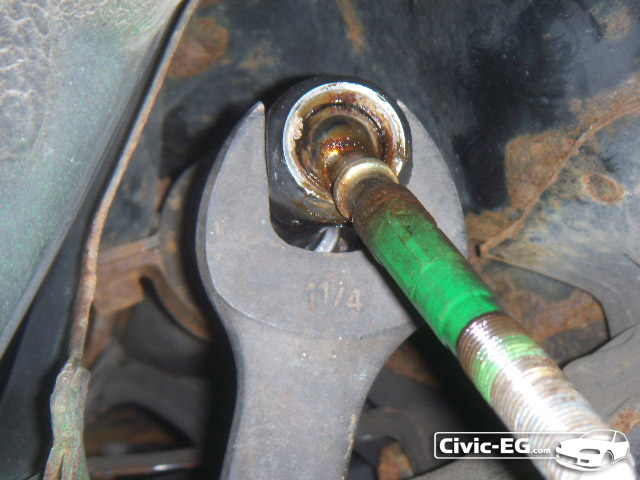
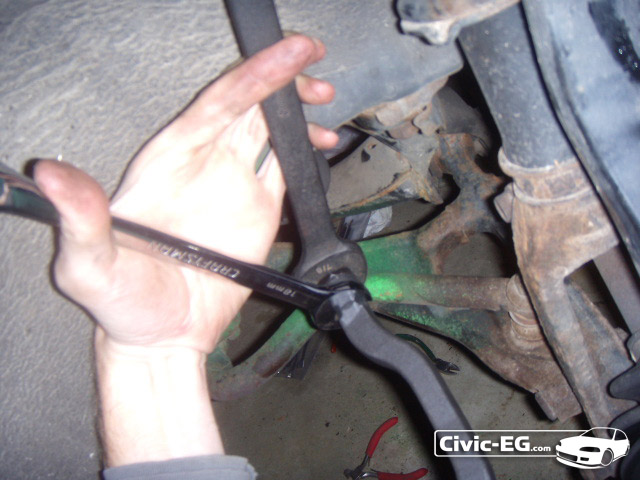
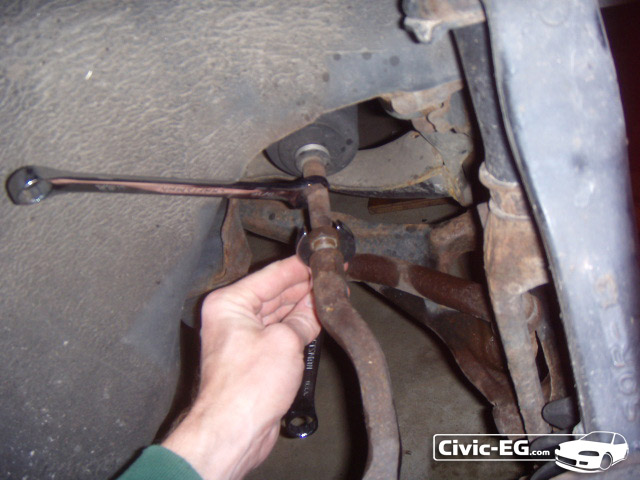
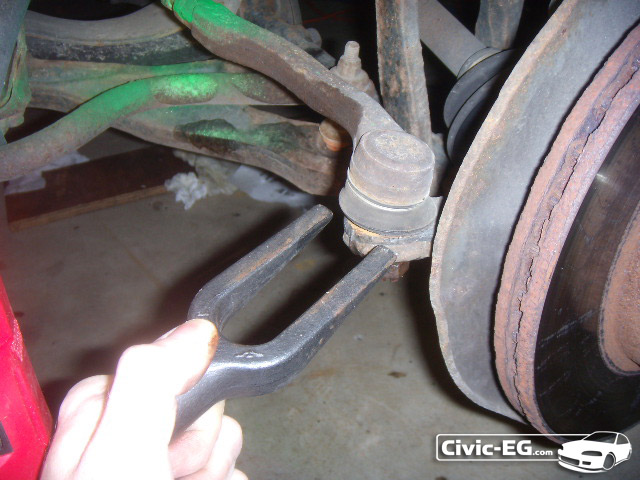
You'll have to crack them loose. Grab them with vise grips or mine had recessed ares where a crescent wrench could slip over them.
The top wrench is on the nut, the bottom is on the outer tie rod.
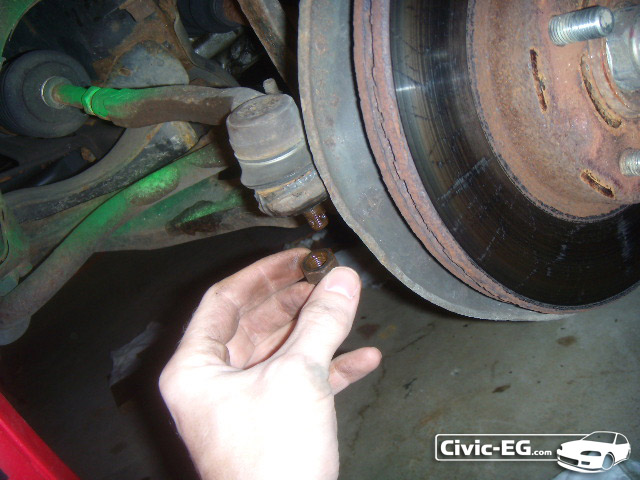
It took some PB blaster & some elbow grease to break the nut loose.
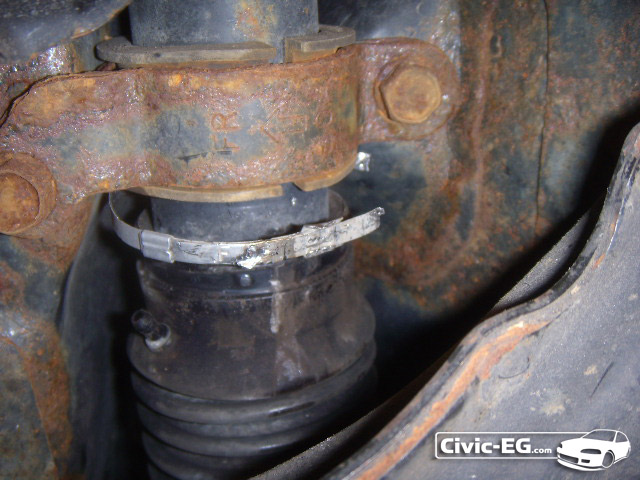
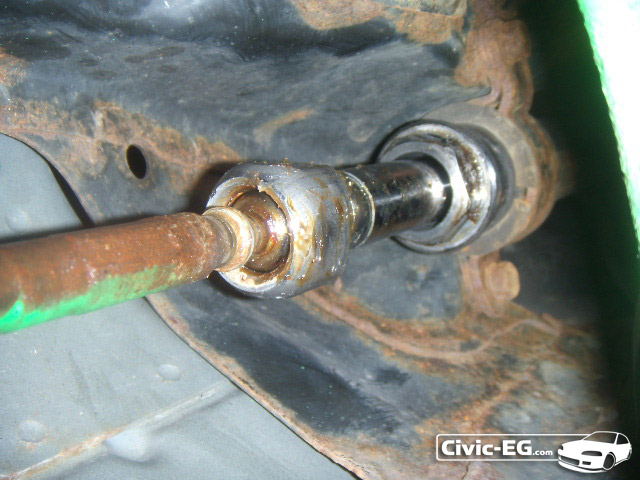
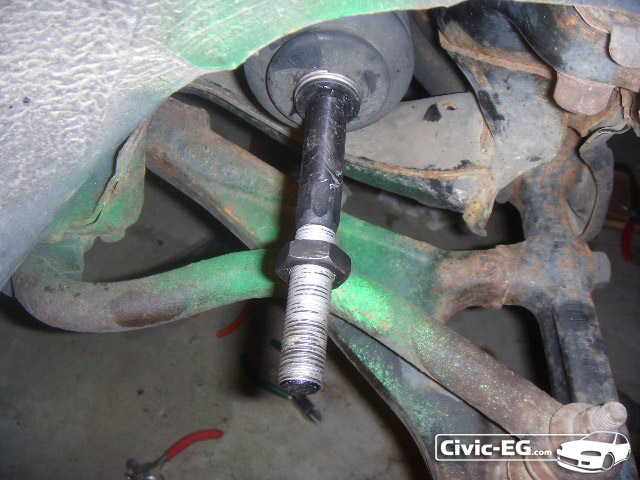
Once the nut is loose, thread it up on the inner tie rod (toward the steering rack).
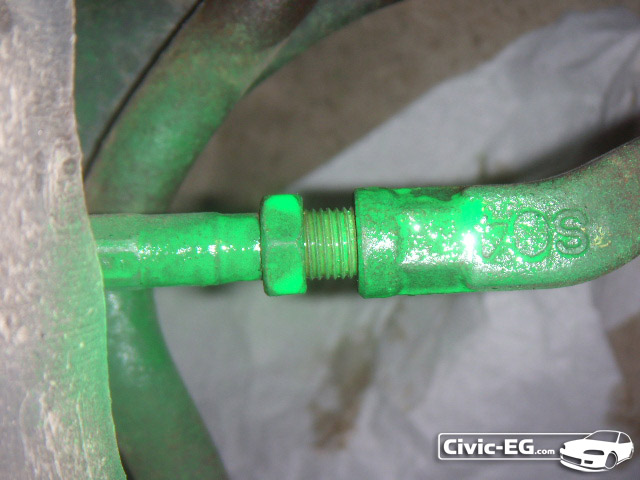
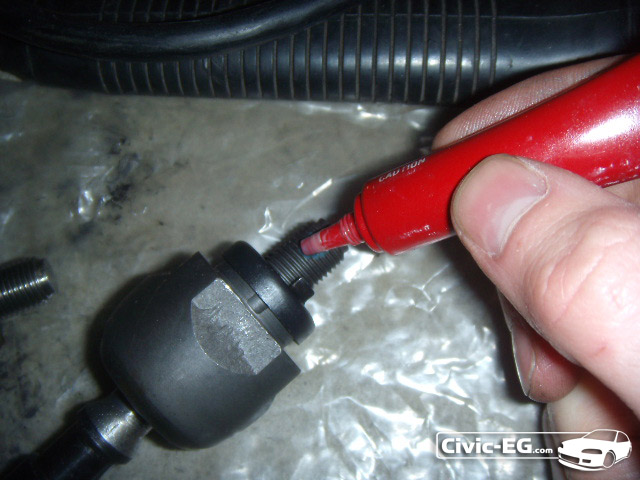
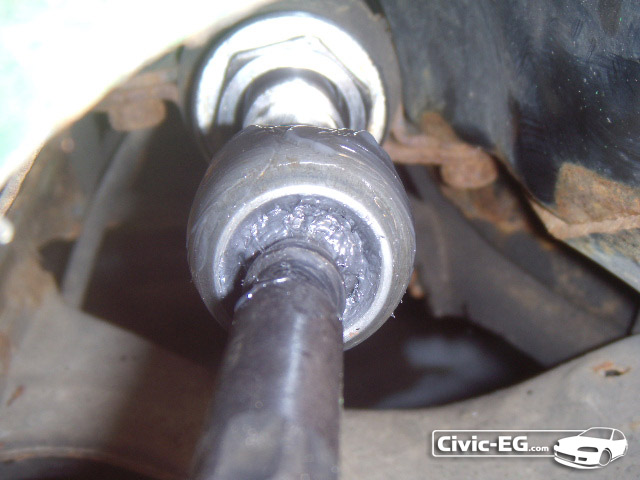
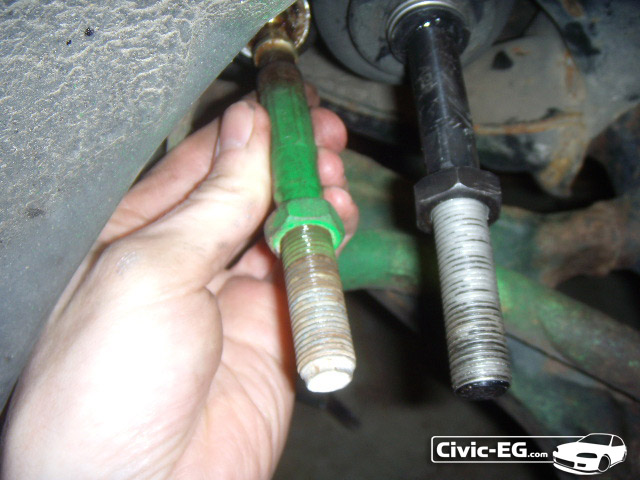
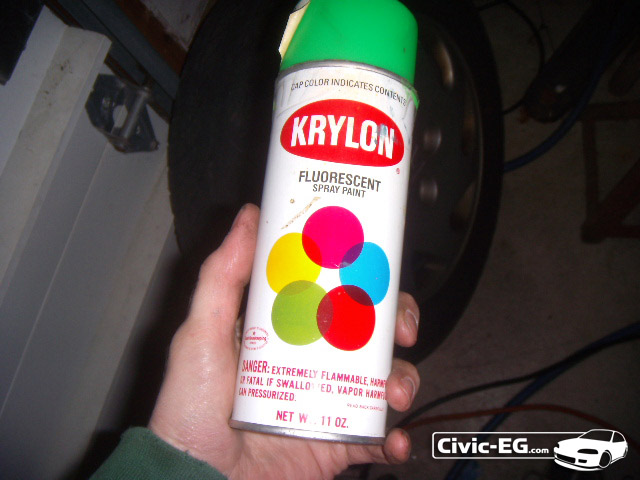
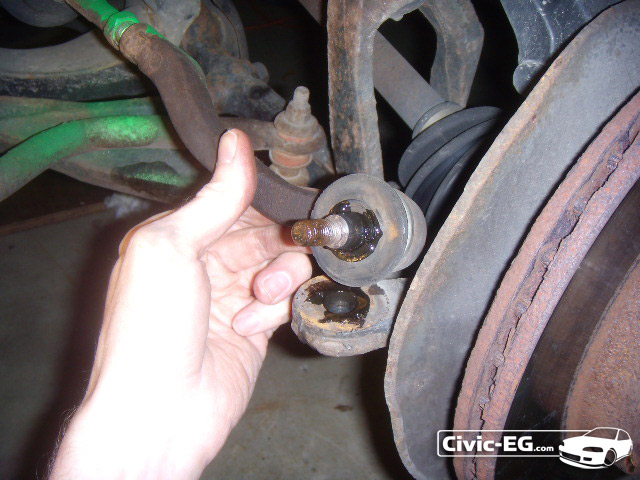
You need to mark exactly where the outer tie rod is threaded onto the inner tie rod. You can count the threads showing and write it down. Or I just hit it with some paint to see what threads were showing.
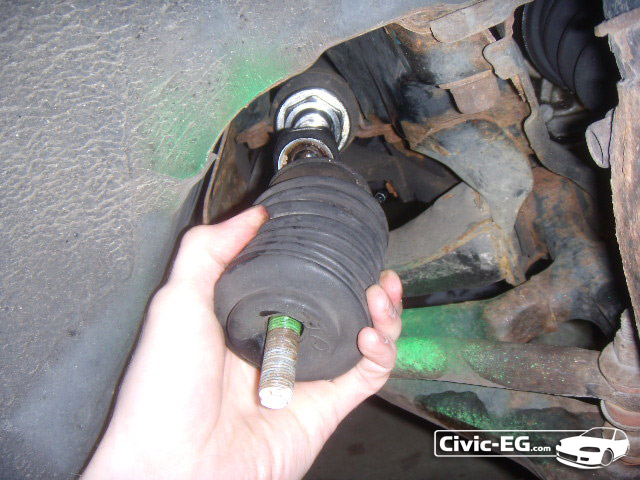
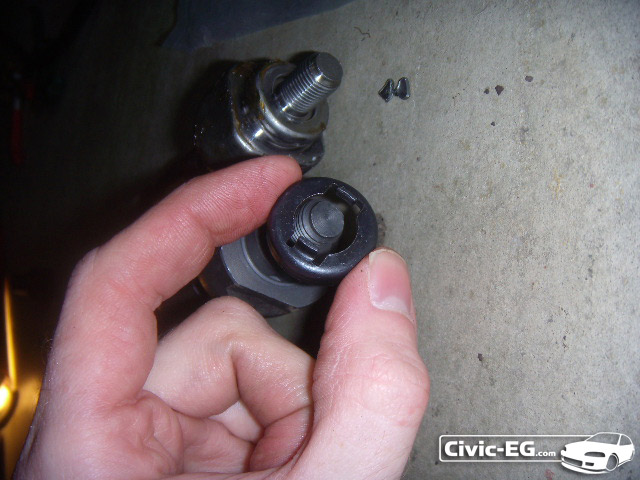
Old school 5 ball!

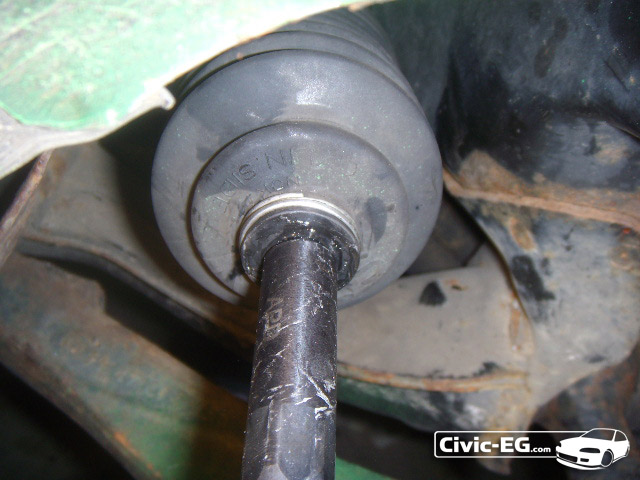
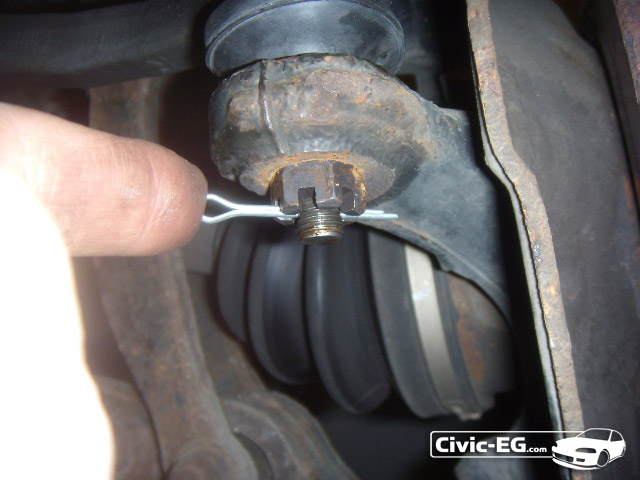
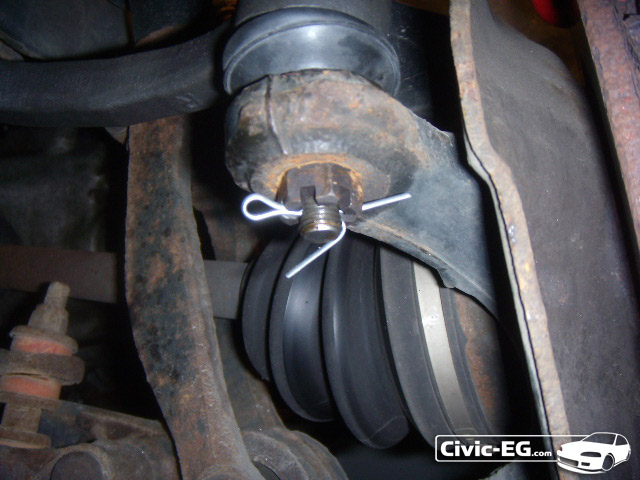
To get the outer tie rod off, you'll need to remove the outer ball joint.
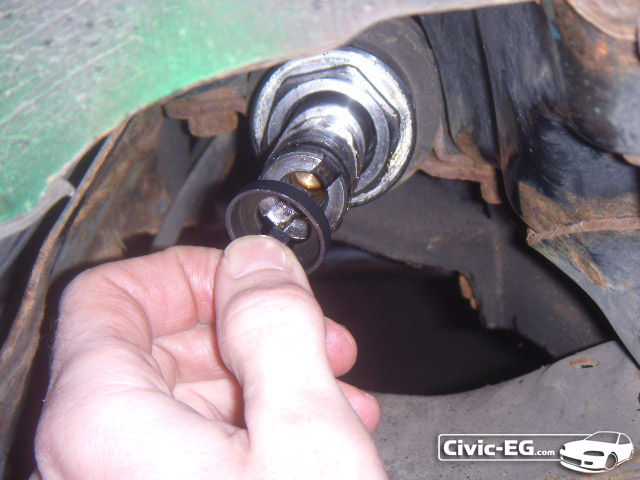
This castle nut on the bottom should have a cotter pin in it to keep it from coming loose - mine didnt!
I've got these old school ball joint seperators which have only ever worked for me once. Normally they just tear the boot
Today was not my lucky day...
You can see grease from the torn boot. I had to end up hitting it out with a mallet which is bad for the ball joint. That's ok though because I am replacing the Inner and Outer tie rods and the outer has the ball joint.
There is a different type of puller similar to a steering wheel puller that is made for ball joints that would probably work better for civics.
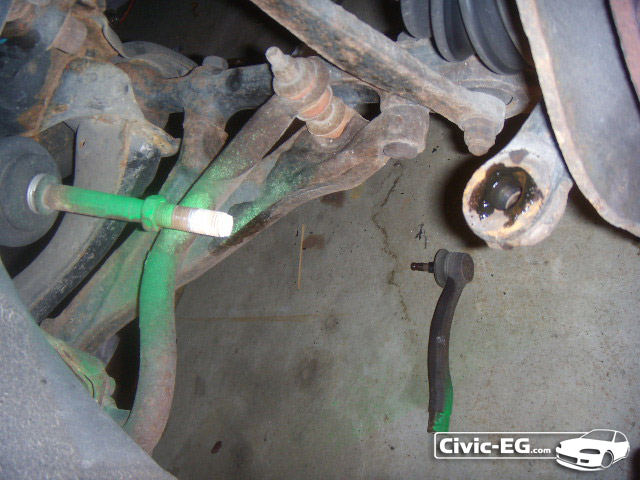
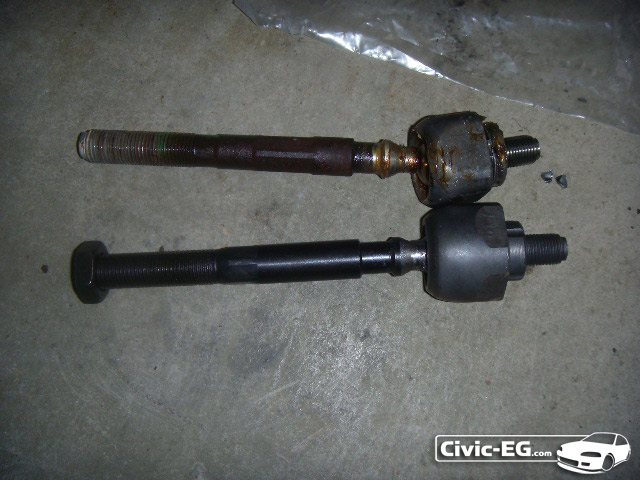
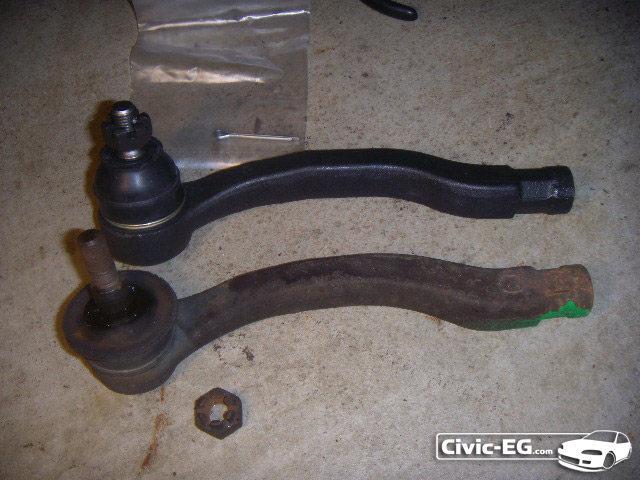
Outer tie rod is off.
The inner and outer tie rod end link your steering rack to the knuckle with the wheel of the car attached to it.
The inner is connected to the steering rack. The outer is connected to the knuckle. The inner & outer tie rod thread together and are adjustable so that the overall length of the two pieces may be increased or decreased. this is how Toe is adjusted in an alignment. A shorter length will mean more toe-out while a longer length will mean more toe-in.
Each tie rod has a ball joint on the end to allow pivoting between the knuckle and the steering rack due to suspension flex. These moving ball joints wear out eventually. If you ever see a car on the side of the road with both front wheels pointing opposite directions, that is most likely due to a neglected tie rod end snapping- more often the outer.
So if you notice any of the symptoms mentioned above, check for wheel play.
With the car on jack stands, grab the left and right sides of the tire and wiggle it as if you were trying to shimmy it off of the hub. If there's play, then you need to replace the inner and/or outer tie rod. (play from top to bottom is usually a ball joint - check upper and lower control arms. Play in all directions could be a very worn wheel bearing - you would hear this while driving)
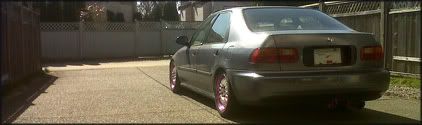
I did this on my EK so there may be slight differences but the overall process is the same so I took pics...
Put the front of your car on jack stands & remove wheels.
The inner & outer tie rod can be seen in this pic. The white line is where they connect. The part to the inside of the line is the inner tie rod. The part on the outside of the line is the outer tie rod.
You'll have to crack them loose. Grab them with vise grips or mine had recessed ares where a crescent wrench could slip over them.
The top wrench is on the nut, the bottom is on the outer tie rod.
It took some PB blaster & some elbow grease to break the nut loose.
Once the nut is loose, thread it up on the inner tie rod (toward the steering rack).
You need to mark exactly where the outer tie rod is threaded onto the inner tie rod. You can count the threads showing and write it down. Or I just hit it with some paint to see what threads were showing.
Old school 5 ball!
To get the outer tie rod off, you'll need to remove the outer ball joint.
This castle nut on the bottom should have a cotter pin in it to keep it from coming loose - mine didnt!
I've got these old school ball joint seperators which have only ever worked for me once. Normally they just tear the boot
Today was not my lucky day...
You can see grease from the torn boot. I had to end up hitting it out with a mallet which is bad for the ball joint. That's ok though because I am replacing the Inner and Outer tie rods and the outer has the ball joint.
There is a different type of puller similar to a steering wheel puller that is made for ball joints that would probably work better for civics.
Outer tie rod is off.
Last edited by teal_dx on Sat Feb 20, 2010 3:37 am, edited 1 time in total.
Do Not PM me your technical questions. Post them in the forum! 
My 1992 SOHC Turbo Hatch
My Youtube Channel: 6th Gear Garage
My 1992 SOHC Turbo Hatch
My Youtube Channel: 6th Gear Garage